Empire Dresser Veneer Repair

I’ve been working the past couple of weekends on an old empire dresser my wife bought at an auction a couple of months ago. After we got the dresser home, we noticed that the dresser had some old repairs on it. It also had a poor stain job that looked like it was sprayed on with a paint sprayer since it was covered in orange peel. So I stripped off all of the stain with Soy Gel paint stripper and wanted to fix some the repairs.

At the top of the dresser was this veneer repair. What the original guy who repaired the dresser was trying to accomplish I’m not sure, but I believe that what was underneath this veneer at one time was a lock mechanism to lock the top drawer. The lock was long gone and we had no intentions of adding the lock back in, so I decided to fix this area of the dresser with a new piece of veneer.

The original veneer on the dresser was made from a piece of crotch mahogany. I didn’t have any mahogany veneer on me so I decided to fill it with a small piece of sapele. Sapele is often considered a poor man’s mahogany being about half the cost. Plus I really didn’t feel like buying an expensive piece of mahogany to fix this little area. The good thing about this repair is that it was dead center of the case so any new repair would still be symmetrical on both sides even if it didn’t match perfectly with the rest of the dresser.

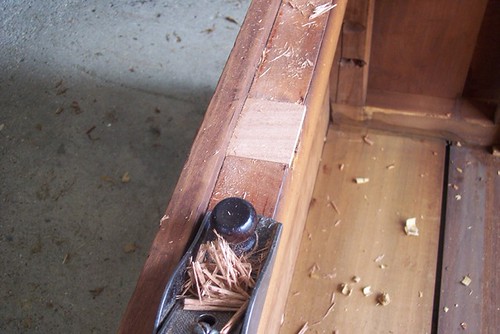
I used a card scraper and ran a utility knife down the scraper scoring the veneer. I then pared away the rest with a paring chisel. After all the wood was removed, I flattened out the rest of the area as best I could so the new piece of veneer would sit flat.

After measuring the area, I cut a new piece of sapele from a scrap board and dried fitted in place. I gently planed across the face to level it with the rest of the veneer making sure I didn’t cut into the old veneer. After everything fit, I glued and clamped it to the dresser.

The piece fit but I wanted to match the color of the original mahogany veneer. I took another scrap piece of sapele and experimented with a few colors of water soluble dyes to see how well I could match it up to the original veneer. After a few attempts, I decided to use a couple of coats of Early Brown American dye with a very light coat of Mahogany stain.

The color turned out well. Not a perfect match but well enough. Once I get the drawers done, my wife will apply a few coats of hemp oil to bring out the natural beauty of the wood. I’ll post a picture when the dresser is done.

A Day at the Auction

My wife and I went to an auction today in Germantown, OH. I saw the auction listed on Auctionzip.com last night and noticed they had some tools listed. They also had a few pieces of furniture that my wife was interested in so we headed out in the morning. This is what I won, but I didn’t want most of this junk.

When we got there, I bid on a couple of boxes of auger bits. I won each lot paying $5.00 for one and $12.00 for the other one, so I was happy with that. They’re both complete but I’m not too sure that some of the augers are original but I do have some extras.

A few minutes later I won a measuring wheel. I’ve seen Roy Underhill use one of these on The Woodwright’s Shop one time and thought it was neat enough to buy. I believe these were mainly used by blacksmiths for measuring. They had a lot of blacksmith tools for sale there so I figured it went with all the other stuff.

As the auction moved down the tables, I had my eye on a Spear & Jackson back saw. It looked in pretty good shape with split saw nuts and a small bend in the blade which is typical for old saws. I waited patiently for about 45 minutes as the auctioneer was approaching the saw. When he got to the table his helper was moving items toward him. Once he got to the saw, the helper grabbed a bunch of other junk and pushed it to the auctioneer. I got pissed because I just wanted to bid on the saw and not have to compete against other bidders for the stuff he put with it.

Luckily no one else really wanted the saw or the crap that went with it as I won the lot for $15.00. After I won, my wife grabbed a box and threw everything in it and I took it to the truck. Walking to the truck I peaked in the box out of curiosity to see what else I won.

As I said, most of it was junk. I won an old hammer, a sickle of some sort, an assortment of hog ringers, oil can, saws, wire brush, an old blue tool box, pruners, an axe, and a cigar box. I’ll throw the hog ringers in the tool box and sell them on eBay as one lot. As far as the rest, I may just throw them in the garbage with the exception of the axe and wire brush.

When I looked in the cigar box, it was filled with old cut nails which was a pleasant surprise. While I have never used cut nails in the past, it’s nice to know that I now have them in case I plan to make a proper antique reproduction. I thought about selling them on eBay but they only go for about $10/lb, so screw it, I’ll keep them.

As far as my wife and her bids on furniture, she got skunked as everything she was remotely interested in went too high. I too got skunked on the planes that were at the auction. Most of them went for more than I was willing to pay but that is how the game is played.

Early Taylor Bar Clamps

Every 4th of July I travel to Adams County, OH to attend an antique tool auction held by the Amish. It’s been something I’ve been doing for the past fifteen years and it has become a tradition for me as something I always looked forward to all year. Every year I would come home with a ton of tools I picked up at a bargain hoping to make a little cash selling them on eBay. It started to decline the past couple of years and I was afraid it might end as the tools weren’t much to choose from and the quality of them were lacking. Well with the economy in the tank and $4 gas hitting the streets, the auction didn’t happen this year.

Bummed out, my wife asked if I wanted to go to an antique mall on the other side of Cincinnati and look around. We go there from time to time as she looks for things to sell in her booth. I rarely if ever find tools so I wasn’t too optimistic finding anything.

After we arrived, I spotted these clamps on the floor of a booth. They intrigued me because while I’ve seen old clamps before, I’ve never seen a clamping action like these. They worked off a cam action from the handle. As you pull the handle up, the shell shaped curve pushes the pad out. I debated getting them because old bar clamps are not very collectible and I really didn’t need them. Plus they were $22.00 a piece. But my wife said if I wanted them I should get them because the next time we were here, they’d be gone. So I used my wife’s 10% vendor discount and picked them up.

These are clamps after I dipped them in citric acid/water mix and cleaned the rust off with steel wool. The clamping range is about 20″. I thought it was a little odd that they weren’t designed to hold 24″ between center but I guess the inventor had his reasons.

Here’s the detail of the handle. You can see how the pad gets pushed out as the handle is raised. It’s simplicity is what makes the design so beautiful.

You can clearly see “The Taylor” on the face. I googled “taylor clamp co” and came up with www.jamesltaylor.com a manufacturer of mass production clamping and gluing machines. After I cleaned the rust off the bar I could faintly see the “The Taylor Manufacturing Co, Poughkeepsie, NY” so these clamps are obviously there’s. However, I was left with a big question.

l

On the jaw there was a patent date of Jan 2, 1900. On the Taylor website they claim that the company was founded in 1911. How were these clamps patented in 1900 while James Taylor didn’t start his company until 1911? obviously John Taylor must have been a sole proprietorship for a few years tinkering around with designs before developing the typical design used today. Are these clamps some sort of prototypes or first edition models?

You can faintly see the logo “The Taylor” in an oval logo very similar to the Taylor logo used today. John must have simplified his logo when he incorporated in 1911. I looked all over their website the to see if they mention these style of clamps with no luck. I even tried searching the US Patent office on the internet for more information but came up empty.

James L. Taylor Manufacturing Co. Inc logo used today.

While the origins of these clamps remains a mystery, the real question is how do they perform? The answer is amazingly well. While they may not provide as much torque as typical bar clamps, they are extremely quick and easy to use. Where they excel is in gluing up cabinetry where you need speed on your side. Simply put the clamp around the stock and pull the handle up. I clamped a piece of wood to my workbench and tried moving it with no luck. They hold rock solid.

Another advantage with these clamps is they would appeal with people with arthritis. Often the screw handle on regular clamps can be tough to tighten with people who suffer from arthritis. With these clamp, they can easily tighten them up. There may be a real market for these clamps being manufactured and sold today as woodworkers are getting older every year. Hmmm….