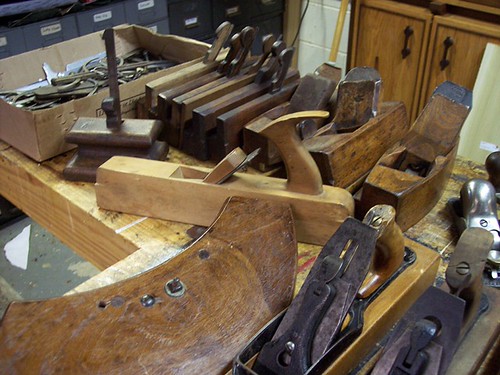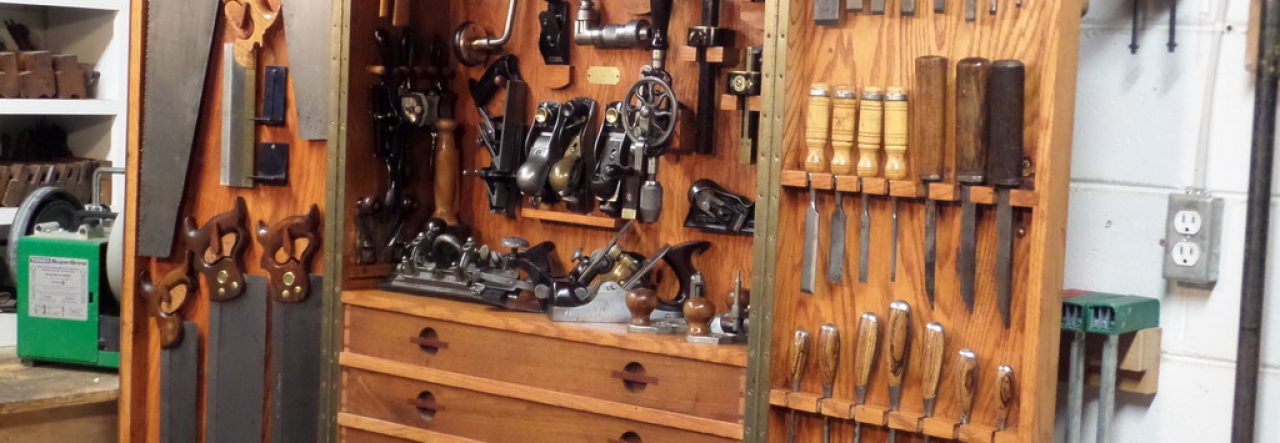
The Perfect Drawer Bottom Plane

I recently won an auction for a Record No 043 plow plane on Ebay from a seller in England. I have always wanted one of these but the prices for these things is a bit high in the States. Not too many of them were sold on this side of the pond so the collectors who have them want about $100 for theirs. The sad part is that Record is no longer in business so buying a new one is virtually impossible.

What makes this plane so nice is its size and simplicity of use. Its small stature and ease to set up makes it an ideal tool to cut the grooves in bottoms of a drawers. In the past, I cut these grooves on the table saw which meant I had to take off the riving knife on my table saw, set the blade to cut a kerf about a 1/4″ high, then move the fence over to widen the groove to the size of a piece of 1/4″ plywood that I was using. This set up was time-consuming and making the groove the perfect width on the table saw was not always fool proof accurate.

Setting up the plane is a synch. I simply used a 3/16″ brass bar to set the blade from the fence and the height of the depth stop. It came with a 3/16″ and 1/4″ cutter but I’ll probably just use the 3/16″ exclusively as 1/4″ plywood is actually 3/16″ thick.

I own a Stanley No 45 and could use it as a drawer bottom plane but the 45 is a little too big and awkward to use when planing such a delicate groove. At 5 1/2″ long, the Record No 043 is half the size of the 11″ long No 45 and grips easily holding the back of the plane in the palm of my hand. With a little practice one could learn to use the plane with only one hand as long as you can keep the fence against the stock tightly.

As you can see, it creates a perfect fit for 1/4″ plywood which is what I primarily use when building drawers. As far as speed, it’s just as quick to plane these grooves as it is with a table saw. A few passes with the plane and the groove is cut.

http://www.leevalley.com/US/Wood/page.aspx?p=69788&cat=1,41182

Even though the Record 043 is no longer made, Lee Valley released a small plow plane a few years ago. The Veritas Small Plow Plane is a nice plow as I was able to use one at The Woodworking in America show last year. At 9″ long, that plane is smaller than a Stanley No 45 but still a little bigger than the Record No 043. You can buy the plane with a set of five blades for $275.00 so the guys who want $100 for the Record No 043 on Ebay may not be such a bad deal after all.

Replacing a stretcher bar on a stool

My wife was considering picking up this stool at an antique mall the other day and asked me if I could replace the stretcher bar in the middle. I told her more likely I could so she should go ahead and buy it.

The old stretcher was completely broken off and only the ends remained in the holes where it was attached. I took an 1/8″ drill bit and drilled a pilot hole in the middle of the holes on each end.

I then took a 1/2″ forstner bit and drilled out the hole cleaning it out. The pilot hole served as a guide for the point on my forstner bit so it would not wander off the center of the hole.

I then found a piece of scrap wood around the shop, measured how long the stretcher needed to be and then turned it so the middle was 1″ in diameter while tapering each end to 1/2″ in diameter.

Once the turning was done, I checked the fit of the stretcher at the hole. If the stretcher was a little tight, I shaved off some of the wood with a spokeshave so that the stretcher would fit in the hole nicely. I also had to loosen the legs a little bit by taking out the screws that held them to the frame to give me enough room so that the stretcher would pop into place. Once in, I screwed the screws back into place.

 A half hour of work and a piece of scrap wood, the stool had a replaced stretcher. Now it’s my wife’s turn to finish the stool.

Empire Wine Bar

 A few months ago my wife bought a dresser from a local auction company. When we picked it up, we noticed that the bottom drawer was so badly damaged that is was not worth repairing. Plus the drawers were only 10″ deep which doesn’t really fit with today’s needs. So, we decided that we would turn it into a wine cabinet.

The first thing I needed to do was take out the drawers and remove the frame that held them. It was a pretty easy process as the drawer runners were simply screwed in place.

I knew the part that held the wine bottles would need a cabinet of some sort so I glued 1/4″ panels to the inside to create a box. I also had to add boards to the bottom of the cabinet to support the bottom of the interior.

After much thought about how many wine bottles I wanted the cabinet to hold, I drew numerous options of the interior. I wanted the grids to go at 45 degrees and hold the maximum amount of bottles yet fit the opening of the cabinet. At first I designed the cabinet opening to hold nothing but wine bottles but after several drawings, I finally decided to make one half hold wine bottles with 4 1/2″ openings and the other half a shelf.

I built a divider down the middle and attached it with pocket hole screws. I installed plugs in the pocket holes and sanded them flush.

The fun part was making the grids. I made them from 3/4″ poplar and custom fitted each piece inside the box. The grids are attached together with dado’s and were painted brown before they were glued in.

I kept the girds shy of the face of the cabinet so that I could glue sapele on top of the poplar. Sapele is a poor mans mahogany which is what the dresser was made from. When stained, the sapele, mahogany and the painted poplar will blend together nicely.

After the interior was done, my wife painted the outside with chalk paint. She took the time to tape off the area that is stained and applied two coats of paint. After the paint dried, she rubbed some of it off to distress it, then added a dark brown glaze over the details of the piece to get in the cracks and appear old.

I applied four coats of General Finishes Arm-R-Seal oil & urathane topcoat to the top, the front of the drawers, and the grids to give the cabinet a nice sheen. We dragged it upstairs from the basement which was a big pain in the ass as it weighs nearly 200 lbs and decorated it in our dining room.

You can see how the distressing looks. The idea is to make the cabinet look old which is exactly what it is. After the glaze dries, Anita applied a light wax over the piece to protect the paint.

The design of the inside of the cabinet came out well. The grids hold eight bottles of wine and all of our various glasses. So far one of the drawers stores our wine bottle opener. Unfortunately, the other drawer will probably end up as a junk drawer.
The Empire dresser spent its first 150 years as a dresser. Now it will spend the next 150 years as a wine cabinet. Not a bad 300 year life if you ask me.

Oh Boy, I Did It Again

Well I went to another antique tool auction yesterday. This one was in Jeffersonville, OH about half way between Cincy and Columbus and good deals were to be had as you can see in the photo.

I only picked up a few Stanley bench planes. After the auction I went to in Indy a couple of weeks ago, I have enough Stanley planes to last me awhile.

I’m a sucker for molding planes and these were too good of a deal to pass up. Several of them I snagged for under $10.00 each.

All the profiles of the molding planes I bought. I realize that you can make nearly every molding profile with a good set of hollow and rounds which I already have, but I can’t resist the opportunity to buy some complex molders. Some of these I’ll keep for myself, the rest I’ll sell.

I also picked up a few hand saws as well for under $5.00 a piece. Three of them were Disston thumb hole saws that are gaining popularity on eBay lately. I’ll clean them up and throw them on eBay to see what they bring.

Here’s a neat pair of shears I picked up for $6.00. I really don’t know anything about old shears and have no idea what they’re worth but my wife will stick it in her booth for sale.

A couple of sash molding planes a froe. I had a nice sash molding plane before and sold it only to regret it later so I’ll probably keep one of them. I’m definitely keeping the froe. Working green wood has always been an ambition of mine and this froe will come in handy. It looks like it was made from old leaf spring from a car.

The two scores I got were a Stanley No 141 with the fillister bed and blade and a Stanley No 603C corrugated bench plane. I may hold onto the 141 until I find some regular blades for it and then sell it.

All I know is that I’m going to be very busy for a while cleaning all the tools I bought this past month.

The Nicest Plane You’ll (Probably) Never Buy

If you’re in the market for a smooth plane, chances are you’ll probably consider one of two options. Buy a new one from a top tool-maker like Lie-Nielsen or Veritas which can set you back $200-350, or buy an old Stanley and fix it up. However there should be a third option on your list.

The Millers Falls No 9 smooth plane is one of the nicest production smooth planes you can buy for the money. In most cases, you can buy one for a lot less than a comparable Stanley No 4 plane and get the same quality of plane.

The differences between a Stanley No 4 and a Millers Falls No 9 are minimal. Both planes use 2″ wide blades. Both are about 9″ long and weigh about 4 lbs. They both have a frog adjustment screw in the back (some older Stanley’s don’t have this feature). In fact, the only main difference between the two is that the Millers Falls uses a two piece hinged lever cap that supposedly holds more pressure on the blade and chip breaker reducing blade chatter.

Both planes are about 9″ long with the Millers Falls being 1/8″ longer. If the bed is pitted a little bit it’s not a big deal as the pits won’t affect the plane’s performance. Consider them micro corrugations.

These two planes both have a frog adjustment screw in the back making it easier to adjust the opening of the mouth for the blade. Stanley’s made before 1907 don’t have this feature but I don’t think it’s a really big deal since once you set the opening of the mouth, you rarely reset it.

The handles on Millers Falls are made of beech hardwood with some older ones being made from cherry. In my experience, these are actually better than the rosewood Stanley used. Although prettier than the stained beech, a lot of Stanley’s with rosewood handles tend to break at the tip since the rosewood is more brittle than beech or cherry.

The nicest difference the Millers Falls No 9 has over the Stanley No 4 is the price you can pick one up for. Basically nobody really wants these things because all the collectors want Stanley’s. Even woodworkers when buying old tools typically gravitate toward Stanley’s more than their competitors since there are far more Stanley’s in the market place. However, if you keep a keen eye out, you can buy an old Millers Falls for about $10.00. I know because I just picked up a few Millers Falls No 9’s for $10.00 each a few weeks ago at antique shows.

As far as the price of Stanley No 4’s expect to pay $40.00 or more for a nice one since dealers will want top dollar for them. I’ve seen some mint Stanley No 4’s go for $150 on eBay.

Getting the Millers Falls No 9 cleaned up and ready to use is no different from an old Stanley. If rusty, dip the parts in citric acid for a few hours and then polish the metal to a shine with steel wool. If necessary, fettle the bed flat with 220 – 400 grit sand paper then sharpen the blade. The results will be stunning for a $10.00 plane as I was able to achieve a plane shaving of .003″ by only sharpening the blade. So thin in fact, that you can literally see through the wood shaving.

As a final note, if you’re the type of person who likes to use several smooth planes with a different cut setting, (hence the reason you don’t need to reset the blade with the frog adjustment screw), a good idea is to have a Stanley No 4 set to a medium-cut and a Millers Falls No 9 set to a fine-cut so it’s easy to determine which plane has the proper cut set to it.

Using Pinterest to Promote Your Blog

I’ve been a member of Pinterest for a few months and have added a few Pins onto my Boards but never messed around with it too much. It’s a fun site where I get ideas on furniture designs or things that just catch my fancy but I never really knew of its potential as a marketing tool.

Then tonight while I’m browsing Pinterest, I see a stool with yardsticks as a seat. I’ve seen them before in stores and always wanted to make one but haven’t gotten around to building one yet so I decided to pin it. When I looked at the photo I clicked on it and it took me to the lady’s blog where she talked about making it.

When that happened I thought, I’ll be damned, how did she do that? Every pin I ever uploaded came from a picture off my computer. The Link box was already filled with where the picture was being pulled from. I had no idea how they were linking their pins to their blog.

After messing around with one of my pins for a while I figured it out. First I added the picture and pinned it. Then I went back in and edited the Link to my blog page. Too simple. 

What can I say, I’m not the most tech savvy guy out there. I’m still trying to figure out what Twitter is for.

Here’s one of my pins. http://pinterest.com/pin/134052526380084266/

My Wife’s First Tool

My wife Anita has been repurposing old furniture and selling it in an antique store the past few months and often the repurposing requires upholstery work. A few days ago I was out-of-town and the upholstery stapler she was using kept failing. She called me on the phone and told me the driver would not retract when she shot a staple out of it. The stapler was a twenty-five year old Senco J tool that I bought for $5.00 when I worked for Senco so the fact that the driver gave out was no surprise. I told her that they probably don’t make parts for it anymore and she would be better off just buying a new gun. So she ends up going to a local Senco dealer and buying a SFW09 for $110 and she was back in business.

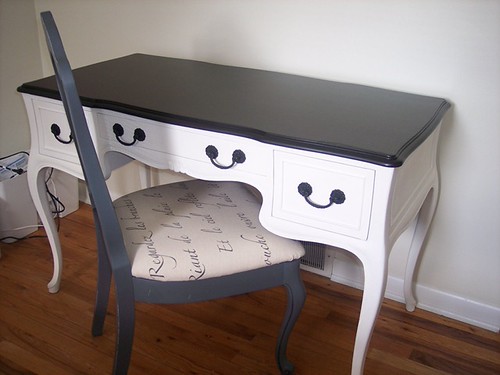
She uses the gun to upholster chairs with new fabric. This cloth is nothing more than a 10′ x 12′ painters drop cloth she bought a Lowe’s for $5.00. She washes the fabric then paints words on it with stencils. The result is quite impressive with the seat looking like it was upholstered with expensive $35/yard fabric.

The chair is for her sewing desk she’s been working on the past few weeks. The desk is the same desk I wrote about a few months ago about having to remake the feet.

https://mvflaim.wordpress.com/2012/09/16/repairing-a-desks-legs/

The desk was painted with chalk paint and the top was painted with enamel. She originally stained the top which I thought looked nice but she didn’t so she redid it. Regardless it still came out really nice with the total cost of the desk and chair under $100.

This how the feet finally turned out. As you can see, you can’t even tell they’ve been remade.

As far as the J tool goes. It was connected to the compressor but the compressor wasn’t on. So as she kept firing staples, the compressor gradually ran out of air and it prevented the driver from going back up into the piston. Oh well, at least now she has a gun that will last longer and give her more power than the old J tool. Oh I forgot to mention, I’m not allowed to touch her new stapler. : (

A day at a tool auction

Last weekend I went to an antique tool auction in Indianapolis and picked up a few planes. Needless to say I went hog-wild with my bidding. All the planes were sold in lots which brought the price per plane down a bit. Even with all the good deals I got, I never spent so much at a tool auction.

I bought several Stanley circular planes as well as No 3’s, 4’s, 6’s, Gage 5C, block planes, and No 71 1/2 router. All of them are in nice shape with nice clean rosewood handles, full blades and no rust.

I also bought a lot of transitional planes but they were all sold in lots with five or more so I couldn’t refuse.

I also won a box of woodies which had a cooper’s croze, old woman’s tooth router and two cute little panel raisers. One of those panel raisers I’ll keep while the rest I’ll sell.

I’m a sucker for old molding planes. I have over 150 in my arsenal and still counting. I’ll more likely keep all these unless I already own that profile then I’ll sell it.

Box of measuring instruments. Lots of calipers and dividers in there and a few do-dads I have no idea what they do.

Some of the tools that were in the box I’ll keep for myself. Buy a box full of tools, sell the ones you don’t need to pay for the ones you keep. End up getting free tools which is not a bad deal.

Once I get all these tools cleaned up I’ll throw them on eBay. The money I make will help pay for my medical bills from when I was in the hospital last month. Wish me luck.

Removing a rusted bolt on a Stanley plane

I’ve cleaned up a lot of planes over the years and most of them come apart pretty easy. However once in a while I’ll get one that’s a bugger to take apart. 

This Stanley No 5 I bought was pretty rusted when I picked it up. In fact the only reason I bought it was because the rosewood handles were in nice shape. I as took it apart, one of the bolts that holds the frog down was seized. I sprayed it with BP Blaster several times and tried numerous flat-headed screw drivers to loosen it with no luck.

I knew it was lost cause to save the bolt so I ended up drilling a 1/4″ hole through the top of the bolt and then use a 5/16″ drill bit to widen the hole.

Once the bolt was weakened, I used a cold chisel and a hammer to smack the head of the bolt off and then I was able to remove the frog.

The only part of the bolt that remained was the bottom half that was still screwed into the bed.

I gently unscrewed the threads with some channel lock pliers making sure the threads wouldn’t break off in the bed.

I have a lot of spare bolts from Stanley planes I have taken apart over the years so finding a suitable replacement was a breeze. Not the prettiest Stanley No 5 but with a coat of black japanning, it would look a lot better. Since the body of the plane is so rusty and pitted, the blade will need to be replaced since it too is pitted.