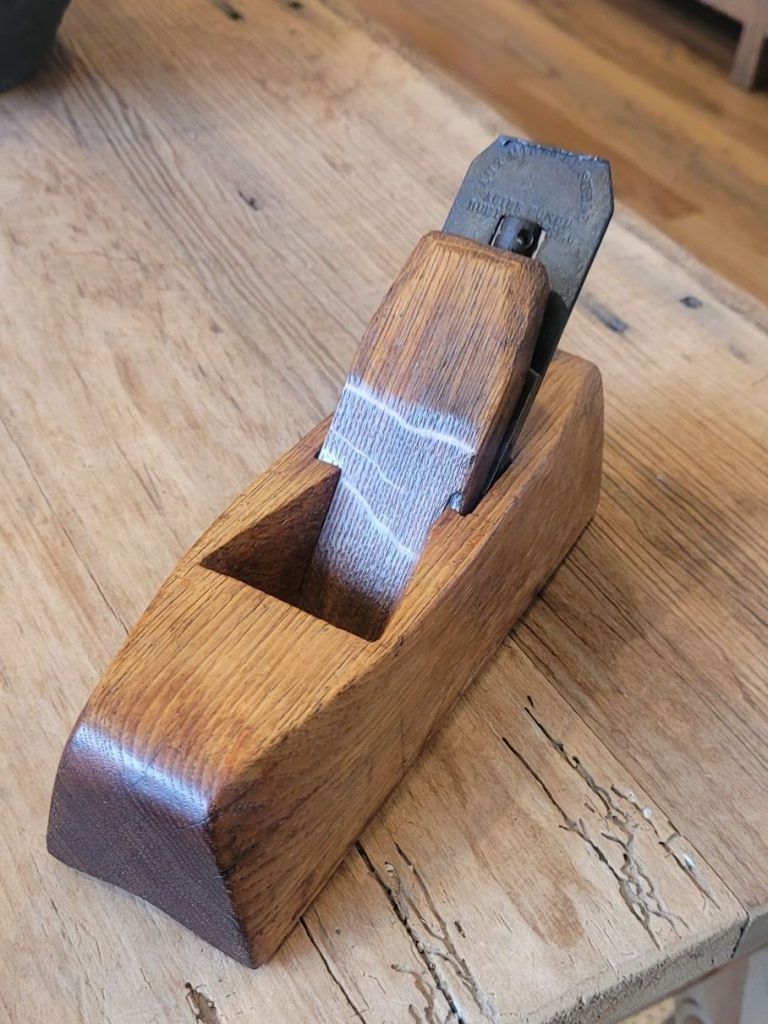
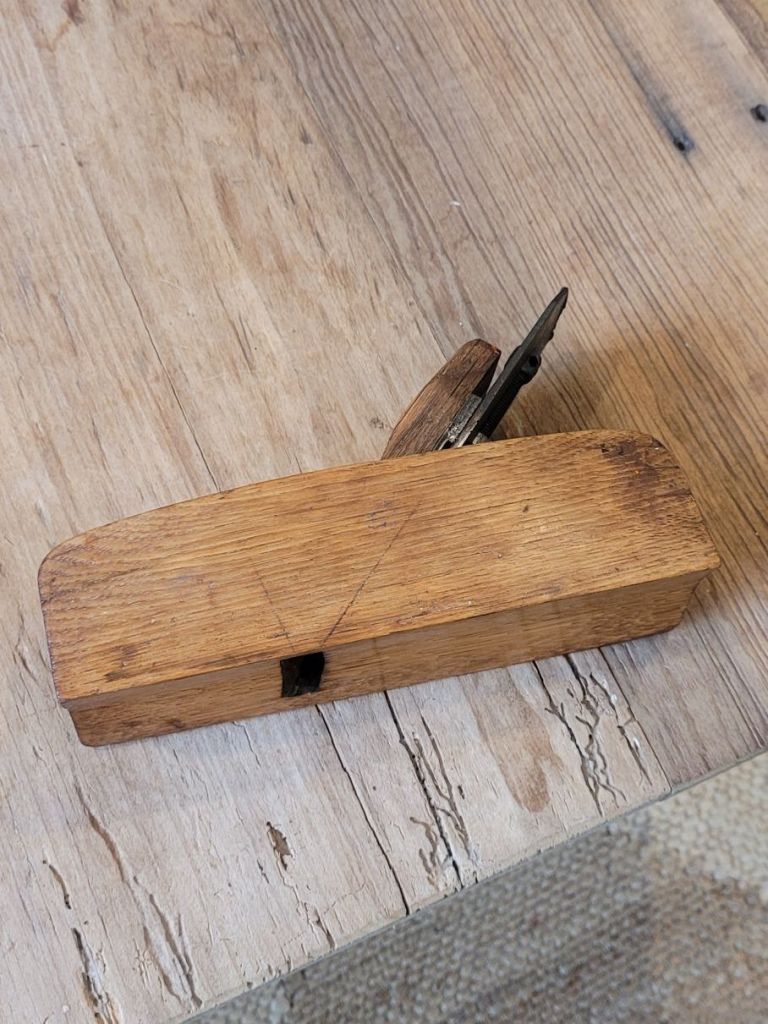
I was going through my tool collection yesterday when I stumbled on this little plane. It looks like any other coffin smoother with a convex sole until I took it apart to look at the blade.
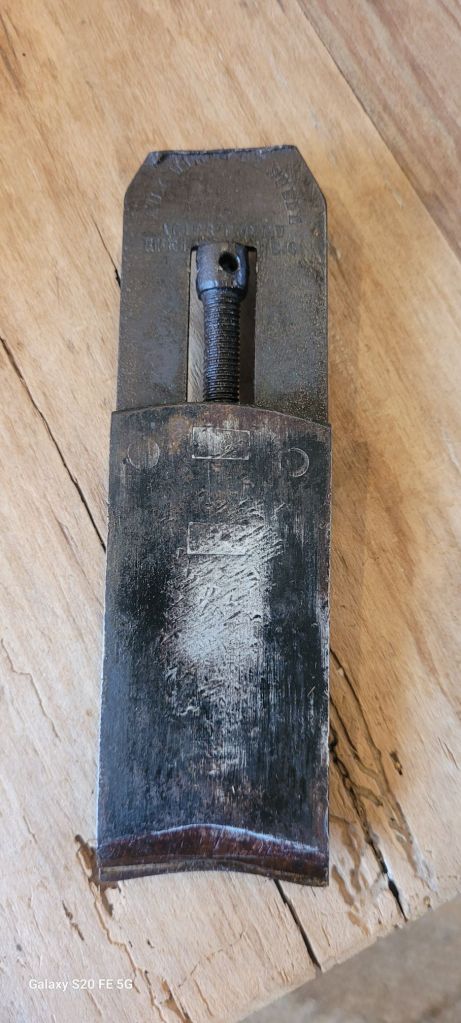
When looking at the back side of the plane, you can see where there is a screw mechanism to advance the cap iron up and down.
I took a brad awl and stuck it in the hole spinning the screw all the way down hoping I could remove the cap iron, but it didn’t work. My thread got stuck underneath the nut and I couldn’t turn it anymore.
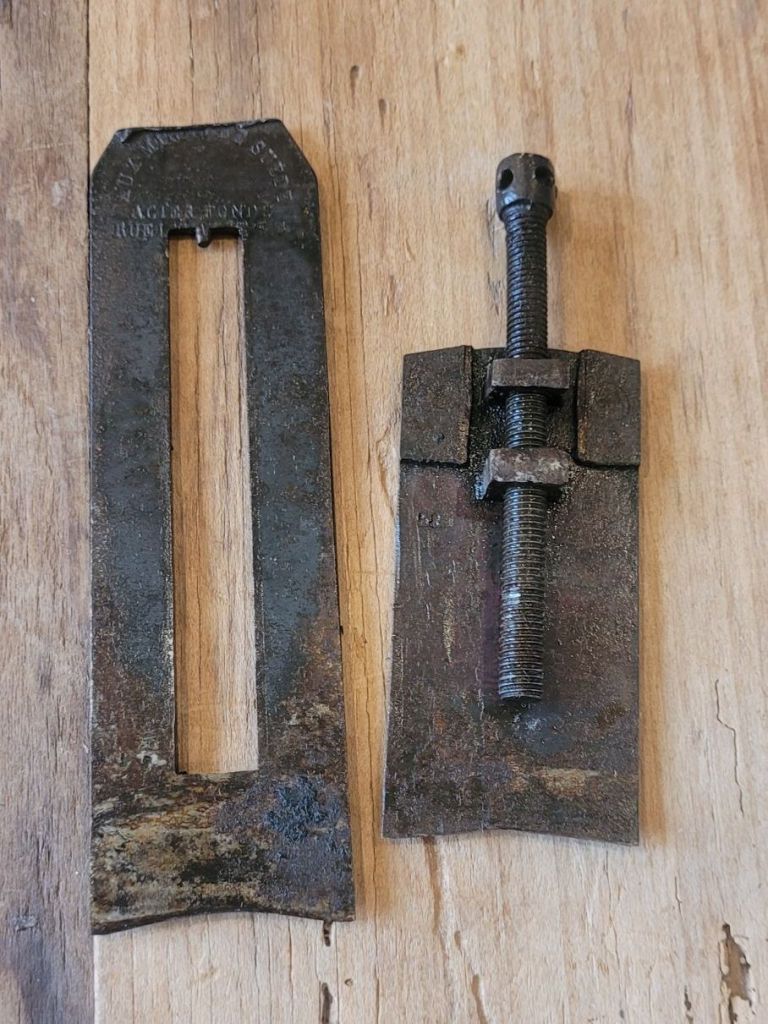
Then, as luck would have it, when I wiggled the cap iron a little bit, it came loose off the blade. My tool oil I used must have loosened up the rust that has been sitting in the blade for decades. You can see a little nib at the top of the blade where the cap iron mechanism lays into.
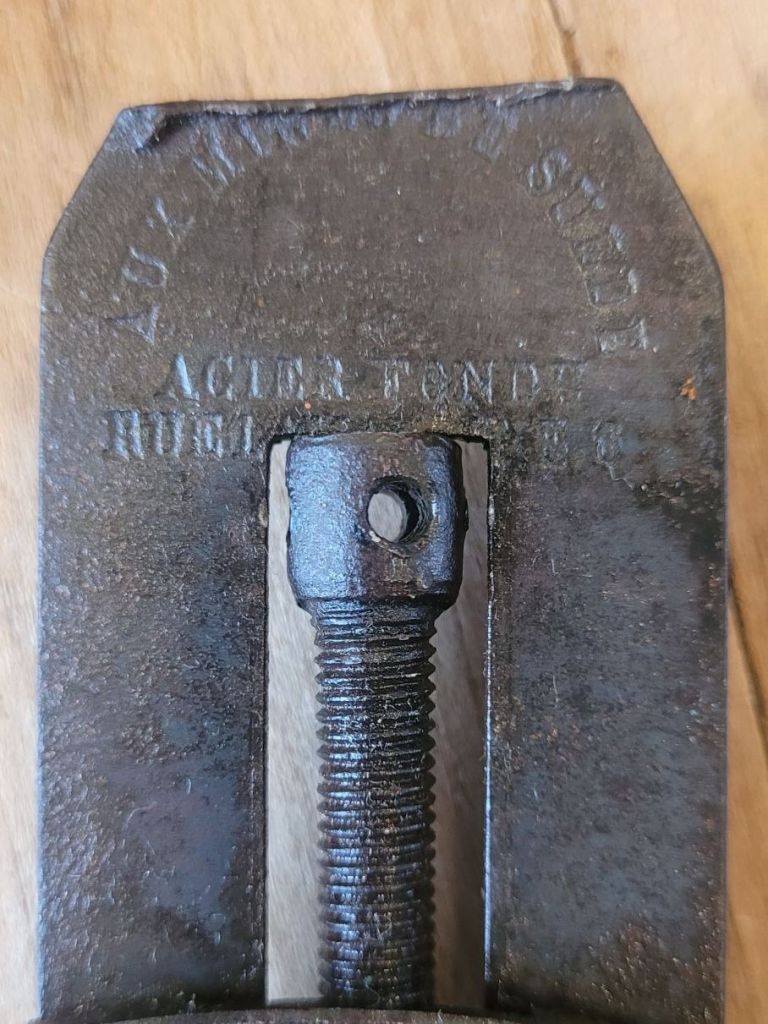
After doing some research, I found the company Aux Mines De Suede that made the plane. I downloaded their tool catalog and they produced a lot of interesting woodworking tools.
The body of the plane looks to be oak. You can see the scribe marks on the side as a guide where to cut out the inside. There is no makers stamp on the body so it may have been custom made plane by the owner. It’s a really interesting plane I have never seen before.
Last weekend, I ventured out to an antique show in Urbana, OH. I got there around 8:00 am and walked around for a couple of hours buying a handful of tools. I was happy with what I bought as I just go to these antique shows because I enjoy going regardless of what I buy.
I decided to make one more pass around the fairgrounds when I decided to go down a little part that I didn’t visit before when I stumbled upon this guy.
A huge tool chest full of tools. The guy selling it said he took out of a house in Troy, OH from a woman who had it in her garage. It was her Dad’s tool chest. She had nowhere to keep it as she was moving into a retirement home, so she had to ged rid of it.
I looked inside at the tools and immediately noticed a Stanley No 8 and 5 Type 4 prelateral planes and an early version of a Stanley No 45 Combination plane. The guy told me he wanted $350 for the chest and tools and that he’s had a few offers for the chest alone. He then told me he’d sell all the tools in it for $200. At this point, wheels were spinning in my head as to where I was going to put this thing as my shop is already overflowing with tools from the auction I went to a few months back.
Then the guy told me he’d take $300 for everything as he really wanted to get rid of it. At $300, I might as well buy the whole thing as the tool chest alone was worth more than a $100. I told him I’d take, but I had to go to the ATM and get some cash.
I came back, gave him the money then drove into the fairgrounds to put it in my truck. I was stoked! In 35 years of collecting antique tools, I’ve never bought a tool chest, let alone one with a bunch of tools in it.
When I got home, I decided to look at the tool chest more closely. It was a pine box dovetailed together with brass hardware on the corners. Inside were mahogany tool bins with veneered banding on top.
Underneath the veneered bins were two tool totes for various tools and parts.
Removing those bins, were two more filled with auger bits and chisels.
Underneath those is where the planes were. There were only two bench planes but he had a decent collection of molding planes with most stamped J W ROOF.
I brought everything in my basement and cataloged all the tools that were inside. There were over 100 with a lot of them being small drill bits and hardware. There were a nice collection on incannel gouges along with metal working punches and wrenches. I’m trying to figure out what he did for a living but it may be impossible to figure out as who knows what tools are missing and which tools were just thrown into the chest over the years.
With the age of the Stanley planes, I estimating that the chest was made in the 1870 -80’s Now I need to decide what to do with it. Nevertheless, what a great Birthday present to myself!
I went on the World’s Longest Yard Sale again this year. We traveled five days traveling from Russel Springs, Ky to Eaton, Ohio, at the I -70 line. It seems harder and harder to find tools. Mainly because the same vendors have the same tools I picked through the previous year. Nevertheless this is what I got.
A couple of Milers Falls planes. These are getting pricier every year as more people realize how well they work.
A bunch of Stanley bench planes and one Craftsman No 5C for $5.00. I’ll buy the parts planes if the price is right as I usually have the correct part to make it complete.
Two Stanley No 48 tongue and groove planes. One is missing a blade, but they’re relatively easy to make. The other has a user made wooden fence that is too narrow to work.
I bought this lot for $20.00. The guy didn’t know what the sun plane body was. I believe the screw handle is from a mitre clamp.
An ivory slide rule and a 2 ft caliper rule I have never seen before. Plus, there are a few odds and ends.
I found the Holy Grail of paste wax. A full can of SC Johnson paste wax for a $1.00. I hit the lottery. lol.
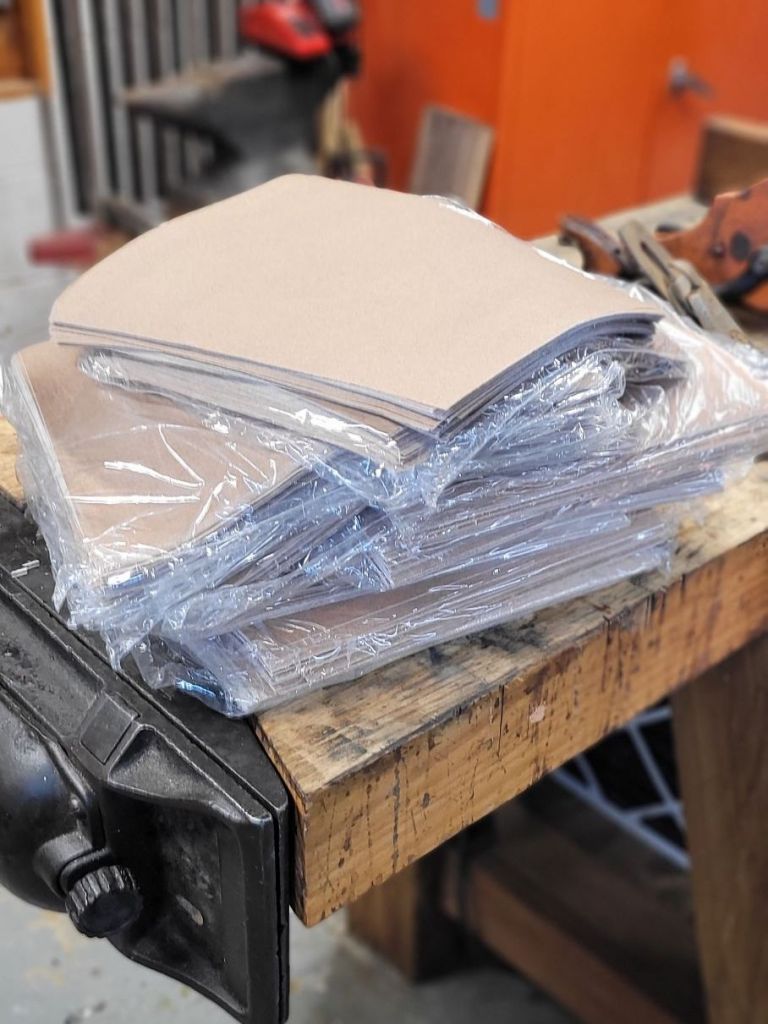
I bought 600 sheets of sandpaper for $20.00. 300 each of 150 and 220. I love cheap sandpaper. The number one rule of sandpaper is to use it like someone else is paying for it.
I only spent about $250.00 for everything, but my wife, Anita, made out well. She bought a whole lot more and spent a whole lot more money than me. You can check out her Instagram page at mybuckeyehome to see what she bought.
A couple of weeks ago, I had the opportunity to attend the tool auction of Jim “Rooster” Brown. I knew Jim a little bit. He always helped out the Amish Tool Auction in Adams Co Ohio every 4th of July. I went to that auction every year for over fifteen years, and it was always something I looked forward to every year. Jim would help out the auctioneer Hess Auction Co as they sold Hostetler’s tools. I would always end up with a boatload of tools. So much so that one year, my Mom got mad at me for all the money I spent (about $500) when I came home with my loot.
Since it was an auction, I never spent too much time talking to Jim because he was too busy holding up and handing out tools during the auction but when I did talk to him he was a super nice guy. I remember one year, a Stanley No 444 Dovetail Plane came up for sale, and I ended up winning it for $200. Jim yelled out, “He stole it!” Everyone laughed, but I was happy that I did indeed steal it. I owned that plane for many years until I had to sell it due to being unemployed after losing my job.
Jim was a collector of Ohio made tools. He had thousands of them after collecting for decades. His collection consisted of hundreds of molding planes, cooper tools, axes, and saws. The first part of the auction was all of his axes, so I had time to look around and examine all the woodworking tools. I couldn’t believe what I was looking at.
Dozens of panel raiser planes, multiple scroll saws, cooper jointer planes, dozens of plow planes, and several tool boxes full of tools that sold as a complete set.
There was a Stanley No 1 plane that sold for $1450.00, and this panther saw that sold for $2625.00. I’ve never seen one in person, and I doubt I ever will again. Some of us thought that the winner overpaid, but one just recently sold for $3500.00.
This Ohio Tool Center Wheel Ivory Tip Plow Plane sold for $2700. The gentleman who won the bid was a personal friend of Jim’s, and he would show it to him every time he visited his home. He was ecstatic that he won his friends favorite plane.
This workbench sold for over $1400.00. I hope it won’t become a kitchen island but you never know these days. lol
This was Jim’s obituary. He worked for the post office for 30 years and was a founding member of the Ohio Tool Collectors.
During the auction, I started to get more involved and bid on the tools. Some of the hand planes I wanted went a little too high for me as a couple of Stanley No 2’s sold for $300 each. At first, I didn’t think I’d win anything, but about halfway through, things started to heat up for me. When they got to the table with all his panel raiser planes, they sold “Choice” off the table. After a couple of rounds, the auctioneer sold all the planes on the table at once. I thought to myself, “Holy shit,” so I got in view of the auctioneer and kept bidding. By the time the bidding ended, I ended up winning all the planes on the table (about 25) for a few hundred dollars. Then, a few minutes later, it happened again, and I ended up buying a second table full of planes for one money. After that, it was full go for me as I was bidding and winning multiple lots.
In the end, this is what I ended up winning. A total of 166 tools. The most tools I ever won and the most money I ever spent at an auction. But boy, did I have fun!
When I got home, I wrote in my book everything I won and what I paid for each tool. I could hear Jim call down from Heaven. “He stole it!”
Sometimes life gives you an opportunity you didn’t know existed.
My friend Tim called me last summer saying that he cuts the grass for our old Junior High Shop Teacher, Mr Morganroth, and he had some old tools he wanted to sell. Mr Morganroth was our shop teacher in the seventh grade. In class, we would make swordfish and ducks out of a piece of walnut, then attach painted metal for the fins and the wings. The class was the basics of woodworking, where we learned the simple steps of using surform files, grades of sandpaper, and cutting things out on the band saw. These simple steps got me hooked on woodworking, and I started to slowly build a shop in my parents’ basement when I was in high school.
Mr Morganroth said he was moving to Tennessee and wanted to get rid of some old tools he had been collecting asking if I would be interested in them. I told Tim I was but wanted to know what he had beforehand, so he sent me a few pics from his phone.
Tim sent me the photos, and I took a close look at them and I said I was interested, but I don’t want all of them since a lot were just common tools. Unfortunately, Morganroth wanted to sell them all at once, so I just let it go and forgot about it.
Then, a few weeks ago, Tim called me again and said Morganroth really wanted to get rid of them, so I contacted him directly and asked him to send me better pictures of what he had. Morganroth said he wanted to sell everything but the cooper’s tools as they were his grandfather’s.
Understanding that, we went back and forth for a few days, and I gave him an offer for the tools he wanted to sell (I really had my eye on the slick at the time). He responded that he would think about my offer.
Then last week he got back with me and said he’ll include the cooper’s tools as well and he’ll also throw in some woodworking books he had. I made him an offer higher than the first one I gave him, and he agreed to the price.
Friday, I went over to his house and picked up the tools. He had them hanging in his house for 30 years. He said his kids have no interest in them as neither of them work with wood, so he was glad they were going to a good home.
I brought them home and clipped them off the barn wood they were attached to to take a better look at them. The tools on the bench are the tools that his grandfather used when coopering. I plan on keeping them together as a set. I’m even considering making a tool chest for them.
It’s an incredible honor to buy old tools from the man who got me started in woodworking over 40 years ago.
I bought a Disston D8 Thumb Hole Rip Saw and wanted to restore it. The saw was in pretty good condition when I bought it. The only issue it had was that the back of the handle was broken with a chip missing from it. It’s a pretty common issue as that is where your thumb and index finger ride when sawing, so it’s under a lot of friction.
I wanted to repair it, so I carefully carved out an area to glue a new piece of apple wood in its place.
After the glue dried, I shaped and sanded the wood to match the rest of the handle. It came out well , it just needed a little bit of wood putty to close up the gaps between the new wood and handle.
After the putty dried, I sanded the whole handle and applied a few coats of shellac to it. The handle looked nice, but the putty stood out like a sore thumb.
This is where I put my artistic hat on. Playing with a paint kit, I mixed up a few colors of red, brown, and yellow, mixing them around to get the best matching shade I could create. It wasn’t about creating the perfect color but laying three different colors down so that it would blend with the rest of the handle.
After a few minutes of painting, I was happy with how it turned out, so I let it dry.
The saw came out nice, and the broken end of the handle won’t dig into my skin when I’m using it. Now that is all left to do is to sharpen the blade and put it to use.
A couple of weeks ago, my wife and I were antique hunting in Dayton, Ohio, where I ran into this old level in the back of a barn. I figured it was a Stanley Rule and Level Co level, but the amount of brass in the front intrigued me as it wasn’t the usual design I see all the time.
I really don’t restore levels too often, but I decided to ask how much it was as I thought it would be a fun little restoration project. After the lady told me $10.00, I took it home.
Restoring it was pretty straightforward. I applied some citrus based paint stripper on it to remove the old grime, then washed it off with a soapy dish liquid. Then I applied elbow grease to buff out brass with steel wool and liquid brass cleaner. Then, coated the level with a few coats of shellac.
You can see on the side that it’s faintly stamped 11, which I figured makes it a Stanley No 11. Stanley made No 11’s in mahagony and rosewood. When I was cleaning the wood, I got excited thinking the level was made from rosewood, but I’m pretty sure it’s mahagony. The fact that the brass is only the corners and not completely covering the end makes it an older level.
You can see the Stanley Rule & Level Co. so it’s possible it’s before they acquired their plane line.
I’m not sure how to date the level as I am unaware of a type study on Stanley Levels, but if I had to take a guess, I’d say it’s around 1860-80’s in age. And it’s in pretty nice shape for being as old as it is.
Does anyone know how old it is? Drop a comment and let me know.
Last weekend, my wife and I were antiquing in Dayton, Ohio, when we stopped in an antique store in Tipp City. I went into the back of the store when I saw this thing sitting on the shelf. I immediately knew exactly what it was as I owned one of these tools many years ago. It’s a No 40 Langdon Millers Falls Portable Mitre Box.
When I was a kid, I went to an Ohio Tool Collector Association meet-up and saw one of these miter boxes on a silent auction table. I thought it was cool as it was something I had never seen before. I put a silent auction bid of $20.00 and hoped for the best. Sure enough, I won the auction! The guy selling it wasn’t too happy about the price it received as he said that’s what he paid for it.
The tool is simple in its concept. There’s a fence that you clamp to a board and disc that you turn and set your angle with positive stops. You can even adjust the accuracy of the angle by adjusting the two screws on either side of the positive stop.
I wanted to try it out, so I grabbed a piece of scrap wood and clamped the miter gauge to it, then swung the fence to 45 degrees.
Since it’s made to be portable, the craftsman would just use a panel saw and cut the board while on the job site. The miter box is small enough that it would easily fit in a toolbox.
After I took a cut, I was surprised how accurate it was. That’s a pretty good 45 for trim carpentry work on a house.
Millers Falls made a compound angle version of this tool called the No 41, but I have never seen one in the wild.
I paid $15 for this miter box, which is cheaper than what I paid for the first one 35 years ago. People don’t know what these things are, so if you find one in the wild, chances are you’ll pick it up for a good price. I sold my first one years ago when I was unemployed and needed money. I really didn’t want to sell it back then as I thought I would never find another. Maybe the antique tool gods like me.
I bought this unmarked antique plow plane sometime during my life. I have bought so many tools over the years, I often can’t remember when or where I got them. Not to mention what I paid for them, which can be a problem if I want to try to make money when I want to sell the tool.
The plane was complete, but the arm was broken in half, missing the bottom of it. The original owner simply stuck a big bolt from the top of the arm through the fence.
I had some Applewood in my shop for fixing handles of my Disston saws and also to turn tool handles. I grabbed a small piece and traced the outline of the good arm, and shaped a new one.
I cut the bad part of the arm off at the bandsaw and found the center of the threaded rod so that I could drill a hole down the center of it.
Unfortunately, the rod was too tall to do this on my drill press, so I had to do it free hand using a square to keep my rod at 90 degrees keeping me in line to drill a straight hole.
Once I drilled a 5/16″ hole about a 1/2″ deep, I stuck a center point in it.
Then, I pushed the center point into my new arm end and used that point to drill another 5/16″ hole into the new piece.
Thankfully, when I glued a dowel into both holes and clamped it for a few hours, the new arm was straight and looked similar to his brother.
The last thing to do was clean up the rest of the plane. I used some Citristrip to remove all the crud off the plane and washed everything with dish soap and water.
After the restoration was complete, I grabbed my antique tool reference catalogs to see if I could find out who made this plane. It turns out that it is a Denison & Co Boxwood Plow Plane. The bottom fence and nuts on my plane are nearly identical to the one in the picture.
The plane came out really well even though I used Applewood while the plane is Boxwood. The color matches well enough and will darken to a nice reddish color similar to Disston saw handles.
You can see where the plane was repaired in its past with a big screw in the brass skate that goes all the way through its body. Plus, there are four screws going up from the bottom of the body for some reason. I see no cracks as to why they are there.
I’ll keep the plane and put it in my arsenal. It’ll be a perfect plane to use since it’s not in original condition.
A couple of weeks ago, I bought Set & File by Matt Cianci from The Lost Art Press. I waited about a year for the book to be published as sharpening has never been a strong suit of mine when it comes to saw restoration.
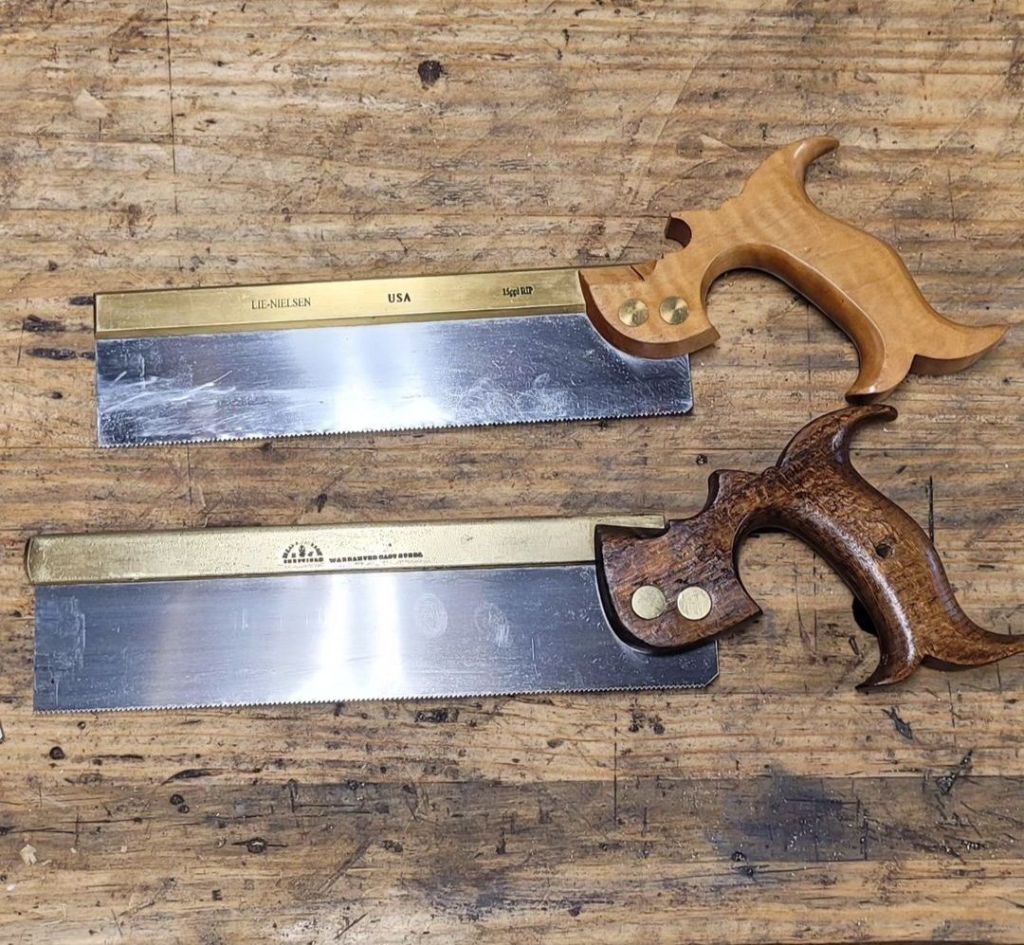
I’ve owned a Lie Nielsen dovetail saw for years and recently restored a Spears and Jackson dovetail saw. While I could sharpen the teeth fine, setting them properly was a pain as the anvil in my saw set was too big to do the job.
I read in Matt’s book where he dismantled his Stanley No 42X saw set and filed the anvil thinner in order to properly set the teeth on fine tooth saws.
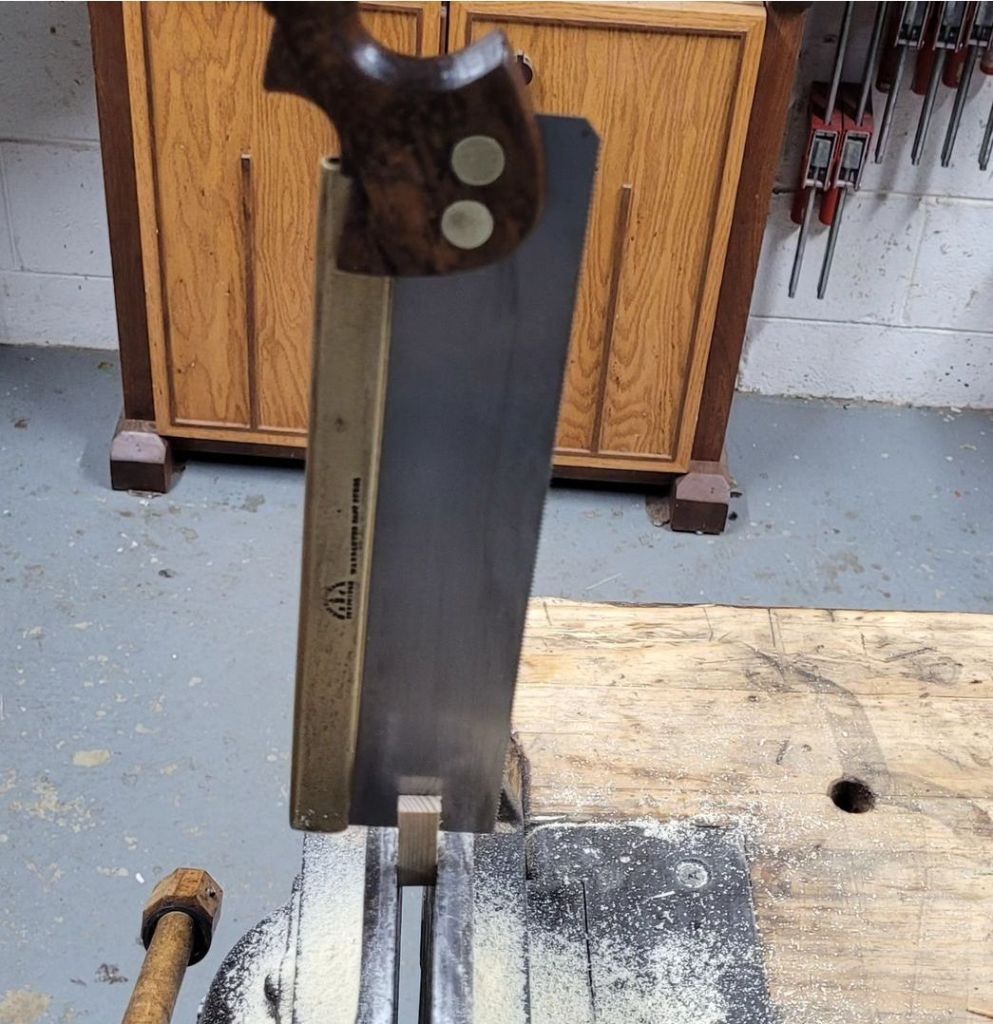
Sure enough, I followed his advice and clamped the anvil in my vise, and carefully filed both sides of the anvil in order for it to look like the one in his book.
Putting the saw set back together, the anvil looked like it would now do the job.
After a few minutes of sharpening and setting the teeth, the saw sat in its kerf nice and tight. Plus, it cut like butter.
Now, I have two dovetail saws that are ready for use. It’s amazing how simple tricks can help your woodworking skills. Major props to Matt Cianci!