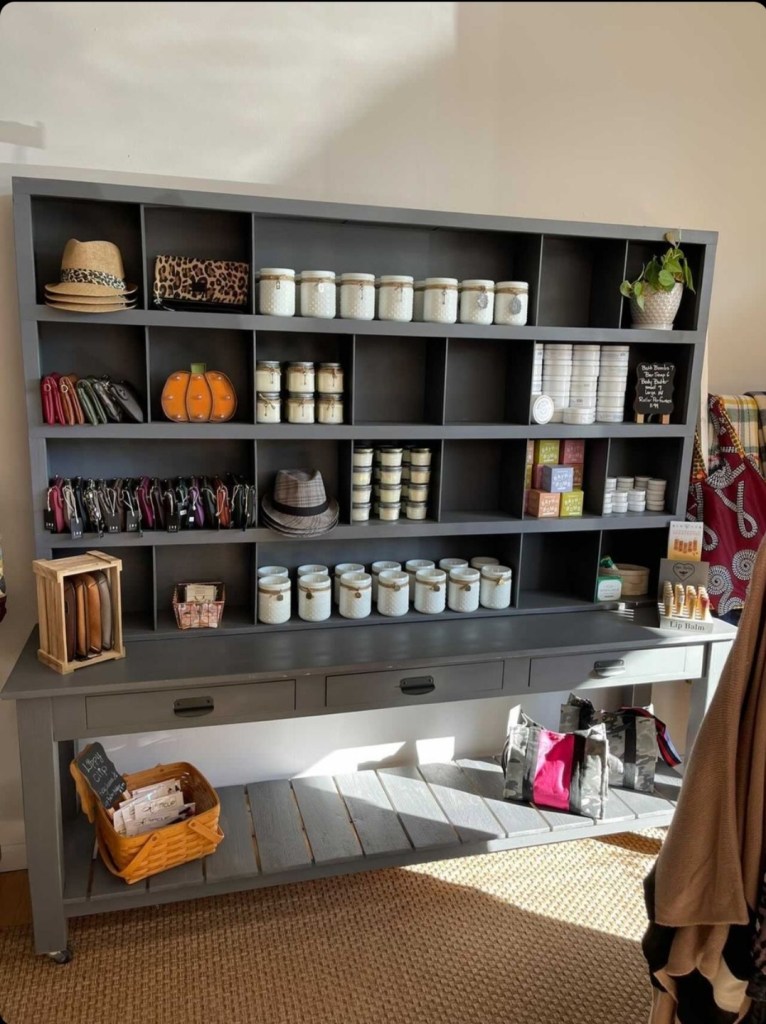
A couple years ago I wrote a blog post about building this huge display cabinet for my wife. She wanted it to use as a backdrop for doing shows. Being 7′ long, it was long enough to stick in the back of a 10′ x 10′ booth with a little room on the sides.
She was hoping to use it for a show in the spring, then Covid hit and the show was cancelled. We waited for everything to go back to normal, but the further things went, Anita decided not to do the show anymore. In the end, we never ended up even using the piece.
It sat in our garage over the months so Anita decided to get rid of it and told me to post it on Facebook Marketplace for dirt cheap. One of Anita’s customers saw the post and came by the next day to buy it. She owns a specialty shop and was planning on painting the piece gray and using it in her store.
Anita stopped by her shop this morning and saw the piece painted. It looks amazing in her store. At least someone got use out of it.
I’m thinking now that I should make these display pieces and put a big price tag on it instead of the garage sale price this lady got. What do you think?
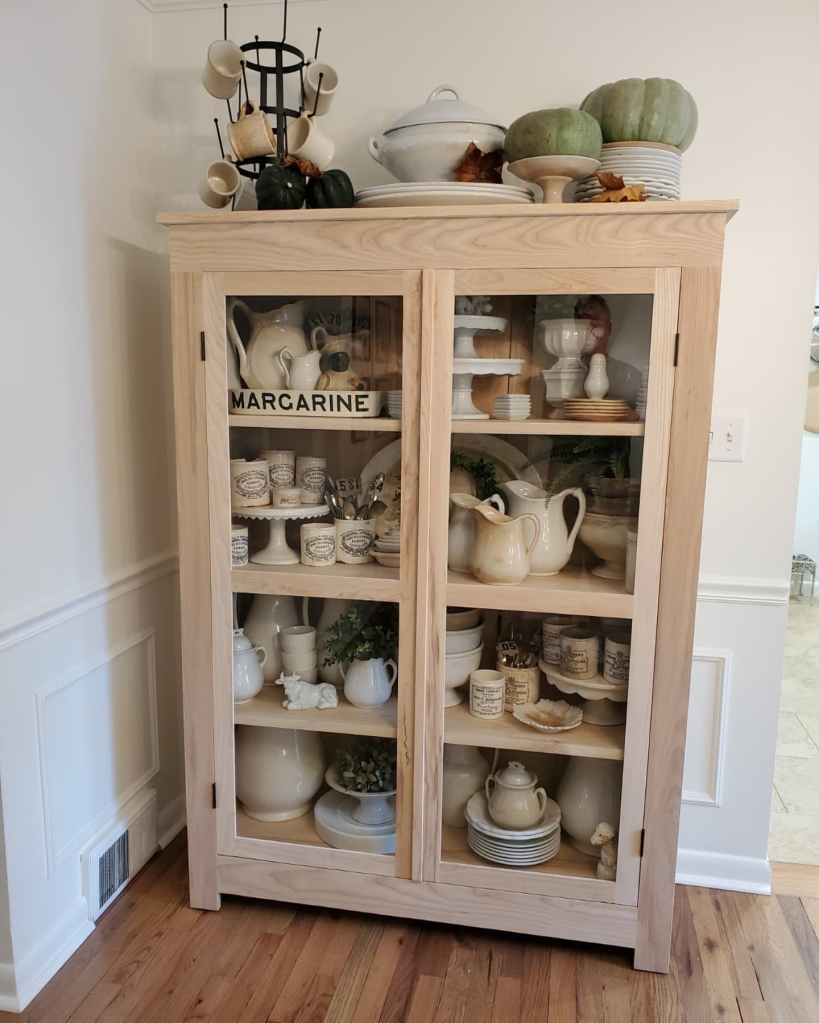
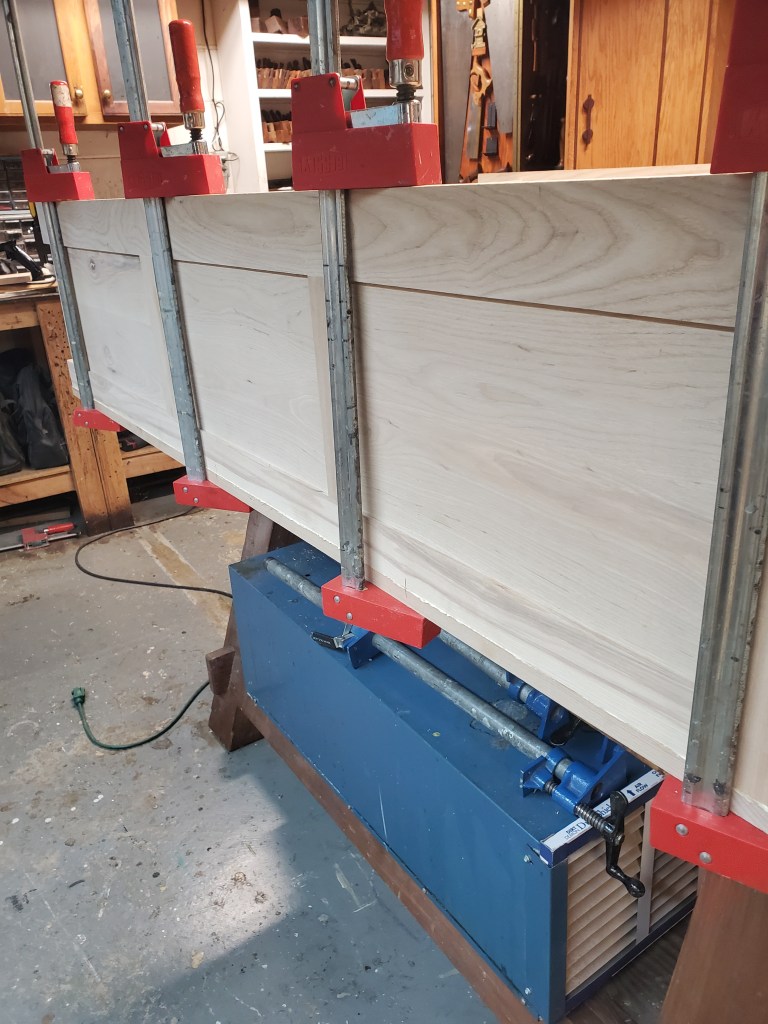
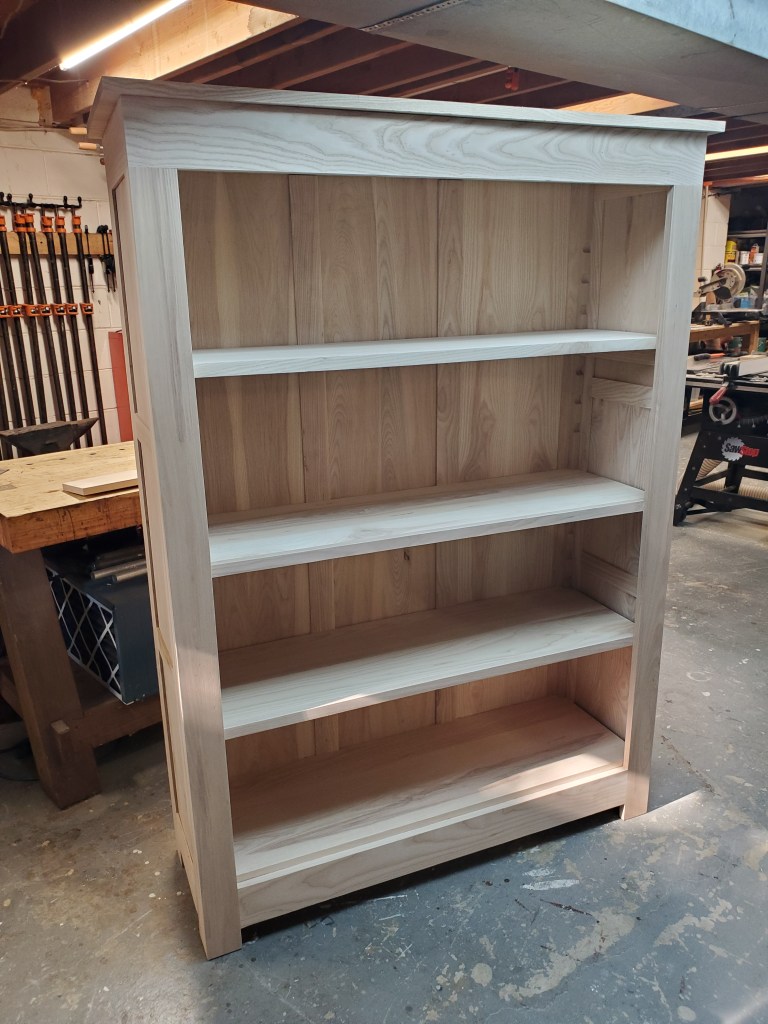
The ash display cabinet I’ve been building for Anita is finally done. Took longer than I wanted but, working full time, restoring and selling antique tools, and doing honey-do lists around the house has eaten up all of my time. Anita will eventually put handles on the doors once she figures out which ones she wants, but for the most part, it’s done.
The cabinet is 48″ x 66″ x 16″ and is the first piece of furniture I made without using a single piece of plywood. I would have at least liked to have made the shelves out of 3/4″ plywood but my lumber supplier doesn’t carry it. The piece is extremely heavy and cost me about $500 to build. But, it’s still way cheaper than the $1600 price tag that was on the one at Pottery Barn. Plus, this is made from American hardwood and not some junky looking Chinese lumber.
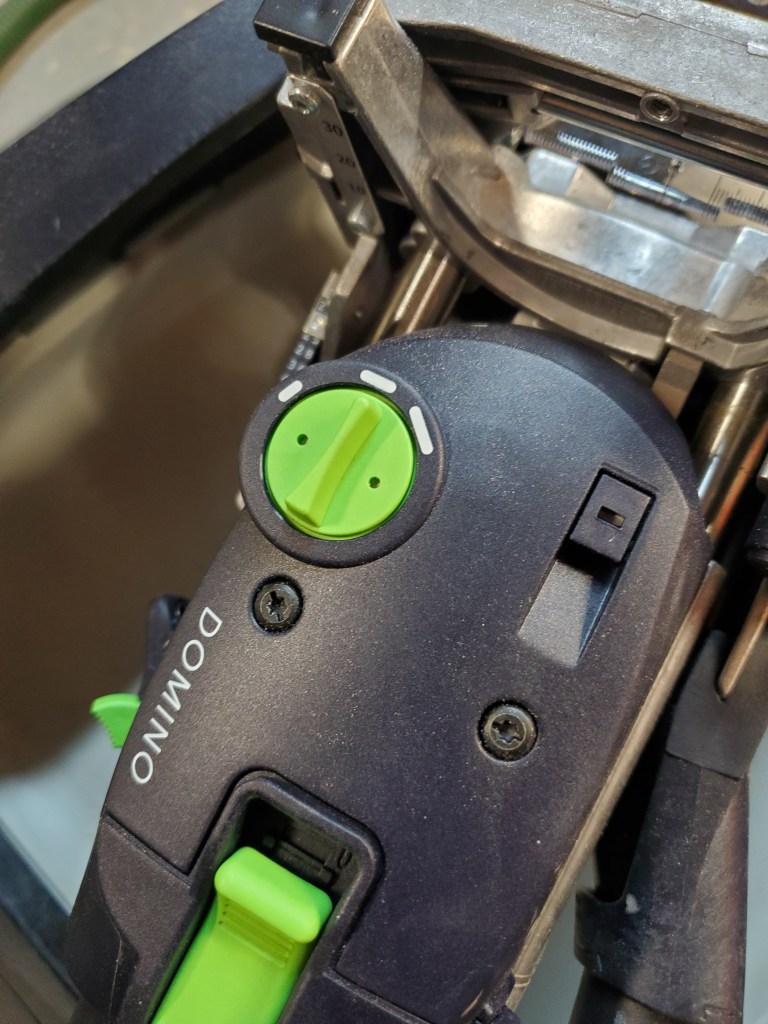
To help speed up the build, I went out and bought a Festool Domino. I waited ten years to buy one until the day I could afford it, but that day never came. So, I bit the bullet and bought the tool as well as the Domino kit with the extra drill bits. So far, I love the tool. I was told by the sales rep at the store that you set the tool on the first setting one one side of the board, then switch to the second setting for the other side of the board. The wider slot gives you a little bit of play when aligning the boards similar to using a biscuit joiner.
I used the machine for the case as well as the joinery on the glass doors and it performed wonderfully. The Domino is one of those tools you wished you would have bought sooner.
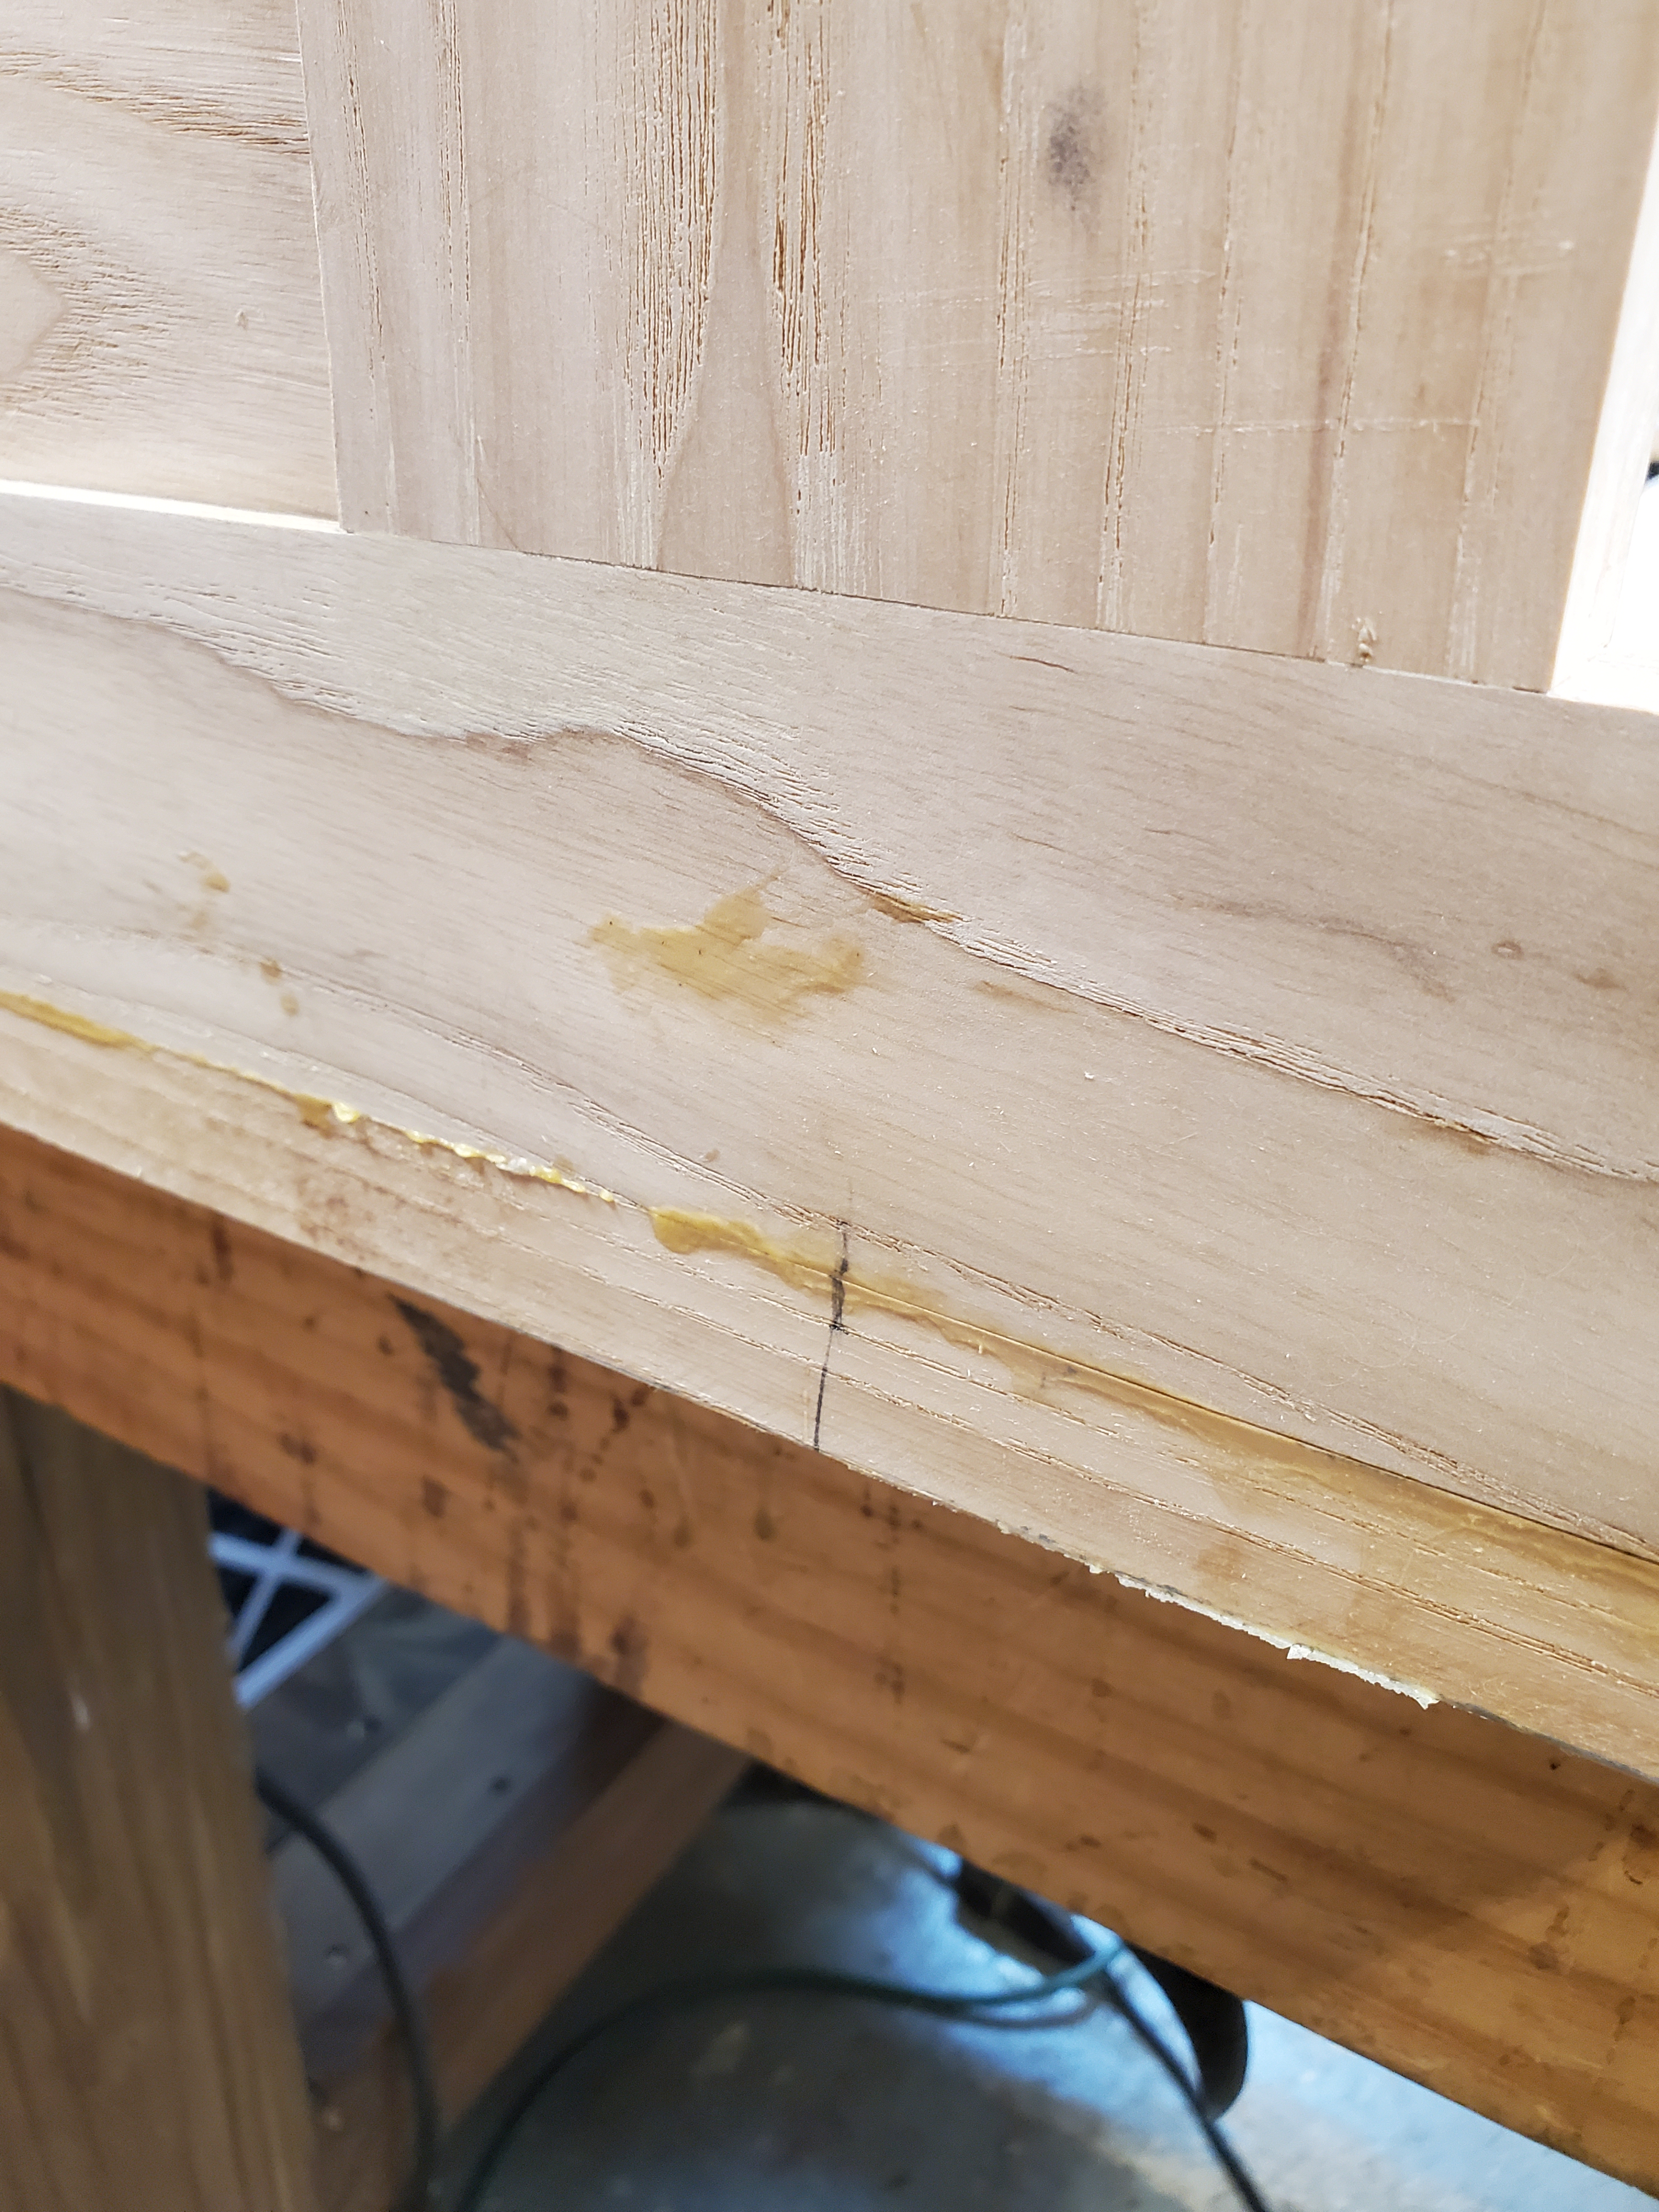
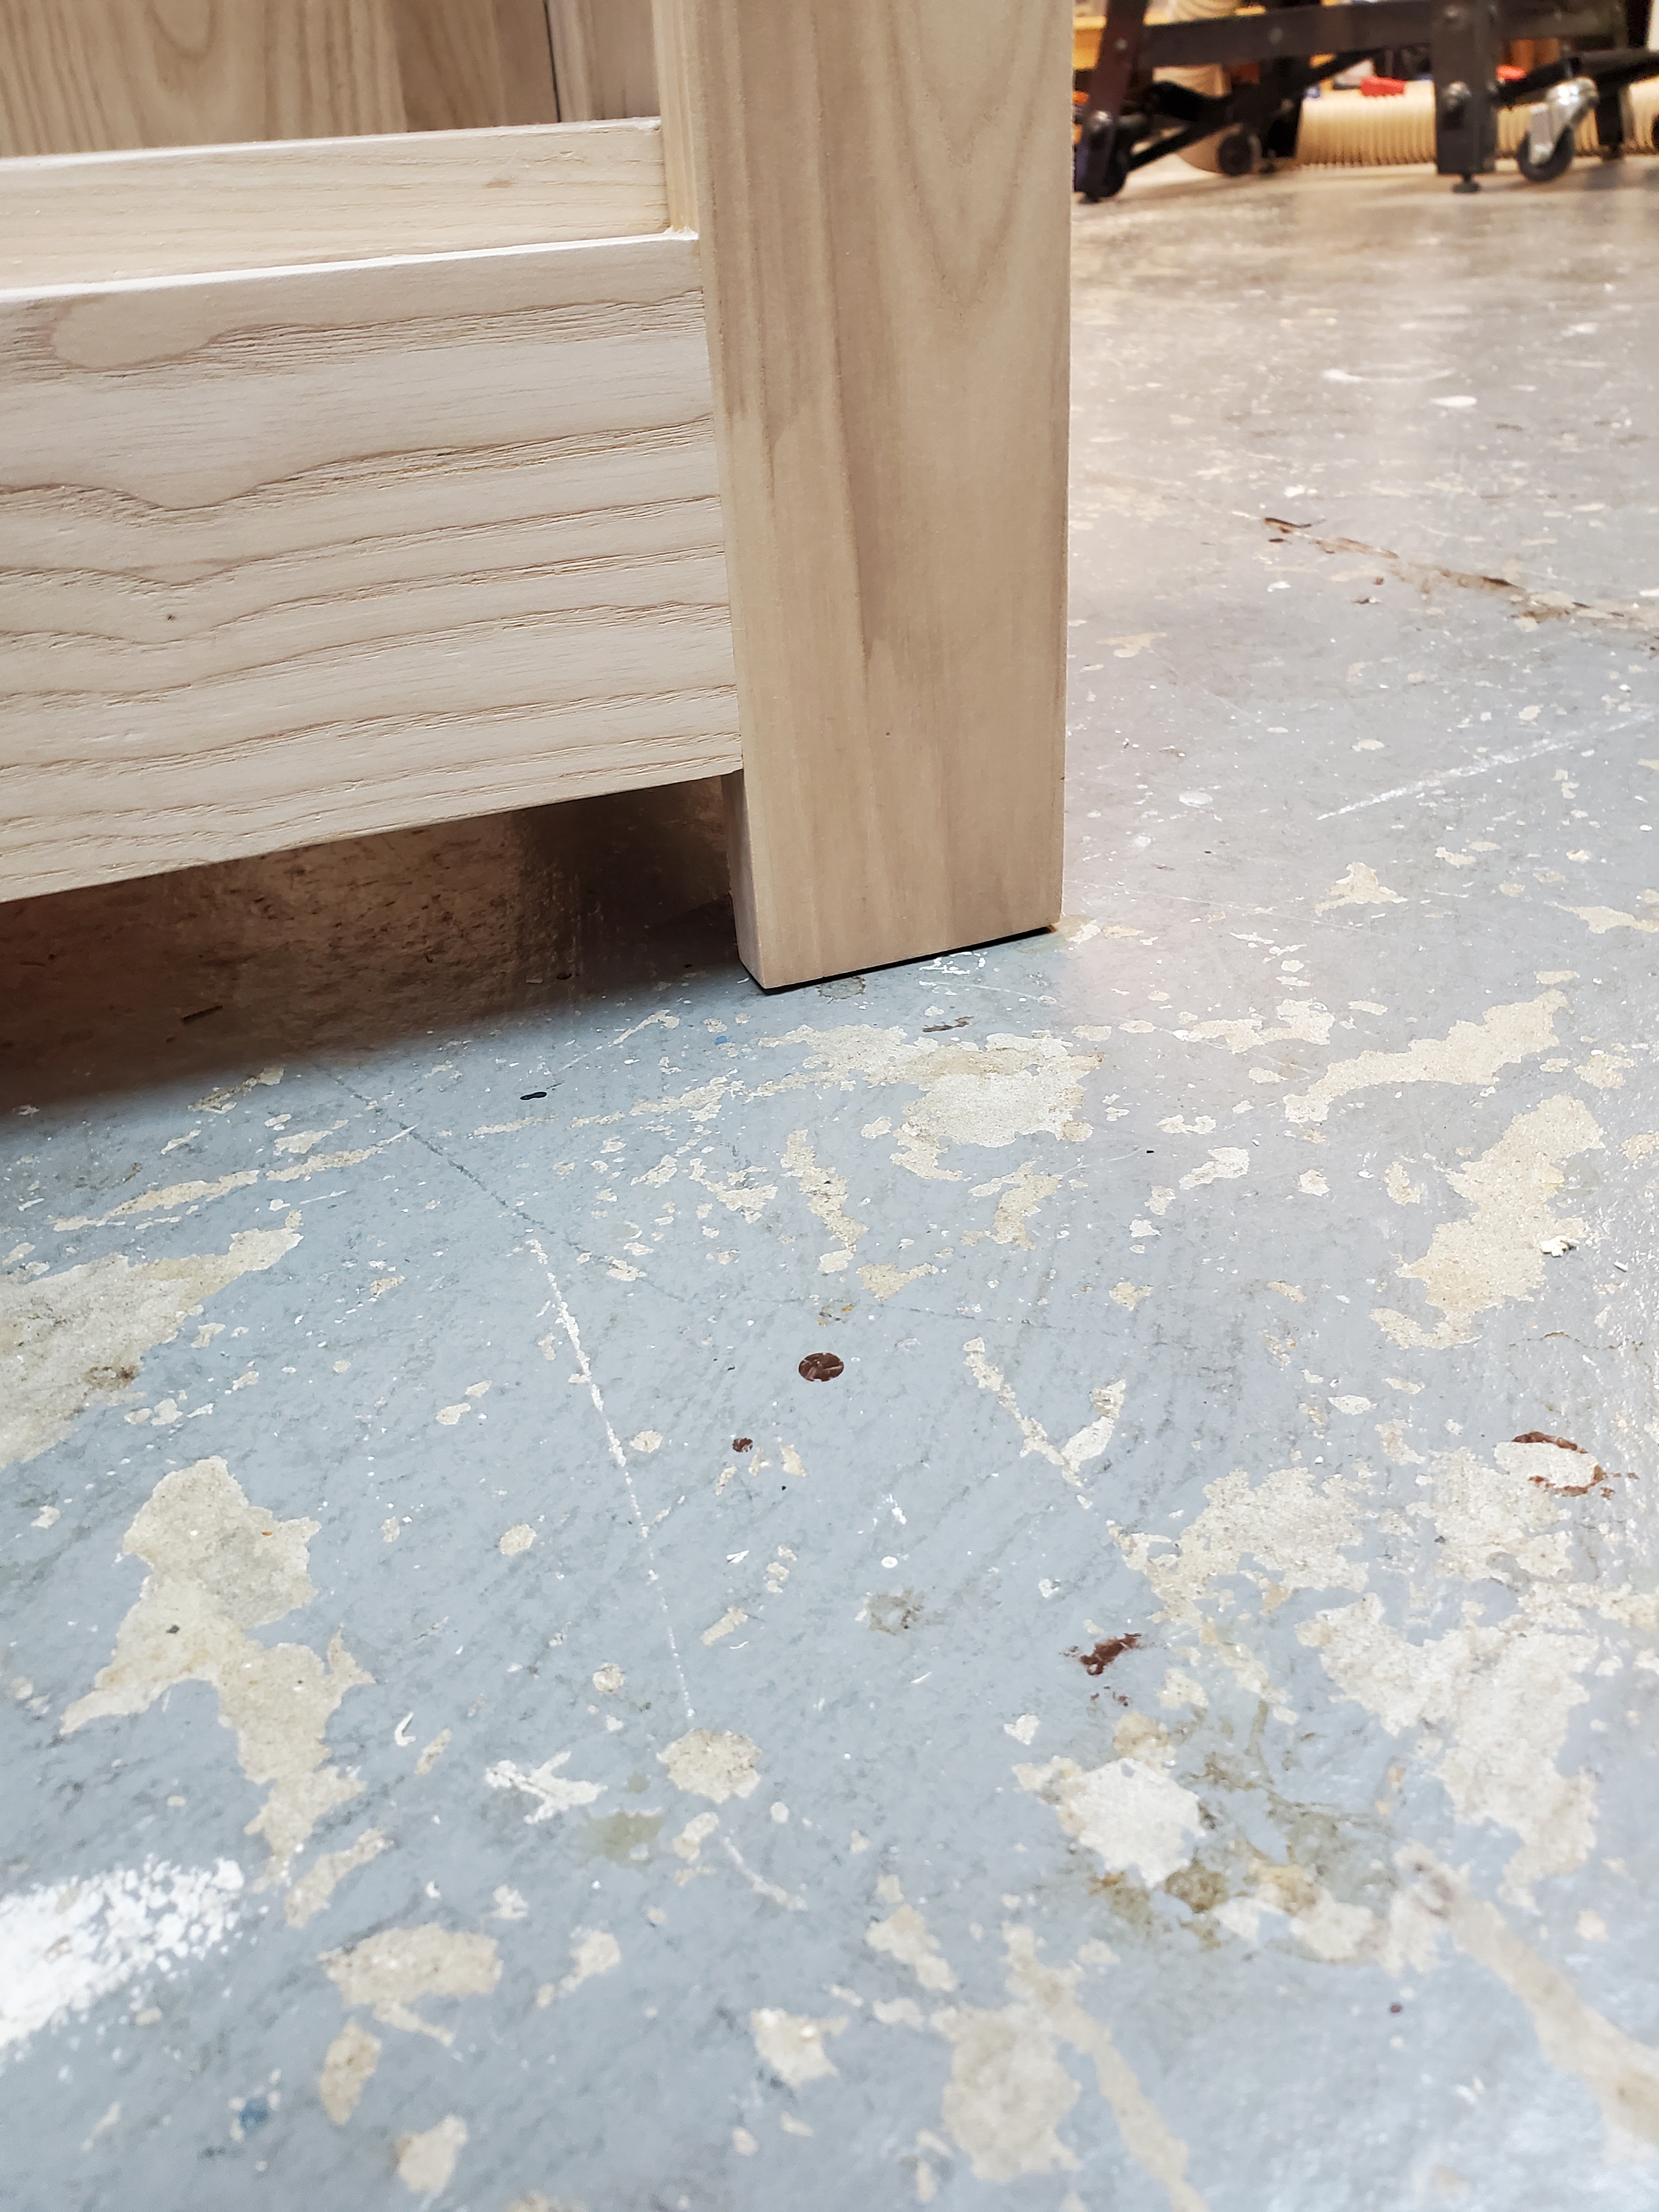
The other thing I did differently on the piece versus others I have built was to put feet on the cabinet. In years past, when I built something, the sides of the case would be the feet of piece of furniture but, after studying antiques over the years, I noticed that the well built pieces would have feet glued to the bottom. This helps protect the sides by lifting them off the floor by a 1/16″. Having square feet also makes sticking furniture pads on the bottom a lot easier.
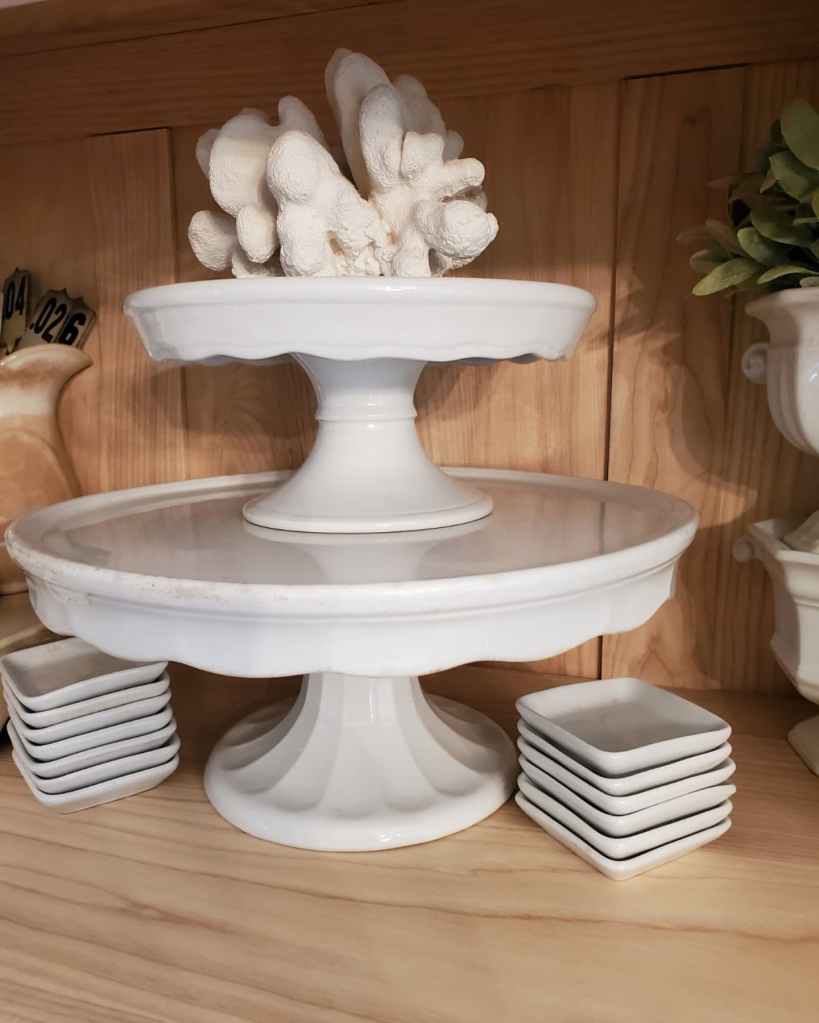
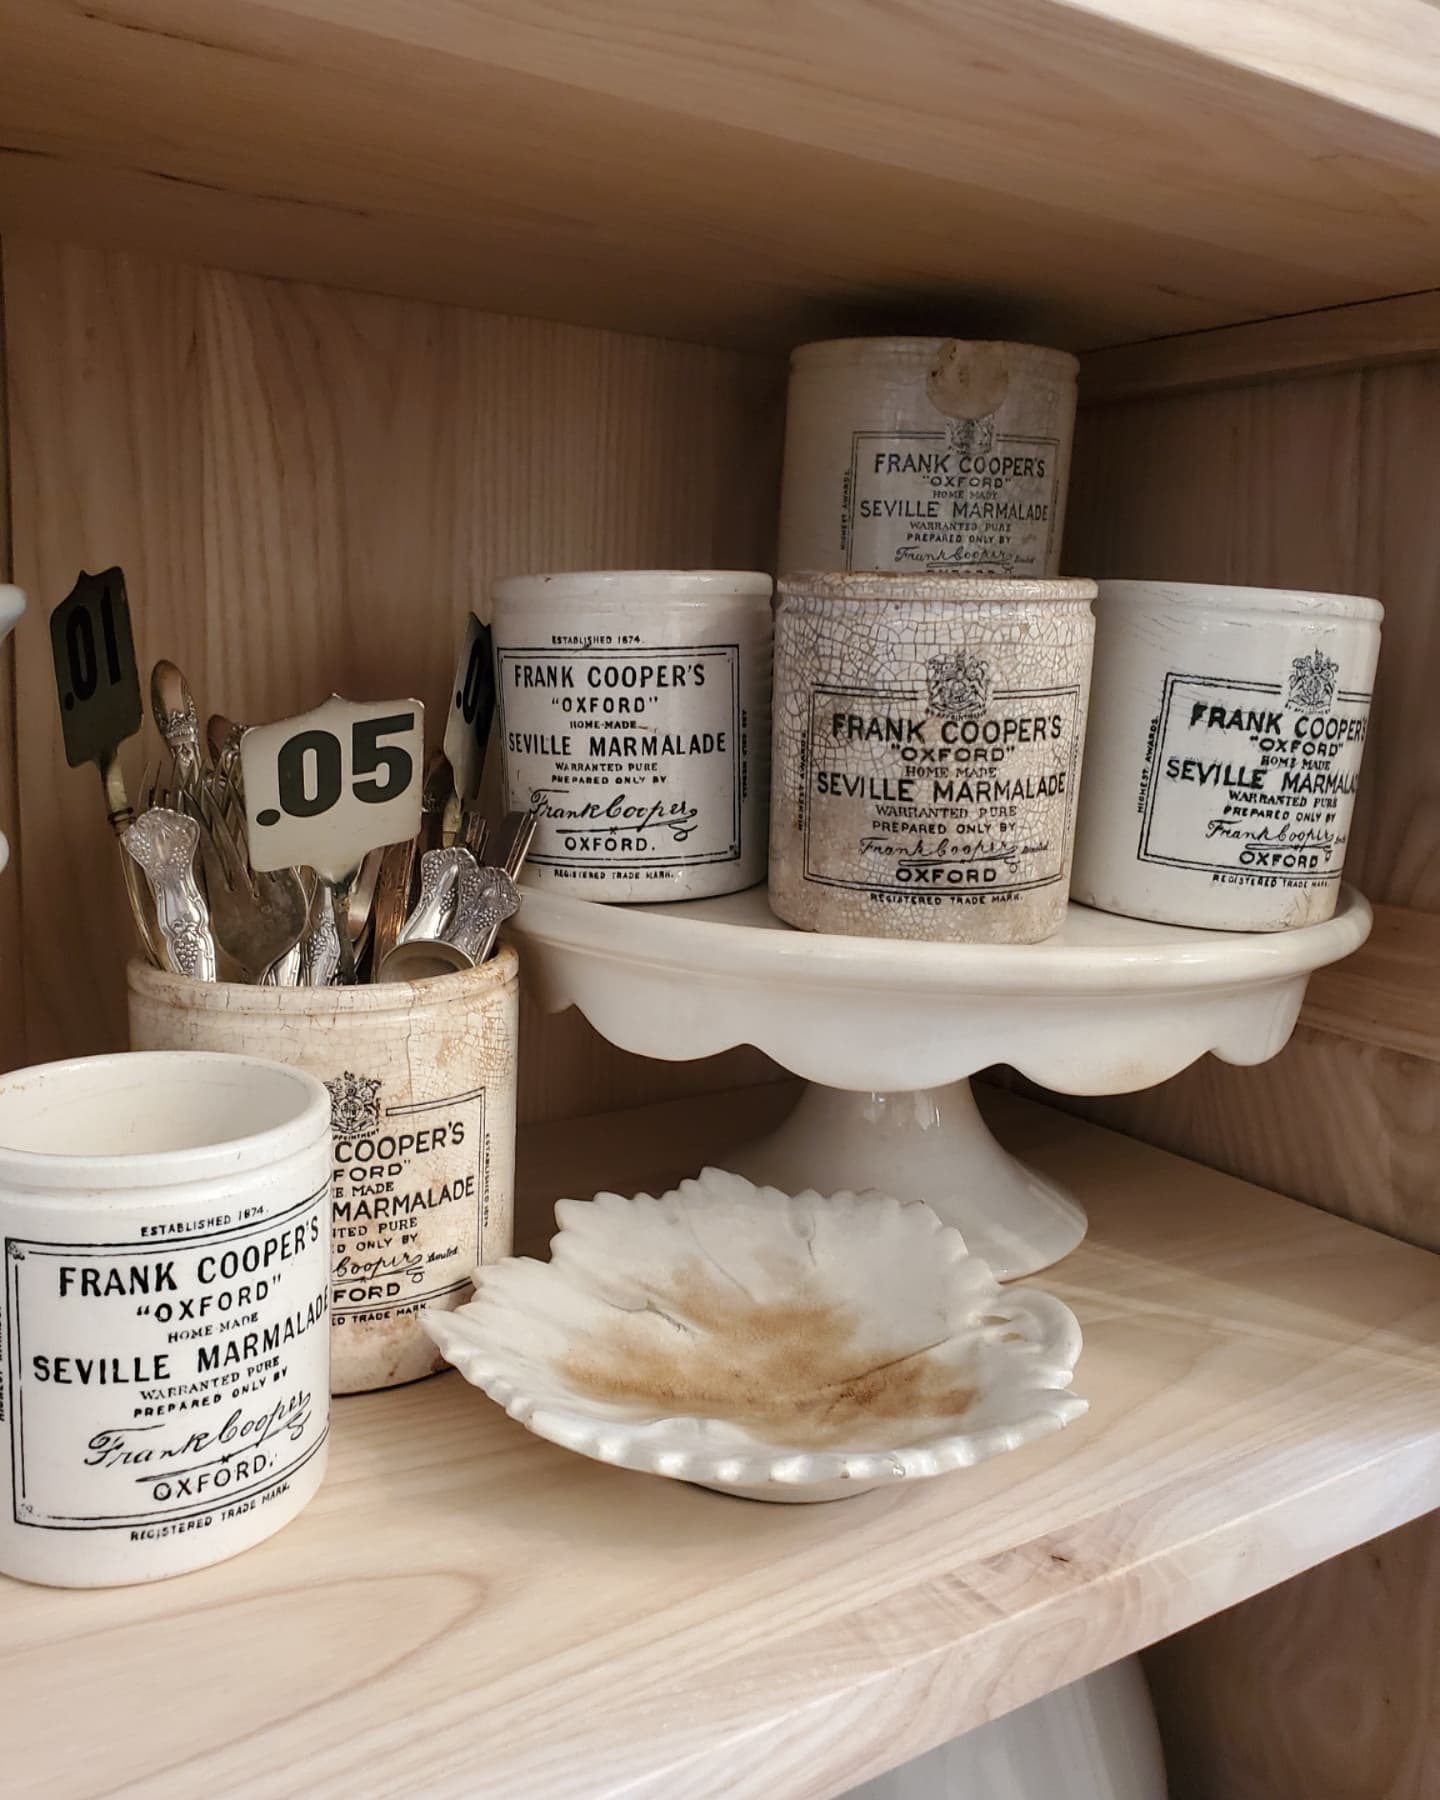
I already wrote about the wooden shelf supports a few weeks ago here. They work exceptionally well and can hold a massive amount of ironstone. I can’t even imagine all that weight on little brass pins.
Anita loves the cabinet, I love the cabinet, her friends love the cabinet, people on Instagram love the cabinet. It’s been a big hit and the money I saved building it, paid for my Festool Domino.. (see what I did there?)
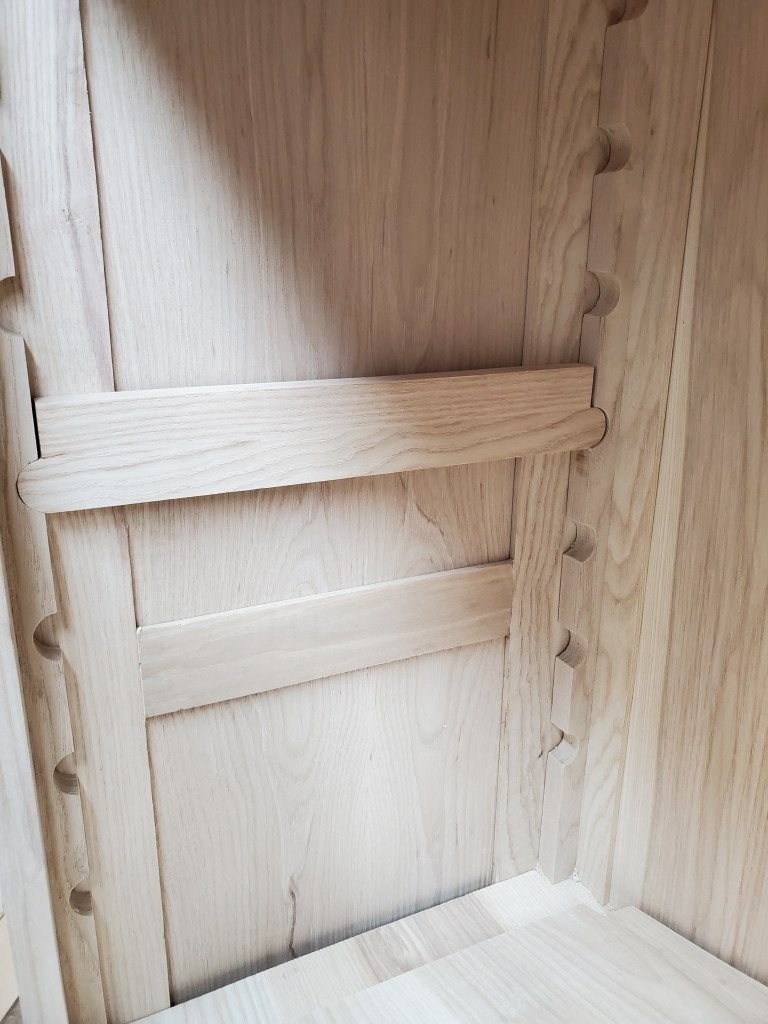
The past few weeks I’ve been building a display cabinet for my wife out of ash. Things have been going well with the build and when it came to adding a way to hold the adjustable shelves, I wanted to use an old method that I’ve seen numerous times on antique furniture.
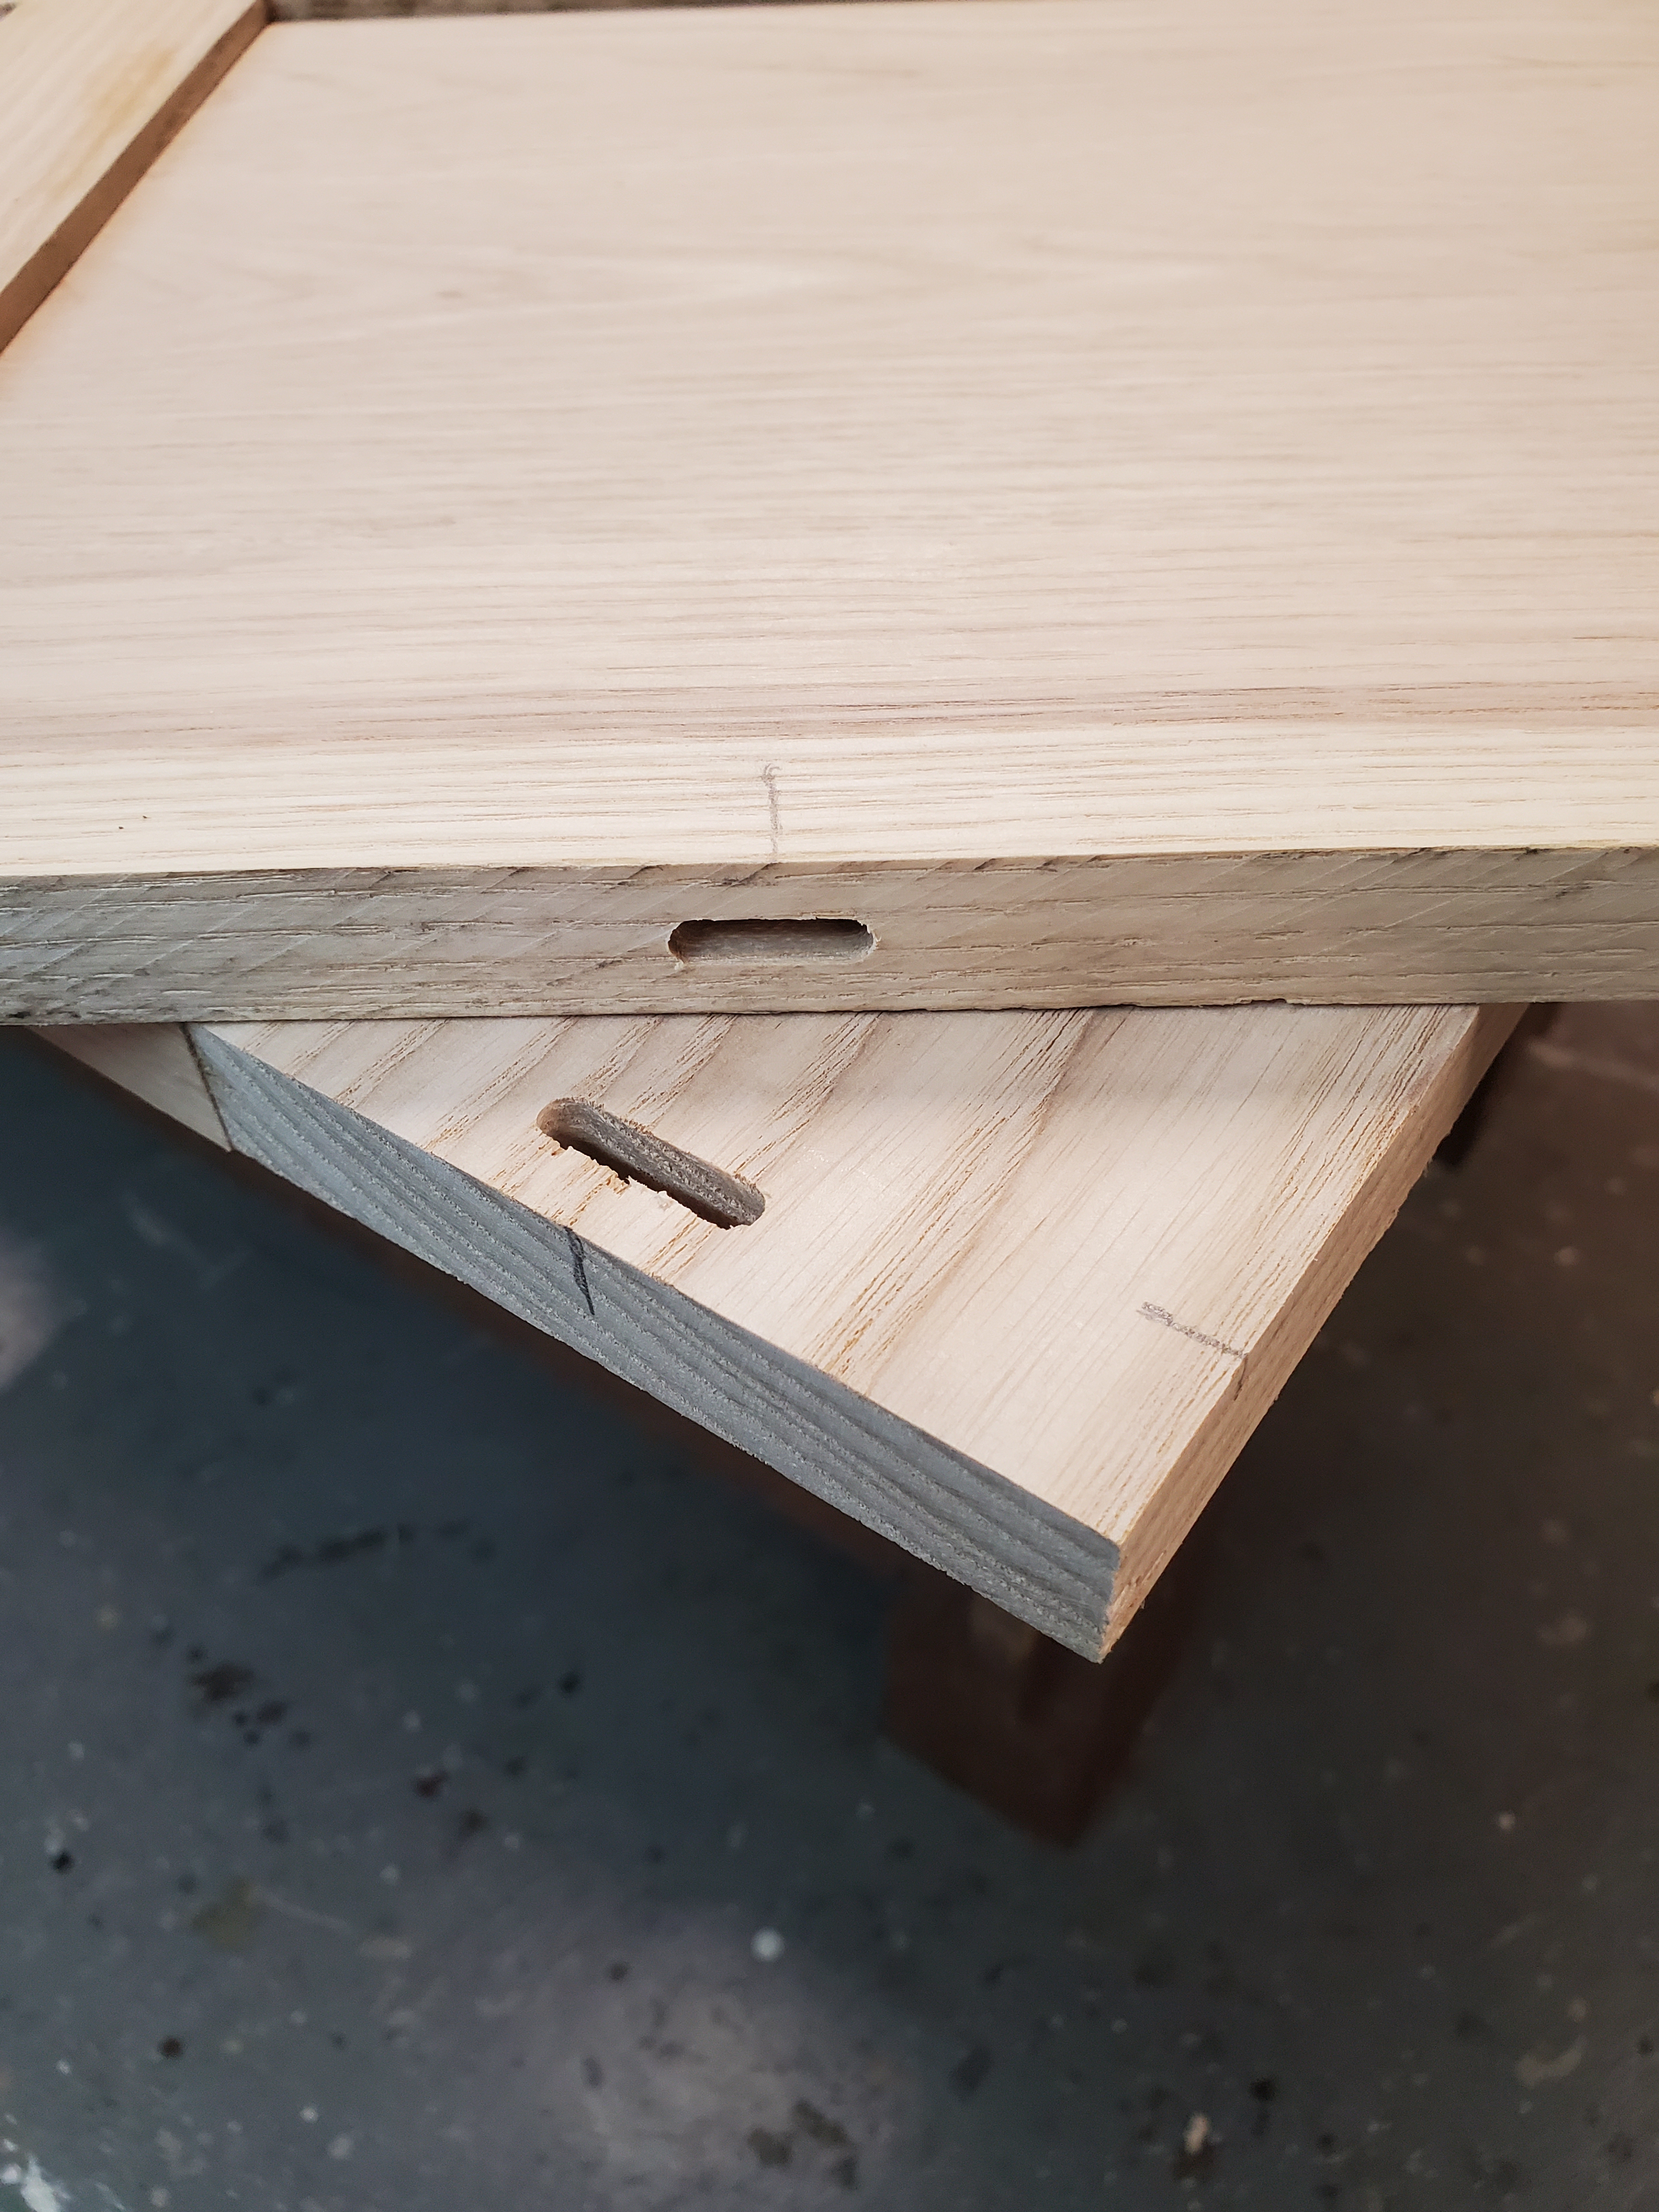
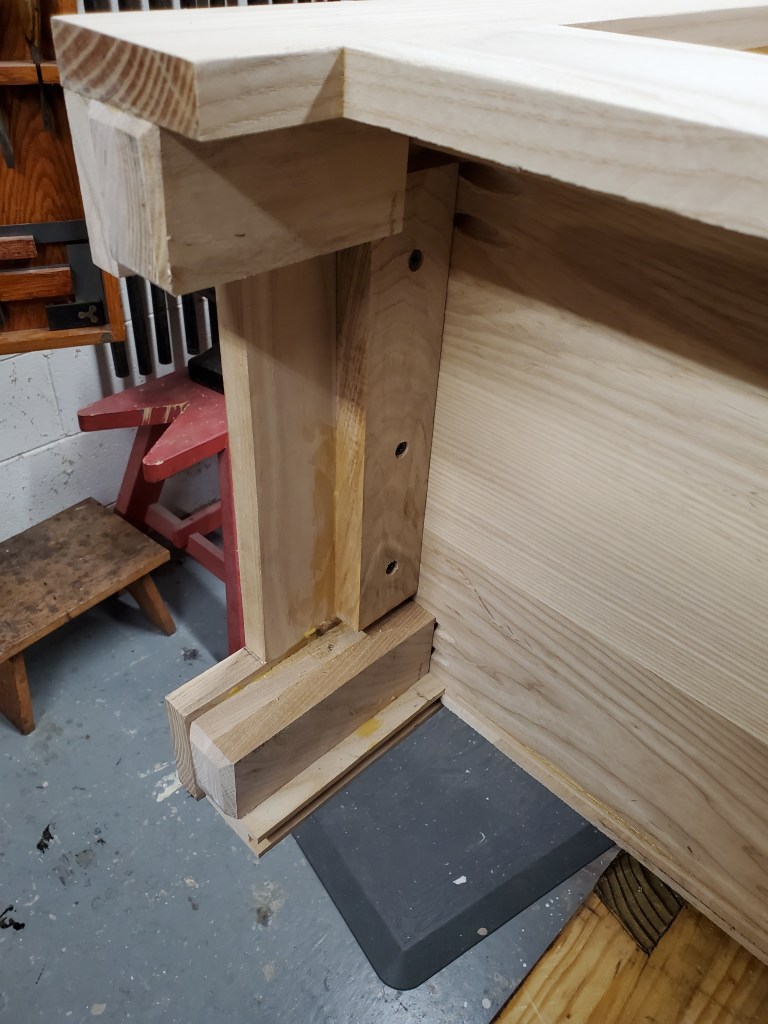
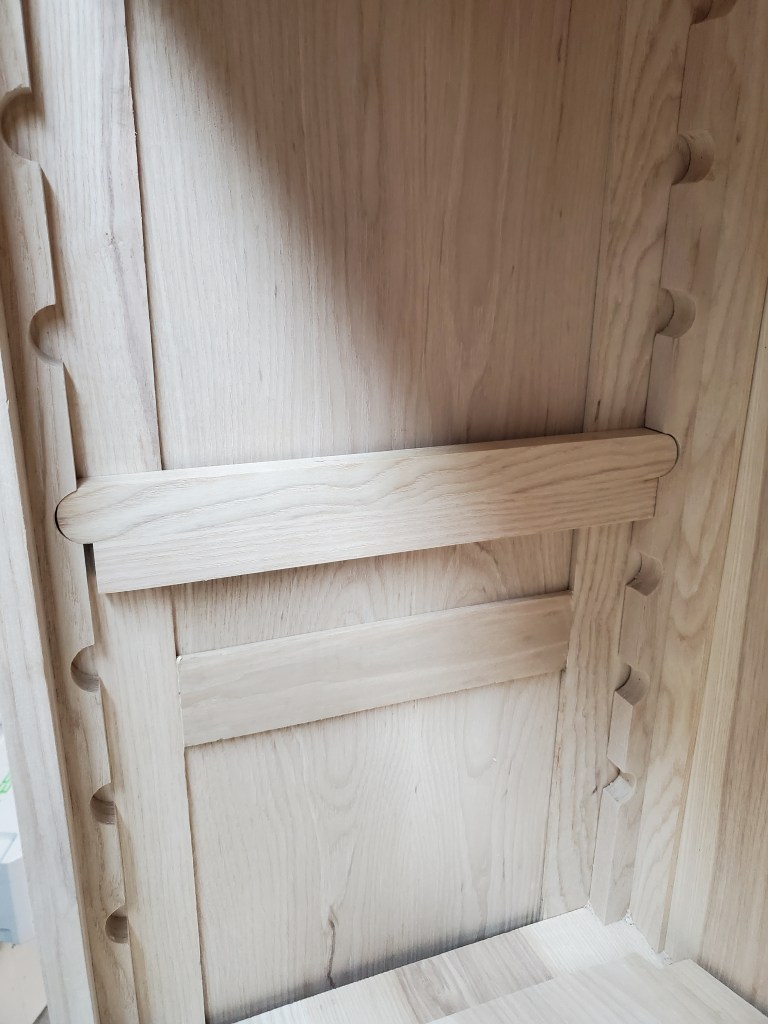
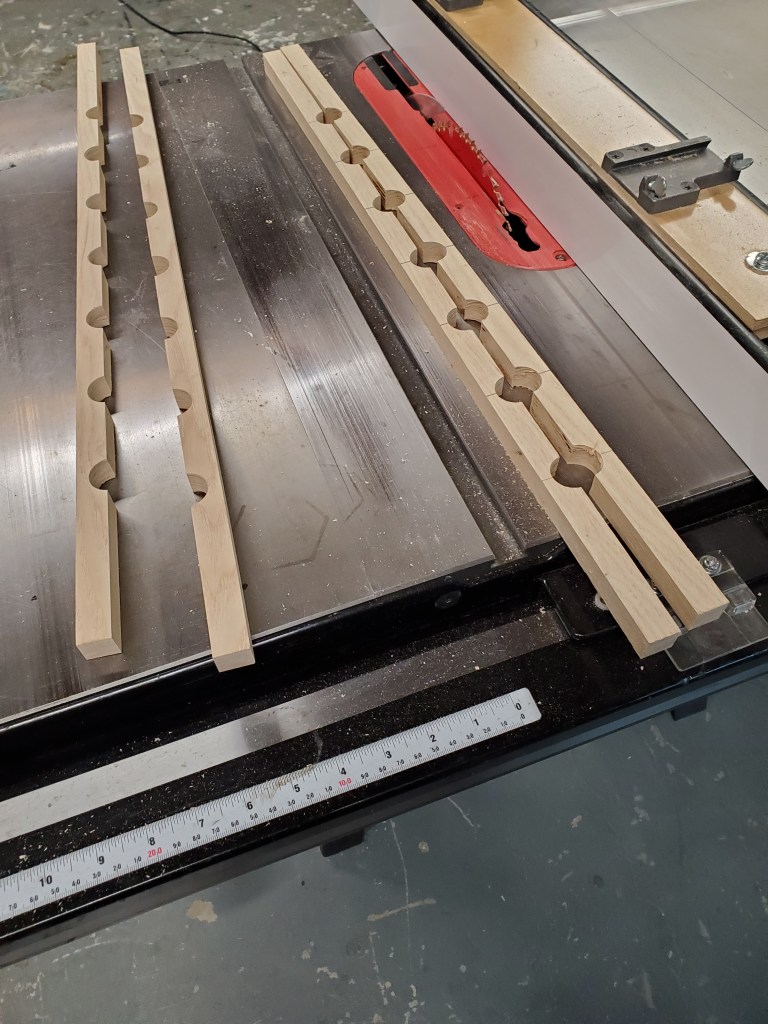
It starts with a couple of pieces of 1 1/2″ wide wood laying out 1″ diamter holes down the middle. The holes are 3″ apart on center. I taped the two pieces together so that when the holes are bored, the pieces mirror eachother.
I then ripped the pieces apart in the middle giving me four brackets that are similar to one another. I then installed each piece in the corner of the cabinet with glue and a few 23 gauge pins. This gives me perfect alignment when I install the shelf brackets.
The brackets are nothing more than a 1″ wide ash with a roundover on each end. I decide to add another 1″ piece of wood onto the stretcher. This gives me the opportunity to adjust the height of the shelf inside the cabinet by one inch. It’s helpful if the shelf needs to be a little bit higher, but I don’t want to move the stretcher three inches to the next notch.
Overall, I love the look of the wooden shelf dividers. I’ve done the 1/4″ holes drilled up and down the sides with brass pins for years and was never a big fan of them. To me, this looks a bit more authentic.
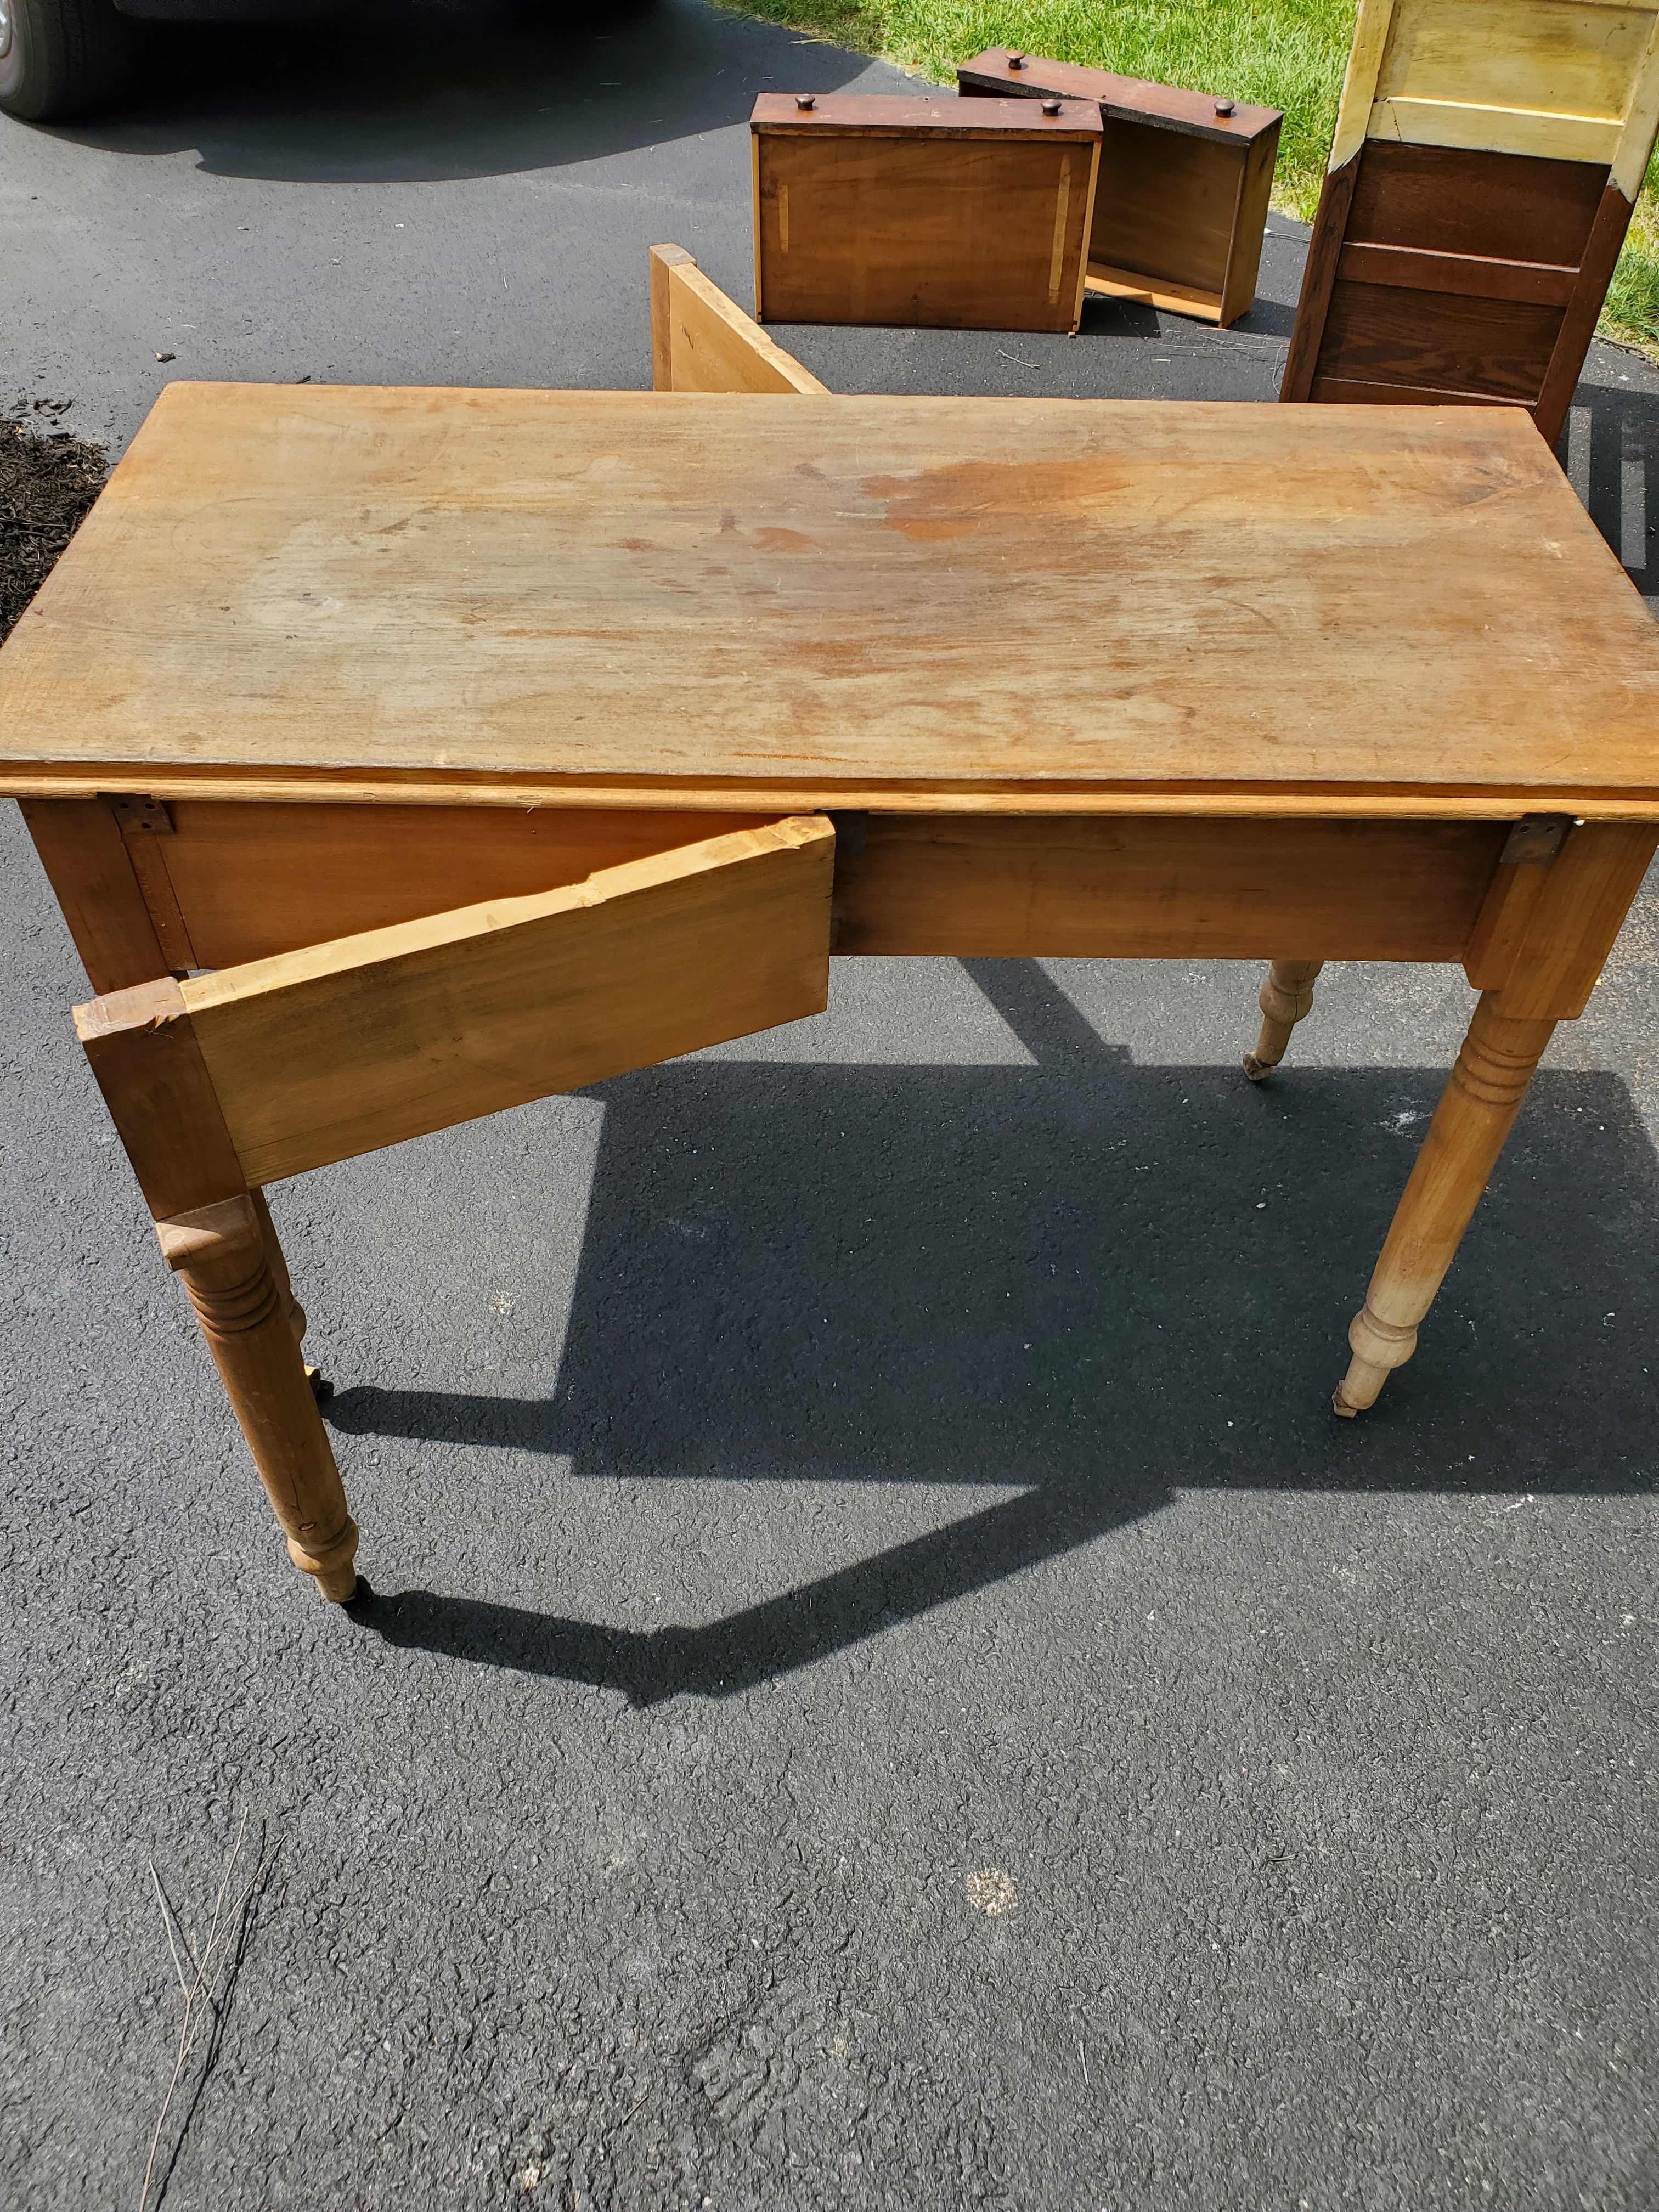
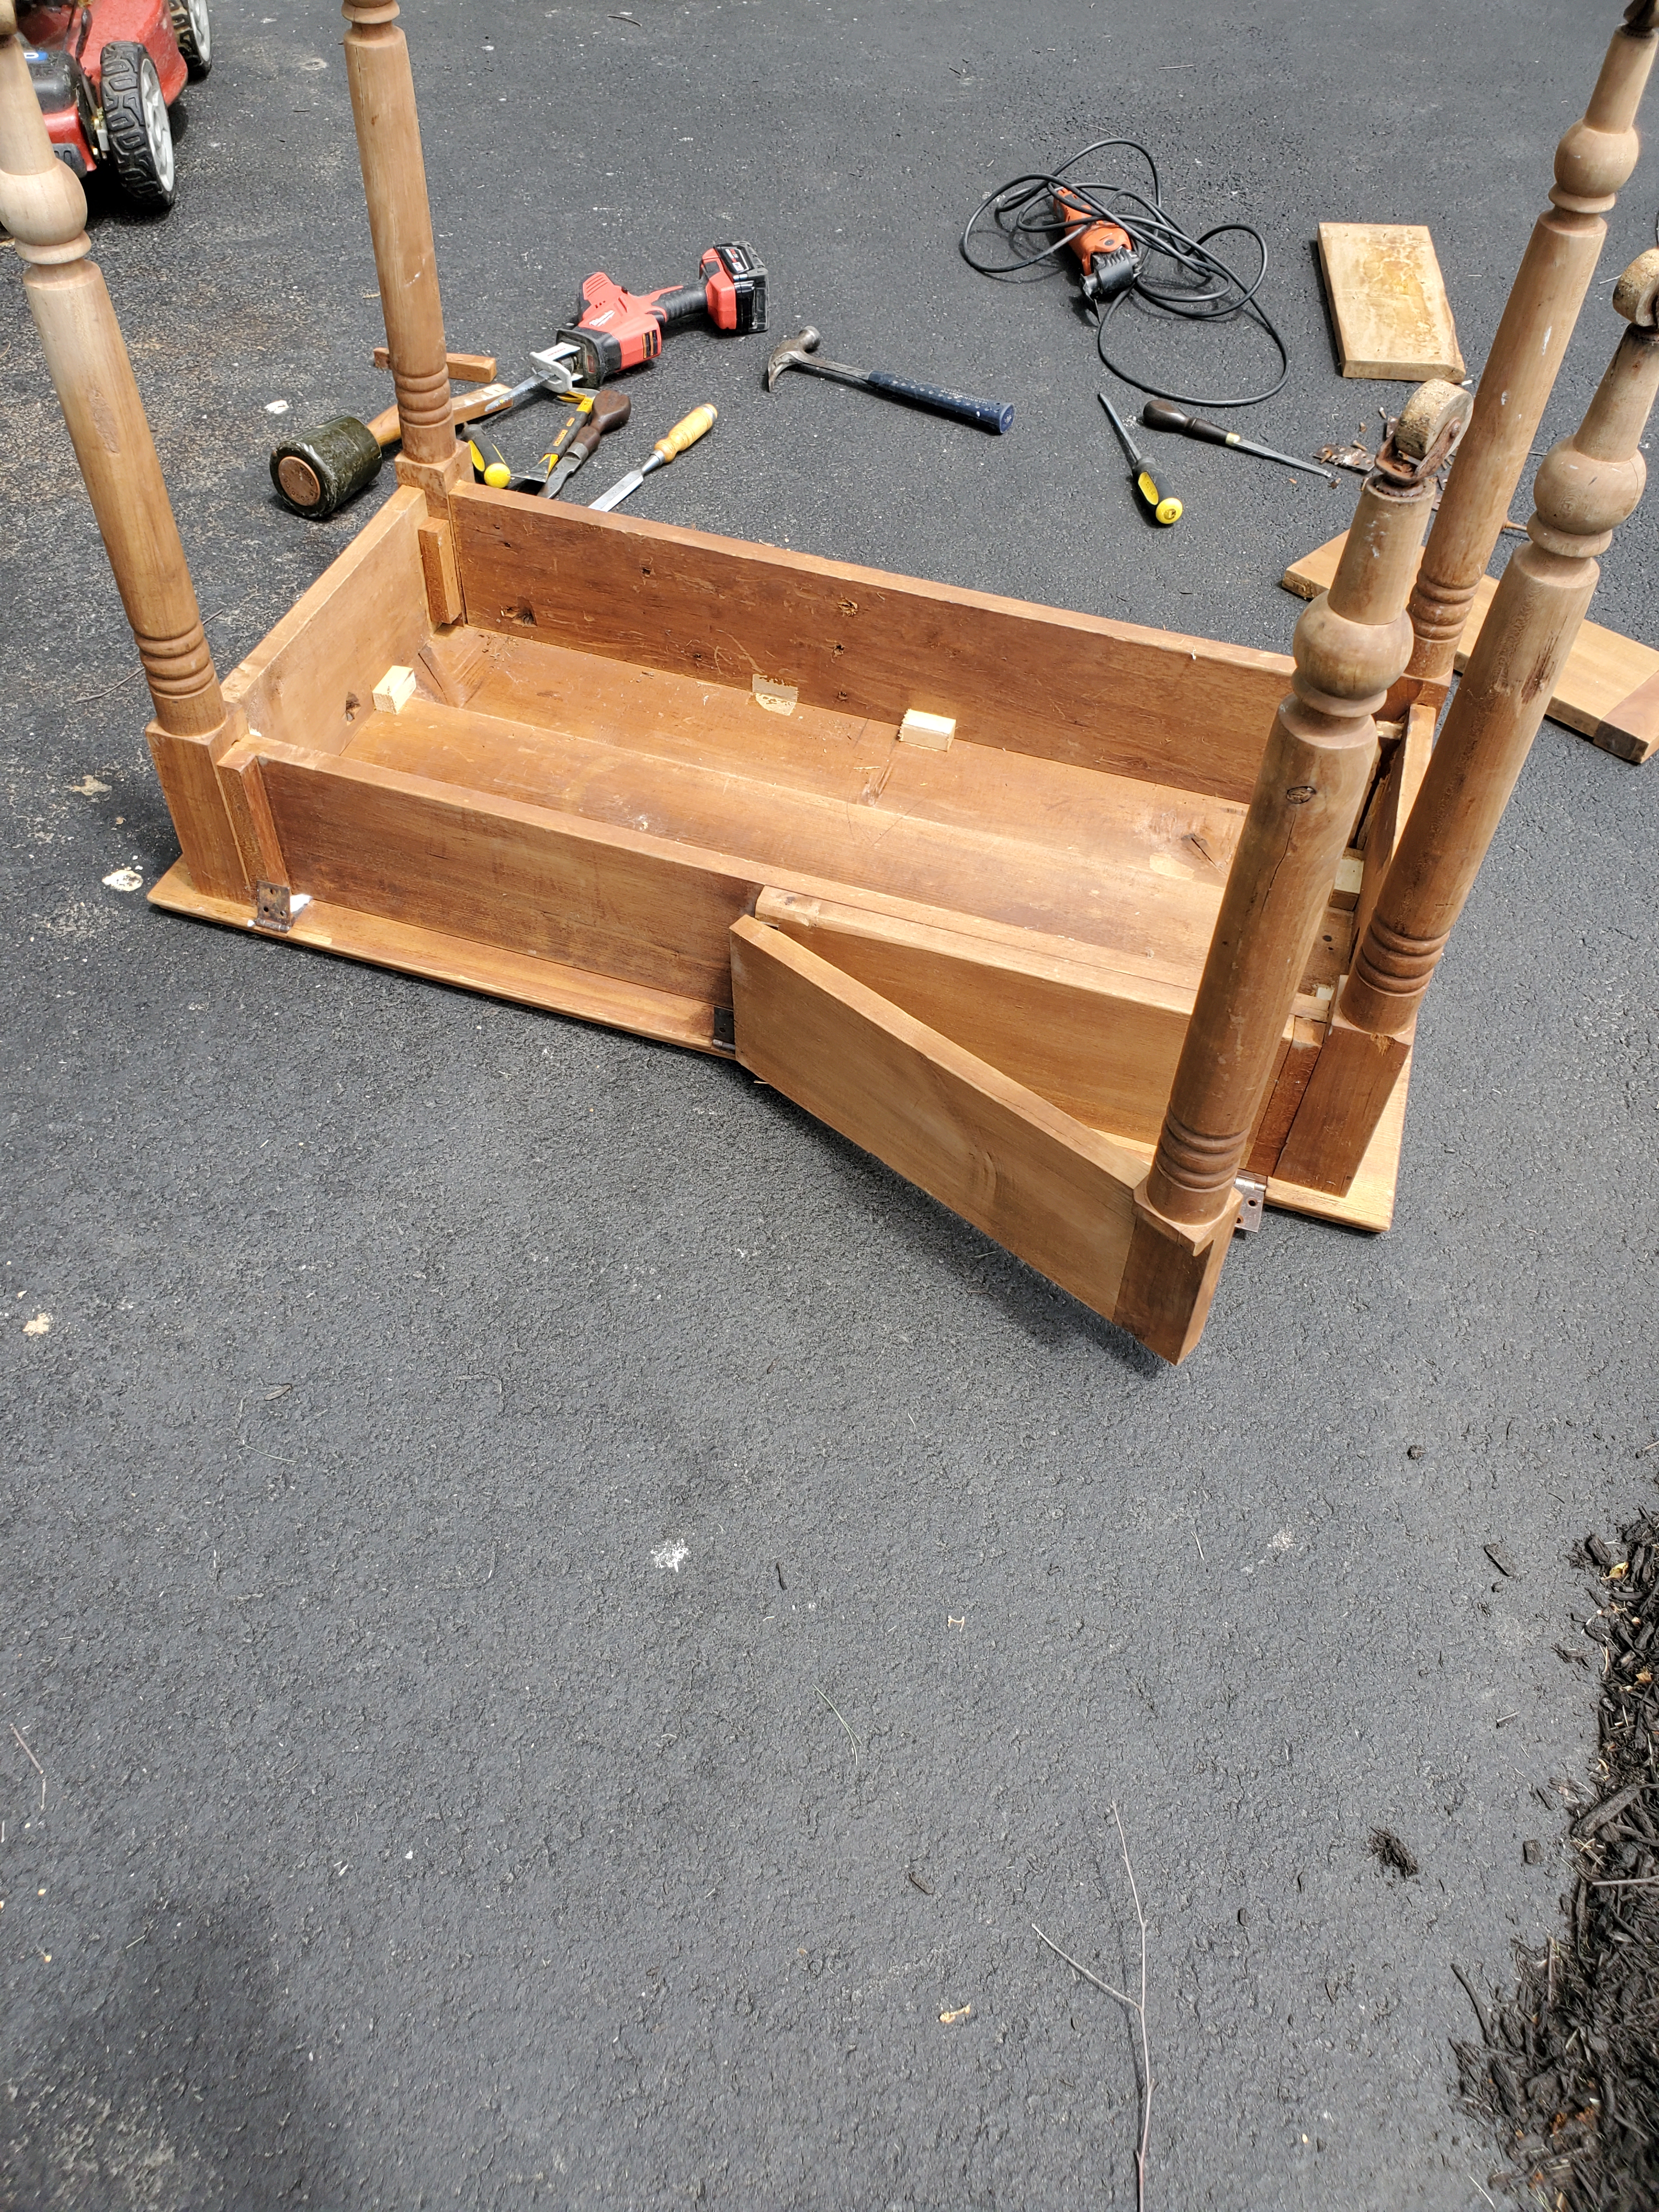
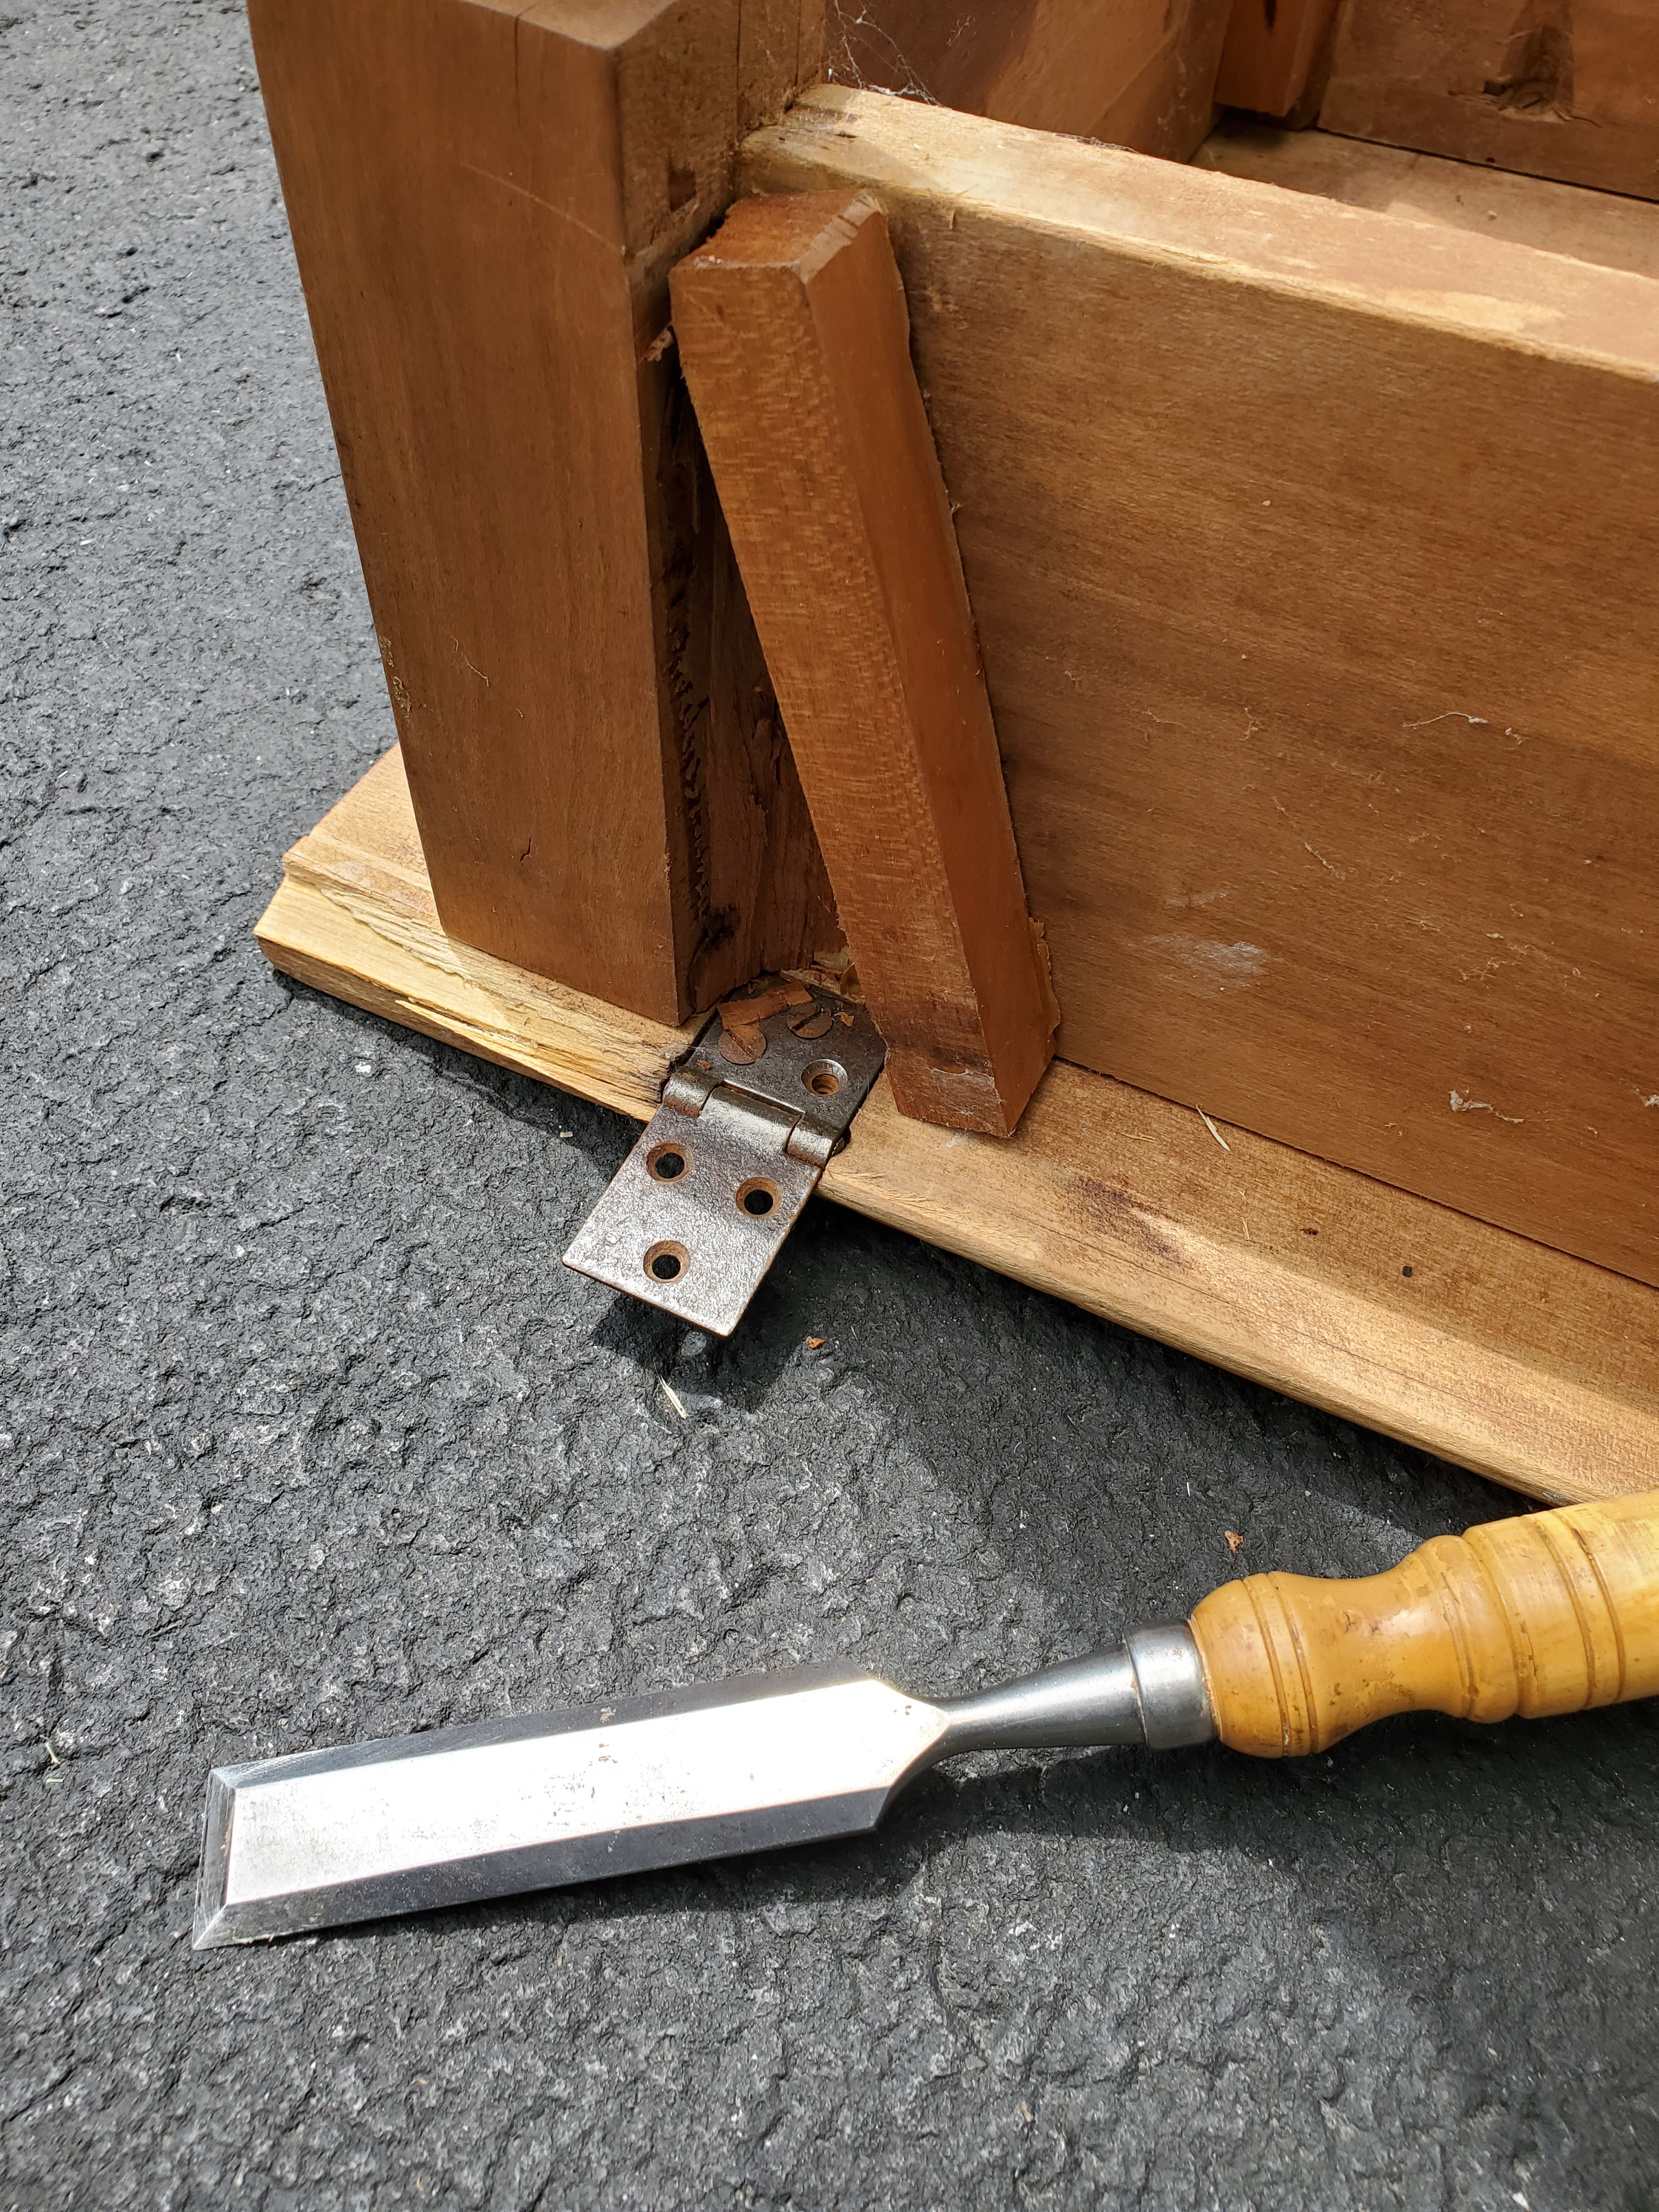
Last weekend while I was repairing the oak dresser we bought at the Springfield Extravaganza, I was working on this drop leaf table as well. The table was in bad shape with both drop leafs broken off. We bought the table to use in Anita’s booth so all I had to do was remove the two swing out legs and make it presentable.
I flipped the table over and started to unscrew all the hinges that were attached to the top and sides. Then I popped off the extra pieces of wood so that the sides would be one single piece of wood.
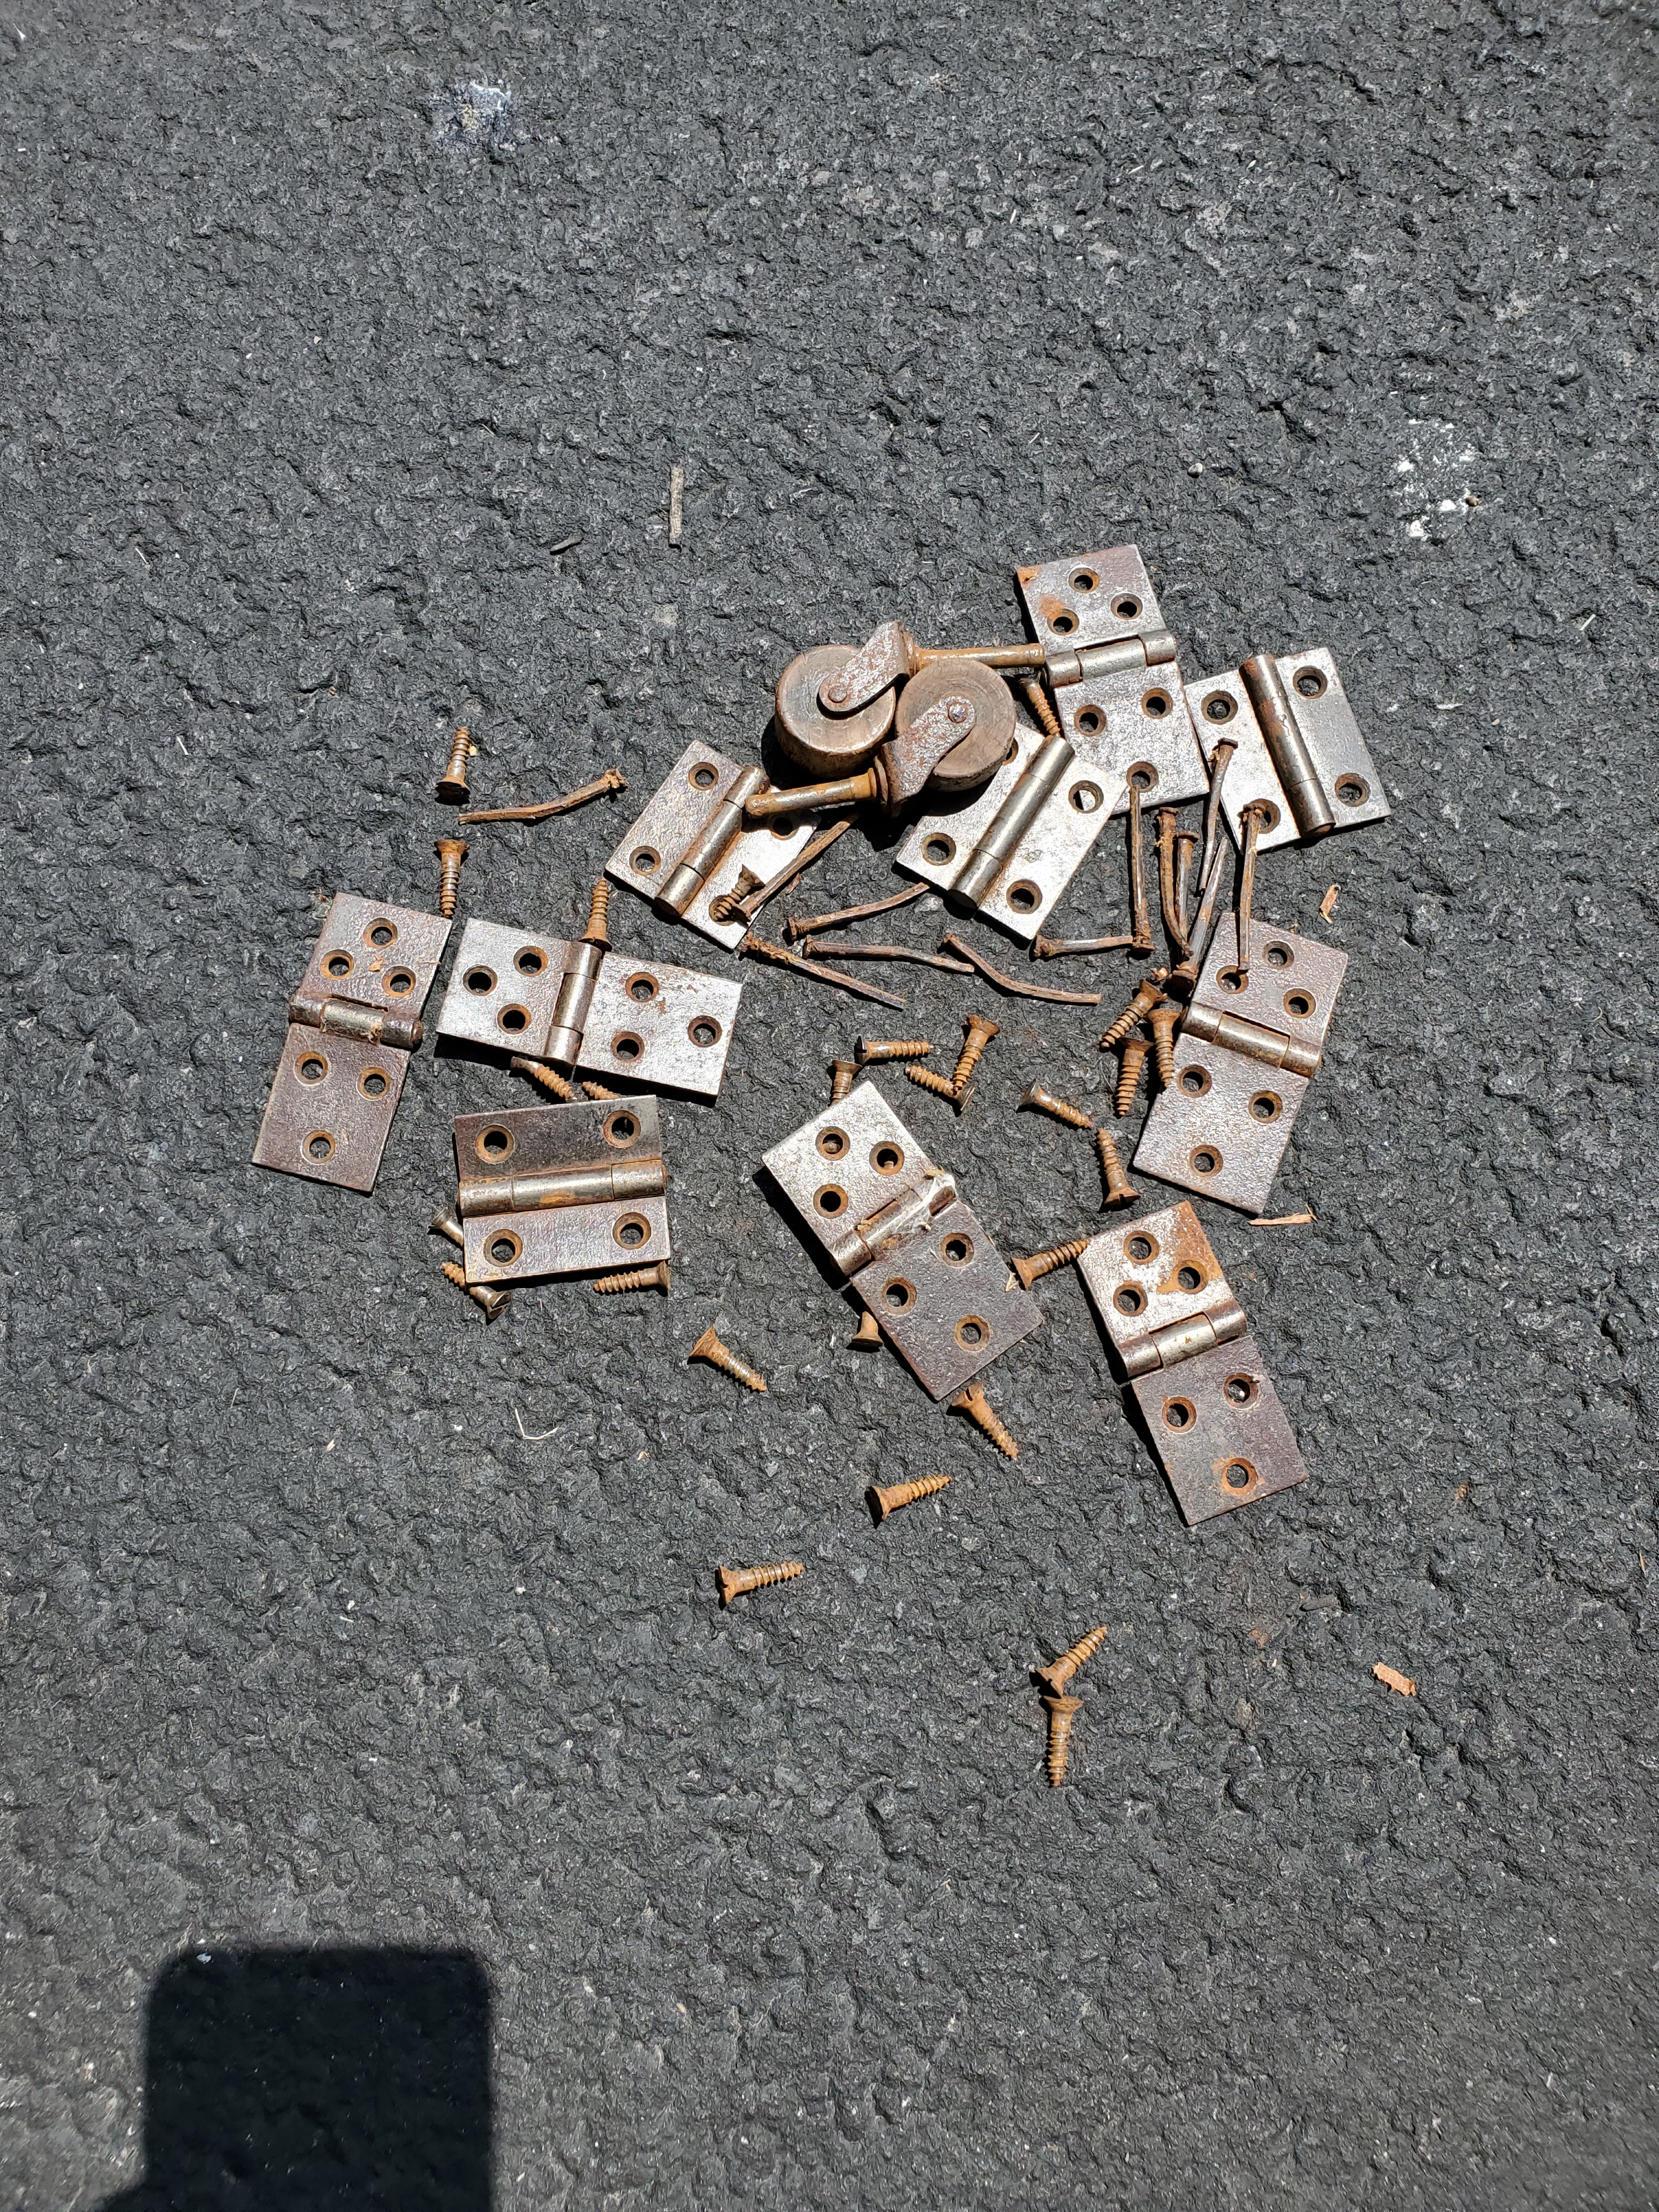
Taking all the hardware off, I made sure that I saved it all in case I need it for another project or even sell on eBay. If I sell the hardware, it will help offset some of the cost of the buying the table. If I’m lucky, I’ll sell it for enough to make the table free.
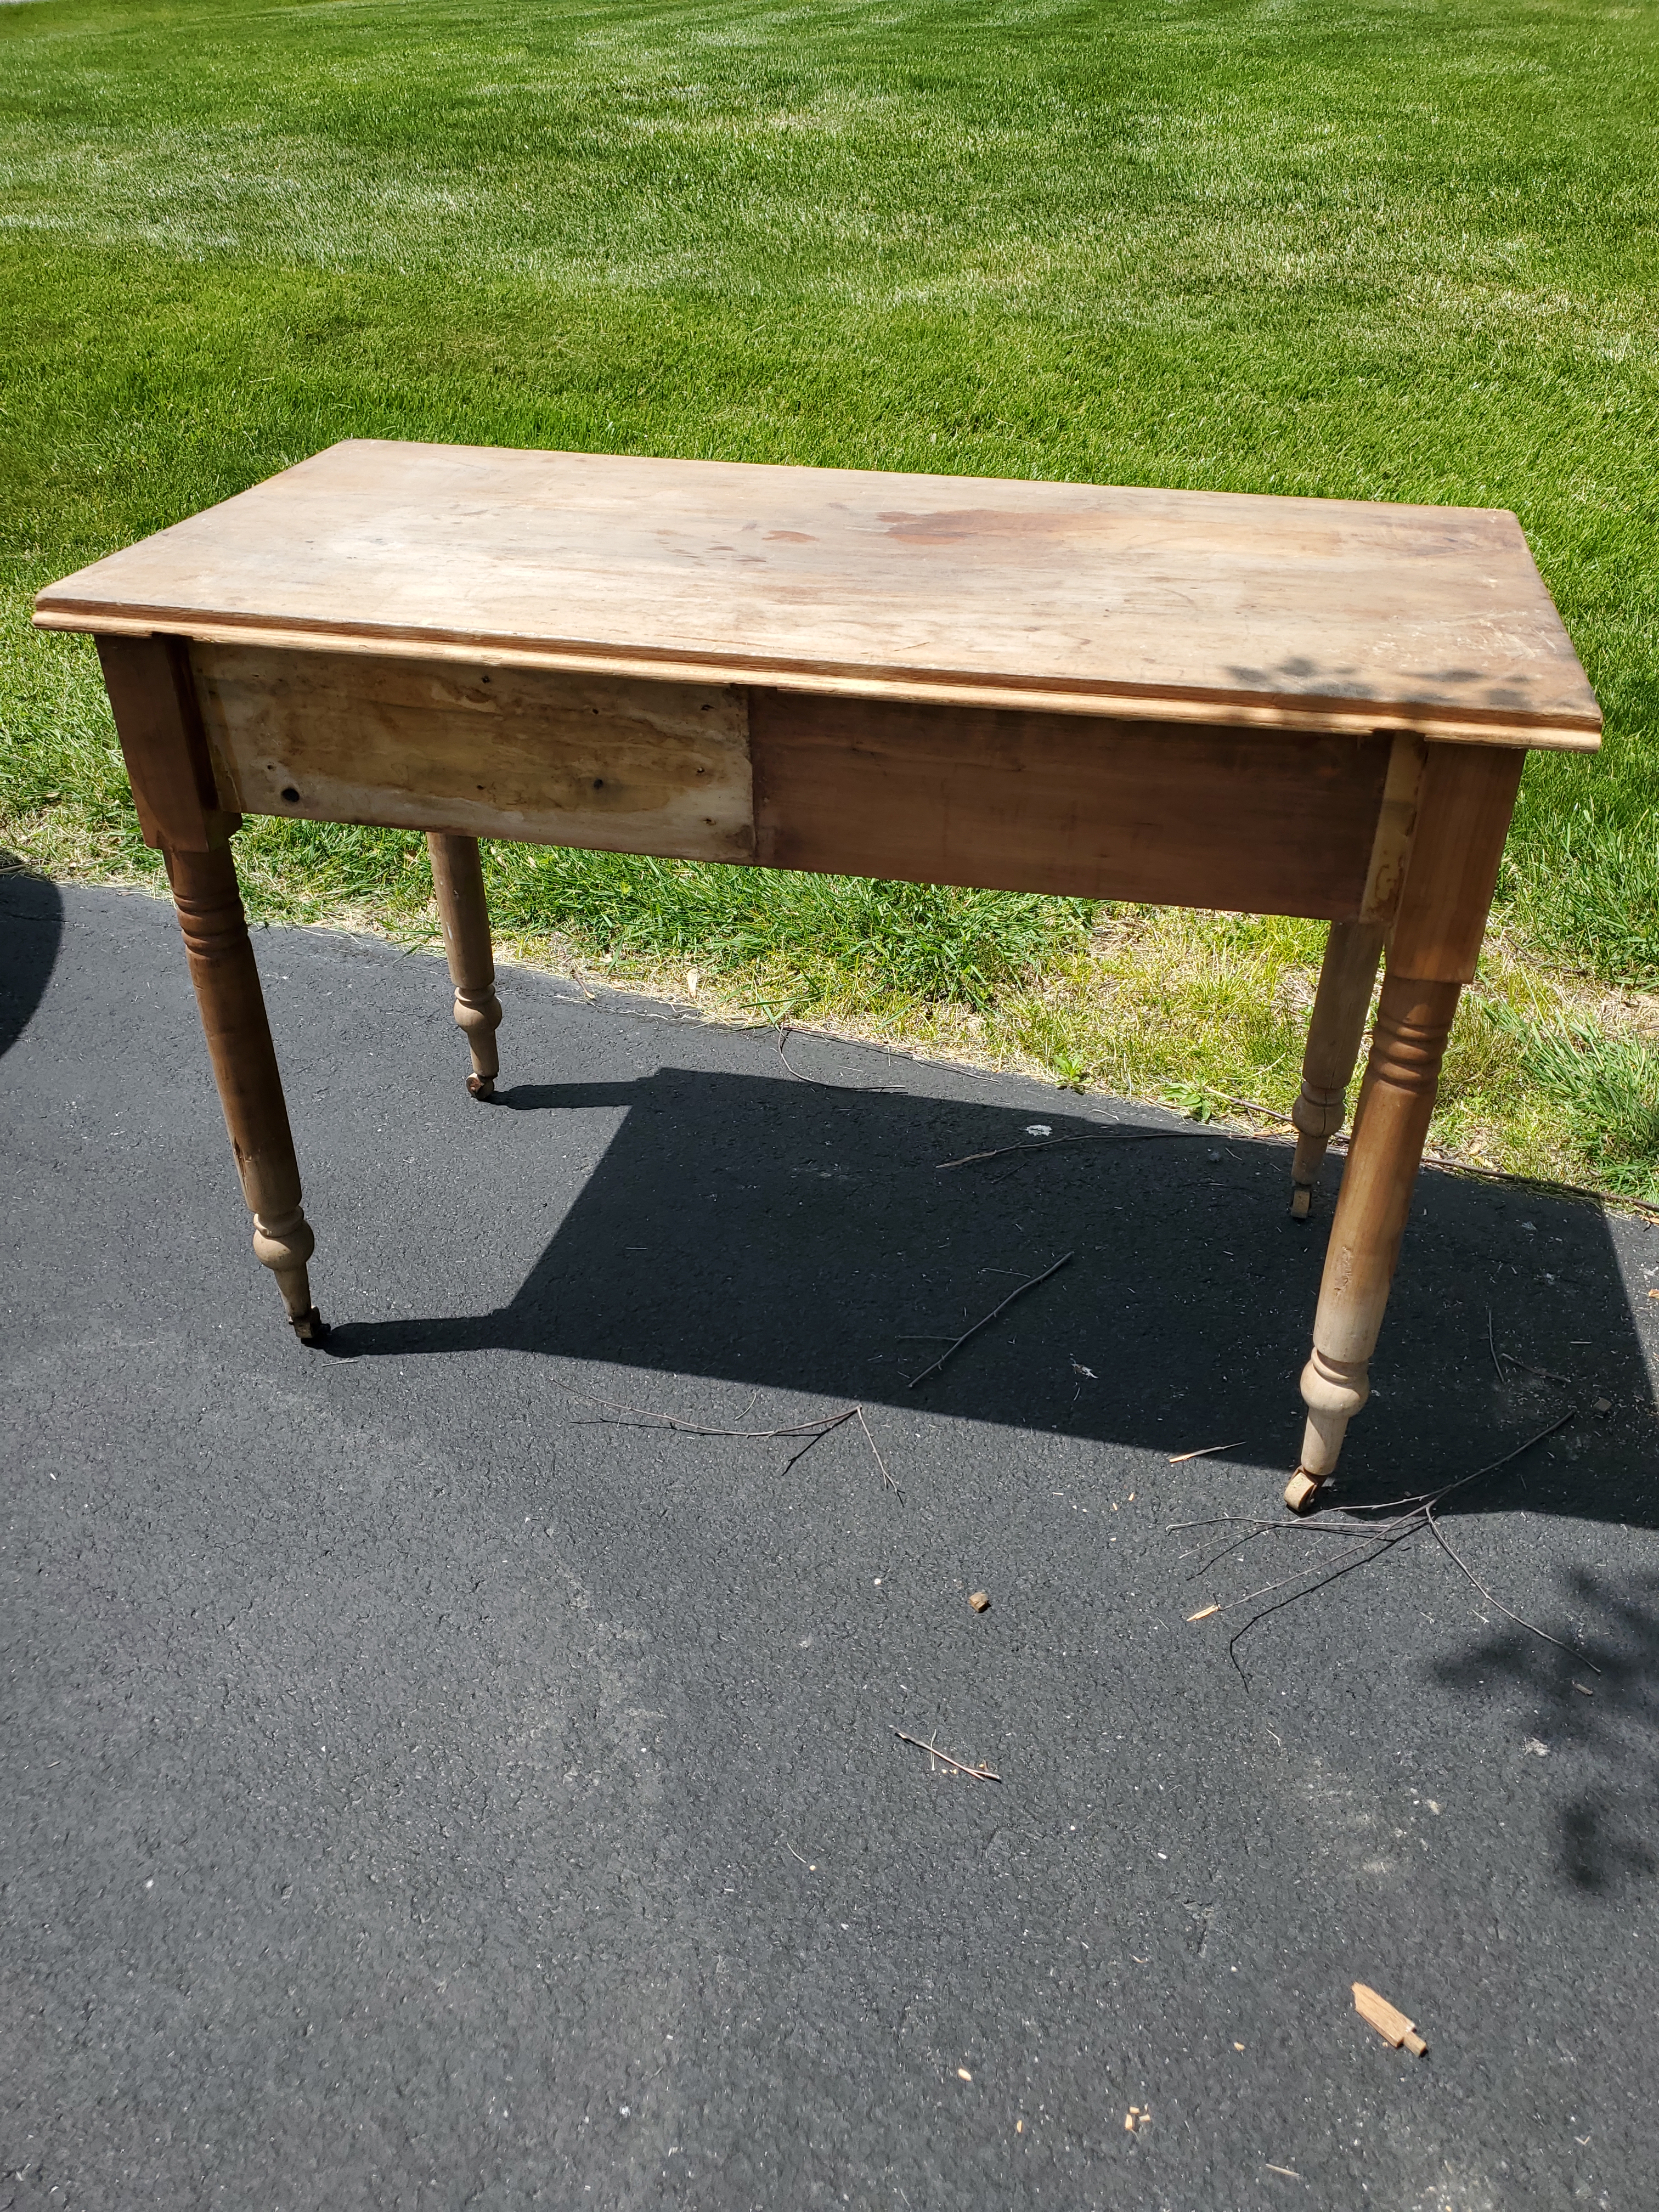
After a few minutes, the table was in good useable condition.
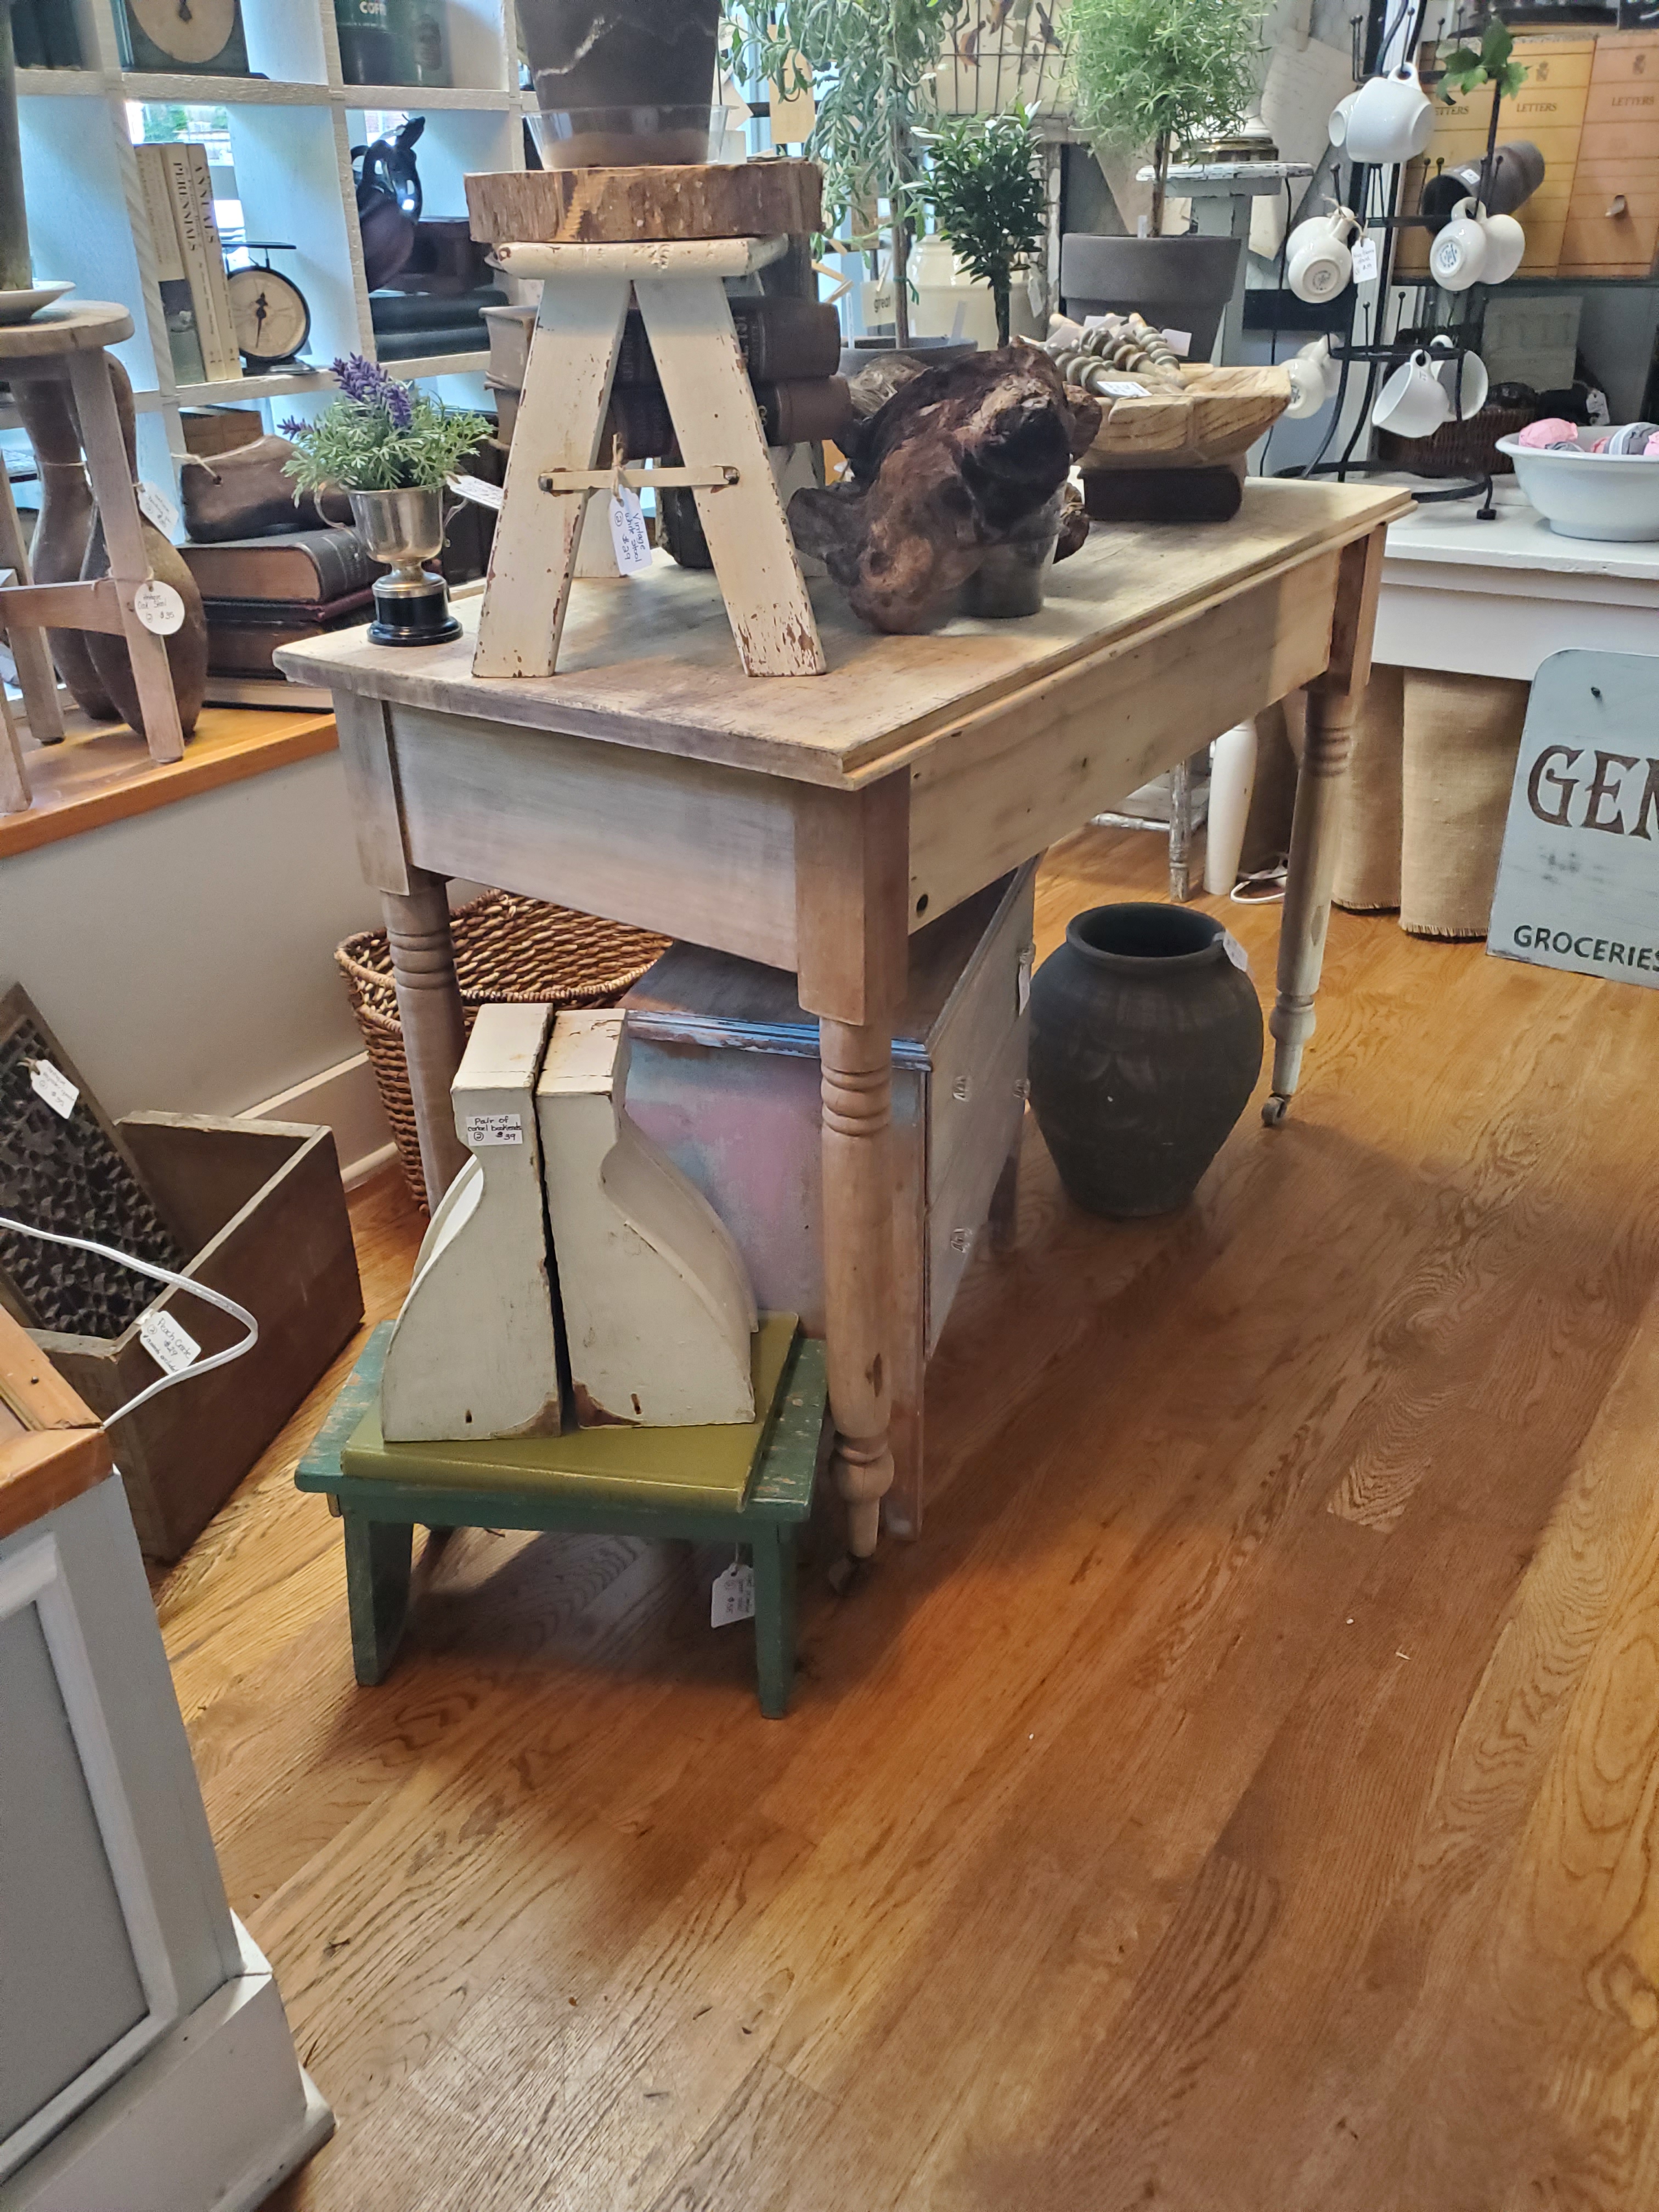
Anita bleached the wood so it would be lighter in color and stuck it in her booth. No paint this time. Really simple project and it makes her booth look nicer.
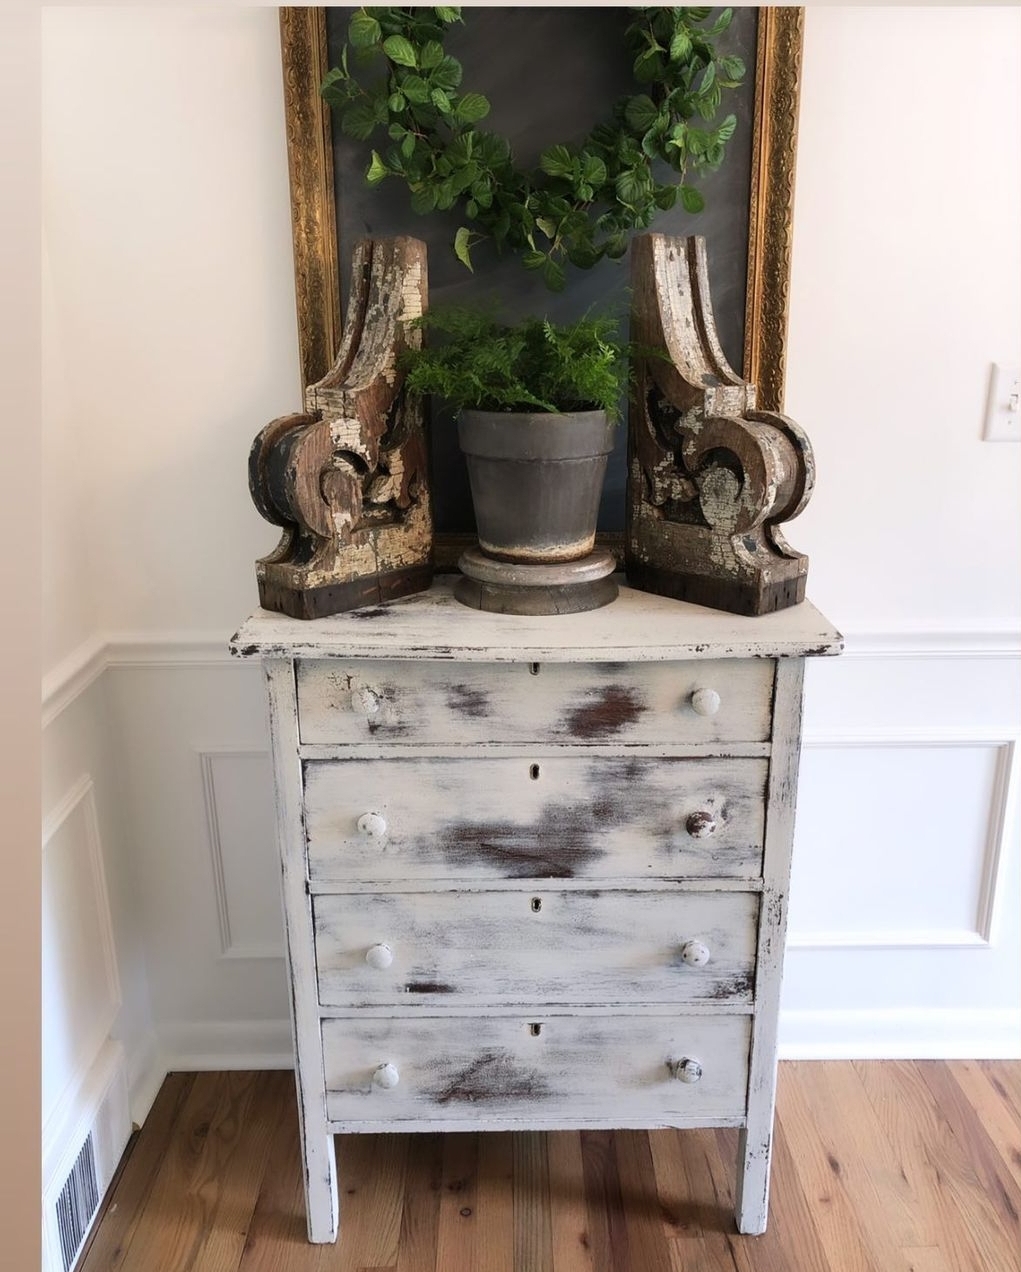
My wife, Anita, and I went to the Springfield Extravaganza Antique Show last weekend looking for some things to buy. Me, it’s always antique tools, and for her, it’s modern farmhouse decor items for her to sell. We bought this old beat up five panel oak dresser for $20. For some reason during its life, the legs were cut off to make it shorter. The problem with that is it made the bottom drawer completely useless.
So, once we got it home, I took a look at it and saw that the bottom drawer was trashed so I took it over to my fire pit to burn. I did take the wooden knobs off the drawer just in case we could use them someday.
I knew I wanted the dresser to have legs again, so I took my sawzall and cut out the panels on the sides and back and then removed all the wood in the grooves.
Since the panels I cut out were already the perfect thickness, I ripped them into thin strips and used them to fill the gaps. A few clamps and glue did the trick.
After the glue dried, I trimmed and sanded the legs and threw the dresser upright. Boom! Now the dresser had legs again and didn’t look so pathetic. I then worked on the drawers to make sure they opened and closed well. I even rubbed paraffin wax on the bottoms of the drawers to make them slide easier. After a little bit of work, this dresser was useable again.
Now the part you hate! Anita painted the dresser white with milk paint and turned into a piece of shabby chic furniture. You may hate it, but some farmhouse decor lady will love it.
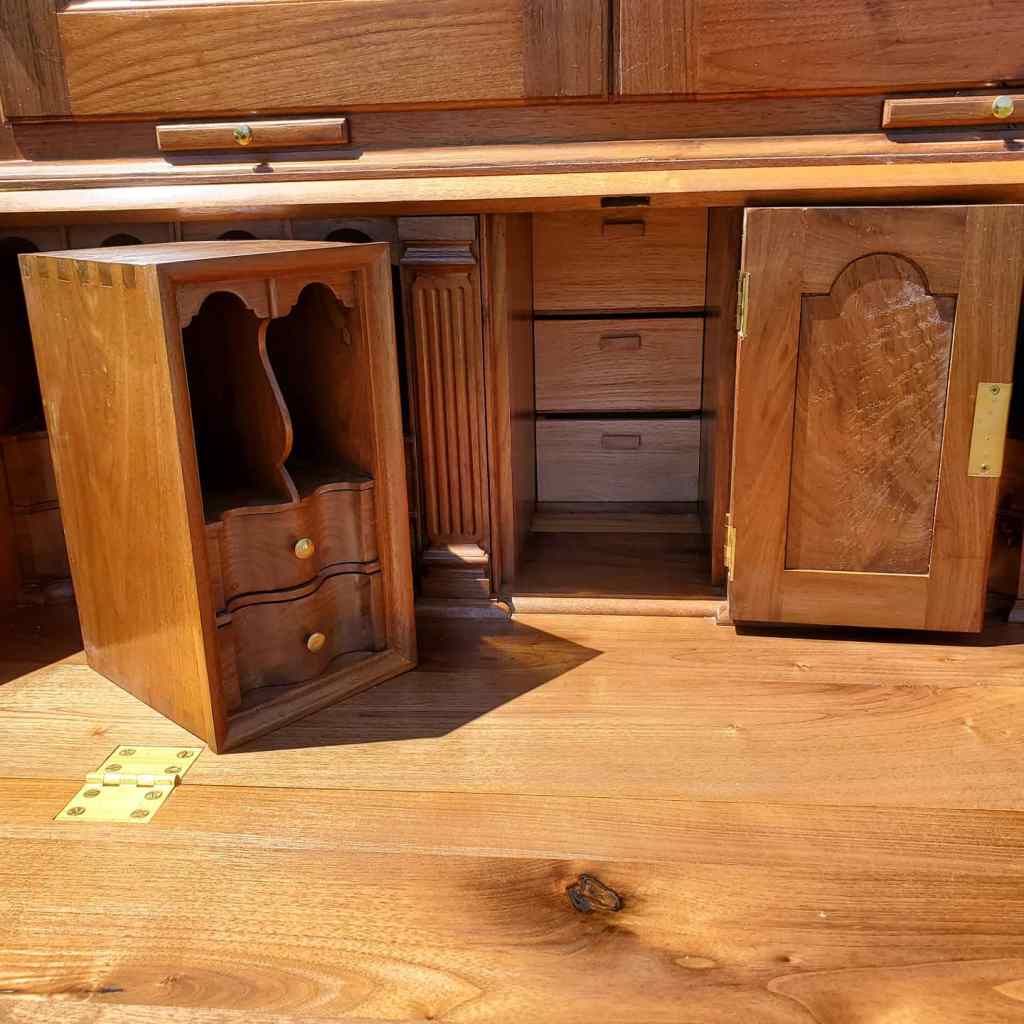
I built this Pennsylvania Secretary back in 2004. It was an article in Fine Woodworking Magazine by Ronnie Bird. I fell in love with the idea of making a piece as complicated as this with it’s intrical cubbies and drawers.
The door panels and desk lid were all sliced from a single piece of 2″ thick walnut. I sliced the wood by hand with my hand saw because the 13″ width of the wood was too wide for my band saw that could only rip stock 12″ wide. I remember it being a major pain the ass.
I used a bread board edge on the lid so that it wouldn’t warp. The joint works well because seventeen years later, the lid is still perfectly flat.
I cut the curvature of the drawers on a band saw and smoothed them with my oscillating drum sander. The panel on the small door was a piece of crotch walnut.
There are a few hidden compartments inside the desk where I kept my silver dollar coins that my Mom gave me before she passed away. The columns slide open to keep important documents but I never stored anything in them.
The drawer fronts were sliced from a single piece of curly walnut that I laminated onto a walnut substrate for each drawer. I cut the cabriolet feet on the band saw and then glued each side together.
The lid opens up to act as a working desk but it actually sucks as a desk. The lid is too high off the ground for my liking.
I built the sides and case with 7/8″ thick walnut with red oak secondary wood. I used red oak because I had a boatload of it when I bought a bundle of it from the company I used to work for. They sold it as oak fence boards so the quality of the wood was not the best. I didn’t care because it was seconday wood but it made the piece extremely heavy. I should have used white pine or poplar instead.
I used plywood on the back and drawer bottoms because the expense of making it was getting out of hand. I paid over $600 for all of the brass hardware and the walnut cost me over $800.
As nice as this piece is, it’s been used as a junk drawer all these years as we just store a bunch of crap in it. I used to store my cd collection in the top cabinet but I sold a lot of them a few years ago on half.com when I was uploading my collection into a digital format.
The secretary has been sitting in our garage ever since we got hit with the tornado last year. After the tornado, we had to take all of our furniture out of the house and into pods in our driveway while our house was being put back together. When everything was done, we never brought it back into the house because it’s too big and heavy to move.
I currently have it for sale on Facebook Marketplace for $1800 but I’ll be surprised if anyone buys it. It’s not an antique so it doesn’t have any value in that way and no one buys big pieces of furniture like this anymore. I may have to donate it or just keep it in the garage.
The secretary was fun to make, but I wouldn’t make it again. All it’s good for is to take pictures and show people “look what I made.”
UPDATE 7-16-21. After zero bites on Marketplace for weeks, I lowered to $500. We’ll see if it sells.
I made this table for my wife last year but never blogged about it. Kind of stupid to call yourself MVFlaim Furnituremaker if you never blog about making a piece of furniture. While I was building it, I took a bunch of pictures of the process and intended to show all the steps, but apparently a bug crawled up my ass and for some reason, I deleted all the photos I took. I guess I was having a bad day. So, I had to search my Instagram account to find some pictures to load here.
The five foot long table is a common table you’d find in any furniture store. The table is really nothing special. In fact, the most unique feature of the piece is the drawer fronts with chair caning panels.
I simply made three drawer fronts with a rabbet in the back. I then glued chair canimg on a plywood panel and stuck it in the rabbeted recess. Since the drawer fronts are stuck to the front of each drawer box, the plywood remains stable inside the rabbet and doesn’t move around. I had photos of the entire process but that bug was in my butt pretty far up so they’re gone forever.
I fitted the carcass together and glued and screwed the bottom rails and shelf.
Joinery I used was mortise and tenons I cut on the table saw and chopped with a 3/8″ mortising chisel. The top rail was joined with a hidden dovetail.
Legs were cut from 2″ square poplar boards I glued up and tapered on the band saw. I then cleaned them up with my smooth plane.
This is the table before Anita painted it dark gray and applied the gold handles. Maybe the next peice of furniture I make I’ll be in a better mood and won’t delete the pictures of my progress.
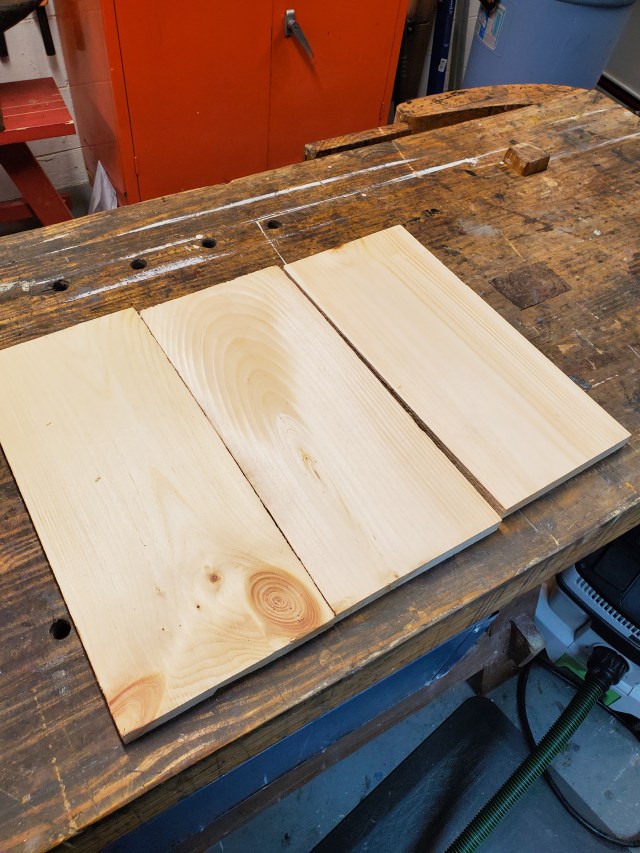
Last weekend I had some Eastern White Pine scraps lying around after I finished building a display cabinet for my wife for her spring show which just got cancelled due to the COVID-19 virus. I hate to throw the scraps away or toss them into the fire pit so I decided to make a small cutting board with them.
I ripped two of the boards 3″ wide and glued up the pieces. The third piece I ripped to 1 1/2″ wide which would serve as the breadboard ends,
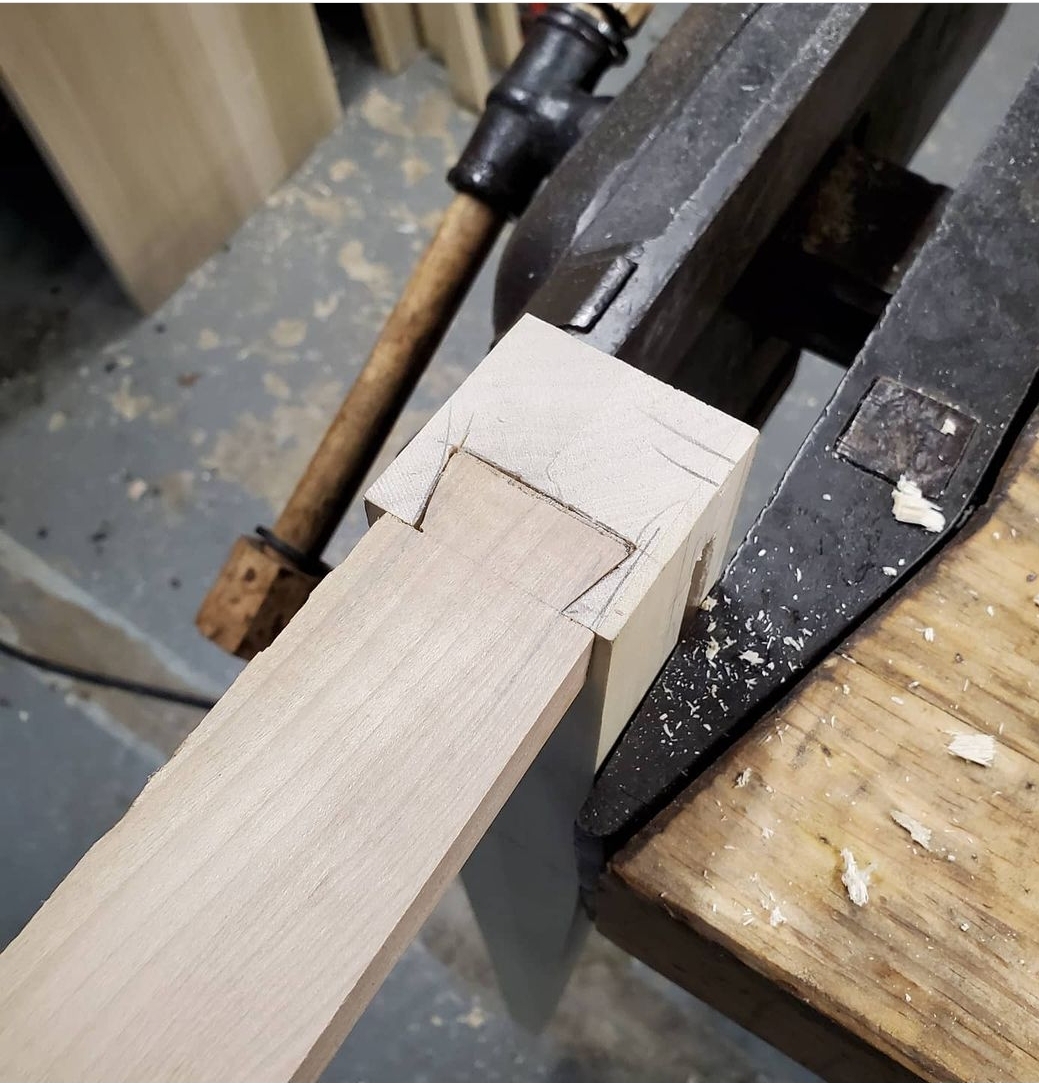
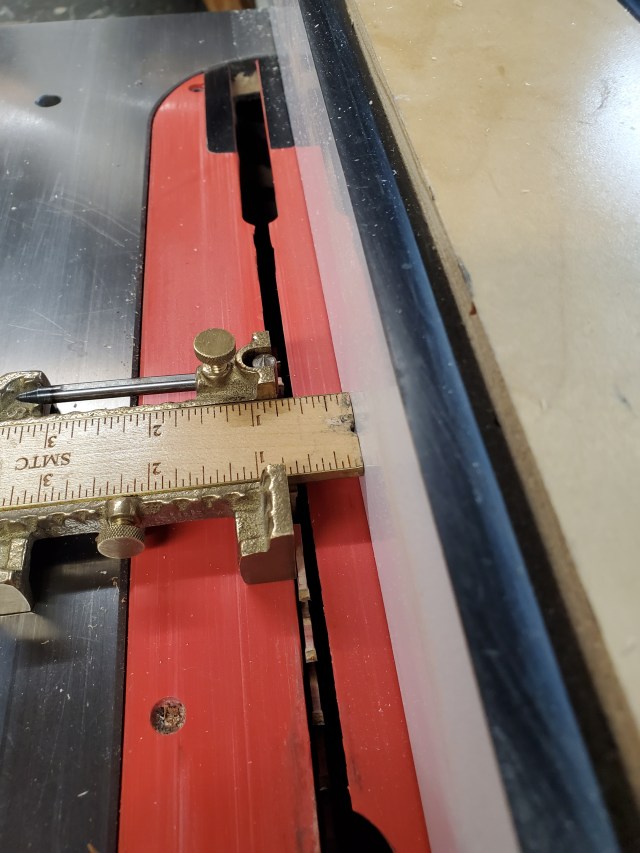
After the glue dried, I sized the board to 16 1/2″ long by 12″ wide. I set up my table saw blade at 1/4″ tall with the furthest part of the blade 3/4″ from the fence using my little Odd Jobs ruler.
I cut grooves on the top and bottom of each end to create a 1/4″ by 3/4″ tenon across the board. I then cleaned up the rough marks with a chisel and rabbet plane so I would have a nice smooth tenon on each side of the board.
Then I took the two 1 1/2″ wide boards and ran a 1/4″ groove 3/4″ high down the edges to give me a nice groove that would be snug with the tenons.
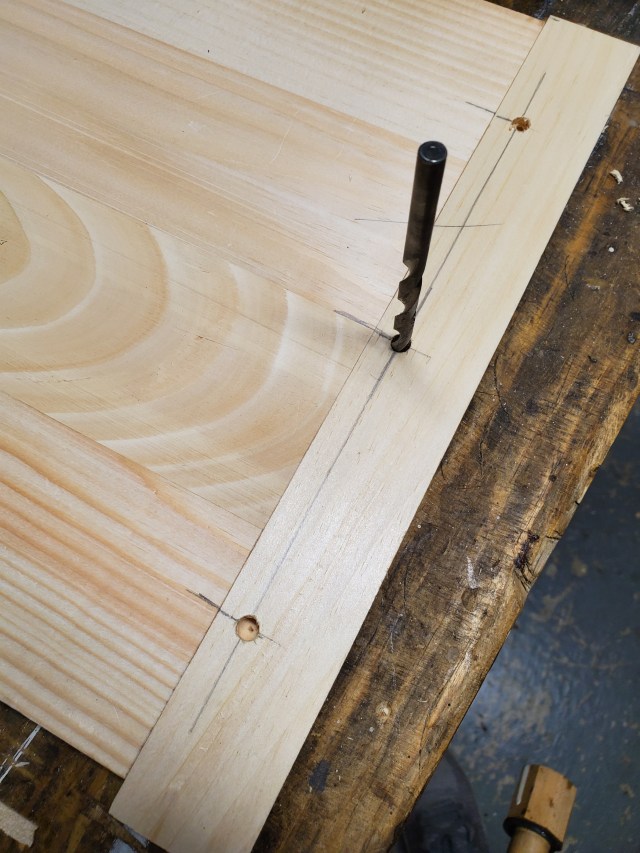
I marked where I wanted the pins to go through the tenon and drilled through the breadboard ends with a 1/4″ drill bit. Then I took the ends and marked with the drill bit where the pins would intersect the tenon. Being this cutting board is small and the sides of the breadboards fit nicely with the tenon, I didn’t bother draw boring the joint.
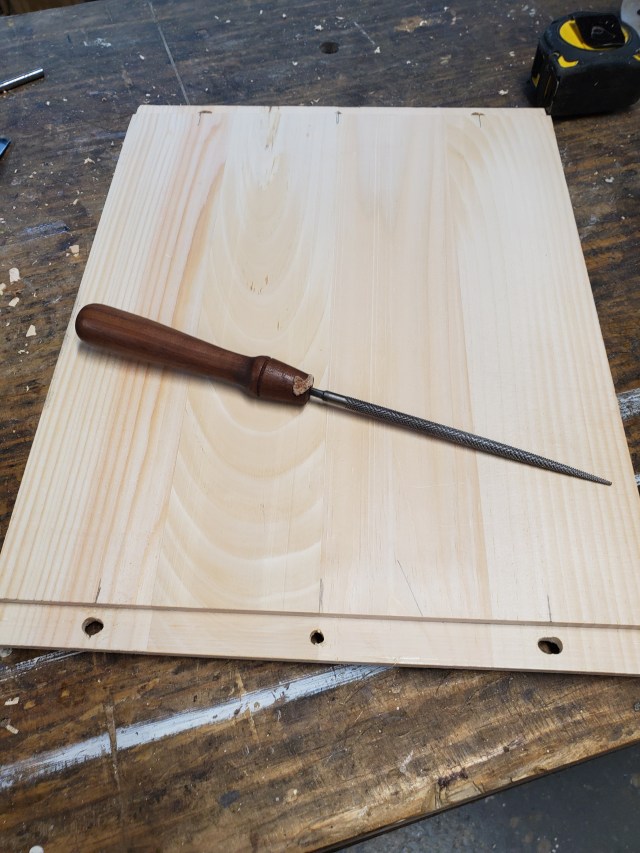
I then drilled the holes and elongated the holes at each end with a round rasp to allow for seasonal movement as the wood will expand and contrast with changes in humidity.
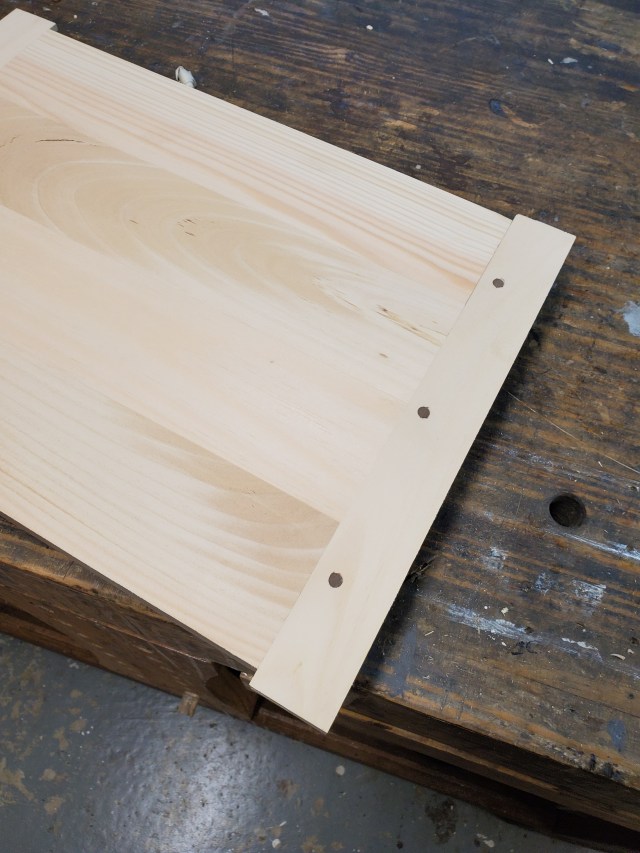
I applied a little glue only in the center of the tenon, clamped and drove 1/4″ walnut dowel pins through all six holes.
After the glue dried, I cut the pins flush and sanded the surface up to 220 grit sandpaper. Then I trimmed the breadboard ends flush to the sides of the cutting board and sanded the edges.
I applied a couple coats of my black shellac I made to give it an aged look. I think the board came out a little too green in color, but my wife Anita likes it. She said it makes it look old and worn. It turned out to be a quick and easy project on a Sunday afternoon.
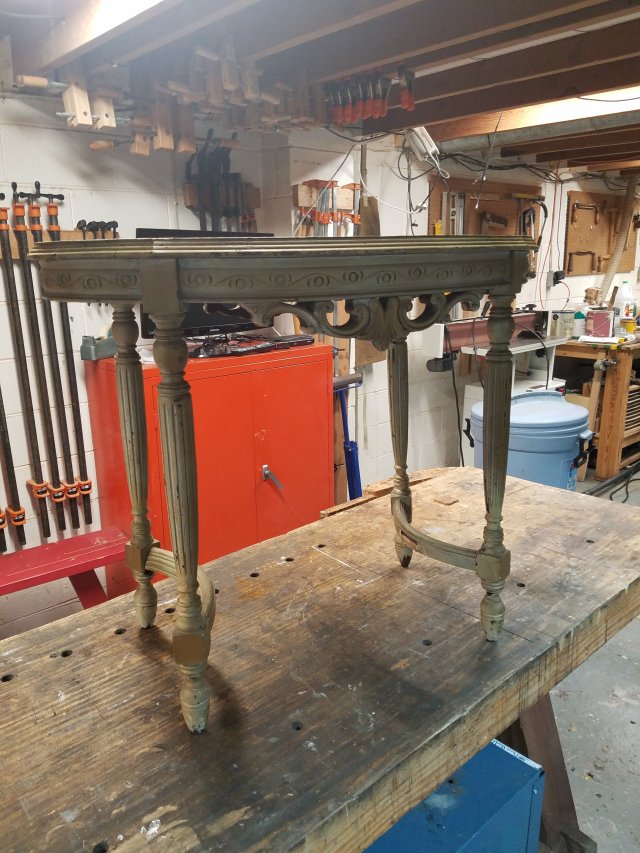
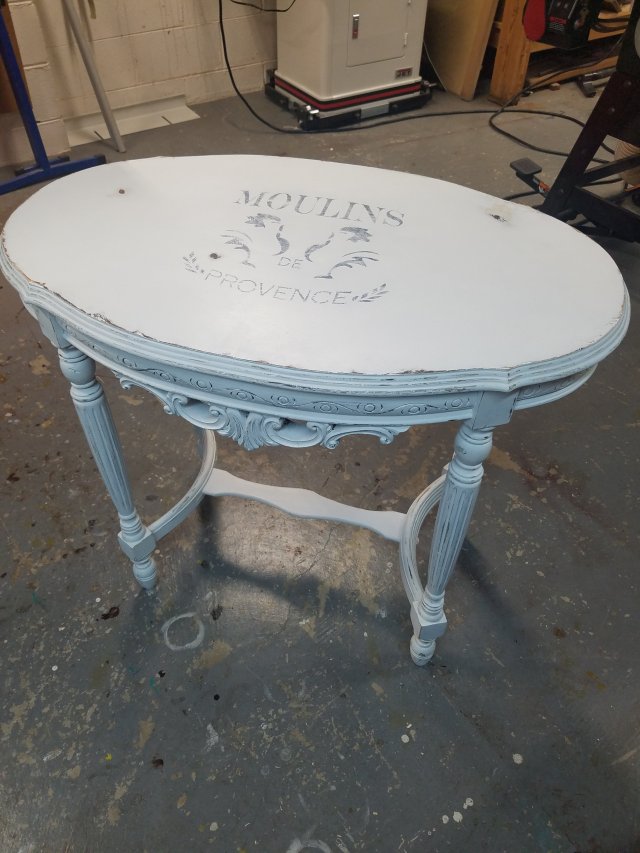
My wife bought an accent table at a local thrift store yesterday. She hesitated on buying it because it needed some work but I assured her that I could fix it quickly.
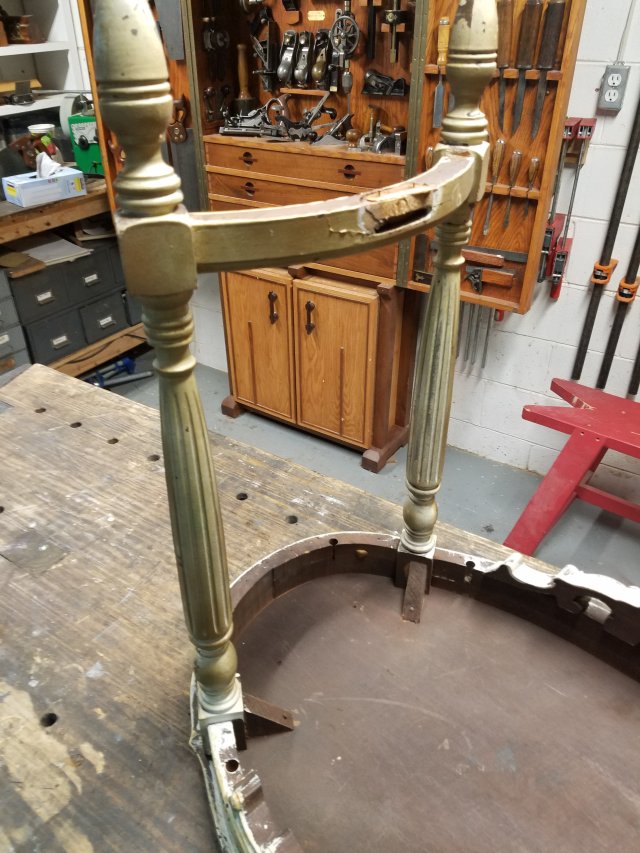
When we got it home, I examined how to repair the stretcher and make the legs not so wobbly. It seems that someone else tried to repair the stretcher in the past with no luck.
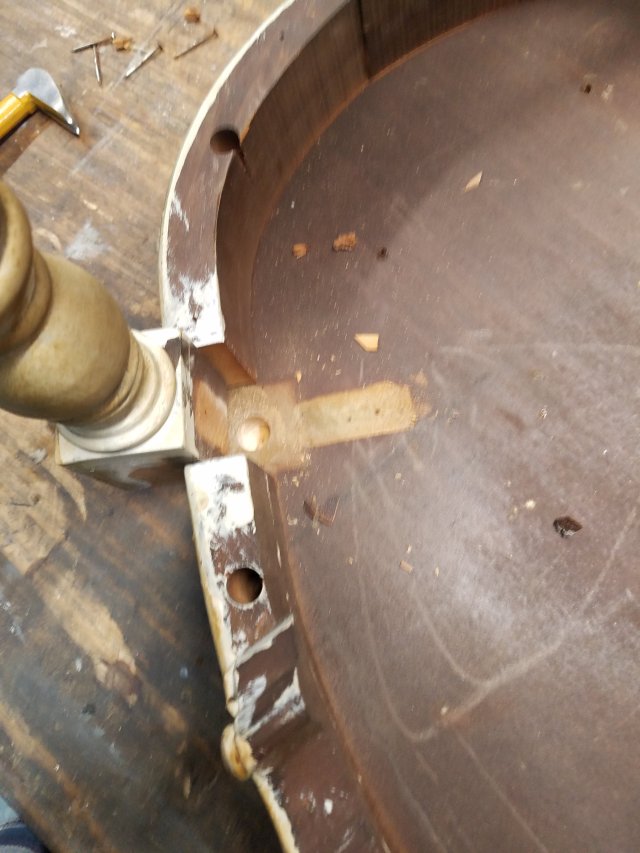
After popping off the glue blocks, I noticed that the only joinery on the legs was a dowel rod and some glue. It’s no wonder why they wobbled. I’m not sure how old the table is but it’s made from mahogany and the fasteners are straight slotted screws. My guess would be around the 1940’s but that’s just a guess.
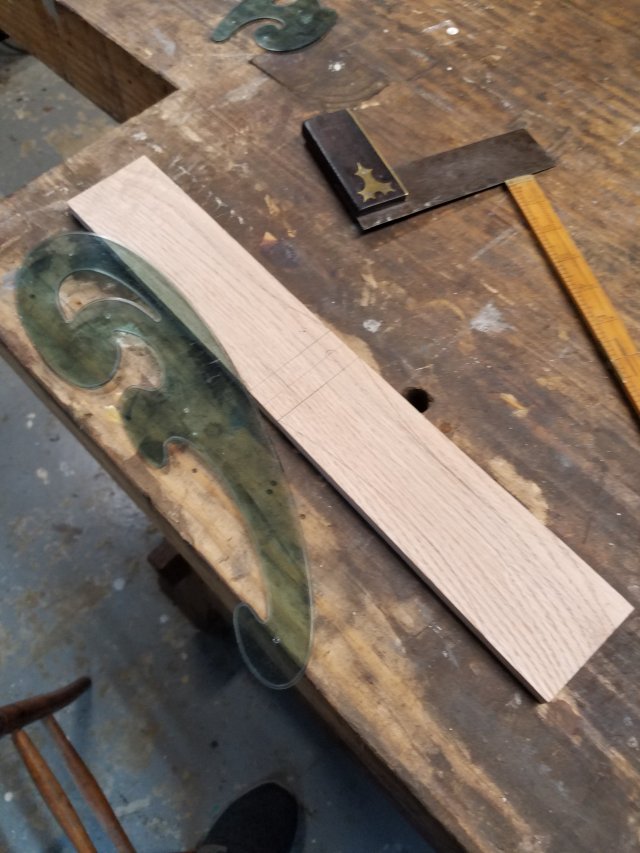
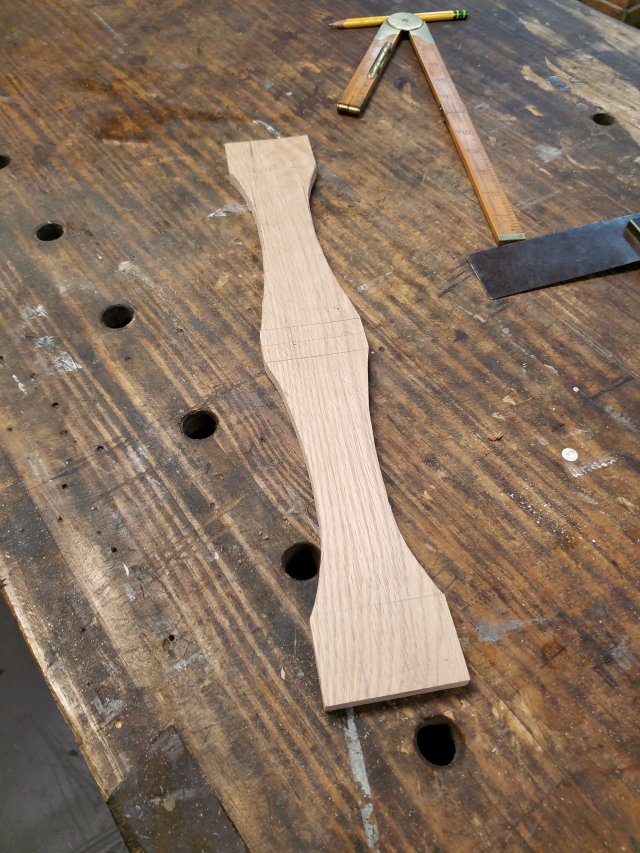
If I was to restore this table properly, I’d used mahogany for the stretcher and make it similar to the original but I’m by no means a professional furniture restorer. If anything, I’m closer to the craftsmen you see on Flea Market Flip where people buy a $40 wheel barrow at an antique show, turn it into a coffee table and sell it at a New York City art show for $450. Except, I don’t do that dramatic transformation on pieces and don’t get anywhere close to those prices. (Personally, I think that show is fake). My wife will eventually paint the table so I just grabbed some scrap wood.
I grabbed some red oak and planed it down to 3/8″ then drew some arches on it with my french curve. Then it was onto my band saw and spindle sander to cut and sand the stretcher to shape. I just whipped this shape up in my head without much thought. I think it’ll do fine.
To break the edges of the stretcher and give it curves, I used my specialty scraper with various radius’s cut out and scraped the edges to shape using the 1/2″ radius.
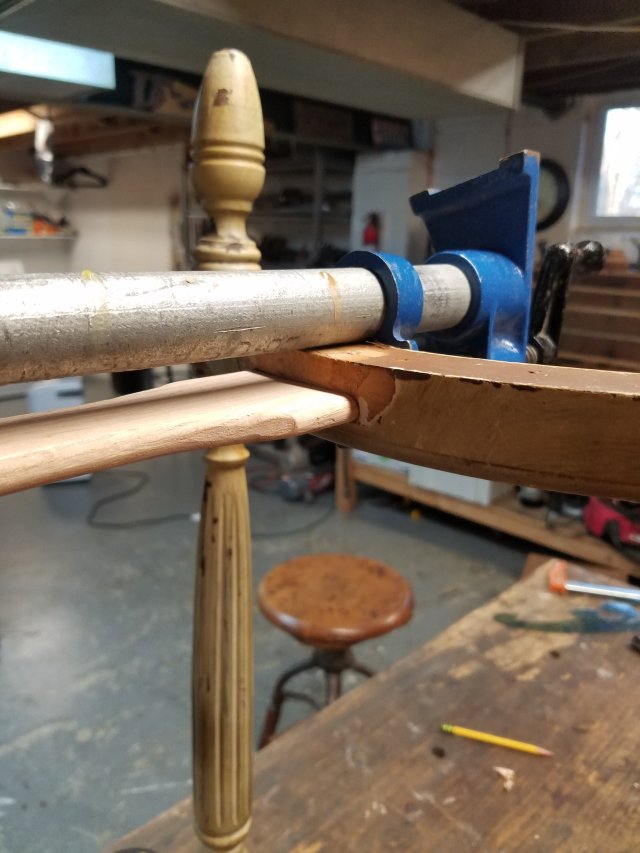
Cutting the piece to proper length took a little trial and error, but I eventually got it to seat in the mortises with the legs being perpendicular to the top when the table was flipped over.
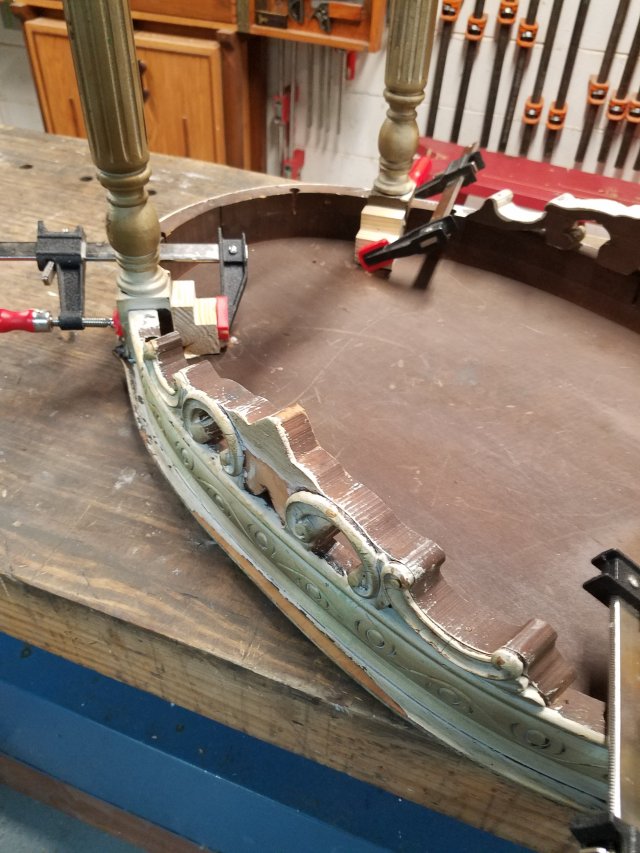
Then I grabbed some scrap pieces and glued and pinned hefty glue blocks onto the legs to hold them to the top better.
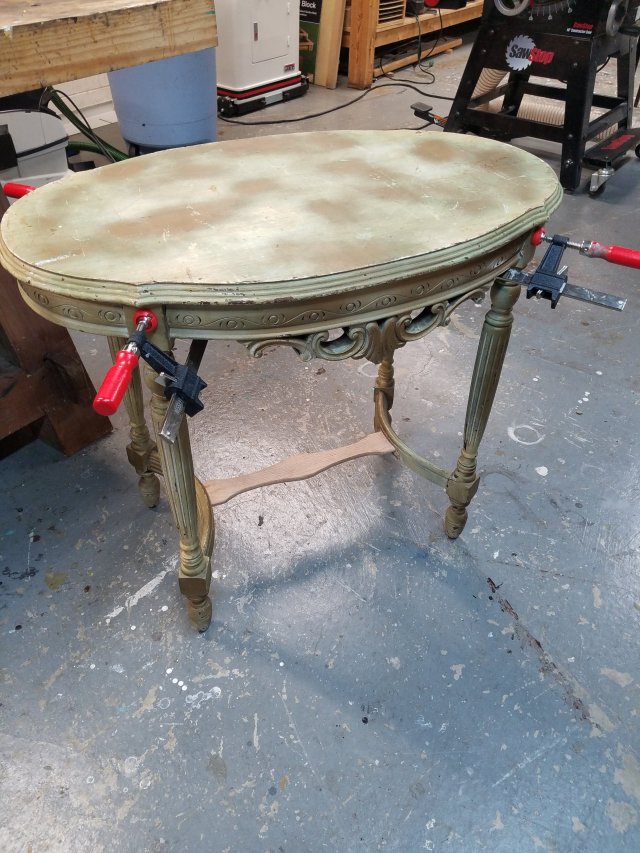
Here’s the table all glued up waiting for paint. My wife will paint the table either white, or black, or green, or duck egg, or whatever. I’ll have to wait and see which one she picks. I’ll throw a picture up when she’s done. Merry Christmas!
UPDATE 1-20-20; Anita painted it white with a stencil on top.
My honey-do list usually starts out the same. My wife will ask if I can make something for her and then asks how much it will cost in wood. I told her it would probably run around $60 so we headed to Home Depot and bought some white pine boards.
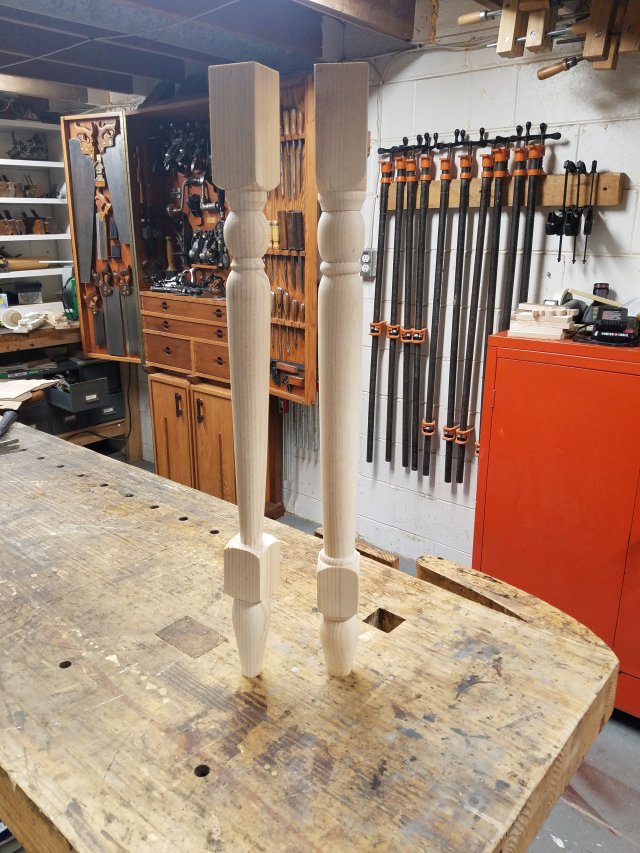
I bought a few 1″ x 10″ x 6′ to use for the legs. One 1″ x 10″ cut in half and ripped into 2 1/2″ wide segments would yield me two legs. After I laminated three of the boards, I sized them to 2 1/4″ square and then turned them on the lathe. I looked at the picture she gave me but I turned the leg from feel of what I thought it looked liked. When I was done, we both decided the bottom part of the leg looked too “boxy” so I decided to turn another leg.
The second leg turned out better than the first. When I threw a picture of both legs onto instagram, one of my followers said that he liked the bottom of the leg on right but liked the top of the leg on the left. I agreed so I refined the leg so the ball of the leg looked more like a ball and not a fat lazy bead.
After refining the leg, I made five more freehand. I’m by no means a master wood turner. In fact, my wood turning is passable at best. The only lesson I’ve ever taken on wood turning is watching The Woodwright’s Shop over the years. I take a ruler, a parting tool, and some calipers and try to make the sixth one to look like the first. In the end, I think the legs came out pretty good.
My wife wanted table to be fourteen inches wide by five feet long so I laid the legs on the top and decided the dimensions of each part of the frame.
After cutting out all the parts of the frame, I attached them to the legs with pocket hole joinery. This is a simple table made from construction grade material so I wasn’t in the mood to start cutting a bunch of mortises for mortise and tenon joinery. Sorry.
I sized and glued the bottom shelf to the lower frame. Ideally this would be best suited for plywood due to the expansion and contraction of the wood however, after studying the original picture, this is how the table my wife wanted was built so I went ahead and made it the same way. Eventually there will be a nice crack in the middle of the shelf, but that will just add to the farmhouse look.
I made the drawers as simple as possible as well. I planed down some of the pine to 1/2″ thick and made the sides with rabbeted joinery and a 1/4″ plywood bottom. I then simply glued and nailed a drawer front to the box.
In the end, this is how the table came out. Not bad for a weekend build. My wife will finish the table with some sort of weathered look stain. I’m happy with it and it’s one less thing off of my honey-do list.
Here’s the table completed with a stain Anita put on. It’s for sale at a design show. It originally wasn’t meant to be for sale, but we had such a good show, we needed more inventory to sell.