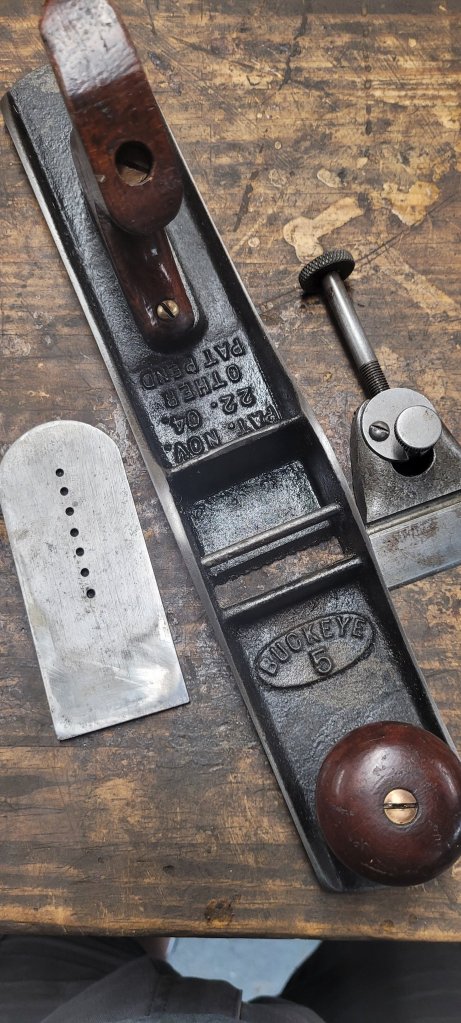
Several weeks ago, I won this Buckeye No 5 plane at auction. The look of the plane was something I had never seen before. I wanted to see how it would perform, so I took a closer look at the plane’s functions.
Buckeye planes were made by the Buckeye Saw Company, which was in business from 1904-1929, and they are known for this patented plane by John Muehl, who more likely sold his patent to The Buckeye Saw Co.
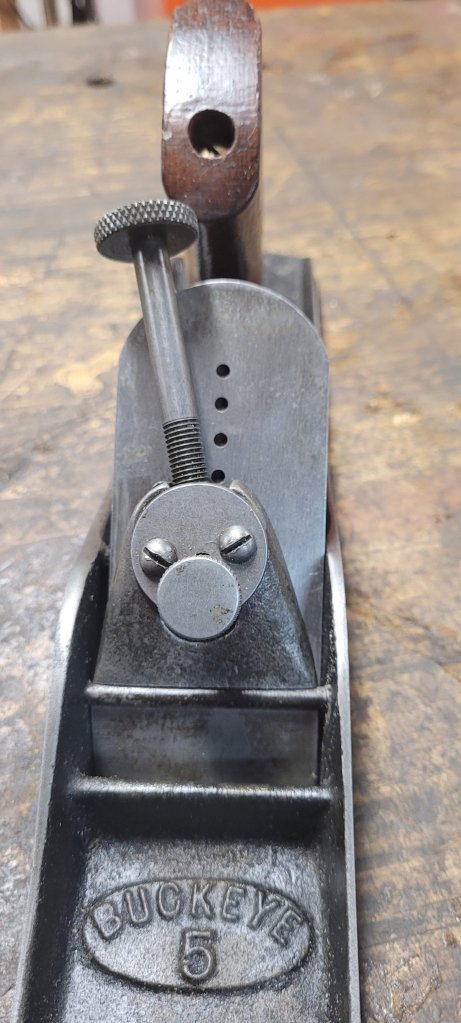
The plane has no frog. The blade simply rests on the casting of the bed, and the Norris style adjuster, pins into holes on the blade.
The lever cap acts as the cap iron as well, which usually is not a good sign for quality. The Norris style adjuster swings from left to right in order to adjust the blade from side to side.
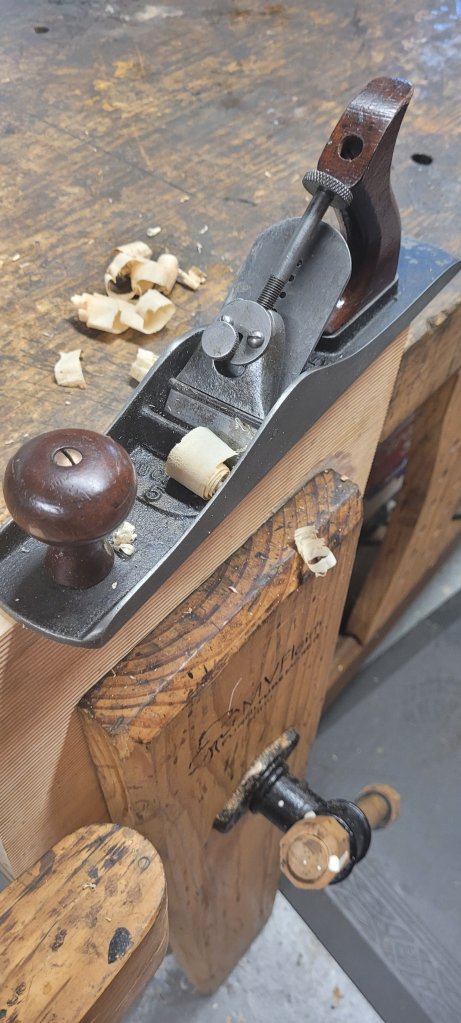
The simplicity of the plane makes it impossible to adjust the gap in the plane’s mouth to produce a thin shaving.
I sharpened the blade to see how it performed. Because the plane is so primitive and basic, I couldn’t get a nice shaving out of it even after messing with it for a few minutes. At best, the plane would only be good for rough carpentry work, like trimming a door and not for fine cabinetmaking.
In the end, my opinion about the quality of this plane is……it sucks!
A couple of weeks ago, I received the latest issue of Popular Woodworking Magazine. Inside was a photo of a new fixture made by Woodyah that hit the market. It was a piece of plastic you put on your hand plane to make your tote tilt at an angle for using it as a shooting board plane. I thought it was pretty cool, so I went online and ordered it.
The fixture came in the mail in a few days, and I took a look at it. It’s made with a 3D printer, so it’s made precisely to fit and it comes with its own hardware. You just need to use your original front tote screw to screw the fixture onto your plane in the front. I downloaded the instructions when I bought the fixture, so I knew how to put it on before I received it.
Once everything is attached, the tote feels really comfortable in your hand, and it’s simple to install.
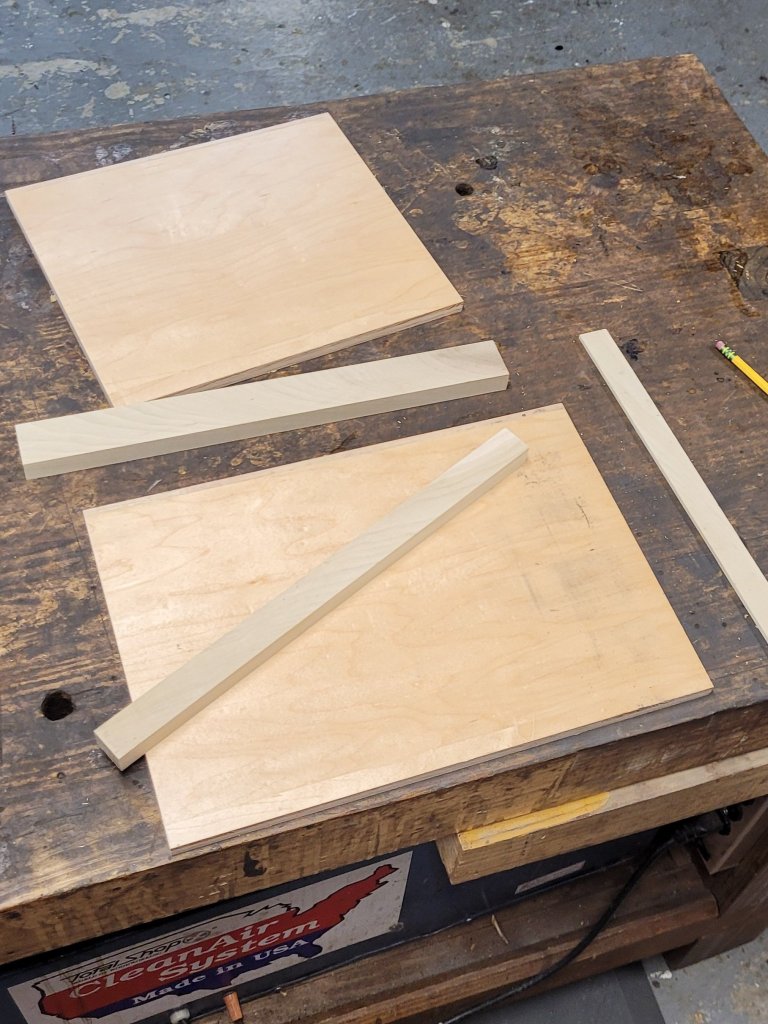
The next thing I needed to do was make a shooting board to go with the plane. I had a scrap of 1/2″ prefinished cabinet grade plywood and some poplar stock (I should have used maple, but I didn’t have any lying around.) The shooting board base is about 10″ wide by 15″ long. The length of the shooting board was simply determined by the overall length of plywood I had, knowing I had to cut it in half.
The parts were pinned and glued together, and I made sure that the side of the plane rode nicely against the thin rail of the shooting board.
Everything worked, but I needed to make sure it was accurate. I checked the squareness of the side of my plane against the bed, and it was just a touch off.
I took the plane over to my oscillating edge sander and fettled the bed first, then flipped it over on its side to fettle the side perfectly 90 degrees.
Taking the plane back to the shooting board, I made sure the bottom of the bed was a perfect 90 degrees to the face of the shooting board.
I then set the blade and tried it out. It worked well with a little bit of practice. Because there is only one point of contact between the side of the bed and the rail, I had to take slow and purposeful strokes to make sure I got a smooth cut. If I tried to use the plane fast, the plane would rock back and forth, producing an inaccurate cut.
I wanted to try shaving miter cuts with the shooting board. At first, I thought about making some sort of fixture that would attach to the base with dowels or some other mechanism. Then I thought to myself not to reinvent the wheel when I saw a plastic speed square in my tool cabinet. I simply placed the square on my shooting board where it needed to be in order to produce a perfect 45-degree angle and clamped it in place with a couple of C clamps. Then I cut a witness mark on the fence and square so I knew where it went the next time I used it.
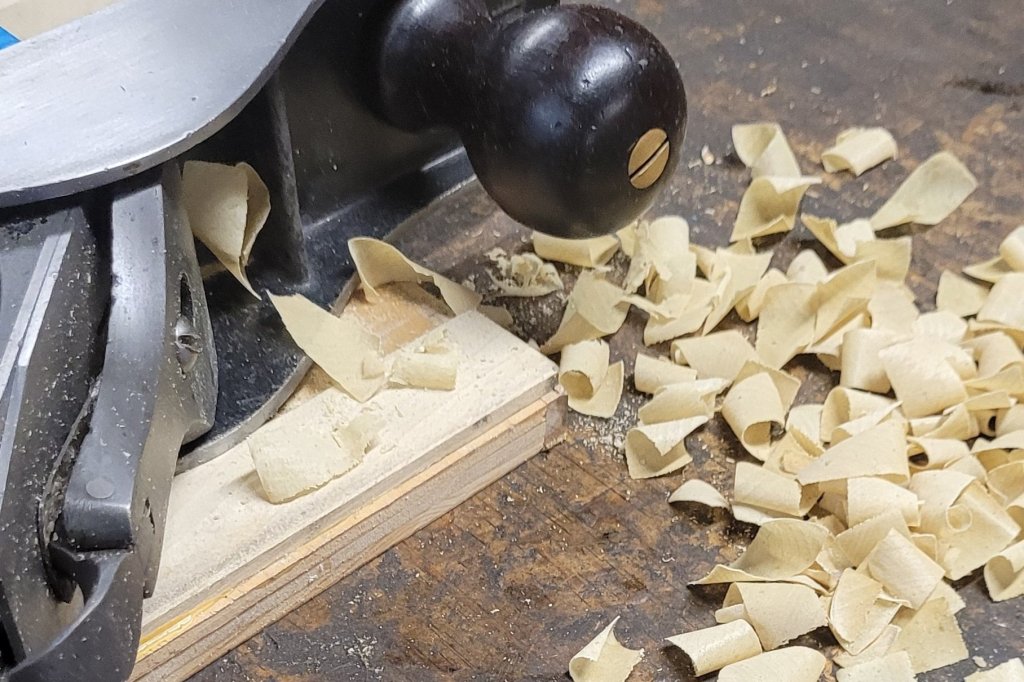
With a sharp blade, the plane was cutting incredibly clean and accurate shavings. They looked like chocolate shavings you find on fancy desserts.
Fortunately, this is the plane that I wrote an article for Quercus Magazine last year, so I’m glad I now have a use for it.
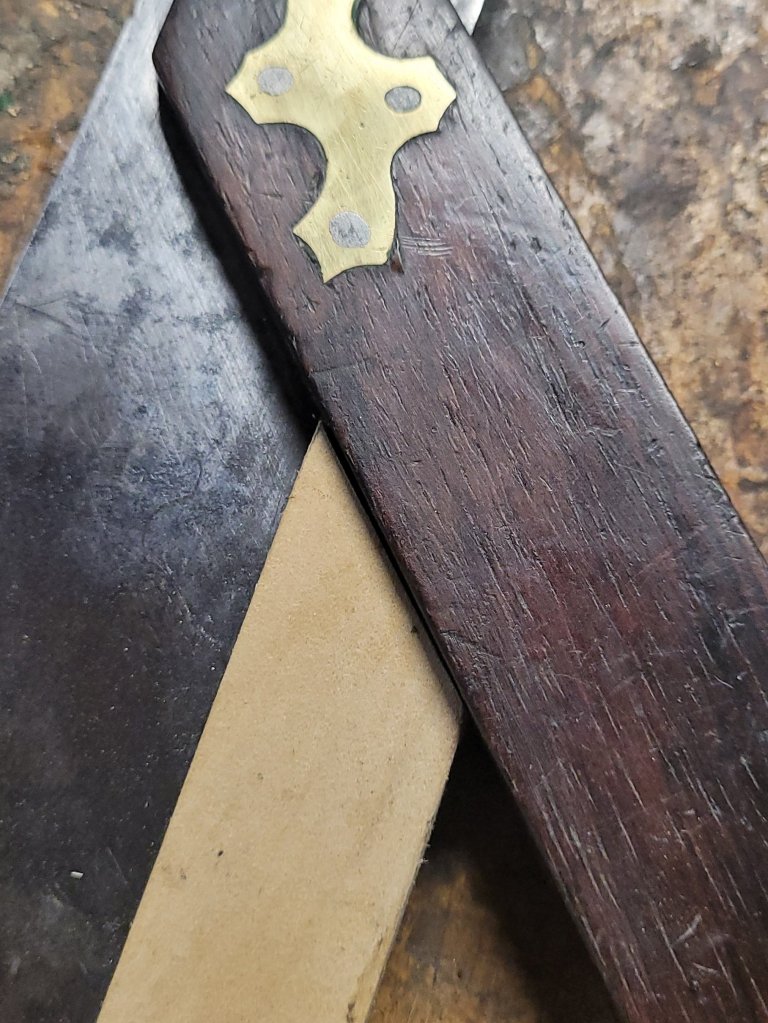
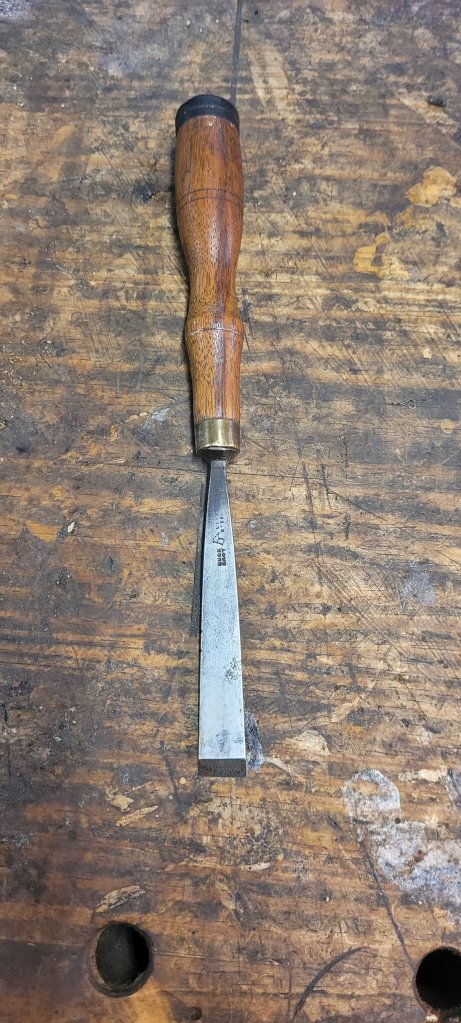
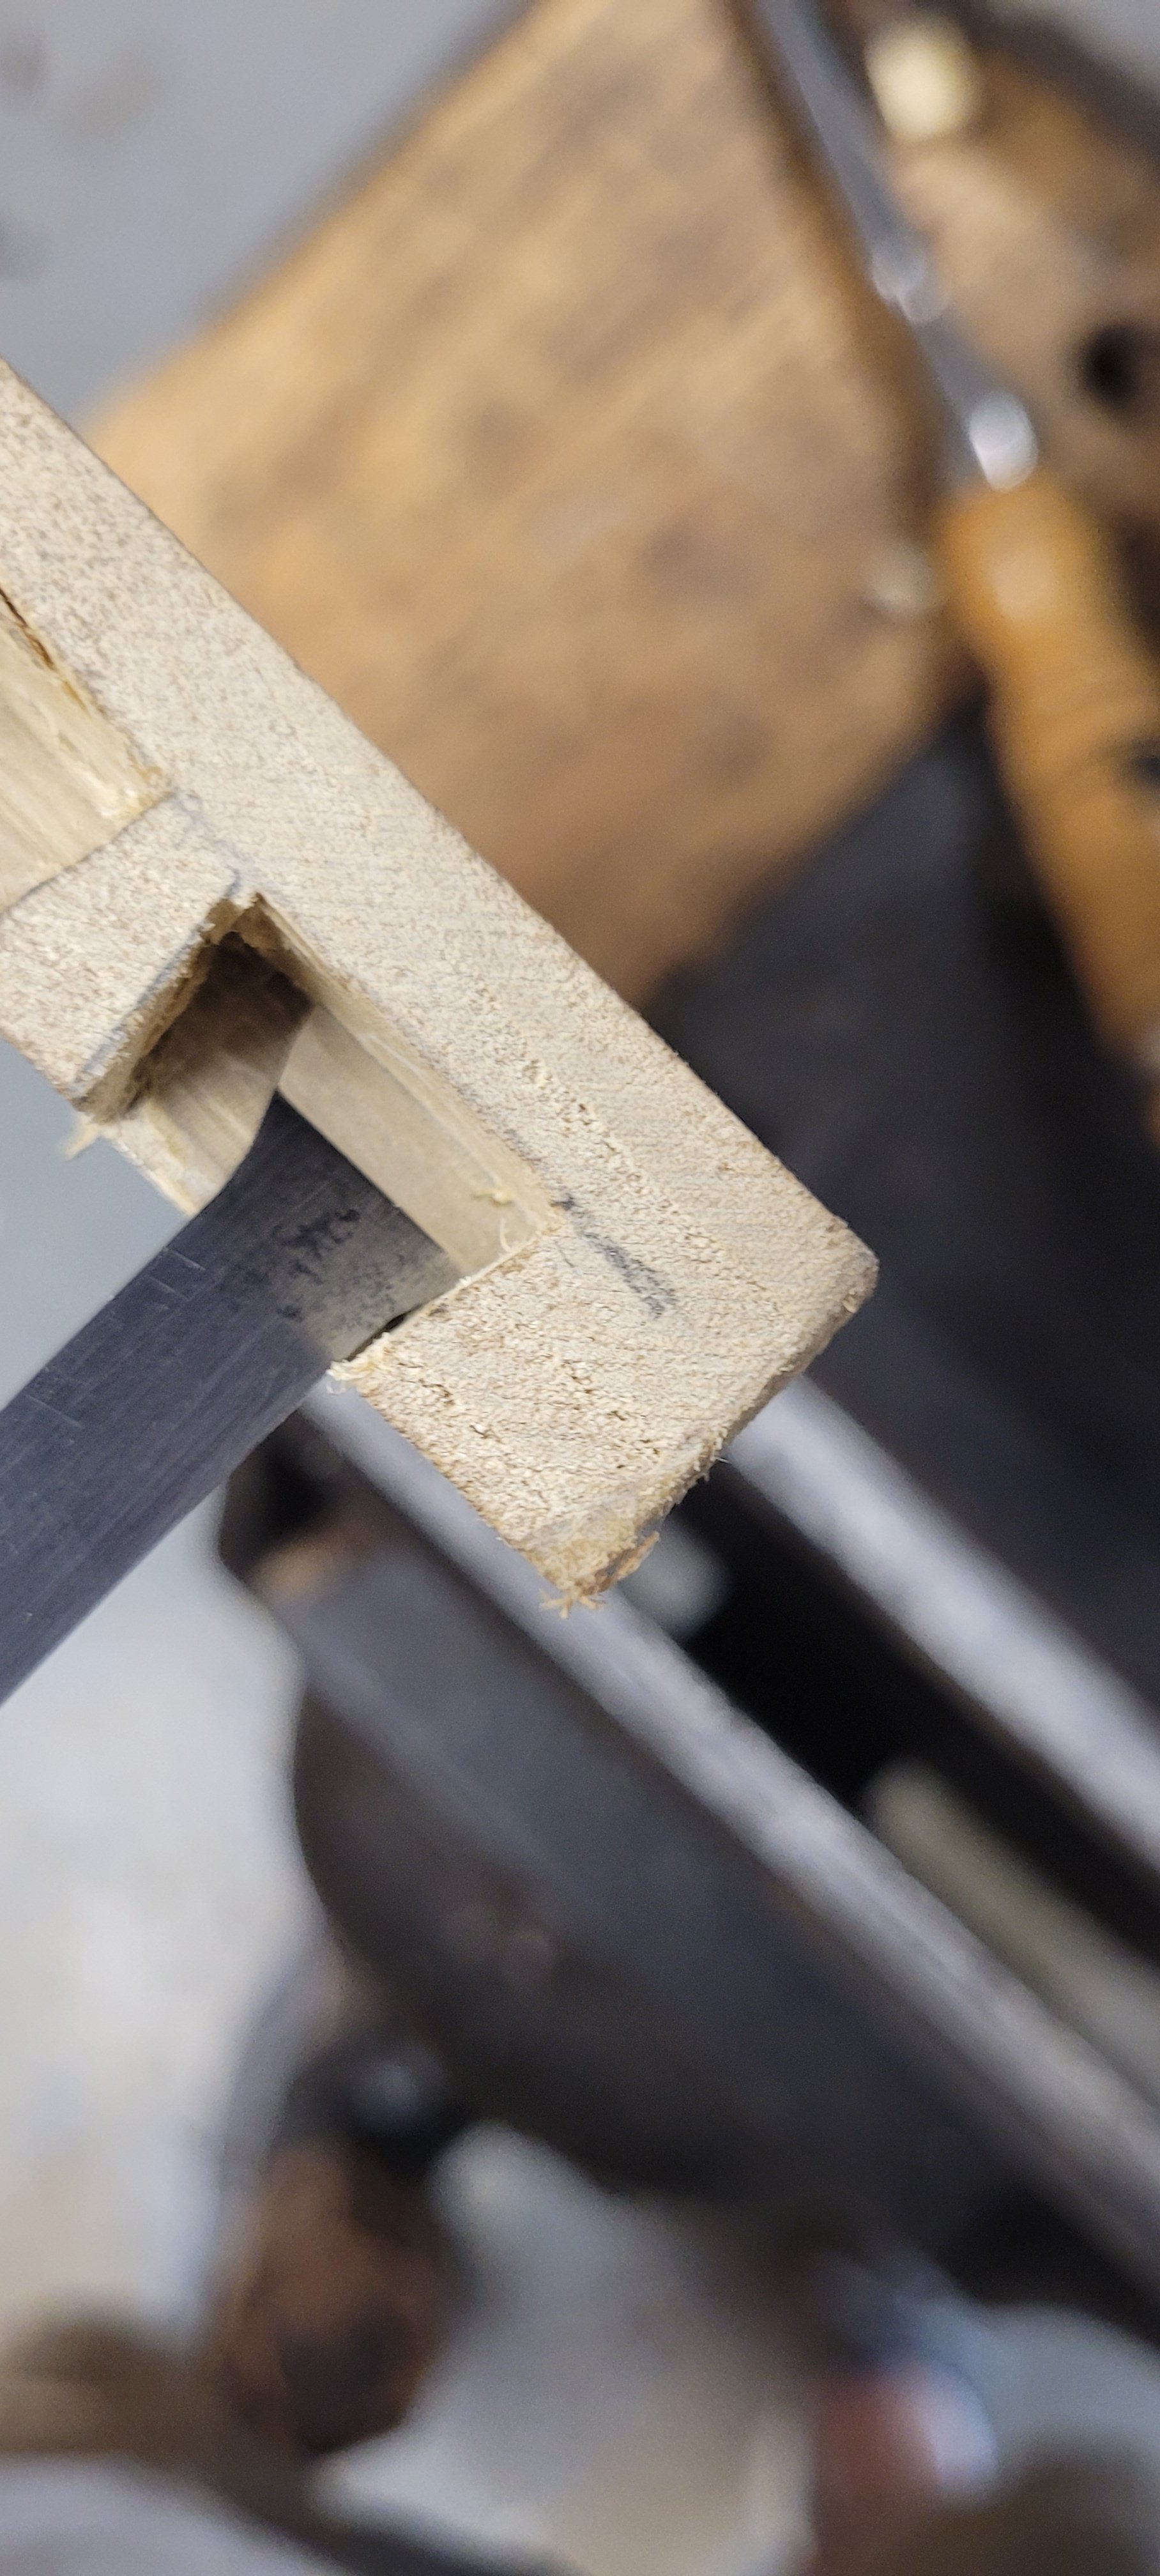
I’ve owned this 5/8″ firmer chisel for years. I’ve kept it around because I always wanted to reshape it and turn it into a chisel to clean out half blind dovetails but never got around to doing it. Since my wife is out of town, I have a lot of shop time right now, so I decided today would be the day.
I used a sharpie to lay out a rough idea of what I wanted the blade to look like. I wanted it to be flared out on both sides, so when I clean up the inside of half blind dovetail pockets, the blade will get all the way into the corners.
I took the chisel over to the bench grinder and carefully and slowly ground away the sides so as not to burn up the tool steel and have it lose its temper.
After a few minutes of grinding, I was happy with the overall look of the chisel. It wasn’t perfectly symmetrical on both sides, but I didn’t care. I would be the only one to use it, so I don’t have to impress anyone with my craftsmanship.
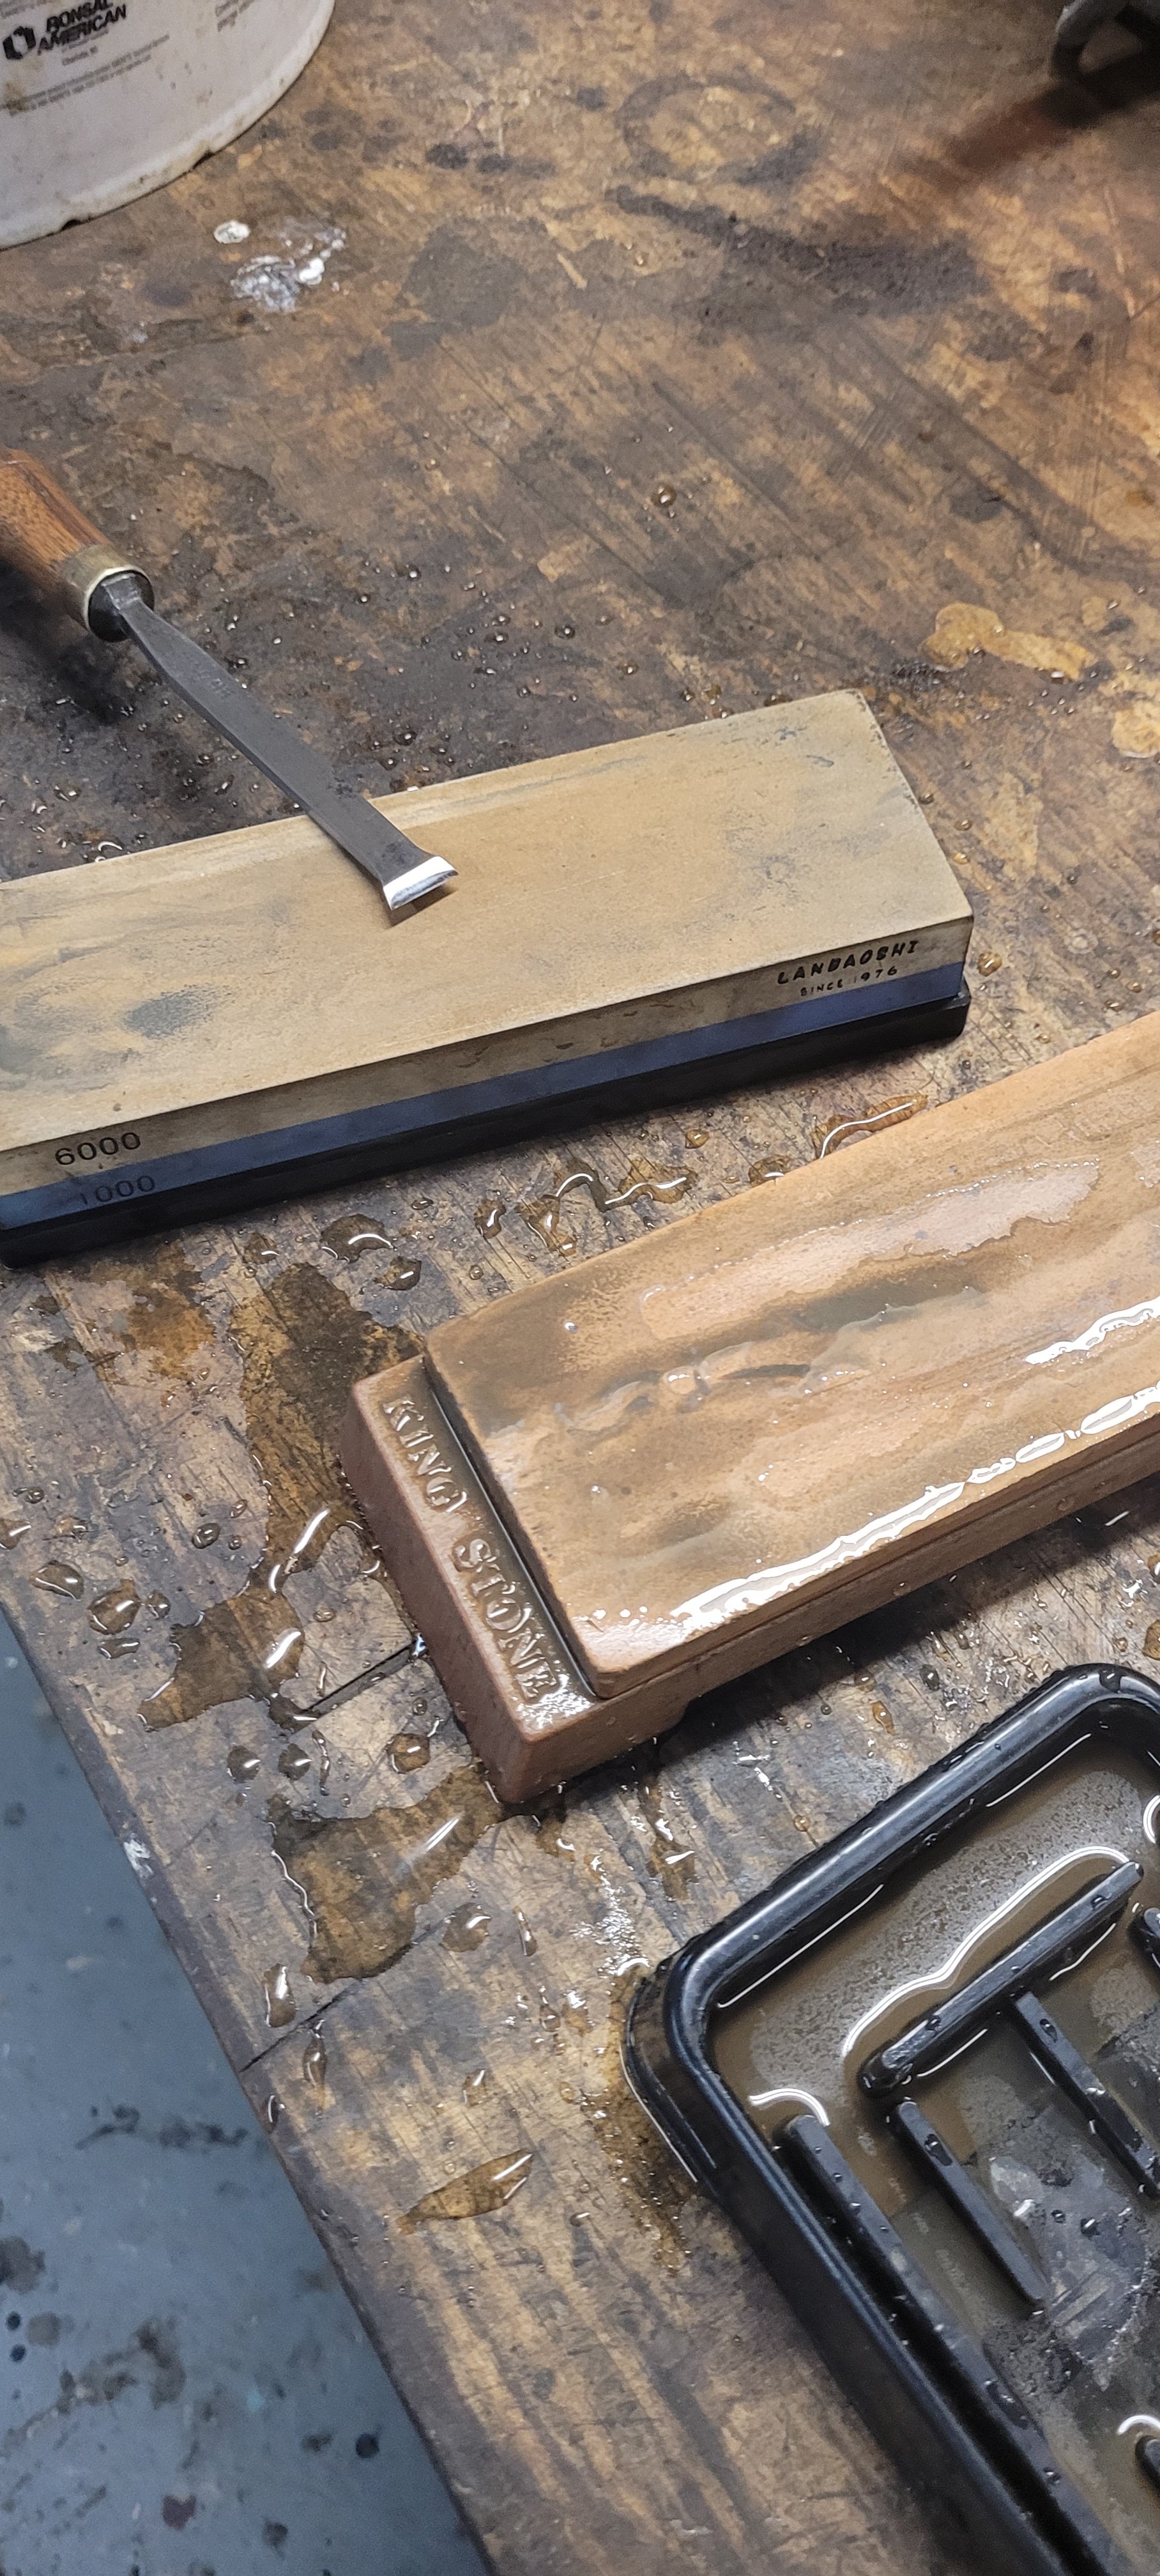
I then went on to sharpen the blade with my water cooled sharpening machine and a few water stones to hone the edge. I then polished the back of the blade to a mirror finish just in case I did get a visitor in my shop and wanted to impress them. Lol
After the chisel was sharpened and honed, it was time to see how it worked. I laid out a few half blind dovetails and sawed and cut out the waste with some bench chisels. Then I tried cleaning up the sides and bottoms with my new dovetail chisel. Sure enough, it cut beautifully! I was able to get into the corners of the pocket with this chisel, something that I had a hard time doing before with my normal bench chisels.
I made a little holder for the chisel and added it to my tool cabinet door. I put off doing this project for years, thinking it would have taken a lot of time to complete, but it ended up only taking about an hour. Figures.
One day last year, my wife and I were driving through Amish country when we stopped at a yard sale. The Amish woman had a long cedar log she was selling for $10.00. We had one of those IKEA storage cube cabinets with cloth drawers the size of milk crates in my truck. We were planning on donating to St Vincent DePaul but asked if she wanted to trade for it. The woman had a few kids, and we figured she could use it for storing away all the kids’ stuff. She agreed to the trade, so I took it out of the bed of the truck and put it by garage. She was tickled to have it.
The log sat in my basement for months until Anita asked me last week if I could cut it up into chunks so she could use them in her booth to put topary plants on them. The different heights add visual appeal to the booth, and it helps her sell more plants
I sliced the log into small pieces as best as I could on the band saw, but the irregular shape of the log made it tough to cut the top and bottom parallel to each other. I sanded the bottom on my oscillating edge sander and then tried to sand the top parallel to the bottom by eye as best as I could. It didn’t work the best, and I figured there had to be a better way.
I looked at my go-to jig book, “Making Woodwork Aids & Devices” by Robert Wearing, but I didn’t see a jig that would work for my task so I kept thinking about it until I came up with this.
It’s basically an 1 1/4″ cube with a 1/2″ hole drilled through the middle. Then another 1/2″ thick piece of wood with 1/2″ hole drill in it and a slit cut to the hole so that a bolt could tighten the piece onto a 1/2″ dowel. At the end of the piece is a 9/32″ hole drilled so that I could shove a pencil into it.
After I assembled the jig, I set the pencil to the lowest part of the top of the log and gently scribe a pencil line all around the log. It’s the same principle as leveling chair legs but on a larger scale.
Once the line is scribed all around the log, I carefully sanded it to the line on my oscillating edge sander. I’m sure a random orbital sander will work, but this thing makes quick work of it.
After a few minutes, all of the log pieces are flush and level. It’s a stupid simple jig, and I’m sure I’ve seen it somewhere, I just can’t remember where.
Here are the stumps in action. Makes the display of plants look much nicer, which increases her sales.
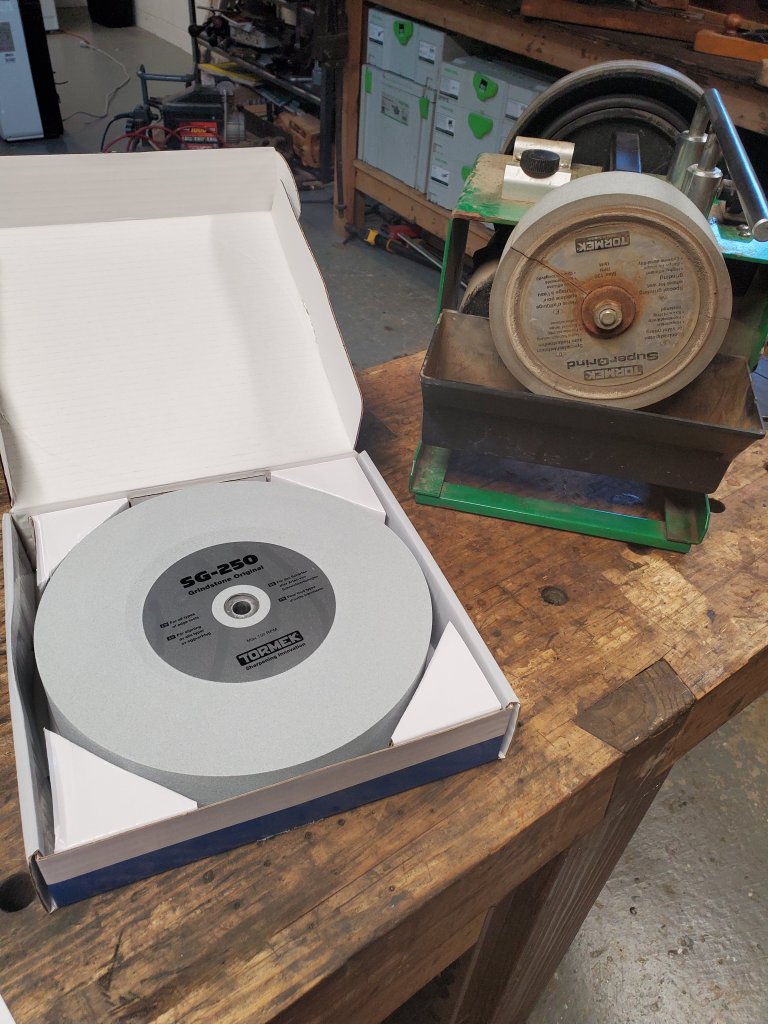
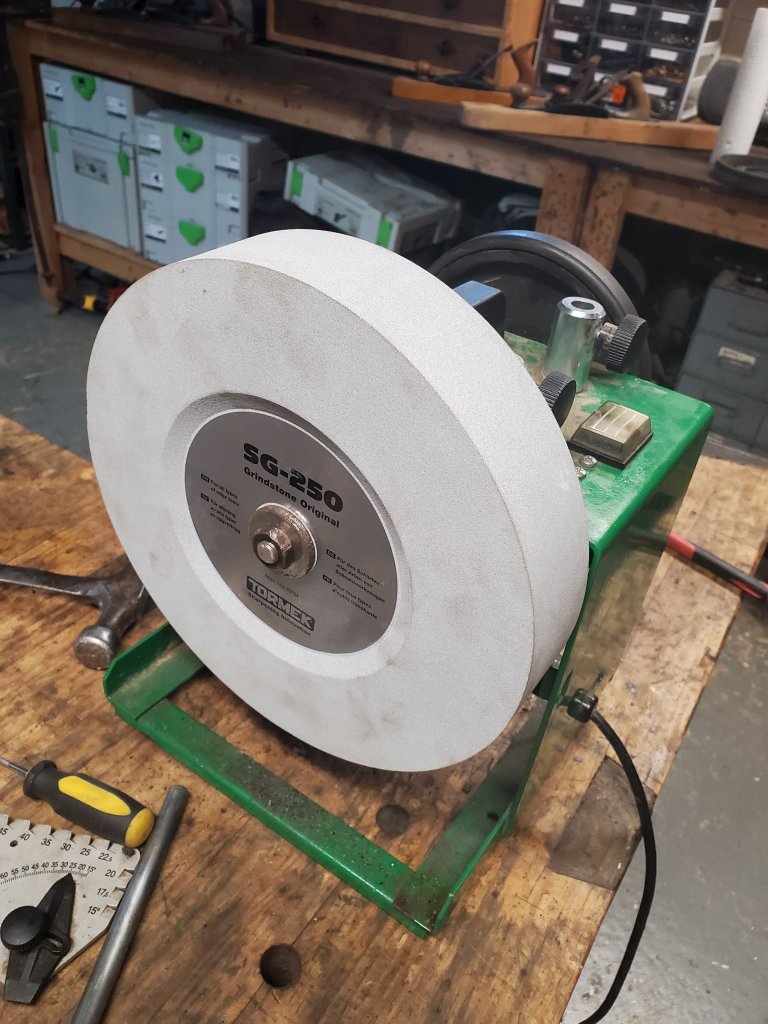
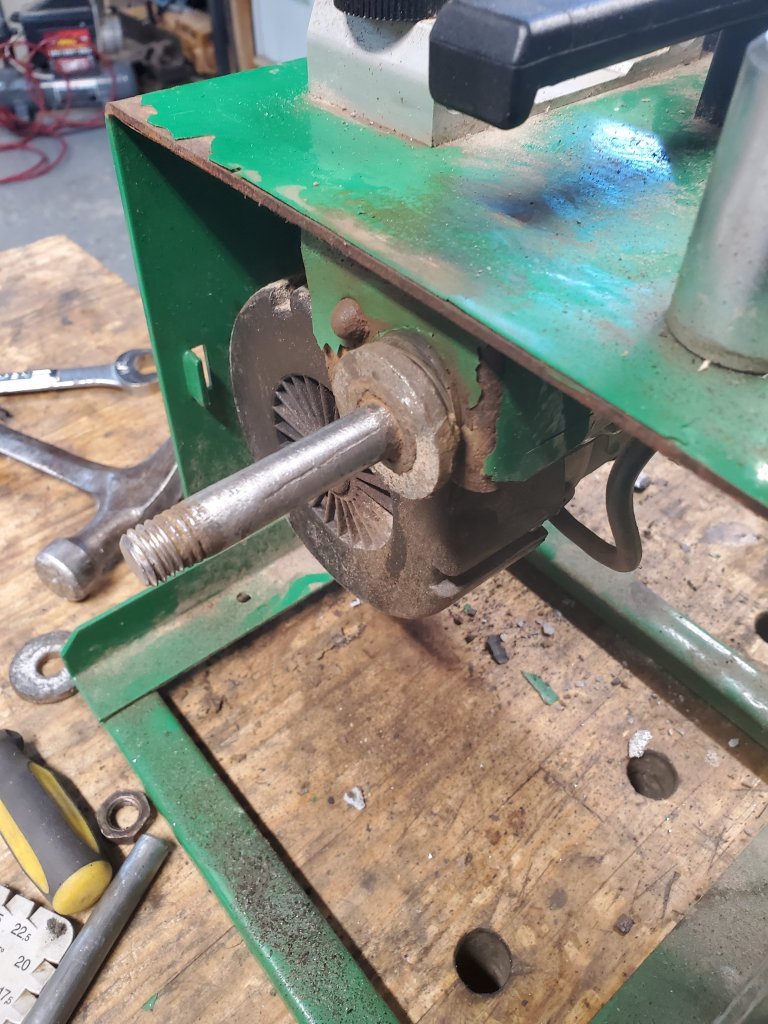
After using my Tormek sharpening machine for the past twenty years, it was time for a new stone. When I researched replacement wheels, I read all about the new CBN wheels on the market that stay flat and don’t require water to use. The one disadvantage I saw with these wheels, is that the side of the stones are prettty narrow. When I sharpen old plane blades, I like to flatten the back of them as well, so I often grind the back of the blade with the side of the stone. I was afraid that the narrowness of the CBN stones wouldn’t do the job as well as my original stone. I’ve been happy with the stone that came with the machine so, if it ain’t broke, dont fix it.
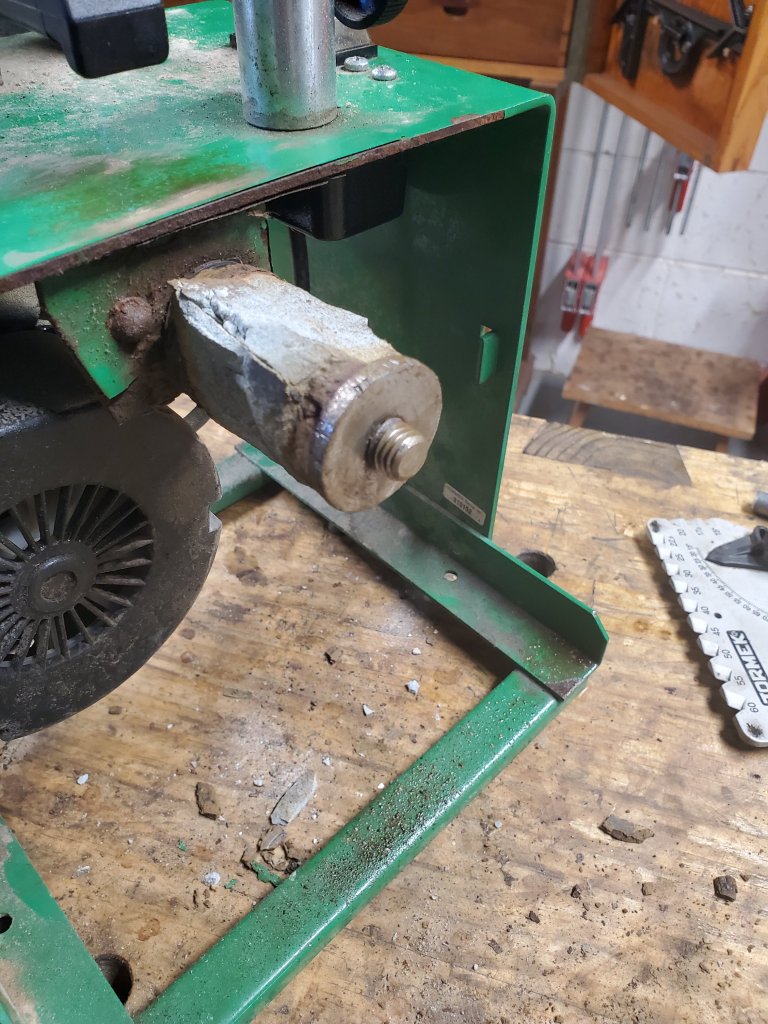
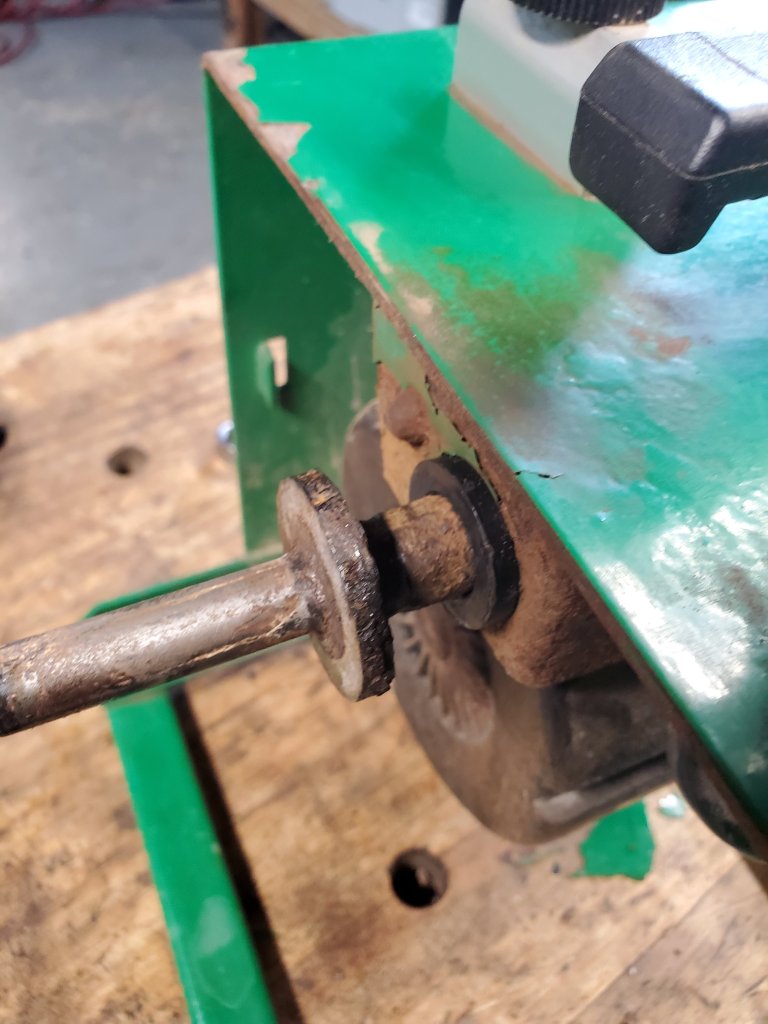
I knew the hard part of replacing the stone would be taking the old one off. I grabbed a 3/4″ wrench and tried like hell to unscrew the nut. I whacked on the wrench with a hammer as hard as I could hoping not to bend the shaft of the machine. It was so tough to get off, my stone cracked and fell apart.
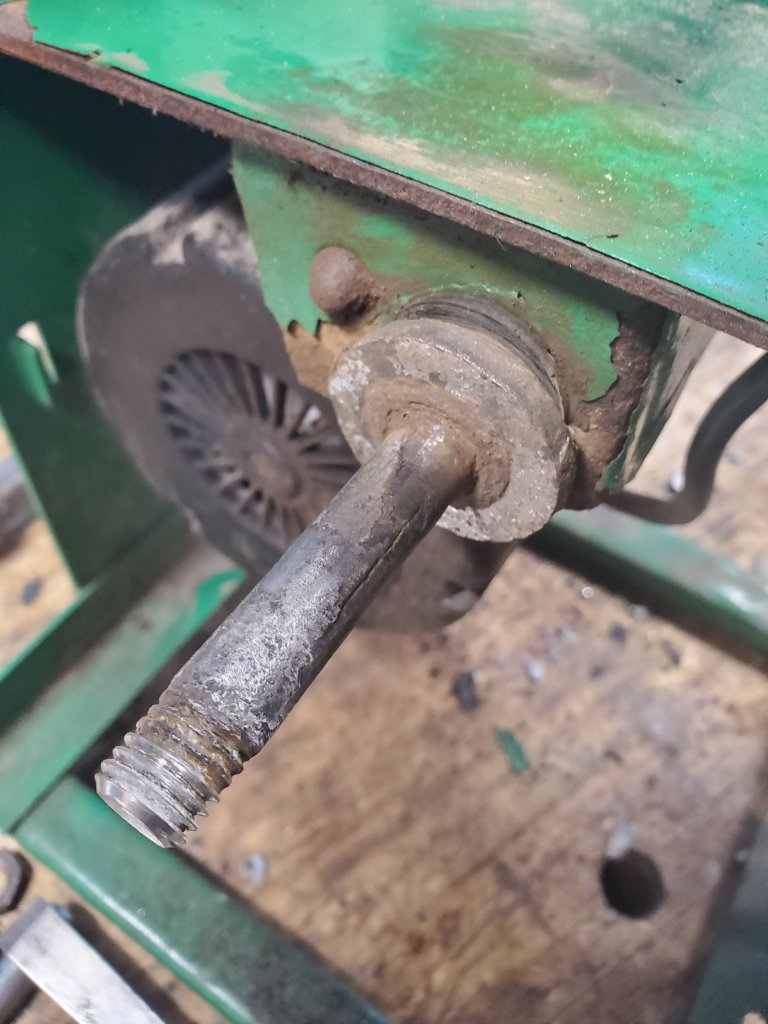
After about twenty minutes of cussing and using a half of a can of PB Blaster, the nut finally freed itself. Once I took the remainder of the stone off, I tried to put the new stone on, but the shaft was so rusted and corroded, I had to sand the shaft smooth in order for the new stone to slide on.
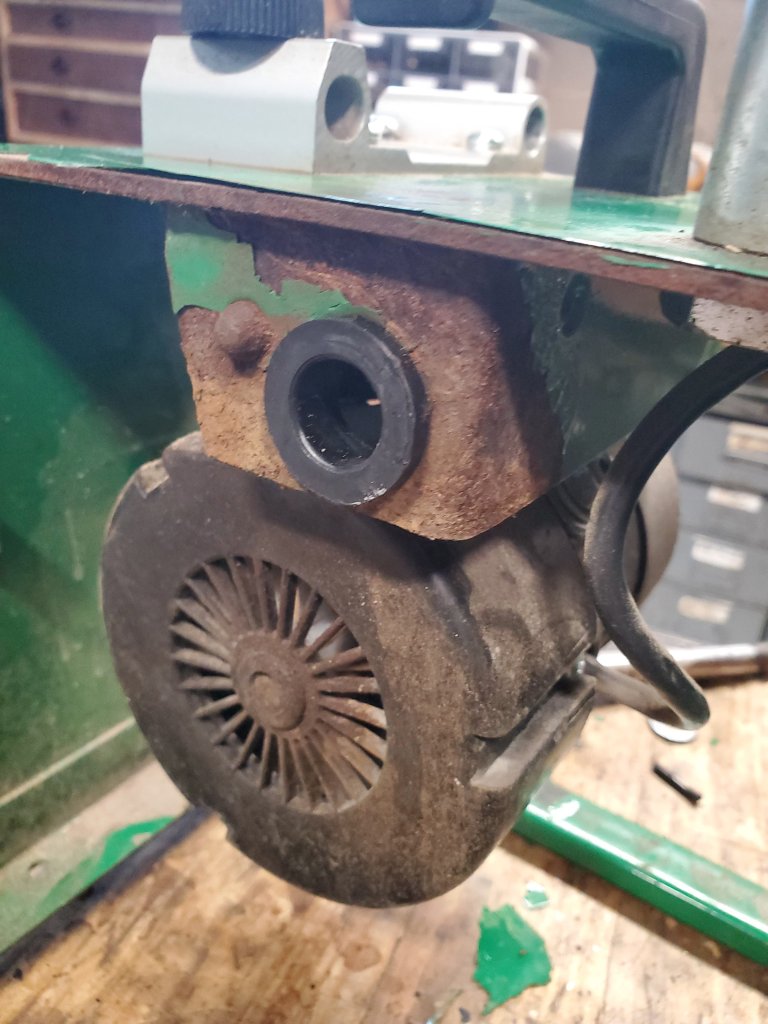
I slipped on the new stone and noticed that it moved up and down just a little bit. Curious, I removed it from the machine and also removed the stropping wheel on the other side so I could remove the shaft in order to get a better look at what was going on.
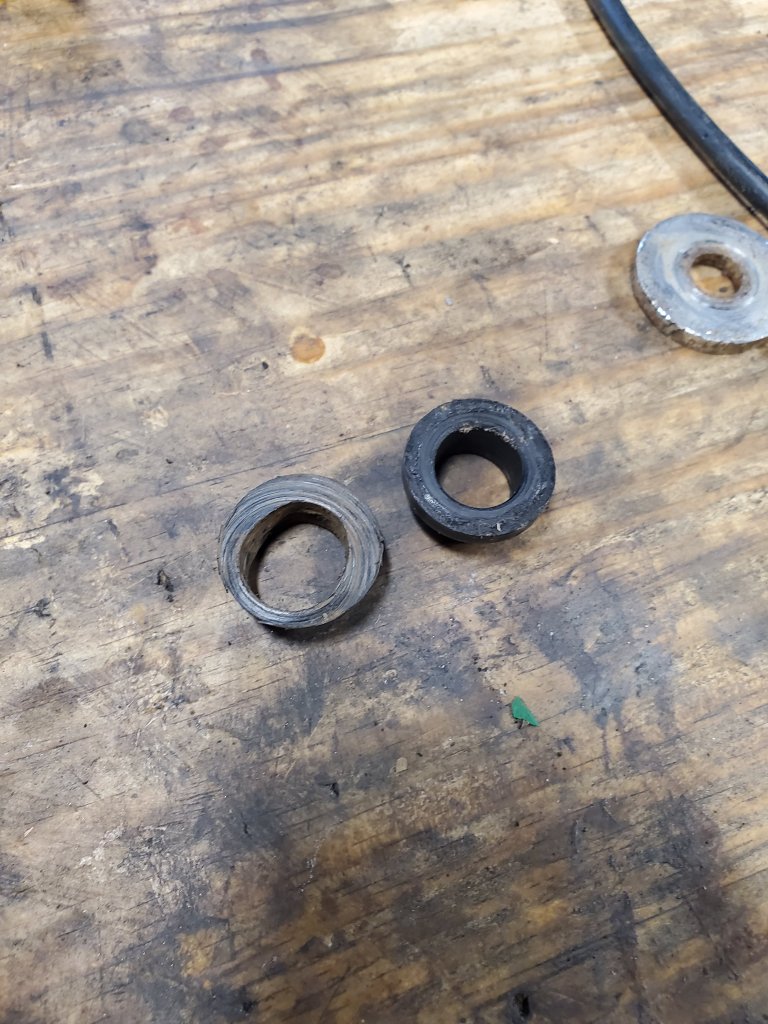
Sure enough, the plastic gasket that was next to the stone had wore a larger hole in it from use over the past twenty years. Not having a replacement gasket on hand, I simply switched the gaskets from eachother sides hoping they will still work.
Now with a “new” gasket in place, the shaft wouldn’t fit into the hole because of all the corrosion on it so, I carefully filed and sanded the rust away. After a few minutes, I was able to get the shaft nicely seated in the machine.
I checked the squareness of the stone to my crossbar and it looked much better than before. For years when I used the Tormek, it would cut slightly heavier on one side of the blade. I would compensate for this error by tilting the angle of my blade in the jig just a smudge. After messing around with the machine this afternoon, I finally understand why it would cut heavier on one side.
I turned the machine on and checked how everything was running. The stone wobbles just a touch but, from how hard I was hitting the wrench with a hammer in order to get that nut off, I’m not surprised. As long as the machine sharpens blades fine, I’m happy with it.
Two years ago, our house got hit by a tornado. One of saddest part from all of the damage was the destruction of the shed I built a few years ago. I was so devastated, I never rebuilt it. As I tore down the shed, I kept some of the lumber hoping I would use the wood to rebuild a new one however, with 2x4s costing $7.00 a piece, I never rebuilt it and left the wood on top of the shed’s wooden platform.
Along with shed being destroyed, a bird feeder was also destroyed in the storm. My wife, Anita, finally wanted a new feeder in the yard so I decided to use some of the cedar from the shed to make a new bird feeder. I cleaned up the boards, removed the nails and milled up some boards from the trim I kept from the shed.
After the boards were milled, I glued some boards together and started cutting up the parts for the bird feeder. The feeder was so simple to build I believe I built one just like it in the 9th grade.
After a couple of hours of work, the bird feeder was installed back on top of the post. The birds are happy again and I gave new life to part of my destroyed shed. This summer, we’re finally planning on building a greenhouse on top of the platform.
Many years ago, I went to The Woodworking Show in Columbus, Ohio and bought this Dowel Crafter jig after seeing it being demonstrated.
I can count on my hand how many times I used it over the decades. There’s really nothing wrong with it, I just never got excited about dowel joinery.
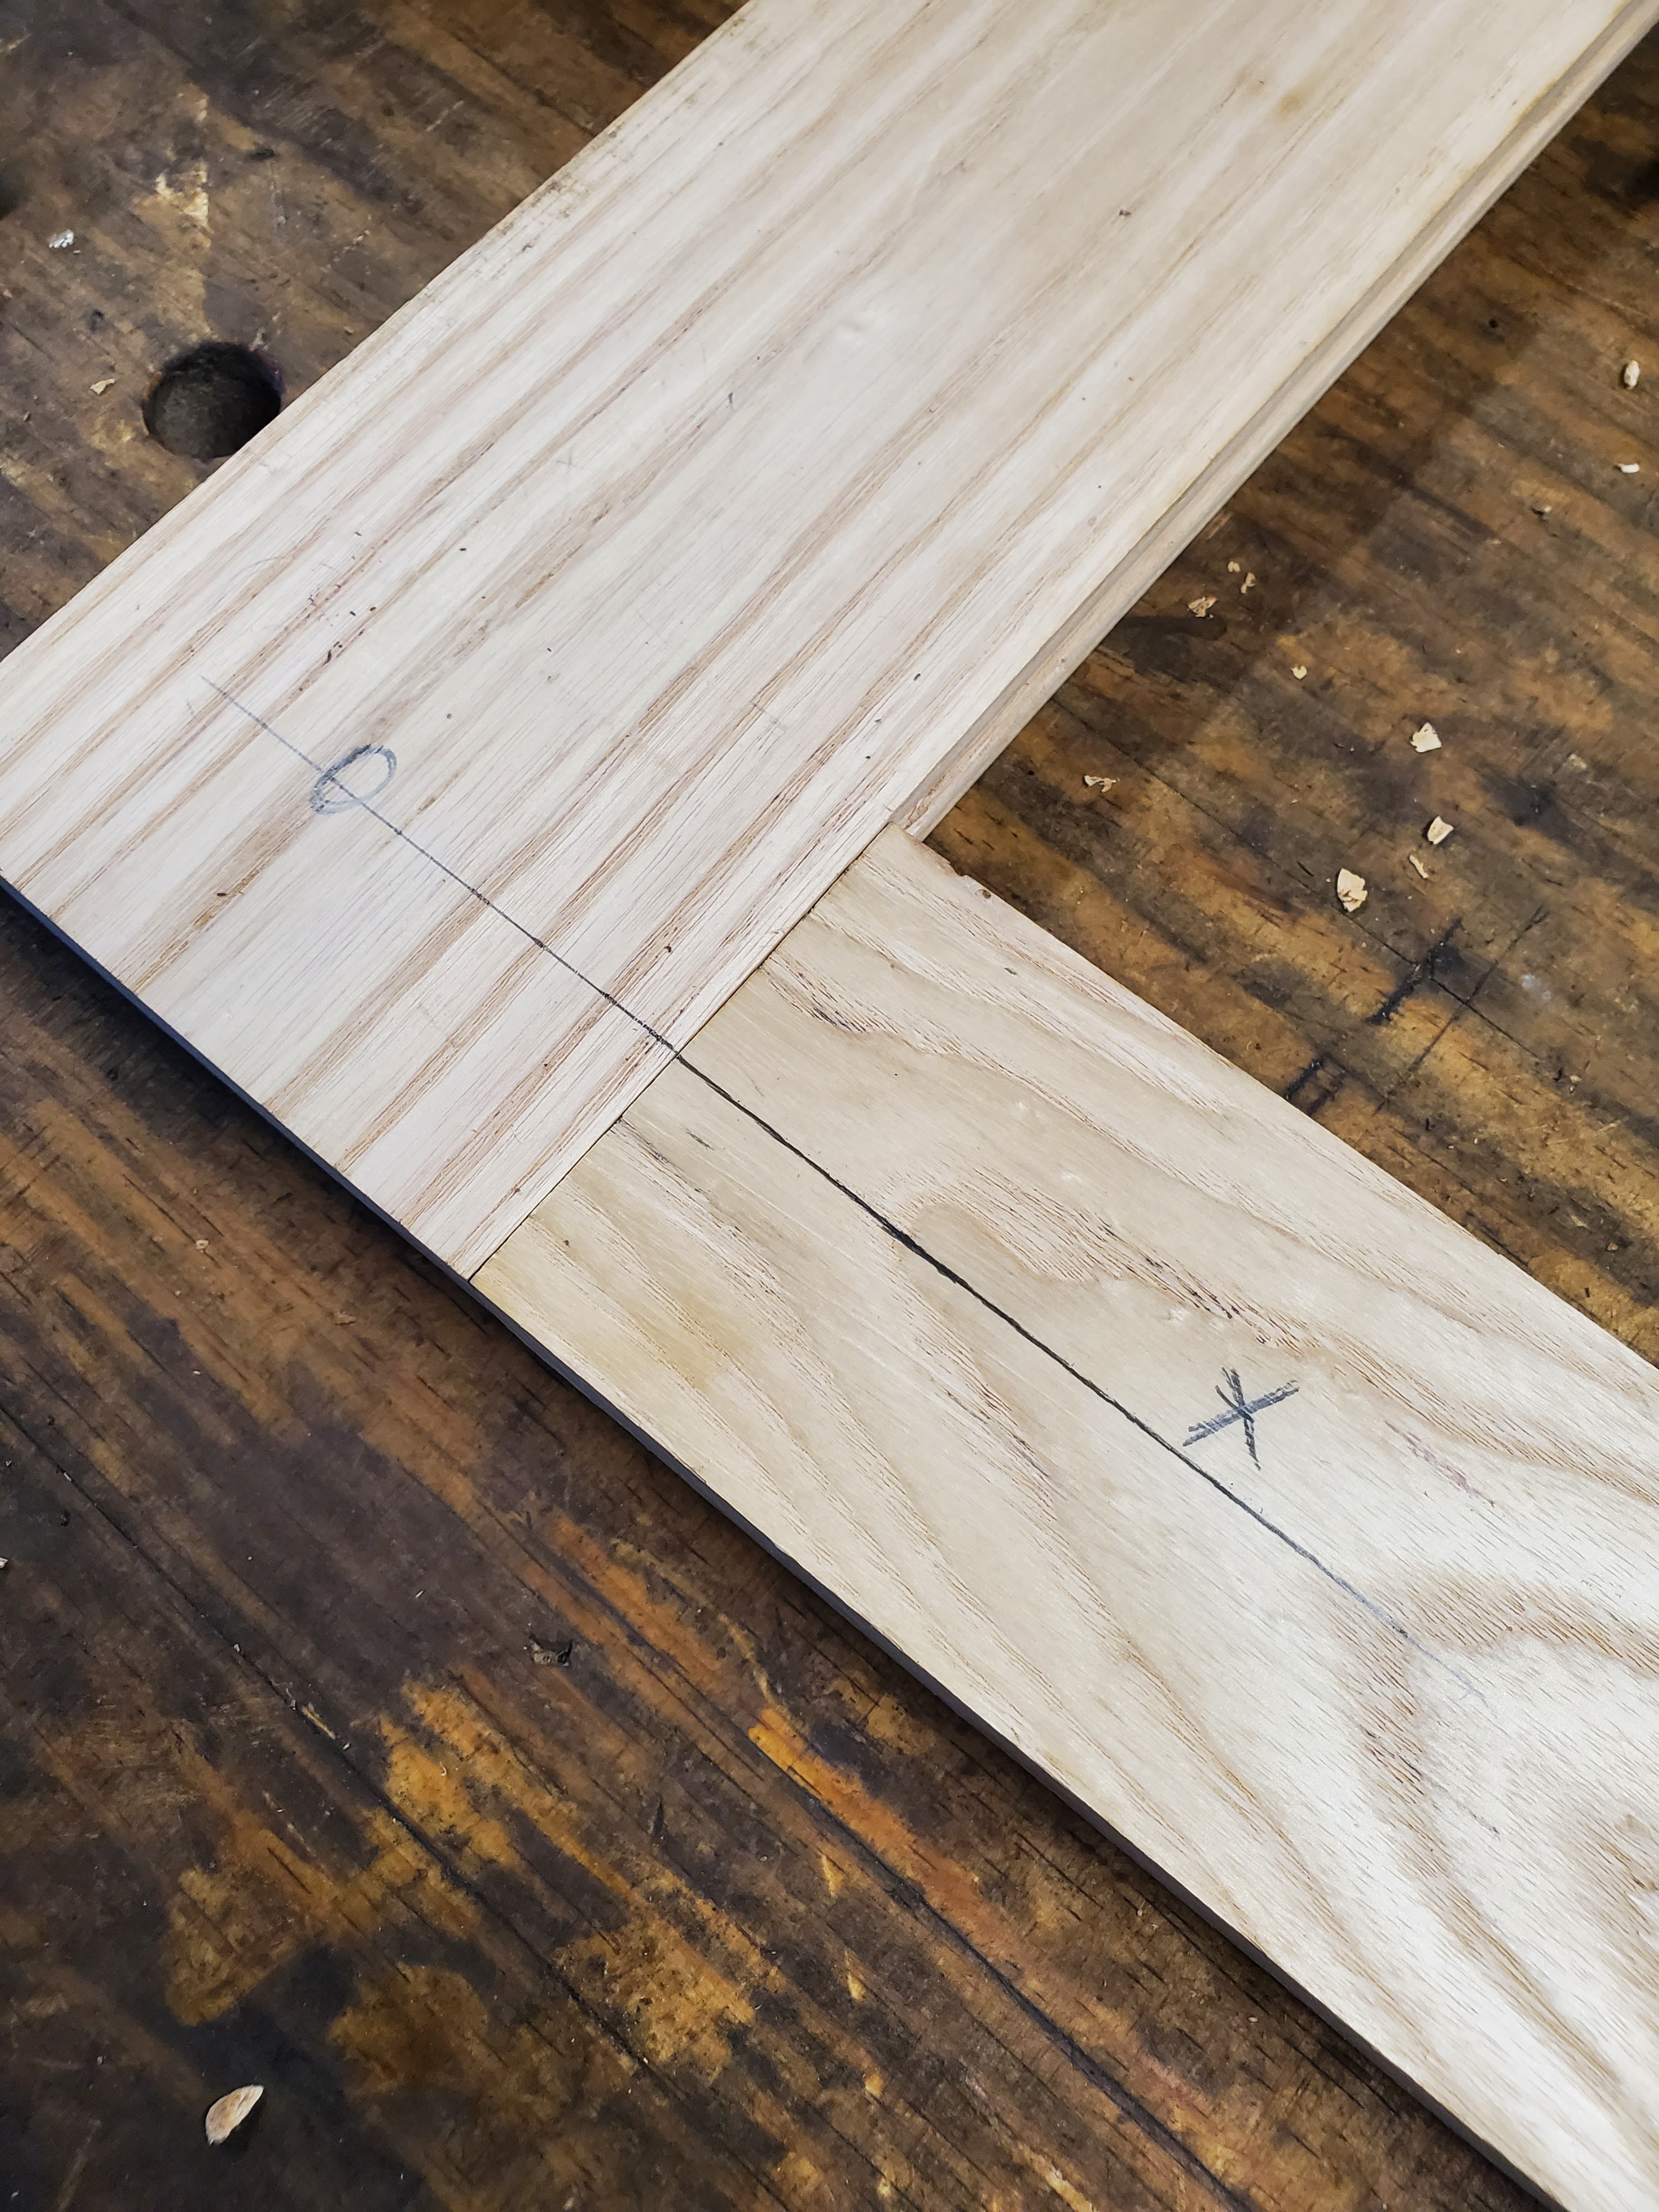
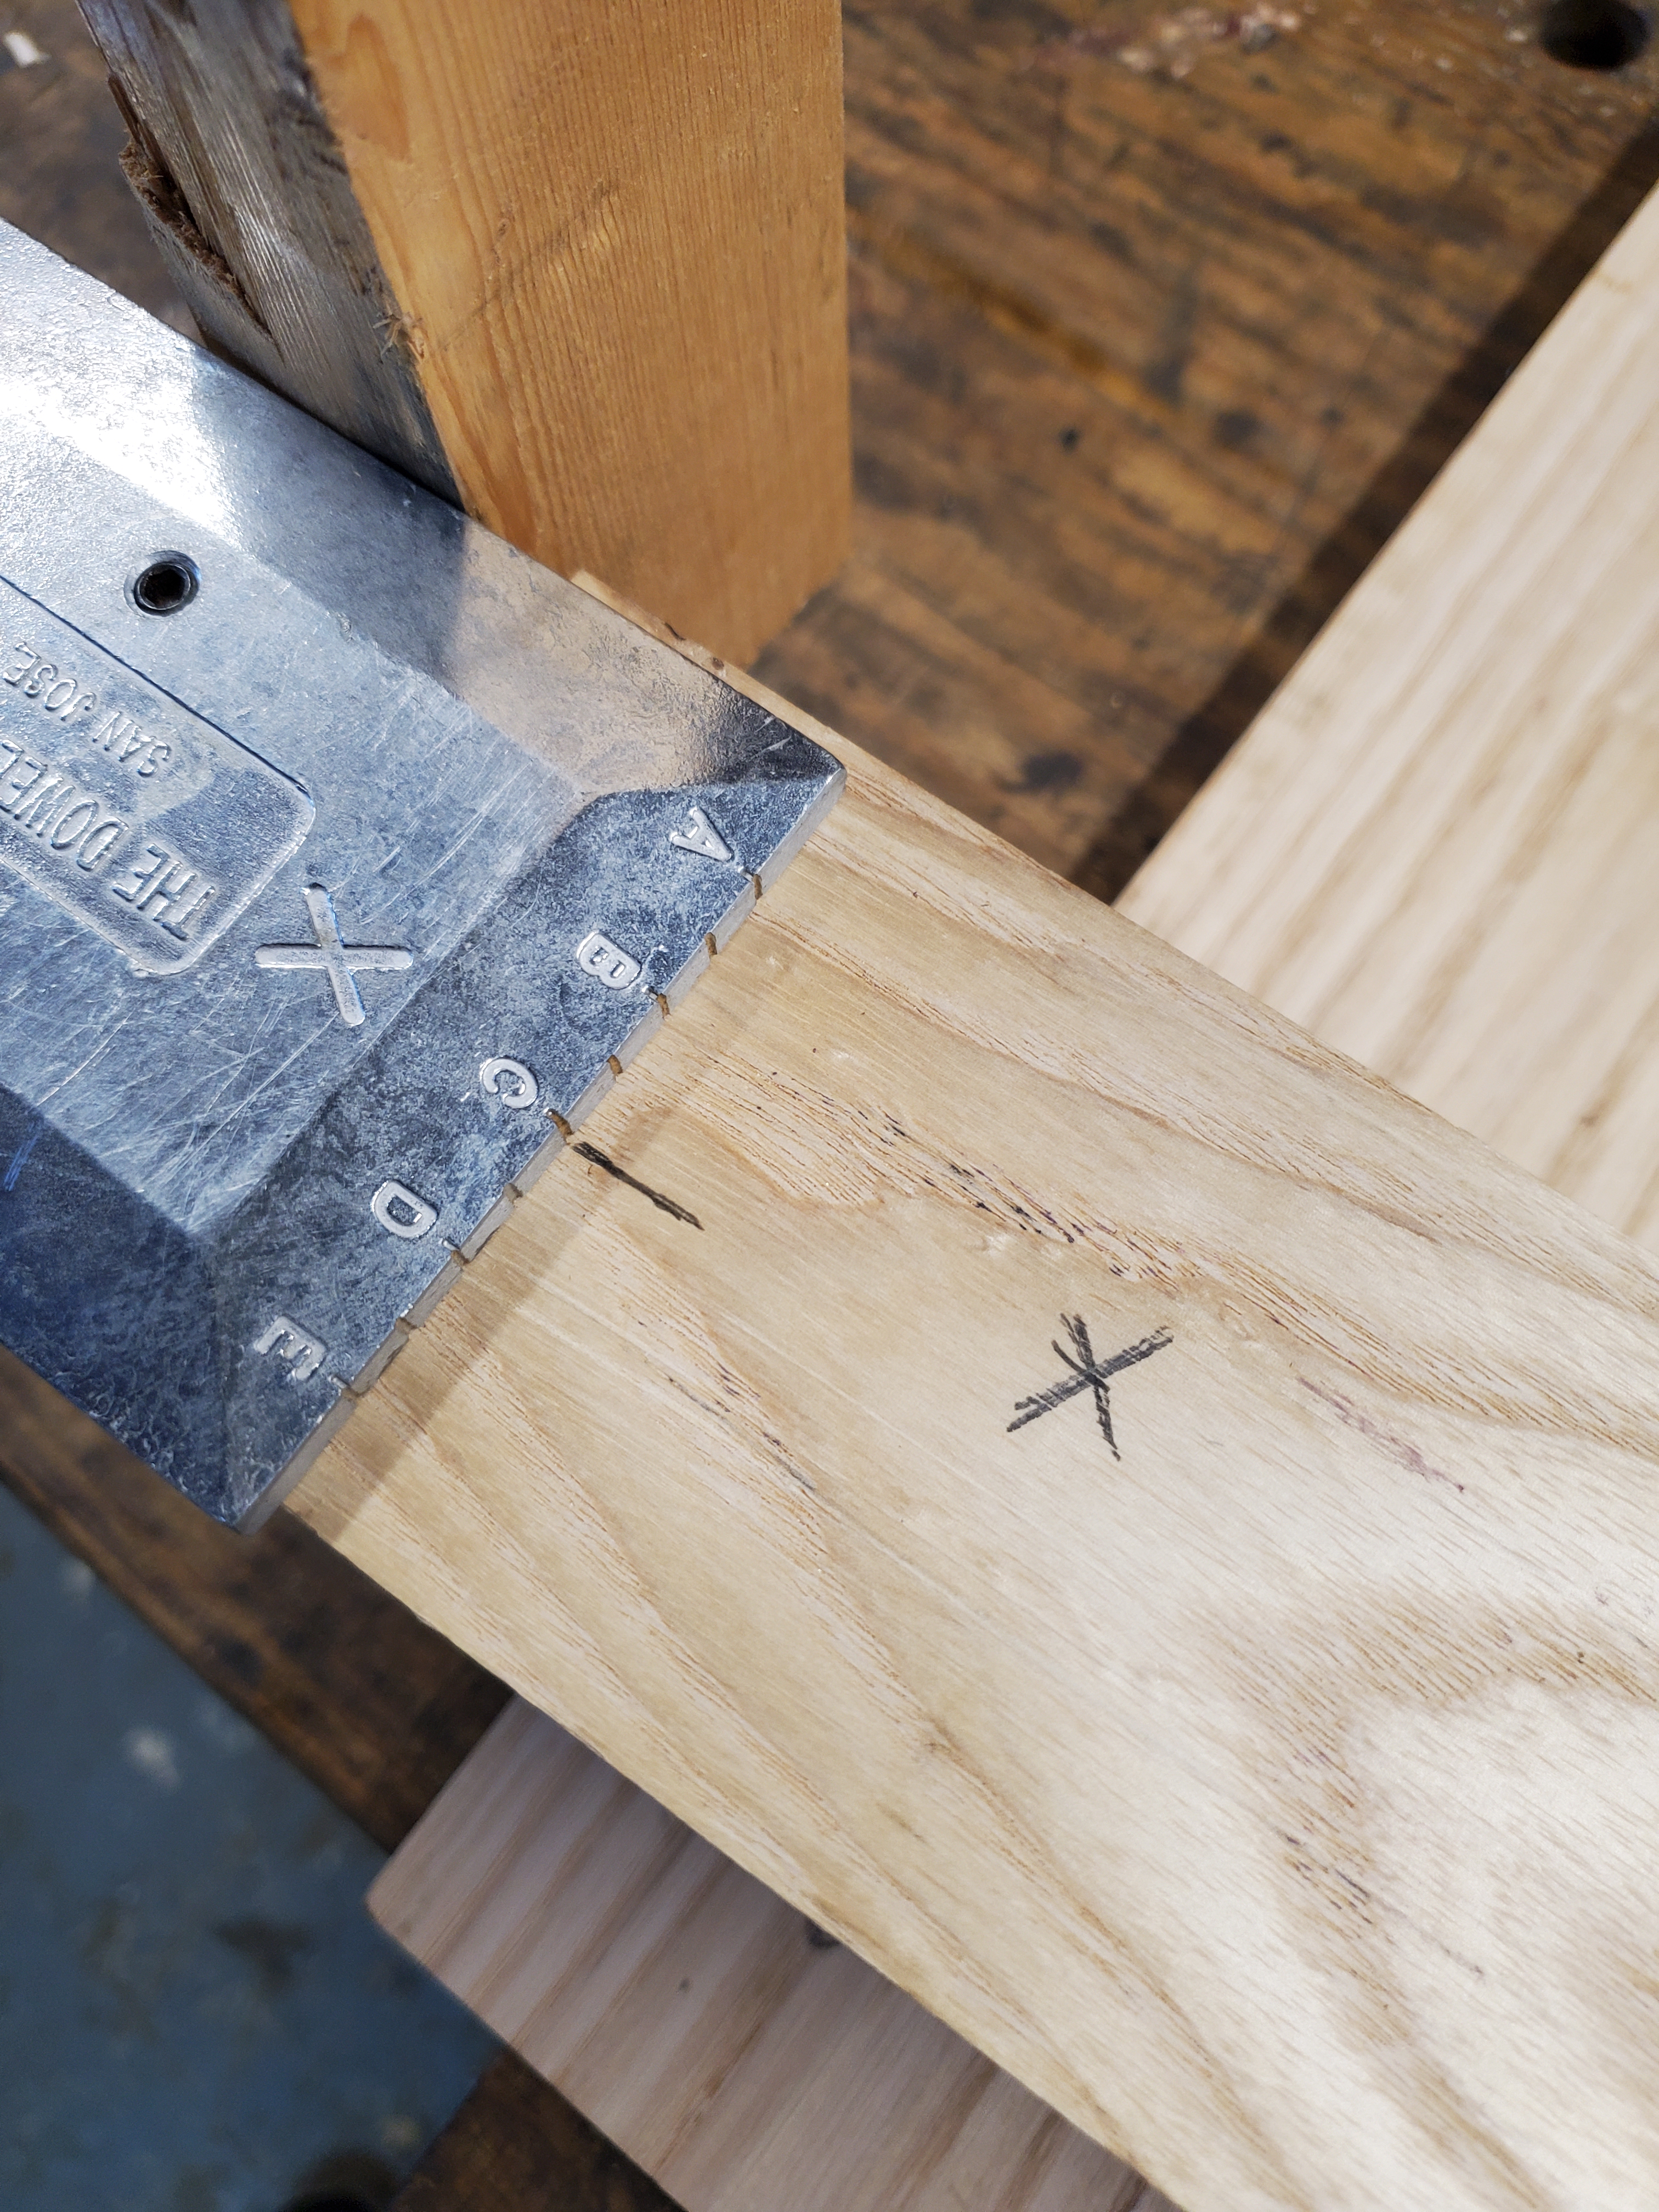
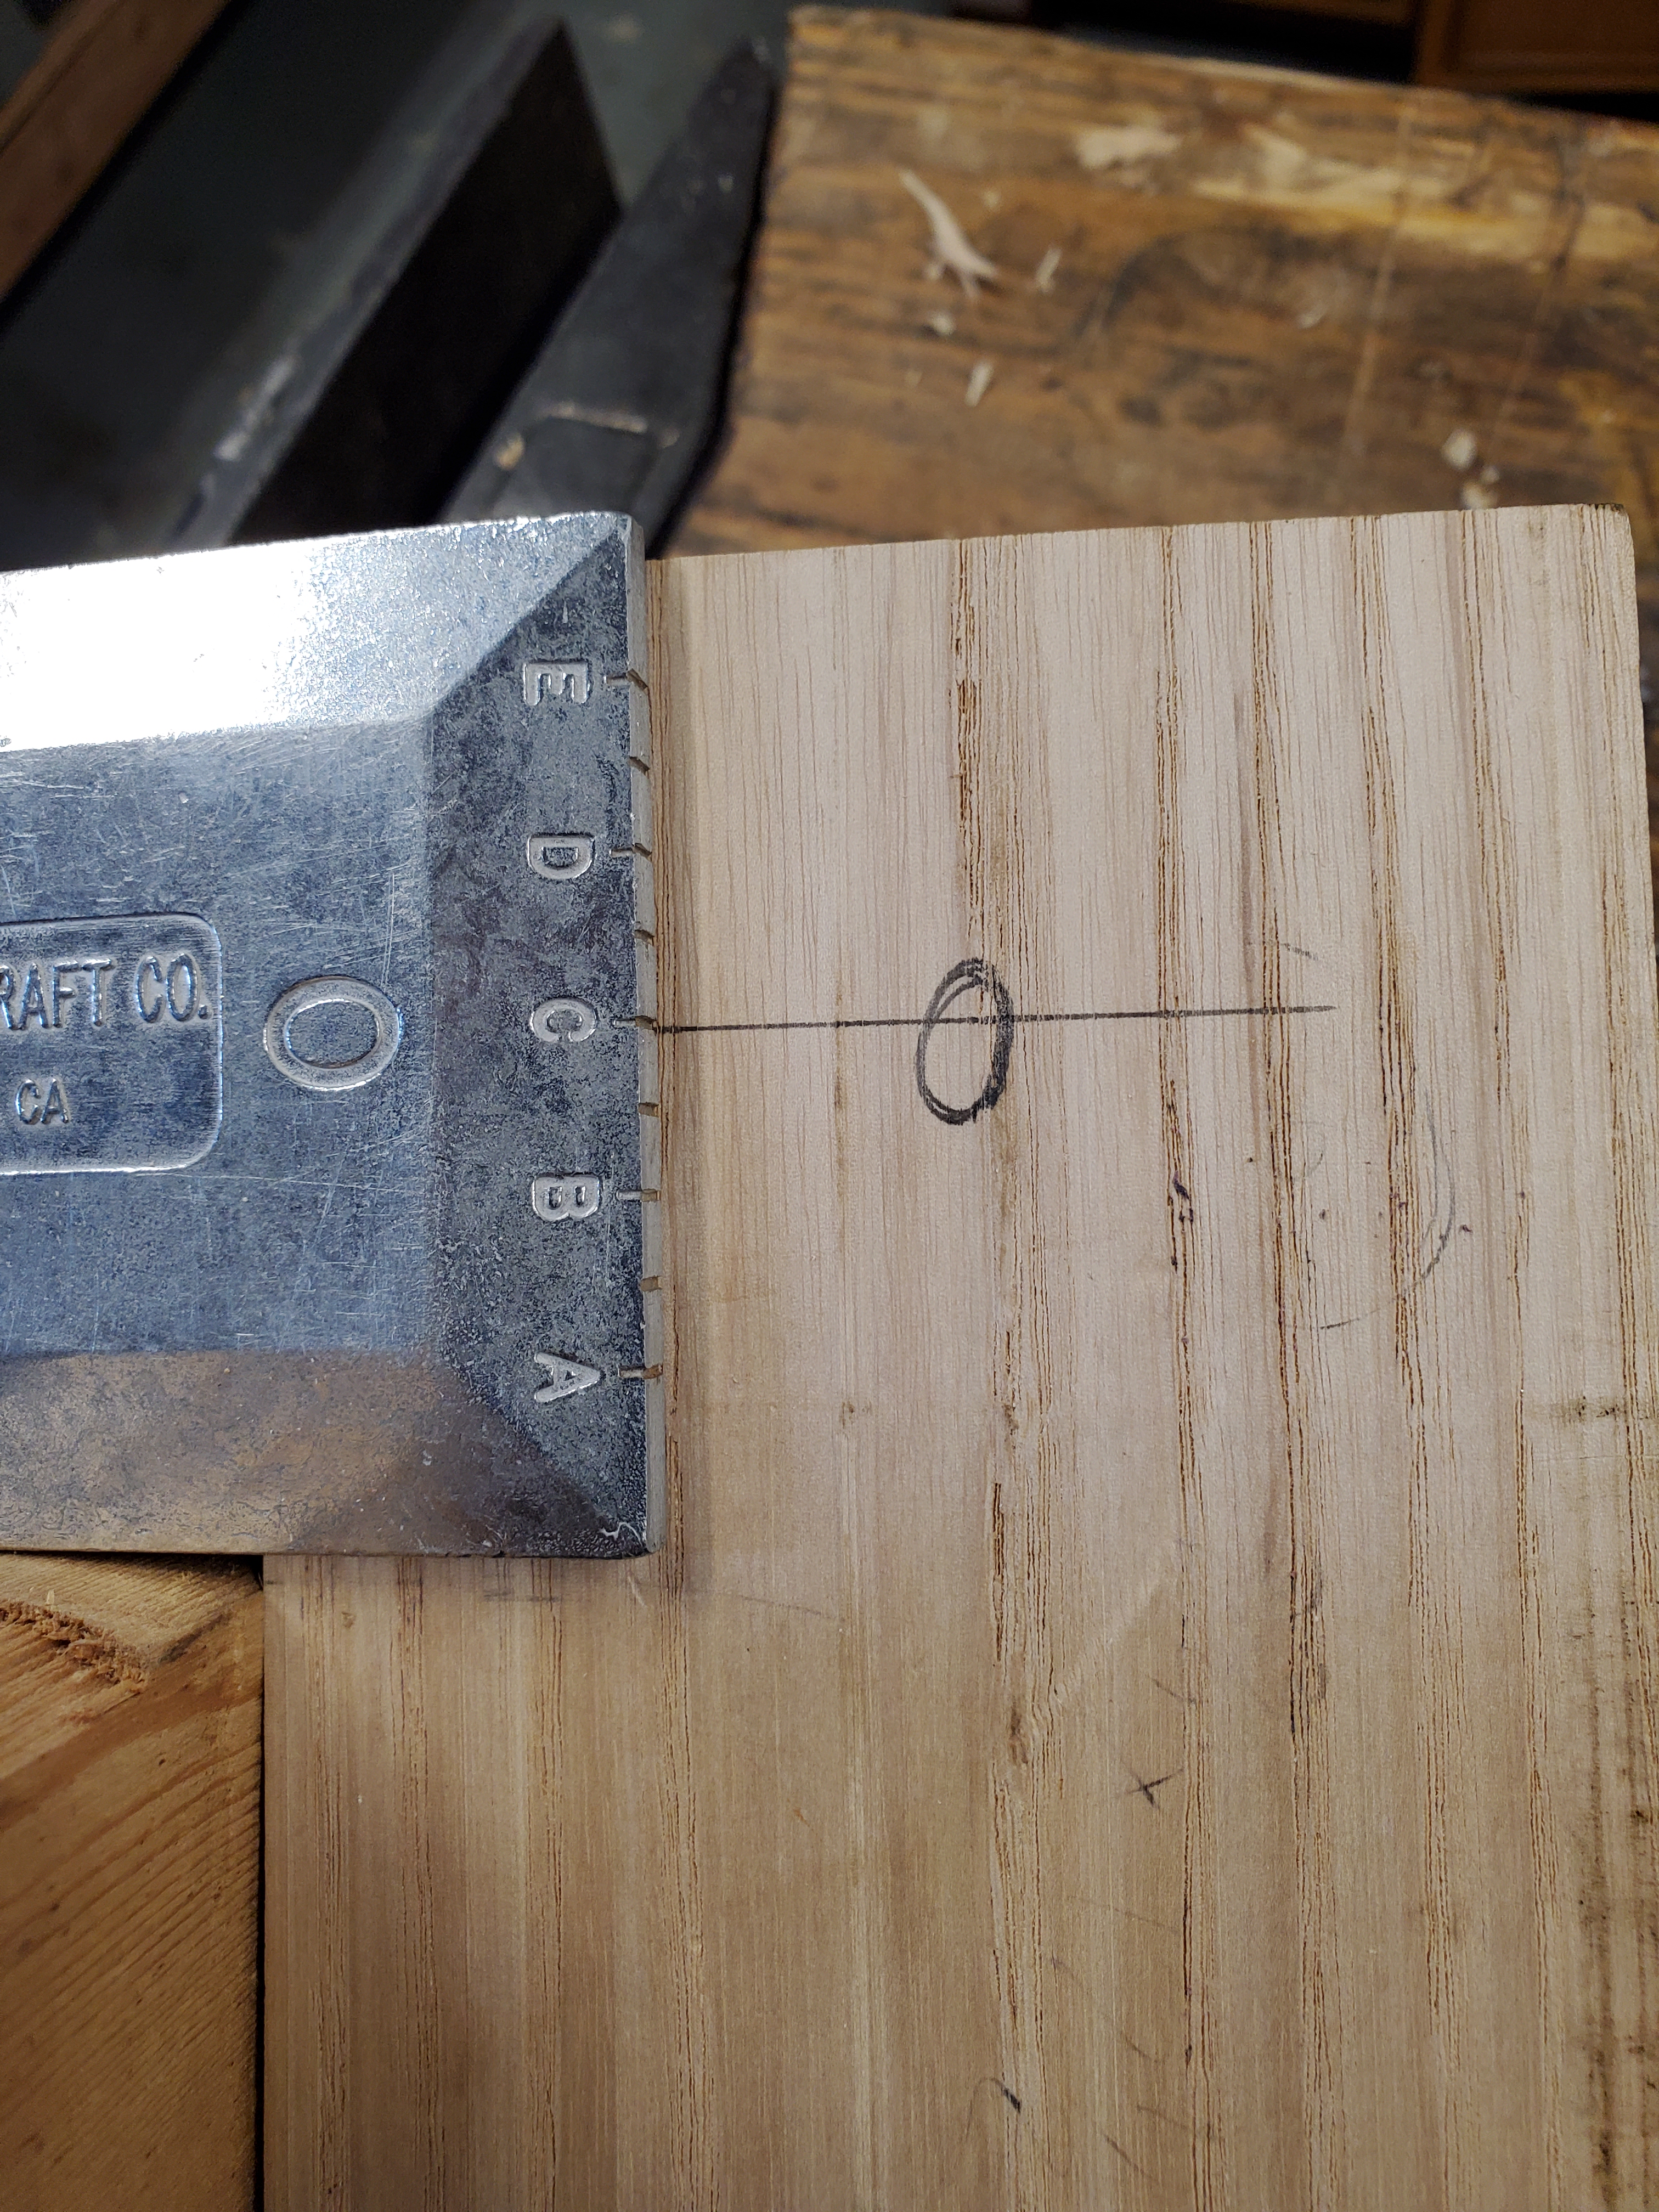
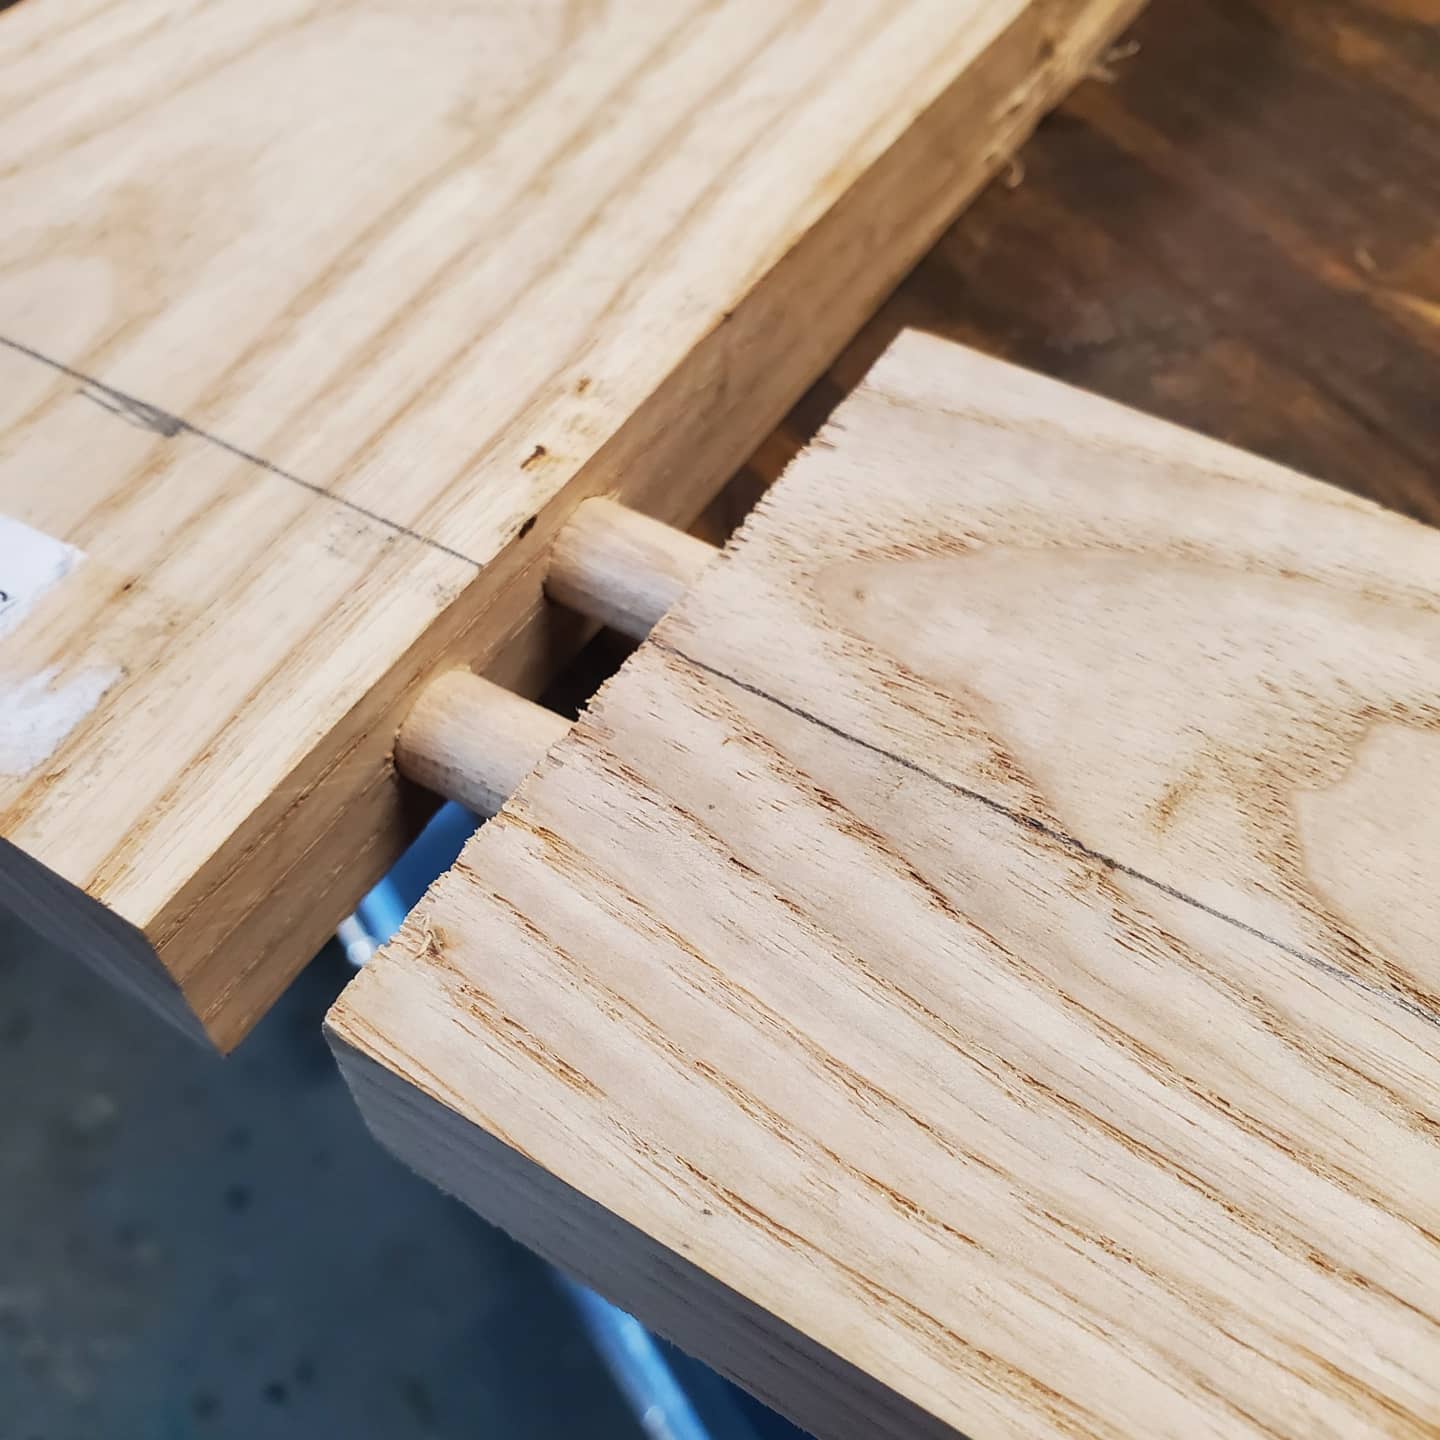
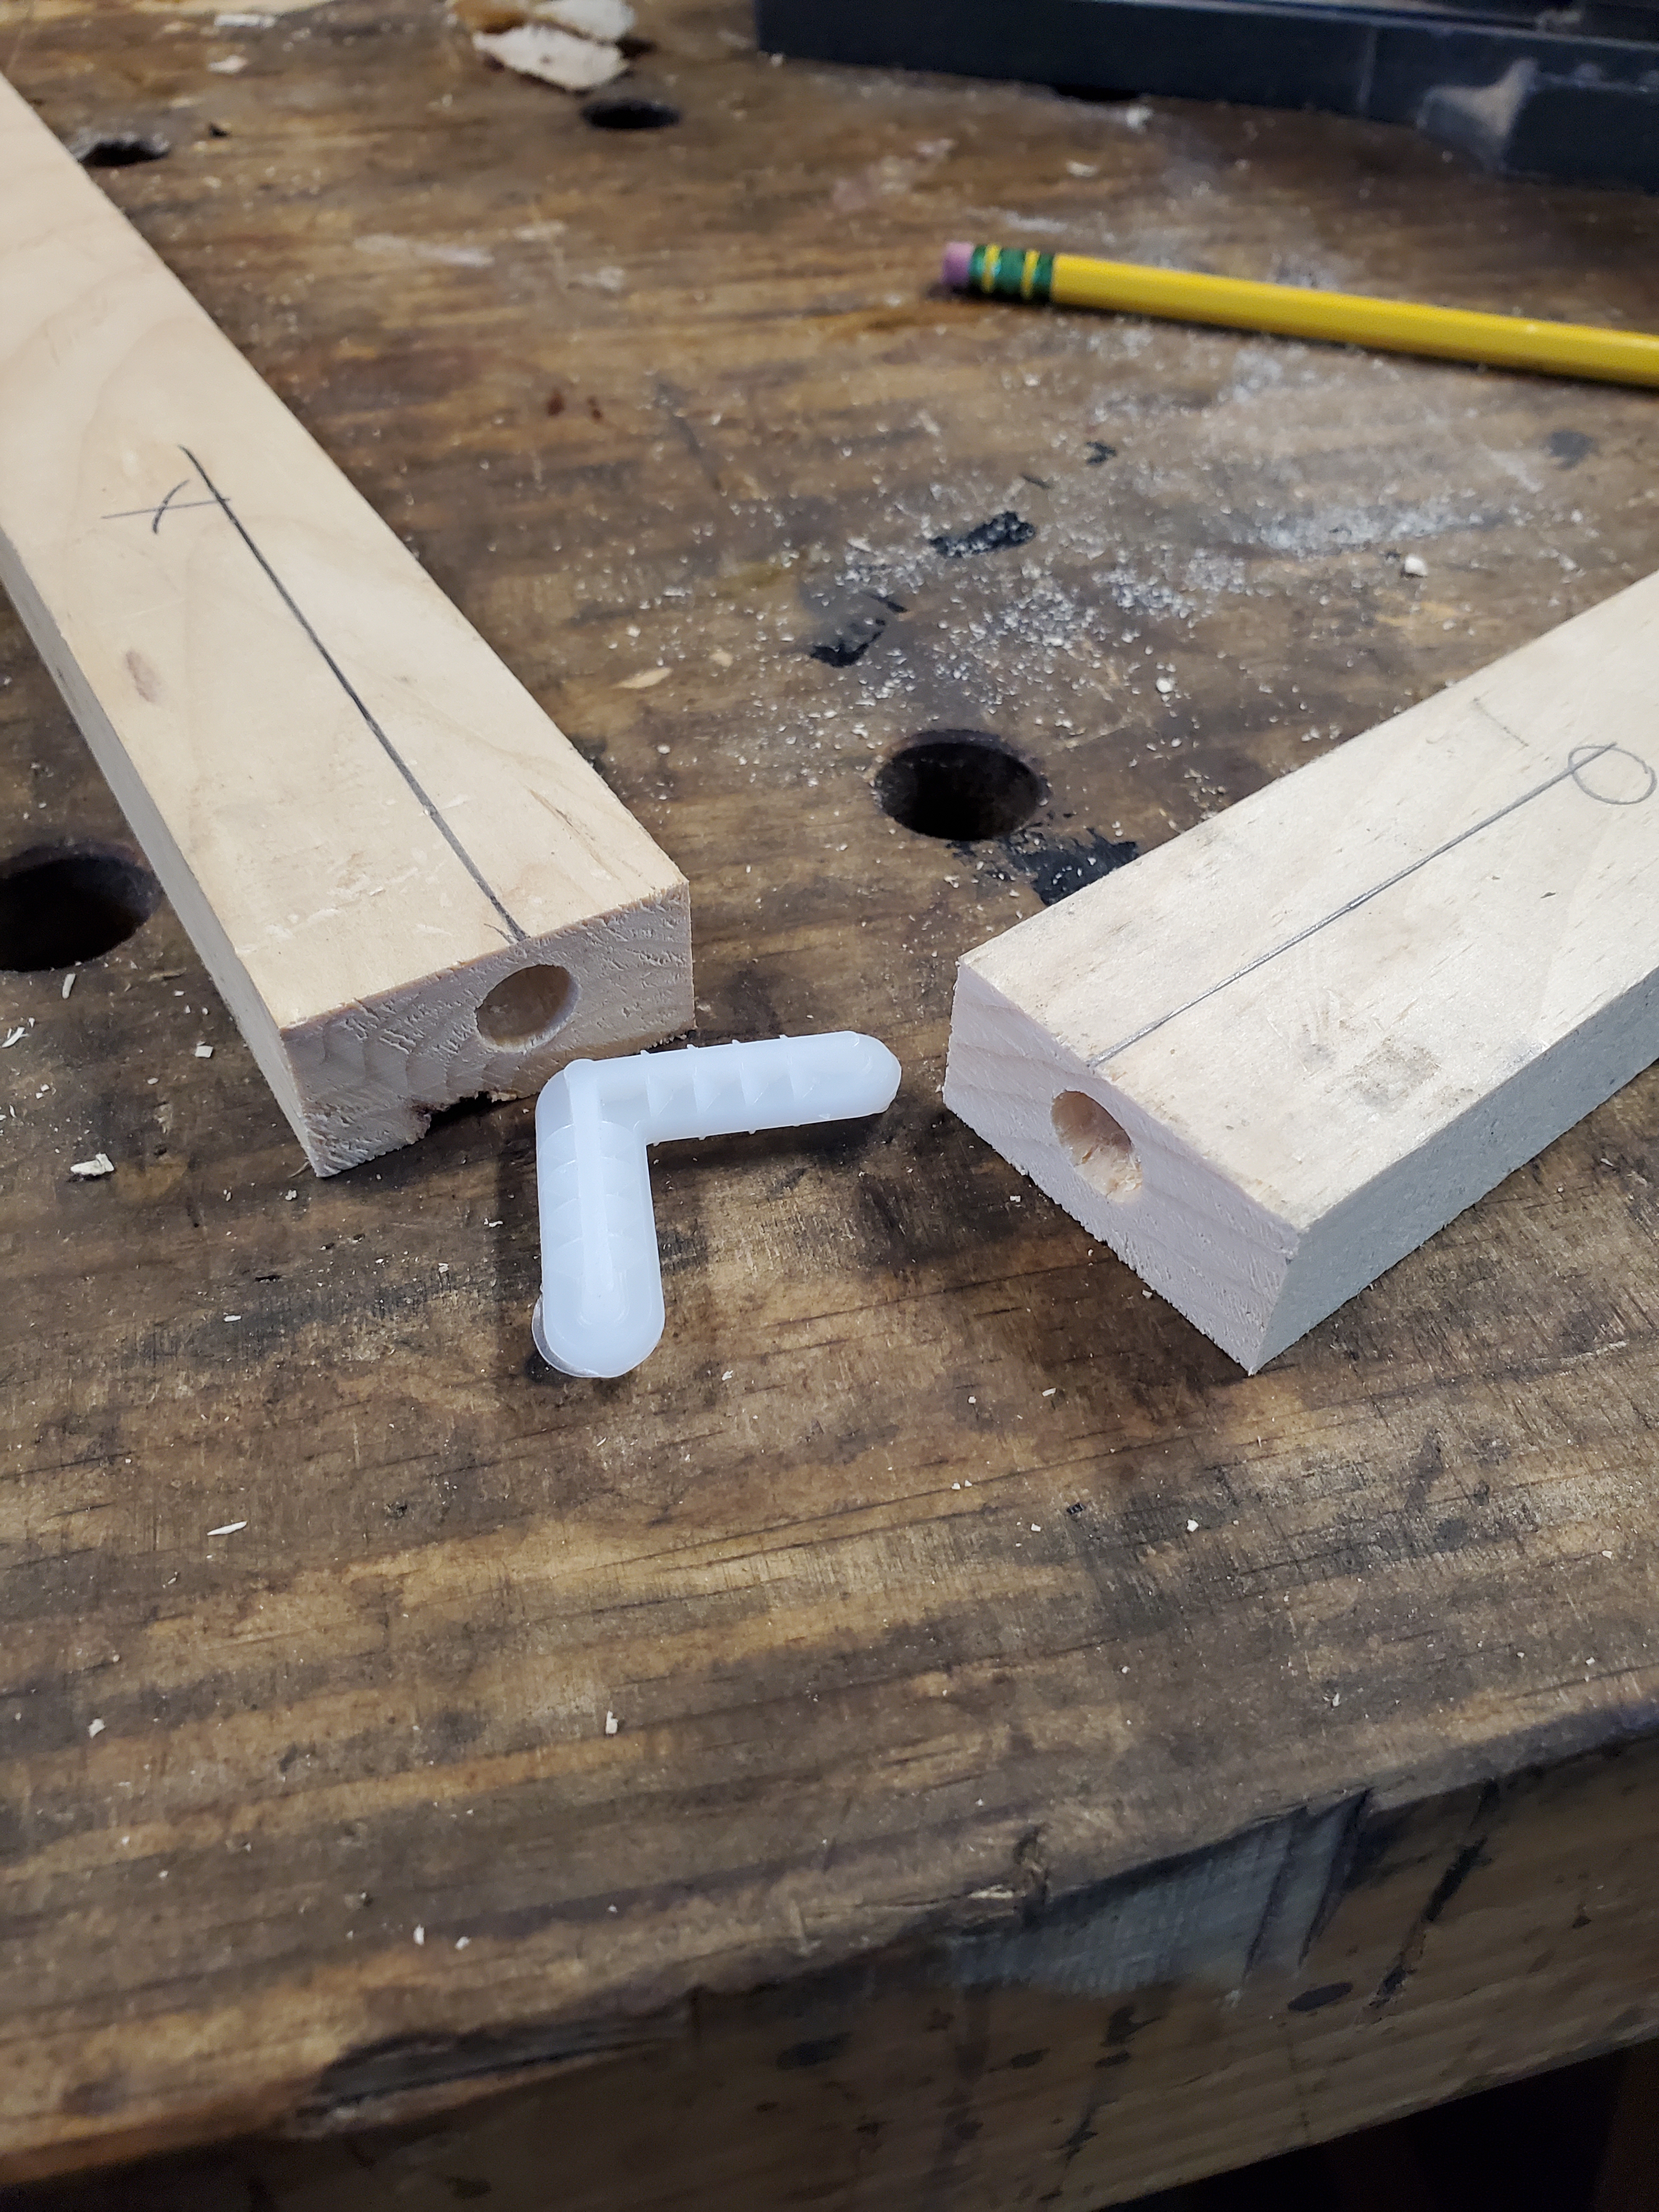
The concept is simple. You draw a line on two mating boards and use it as a guide for the jig. You mark one piece “X”and the other piece “O”.
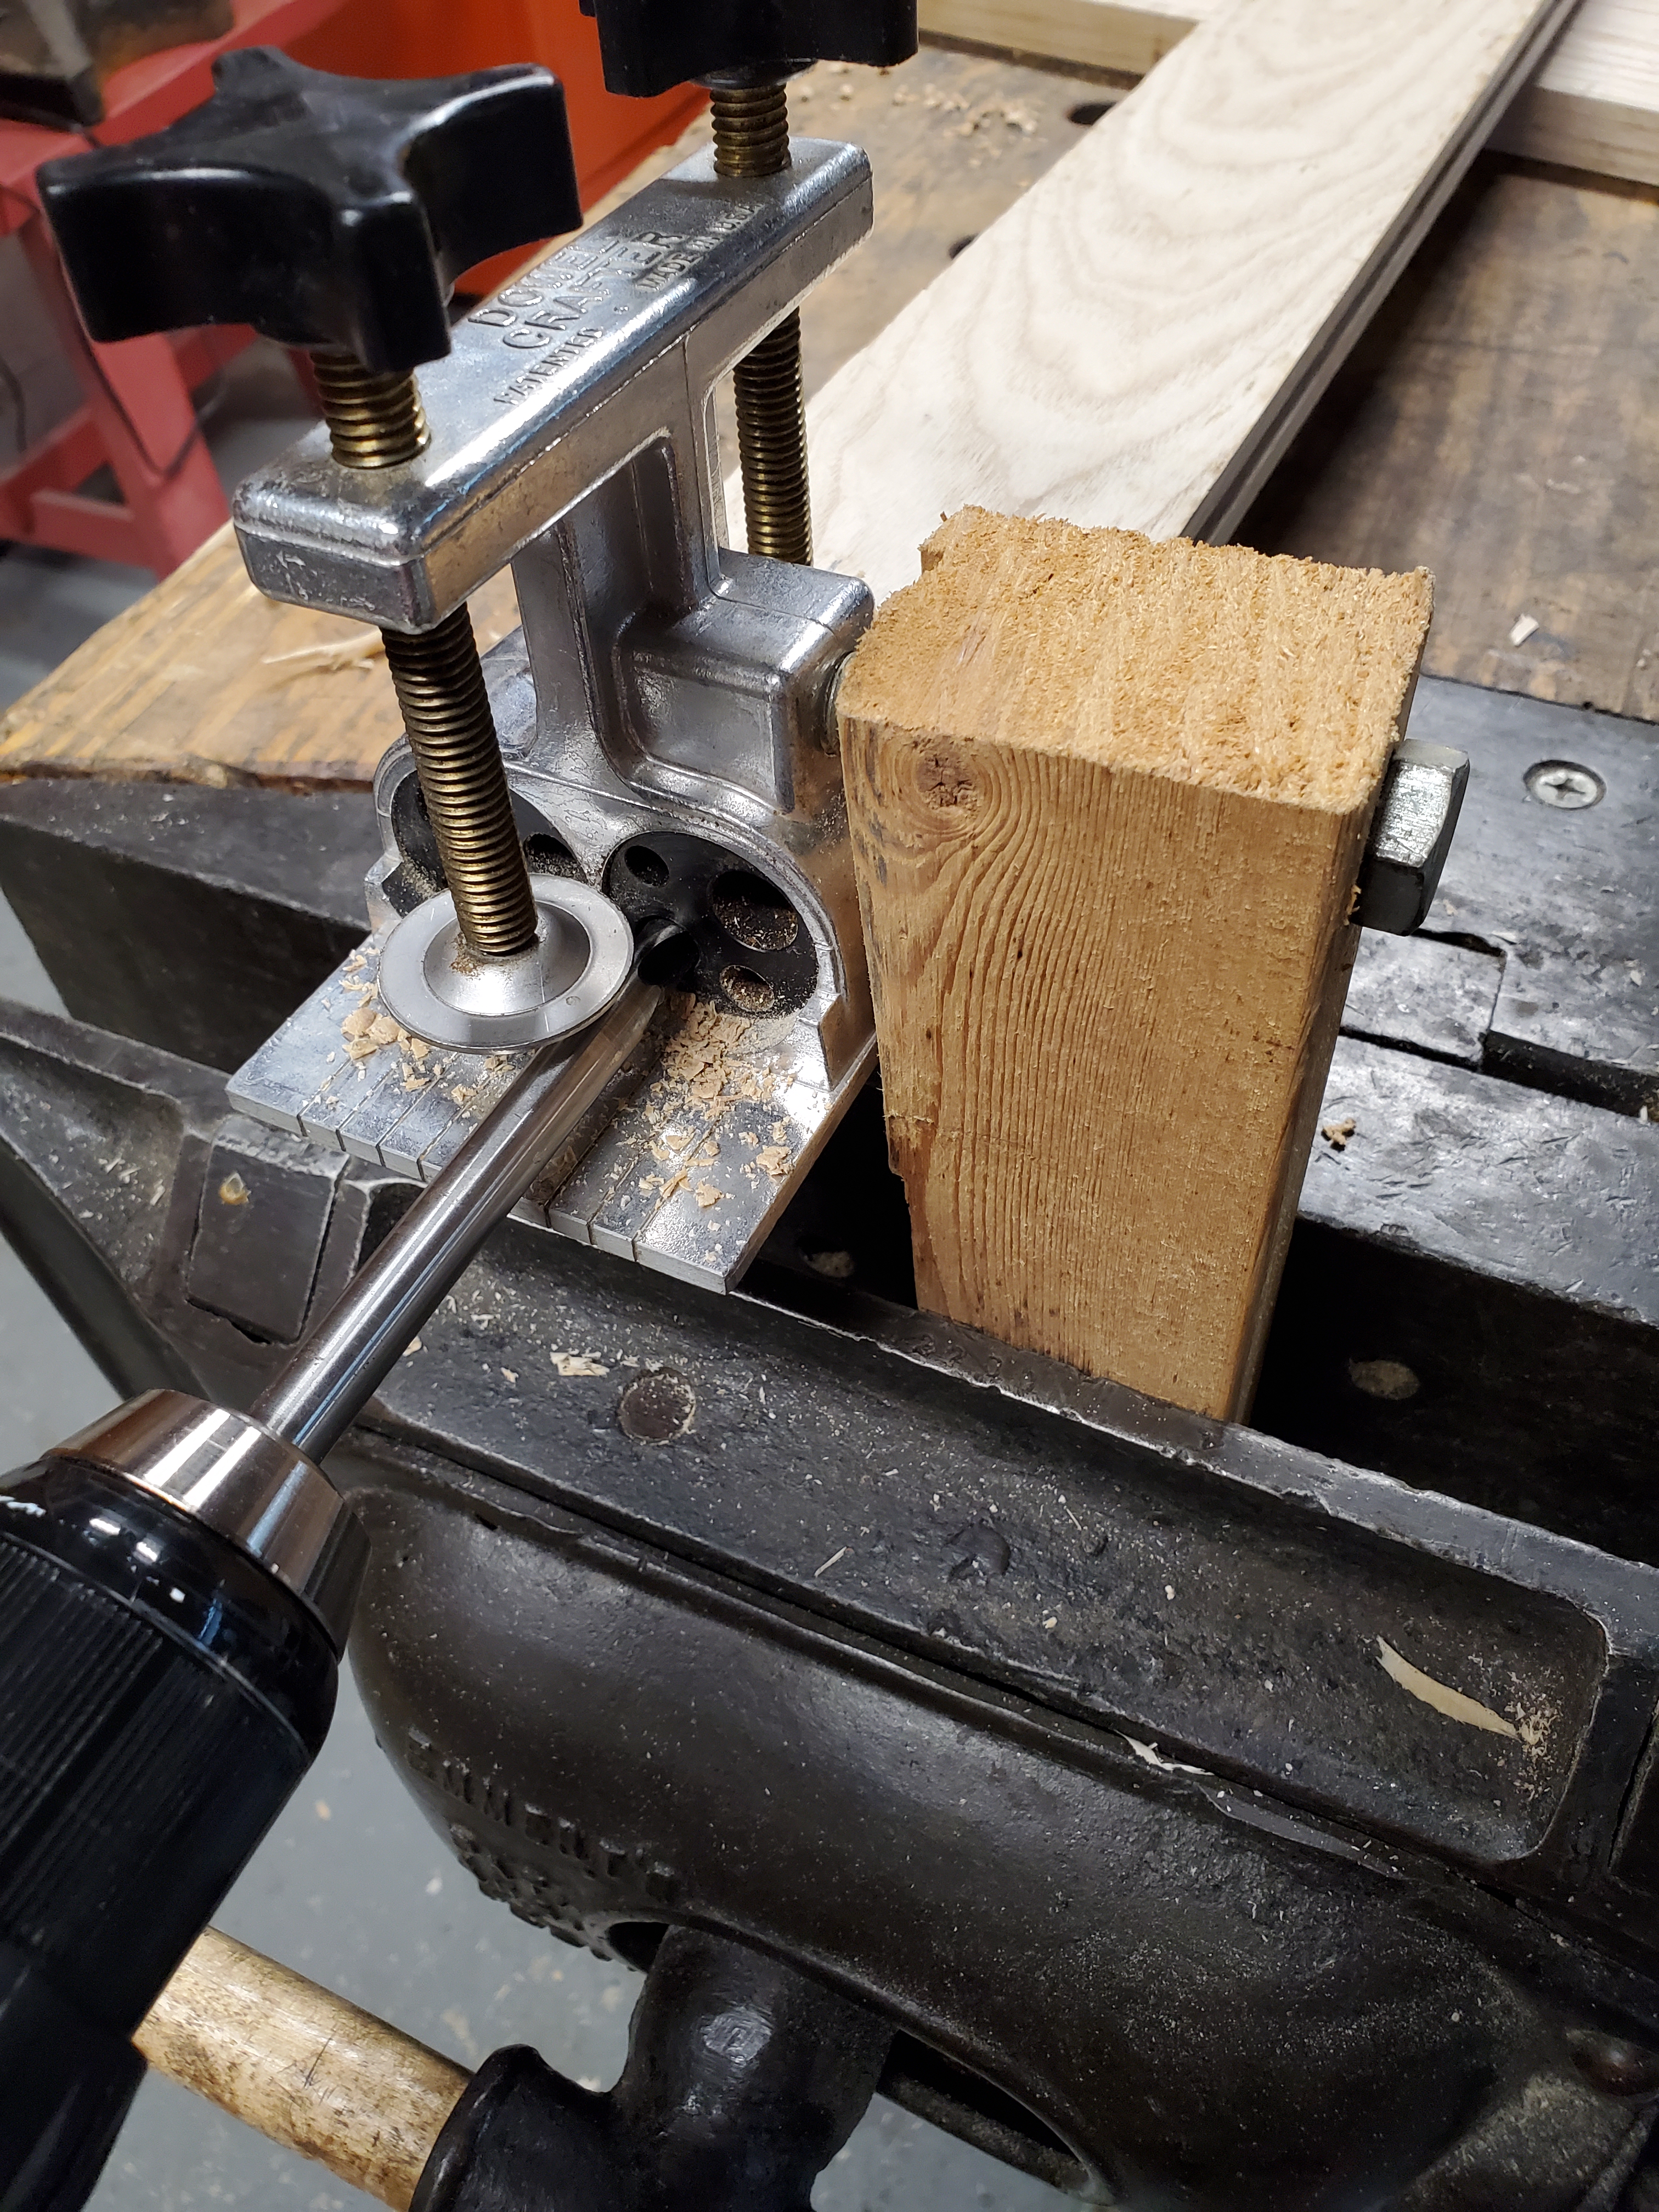
You then line up your mark with one of the alphabet letters on the jig and clamp it down. Then you flip it over and drill your holes through the circular black guides. The two guides spin and lock in place with a nut depending on how big of a dowel you’re using. Once you drill your “X” hole you repeat the process for the “O” hole.
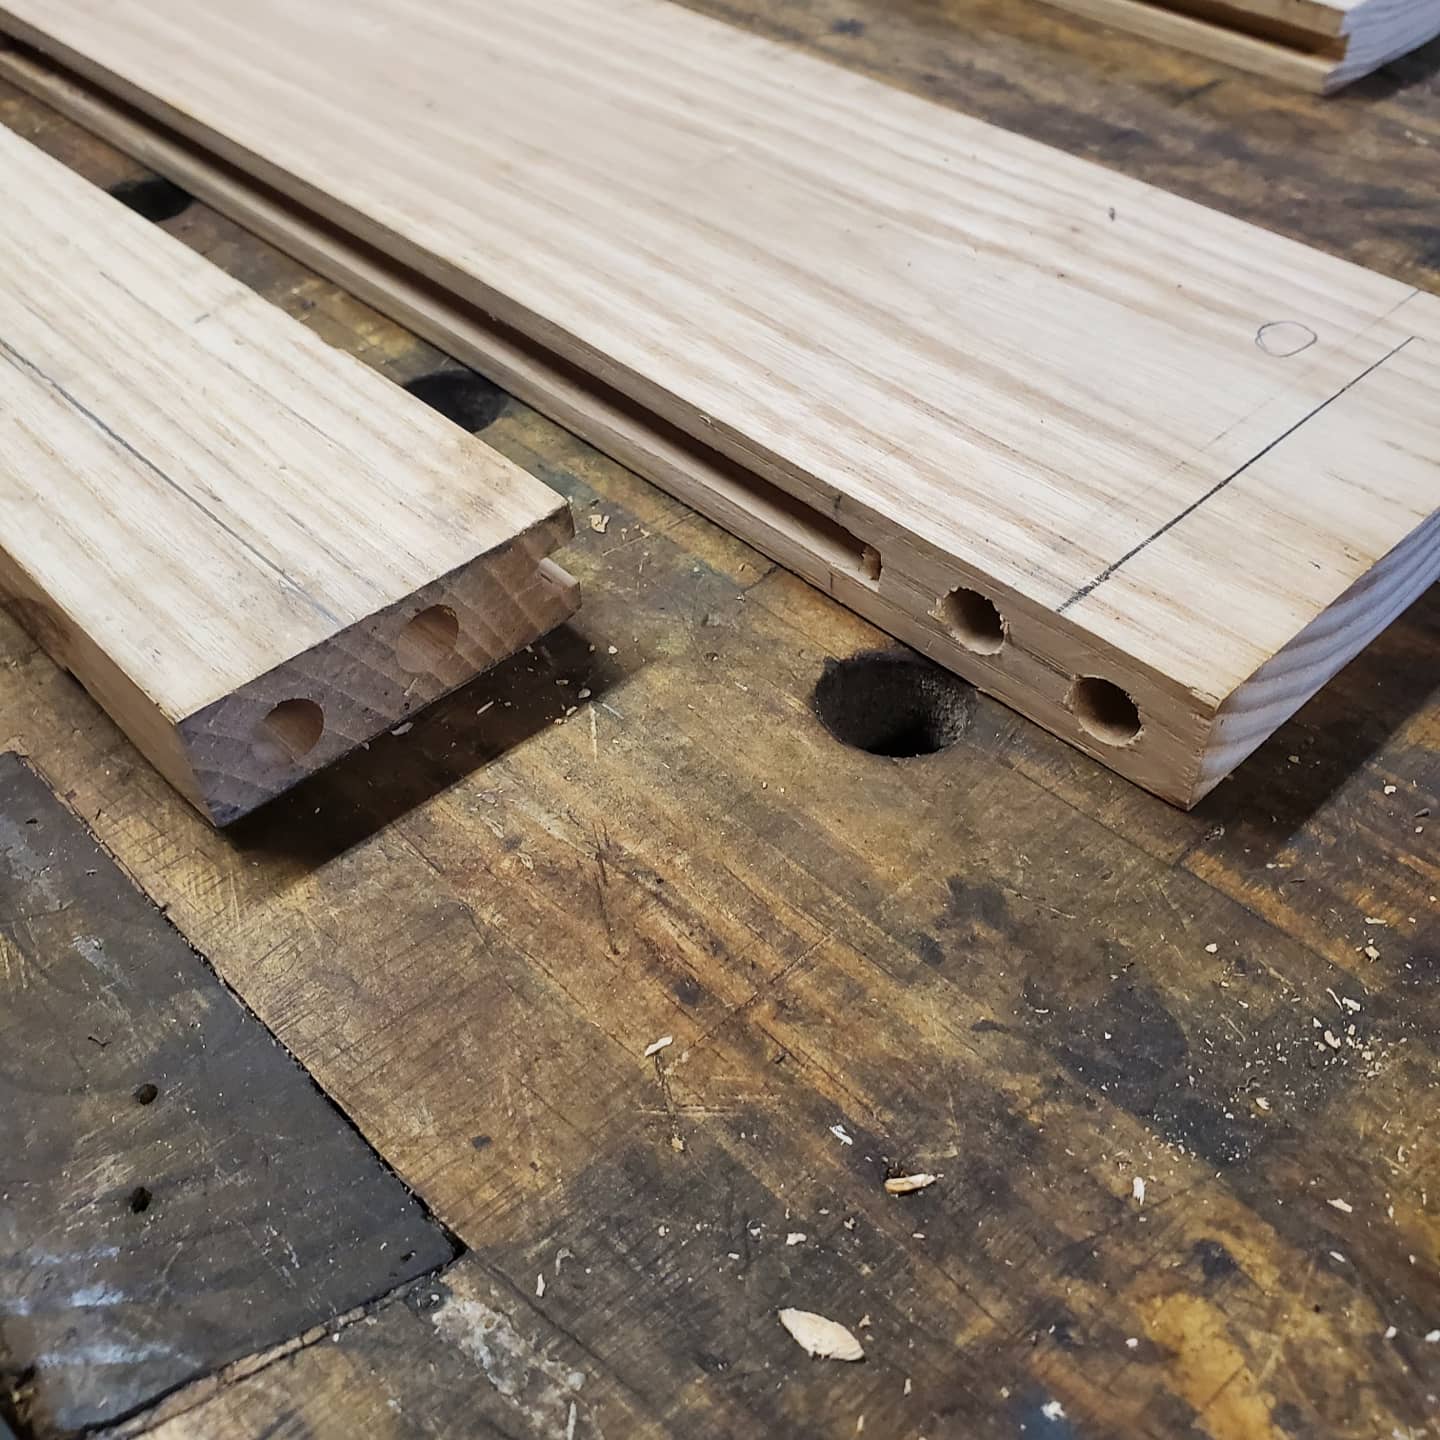
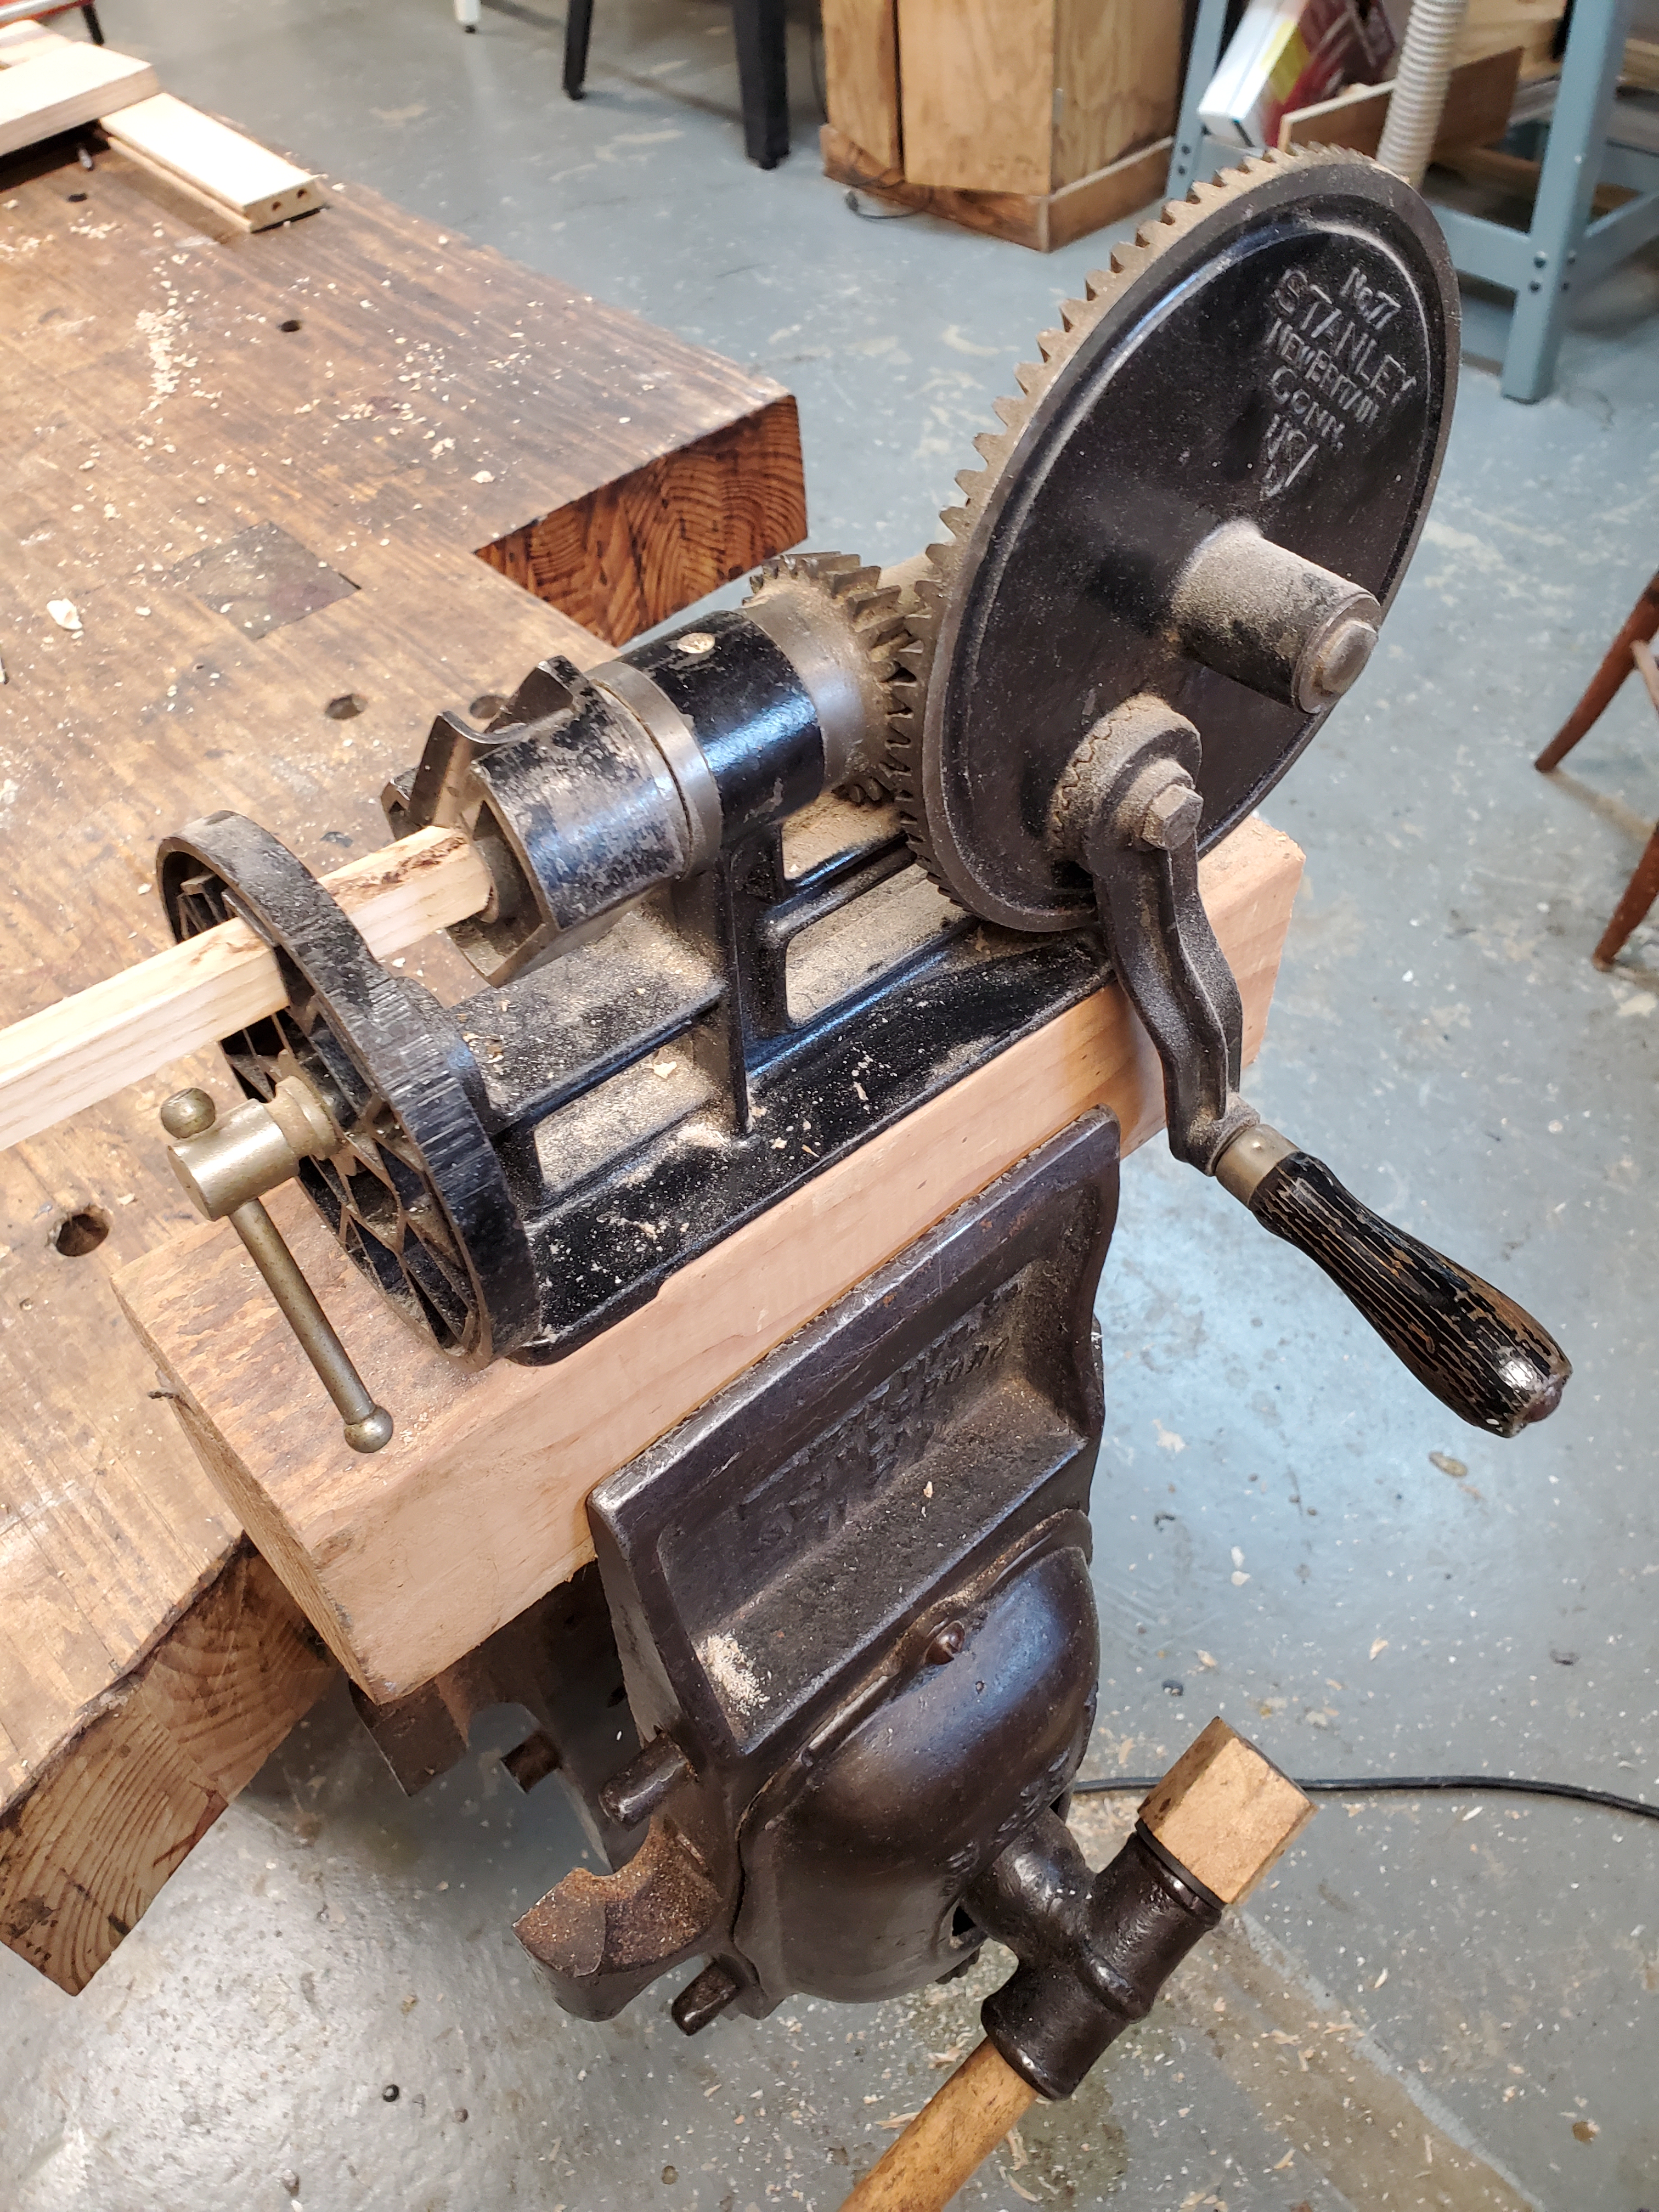
You now have four holes that correspond with eachother. Next you can either use dowels or in my case, make a dowel with my Stanley No77 Dowel Making machine. I then cut the dowels and punch them through my Lie Nielsen Dowel Plate so they are the perfect diameter. When sticking them in the holes, they line up perfectly, giving me a nice tight fitting and strong joint.
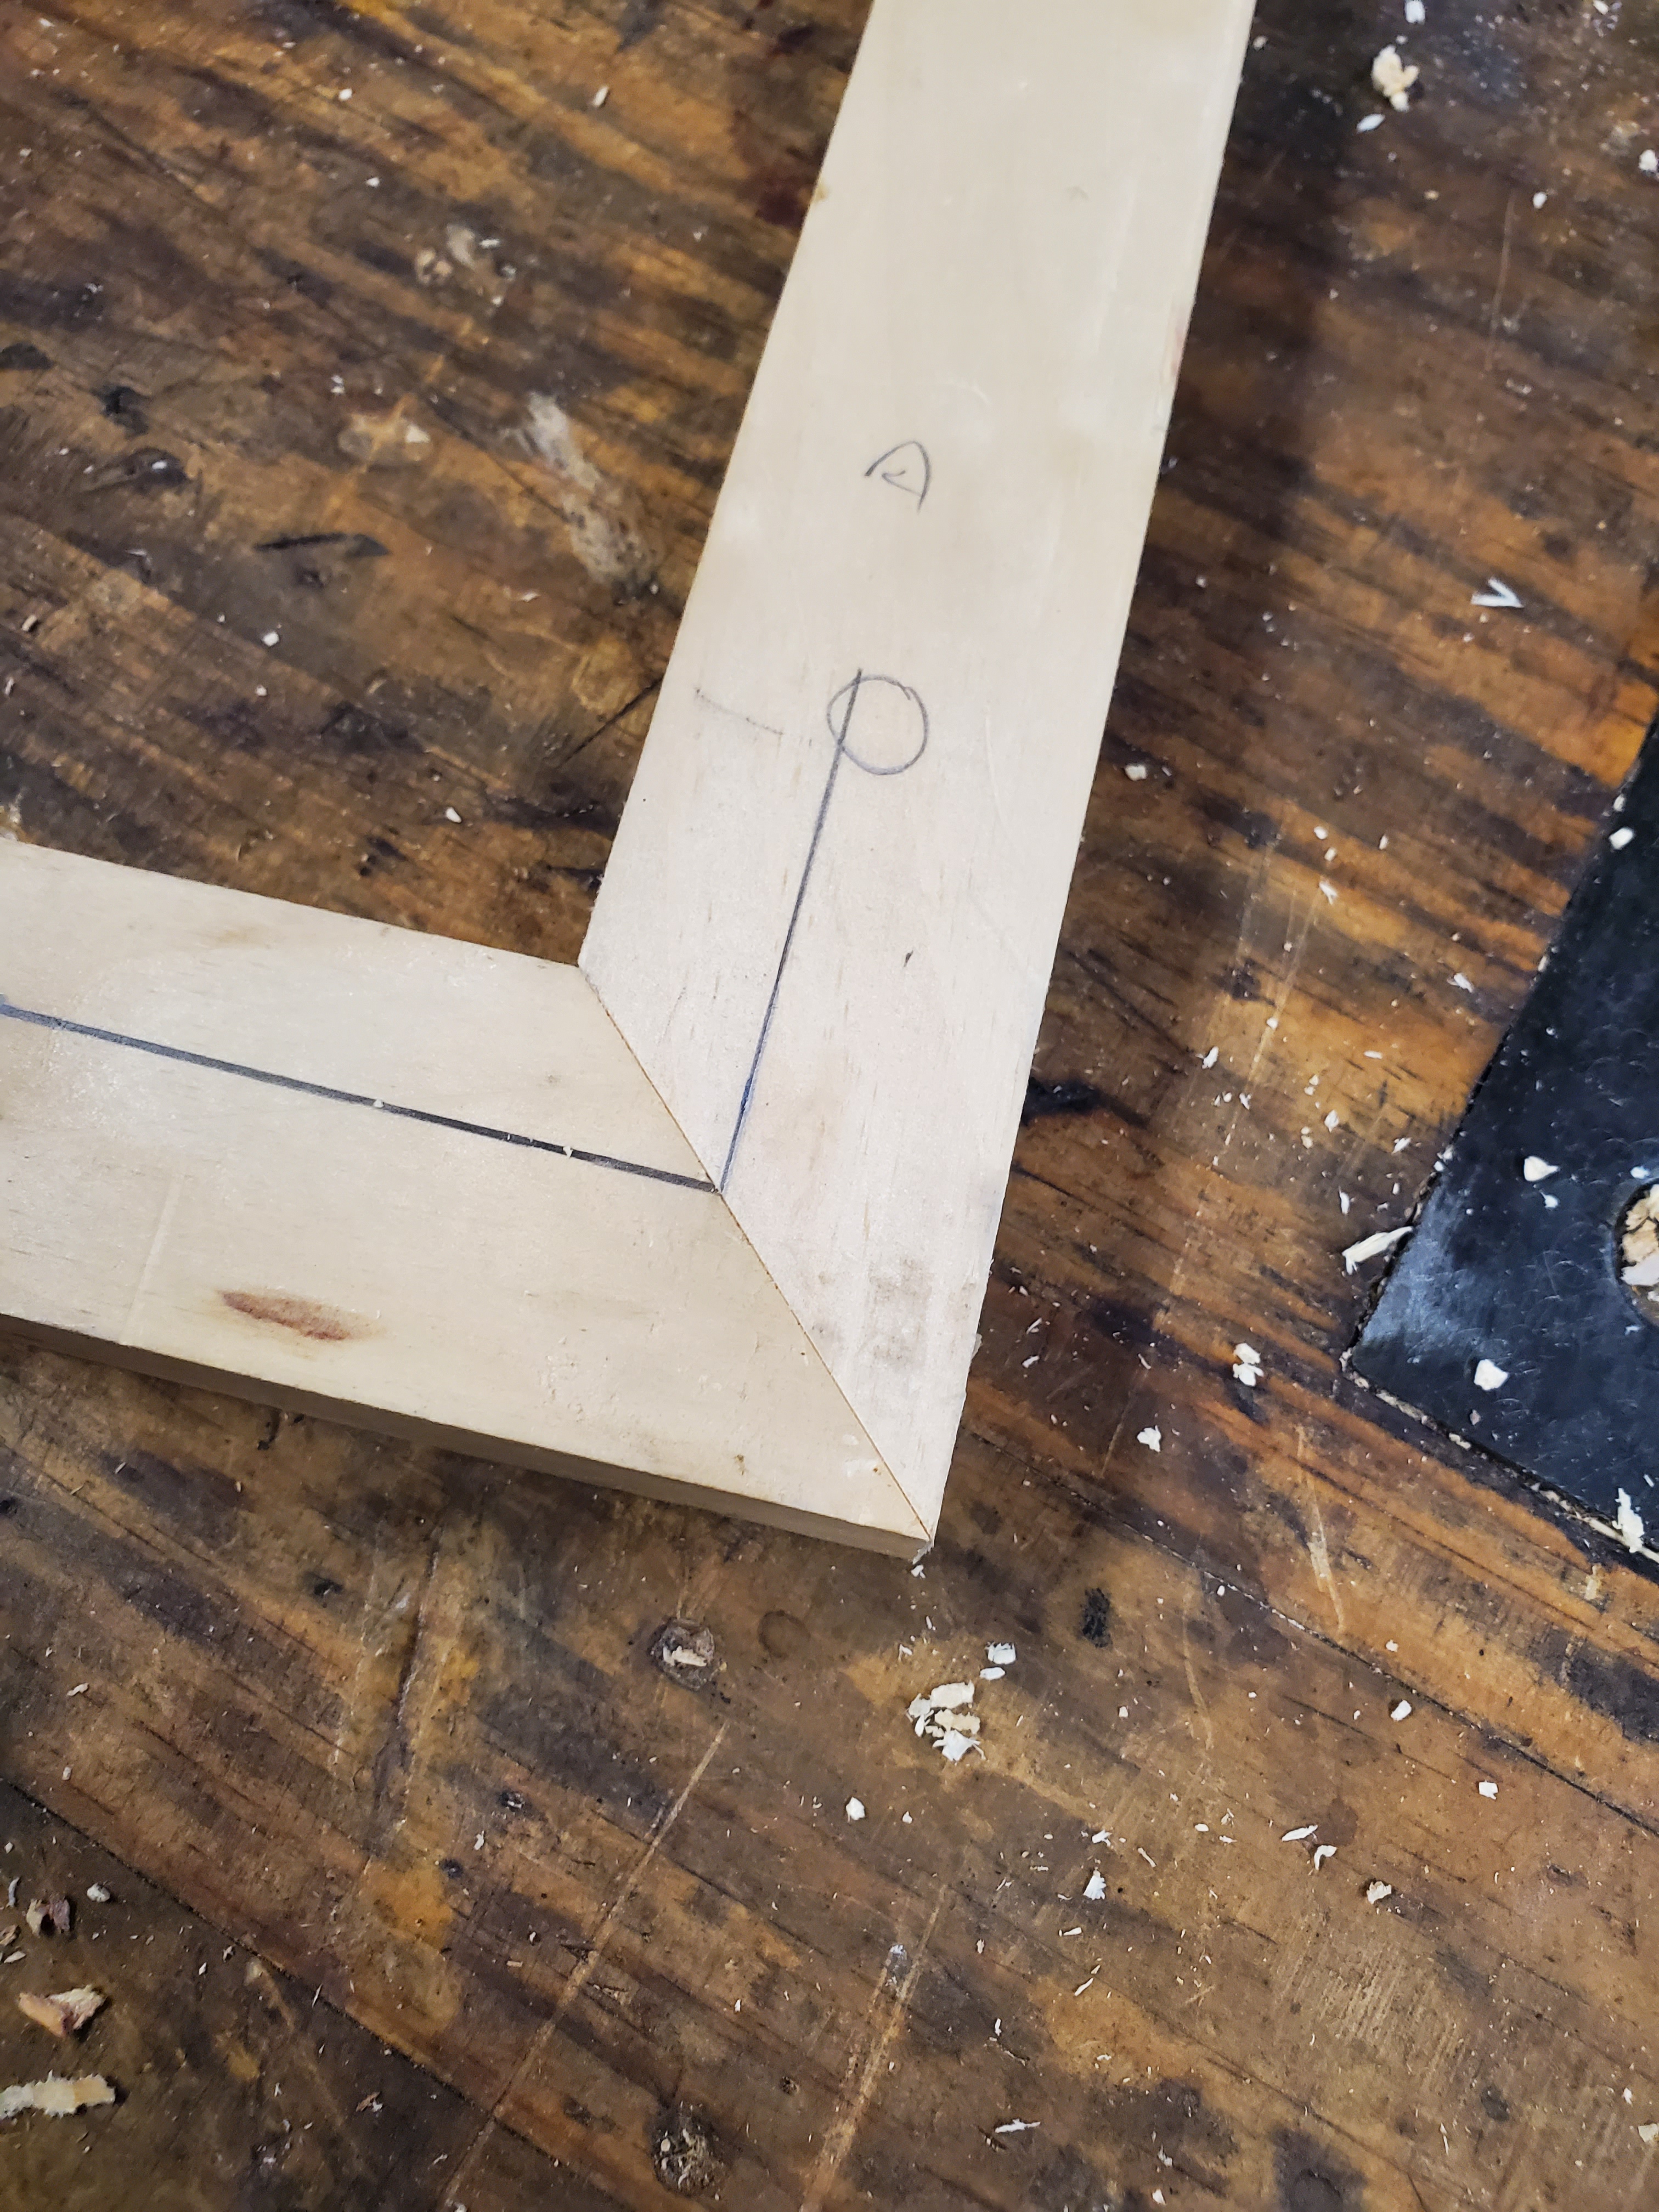
This jig can also make dowelled miter cuts but you have to do it bass-ackwards. You first take your two pieces and mark your line. Then you drill your holes just as before. The jig had plastic 90 degree dowels you could buy as a kit. You can see how many plastic dowels I have used over the past 35 years.
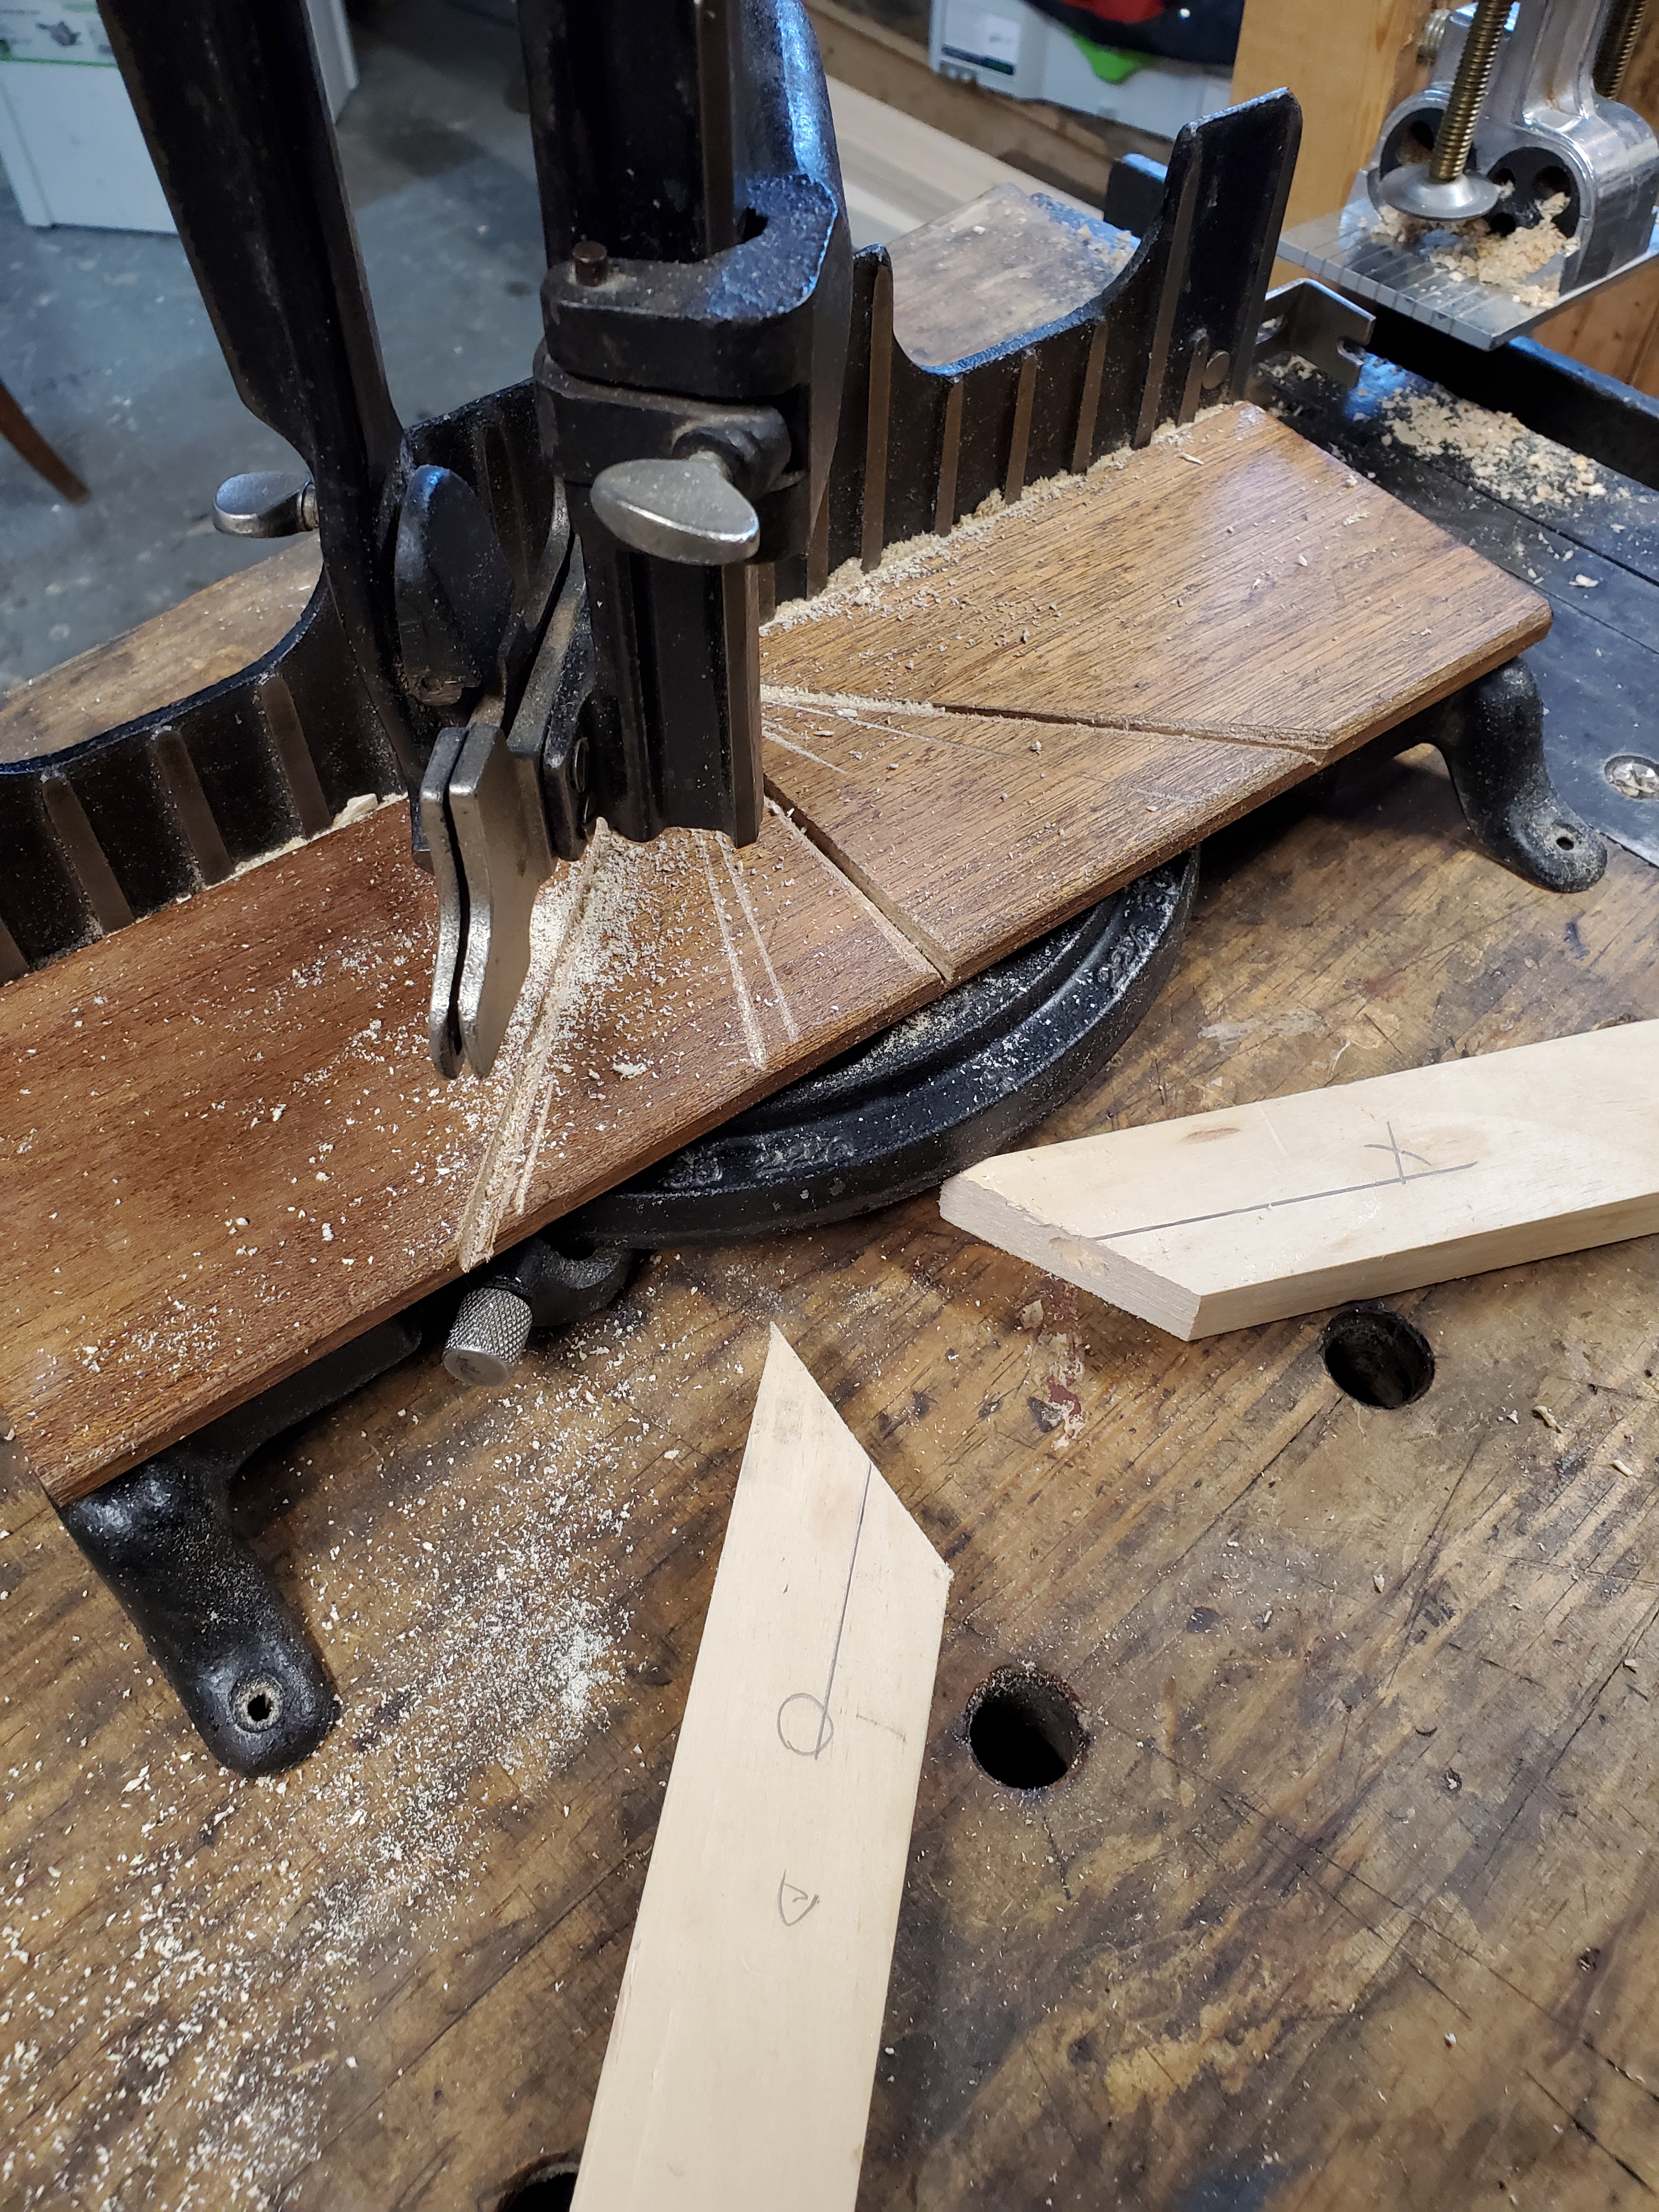
After the holes are drilled, you cut your 45’s on the miter box and glue them together. The joint is remarkably strong. By far the strongest miter joint I’ve ever made.
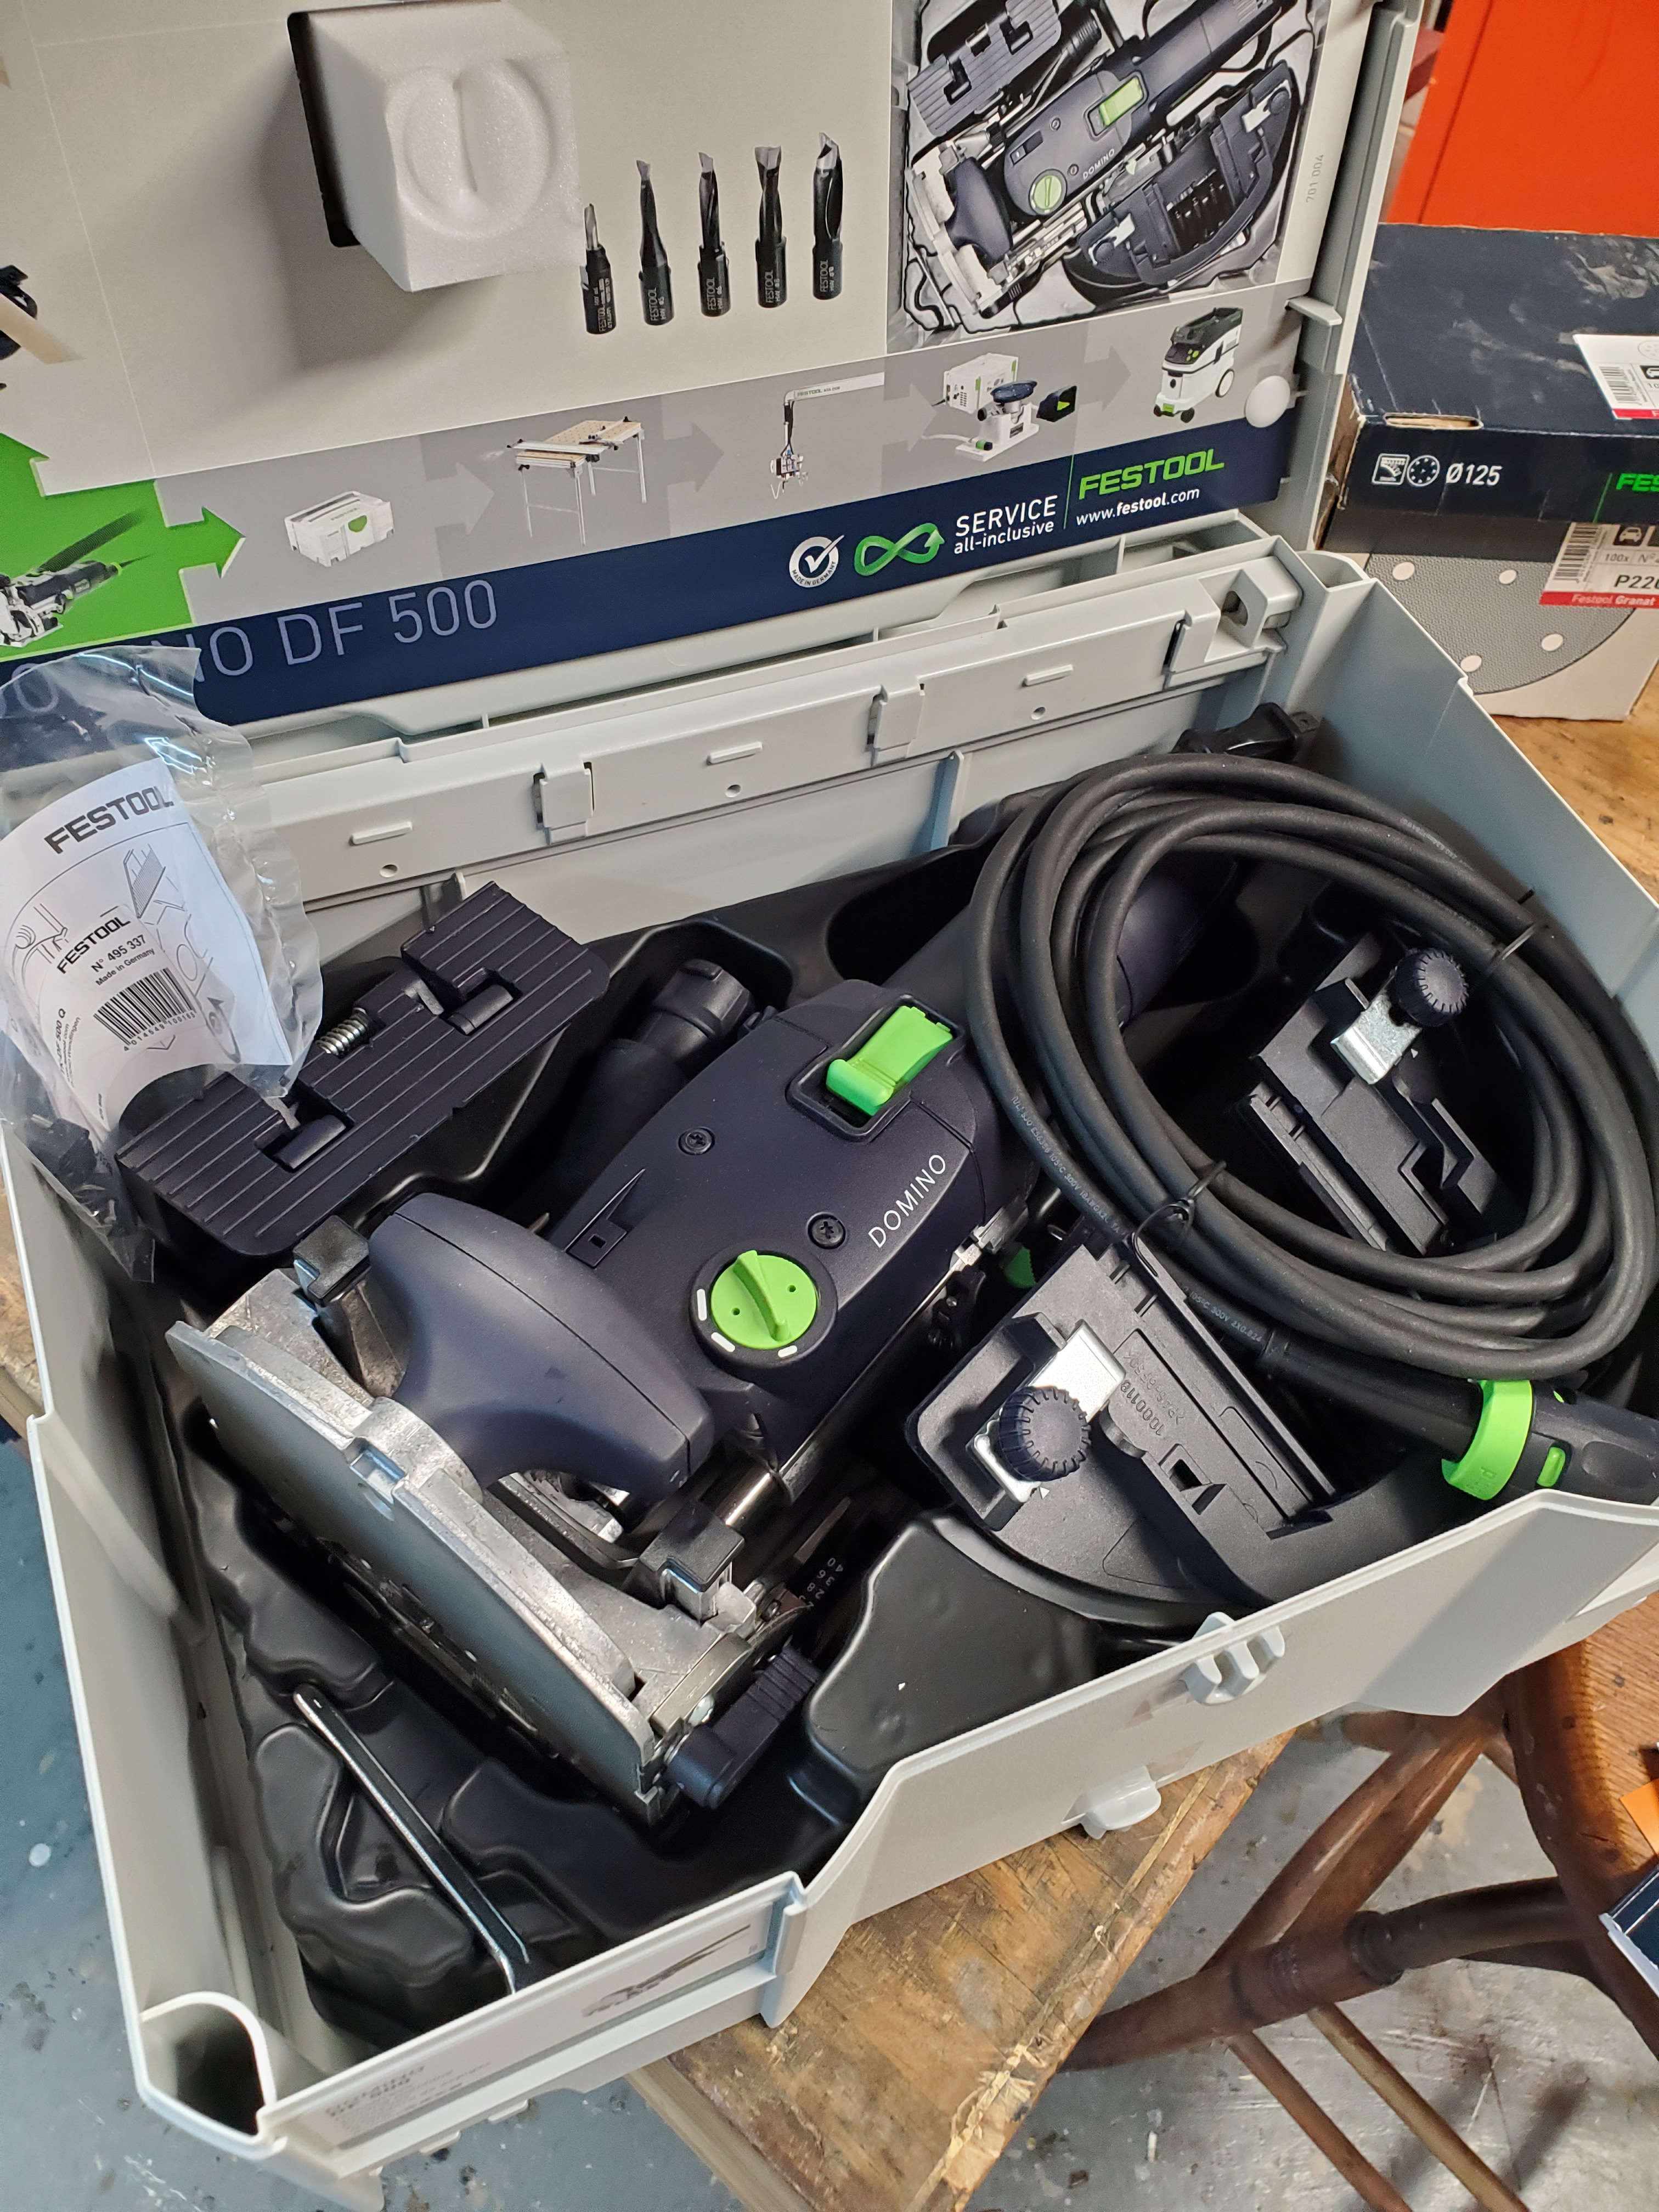
You can buy this jig on eBay for about $20 but good luck finding the 90 degree plastic dowels. I love using this jig so much that I went out and bought a Festool Domino. Go figure. I hate dowel joints!
About 12 years ago, we decided to update our kitchen from the 1980’s colonial style cabinetry into the new century with a new Tuscan style of cabinetry. It looked great for years but, after we got hit with the tornado last year, Anita wanted to use the opportunity to update the kitchen again into a modern farmhouse style of kitchen. This is the only photo I have of the cabintery I made when we were reinstalling them after the tornado.
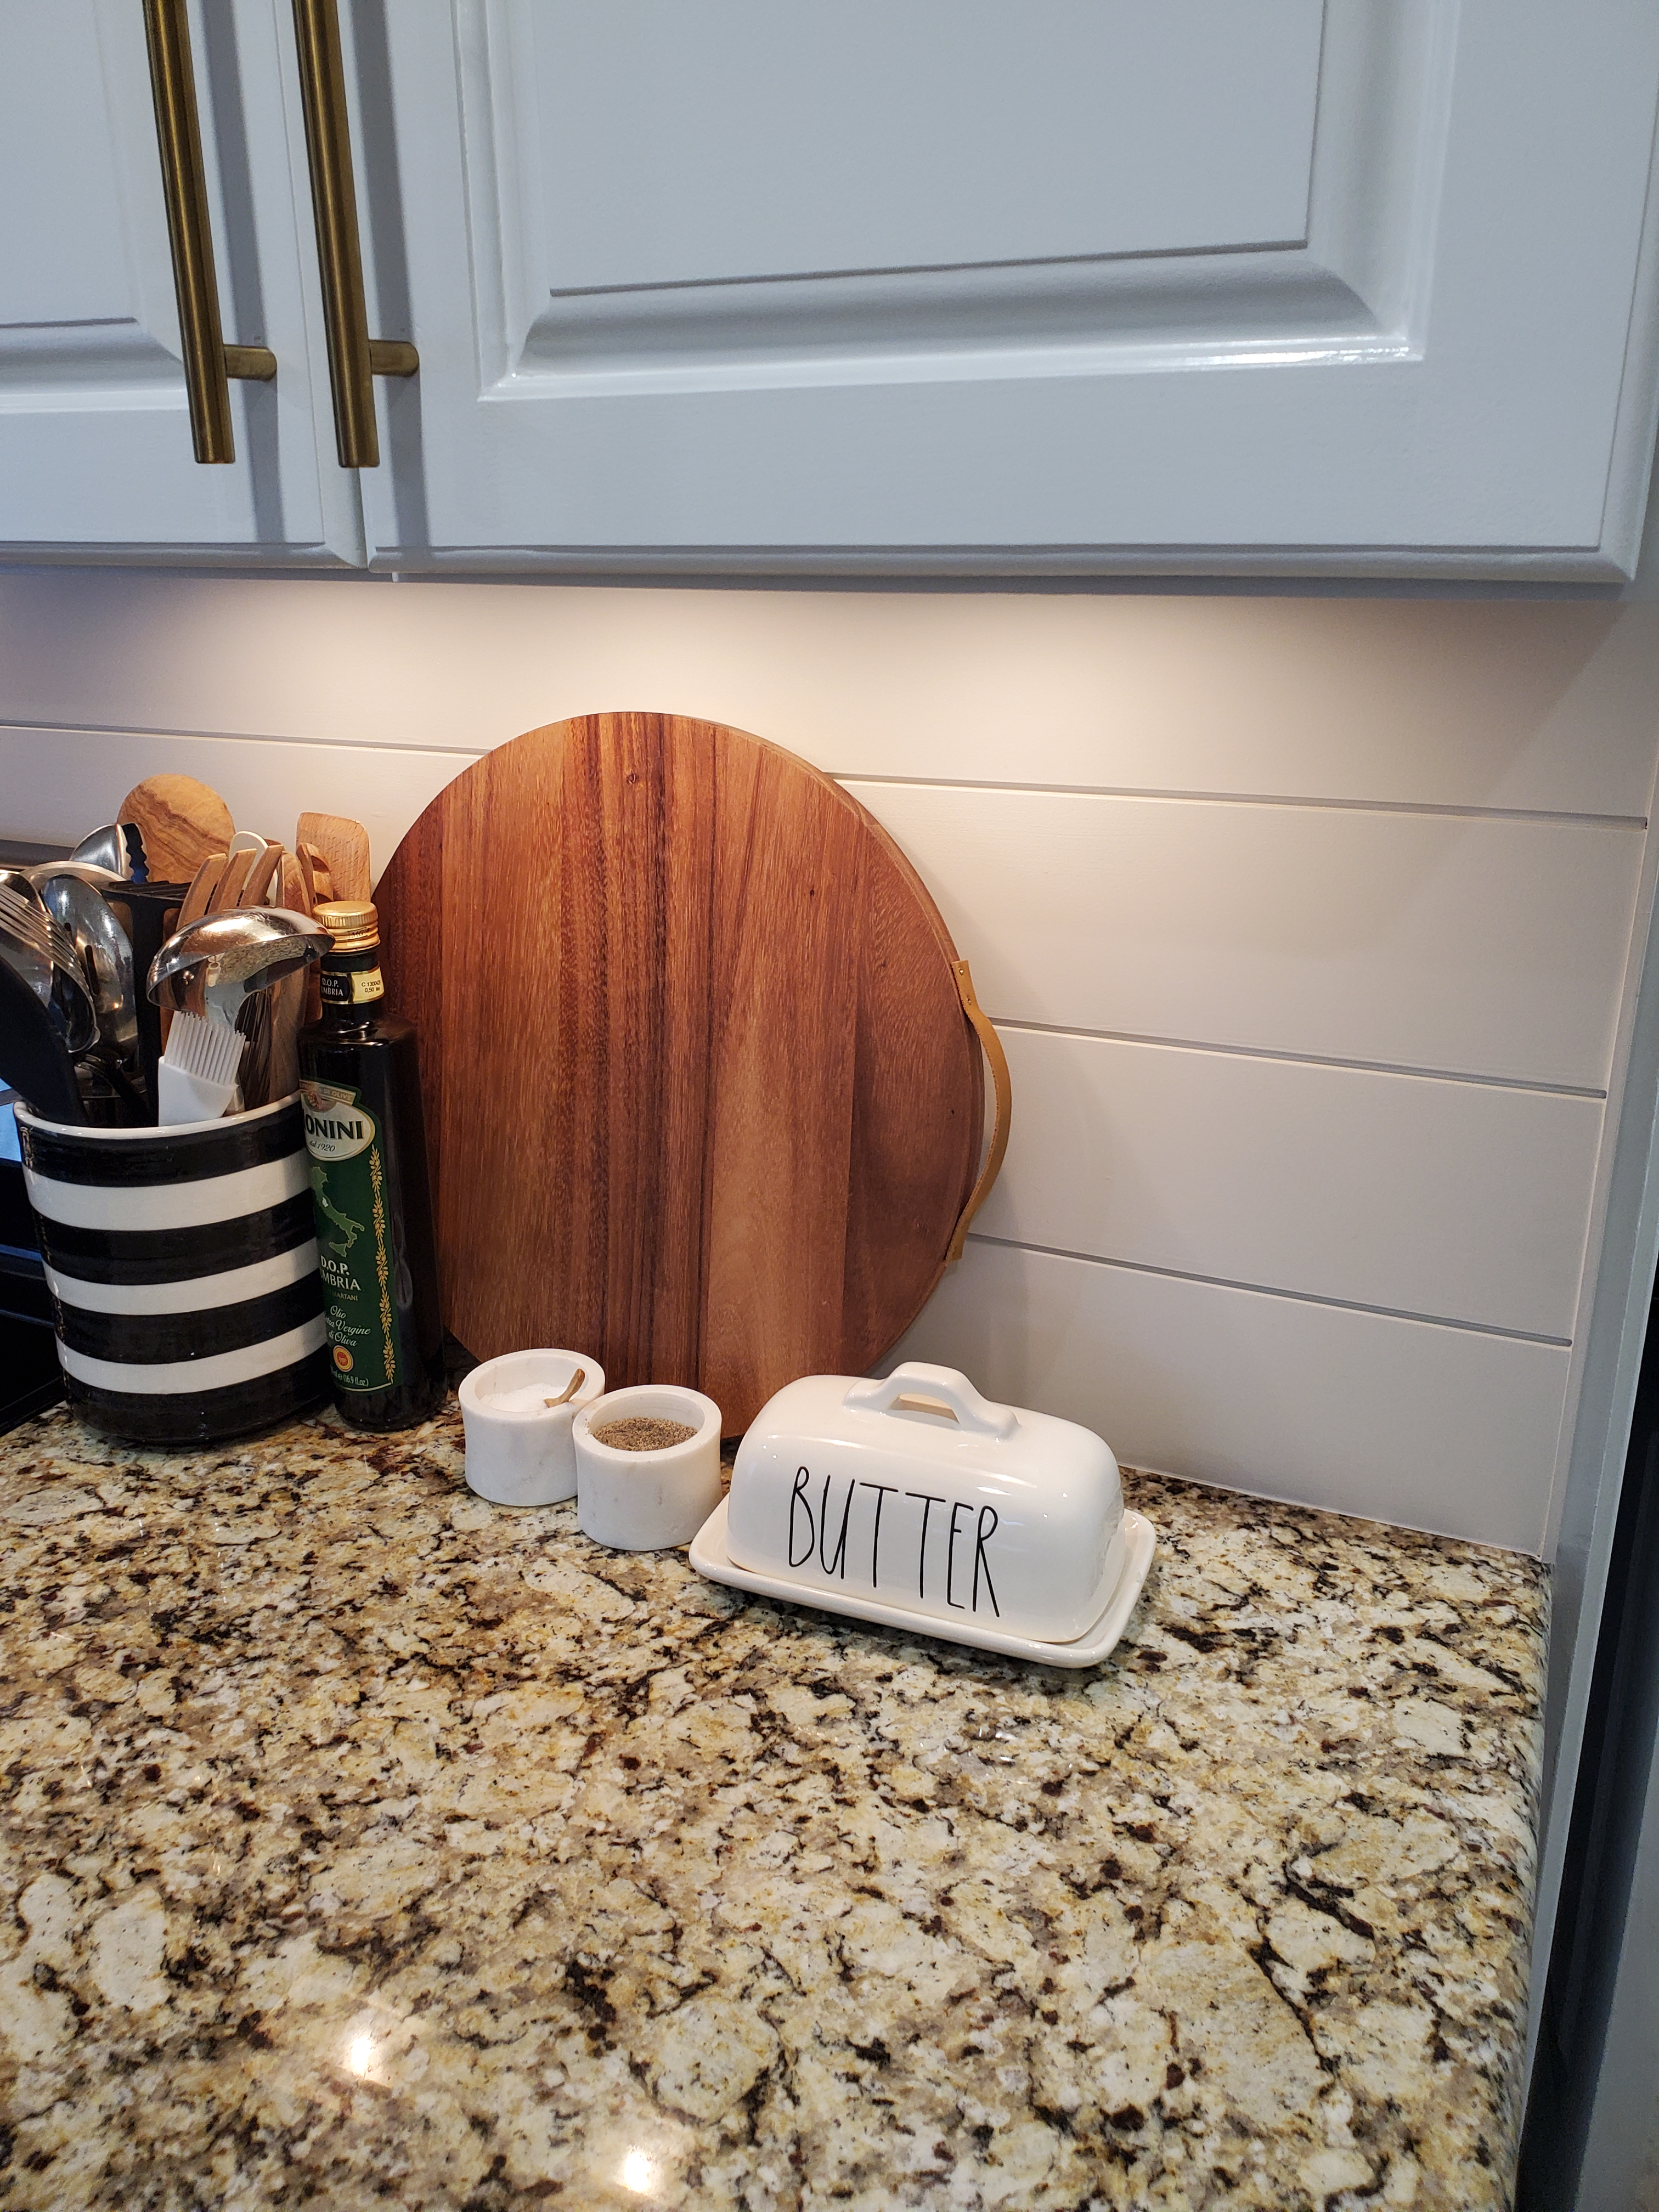
Luckily, the only thing that really needed to be done was simply paint the cabinets, get new hardware and update the backsplash. Anita went with a two toned cabinetry with white on the top and dark gray on the bottom.
We took down the Tuscan style tile and installed ship lap as the backsplash. It’s been up for the past eight months and has held up better than I would have expected. There has been no staining on the wood whatsoever even though the kitchen gets used on a daily basis.
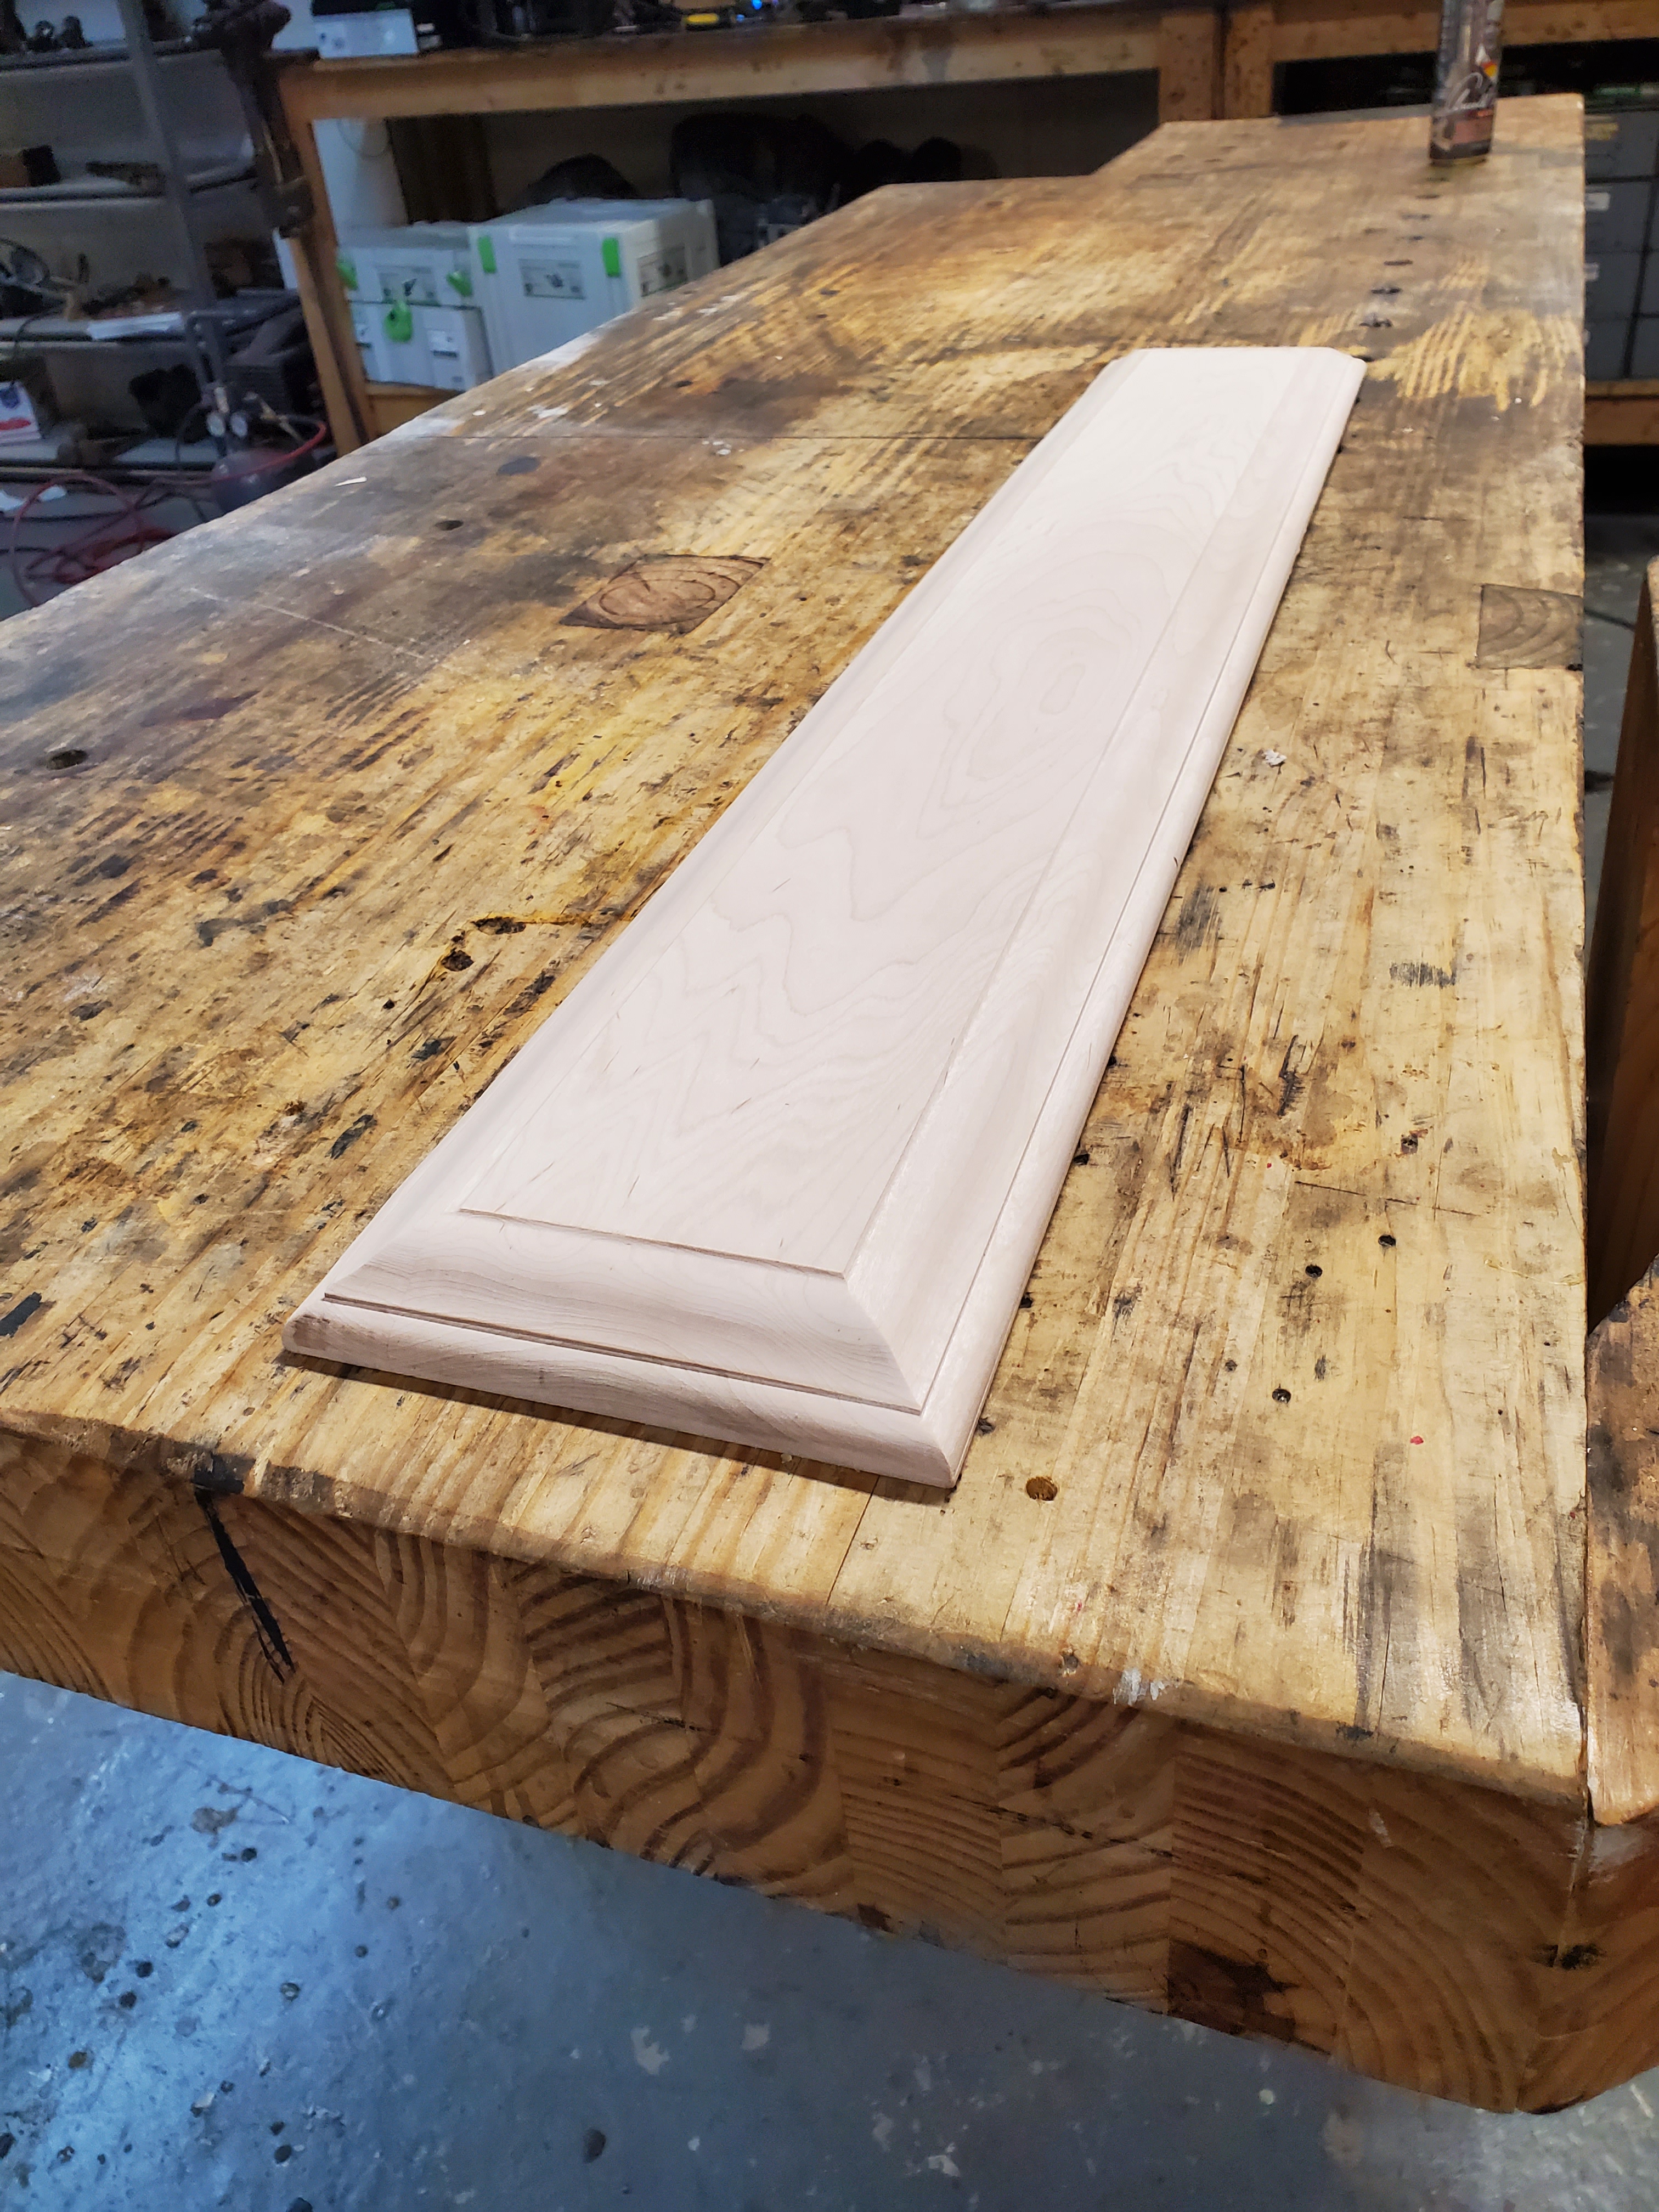
The biggest issue we had with the update was the that I had to make a new drawer front for underneath the sink. Before that, we had a wooden fluer de lis applique nailed on the kitchen base.
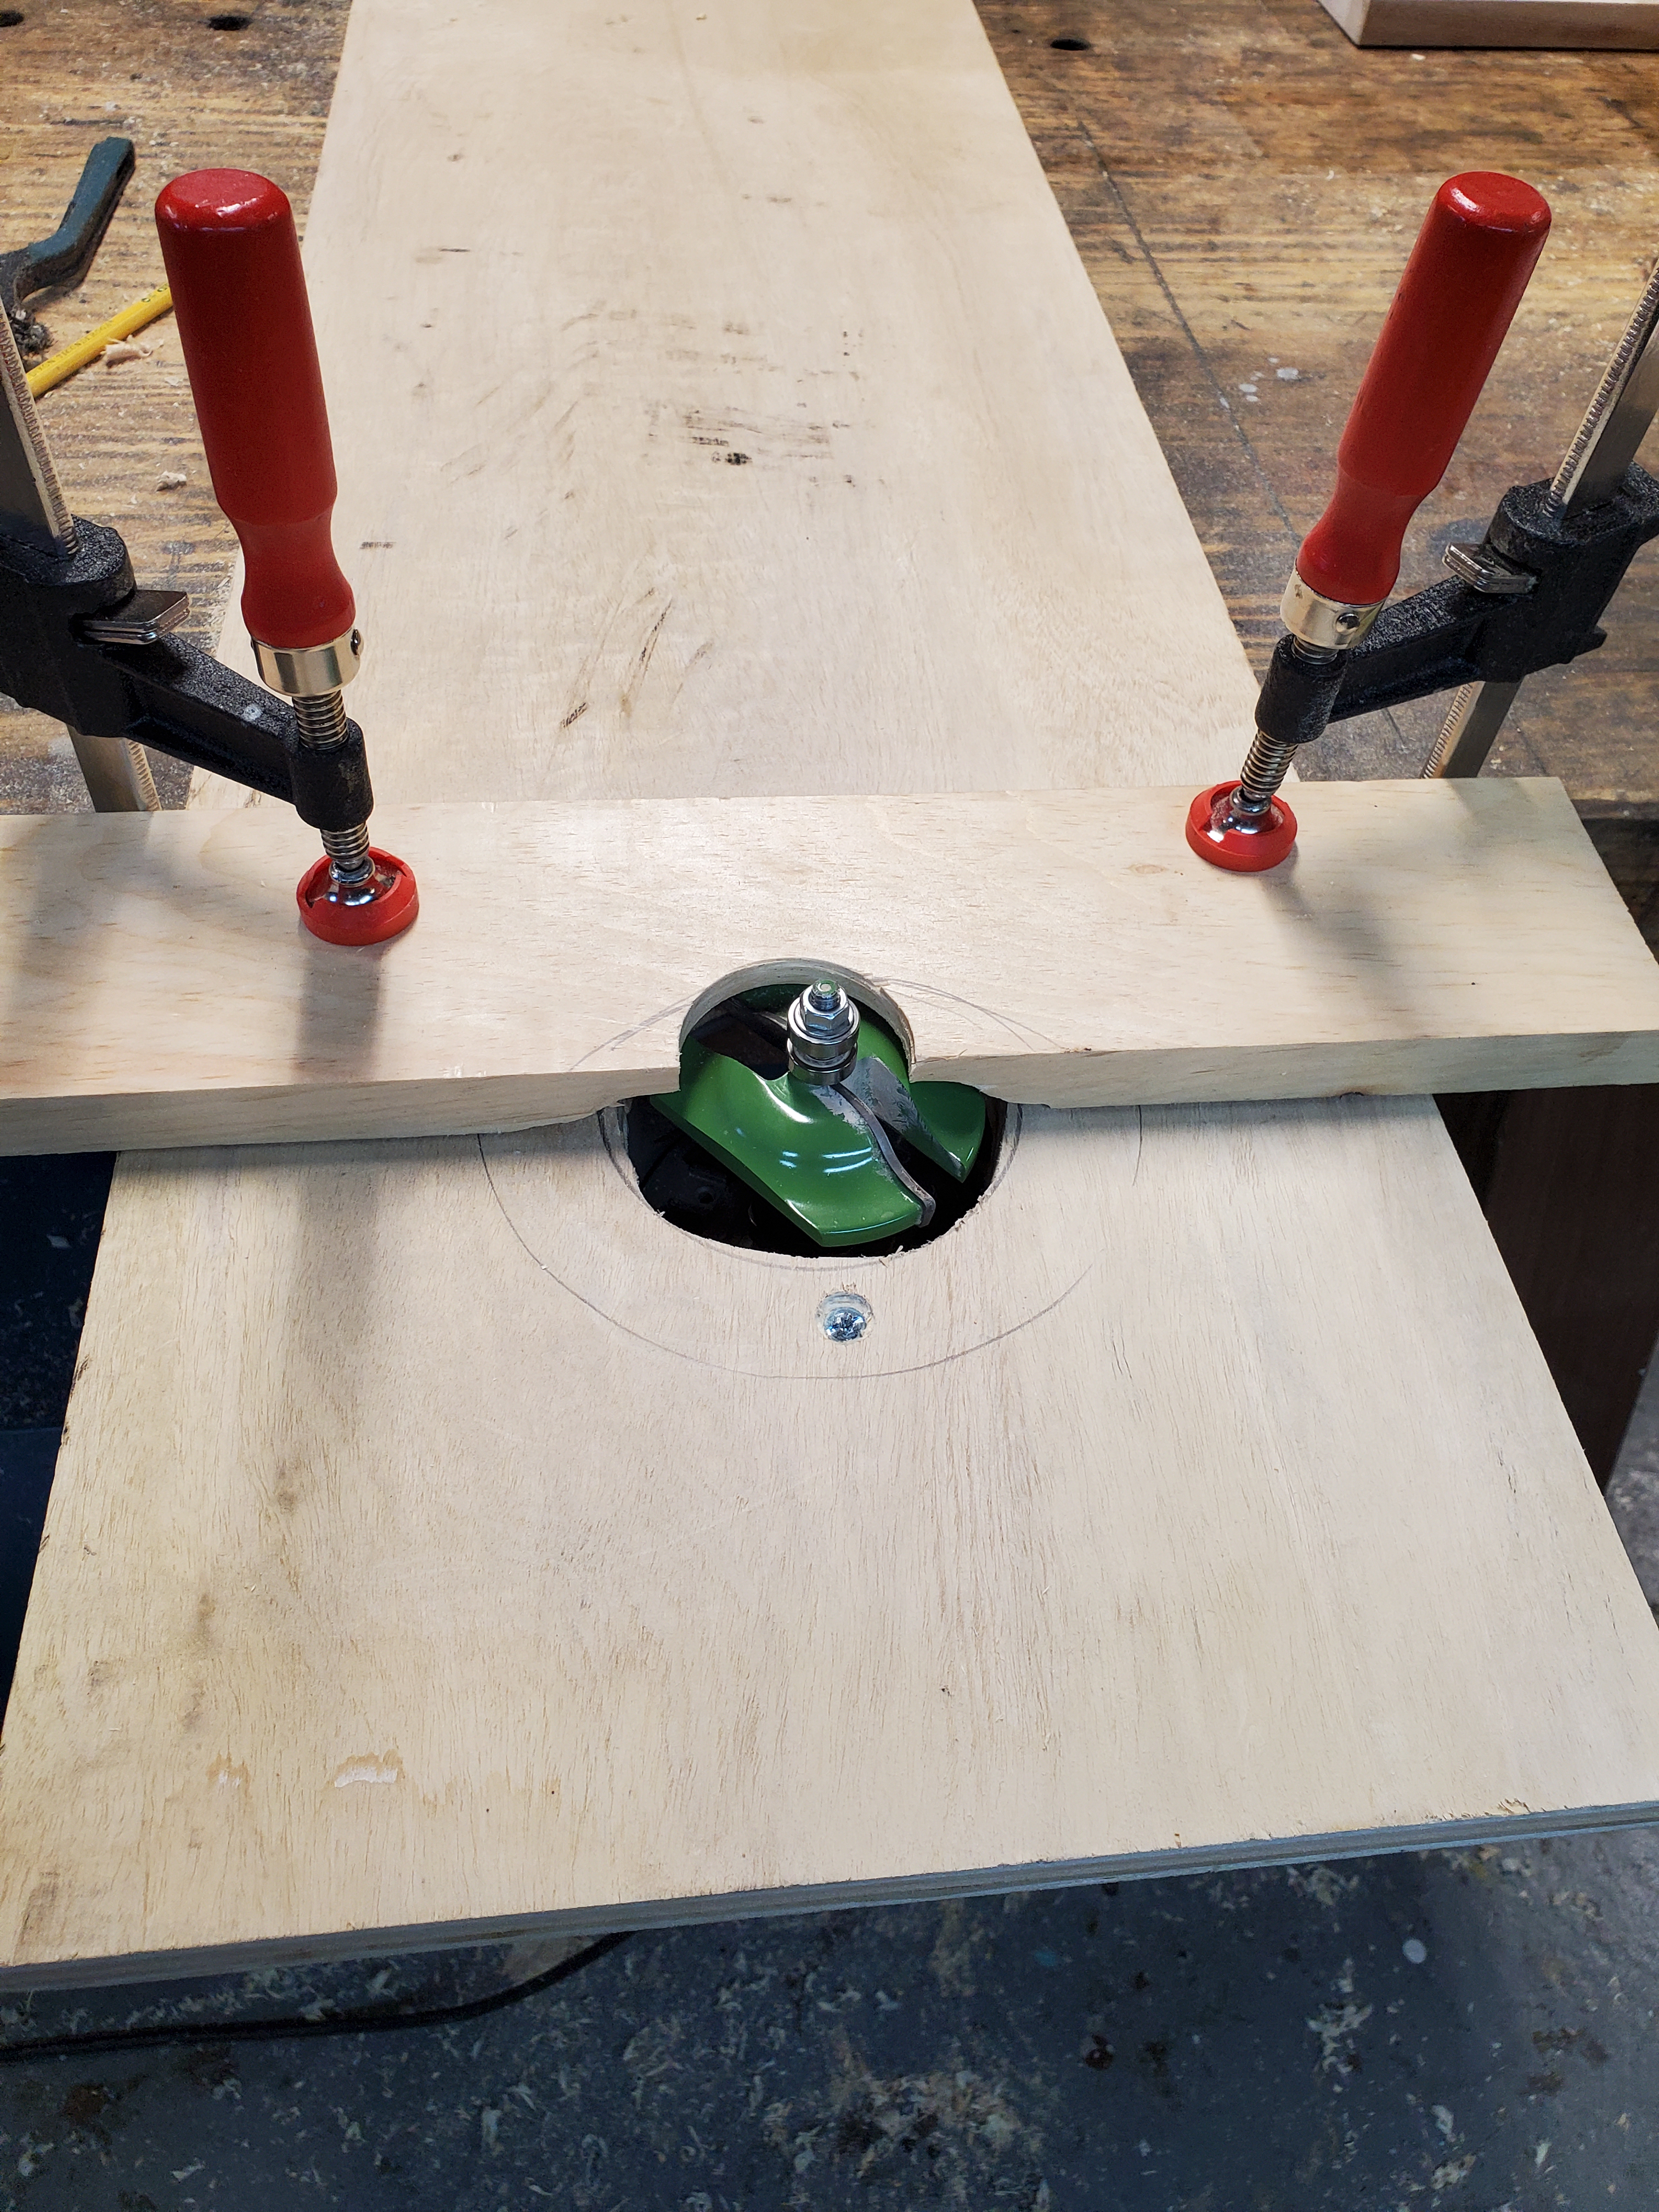
Making the drawer front was going to be a challenge since I no longer owned a router table. I had to jimmy one up real quick so I grabbed a piece of plywood and laid where I wanted the router to sit.
Then I drilled a few holes so that I could install the router with an opening large enough to accept my panel raising bit.
I then grabbed a piece of scrap wood and routed out the underside to act as a fence.
Adding two clamps to hold down the fence, BOOM!, an instant router table. Using a router table like this can be a bit dangerous as I had no safety shields above the bit, but it just kept me on my toes.
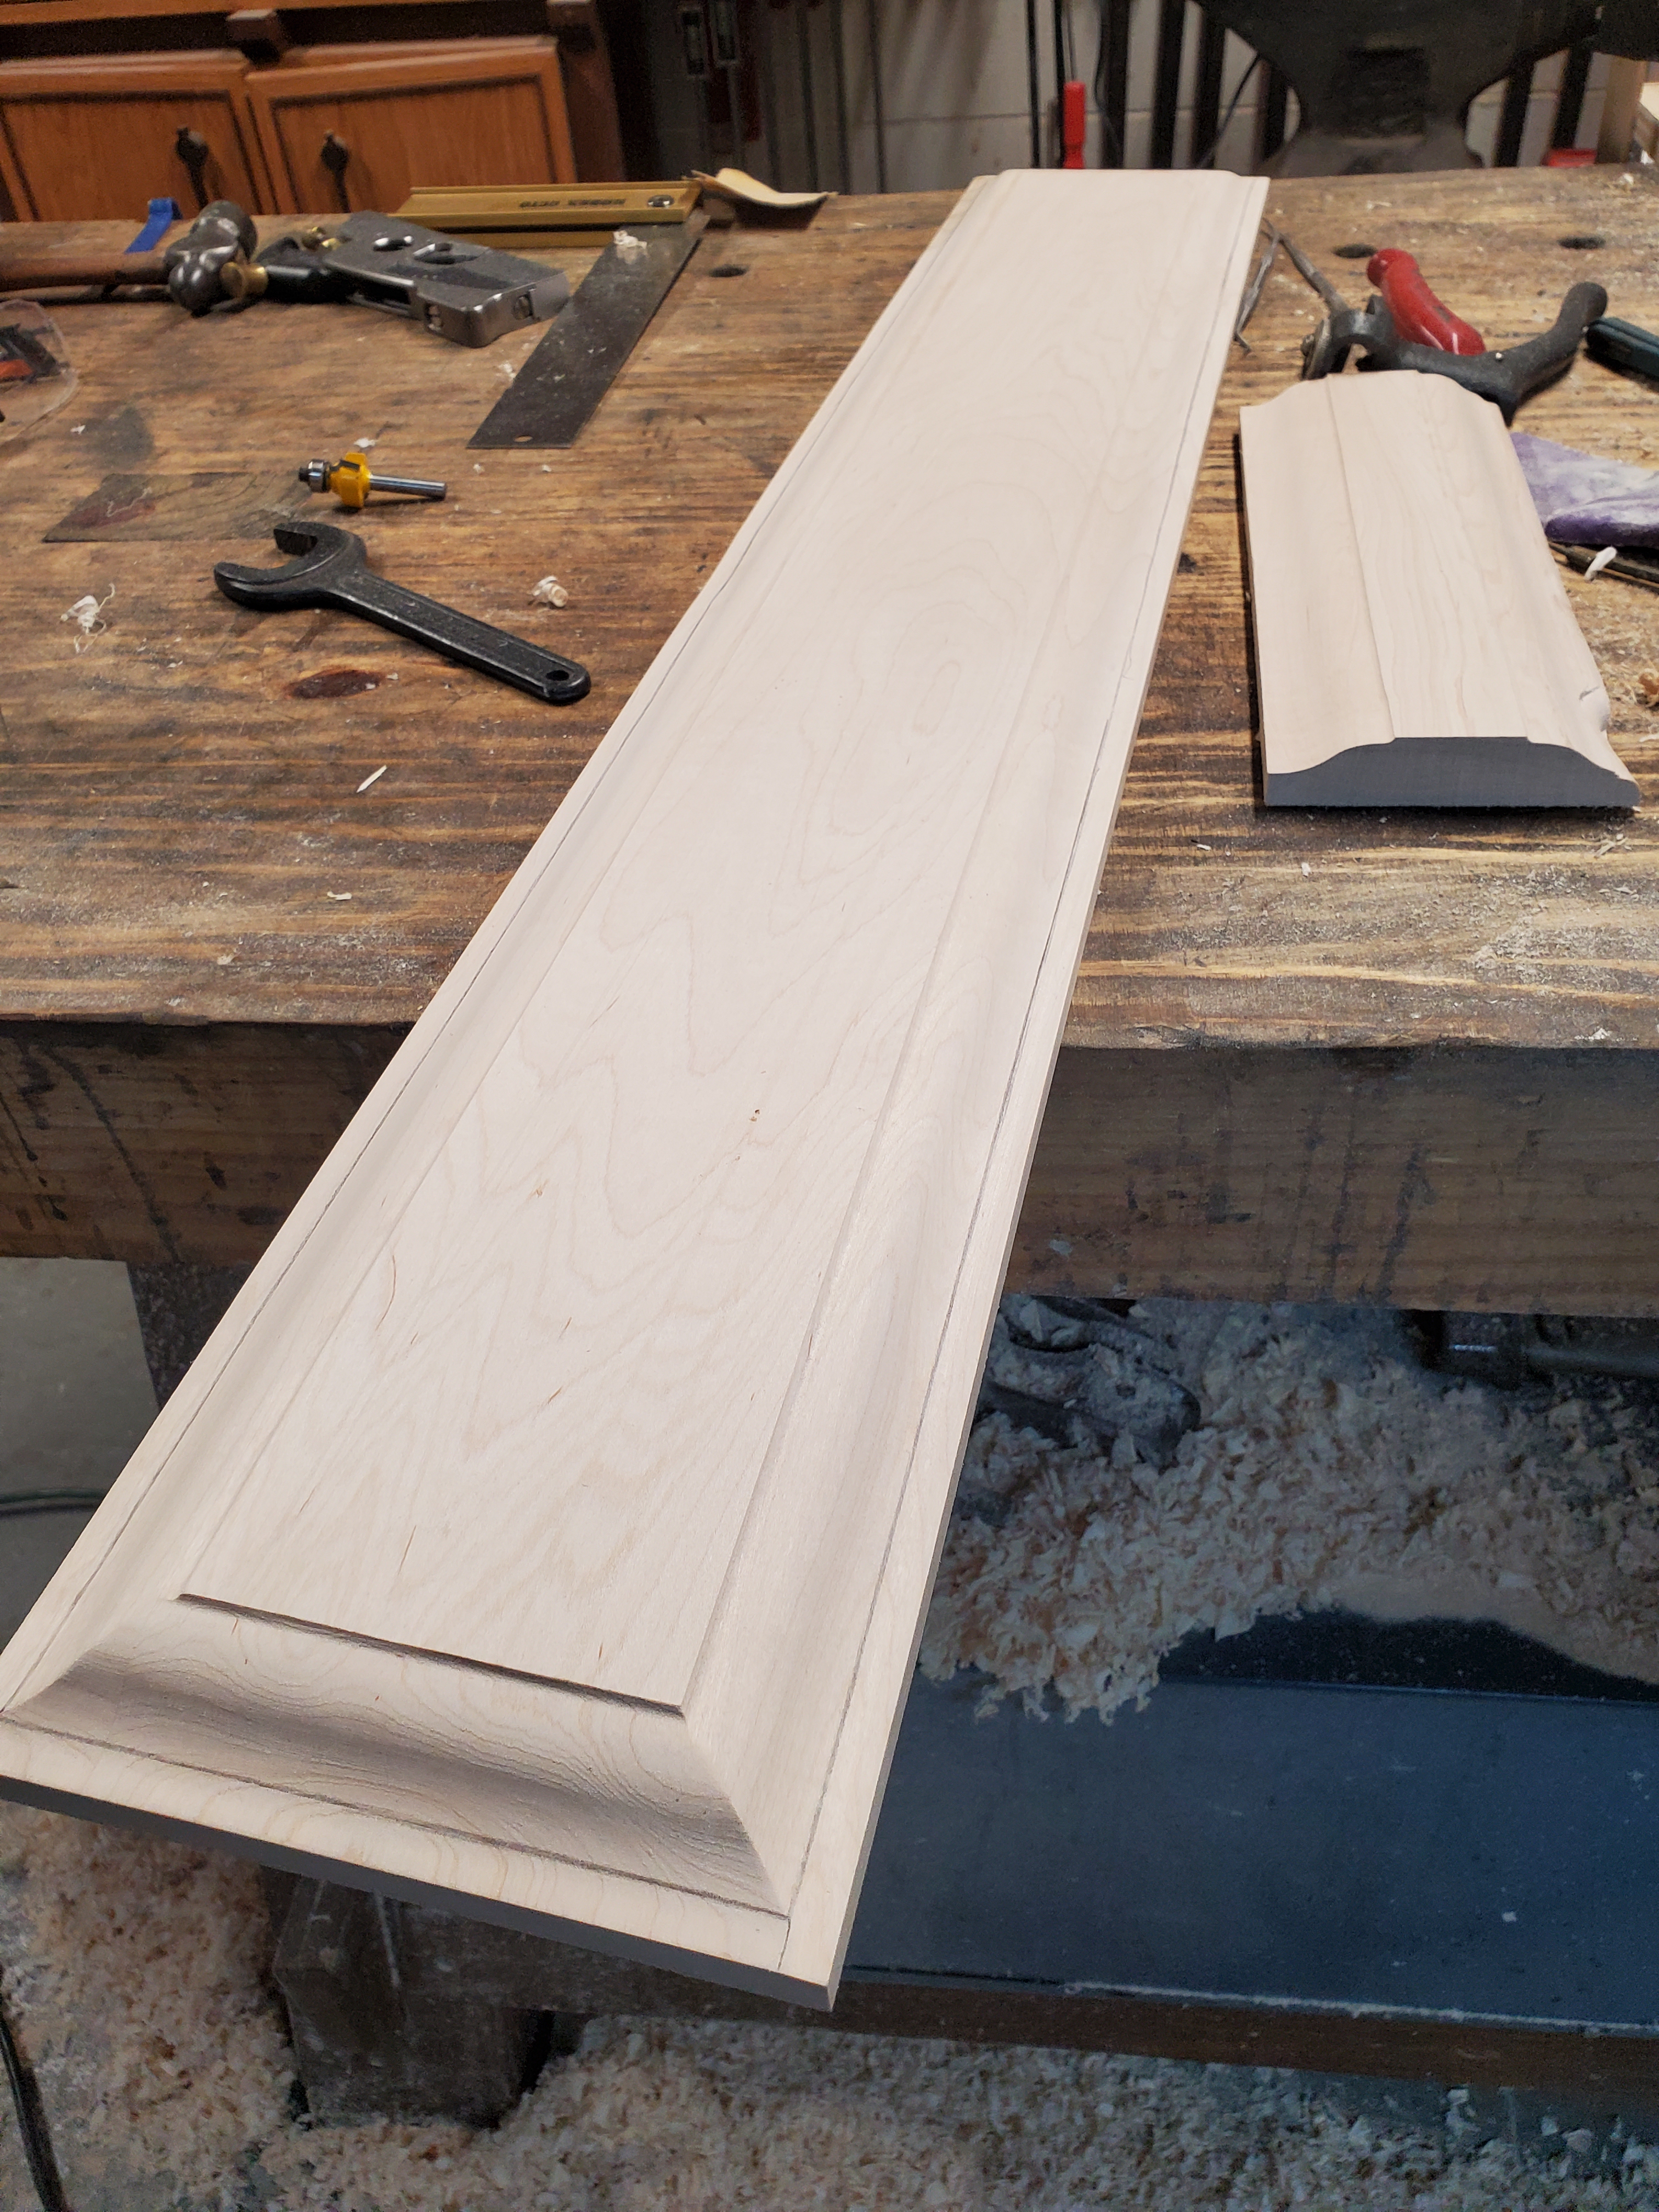
After a little trial and error with scrap wood, I was able to route the edge of the panel with ease.
I needed a round over for the edge of the drawer front so I stuck a 3/8″ round over bit in the router and grabbed another piece of scrap wood for the fence.
My sample board looked great, so I was confident I could get this bit to work well.
After taking a few passes and cleaning up the edge with a rabbet plane, the drawer front was done.
My wife painted the piece dark gray to match the other cabinets and I nailed it onto the kitchen base with 18 gauge brads. Nearly a year after we got hit with the tornado, our updated kitchen is complete.
I was reading Journeyman’s Journal blog this week (if you don’t follow him, you should) and he had a quick post about someone who submitted a tip to a woodworking magazine about sharpening a block plane blade with a drill press. The tip shows a block plane blade in a drill press vise with a drum sander attached in the chuck. You would raise and lower the handle grinding a bevel on the blade while sharpening it at the same time. I looked at the tip and laughed thinking there’s no way that would work. But after thinking about it for a minute, I wanted to see if it actually would work. I knew I could try it but instead of using a drill press, I could use my oscillating drum sander. So, I grabbed an old plane blade and gave it a go.
I have this old Ryobi oscillating drum sander. It’s nothing special. In fact, I think I bought it at Sears about 30 years ago. It still works fine so I’ve never bothered buying a new one. I decided to sharpen the blade with 150 and 220 grit papers.
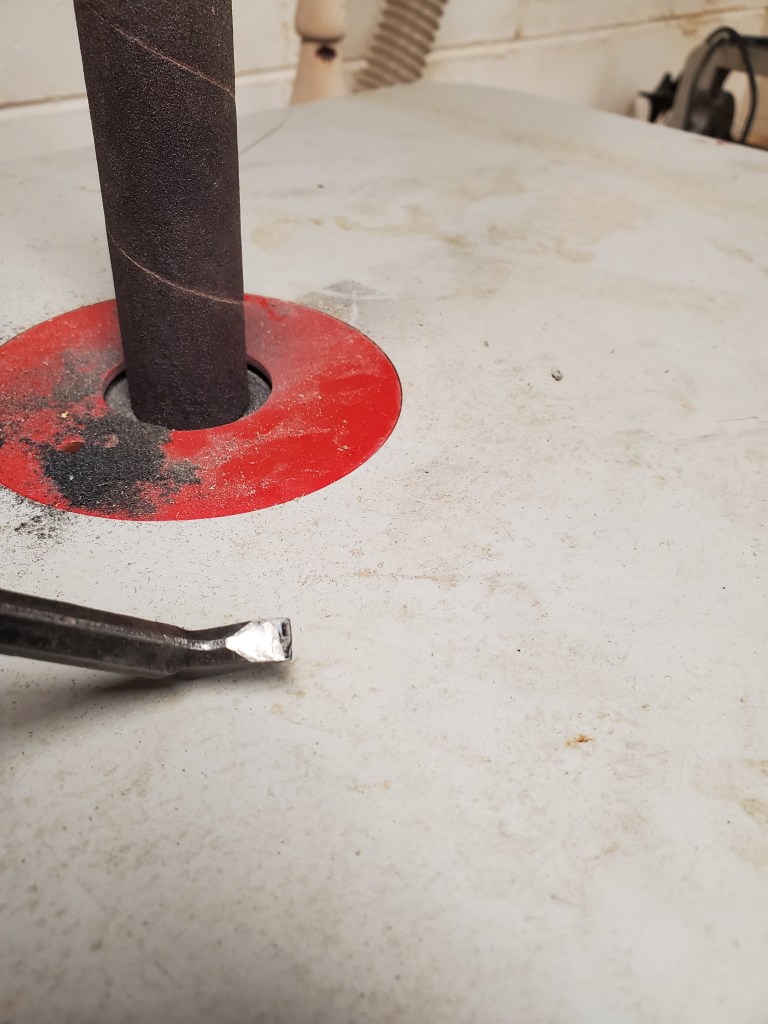
I wanted a 25 degree bevel on the blade so I clamped the blade into a hand clamp and set it up to the sander at 25 degrees to the table. This actually didn’t work because of the diameter of sanding sleeve changed the angle of attack. I probably should have used a larger diameter of a drum in order to get a more accurate bevel on the blade but I really didn’t care since I wasn’t going to use the blade full time in a plane anyway.
I carefully sanded the blade taking it on and off the drum every few seconds so not to burn the edge. After I ground the bevel with 150 grit, I switched to 220 grit paper and repeated the process.
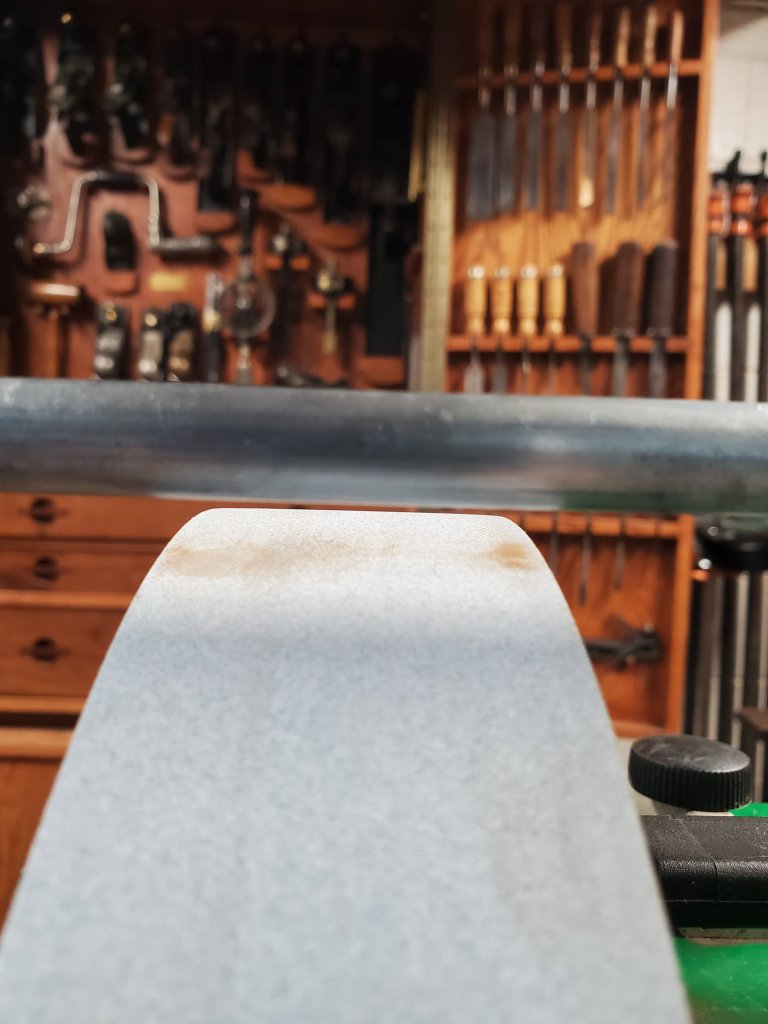
Here’s the edge after I took it off the sander. You can see the heavy burr on the back side of the blade however, the grinding is nice and consistent.
I then took the blade and removed the burrs and honed the edge with my oil stone. It turned out well enough to see how it performs.
As you can see, the bevel turned out to be 35 degrees. I don’t care as I was just trying to determine a proof of concept. If I did care, I would have played with the angle of attack at the sander until the end result was 25 degrees.
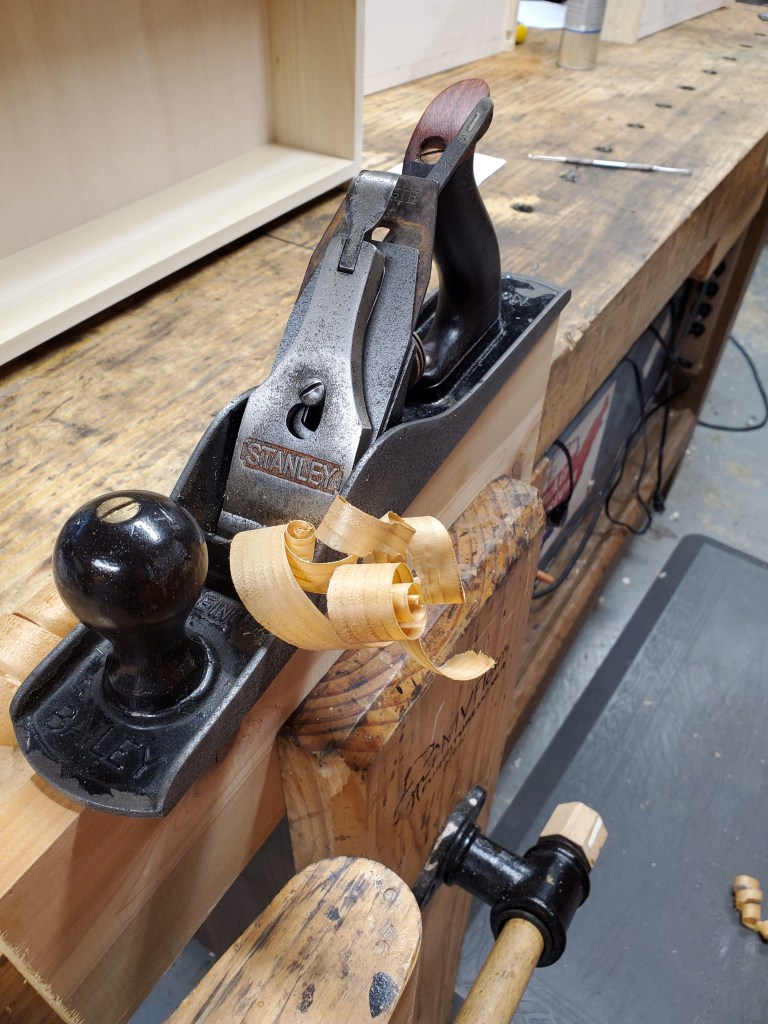
I stuck the blade in a Stanley a No 5 plane and tried it out. Sure enough, it took a nice shaving even though the cutting edge was a little too high for my liking. Even though it works, I’ll still stick to my water cooled sharpening machine for grinding a bevel on blades for it’s ease of use.
On Salko’s post, one of his followers posted that a popular woodworking blog-gist, Derek Cohen, sharpens his router plane blades with a drum sander so I had to try that out as well. Below is the blade I’ve been using in my router plane for years but never bothered to sharpen it properly. I sharpened this blade the same way as with the block plane blade. I did this just free hand and didn’t bother to make a jig or holding device for it.
After a few seconds grinding the bevel, I honed the edge on my oil stone and stuck it back in the plane.
Sure enough, it worked like a champ. The router has never cut so nice. Who knew!