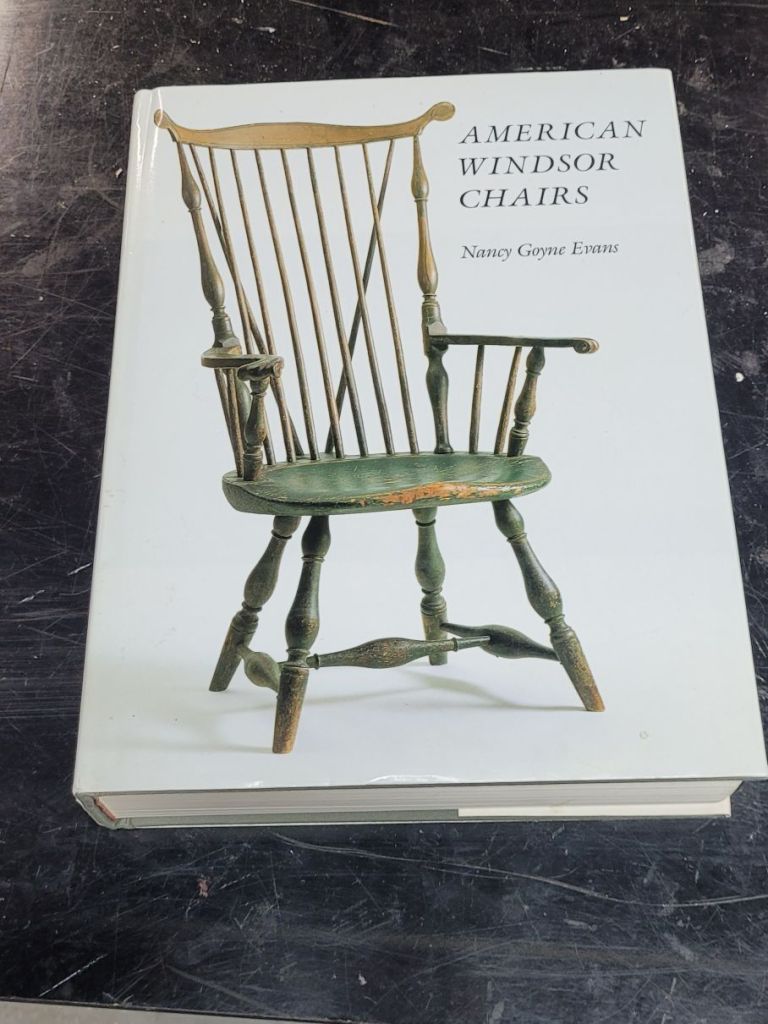
Several months ago, I was reading a post on the Lost Art Press, and someone asked Chris Schwarz which book on Windsor chairs he thought was the best. Chris mentioned American Windsor Chairs and said it’s worth getting if you can find it cheap enough. Curious, I checked Amazon and saw one was for sale for $300. Then I checked eBay and saw one seller was asking $40 plus shipping, so I jumped on it.
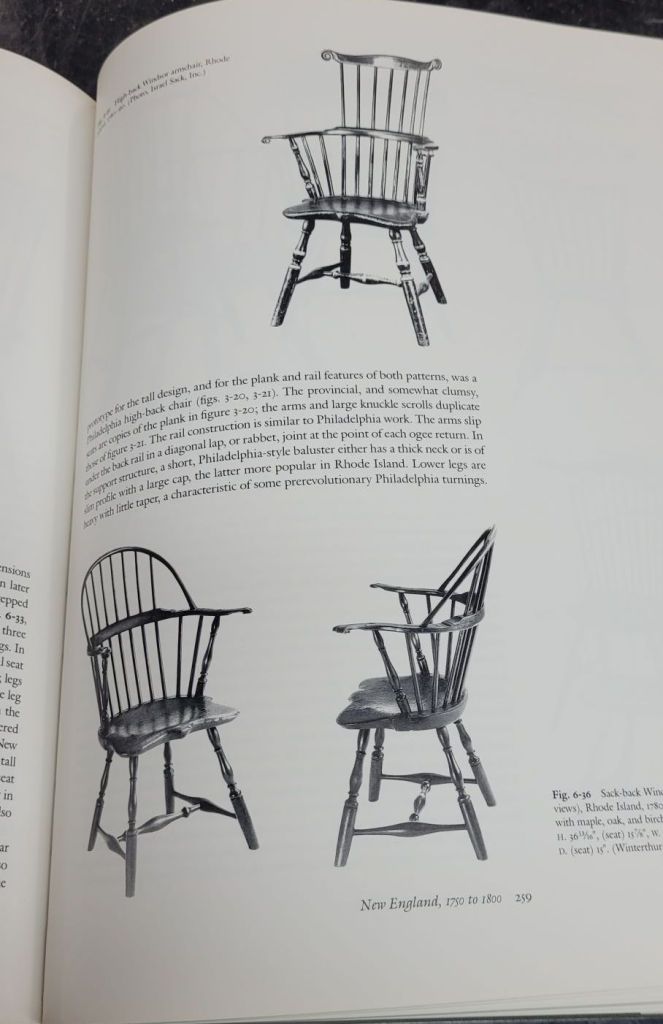
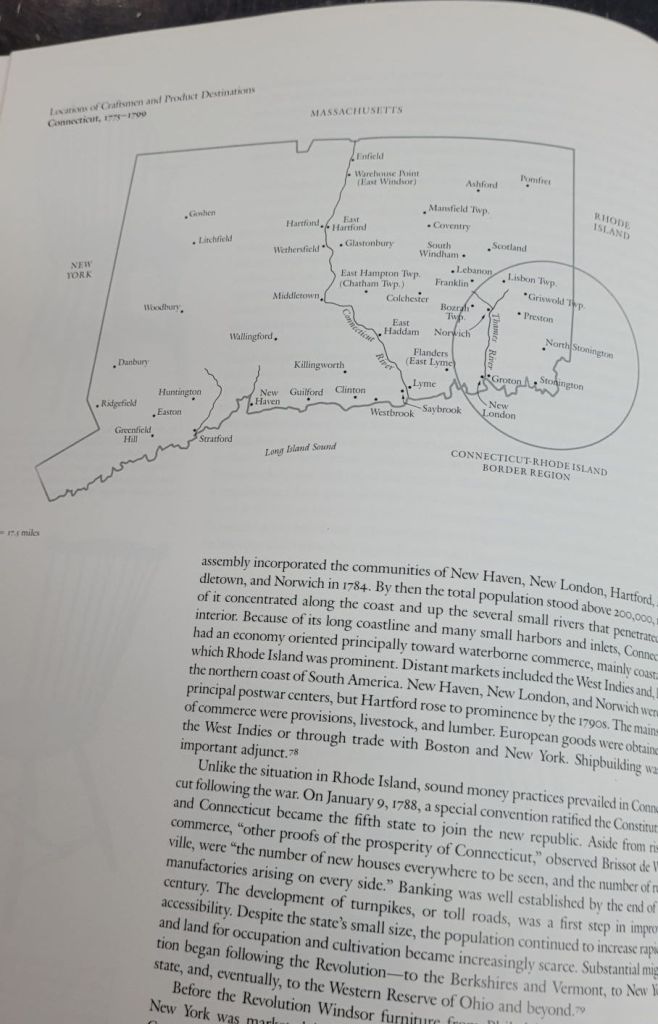
Written by Nancy Goyne Evans, the book is over 700 pages with 1000 illustrations of chairs of various makers. The book starts with the classic European design and how the chairs evolved in America with first handcrafted chairs to mass-produced units in the 1850s. The book is categorized by geographic region and describes the differences in Windsor chairs in different regions of the country. It’s extremely detailed with stories about some of the makers and their business practices. If you have a passion for Windsor chairs and their designs, then this a must-have book you need to own.
In the back of the book, there are reference pages where it lists the chair makers and the time of their business. Simply look up their name and determine where and when the chair was made. It’s an excellent reference book you’ll enjoy owning if you’re lucky enough to find one at a reasonable price.
If you own a Windsor chair and would like to know when it was made, drop me a comment, and I’ll look it up and see if I can find more information for you.
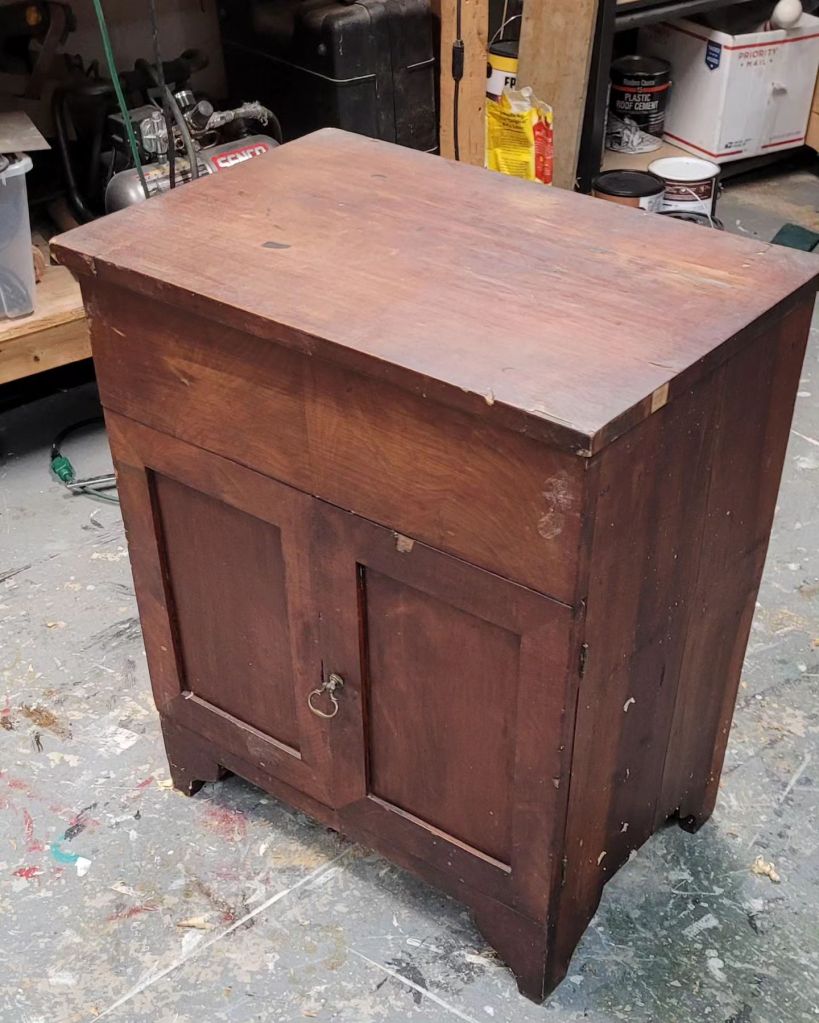
I haven’t been spending too much time in the shop the past few months since I’ve been working on the shed during the summer and fall, but I did have time today to work on an antique dry sink my wife bought at a local sale.
The cabinet was in good condition, but the top was off as the hinges had broken. I noticed that they were too small for the top, so I grabbed some larger hinges I had around to replace the small, broken ones.
After removing the old broken hinges, I made a jig to route a perfect sized recess in the cabinet and top to accept the new hinges. I found this jig while reading Michael Pekovich’s book “Foundations of Woodworking”. The idea of the jig is to make a cutout in a piece of wood the exact length and depth of the hinge, then use a small flush cut patternmakers bit to route out a recess that’s the perfect size of the hinge.
After making the jig and routing a few test pieces to make sure it worked, I placed it over the cabinet back and the lid to route out the recess for the new larger size hinges.
After a few minutes, the hinges fit, and I shaved down the top of the cabinet for the lid to fit flush. This was a quick and easy project that will make this dry sink serve another 100 years. Plus, I’m finally back in the shop after a few months’ absence.
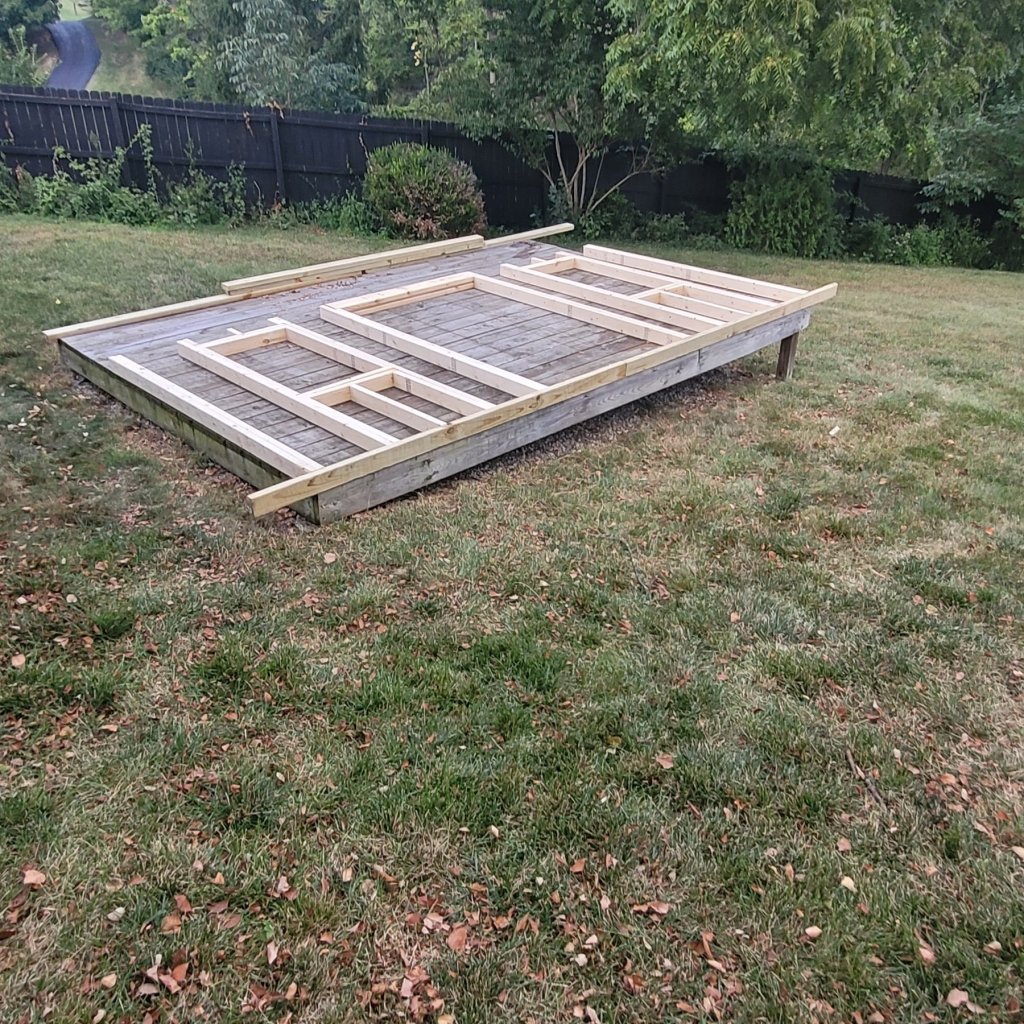
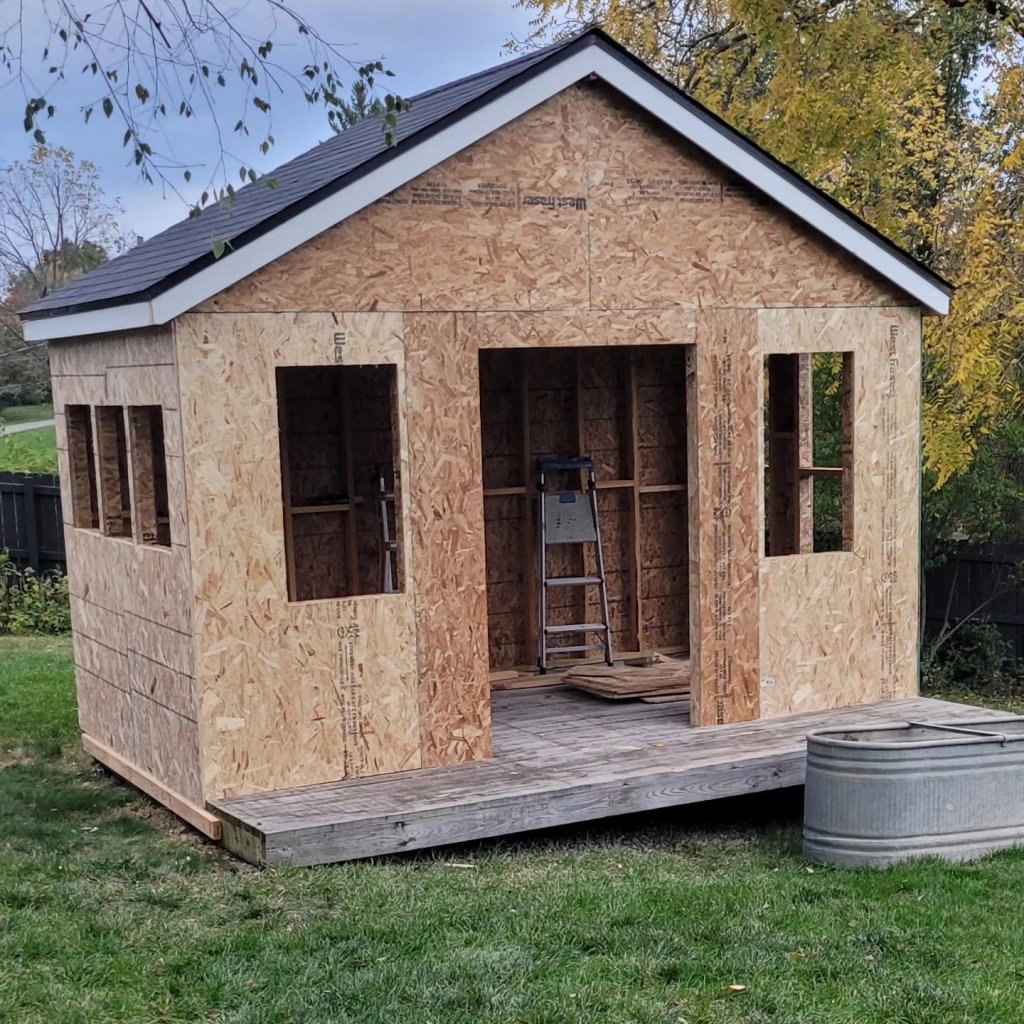
Three years after my original shed was destroyed in a tornado, I finally decided it was time to rebuild a new one. I designed a new shed that would only be 7’x 10′ on the original 10′ x 14′ deck platform where the original stood. My wife and I wanted to have a little deck to step onto instead of stepping directly from the grass.
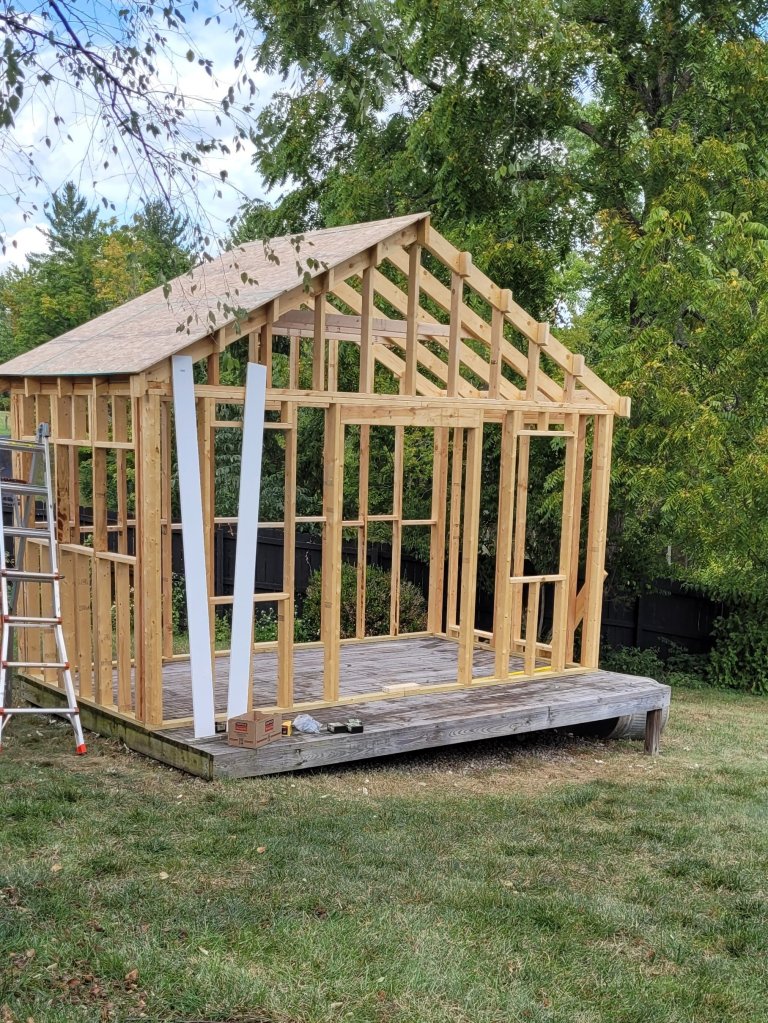
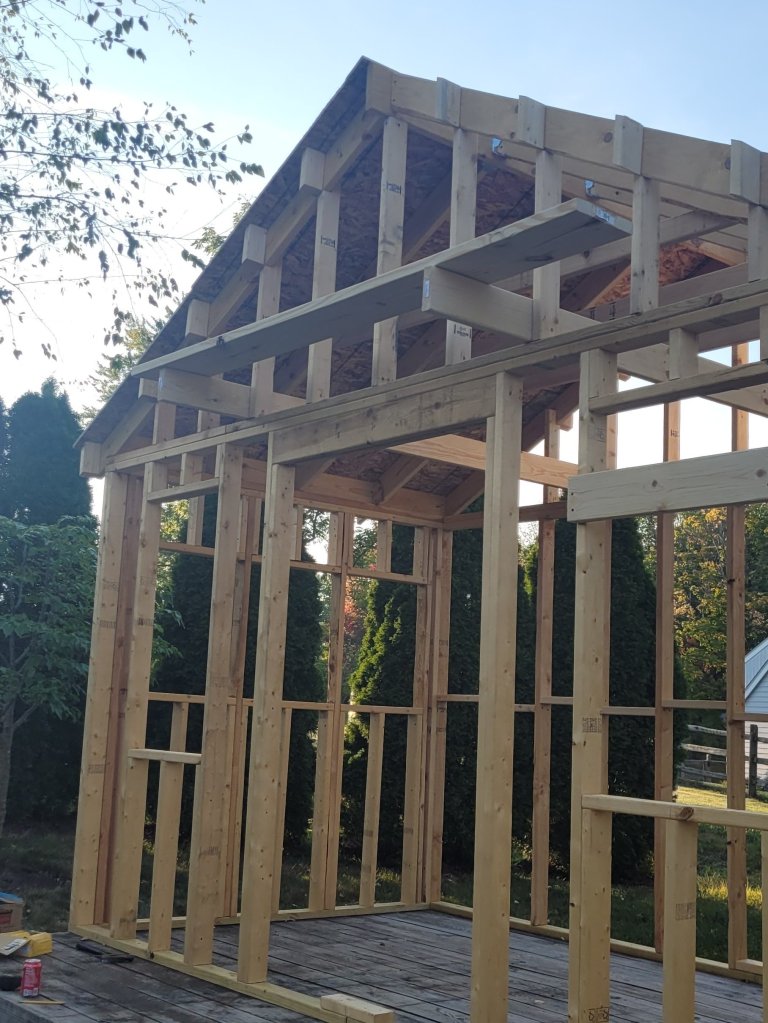
The new shed will have nine windows and two french doors in the front. I built the roof trusses in the opposite direction from the original one with stronger bracing for the wild winds we get.
With the framing done, I worked on the roof and sheathing. I had to build platforms made from 2×12’s on three sides of shed in order to work safely.
After the roof shingles and soffit were installed, I put 1/2″ sheathing around the shed. This shed is much stronger than the first one as that had just carsiding nailed onto the 2×4 framing.
I spent some time working on the doors and windows. We bought wooden windows at Menards, and I built frames around them in order to function. Four large windows are fixed while the other five swing open.
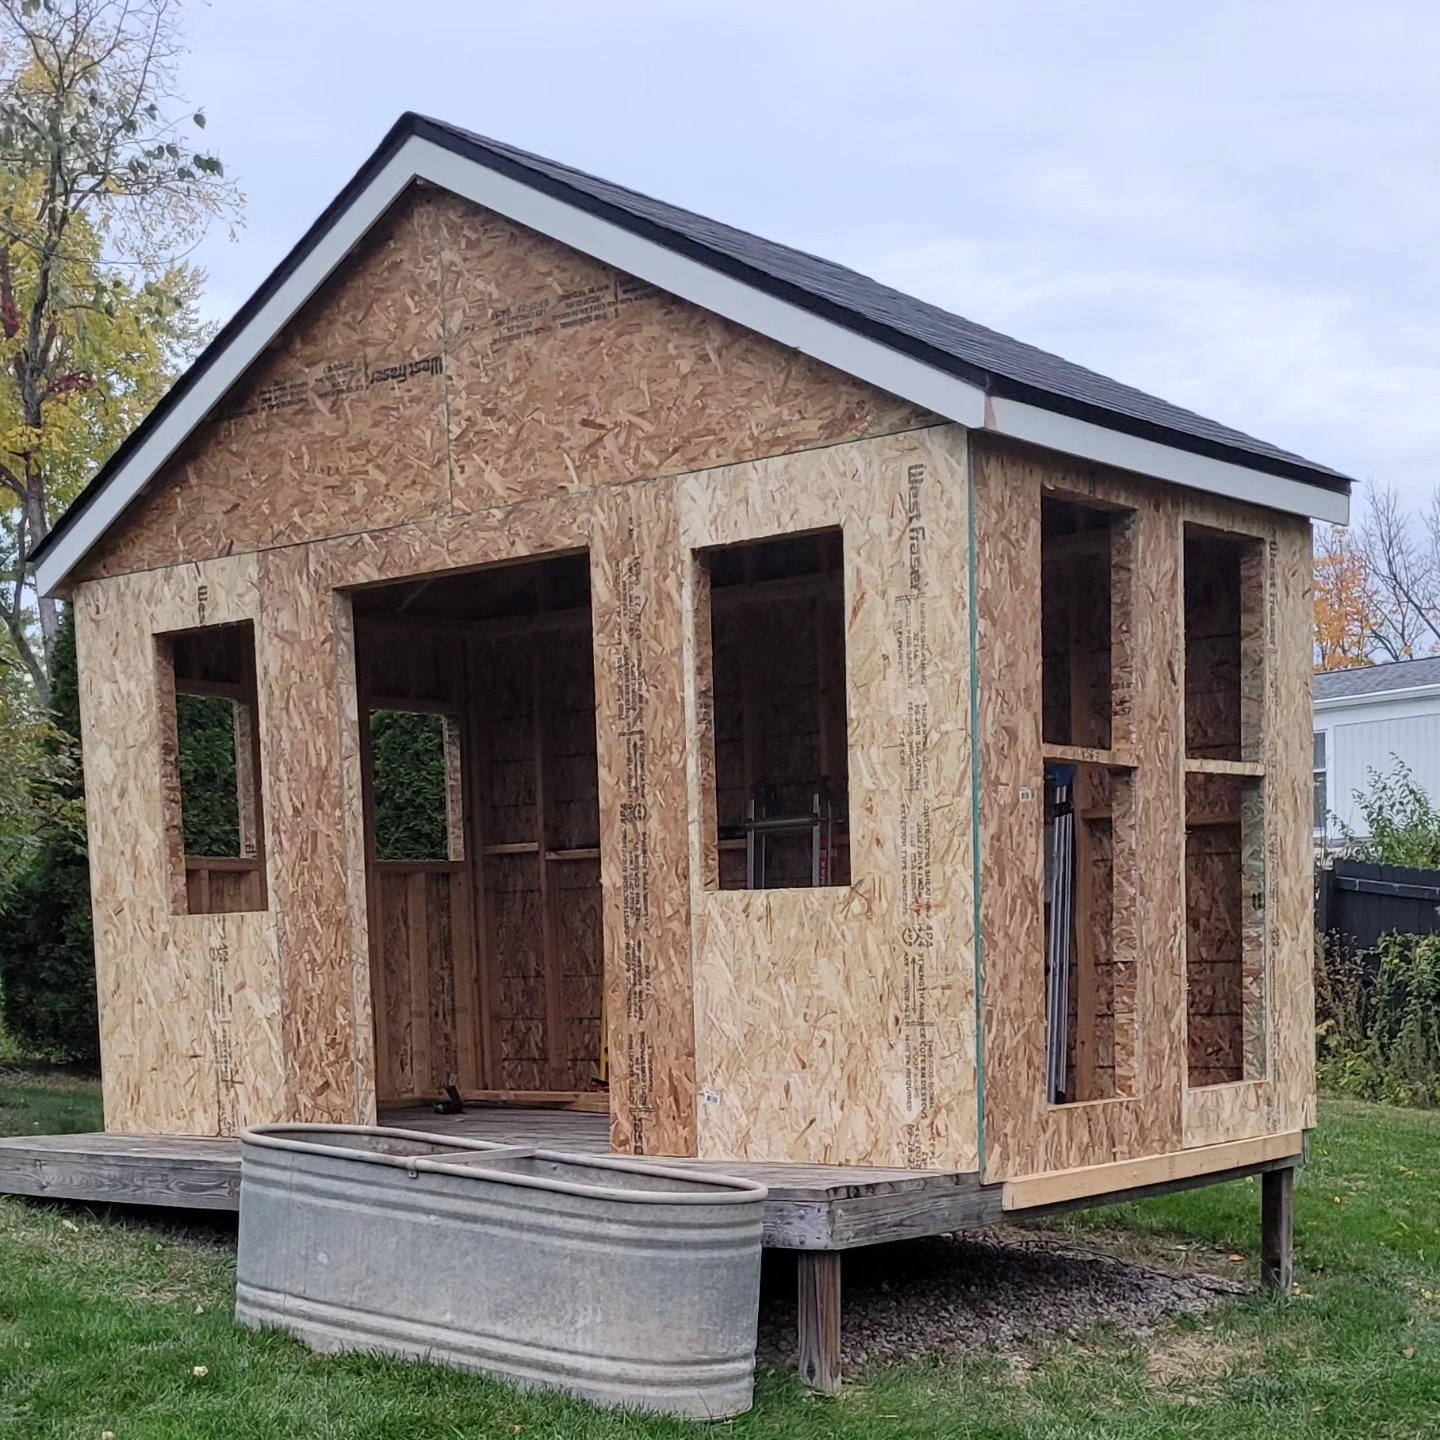
I wrapped the shed with 8″ wide shiplap and ran it vertical. Then, I spent time installing the doors, windows, and trim. Next, we need to paint the shed, but we may have to wait until spring until it gets warm again. In the meantime, I’ll work on the inside of the shed. It’s taken me three months to get this far working on it during the weekends, and I still have a bunch more to do.
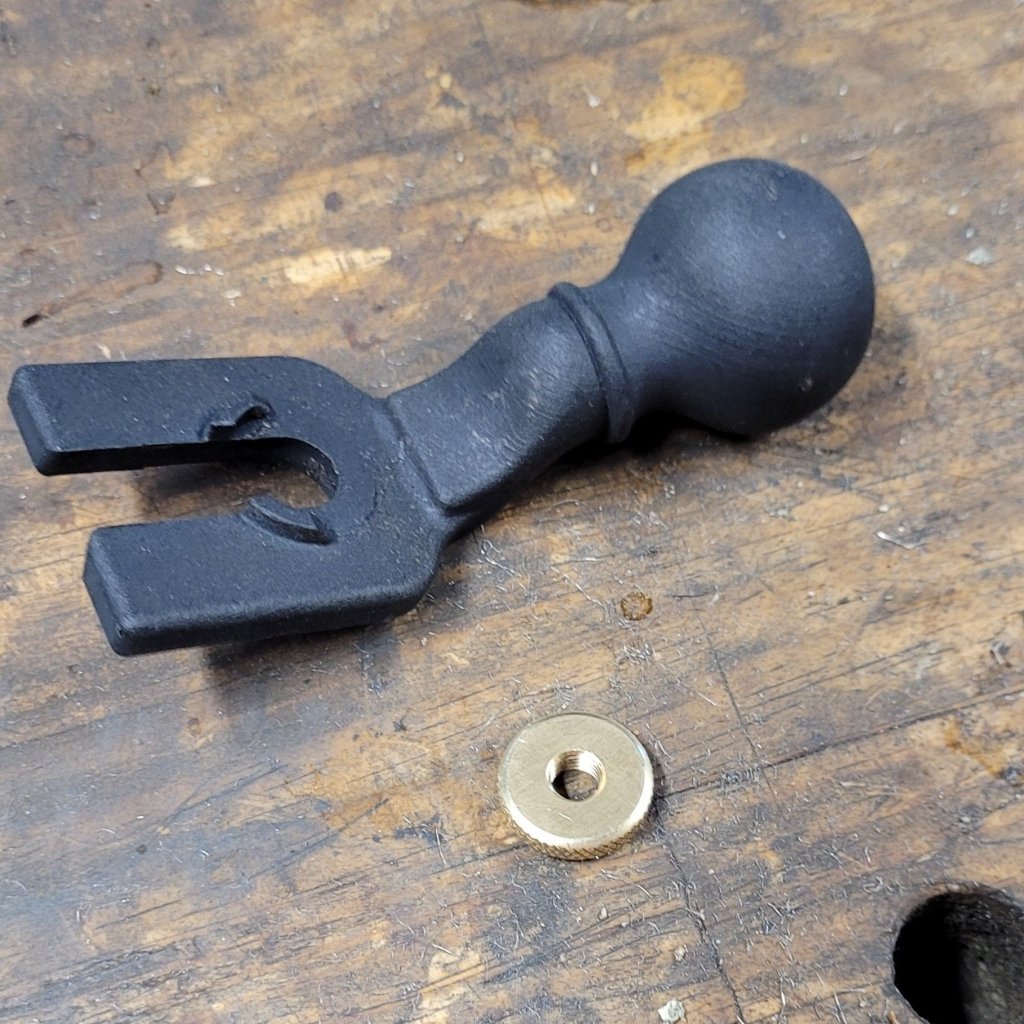
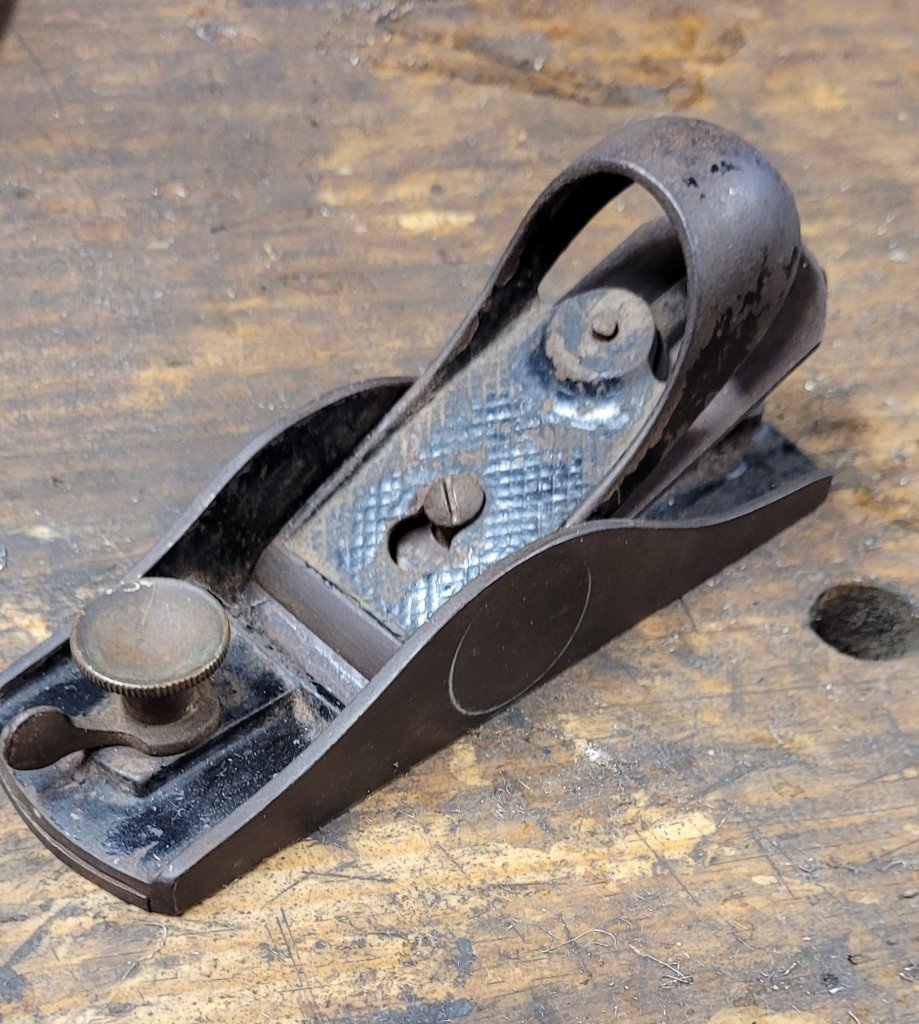
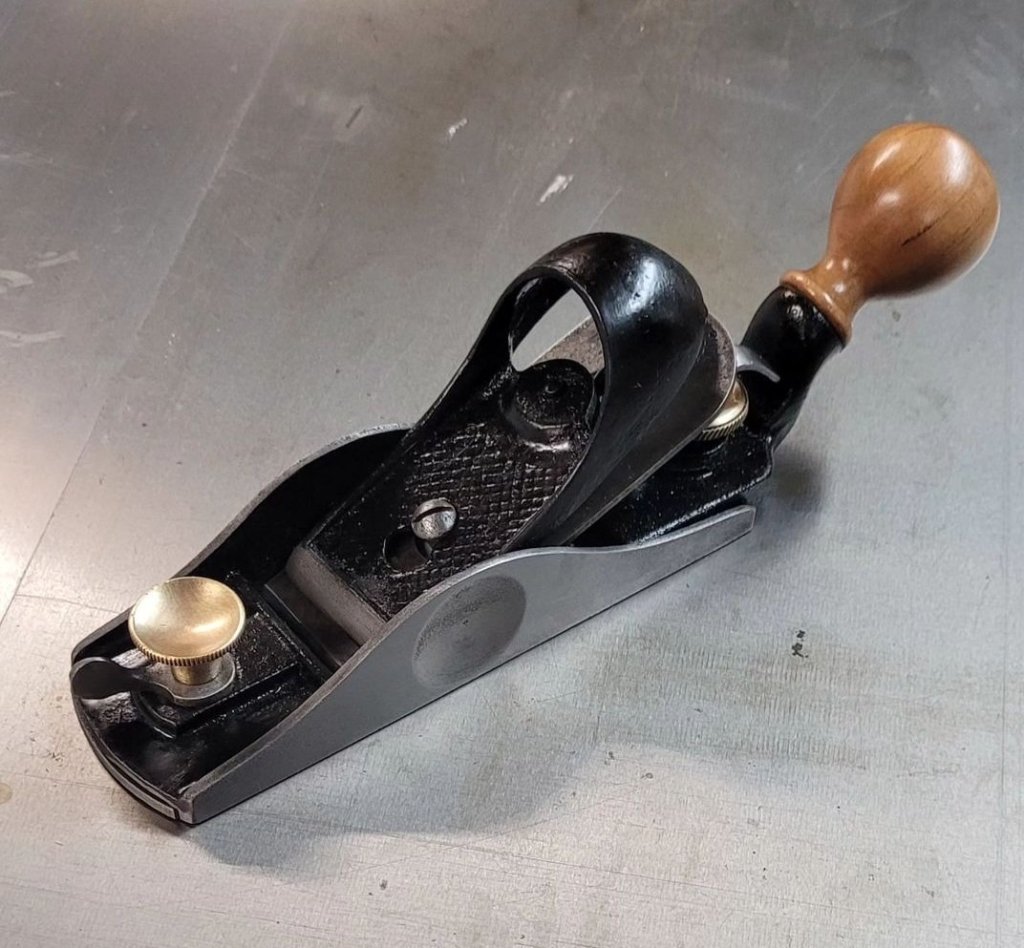
When I bought my Tote Turner a few months ago from Woodyah, I picked up this block tail accessory at the same time. This, like the Tote Turner, is printed on a 3D printer and fits Stanley block planes.
However, I wanted to install it on my Ohio Tool Co O9 1/2 block plane. Similar in size, it’s nearly identical to a Stanley No 9 1/2.
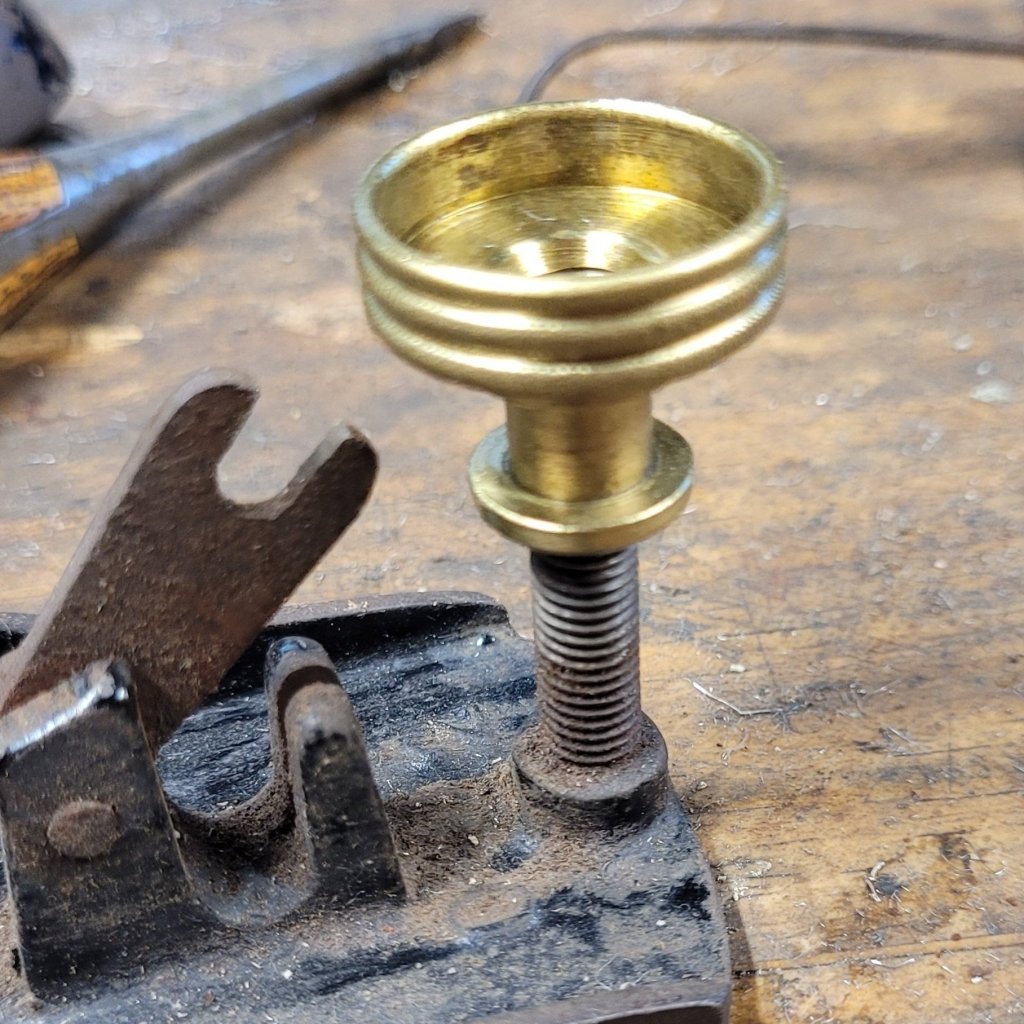
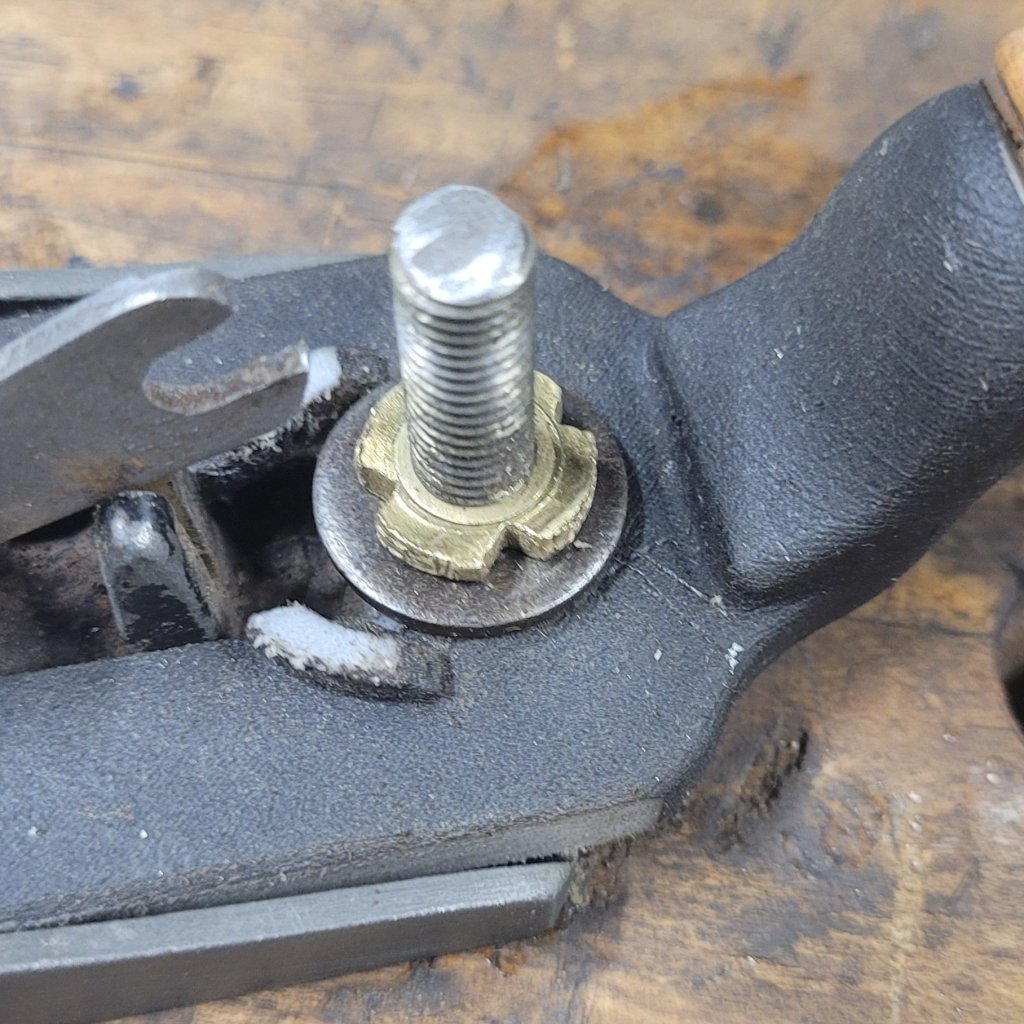
Unfortunately, the threads on my Ohio Tool Co plane are not the same as a Stanley, so the brass hold down piece won’t work. Luckily, I have an old Ohio Tool Co brass blade adjuster wheel in my parts bin, so I cut the very bottom off of the brass wheel and filed four notches in it so I could turn it with a screwdriver.
My little homemade brass hold down screw was a little too small, so I used a washer underneath to hold down the tail better.
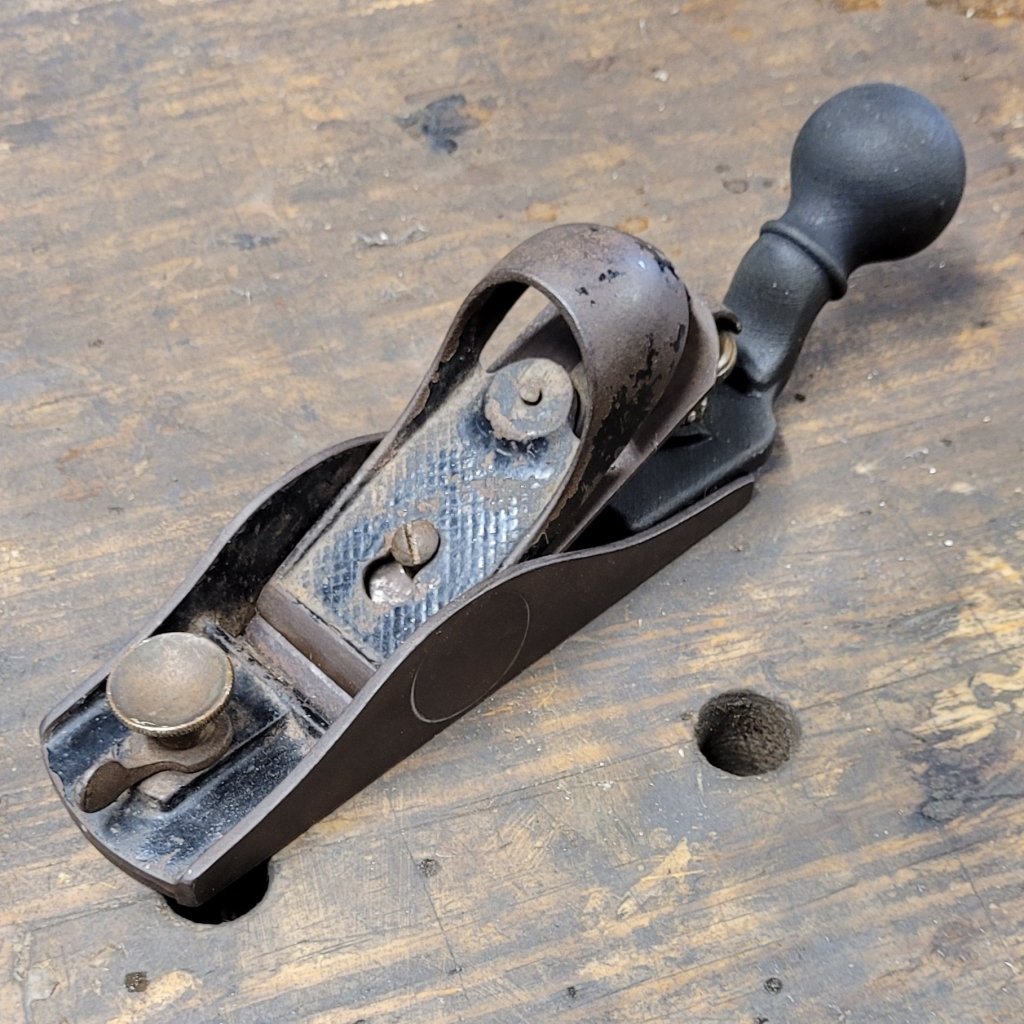
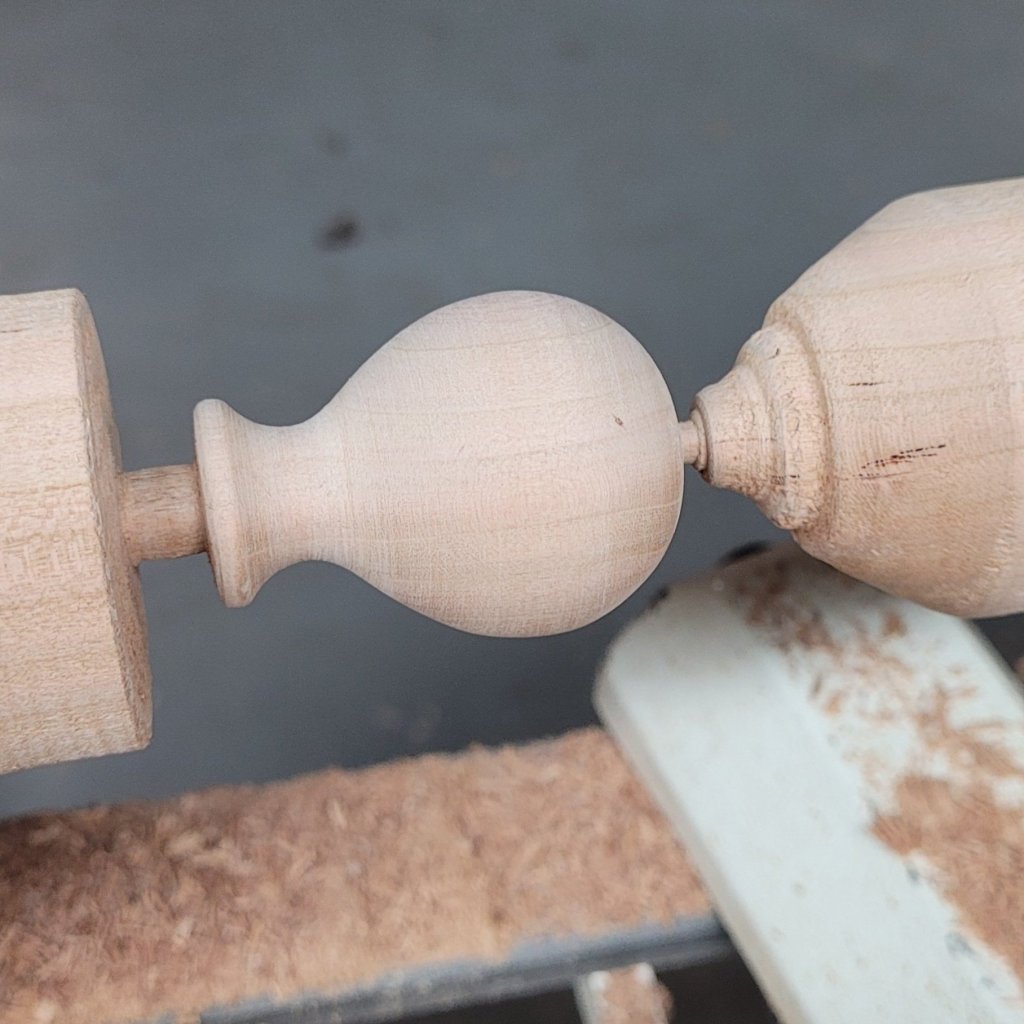
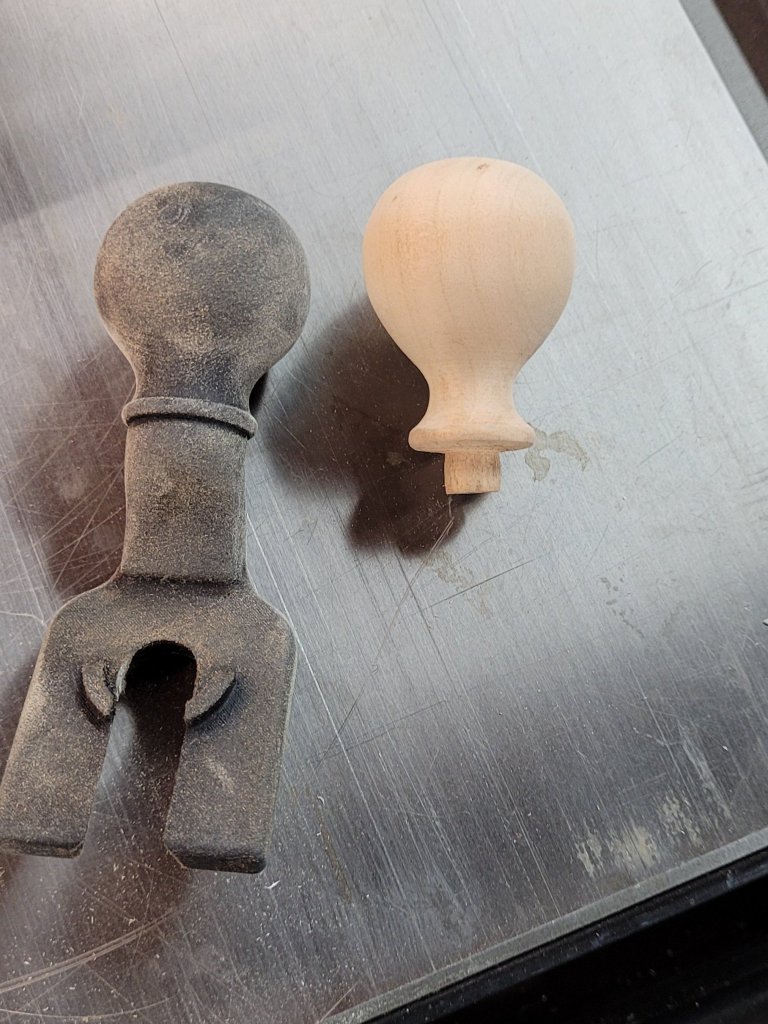
Everything worked, but I was not a big fan of the big black knob to the handle. I wanted something more historic and natural looking, so I decided to make a new knob out of cherry.
I turned a 2″ diameter knob on the lathe and added a 1/4″ tenon on the bottom.
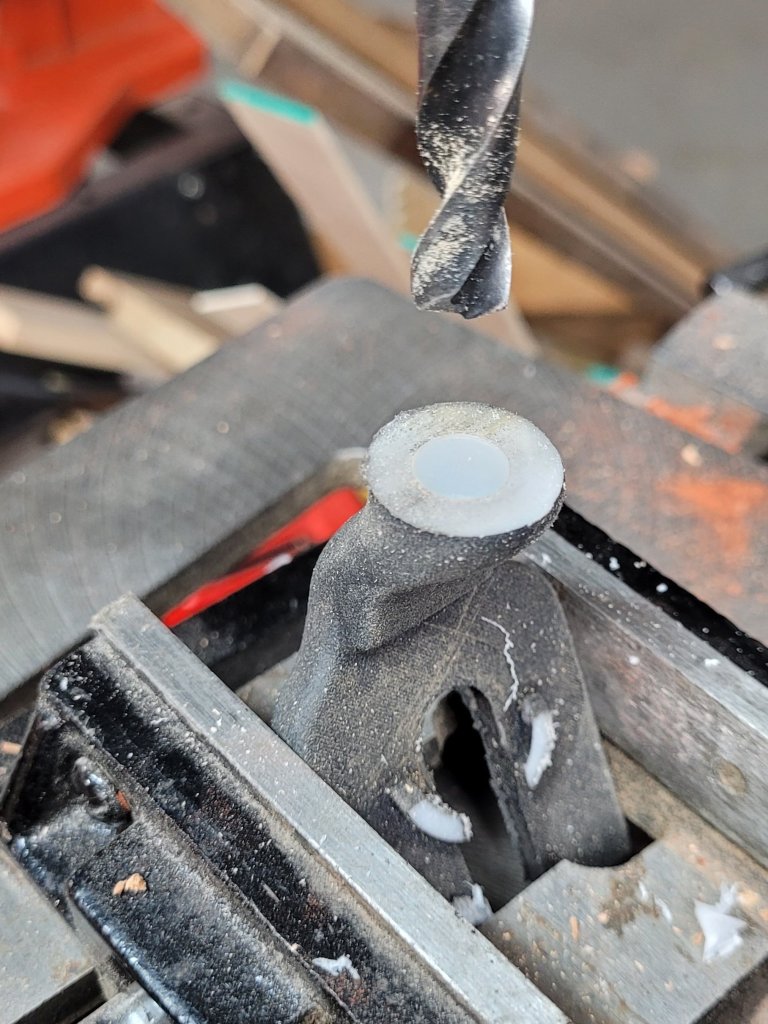
Then I sawed the ball off the tail and drilled a 1/4″ hole to accept the tenon from my wood handle.
After I cleaned the rust off the block plane, I wanted all the parts to match in color and sheen, so I japanned everything during a hot day so I could use the sun as my oven.
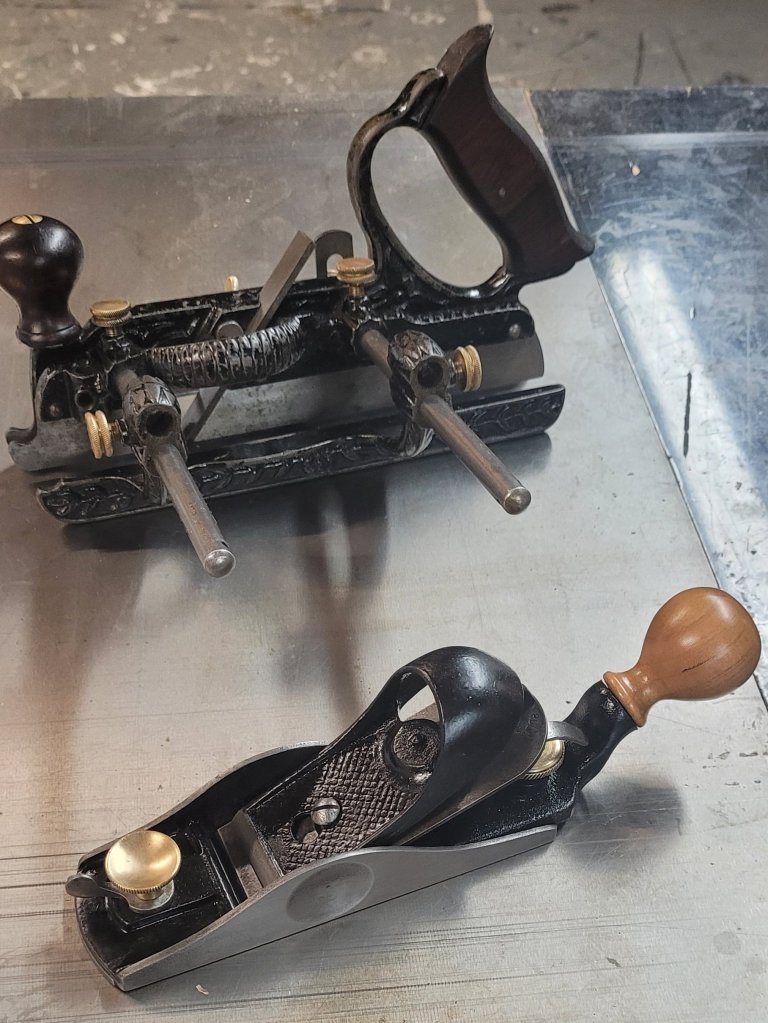
After a couple of weeks, when the japanning dried, I put the plane together to see how everything turned out. As you can see, my japanning looks similar to the old Stanley 45 japanning behind it.
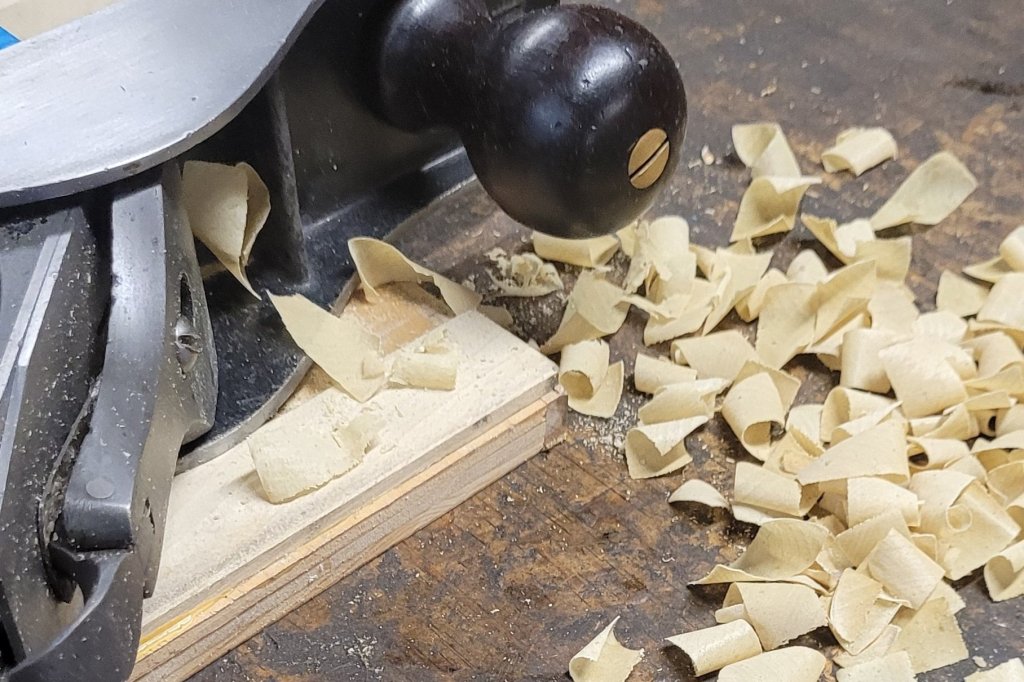
The only thing left to do was to sharpen the blade and try it out. The plane works fine. Ironically, the handle doesn’t make the plane cut any better, which begs the question, what was the purpose of them? The one thing I hear is that they were good for craftsmen who have arthritic hands, making the plane easier to hold.
Honestly, I don’t know how often I’ll use this plane as I already have a couple of my favorite block planes that I use, but it’s still a fun plane to own.
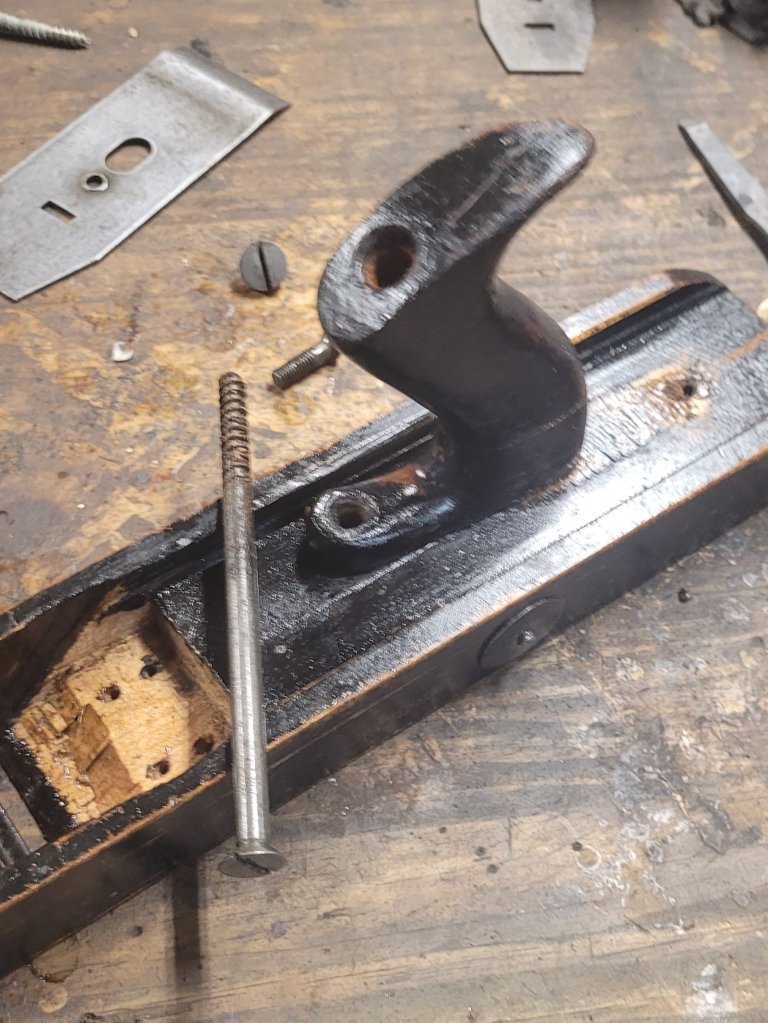
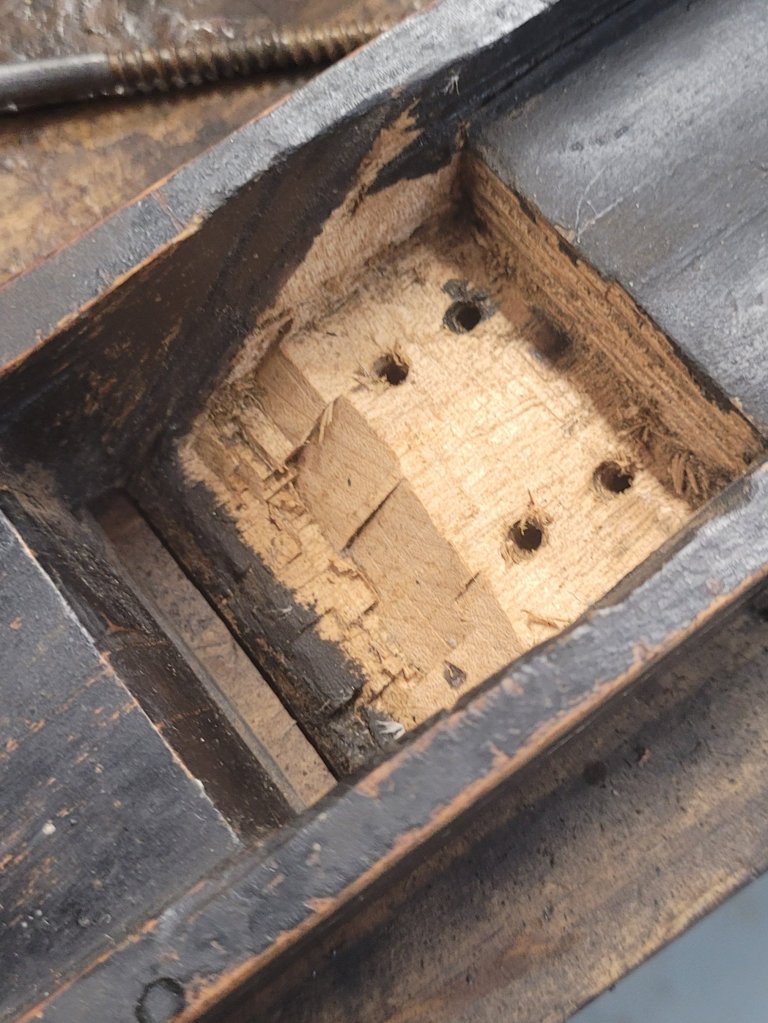
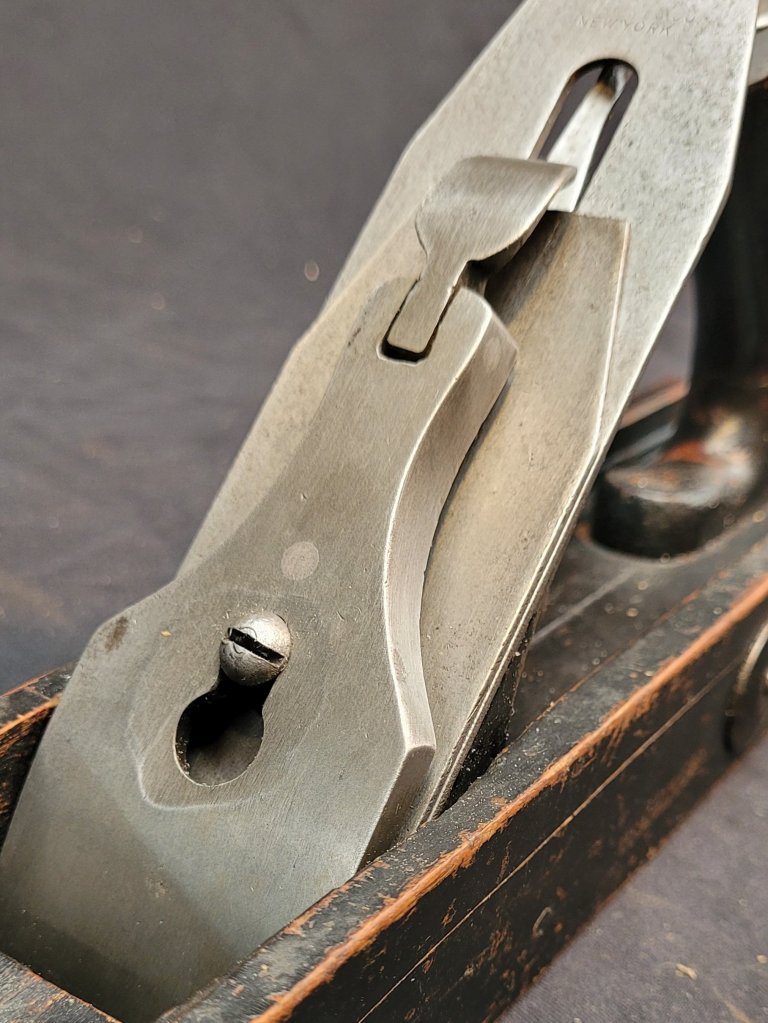
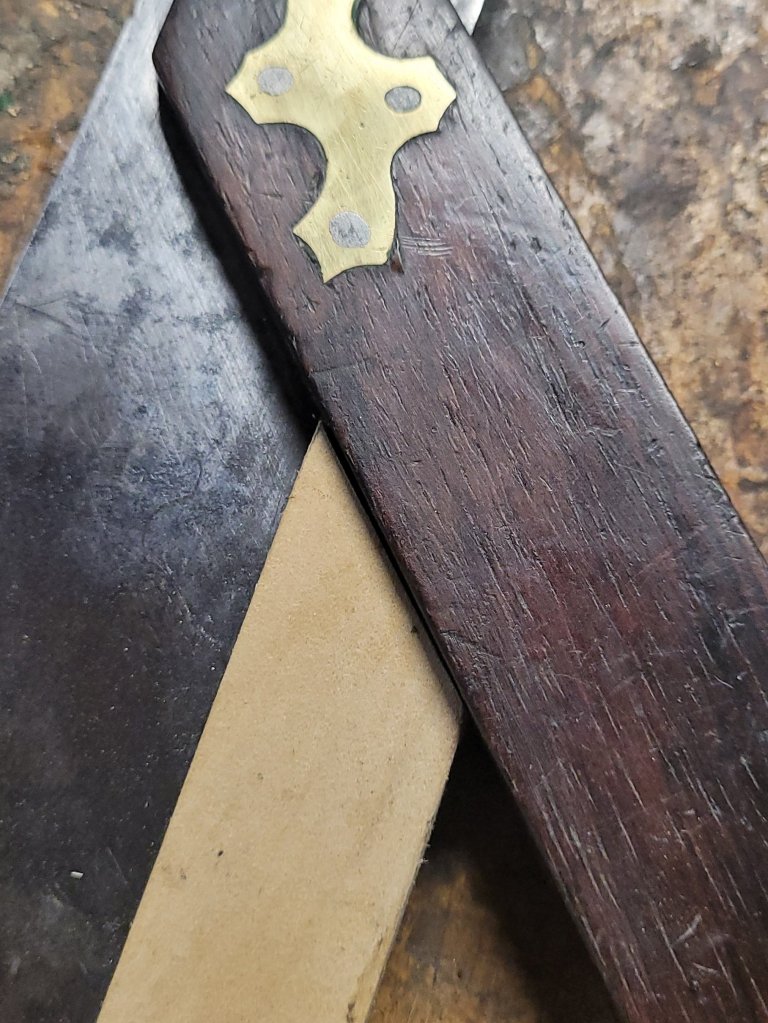
Several weeks ago, I won this craftsman made hand plane on an auction site. When I first looked at it, I thought the body was made with three pieces of wood laminated together like a Krenov plane, but after studying it, I realized it was one single piece of wood. There are a couple of rivets through the body, but I don’t know what purpose they serve.
I’m not sure what the story of this plane is, but it looks like the craftsman owned a Sargent plane that broke, so he made a custom wood body out of mahagony and turned his plane into a transitional plane. You can see the chisel marks as he dug out for the frog, which adds a cool factor to the plane.
For whatever reason, he used four screws to hold down the frog to the body. It allows for very little advancement of the frog, but the plane still functions fine.
The owner also grounded the face of the lever cap down, which seems odd. You would think the original lever cap screw would have worked just fine, but maybe this screw is a replacement.
Luckily, I know the name of the craftsman of the plane (at least the last name). C Heiland is the person who made the plane. I googled “C Heiland Woodworker,” hoping I would find some information about him but had no luck. It would be awesome to have some provenance on the plane.
It’s a neat plane to look at, but I wanted to see how it performed, so I sharpened the blade and put it to work. The plane performs admirably. It was much better than the Buckeye plane I tried out from a few weeks ago.
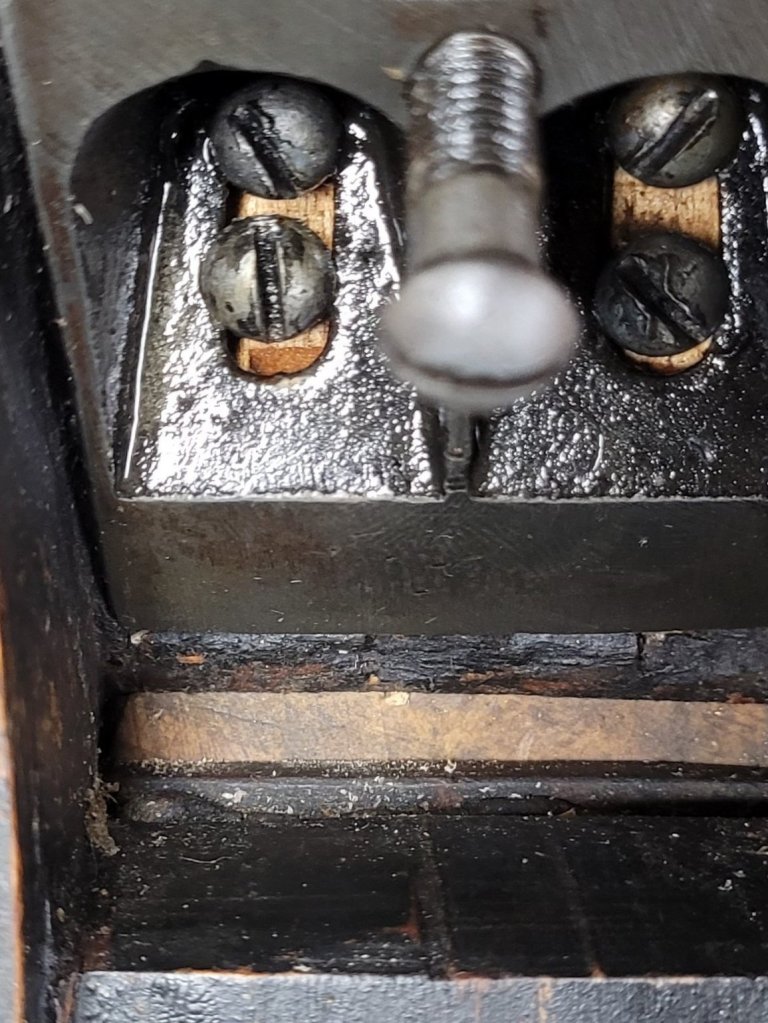
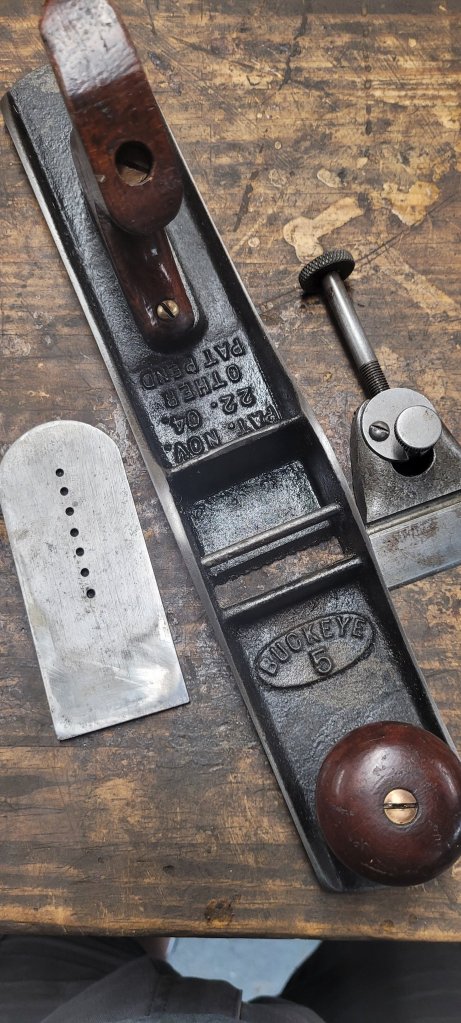
Several weeks ago, I won this Buckeye No 5 plane at auction. The look of the plane was something I had never seen before. I wanted to see how it would perform, so I took a closer look at the plane’s functions.
Buckeye planes were made by the Buckeye Saw Company, which was in business from 1904-1929, and they are known for this patented plane by John Muehl, who more likely sold his patent to The Buckeye Saw Co.
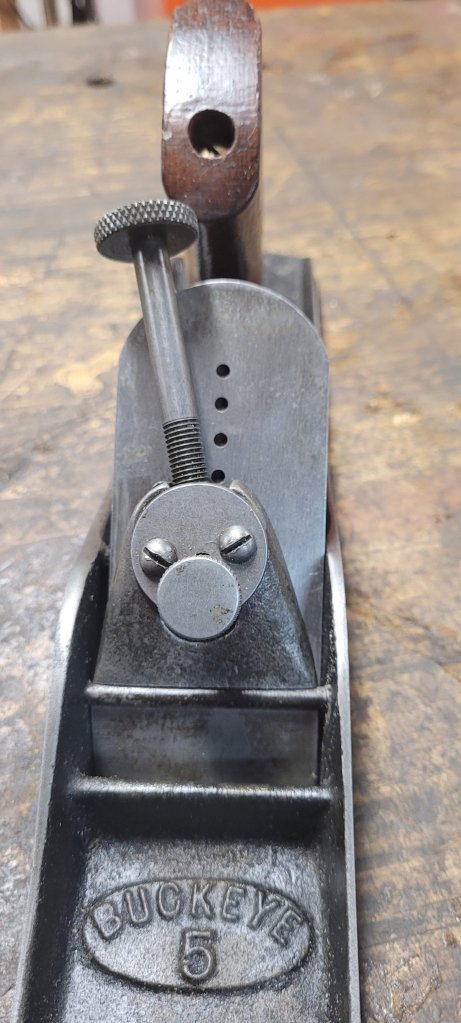
The plane has no frog. The blade simply rests on the casting of the bed, and the Norris style adjuster, pins into holes on the blade.
The lever cap acts as the cap iron as well, which usually is not a good sign for quality. The Norris style adjuster swings from left to right in order to adjust the blade from side to side.
The simplicity of the plane makes it impossible to adjust the gap in the plane’s mouth to produce a thin shaving.
I sharpened the blade to see how it performed. Because the plane is so primitive and basic, I couldn’t get a nice shaving out of it even after messing with it for a few minutes. At best, the plane would only be good for rough carpentry work, like trimming a door and not for fine cabinetmaking.
In the end, my opinion about the quality of this plane is……it sucks!
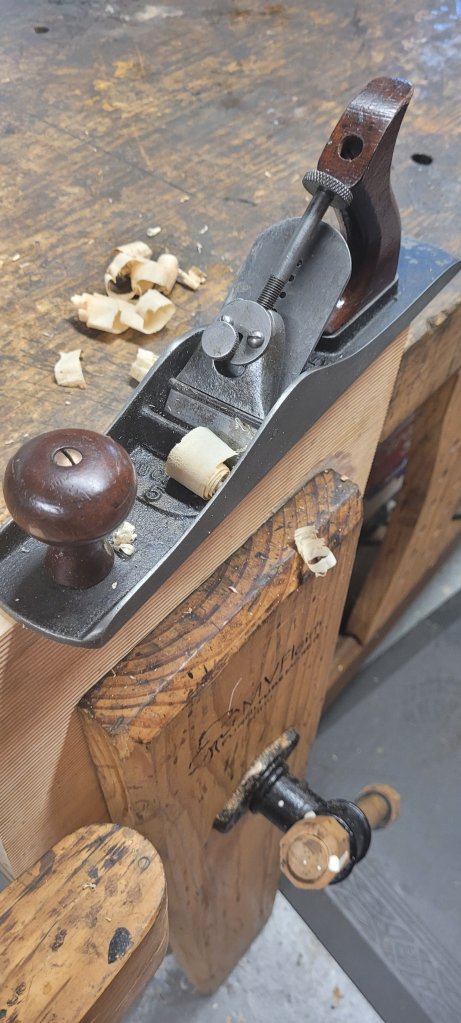
A couple of weeks ago, I received the latest issue of Popular Woodworking Magazine. Inside was a photo of a new fixture made by Woodyah that hit the market. It was a piece of plastic you put on your hand plane to make your tote tilt at an angle for using it as a shooting board plane. I thought it was pretty cool, so I went online and ordered it.
The fixture came in the mail in a few days, and I took a look at it. It’s made with a 3D printer, so it’s made precisely to fit and it comes with its own hardware. You just need to use your original front tote screw to screw the fixture onto your plane in the front. I downloaded the instructions when I bought the fixture, so I knew how to put it on before I received it.
Once everything is attached, the tote feels really comfortable in your hand, and it’s simple to install.
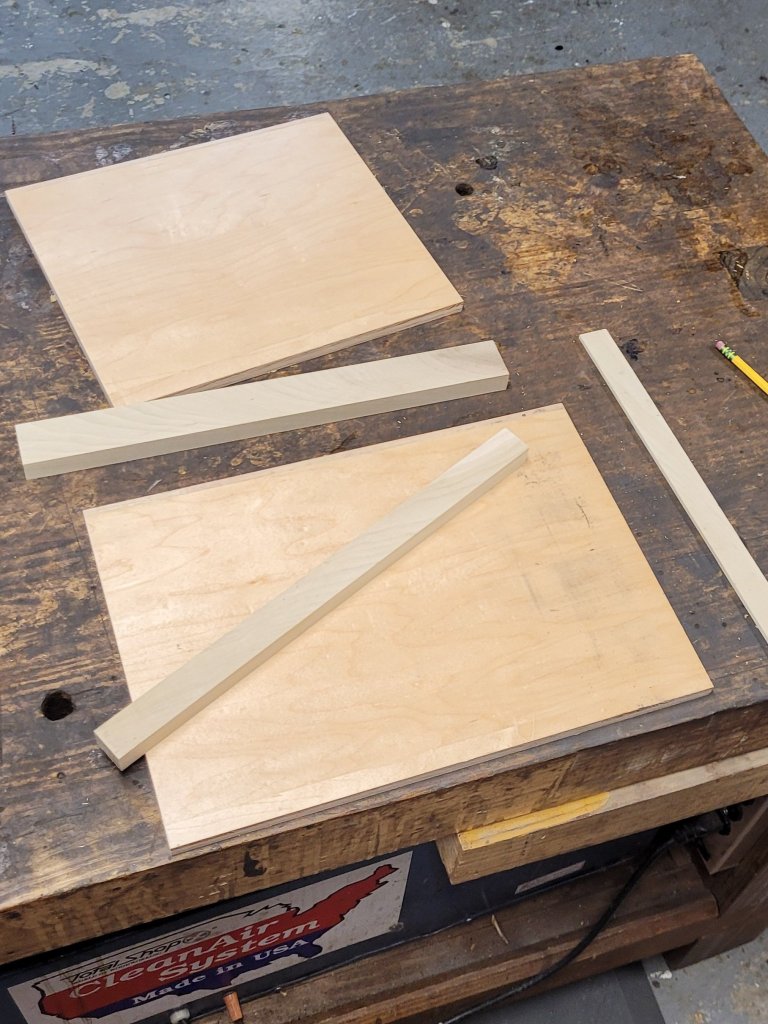
The next thing I needed to do was make a shooting board to go with the plane. I had a scrap of 1/2″ prefinished cabinet grade plywood and some poplar stock (I should have used maple, but I didn’t have any lying around.) The shooting board base is about 10″ wide by 15″ long. The length of the shooting board was simply determined by the overall length of plywood I had, knowing I had to cut it in half.
The parts were pinned and glued together, and I made sure that the side of the plane rode nicely against the thin rail of the shooting board.
Everything worked, but I needed to make sure it was accurate. I checked the squareness of the side of my plane against the bed, and it was just a touch off.
I took the plane over to my oscillating edge sander and fettled the bed first, then flipped it over on its side to fettle the side perfectly 90 degrees.
Taking the plane back to the shooting board, I made sure the bottom of the bed was a perfect 90 degrees to the face of the shooting board.
I then set the blade and tried it out. It worked well with a little bit of practice. Because there is only one point of contact between the side of the bed and the rail, I had to take slow and purposeful strokes to make sure I got a smooth cut. If I tried to use the plane fast, the plane would rock back and forth, producing an inaccurate cut.
I wanted to try shaving miter cuts with the shooting board. At first, I thought about making some sort of fixture that would attach to the base with dowels or some other mechanism. Then I thought to myself not to reinvent the wheel when I saw a plastic speed square in my tool cabinet. I simply placed the square on my shooting board where it needed to be in order to produce a perfect 45-degree angle and clamped it in place with a couple of C clamps. Then I cut a witness mark on the fence and square so I knew where it went the next time I used it.
With a sharp blade, the plane was cutting incredibly clean and accurate shavings. They looked like chocolate shavings you find on fancy desserts.
Fortunately, this is the plane that I wrote an article for Quercus Magazine last year, so I’m glad I now have a use for it.
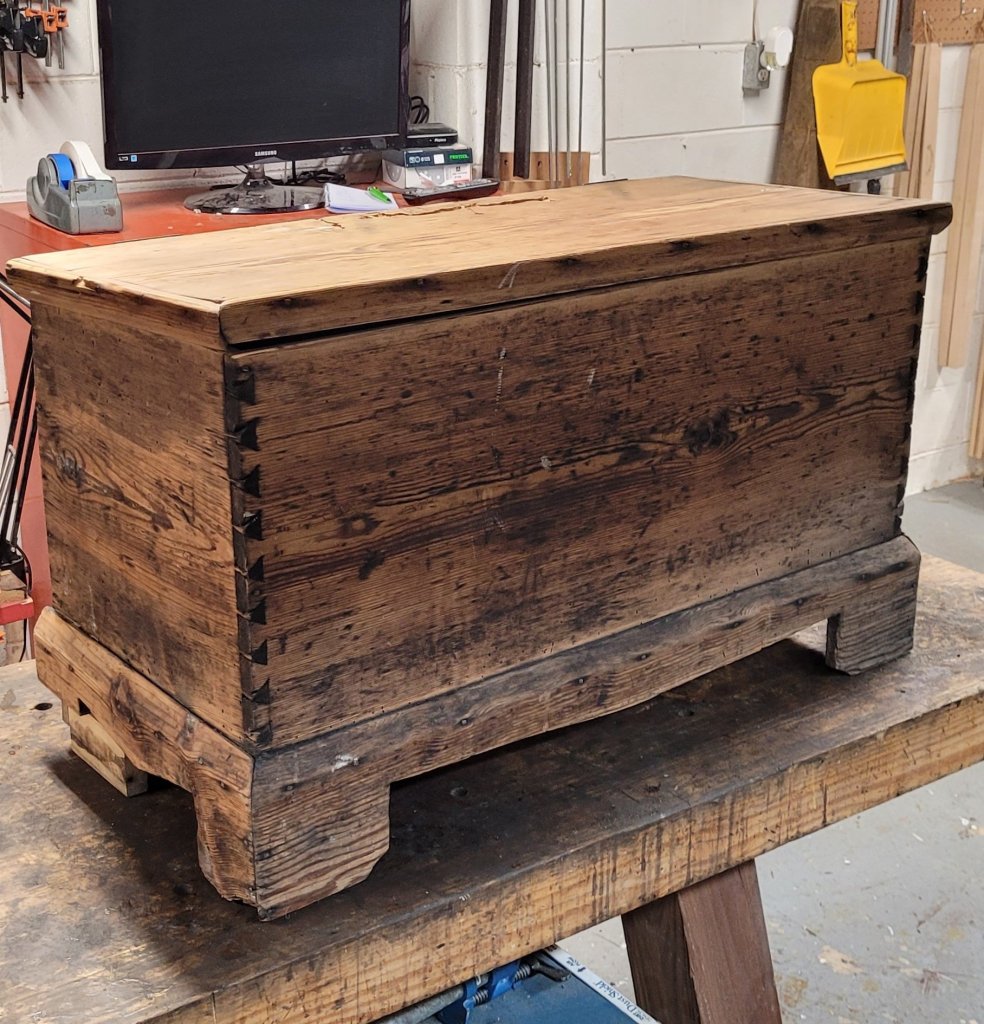
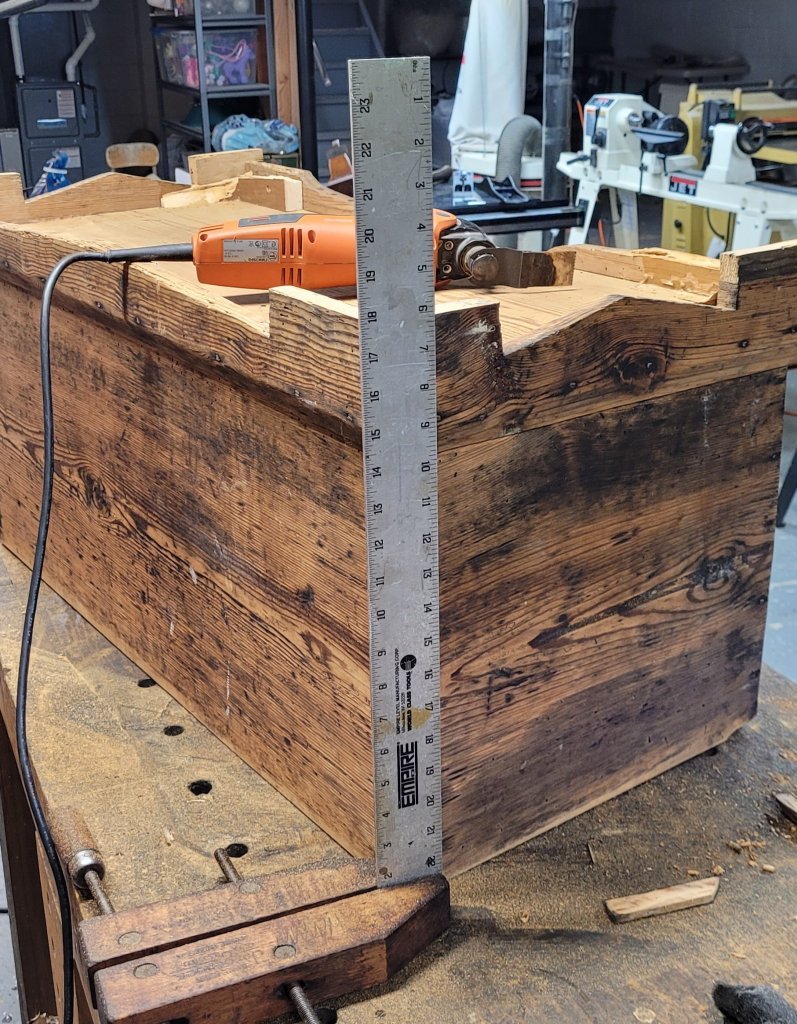
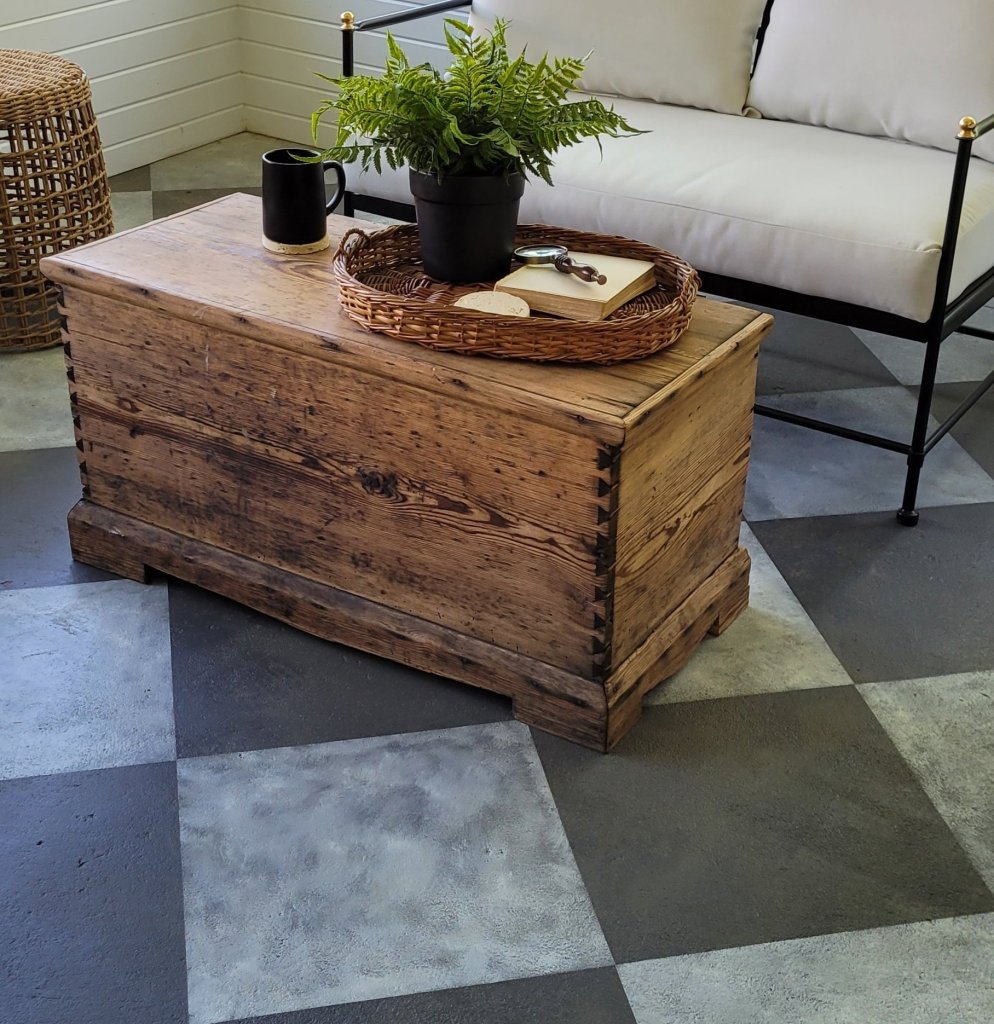
My wife came home from Florida with this old chest she bought off Facebook Marketplace for $20.00. She liked it because it was made from pine and had an old-world look to it. She asked me if I could repair it so it could be used as a coffee table.
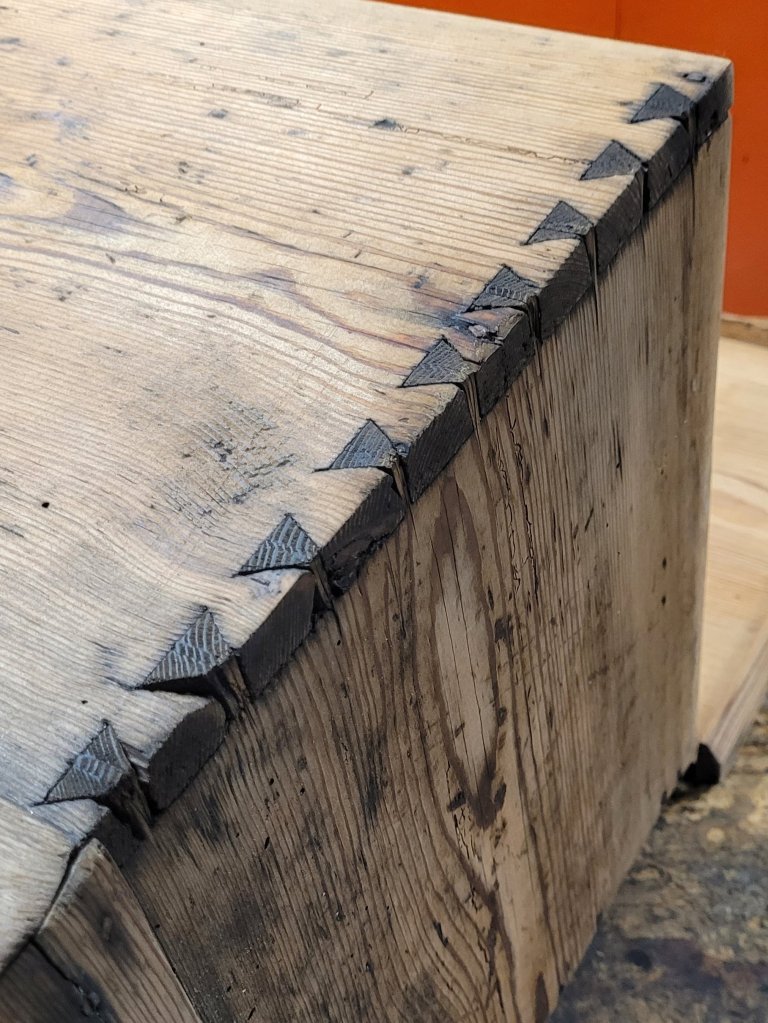
The chest had nice handcut dovetail joints on the front with really steep angles. So steep, they look like equilateral triangles. However, the back of the chest is just fastened together with a rabbet and some cut nails. I guess the craftsman who built the chest was tired of cutting so many dovetails that he opted for something easier for the back.
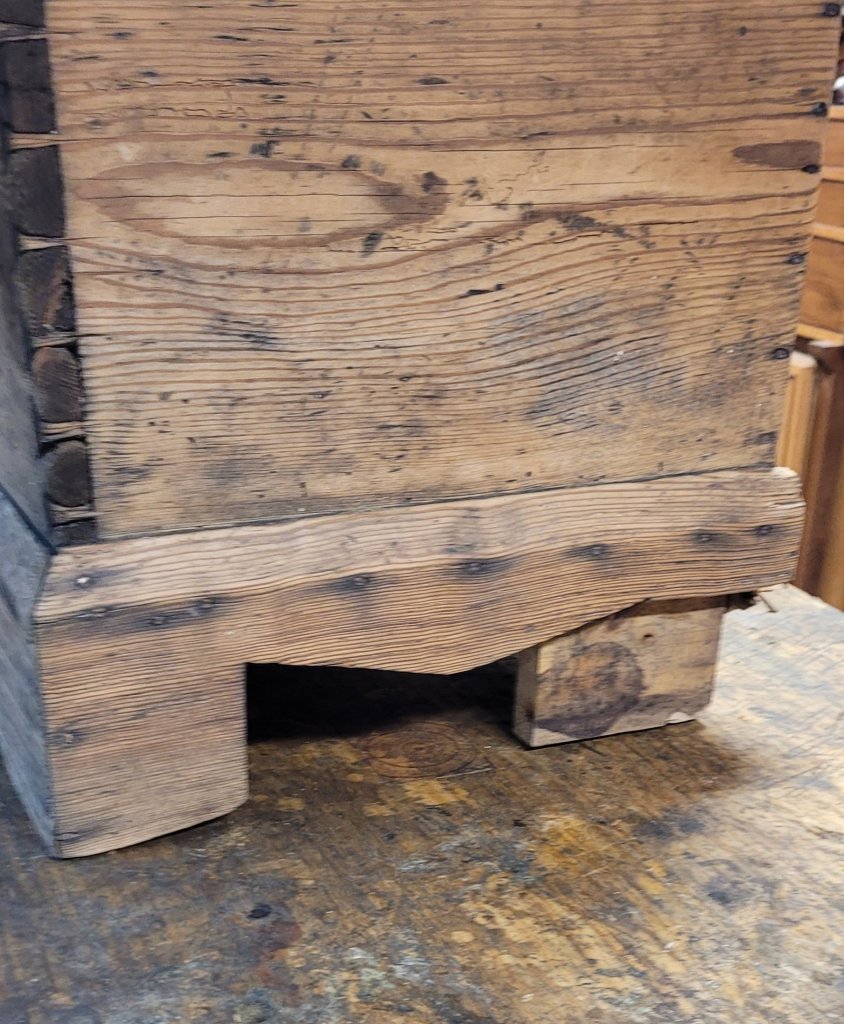
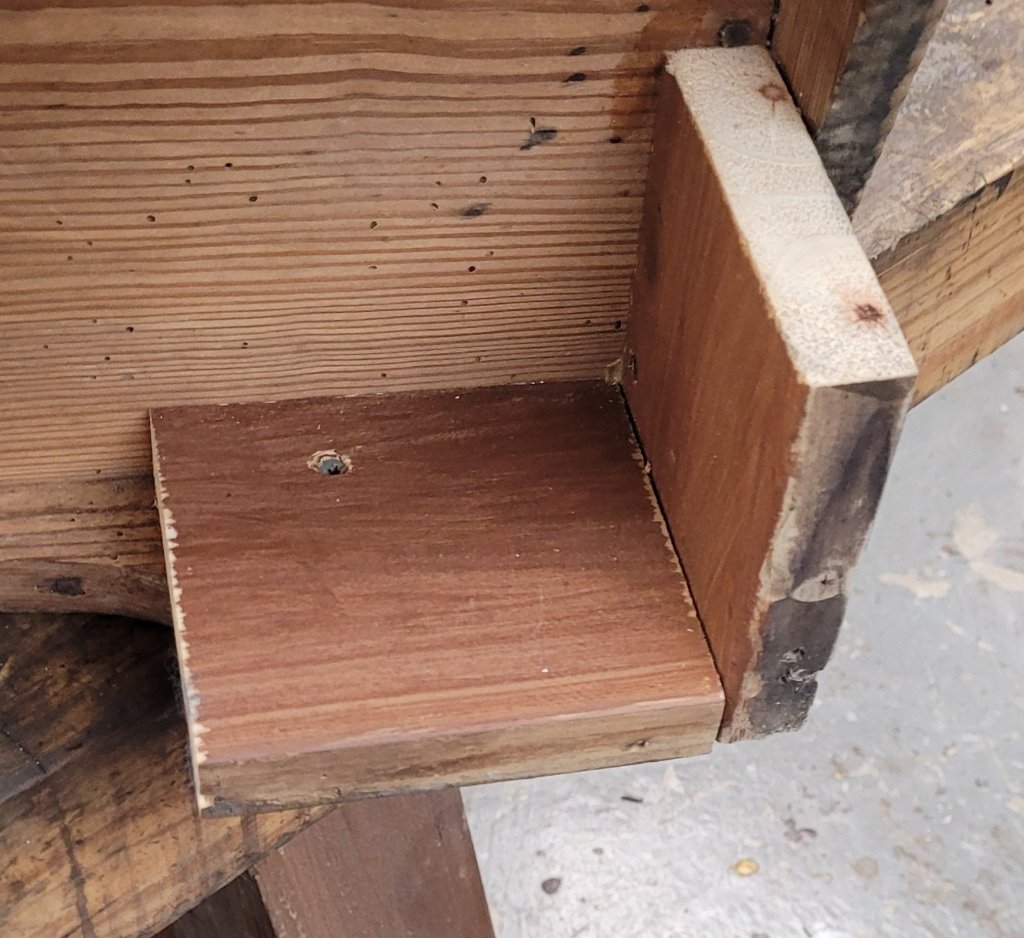
The bottom of the chest had a horrible repair to the back. Because the base was so tall, the wood failed and broke away. Somebody came in and simply installed L wood brackets to the back and screwed them in place with drywall screws.
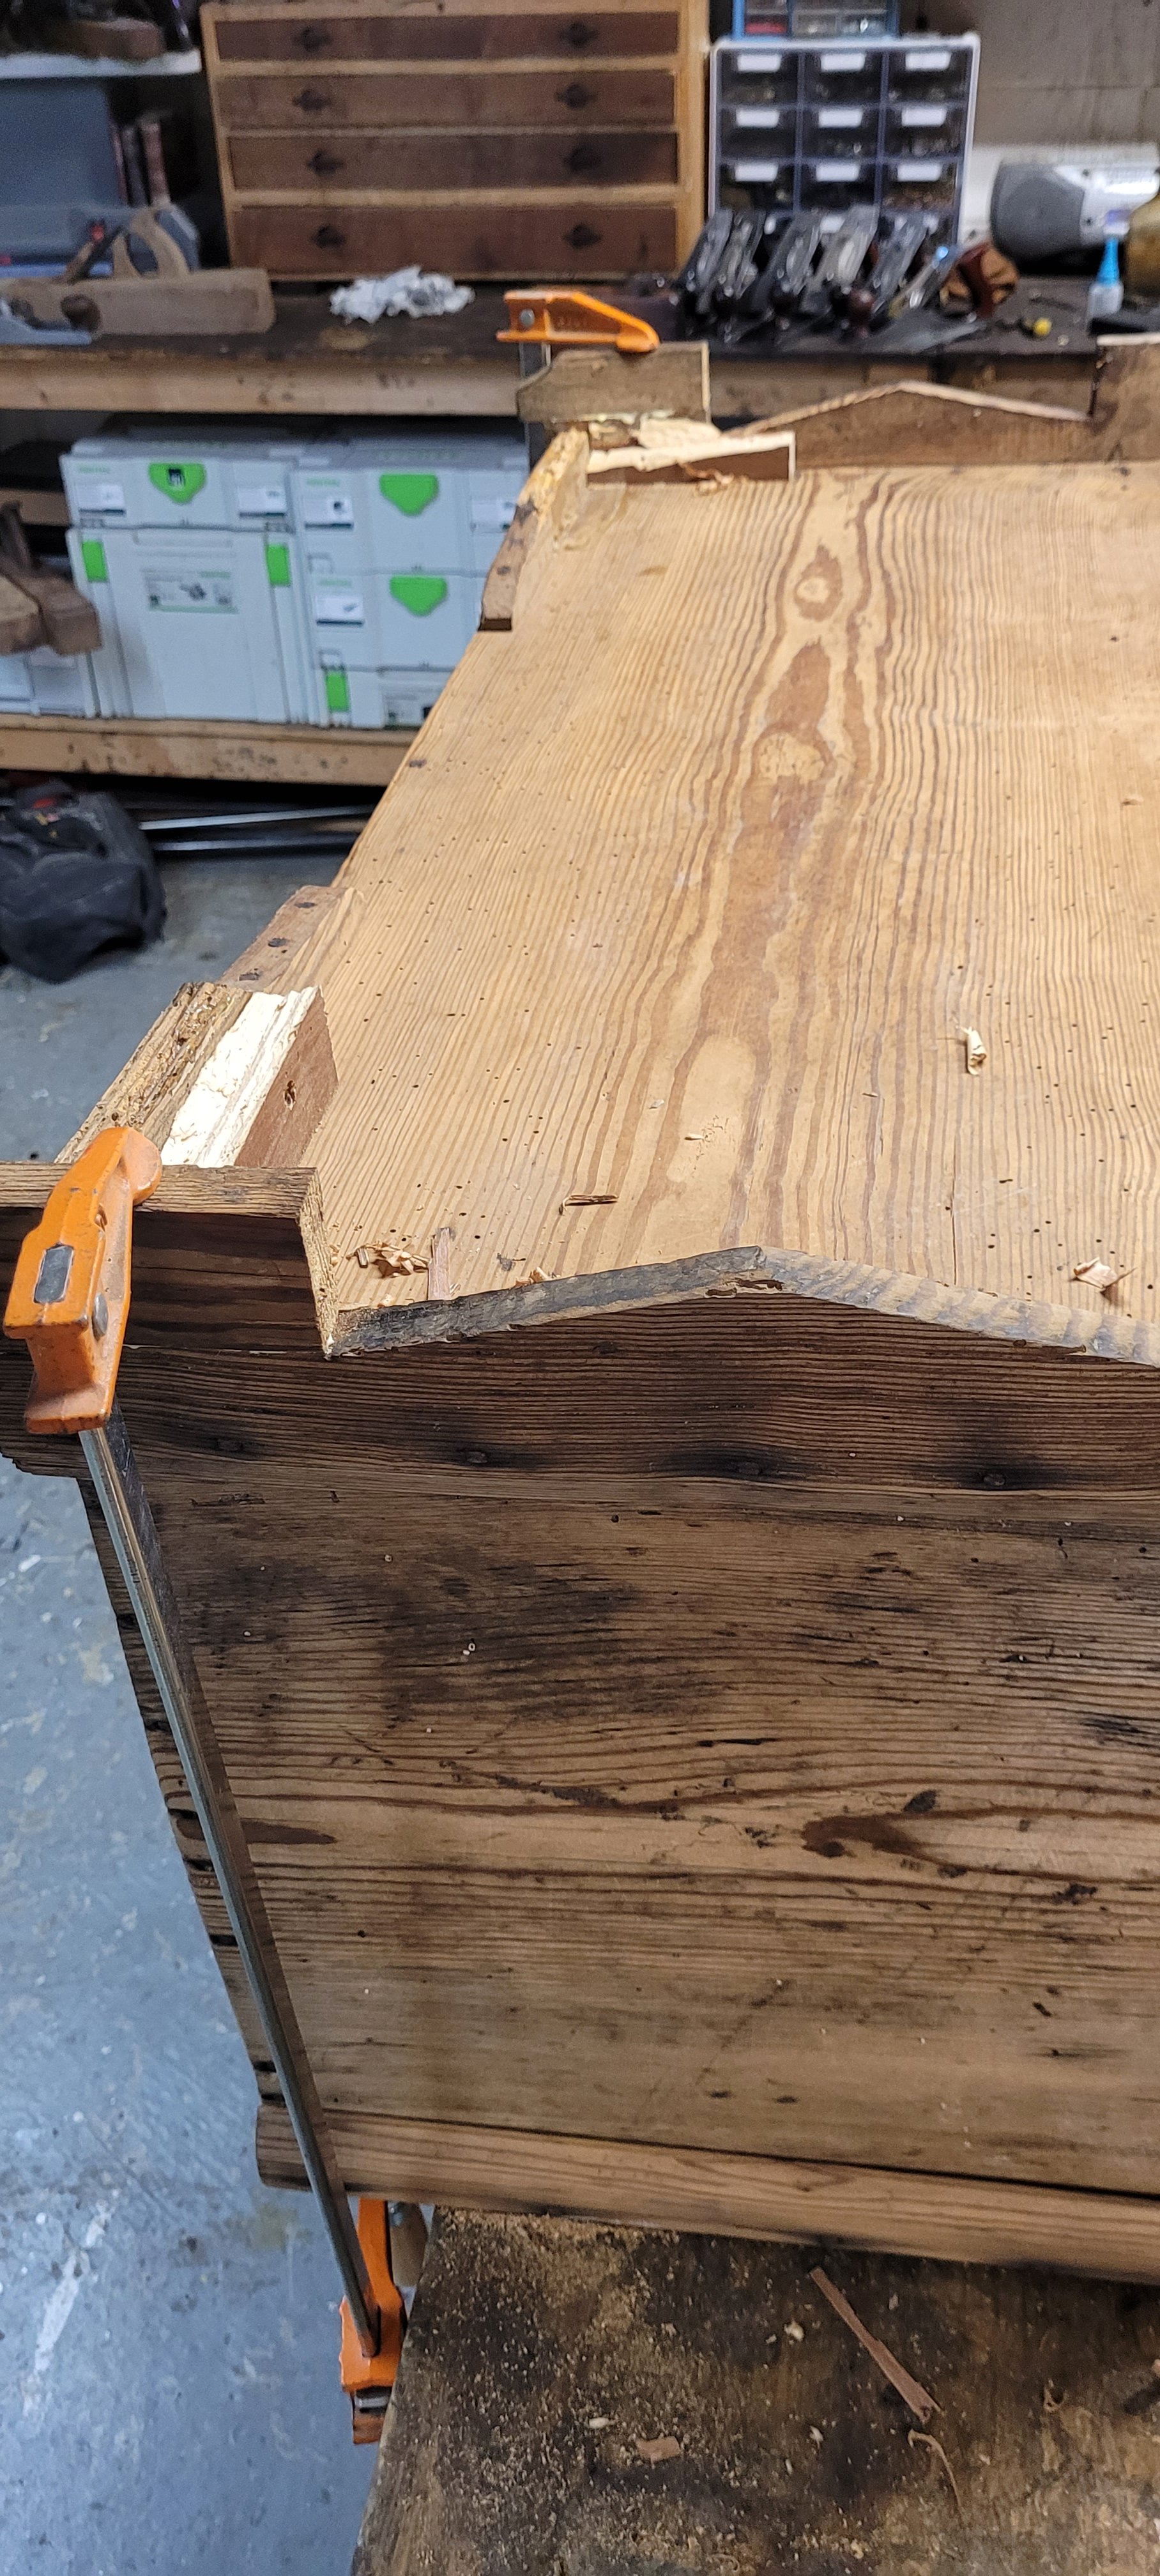
Flipping the chest on its top, I broke off the terrible repair and cut the front feet of the chest to 18″ tall. I then took the off cuts and glued them to back of the feet that were missing.
Once everything was glued, I flipped the chest back over on its feet and checked how it looked. The narrower base was more pleasing to the eye and less prone to breaking since the feet were no longer so tall.
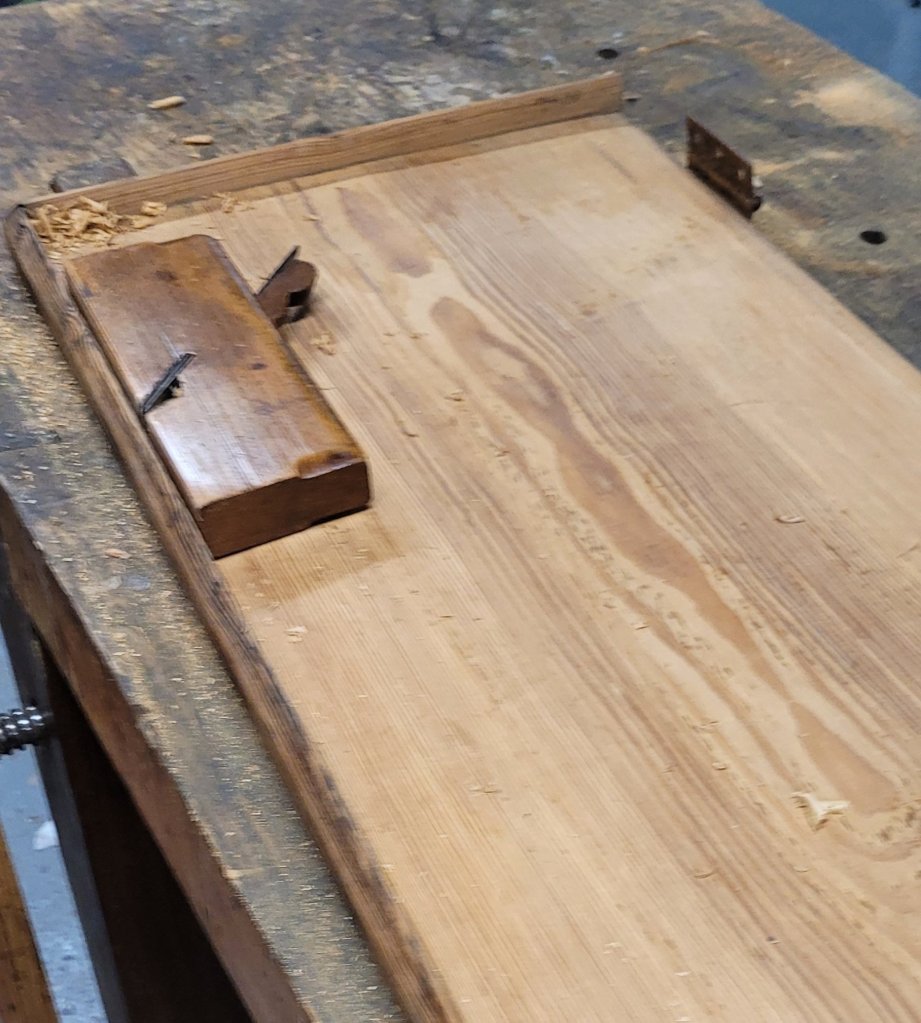
I then worked on the lid shaving away the inside of the front trim so that it would close around the chest. After a few minutes of shaving, the lid closed fine when I reinstalled it.
The chest now serves us well as a coffee table in our screened in porch. Hell of a coffee table for $20.00, and you can barely notice it has been repaired. Anita is ordering old looking chest handles for the sides as we both feel it would look nicer with them.
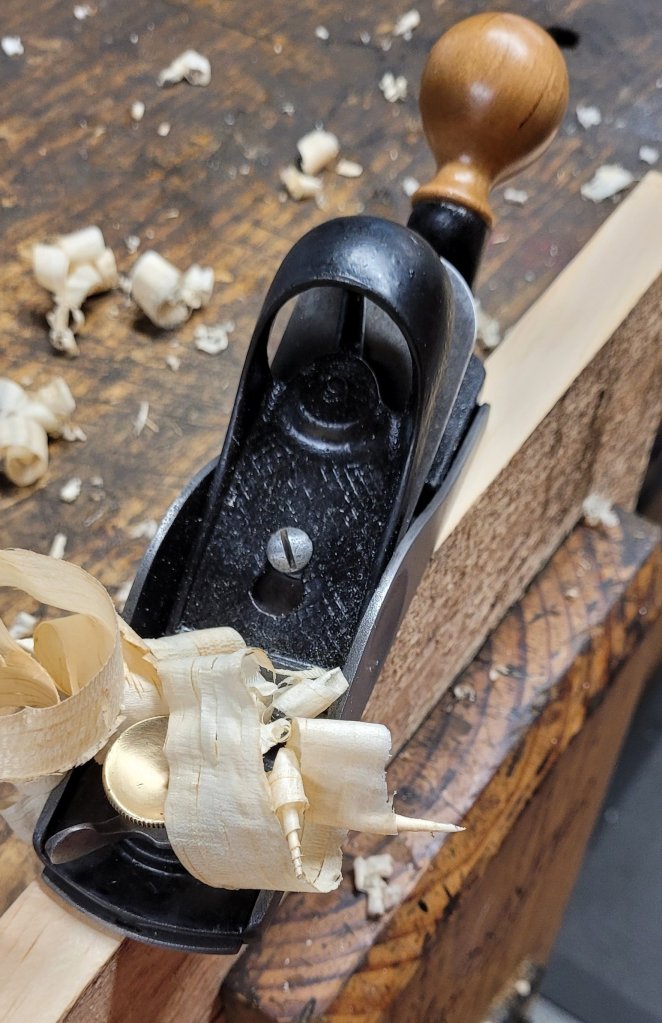
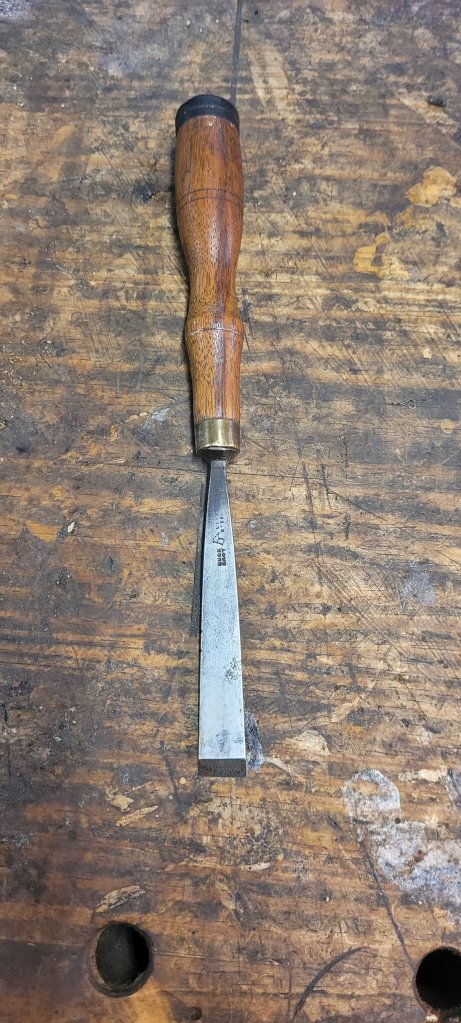
I’ve owned this 5/8″ firmer chisel for years. I’ve kept it around because I always wanted to reshape it and turn it into a chisel to clean out half blind dovetails but never got around to doing it. Since my wife is out of town, I have a lot of shop time right now, so I decided today would be the day.
I used a sharpie to lay out a rough idea of what I wanted the blade to look like. I wanted it to be flared out on both sides, so when I clean up the inside of half blind dovetail pockets, the blade will get all the way into the corners.
I took the chisel over to the bench grinder and carefully and slowly ground away the sides so as not to burn up the tool steel and have it lose its temper.
After a few minutes of grinding, I was happy with the overall look of the chisel. It wasn’t perfectly symmetrical on both sides, but I didn’t care. I would be the only one to use it, so I don’t have to impress anyone with my craftsmanship.
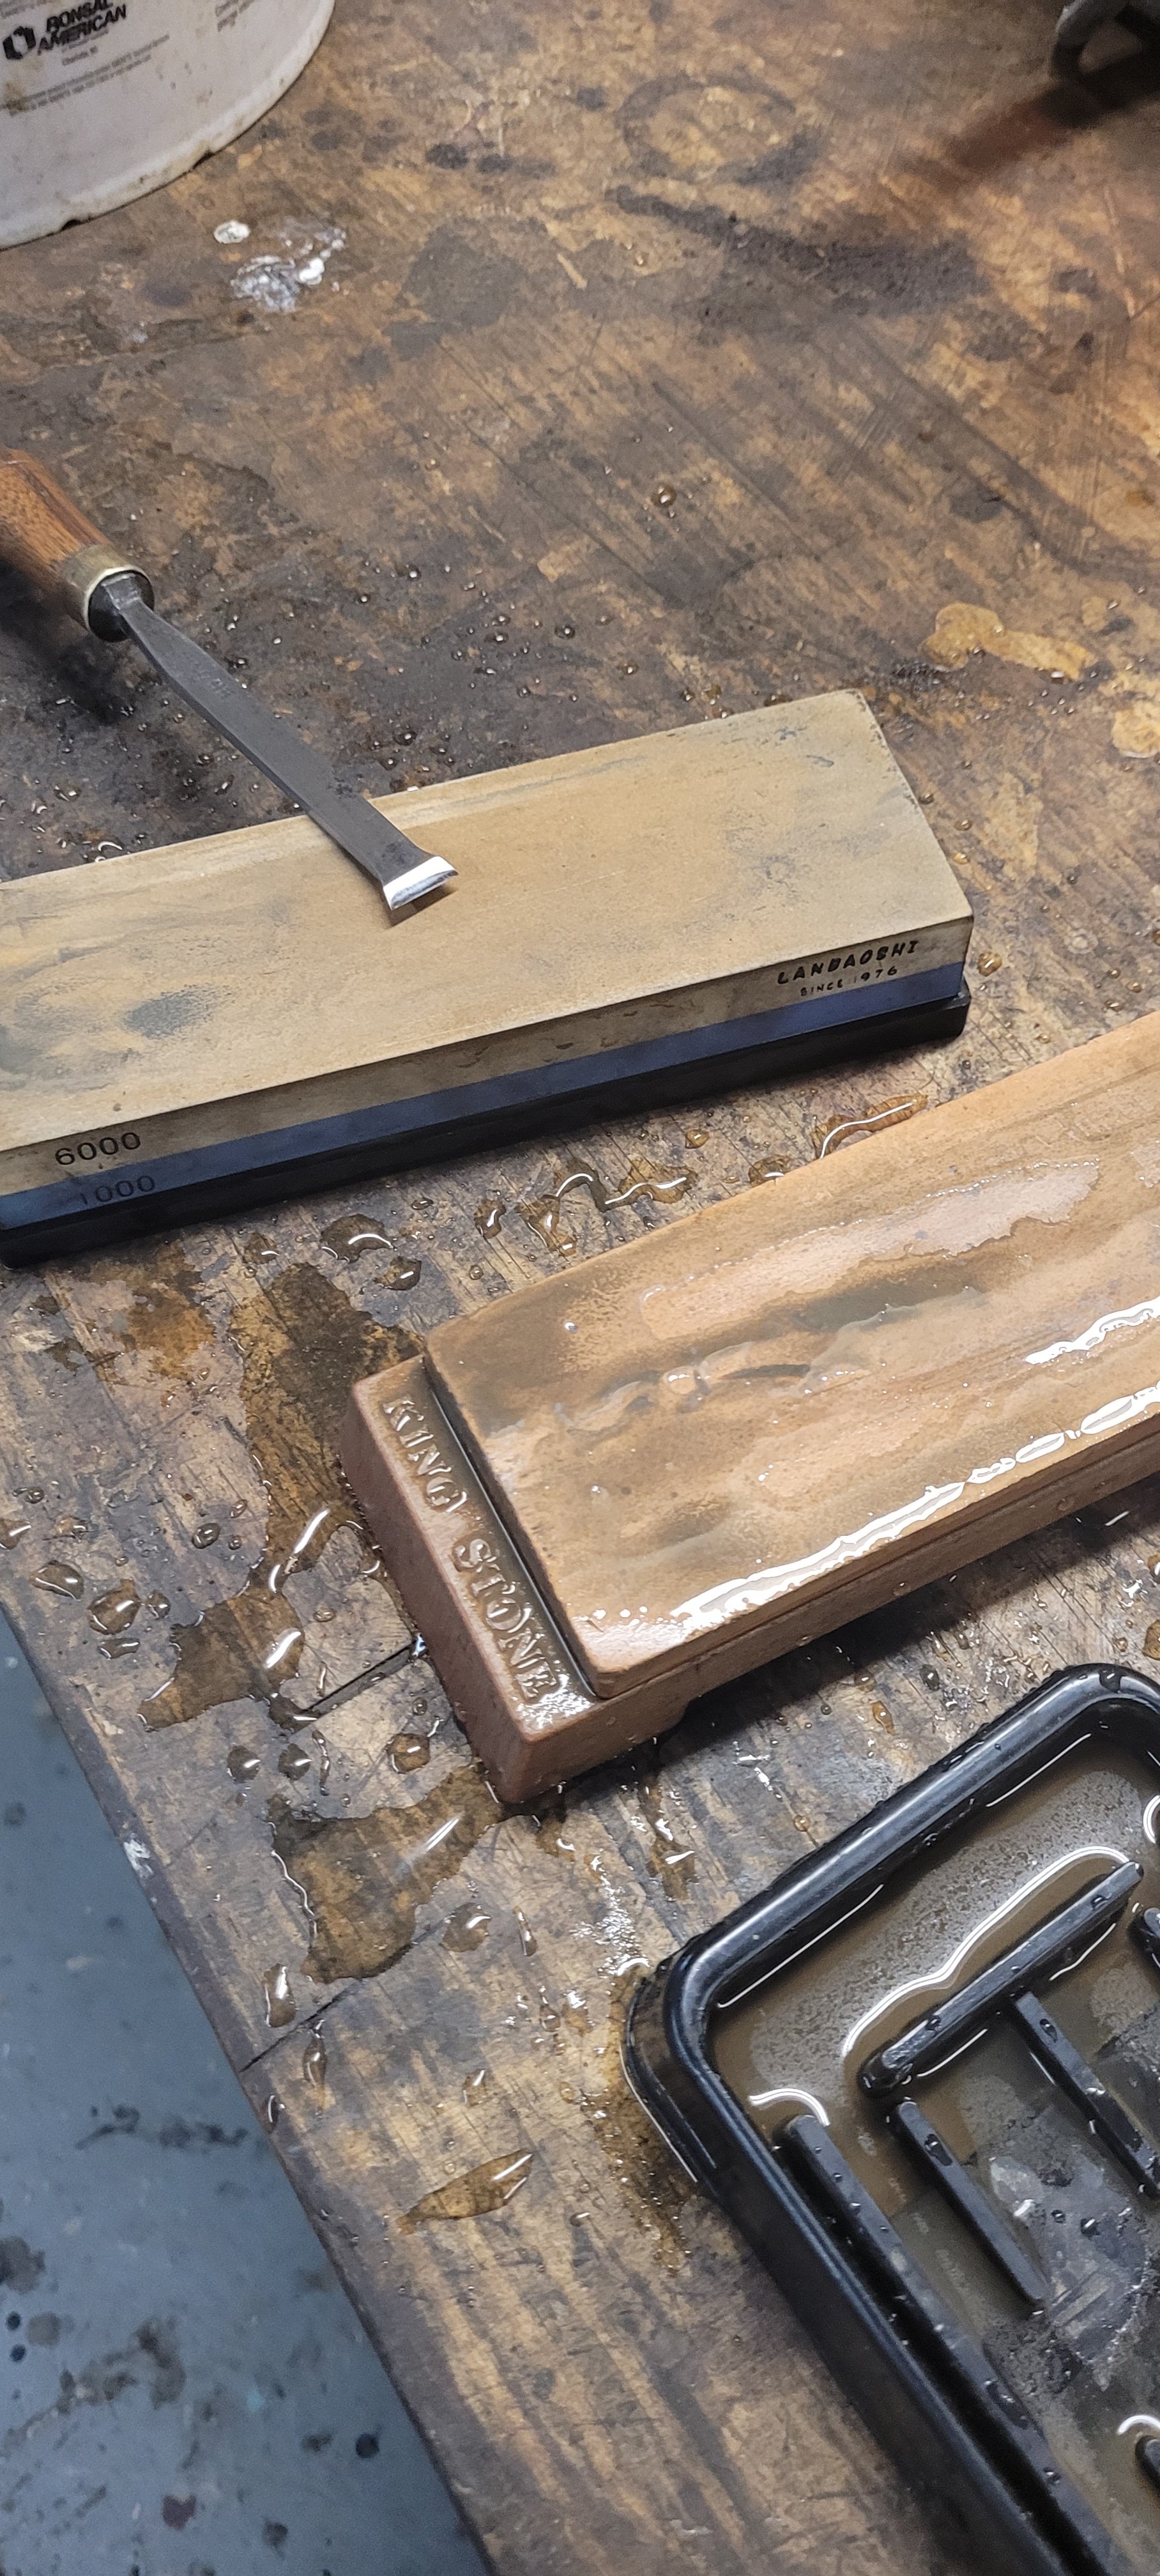
I then went on to sharpen the blade with my water cooled sharpening machine and a few water stones to hone the edge. I then polished the back of the blade to a mirror finish just in case I did get a visitor in my shop and wanted to impress them. Lol
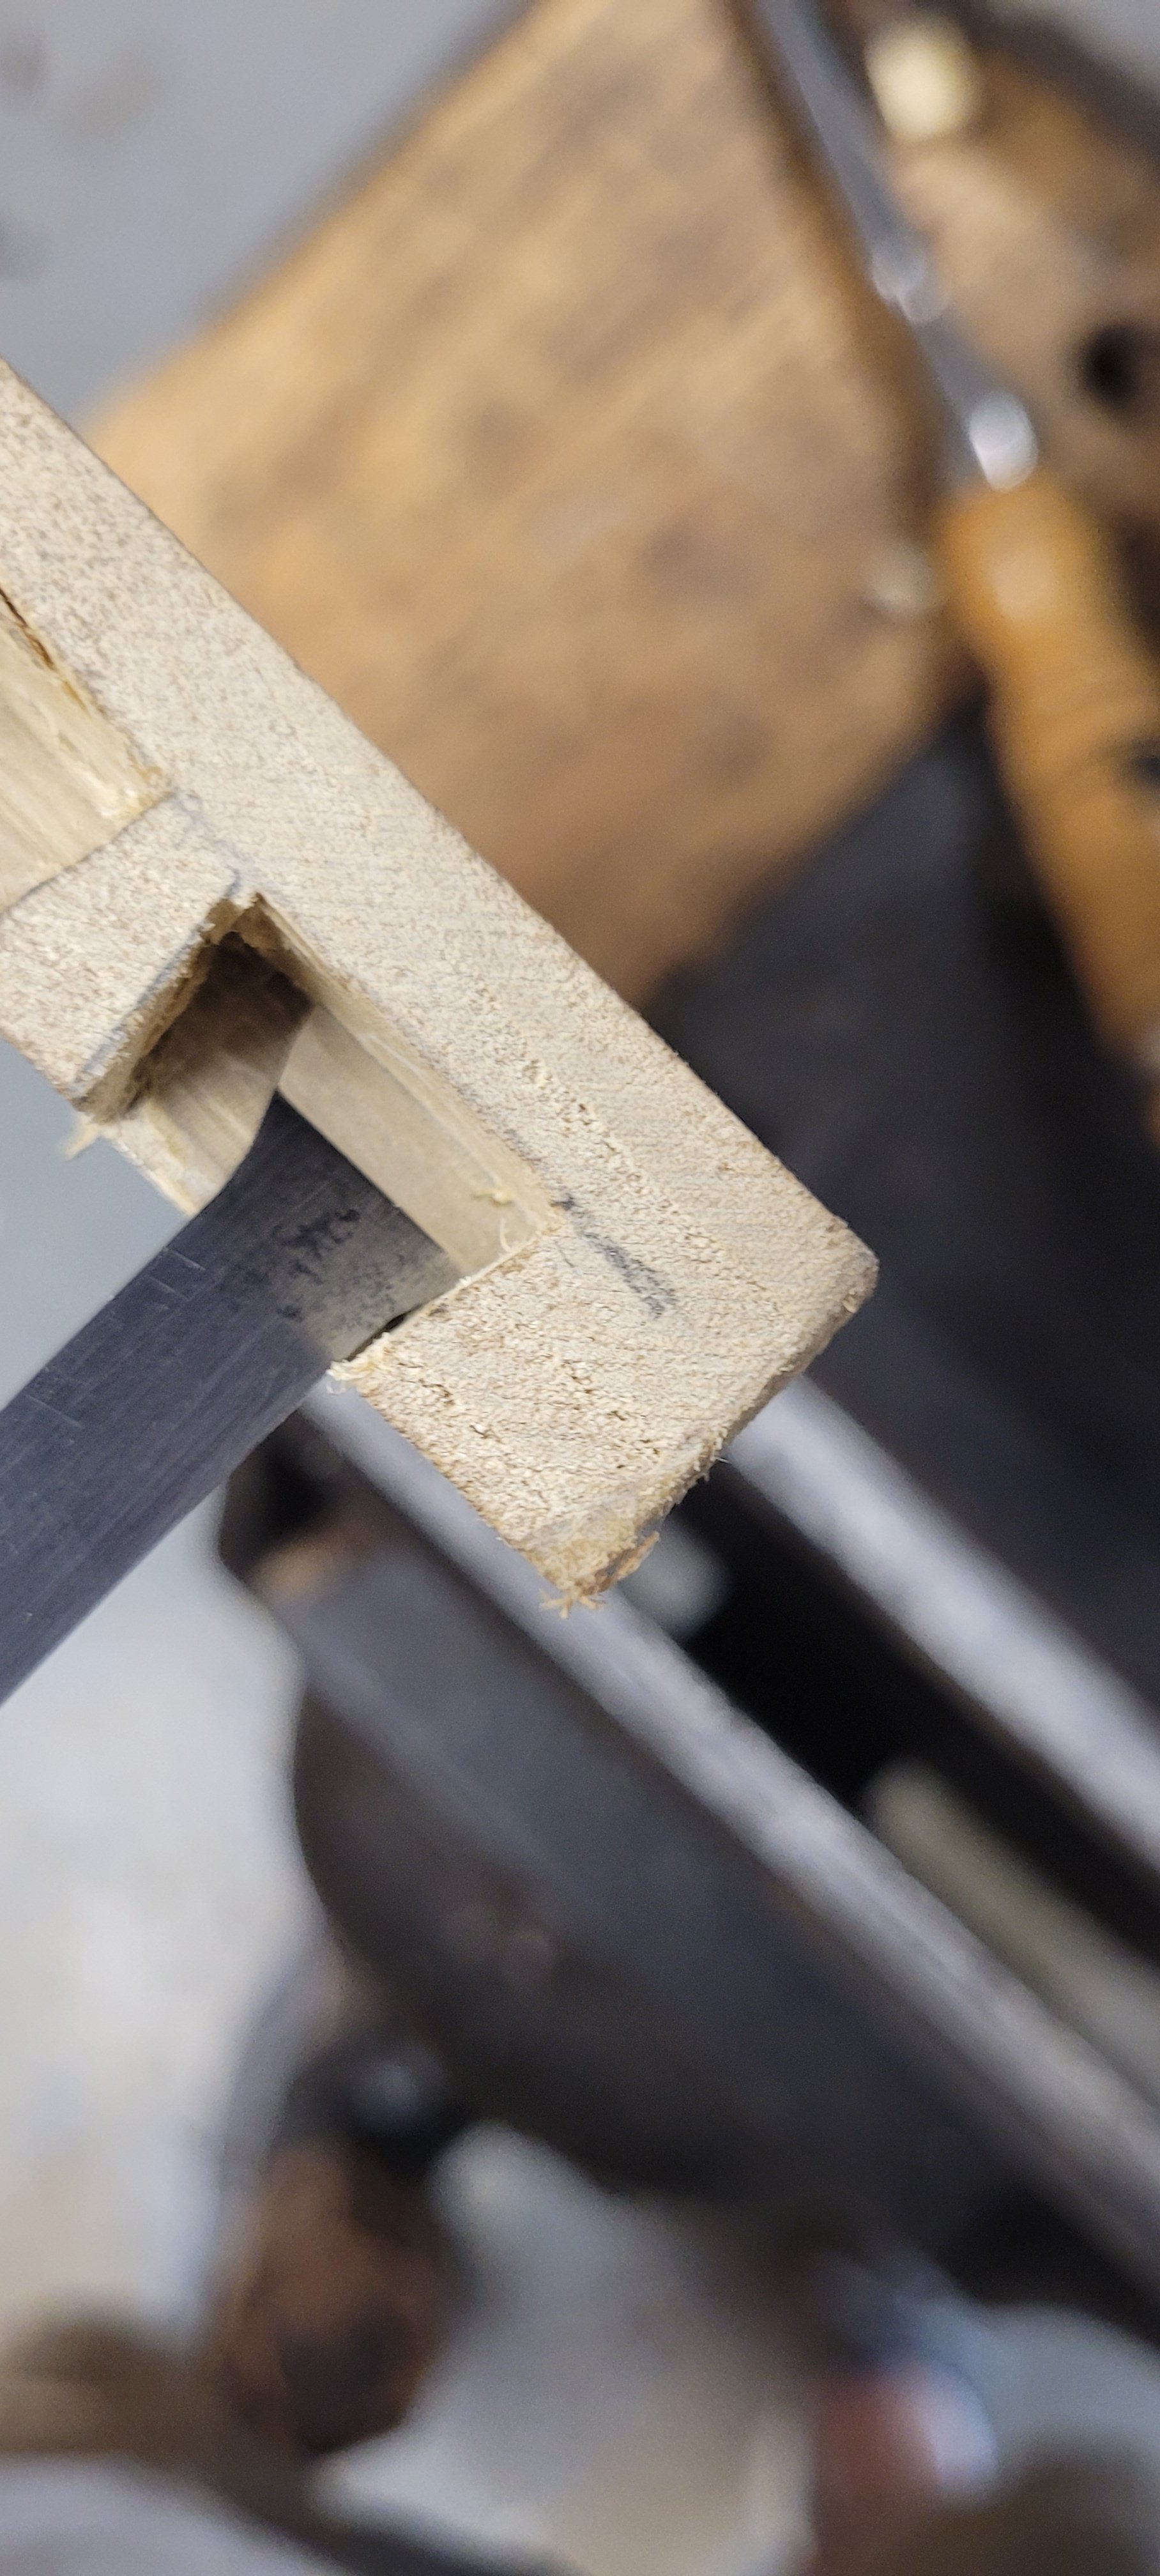
After the chisel was sharpened and honed, it was time to see how it worked. I laid out a few half blind dovetails and sawed and cut out the waste with some bench chisels. Then I tried cleaning up the sides and bottoms with my new dovetail chisel. Sure enough, it cut beautifully! I was able to get into the corners of the pocket with this chisel, something that I had a hard time doing before with my normal bench chisels.
I made a little holder for the chisel and added it to my tool cabinet door. I put off doing this project for years, thinking it would have taken a lot of time to complete, but it ended up only taking about an hour. Figures.
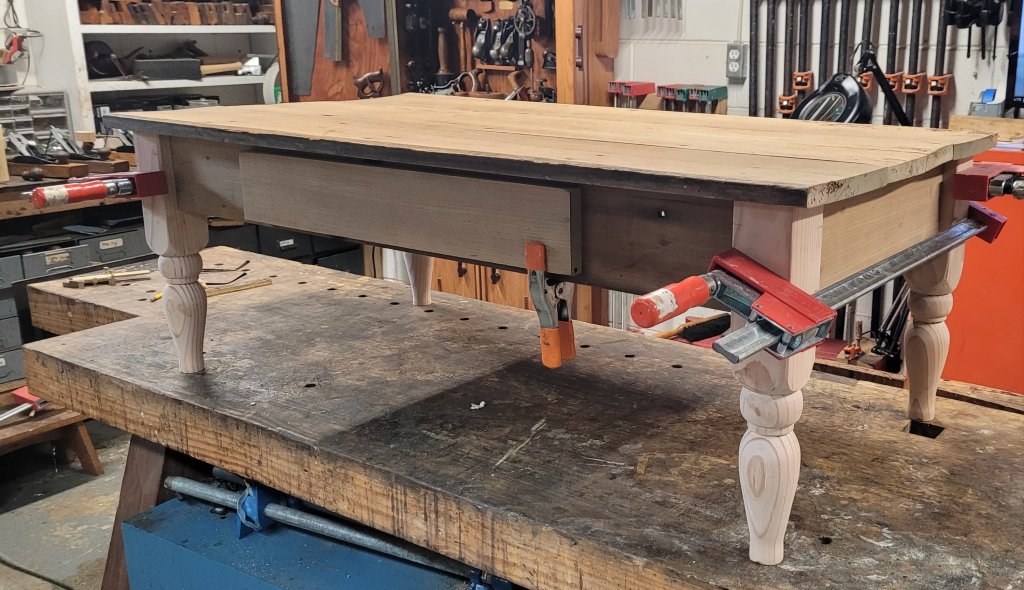
Well, I finally built something! It’s been over a year since I built any type of piece of furniture. Mainly, because my new job keeps me busy during the week so the only time I have time to work in the shop is on the weekends.
My wife bought an old bookcase on Marketplace last year. She originally wanted to use the bookcase in her booth, but it was in such poor shape that she decided that she wanted me to take it apart and make a coffee table with the wood instead. So, I disassembled it and removed all of the cut nails from the boards.
The wood was poplar and in decent shape, just dirty and covered in paint, so I sanded the surfaces clean with my random orbital sander. Some of the boards were nearly 20″ wide.
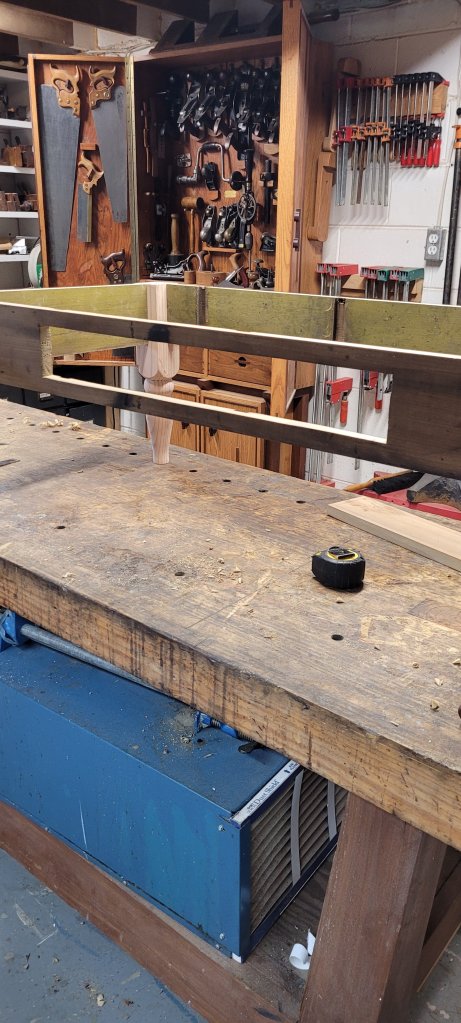
We originally wanted to use an old 4 x 4 to make the legs but came up empty at our local reclaimed wood supplier. So I ended up using a douglas fir 4 x 4 from Home Depot and turned four legs from it.
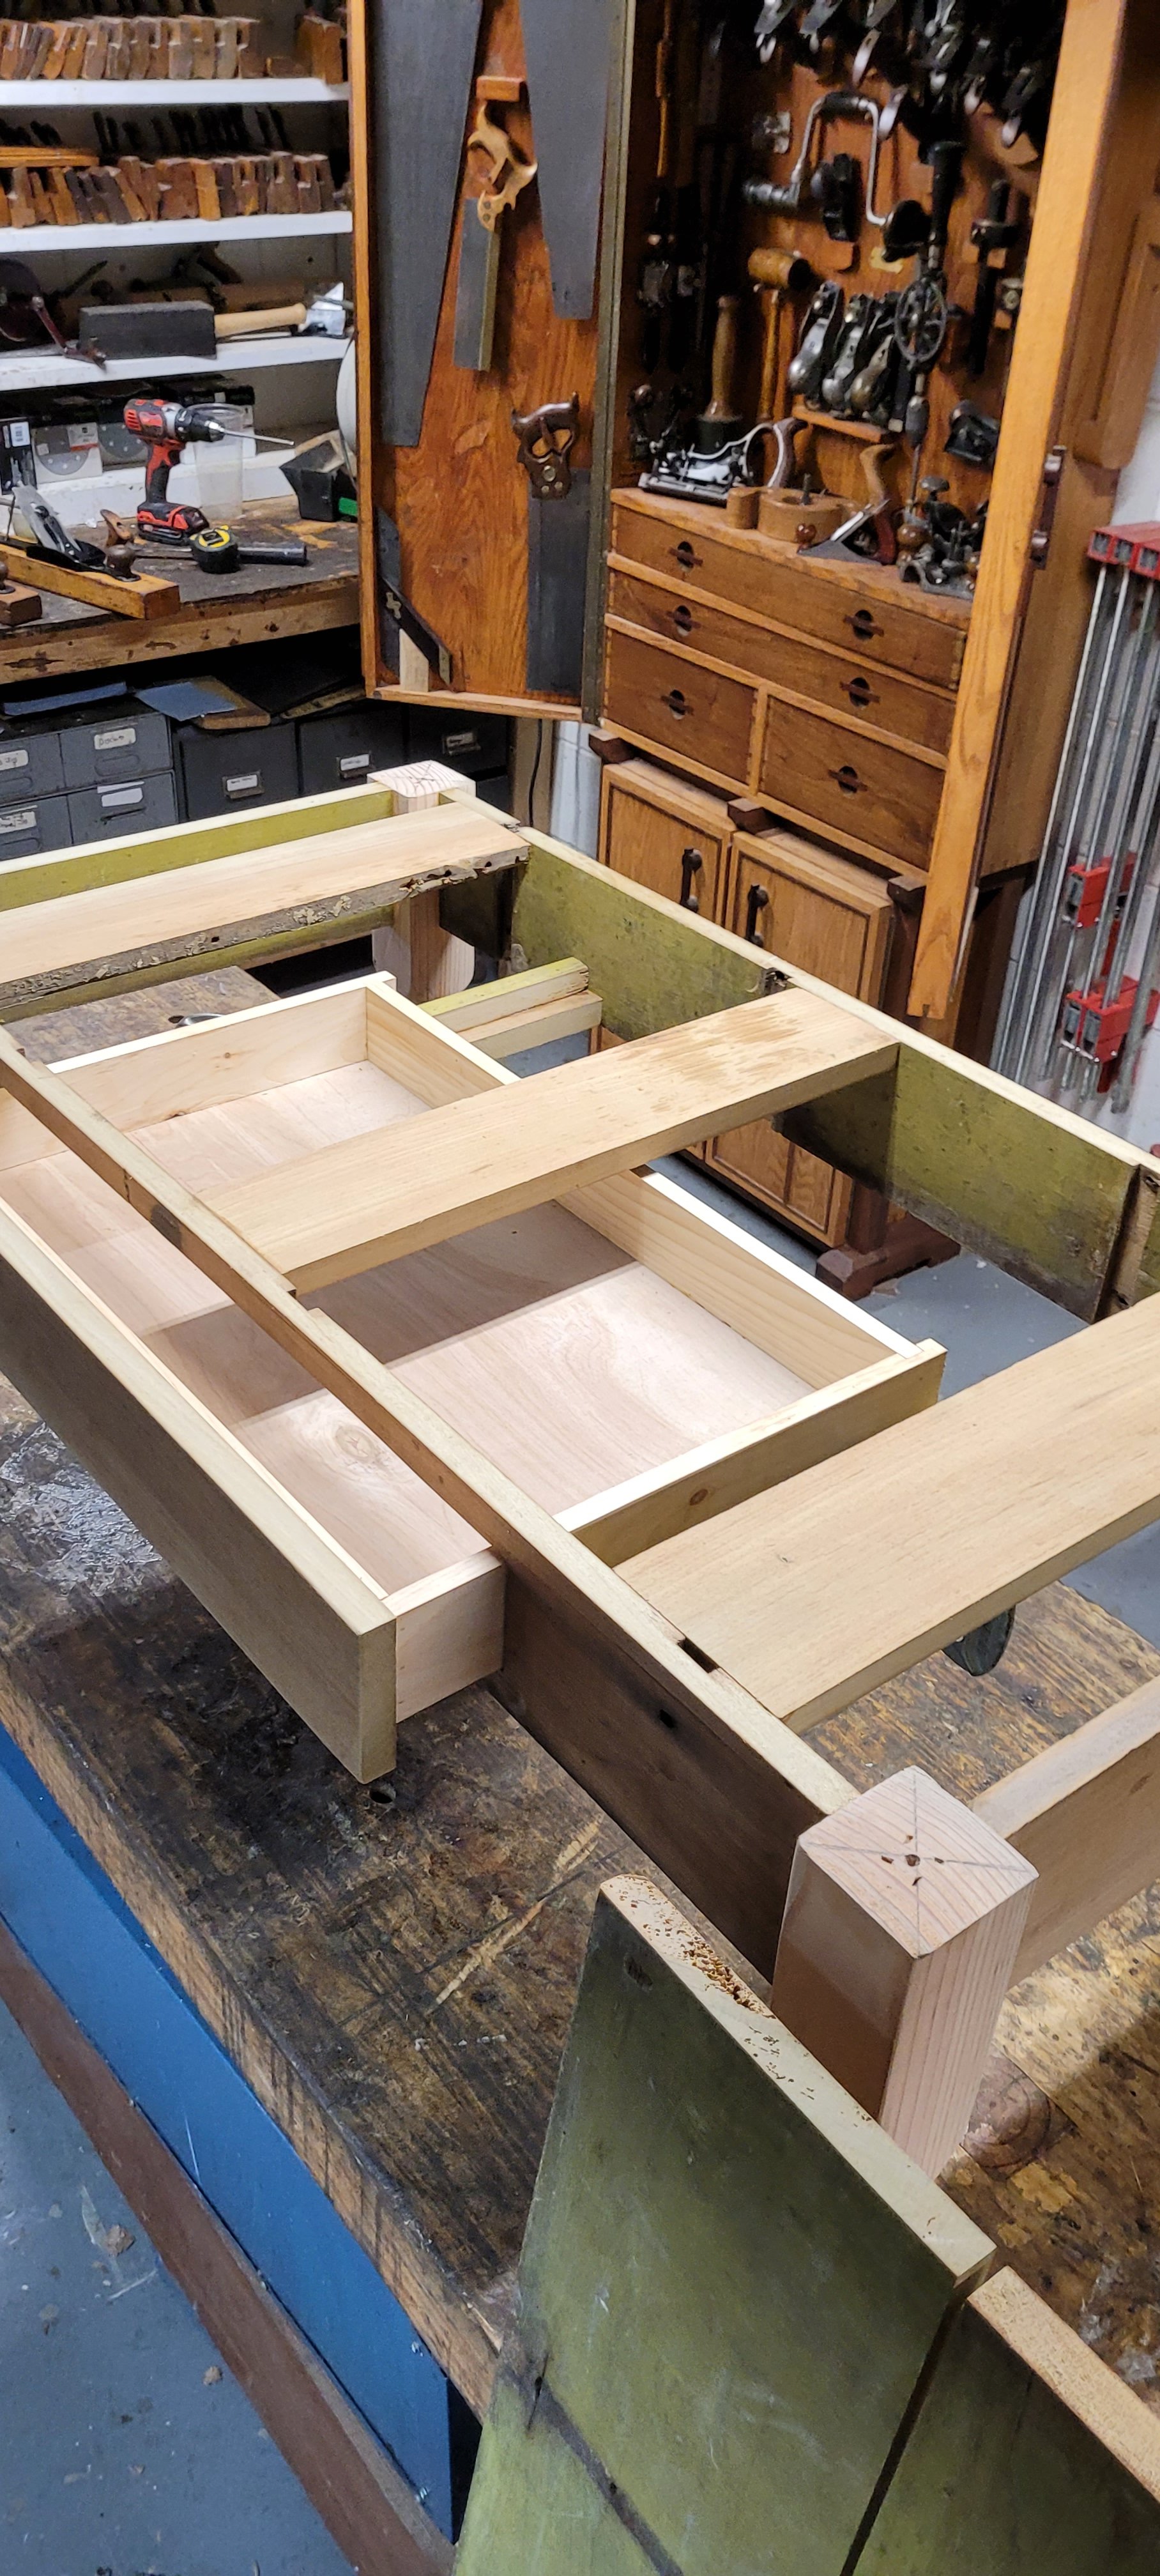
Assembling the table was super simple. I used Dominoes to attach the sides to legs and the top pieces were going to be screwed down from underneath.
I opted to put a drawer in the front of the table so I cut out a rectangle hole in front with my jig saw. Then, I made a drawer with frame work with some scrap pine. The drawer face was glued and pinned onto the drawer box.
After the drawer was made and fitted well, I attached the top pieces and brought it upstairs into the living room. It was a fun, simple build, and it felt good to get back in the shop and build something.