Saw Sharpening

A couple of weeks ago, I bought Set & File by Matt Cianci from The Lost Art Press. I waited about a year for the book to be published as sharpening has never been a strong suit of mine when it comes to saw restoration.

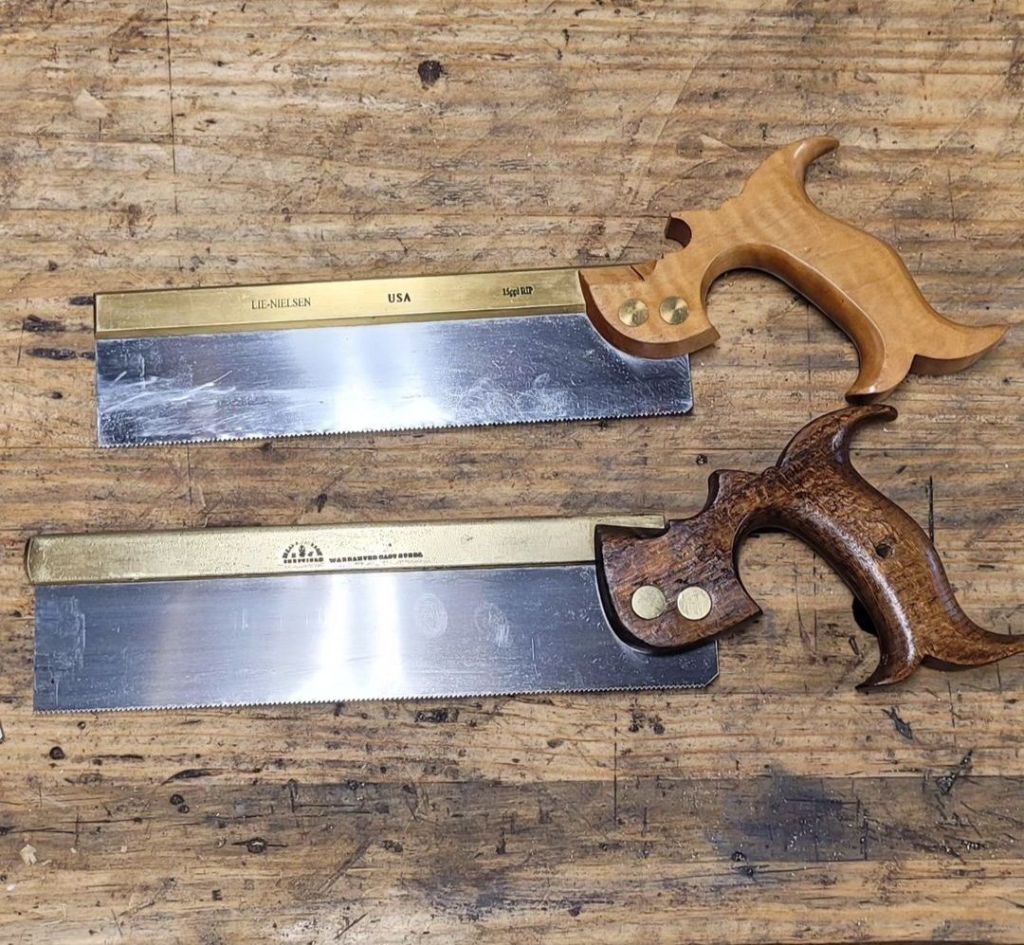
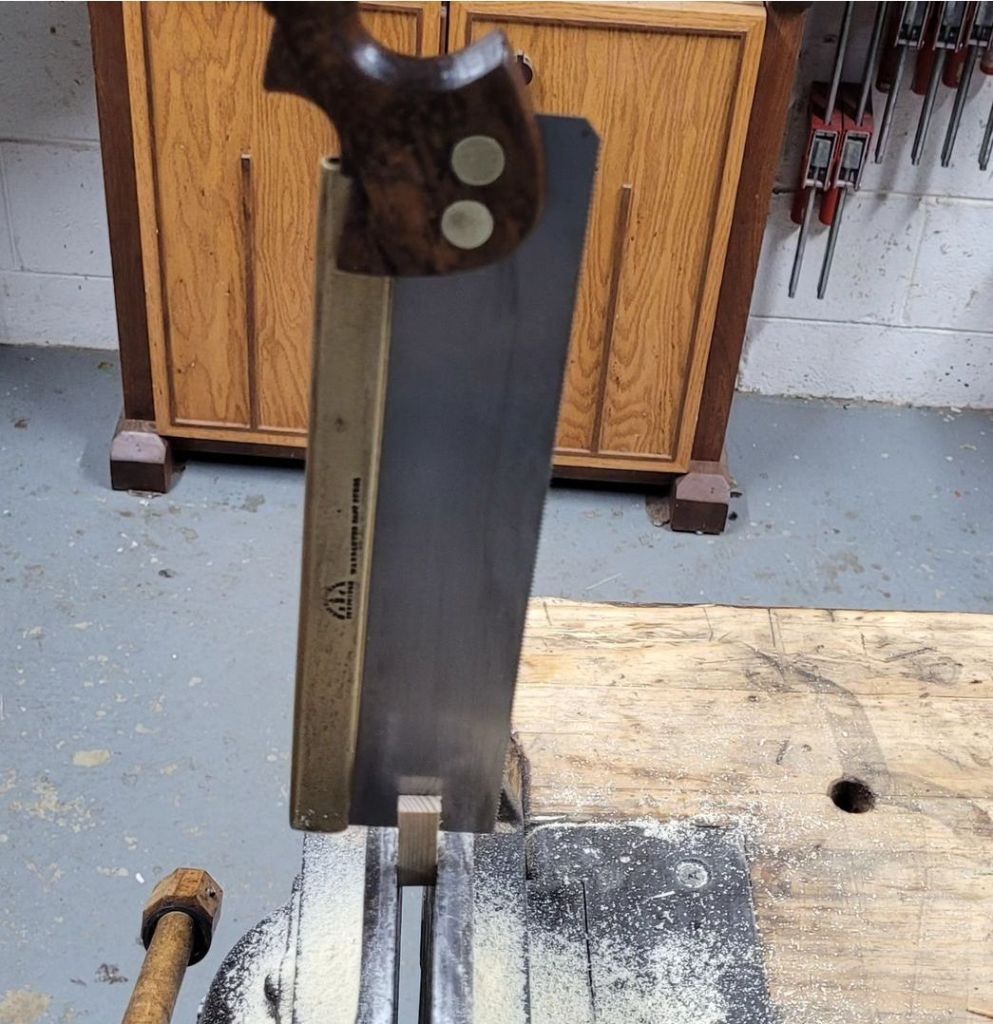
I’ve owned a Lie Nielsen dovetail saw for years and recently restored a Spears and Jackson dovetail saw. While I could sharpen the teeth fine, setting them properly was a pain as the anvil in my saw set was too big to do the job.

I read in Matt’s book where he dismantled his Stanley No 42X saw set and filed the anvil thinner in order to properly set the teeth on fine tooth saws.

Sure enough, I followed his advice and clamped the anvil in my vise, and carefully filed both sides of the anvil in order for it to look like the one in his book.

Putting the saw set back together, the anvil looked like it would now do the job.

After a few minutes of sharpening and setting the teeth, the saw sat in its kerf nice and tight. Plus, it cut like butter.

Now, I have two dovetail saws that are ready for use. It’s amazing how simple tricks can help your woodworking skills. Major props to Matt Cianci!

Cool Little Workbench

My wife, Anita, and I were antiquing in Madison, IN, yesterday when I stumbled upon this little workbench. 

It was cute little Sloyd style workbench from the 1800s. I couldn’t believe how small it was, so I imagine it had to be built for a little kid.

It had to be about 3′ 6″ tall by 5′ long. What was so amazing about the bench was how well worn out and used it was. The child that worked on this bench used it a lot as the top is full of tool marks.

Obviously, it could have been for multiple children in a school shop class, but I never had a bench like this in elementary school, let alone a shop class.  Can you imagine being the kid lucky enough to work on this bench?

No, I didn’t buy the bench as I couldn’t afford the $350.00 price tag as I’m too cheap. Plus, I didn’t want to drag it home because I had no place to put it. But it’s definitely the coolest old workbench I’ve ever seen.

Rebuilding a Drawer

I bought this old cabinet at an antique show last month. I didn’t realize it at the time that the left drawer was an imposter. It’s basically the drawer face screwed to a smaller drawer. Shame on me for not checking before I bought it.

here is the drawer. you can see Bentley is not impressed.

So I took the drawer face off the stupid faux drawer and decided to rebuild the whole thing with some white pine .

I cleaned up all the nails that the previous owner used to “fix” the drawer in order to use the existing pins as a jig to cut the dovetail tails. I also cleaned up the pins so that could work again.

Basically, what I did was scribe the pins onto the drawer side and cut tails into the wood. No different than making a drawer from scrap. The only difference is that not all the pins survived over the years, so there are ghost pins within the drawer side.

After I cut the front tails, I made normal dovetails on the back to match the other two drawers that survived.

I made a new bottom and stuck it in the drawer to make sure it worked. Everything was square and fit into the cabinet opening.

Here’s the drawer finished and glued together. They all fit nicely back into the cabinet and everything is good to go. I also glued one of the cabinet doors back together and attached both of them back on the cabinet.

My 15 Year Old Workbench

This year, my Roubo workbench turns fifteen years old. All I can say is that it’s one of the best things I’ve ever built as it has held up a lot better than I thought it would. It’s pretty beat up with a bunch of tool marks and stains, but it looks like every antique workbench I have ever seen in the wild, so I must be doing something right.

The bench is designed based off two Roubo workbenches, one from Roy Underhill in his book Working Wood with Wedge and Edge and Christopher Schwarz’s book Workbenches. Made from 2x material and 6×6 pressure treated wood for the legs, the bench is incredibly beefy and does not wrack when I’m planing or doing any other task on it.

The leg vise is still strong and tight, and the crochet at the end has never let the wood slip when I jammed my board into it.

Amazingly, the top is still level even after all these years. I did have to flatten the top a year or so after I first made it, but the wood is now stable and is done drying out.

The king of the bench is my Emmert Patternmakers Vise. It’s by far the best antique tool I’ve ever bought as it is extremely versatile, holding wood at various angles. I can even swivel the jaws 90 degree to raise my work pieces height higher so I can cut dovetails easier without having to bend over.

I restore a lot of tools and do a lot of sharpening, so the top is constantly dirty. I occasionally will break out my random orbital sander or even plane and remove all the gunk when I’m sick of looking at it. The downside to all the dirt and grease on top is that if I don’t lay down a protective sheet on top of the bench, the workpiece will get dirt marks on it. (which brings me to grab my sander and clean the top).

The drawer I built to go under the top is full of miscellaneous tools that I use, like pencils, hold fasts, bench cookies, etc. It’s also full of sawdust that falls through the holes on top.

I’m getting old (50), so more light is always a plus. Last year, I bought an old desk lamp at the thrift store for $8.00 and use it so I can see what I’m doing.

My fancy sliding double dovetail is still holding strong. It’s not pretty enough with my sloppy joinery and wood shrinkage to be featured in a magazine, but it has never let me down.

The bench can be disassembled so I can move it out of my shop when I eventually move someday. If I take off the Patternmakers vise, I’m hoping the top can be moved upstairs without too much trouble, but I’ll cross that bridge when I come to it.

American Windsor Chairs

Several months ago, I was reading a post on the Lost Art Press, and someone asked Chris Schwarz which book on Windsor chairs he thought was the best. Chris mentioned American Windsor Chairs and said it’s worth getting if you can find it cheap enough. Curious, I checked Amazon and saw one was for sale for $300. Then I checked eBay and saw one seller was asking $40 plus shipping, so I jumped on it.

Written by Nancy Goyne Evans, the book is over 700 pages with 1000 illustrations of chairs of various makers. The book starts with the classic European design and how the chairs evolved in America with first handcrafted chairs to mass-produced units in the 1850s. The book is categorized by geographic region and describes the differences in Windsor chairs in different regions of the country. It’s extremely detailed with stories about some of the makers and their business practices. If you have a passion for Windsor chairs and their designs, then this a must-have book you need to own.

In the back of the book, there are reference pages where it lists the chair makers and the time of their business. Simply look up their name and determine where and when the chair was made. It’s an excellent reference book you’ll enjoy owning if you’re lucky enough to find one at a reasonable price.

If you own a Windsor chair and would like to know when it was made, drop me a comment, and I’ll look it up and see if I can find more information for you.

Restored Dry Sink

I haven’t been spending too much time in the shop the past few months since I’ve been working on the shed during the summer and fall, but I did have time today to work on an antique dry sink my wife bought at a local sale.

The cabinet was in good condition, but the top was off as the hinges had broken. I noticed that they were too small for the top, so I grabbed some larger hinges I had around to replace the small, broken ones.

After removing the old broken hinges, I made a jig to route a perfect sized recess in the cabinet and top to accept the new hinges. I found this jig while reading Michael Pekovich’s book “Foundations of Woodworking”. The idea of the jig is to make a cutout in a piece of wood the exact length and depth of the hinge, then use a small flush cut patternmakers bit to route out a recess that’s the perfect size of the hinge.

After making the jig and routing a few test pieces to make sure it worked, I placed it over the cabinet back and the lid to route out the recess for the new larger size hinges.

After a few minutes, the hinges fit, and I shaved down the top of the cabinet for the lid to fit flush. This was a quick and easy project that will make this dry sink serve another 100 years. Plus, I’m finally back in the shop after a few months’ absence.

My Next Shed

Three years after my original shed was destroyed in a tornado, I finally decided it was time to rebuild a new one. I designed a new shed that would only be 7’x 10′ on the original 10′ x 14′ deck platform where the original stood. My wife and I wanted to have a little deck to step onto instead of stepping directly from the grass.

The new shed will have nine windows and two french doors in the front. I built the roof trusses in the opposite direction from the original one with stronger bracing for the wild winds we get.

With the framing done, I worked on the roof and sheathing. I had to build platforms made from 2×12’s on three sides of shed in order to work safely.

After the roof shingles and soffit were installed, I put 1/2″ sheathing around the shed. This shed is much stronger than the first one as that had just carsiding nailed onto the 2×4 framing.

I spent some time working on the doors and windows. We bought wooden windows at Menards, and I built frames around them in order to function. Four large windows are fixed while the other five swing open.

I wrapped the shed with 8″ wide shiplap and ran it vertical. Then, I spent time installing the doors, windows, and trim. Next, we need to paint the shed, but we may have to wait until spring until it gets warm again. In the meantime, I’ll work on the inside of the shed. It’s taken me three months to get this far working on it during the weekends, and I still have a bunch more to do.

Custom Block Plane Tail

When I bought my Tote Turner a few months ago from Woodyah, I picked up this block tail accessory at the same time. This, like the Tote Turner, is printed on a 3D printer and fits Stanley block planes.

However, I wanted to install it on my Ohio Tool Co O9 1/2 block plane. Similar in size, it’s nearly identical to a Stanley No 9 1/2.

Unfortunately, the threads on my Ohio Tool Co plane are not the same as a Stanley, so the brass hold down piece won’t work. Luckily, I have an old Ohio Tool Co brass blade adjuster wheel in my parts bin, so I cut the very bottom off of the brass wheel and filed four notches in it so I could turn it with a screwdriver.

My little homemade brass hold down screw was a little too small, so I used a washer underneath to hold down the tail better.

Everything worked, but I was not a big fan of the big black knob to the handle. I wanted something more historic and natural looking, so I decided to make a new knob out of cherry.

I turned a 2″ diameter knob on the lathe and added a 1/4″ tenon on the bottom.

Then I sawed the ball off the tail and drilled a 1/4″ hole to accept the tenon from my wood handle.

After I cleaned the rust off the block plane, I wanted all the parts to match in color and sheen, so I japanned everything during a hot day so I could use the sun as my oven.

After a couple of weeks, when the japanning dried, I put the plane together to see how everything turned out. As you can see, my japanning looks similar to the old Stanley 45 japanning behind it.

The only thing left to do was to sharpen the blade and try it out. The plane works fine. Ironically, the handle doesn’t make the plane cut any better, which begs the question, what was the purpose of them? The one thing I hear is that they were good for craftsmen who have arthritic hands, making the plane easier to hold.

Honestly, I don’t know how often I’ll use this plane as I already have a couple of my favorite block planes that I use, but it’s still a fun plane to own.

Craftsman Made Plane

Several weeks ago, I won this craftsman made hand plane on an auction site. When I first looked at it, I thought the body was made with three pieces of wood laminated together like a Krenov plane, but after studying it, I realized it was one single piece of wood. There are a couple of rivets through the body, but I don’t know what purpose they serve.

I’m not sure what the story of this plane is, but it looks like the craftsman owned a Sargent plane that broke, so he made a custom wood body out of mahagony and turned his plane into a transitional plane. You can see the chisel marks as he dug out for the frog, which adds a cool factor to the plane.

For whatever reason, he used four screws to hold down the frog to the body. It allows for very little advancement of the frog, but the plane still functions fine.

The owner also grounded the face of the lever cap down, which seems odd. You would think the original lever cap screw would have worked just fine, but maybe this screw is a replacement.

Luckily, I know the name of the craftsman of the plane (at least the last name). C Heiland is the person who made the plane. I googled “C Heiland Woodworker,” hoping I would find some information about him but had no luck. It would be awesome to have some provenance on the plane.

It’s a neat plane to look at, but I wanted to see how it performed, so I sharpened the blade and put it to work. The plane performs admirably. It was much better than the Buckeye plane I tried out from a few weeks ago.

Buckeye No 5 Plane

Several weeks ago, I won this Buckeye No 5 plane at auction. The look of the plane was something I had never seen before. I wanted to see how it would perform, so I took a closer look at the plane’s functions.

Buckeye planes were made by the Buckeye Saw Company, which was in business from 1904-1929, and they are known for this patented plane by John Muehl, who more likely sold his patent to The Buckeye Saw Co.

The plane has no frog. The blade simply rests on the casting of the bed, and the Norris style adjuster, pins into holes on the blade.

The lever cap acts as the cap iron as well, which usually is not a good sign for quality. The Norris style adjuster swings from left to right in order to adjust the blade from side to side.

The simplicity of the plane makes it impossible to adjust the gap in the plane’s mouth to produce a thin shaving.

I sharpened the blade to see how it performed. Because the plane is so primitive and basic, I couldn’t get a nice shaving out of it even after messing with it for a few minutes. At best, the plane would only be good for rough carpentry work, like trimming a door and not for fine cabinetmaking.

In the end, my opinion about the quality of this plane is……it sucks!