My wife bought an apothecary cabinet that was missing one of its drawers. I took a look at how they were built and assured her that I could make another one. The drawer was about 6 1/2″ tall x 8″ wide x 7 1/2″ deep.

The drawers are made of pine so I grabbed a scrap 2 x 8 and drew a couple of lines down the edges. The side of the drawers were about 3/8″ thick, while the drawer front was 3/4″ thick.

I took each piece and cut kerfs down the lengths of their edges making it much easier to rip them off at the band saw. This saves the band saw’s blade and motor as it won’t have to strain as much.

After they were ripped on the band saw, I took them over to the planer and sized them up to proper thickness.

I made the drawer bottom out of mostly quarter sawn pine, so it wouldn’t expand and contract as much with changes in humidity. It too was about 3/8″ thick.

Focusing on the front, I cut a 3/8″ x 3/8″ rabbet on each end the same thickness as the sides of the drawer.

I then used my little Record plow plane and planed a 1/4″ groove down the sides and front boards that started about 7/16″ up from the bottom. This way the 3/8″ thick bottom will not rub as the drawer is being pulled in and out. You can do this step on the table saw, but I really enjoy using this little sucker.

I cut a 3/8″ dado on each side of the drawer side so that the drawer back would fit nice and snug.

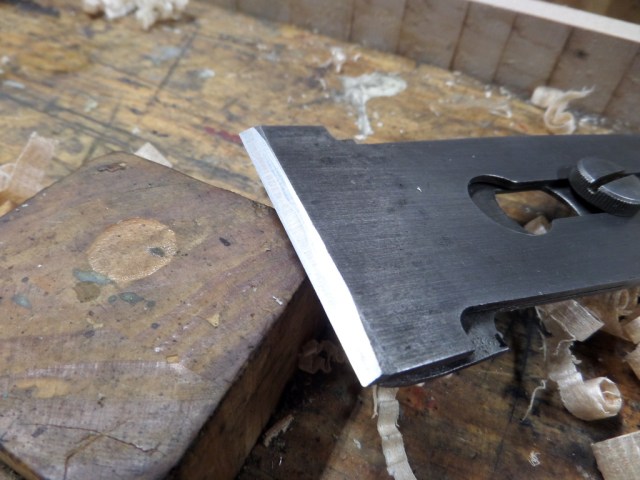
Using my Stanley No 140 rabbet block plane, I chamfered three sides of the drawer bottom to fit inside the 1/4″ groove I plowed with my plow plane.

Dry fitting the piece, I made sure everything fit properly and was square. The extra length of the drawer bottom and top of the back was quickly trimmed off at the table saw.

Once everything fit well, I glued the sides and back and pinned the drawer with 18 gauge brad nails. I didn’t use any glue on the bottom as I want it to move with changes in humidity.

After about an hour, I ended up with a nice little drawer for my wife’s apothecary cabinet. I’ll have to use vinegar and steel wool to age the pine. My wife will probably repaint the entire piece so the drawer front will match all the others.