
Anita got two new booths in the antique mall she sells in. She went from having a small 8′ x 10′ L shaped booth to having two big rooms. Because of this, she needed a big display cabinet for the back wall in one of her rooms. She searched the internet and asked me if I could make this apothecary cabinet for her.
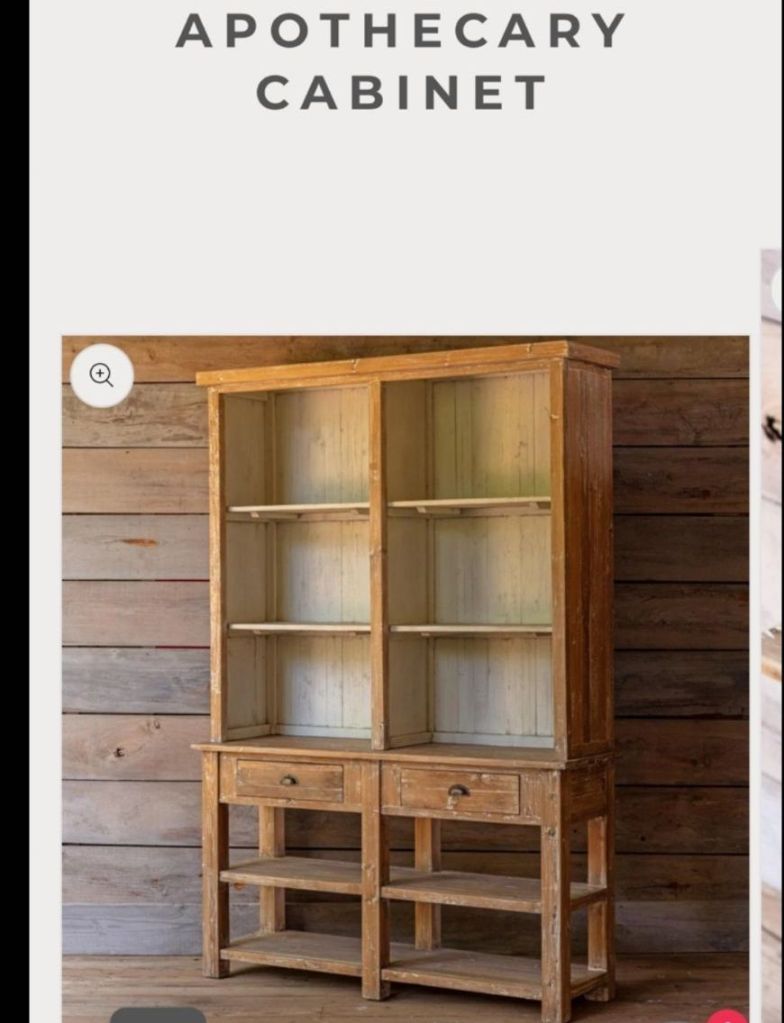
She wanted the piece to be made of a light colored wood but didn’t want maple or poplar. We went to Lowes and bought a bunch of 1×12’s that were a light pine made in Sweden. Being that they were from Sweden, I assume that it’s the same pine that IKEA uses in their furniture.
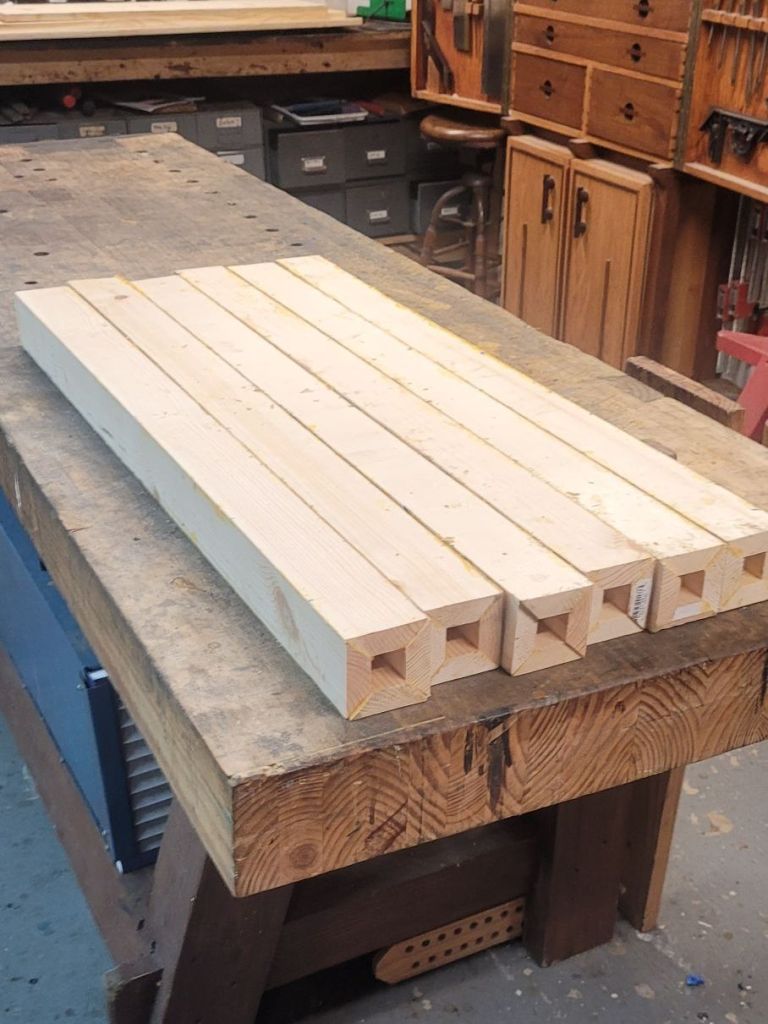
The first thing I did was make the legs by glueing up boards into a square. There’s a special lock miter router bit for this purpose but I have always heard that your stock has to be completely straight and flat in order for the bit to work well. My boards were neither, so I opted for 45 degree cuts and a lot of clamping pressure with band clamps and duct tape. Fortunately, they came out fine.

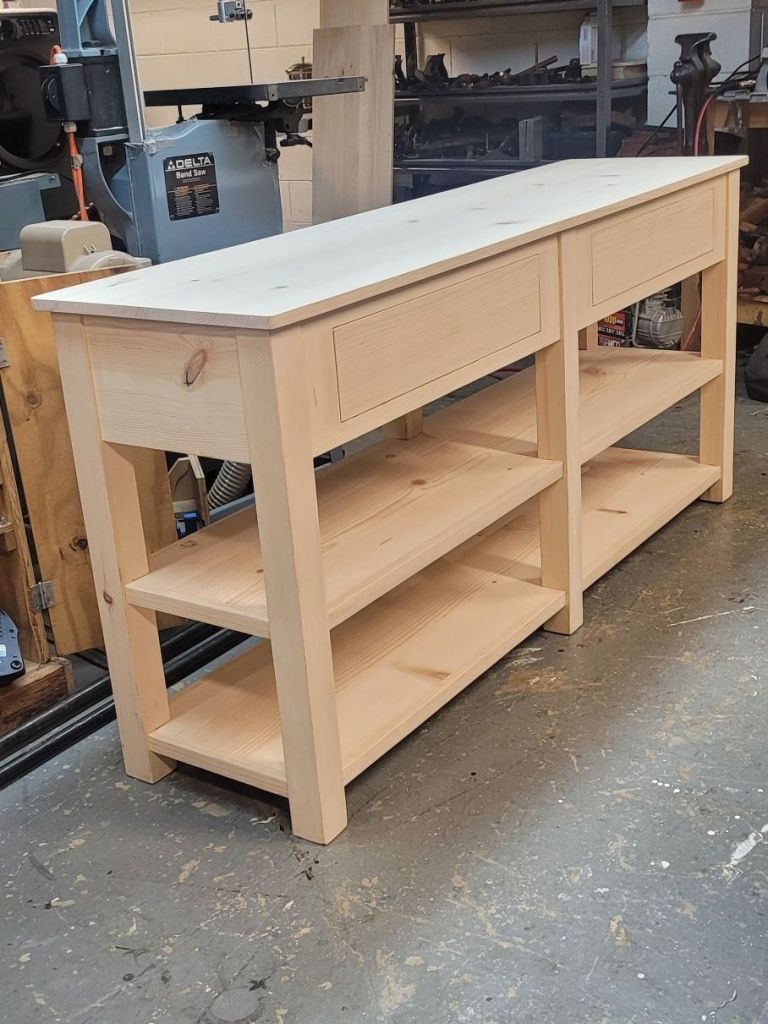
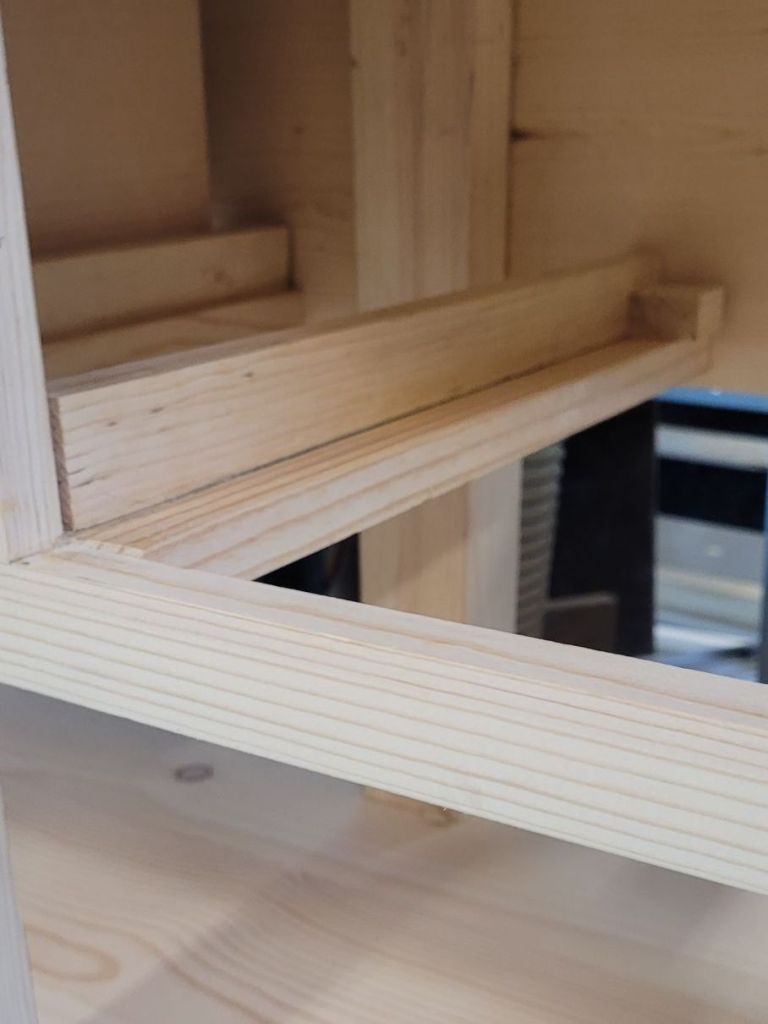
After the legs were made, I cut notches into them to fit the shelves. Then I wrapped the edge of the shelves with 1 1/4″ pieces of wood. On the end grain, I used a little bit of glue and pocket screws for the wood movemnet. The rest of the base was built with Festool Dominoes and glue.
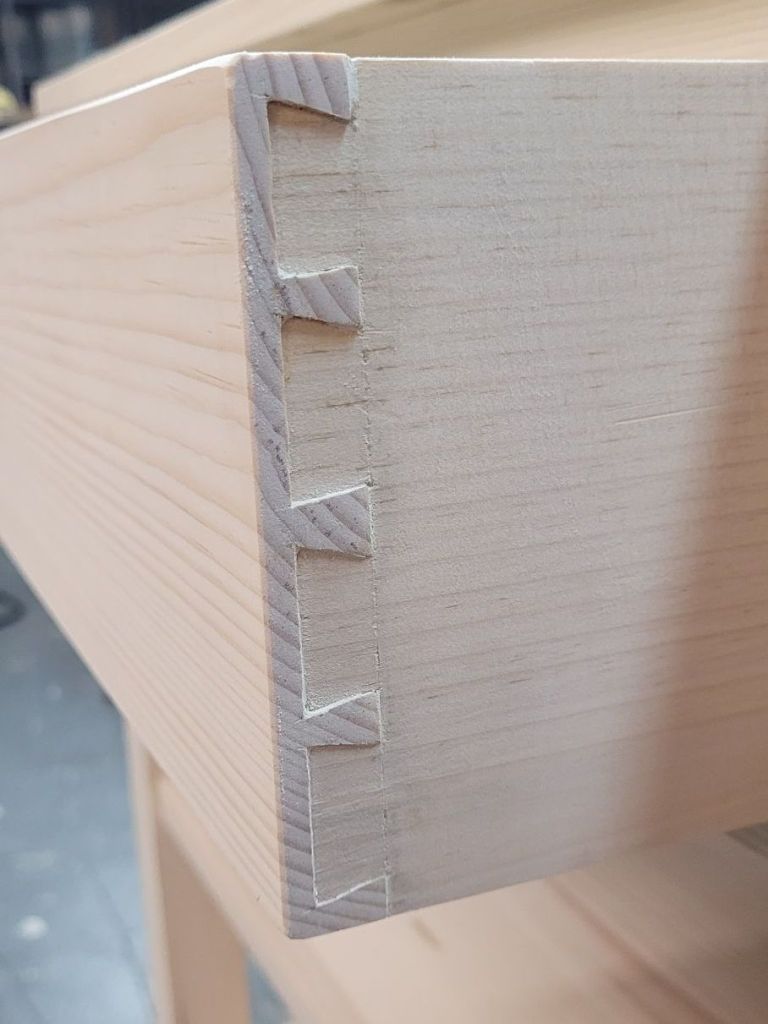
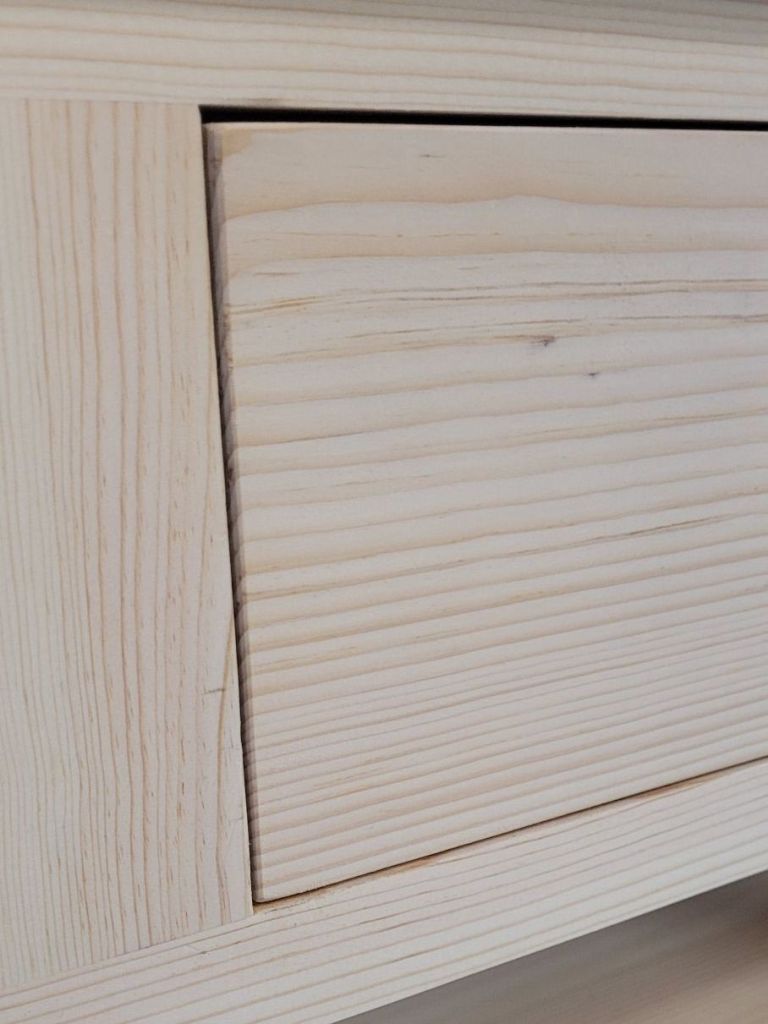
I wanted robust drawers so I made those with handcut half blind dovetails. It’s a lot of fun cutting dovetails by hand and it really doesn’t take too long once you get the hang of it.
I wanted to make sure that the drawers wouldn’t bind, so I made the drawers a 1/8″ smaller in length and height so there would be a 1/16″ gap all around. I made sure the drawer runners were 1/16″ proud of the opening and screwed them in place with pocket screws and glue.
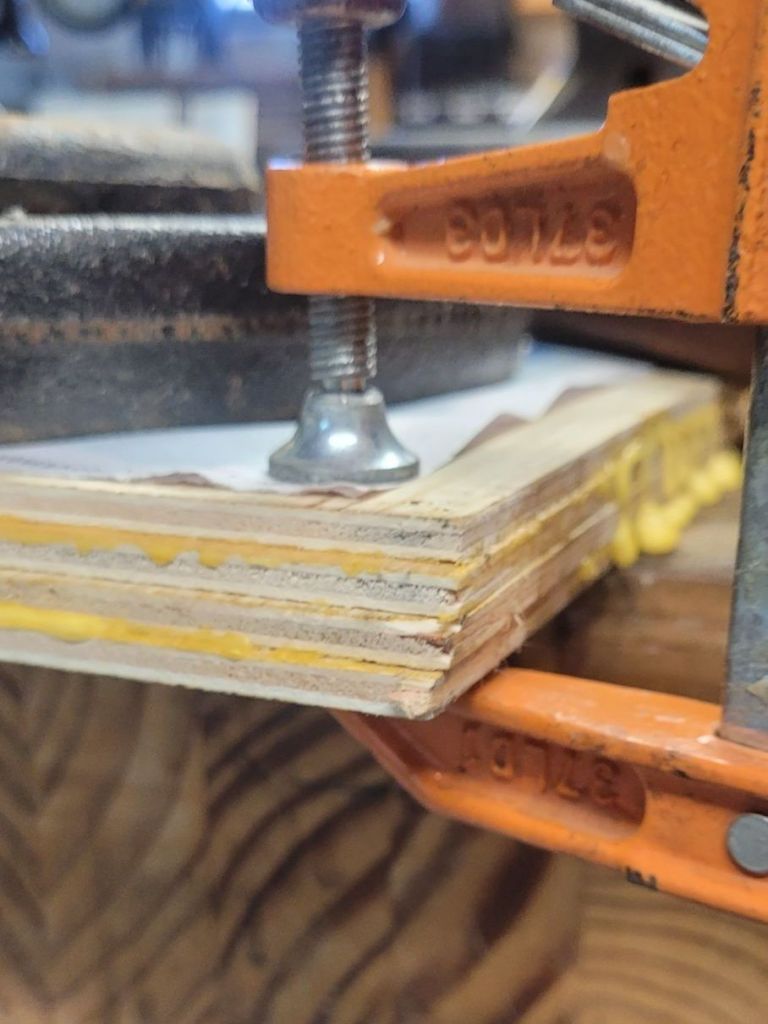
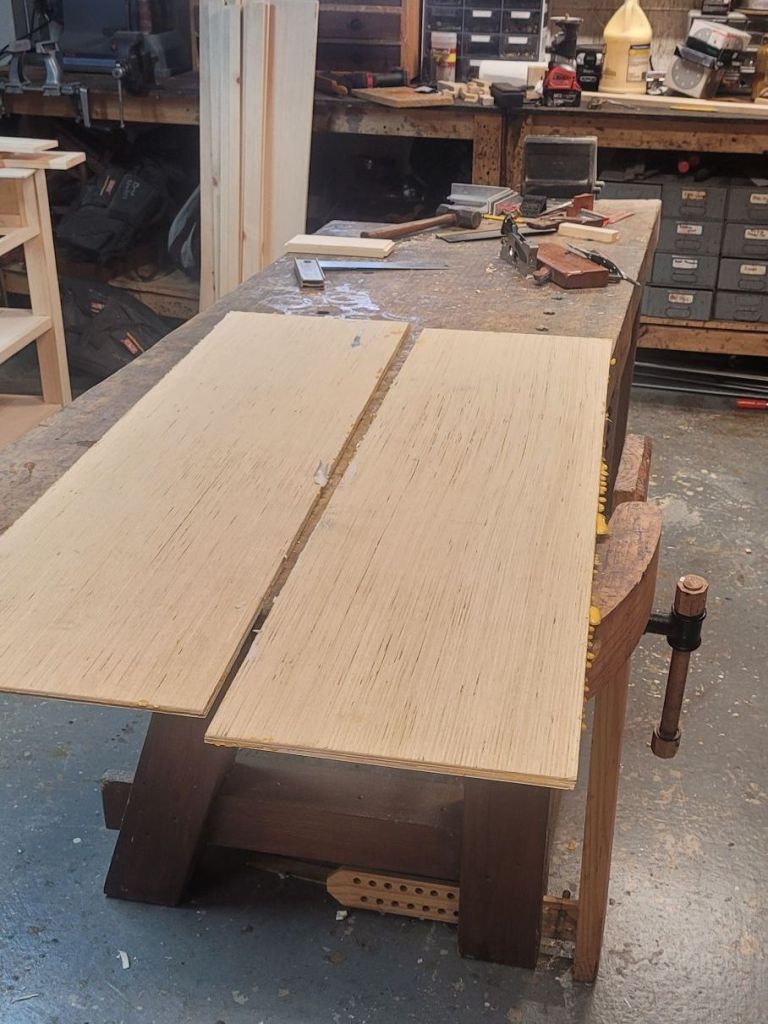
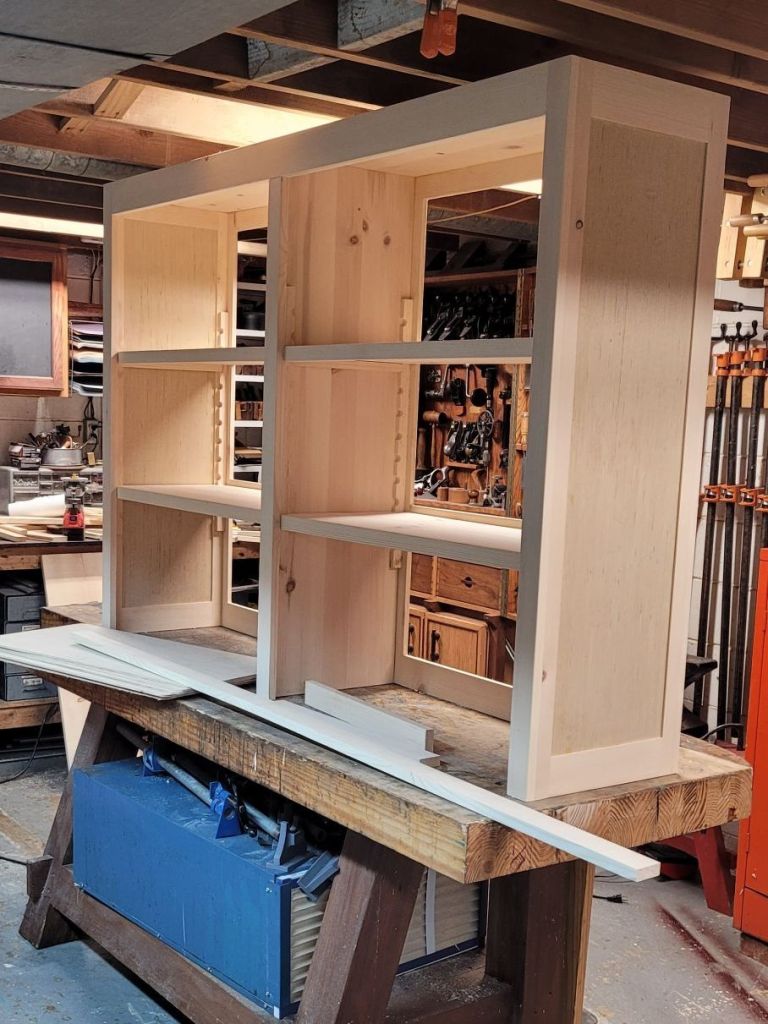
Once the base was made, I focused on the top. I wanted the sides to have a thicker panel in the middle of them, so I glued up the 1/8″ panels together. I used as many clamps I could find and stuck newspaper between the two panels so they wouldn’t stick together. Luckily, when the panels dried, I was left with two oversized panels for the sides of the cabinet.
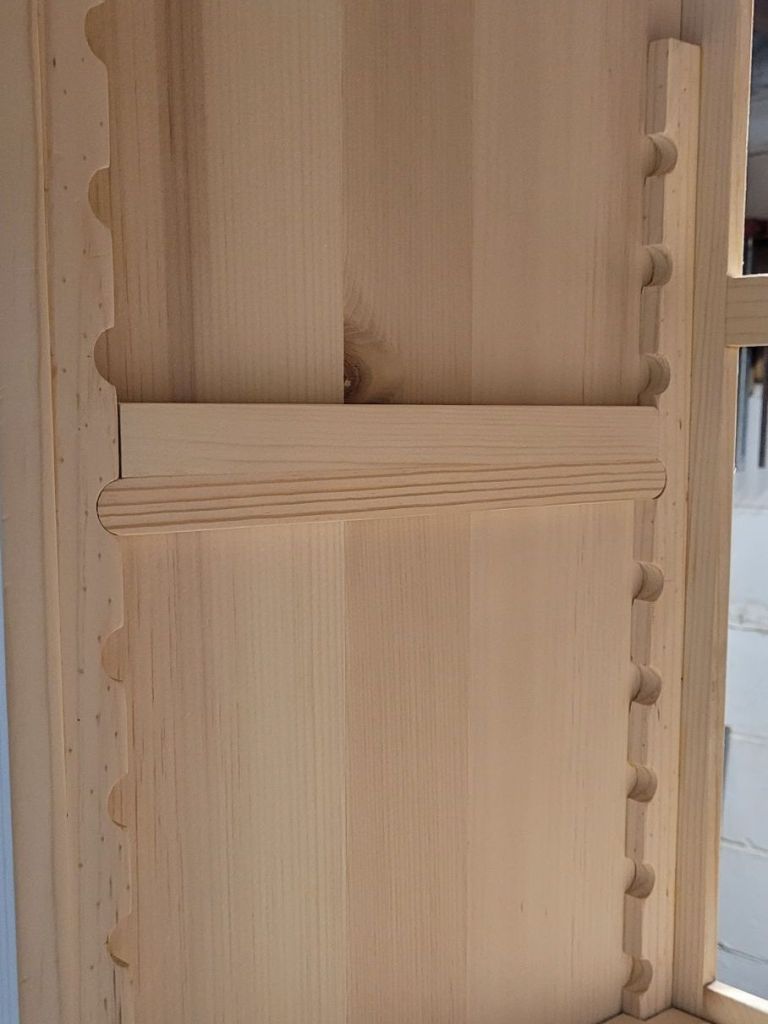
I built the case with more Dominoes and glue and created adjustable shelf supports with the scrap wood I had left over.
I love this technique for adjustable shelves. You drill a 3/4″ hole every 2″ then you rip the piece in half on the table saw. Then for the support, you add a 1″ filler on the bottom of the support stick. This way, if you need your shelf 1″ higher, you simply flip over your shelf support.
I installed the back with more of the 1/8″ thick panel wood and Anita put a natural aging solution on the piece as she didn’t want it stained.
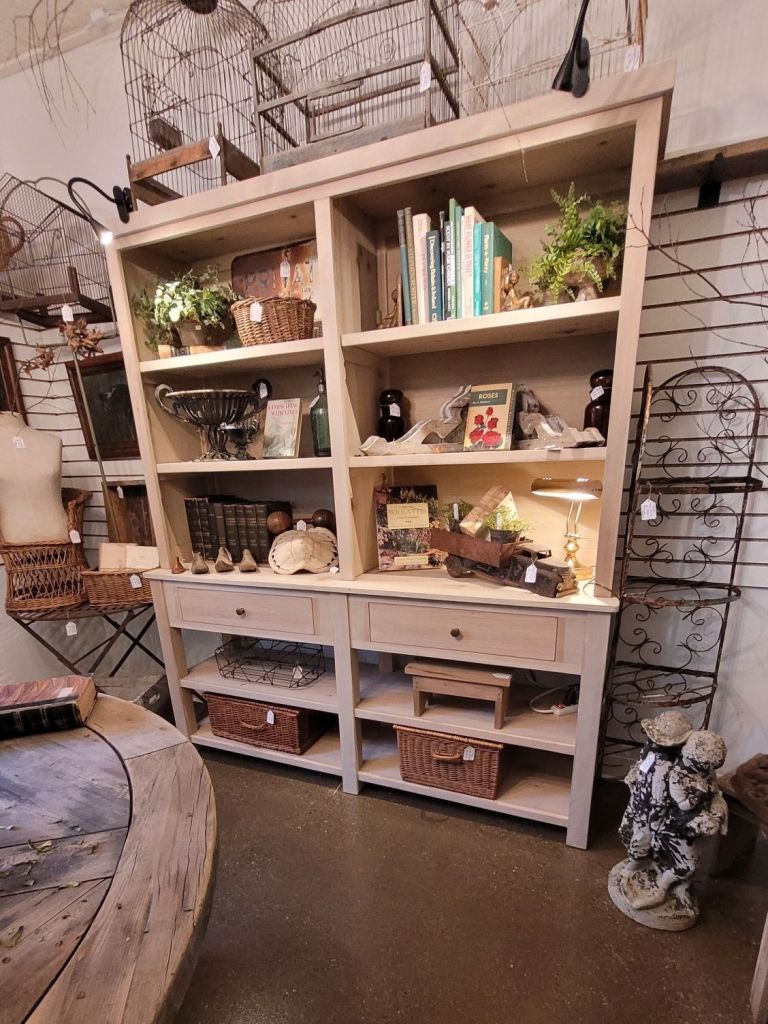
People in the antique shop love the piece and are perplexed that I built it out of 1×12’s from Lowes.


