The Worst Plane Blade

Every once in awhile I’ll come across a plane blade that is so heavily pitted and corroded, the best thing to do is to simply throw it away. This blade that came off a Stanley No 6 plane was no different. The problem was that I didn’t have a replacement blade to go with the plane I was restoring, so I was forced to see if I could get the blade to work again.

The first thing I did was take the blade over to my 8″ speed grinder and grind the face and back of the blade to remove the corrosion. I paid special attention not to heat the blade up too much so, I occasionally cooled it off in a bucket of water. Fortunately, the blade’s face had about a 1/4″ of metal at the bottom that wasn’t pitted, so I was hopeful I could still get a good edge out of it.

I took the blade over to my Tormek and ground a 25 degree bevel on it and honed the face flattler on the side of the Tormek grinding wheel the same way as I did with my 8″ speed grinder.

After the grinding was finished, I took the blade over to my water stones and sharpened it just as I do with any other blade. When I was done, there was a clean line of light at the tip of the cutting edge so I was hopeful it could achieve a nice cut.

Placing the blade back into the plane, I tuned it up, and sure enough, this crappy blade cut pretty well. I took out my dial calipers, and the shavings measured .002″ thick. The blade will eventually need to be replaced, but at least the plane can function properly now.

The plane performed so nicely, I used it to flatten my workbench.

Wooden Router Plane

Several months ago, I bought an old wooden router at an antique store for $20. The price tag said it was a Japanese woodworking tool. I guess it could be if a Japanese guy used it. Looked like a home made wooden router plane to me. I bought the tool simply for the hardware, and the Stanley router bit it that came with it.

I search online and came up with a wooden router plan and printed it out. Then I measured, drew, and bore the three holes for the body on a piece of 2″ thick cherry.

A few minutes on the band saw I had the new body of the router.

The hardest part in making the body was cutting the mortise for the blade holder. I jabbed at the wood with chisels, knives and drill bits in order for the piece to fit. I ended up getting the piece in the hole and then tightening in the back in order to crush the wood fibers into shape. It took a few attemps, but after a few minutes, it finally fit.

Once the hardware was in, I stuck the blade back in to see how the final fit. Once I was satisfied, I sanded the body and applied a few coats of shellac to it.

The last thing I needed to do was sharpen the blade. The easiest way I have found to sharpen a router plane blade is to grind a bevel on an oscillating spindle sander making sure to take a light touch in order to prevent burning the edge of the cutter. Then, I hone the edge and flatten the back with a whetstone.

I stuck the blade back into the router to see how it cuts. Cuts like butter!

If you’re in the market for a router plane, take a look at the wooden versions. They are much cheaper than their metal counterparts as some of their prices fetch up to $150. I see wooden router planes all the time at antique shows for around $40. They work pretty much the same way, they just don’t have the adjustment mechanism to raise and lower the blade. With a little practice, you can easily tap the blade down with a hammer to lower the blade for the next cut.

Jorgensen Compound Miter Box

A few months ago I was browsing through my local thrift store when I stumbled upon this miter box. I’ve seen hundreds of miter boxes in my day, but this was the first handtool compound miter box I had ever seen.

It’s a Jorgensen No 64020 Compound Miter Box made during the 1980’s or ’90’s in complete condition with its original instruction sheet. The price at $15 was too good to pass up so I brought it home to play with it.

The miter box appeared to be well made with smooth action on the vertical axis swing, wood support, repetive cut stop, and a hold down clamp. After figuring out how the tool worked, I was excited to put it to use.

I grabbed a piece of pine and randomly set the angles on the vertical and horizontal axes and gave it a go. After a few minutes of cutting, I was finally able to cut the piece off. The blade is either dull or the teeth are set so fine, that it easily binds in the wood. I measured the teeth on the blade and they’re 20TPI. I’m thinking that maybe this tool was meant to cut woods like balsa for model airplane building.

I went online to find a replacement blade, but unfortunately they are no longer made. Craftsman makes a 16″ long replacement blade but this one is 24″. I guess I could make a new out out of old miter box saw blade and use this one as the template. That may be a fun thing to try someday.

So right now, it sits underneath one of my workbenches out of the way collecting dust. What a shame! It looks like a really cool miter box that would come in handy for cutting intricate molding that would be too dangerous to perform on a powered miter box.

Using a Lion Miter Trimmer

A couple of weeks ago I posted on a Facebook page called “The Collectors of Antique/Vintage Tools” about a Lion Miter Trimmer I just restored. A few people in the group replied to my post asking what the tool did. I was surprised that so many people weren’t aware of this tool, that I decided to talk about it here.

 photo mitertrimmer002.jpg

I’ve owned an AMT miter trimmer for over twenty-five years and love it. They are simple tools that were popular for people who made picture frames back in the day. You use it by swinging the arm pulling the knife through the piece of wood, slicing off perfect little curls precisely at whatever angle you set the fence at.

 photo mitertrimmer030.jpg

The miter trimmer has fences on each side that can be positioned between 90 -45 degrees. There are adjustable stops at 90 and 45 that can be fine tuned with a screwdriver. Once you swing the fence to whatever angle you want, you tighten the wing nut on top locking the fence in place. As you can see in the photo, this machine also has layouts for 60 and 67 1/2 degrees.

 photo mitertrimmer004.jpg

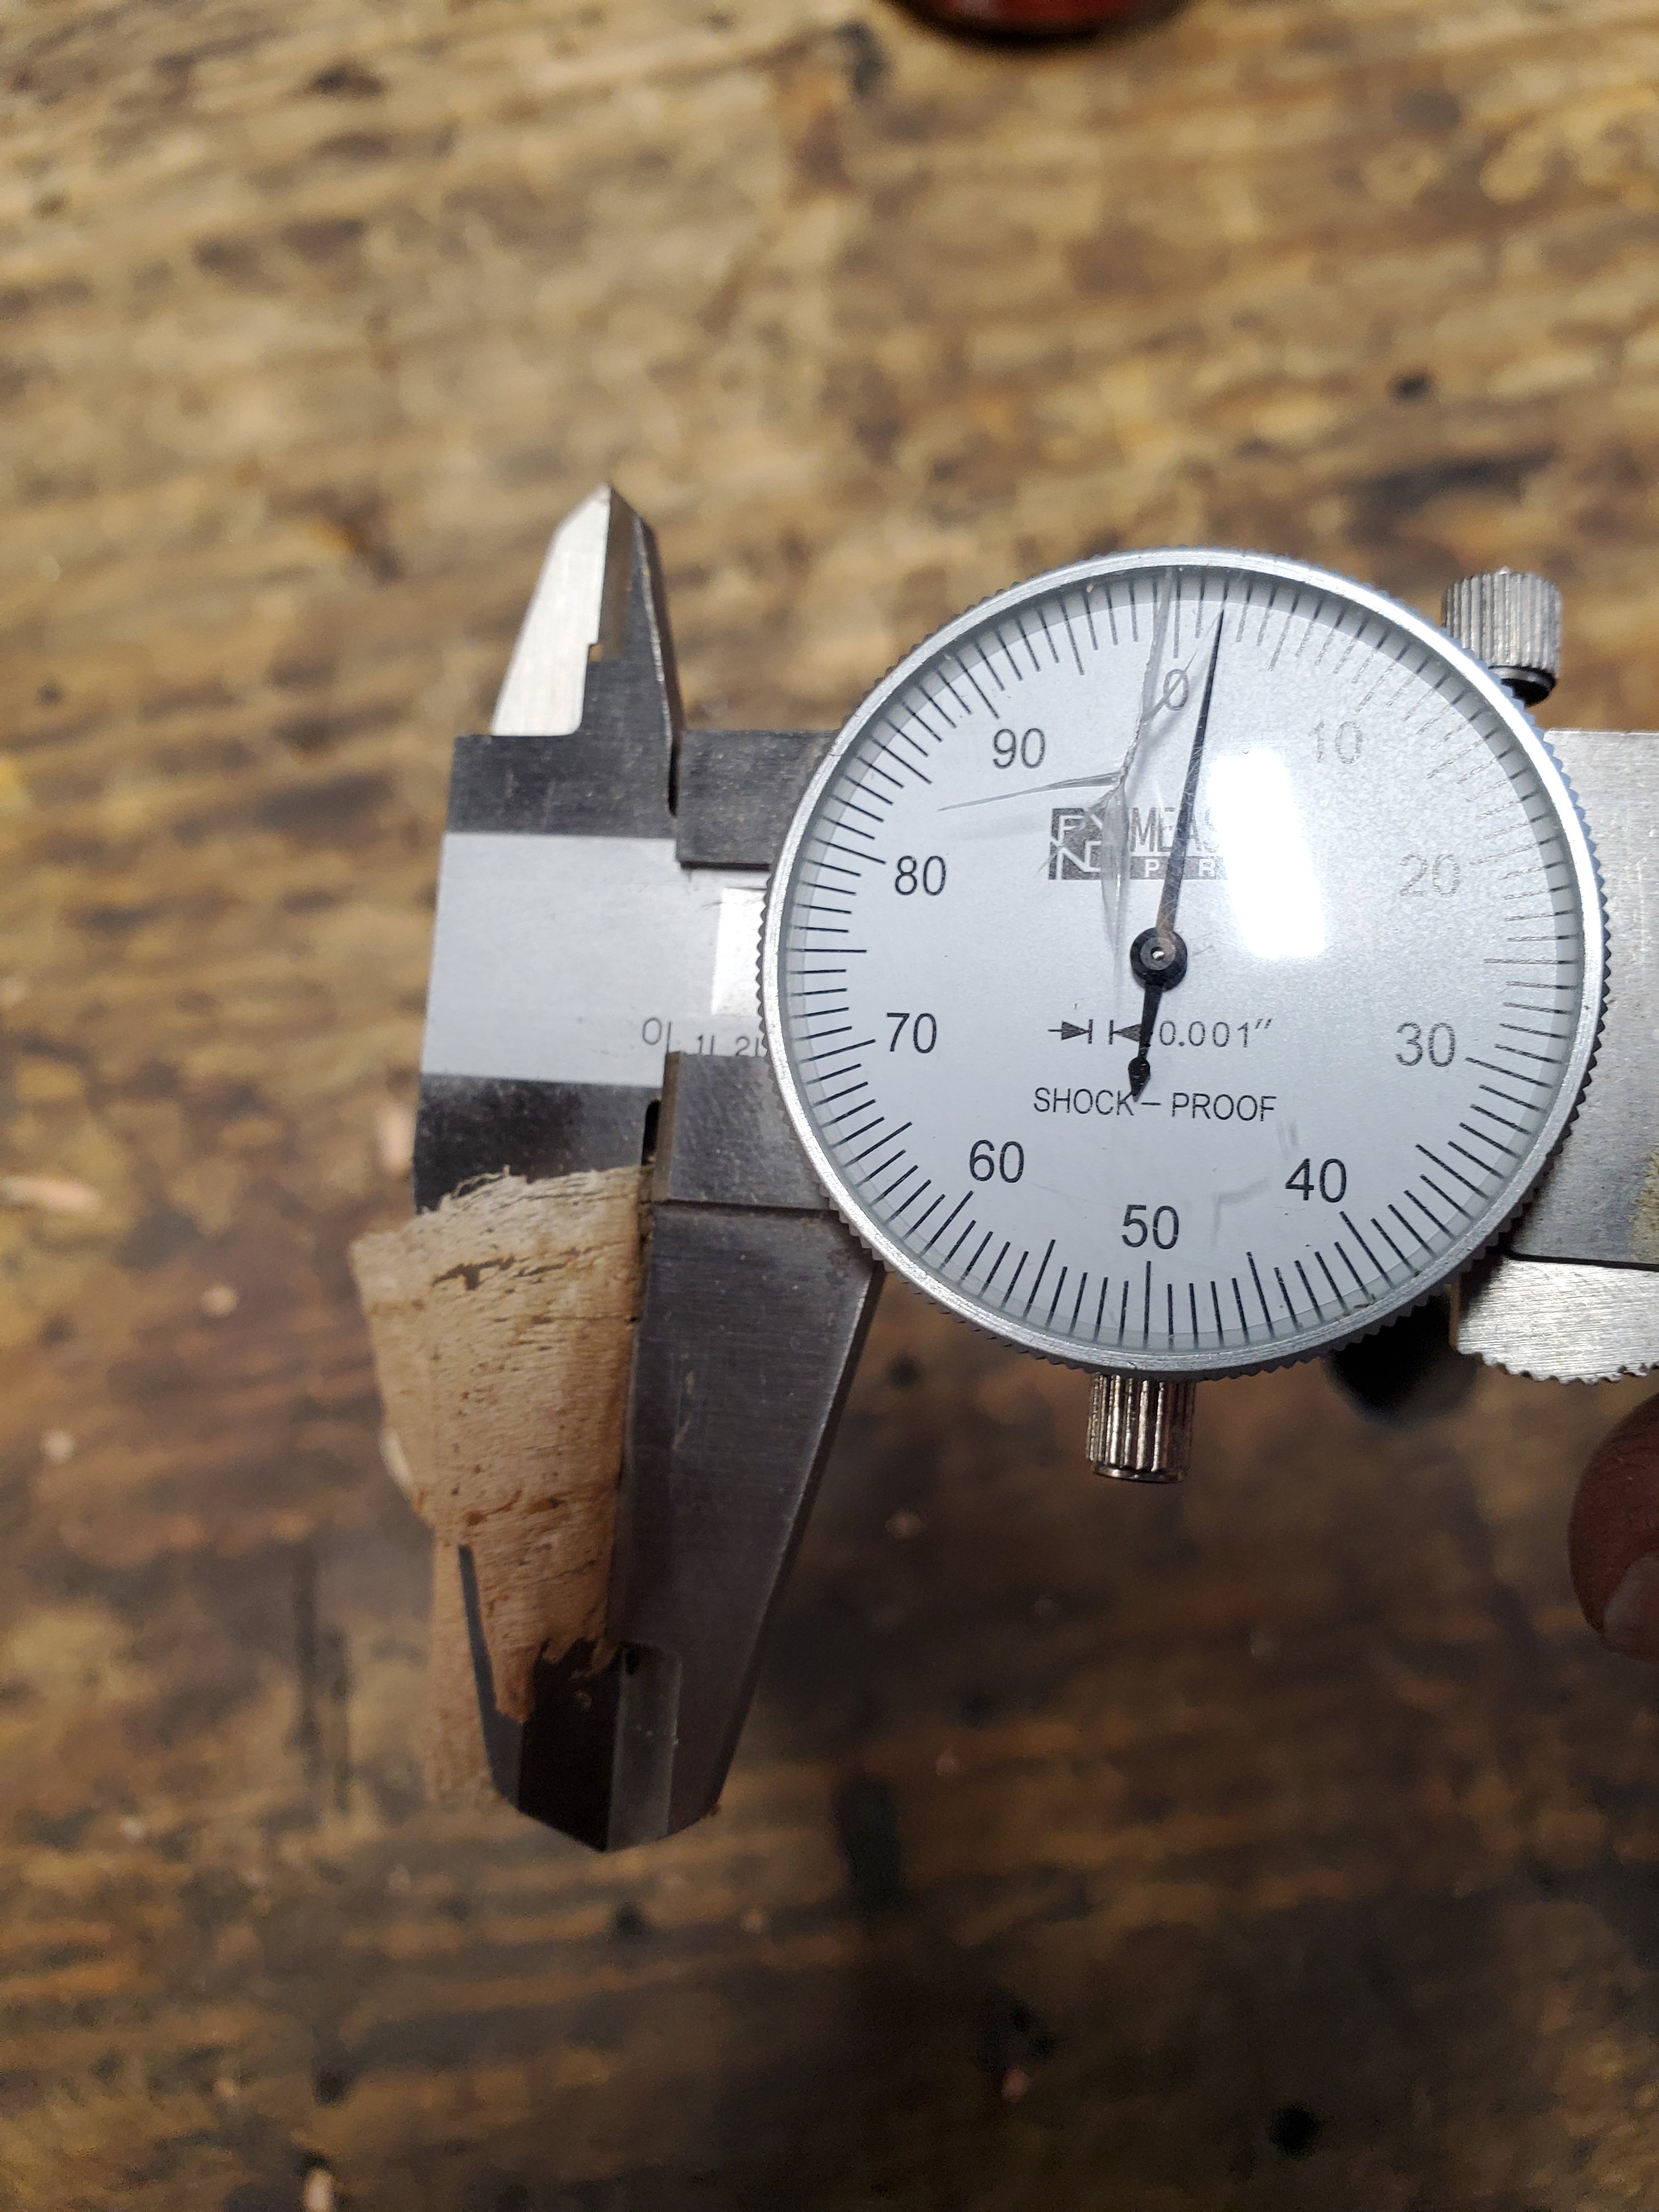
After fiddling with the machine for a few minutes, I positioned the adjustable stops precisely were they needed to be. As you can see, the stop is a little shy from the 45 degree scribe line on the bed. I’m not sure why this is, but the tool is probably over 100 years old, so it’s allowed to be off a little.

 photo mitertrimmer005.jpg

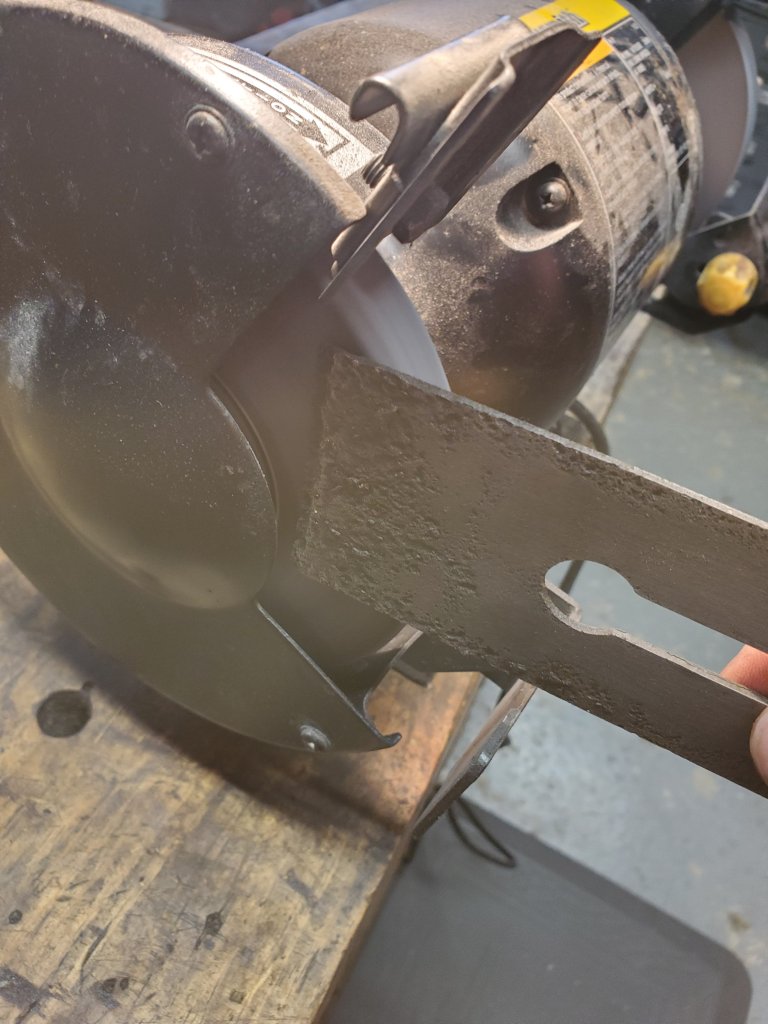
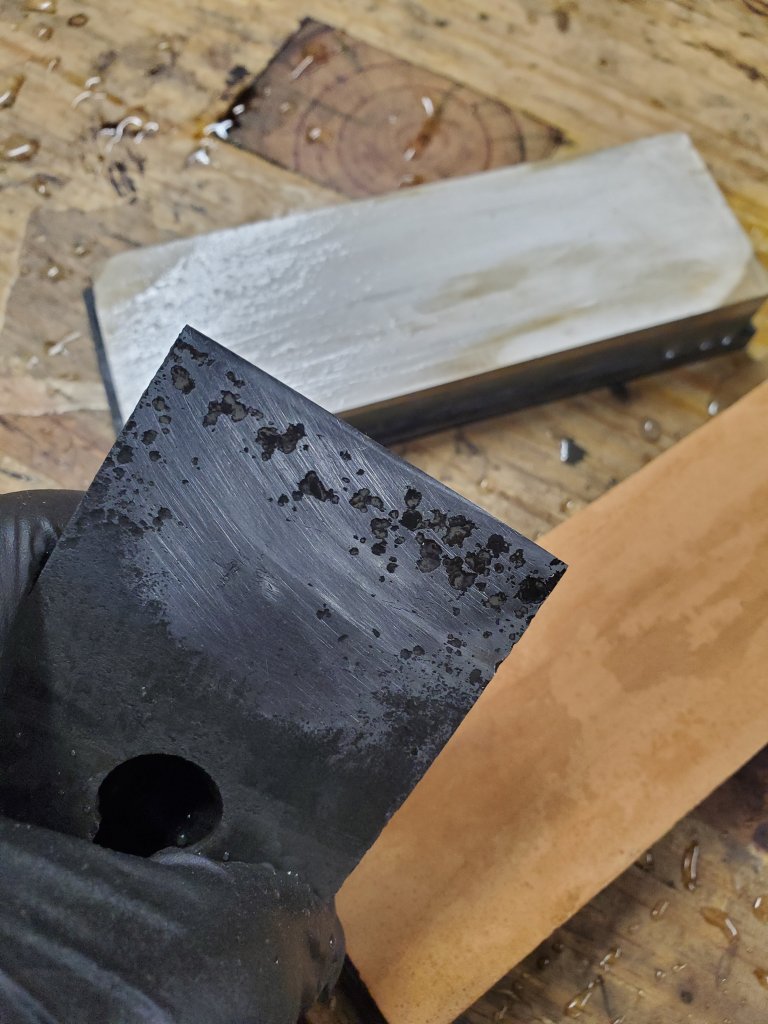
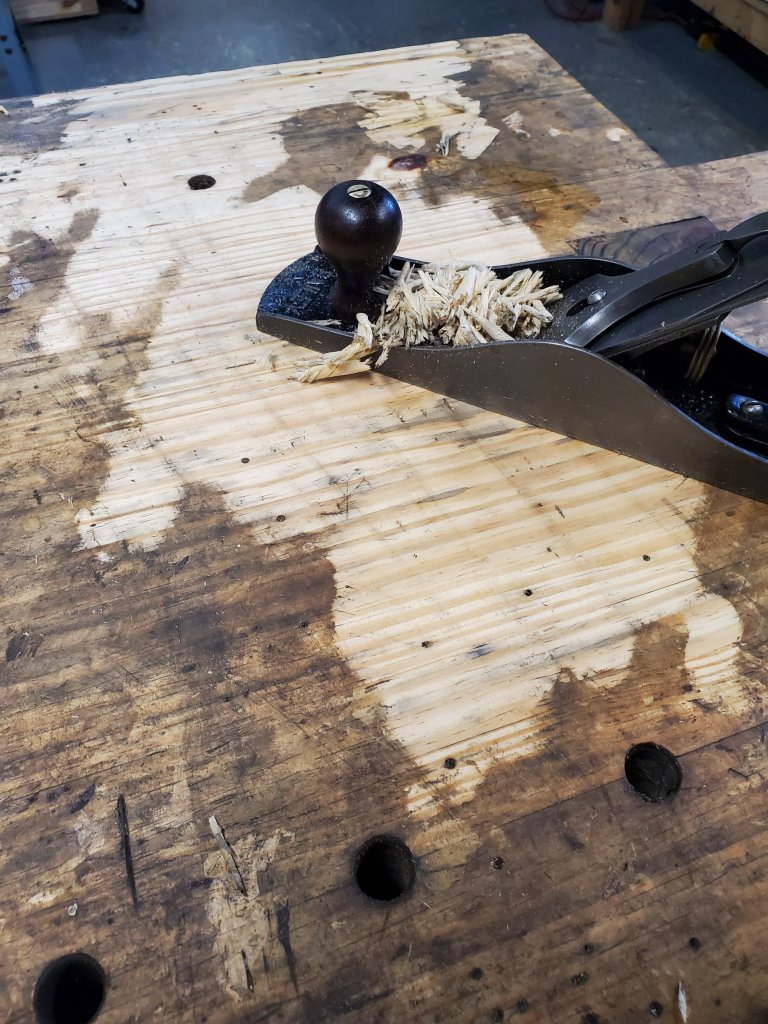
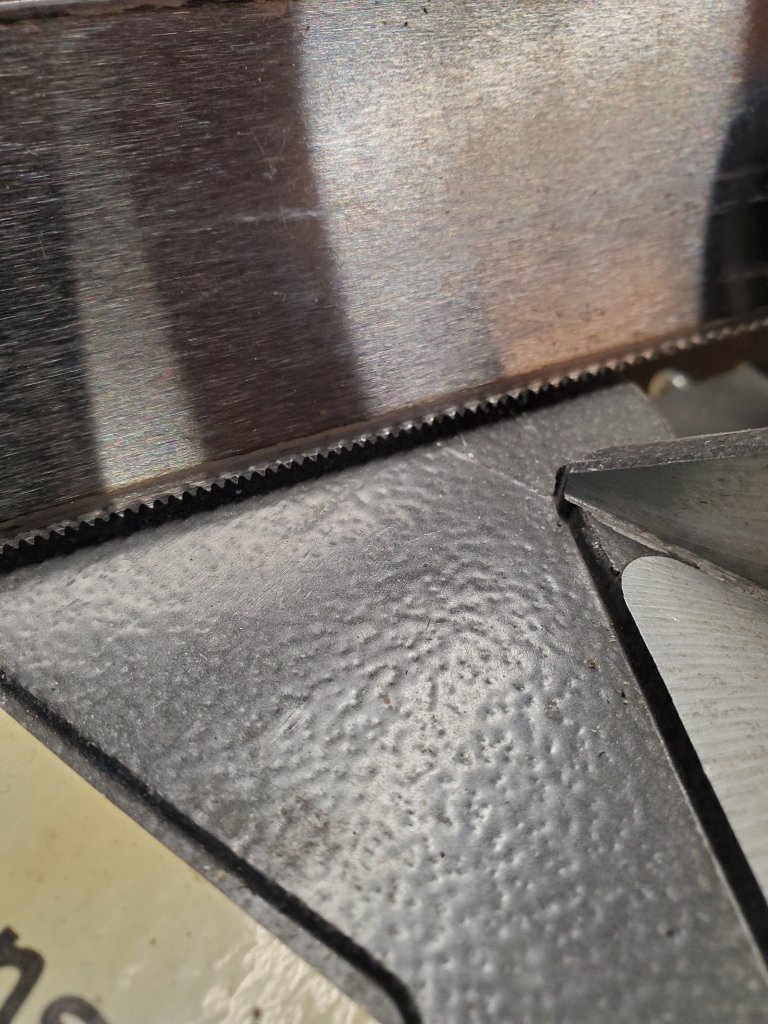
You can see how the tool slices off perfect little shavings. When I was restoring the tool, I took the knives off and sharpened them on my Tormek using the Tormek knife jig. Before I sharpened them, the knives couldn’t cut butter.

 photo mitertrimmer031.jpg

 photo mitertrimmer007.jpg

The main reason I love my miter trimmer is that it cleans up the cuts that are made from my miter box and saw. For safety reasons when doing delicate trim work, I like to use my little miter box instead of a powered miter saw.

 photo mitertrimmer022.jpg

However, the saw doesn’t leave the wood with a nice enough cut.

 photo mitertrimmer026.jpg

Not only that, the miter box doesn’t even produce a perfect 45 degree angle throwing the two pieces out of square.

 photo mitertrimmer025.jpg

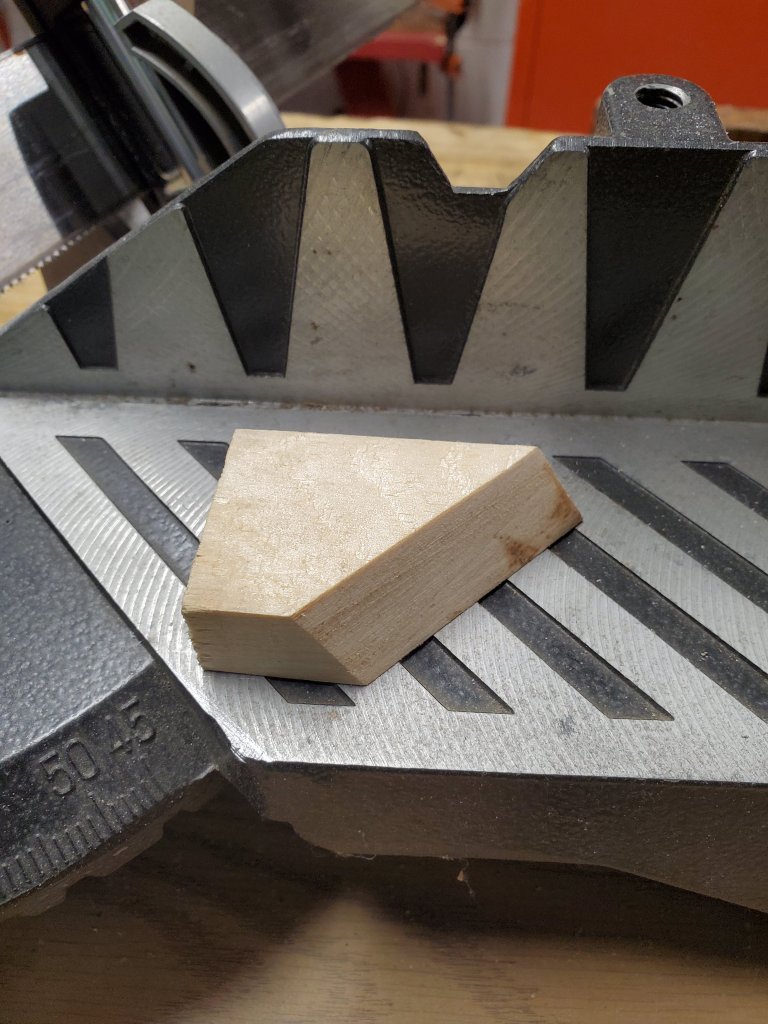
Here are the two pieces after they’ve been trimmed up with the miter trimmer.

 photo mitertrimmer019.jpg

The proof is in the pudding here. All the joints fit nicely together and the frame is a perfectly square inside. No wonder why picture framers loved these things.

 photo mitertrimmer006.jpg

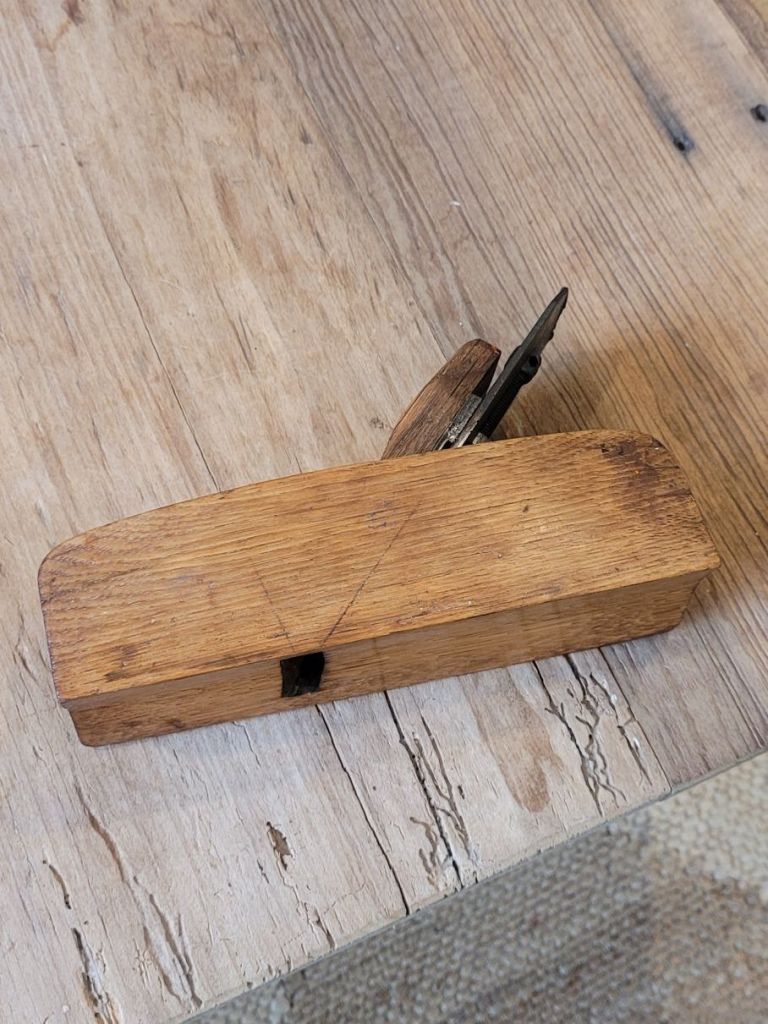
Another good use of a miter trimmer is doing outside corners like attaching molding to a bookcase or cabinet. Here is a piece of molding that I cut with one of my molding planes.

 photo mitertrimmer012.jpg

If I stick the piece in my miter trimmer and try to trim it up normally, you can see how the inertia of the cut pulls the molding off the bed. There’s simply not enough surface area in the front of the molding to keep the piece stable.

 photo mitertrimmer011.jpg

The cut it produces this way is garbage. Not only is it not 45 degrees, it’s not even a straight cut.

 photo mitertrimmer027.jpg

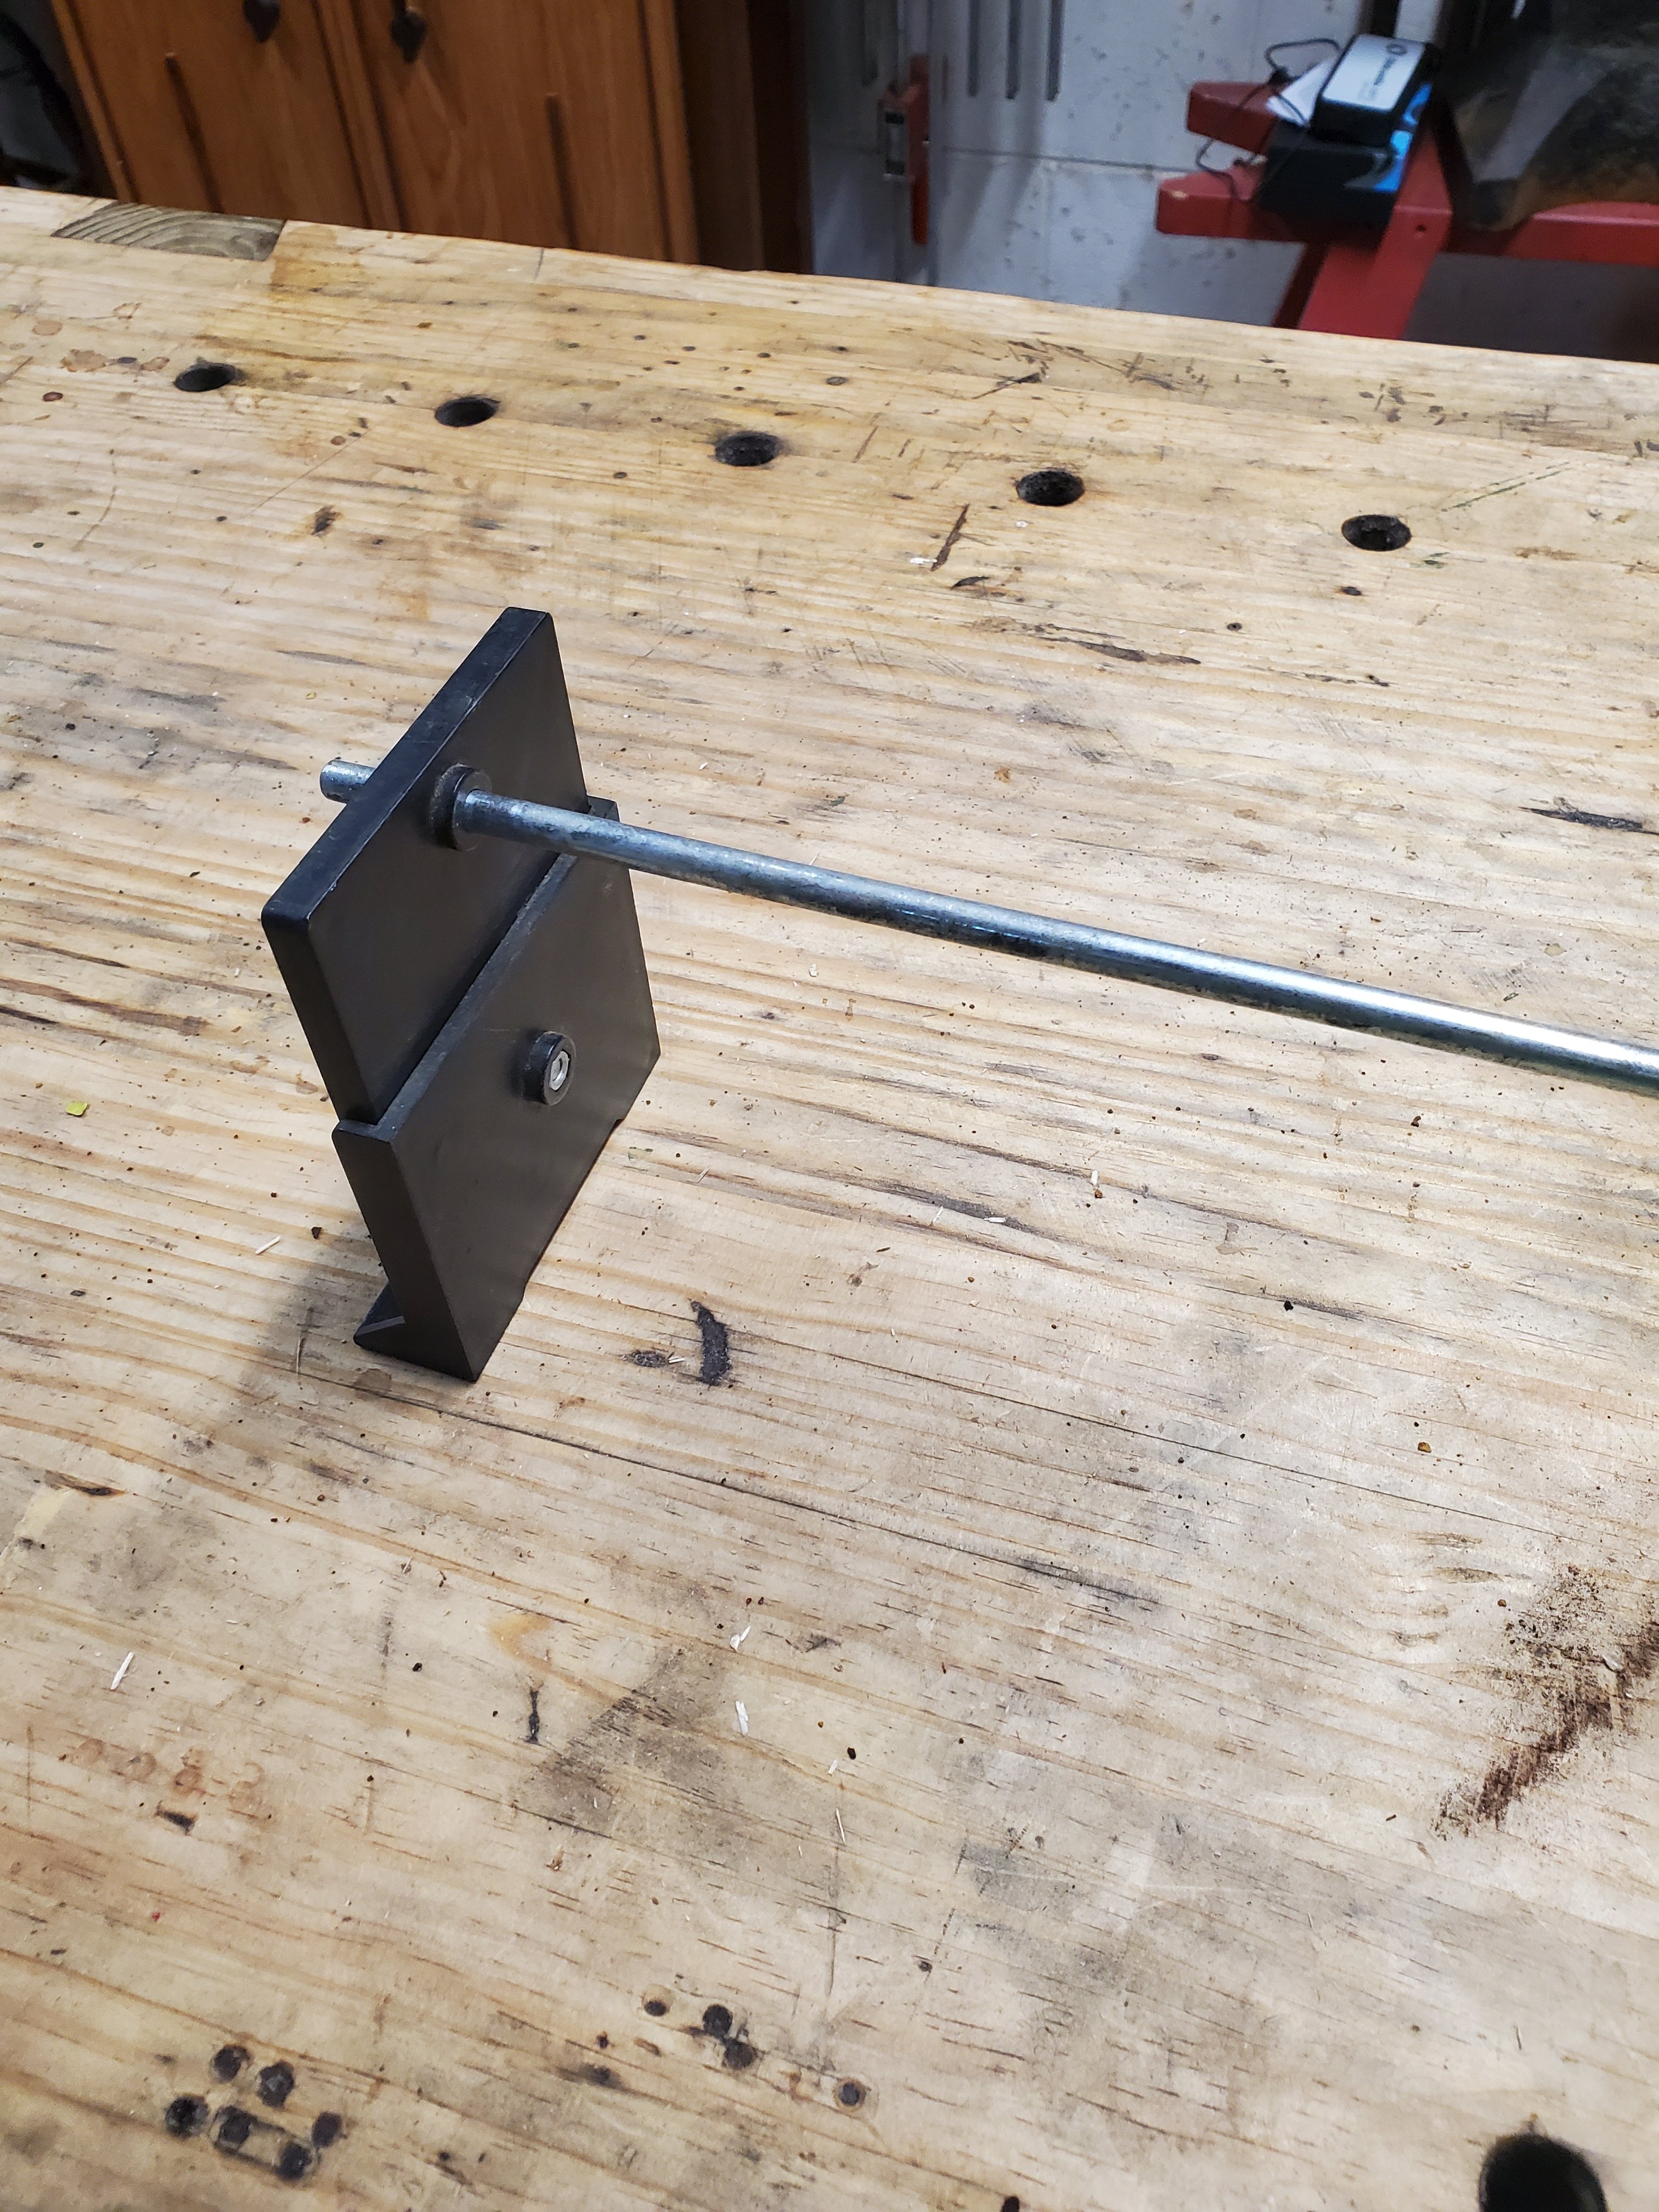
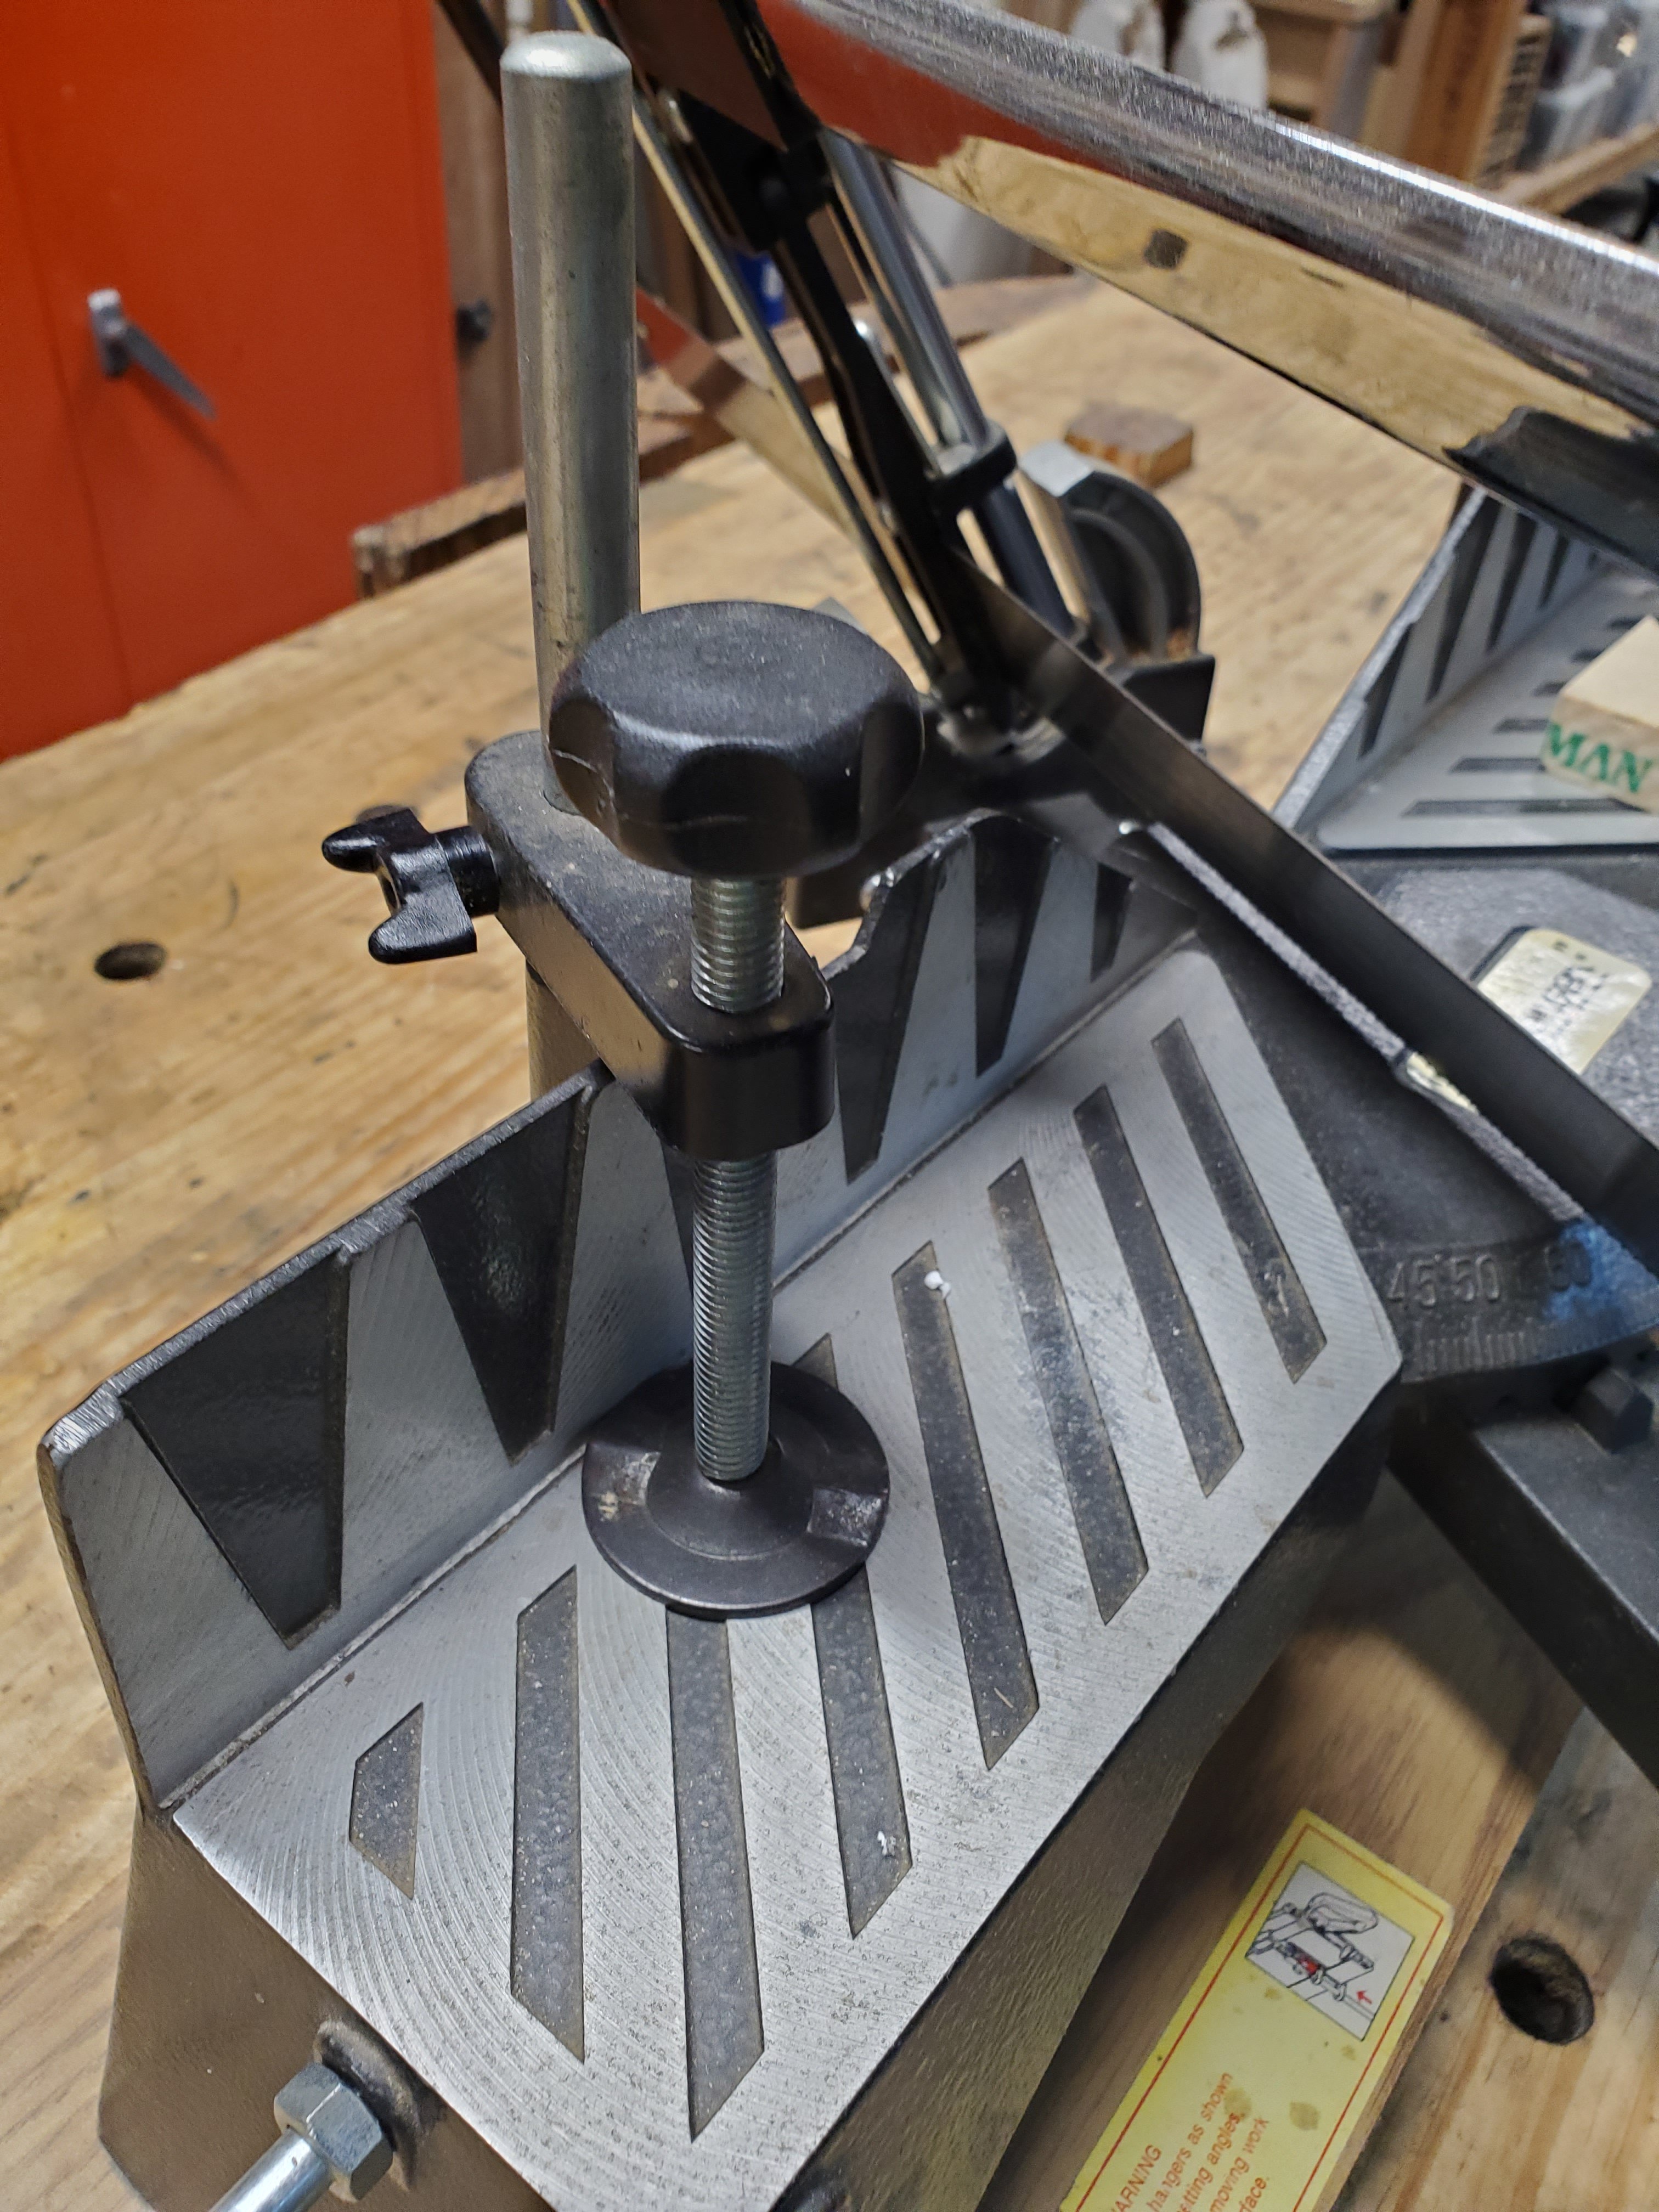
The way to get around this, is to take the body off a combination square and clamp it to the fence of the trimmer. Use a scrap piece of wood and cut a 45 degree angle to the end with the trimmer. Then use the cut as a gauge to accurately place the combination square under it. It’ll take a little time and a few test cuts, but once you have the combination square properly position, you’re ready to go. Note: You can buy an attachment from Grizzly for about $30 which does the same thing as this, but I’m not sure if it will work on old Lion Miter Trimmers.

 photo mitertrimmer010.jpg

Now you can use the bottom of the molding to rest against the fence for support and make a perfect 45 degree cut.

 photo mitertrimmer013.jpg

 photo mitertrimmer015.jpg

Repeat on the other side of the trimmer for the other side of the molding and you’ll get a super clean and accurate joint.

 photo mitertrimmer017.jpg

Unfortunately, the website for the original Lion Miter Trimmer no longer works which makes me believe they are no longer in business. http://www.lionmitertrimmer.com It’s a shame because the tool is truly an awesome piece of machinery.

The Nicest Plane You’ll (Probably) Never Buy

If you’re in the market for a smooth plane, chances are you’ll probably consider one of two options. Buy a new one from a top tool-maker like Lie-Nielsen or Veritas which can set you back $200-350, or buy an old Stanley and fix it up. However there should be a third option on your list.

The Millers Falls No 9 smooth plane is one of the nicest production smooth planes you can buy for the money. In most cases, you can buy one for a lot less than a comparable Stanley No 4 plane and get the same quality of plane.

The differences between a Stanley No 4 and a Millers Falls No 9 are minimal. Both planes use 2″ wide blades. Both are about 9″ long and weigh about 4 lbs. They both have a frog adjustment screw in the back (some older Stanley’s don’t have this feature). In fact, the only main difference between the two is that the Millers Falls uses a two piece hinged lever cap that supposedly holds more pressure on the blade and chip breaker reducing blade chatter.

Both planes are about 9″ long with the Millers Falls being 1/8″ longer. If the bed is pitted a little bit it’s not a big deal as the pits won’t affect the plane’s performance. Consider them micro corrugations.

These two planes both have a frog adjustment screw in the back making it easier to adjust the opening of the mouth for the blade. Stanley’s made before 1907 don’t have this feature but I don’t think it’s a really big deal since once you set the opening of the mouth, you rarely reset it.

The handles on Millers Falls are made of beech hardwood with some older ones being made from cherry. In my experience, these are actually better than the rosewood Stanley used. Although prettier than the stained beech, a lot of Stanley’s with rosewood handles tend to break at the tip since the rosewood is more brittle than beech or cherry.

The nicest difference the Millers Falls No 9 has over the Stanley No 4 is the price you can pick one up for. Basically nobody really wants these things because all the collectors want Stanley’s. Even woodworkers when buying old tools typically gravitate toward Stanley’s more than their competitors since there are far more Stanley’s in the market place. However, if you keep a keen eye out, you can buy an old Millers Falls for about $10.00. I know because I just picked up a few Millers Falls No 9’s for $10.00 each a few weeks ago at antique shows.

As far as the price of Stanley No 4’s expect to pay $40.00 or more for a nice one since dealers will want top dollar for them. I’ve seen some mint Stanley No 4’s go for $150 on eBay.

Getting the Millers Falls No 9 cleaned up and ready to use is no different from an old Stanley. If rusty, dip the parts in citric acid for a few hours and then polish the metal to a shine with steel wool. If necessary, fettle the bed flat with 220 – 400 grit sand paper then sharpen the blade. The results will be stunning for a $10.00 plane as I was able to achieve a plane shaving of .003″ by only sharpening the blade. So thin in fact, that you can literally see through the wood shaving.

As a final note, if you’re the type of person who likes to use several smooth planes with a different cut setting, (hence the reason you don’t need to reset the blade with the frog adjustment screw), a good idea is to have a Stanley No 4 set to a medium-cut and a Millers Falls No 9 set to a fine-cut so it’s easy to determine which plane has the proper cut set to it.

User vs Collectible Stanley Planes

Sometimes I’ll see people ask the simple question on woodworking forums on whether or not an old plane they picked up at a garage sale is worth anything. While chances are it’s worth what they paid for it, every once in a while they found a real gem. The key is finding out what Type of Stanley plane you have.

About twenty years ago Roger K Smith wrote a Type Study on the different features of Stanley planes through the years.  It was originally printed in Patented Transitional and Metallic Planes in America Volume I and then later used in John Walter’s book Antique and Collectible Stanley Tools Guide to Identity and Value. Unfortunately both books are out of print and tough to acquire but fortunately for us, some people have uploaded the info to the internet. Below is one of the links. http://www.tooltrip.com/tooltrip9/stanley/stan-bpl/bailey-types.htm

This Type Study is considered to be the most accurate information to date on the manufacturing of Stanley planes, however it should be noted that Stanley Works never built planes based on these Type Studies. They simply build planes with whatever parts they had lying around. So it is quite possible to have a plane that fits all the criteria of a certain Type Study but may have a part or two with an earlier or later Type to it.

Below are two Stanley No 5 planes that to an untrained eye, may look quite similar to one another but are worlds apart as far as value. The plane on the left is a Type 2 which was made from 1869-1872. The one on the right is a Type 13 made from 1925-1928.

The easiest way to tell if your plane is collectible or not is to see if there is a lateral adjustment on the frog. Planes without this lever are known as Prelateral planes. There are four Type Studies that were Prelateral planes, Type 3 being the most rare. If you come into contact with a Type 3 plane, don’t do anything to it. It’s gold to tool collectors.

The second easiest way to see if you have a collectible Stanley plane is to see where the round hole on the plane’s blade is. If it’s on top like the blade on the left, it’s a Prelateral plane blade. Why Stanley changed the position of the hole from the top to the bottom, I have no idea. The hole is there to put the cap iron nut through the blade without having to fully remove it. Seems like a silly feature  to me but that’s just me. Every plane blade ever made has this feature so I’m obviously missing something.

Another feature that distinguishes really old Stanley planes from the users is the lever cap. If your lever cap is solid without any recesses, it’s rare. I guess metal was a precious commodity back then and every ounce counted. Do the solid lever caps work better? I doubt it. It’s just a lever cap.

The fourth feature that separates the collector from the user is the brass adjustment knob in the back of the frog. I guess Stanley was trying to save money anyway they could back in the 1870’s and putting a recess in the adjustment knob saved them $.001 in brass. But hey, $.001 was a lot of money back then.

A fifth major feature is the shape of the tote. It was still being made out of rosewood but the shape on later Stanley’s became more streamed line. Stanley probably heard complaints from customers about the totes being uncomfortable so they redesigned  the shape. But that’s my guess. It wasn’t cost savings because they didn’t switch to birch hardwood until the 1940’s.

Now it’s your call of you want to use one of these old planes in your shop on a day-to-day basis. All I know is I sold the Type 2 on eBay for $175.00 while the Type 13 commonly goes for $40.00. With the economy the way it is today, if I had an old collectible Stanley plane, I’d sell it and buy a later version with a little bit more bells and whistles for a quarter of the price and fill up my truck with a tank of gas and take my wife out for dinner with the remainder of the money.

Citric Acid, the new Evapo-Rust

I’ve been cleaning old tools ever since I was a kid. I fell in love with the way they looked and wanted to make them look better by cleaning all the rust off of them. After all, when they were in use in someone’s shop, the blade was sharp, the parts moved freely and the tool didn’t have a speck of rust on them. It was only after they were left for dead did rust start appearing on the metal making them appear unusable. I knew early on that with a little love, these tools could come back to life.

In the beginning, cleaning the rust off the plane was attacking it with 220 grit sandpaper. With lots of elbow grease I got the job done. Then after a few years, I moved onto using a flap wheel on my drill press. Rust removal was faster but left a cloud of rusted dust in the air. Something I had a hunch was not too healthy to breathe. I tried electrolysis for a while but thought it was too cumbersome and time-consuming hooking each part to a positively charged metal rod and battery charger.

Then while reading internet woodworking forums, I ran across a member talking about Evapo-Rust. I was intrigued and had to give it a try. I bought a gallon of it, poured it into a container, dropped the parts in, and let them set overnight. The results were amazing! Nothing I had ever tried worked so well with so little effort. There was only one problem; the price. I bought a five gallon bucket form a company called Nebraska Hotrod for $65.00. It would last about five servings worth of tool cleaning, pouring about a gallons worth of it in a container at a time.

Then this spring I read about citric acid. I’ve heard it mentioned before but I was so in love with Evapo-Rust that I thought nothing would work better. But the economy was tight, my wallet was thin and I was open to the idea of using it. Plus I was curious to see how it would compare to my beloved Evapo-Rust. I looked in my local grocery store for it but came up empty. I was told that it could be found at health food stores but eBay was easier and I found it available there. I bought 15 lbs of it for about $42.00 and received it within a week.

I poured one cup of citric acid in about a gallons worth of water and dropped my parts in just like it was Evapo-Rust. I use a 30″ window planter box as my container as it’s long enough for #8 jointers. I waited overnight for the results and was pleasantly surprised! My parts turned out just as well as if they had been sitting in Evapo-Rust.

The true benefit of citric acid is the price.  A cup of citric acid weighs about one pound and a five gallon bucket of Evapo-Rust would last me five servings worth of tool cleaning. So when you do the math, A gallon of Evapo-Rust cost me about $13.00 ($65.00/5 gallons) while a pound of citric acid cost me a meer $2.80 ($42.00/15 lbs). Now that’s a price that I can live with.

Restoring a Stanley No 7 Jointer Plane

Every time I see an article in a woodworking magazine about restoring an old plane, it’s usually a Stanley No 4 smooth plane. While a smooth plane is probably one of the most important planes to own, it certainly shouldn’t be the only plane you have in your arsenal of tools. A jointer plane is extremely handy for jointing the edges of boards straight as well as leveling the tops of wide panels flat. In fact I probably use my jointer just as much as I use a smoother.  So I decided to write a blog and show how easy it is to refurbish an old jointer and put it back to use.

The first thing I do when cleaning a plane is take it completely apart. Remove every single bolt and screw you can and lay them on the bench so you won’t lose them. Don’t worry about not knowing where each screw will go as the guts of a plane are quite simple and easy to put back together.

Next you need to get yourself a product called Evap-O-Rust. I buy it in a five gallon bucket as I clean a lot of tools but a couple of gallons at your local auto parts store should do you just fine. Fill a container with the Evap-O-Rust and submerge the parts in so that they are completely covered in the solution. If you don’t have the part completely covered, you will end up with an oxidized line on the part where the air and the solution meet. It’s also important to make sure that the parts of the plane are not lying on top of one another in the solution. You want to make sure that the Evap-O-Rust has the ability to penetrate the entire part. Let the parts sit in the solution overnight.

Once the parts have soaked overnight, take them out and wash them under the tap to remove any residue from the part. You’ll notice that the parts will be completely clean from rust but will have a dull finish to them. I like to take them over to a flap wheel sander and buff them to a nice satin shine.

After buffing the parts, wipe them with an oil protector called Kramer’s Antique Improver. I have been using this stuff for twenty years and have never come across anything that works better or is simpler to use than Kramers. It simply brings the metal and wood back to life. After wiping all the parts with Kramers, put the majority of the plane back together.

Now that the plane is clean, you’ll need to make it work. The first thing to do is grab something that is perfectly flat and place soaking wet 220, 320, 400, and 600 grit wet and dry sandpaper on top of it. I use an old marble window sill but the top of your table saw will probably work just fine. You will need to flatten the bottom of the plane so that it will be able to cut crisp clean shaving off. Start with 220 grit and work it over until you have uniform scratches upon the entire body. You actually don’t need to have the entire bed perfectly flat. Only the front of the bed, the front and back of the mouth and the back of the bed need to be co-planer with each other. If you happen to have a hollow area between the back of the mouth and the back of the bed, it’s perfectly fine. Once you have uniform scratch marks with 220 grit paper, switch to 320, then 400 and so forth until you have a nice clean bed with the 600 grit paper.


Next and most importantly, you need to sharpen the blade. I own a Tormek sharpener so I use my Tormek to grind a 25 degree bevel on my irons. After I sharpen and flatten the back of the iron with the fine grit of stone I switch over to my 4000 grit water stone and continue to sharpen the burr off. I then finalize the edge with my 8000 water stone. Sharpening to this magnification gives me an edge that stays sharper than simply using my Tormek alone.


Now it’s time to see the results of your work. Take a piece a wood and start planing it. You will need to adjust the position of the frog and depth of the blade in order to achieve a clean cut. Since you’re using a jointer plane the tolerances of mouth opening isn’t as critical as it would be for a smoother. You’re not trying to achieve .002″ thick shavings with a jointer. A jointer is a medium cut plane that is used to clean up joints and panels so that other planes can finish the job. A shaving of .005 to .010″ should work just fine.

With about an hours worth of work, you can a have a perfectly usable plane and save hundreds of dollars as opposed to going out and buying a brand new plane off the shelf.

**** Word to the wise: If you’re a beginning woodworker and are considering spending a few hundred bucks on a 6″ motorized jointer, pick up one of these hand jointers for $30.00 and learn to use it. I no longer even use my 6″ motorized jointer anymore.

UPDATE 4/17/17 — Forget about buying a Stanley No 7 for $30.00. Prices have gone way up since I wrote this post in 2011. If you buy one on eBay, you’ll pay $100 or more. If you’re lucky, you may find one at a flea market or antique show for less, but don’t count on it.