Stanley No 68 Rabbet Spokeshave

Yesterday, I went to an antique show and picked up the Stanley No 68 Rabbet Spokeshave in it’s original box. I’ve heard about the tool, but I don’t think I’ve ever seen one in person. The price the guy was asking was too good to pass up so I took it home.

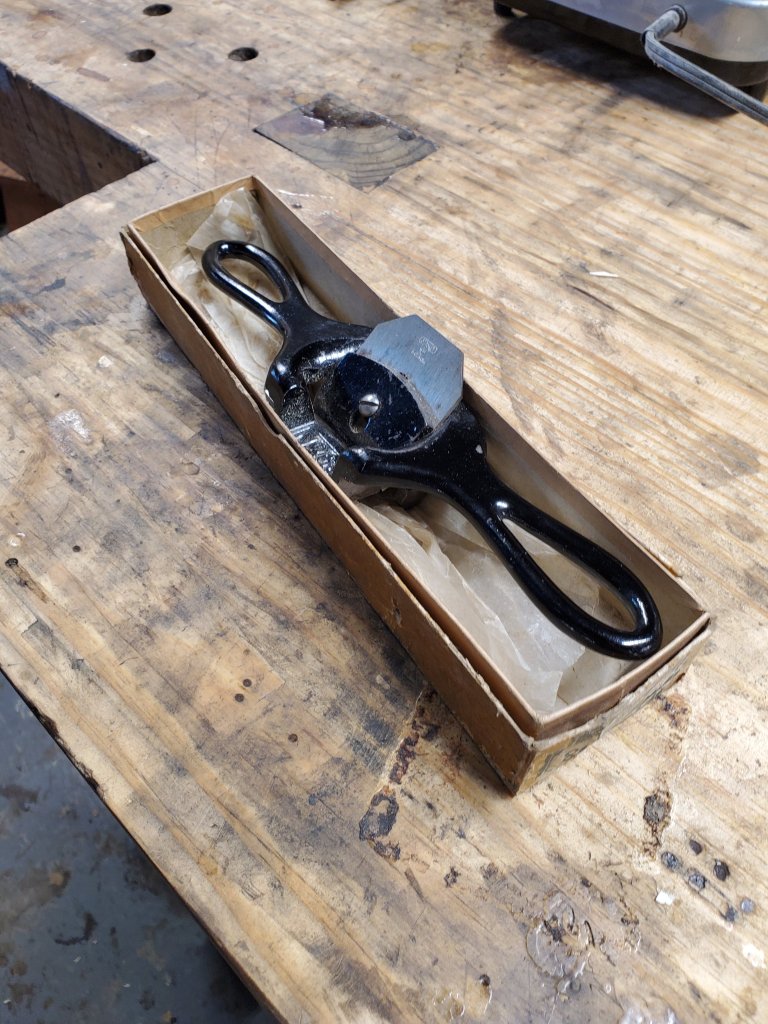
When I got home, I noticed a fence inside the box. At first, I thought it didn’t belong with the spokeshave but after looking at it for a few minutes, I saw that it clips on the back. The fence looks crude as if it was made by the original user, so I looked in John Walter’s Stanley book, but saw no mention of a fence that came with the tool.

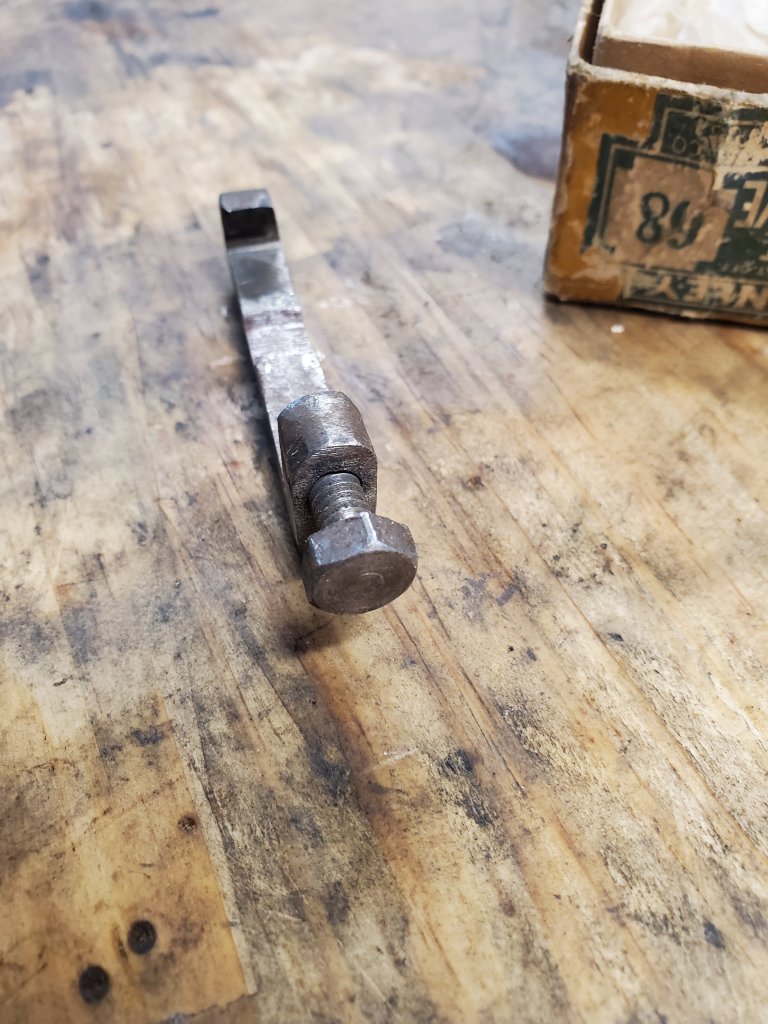
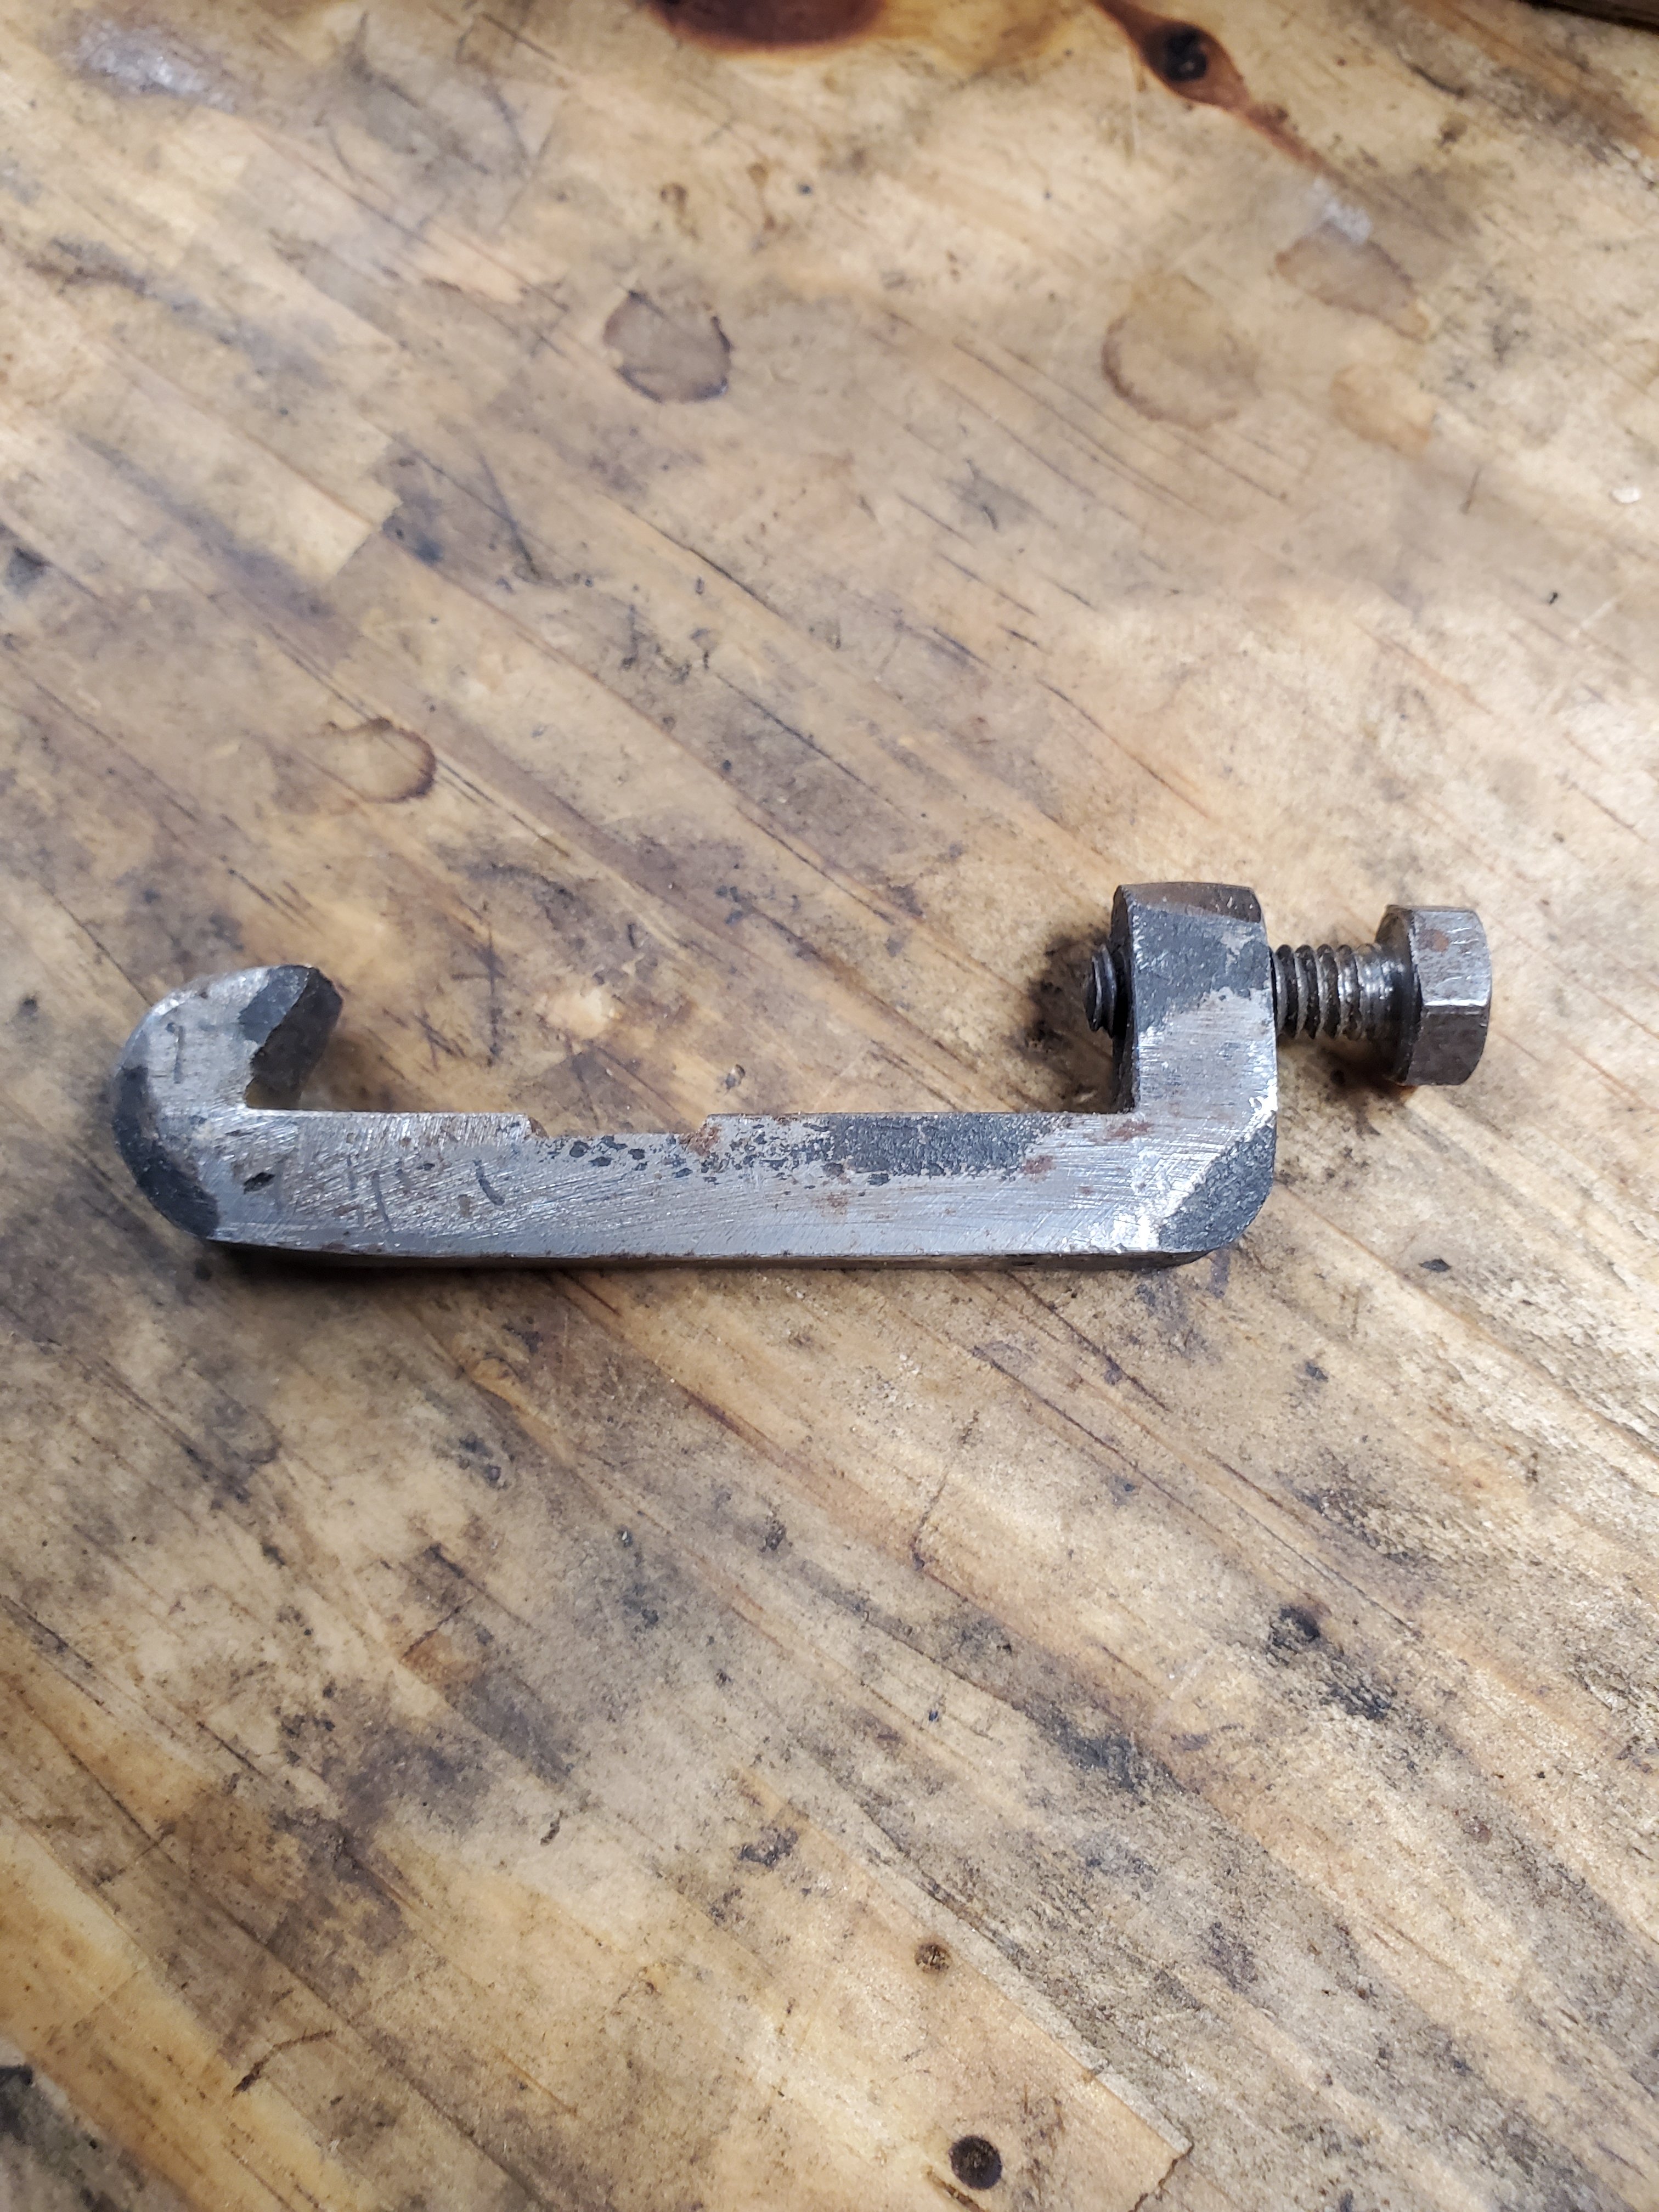
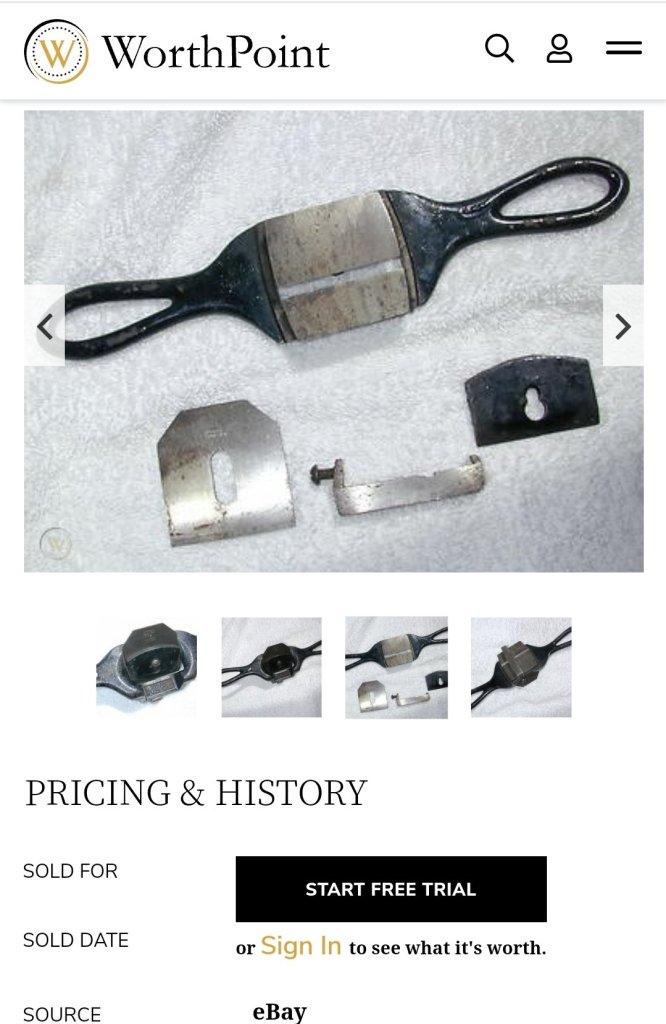
When looking online for more information for this spokeshave, I saw that the vast majority of them have no fence. Then I came across this photo on WorthPoint where it shows a similar fence as mine, except this fence has a screw to tighten it while mine has a bolt. So, I’m not sure if this was a user tip that people saw in magazines that they made themselves or not.

Here’s the spokeshave in action. It works quite well with the fence. I posted this video on instagram and people said that the spokeshave was used by boat builders and carriage makers which would make sense. Definitely an interesting tool.

Wood Movement

Over the past few months, I’ve been making these Ohio signs and selling them in my wife’s booth. They’re a simple thing to make. Just cut the wood in the shape of Ohio, then glue and staple the pieces to a plywood back. Originally I used old pallet wood to make the signs, but the past few batches I made them with old fence boards.

20180110_090136-2.jpg

Last week, when I was helping my wife move things around in her booth, she told me that some of the signs had warped. Worried, I grabbed a few of the signs to look at them. Because we had such a hard cold spell, the antique store was kicking up heat to stay warm. Apparently, the dry heat sucked all the moisture from the signs making them bend up. Even the top of an old bench my wife was selling warped.

20180110_090148.jpg

When examining the sign, I realized I made two rookie mistakes. The first mistake I made was that I painted the wrong side of the fence board. I should have fastened the wood crown-down so that the board wouldn’t warp upward. The second mistake I made was that when I fastened the boards on the plywood, I spread glue all over the plywood back making the wood unable to expand and contract. Embarrassing to admit I know. When I first made these signs, I made them from old pallet wood that was a lot narrower than the wide fence board I used here. I thought my wood was dry enough to make them in the same process, but I was sorely mistaken.

20180110_090235.jpg

Wanting to fix the sign, I ripped apart the plywood back and removed all the staples from the wood.

20180110_090628.jpg

After cleaning the back of the pieces, I saw how the widest board on the sign was warping in conjunction with the others.

20180110_091652.jpg

I decided to shave off the high spot in the middle with my scrub plane so the warping wouldn’t be as noticeable when I remade the sign.

20180114_125852.jpg

Then, instead of spreading glue all over the plywood back, I laid a bead of glue down the center of each piece of wood so the wood could move. I then attached the plywood back to the pieces with 1/4″ crown 5/8″ long staples.

20180114_130102.jpg

With everything back together, I was happy how the sign laid flat again. I really don’t mind if the boards warp a little bit. After all, the sign is supposed to look old and rustic. I just don’t want the whole thing to curl.

20180114_130219.jpg