Craftsman Made Plane

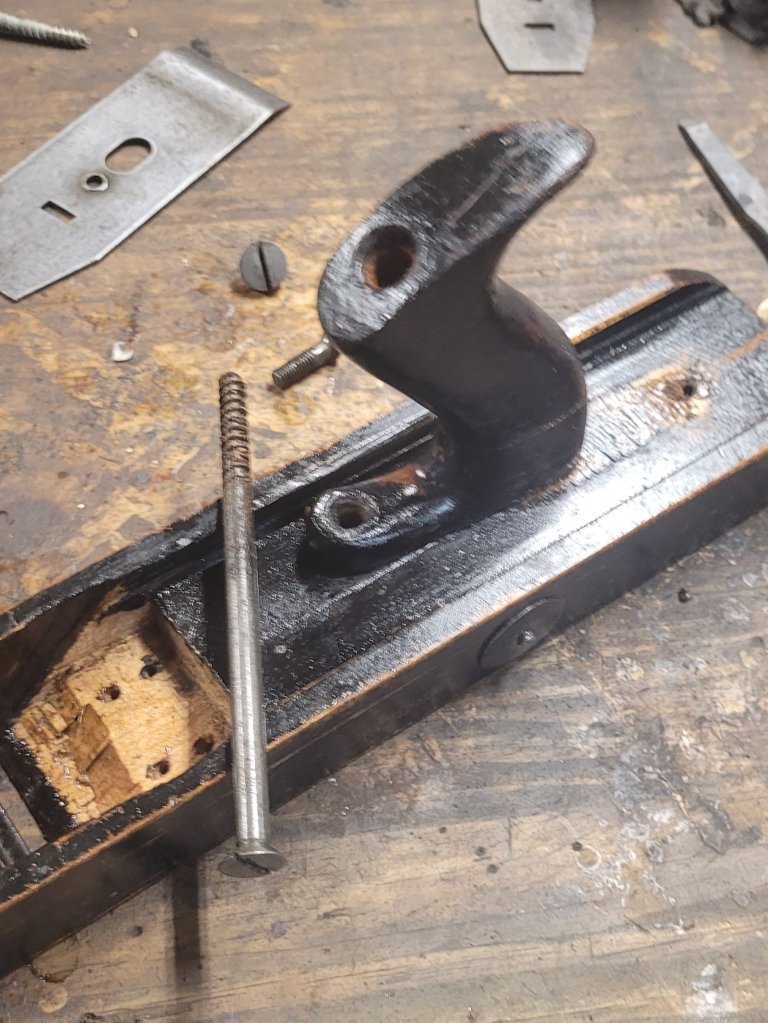
Several weeks ago, I won this craftsman made hand plane on an auction site. When I first looked at it, I thought the body was made with three pieces of wood laminated together like a Krenov plane, but after studying it, I realized it was one single piece of wood. There are a couple of rivets through the body, but I don’t know what purpose they serve.

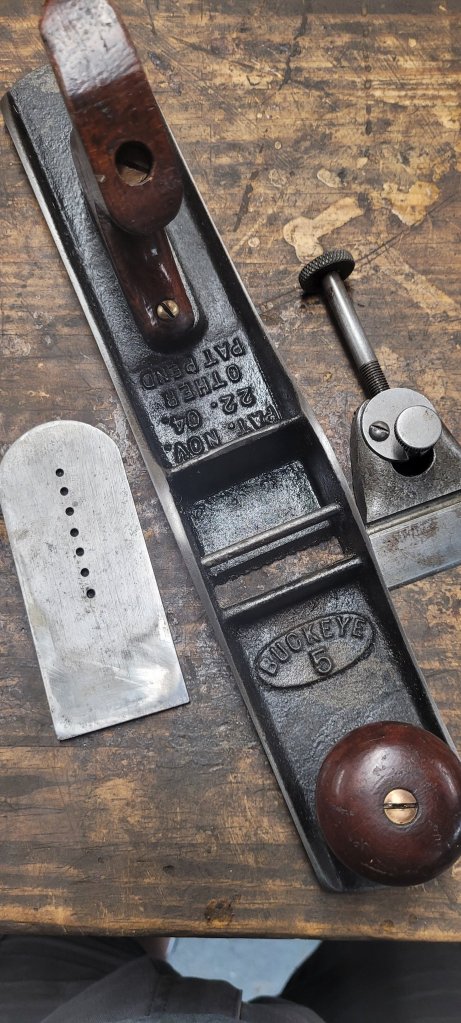
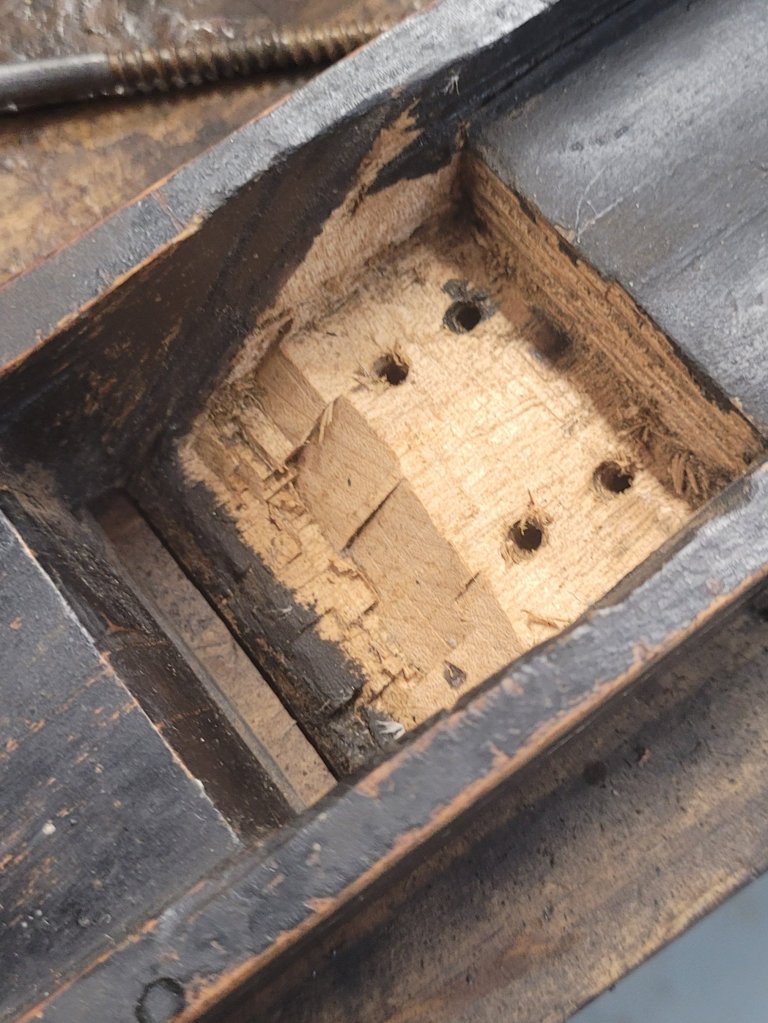
I’m not sure what the story of this plane is, but it looks like the craftsman owned a Sargent plane that broke, so he made a custom wood body out of mahagony and turned his plane into a transitional plane. You can see the chisel marks as he dug out for the frog, which adds a cool factor to the plane.

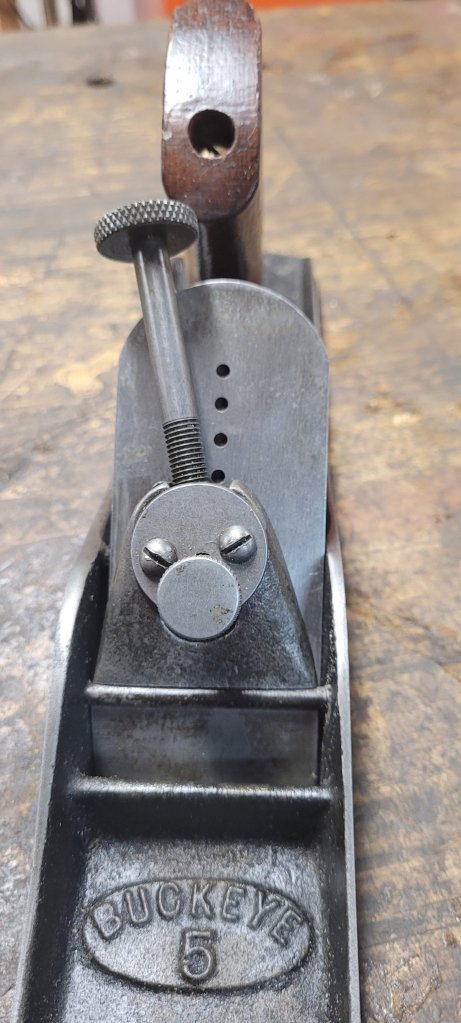
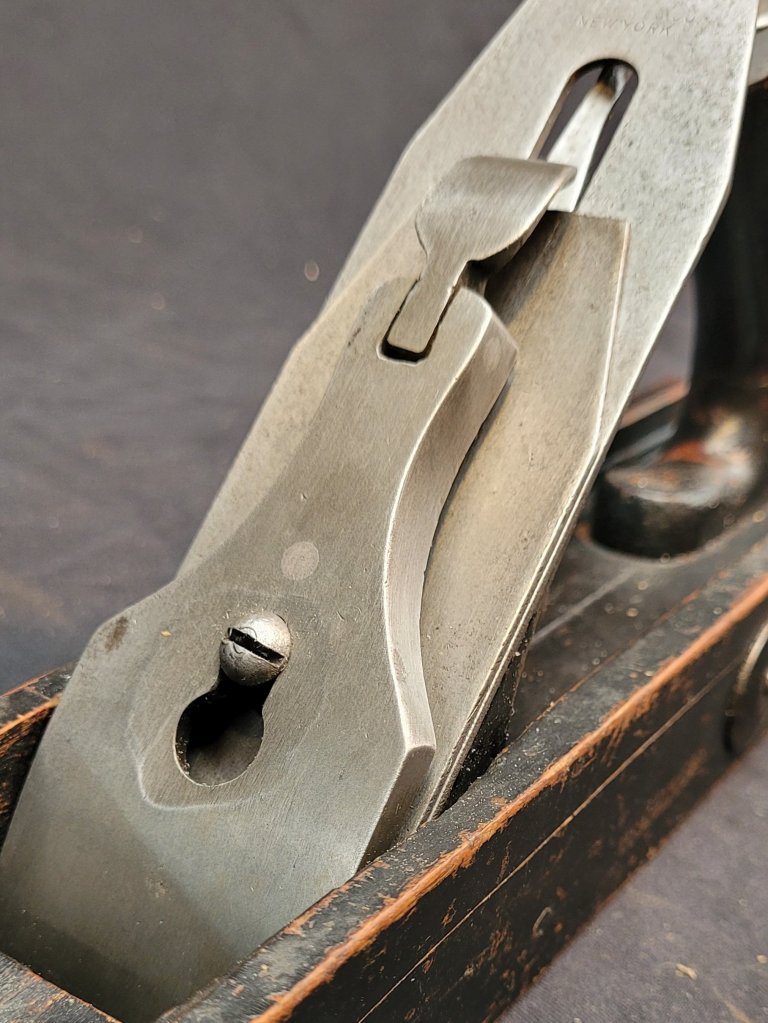
For whatever reason, he used four screws to hold down the frog to the body. It allows for very little advancement of the frog, but the plane still functions fine.

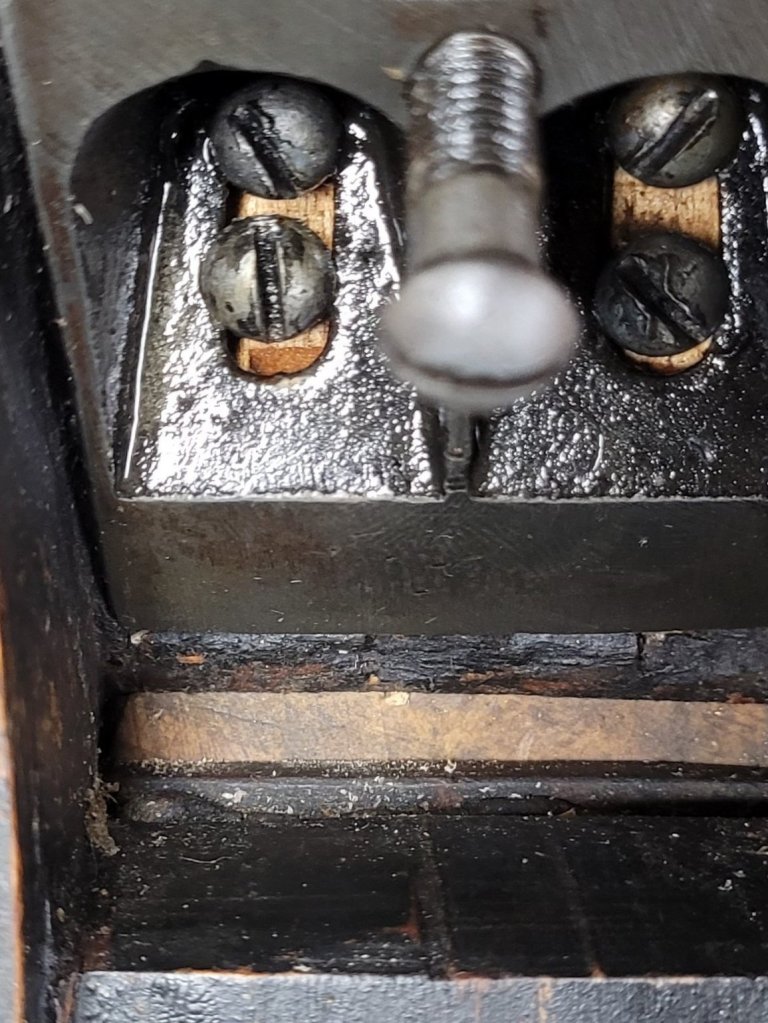
The owner also grounded the face of the lever cap down, which seems odd. You would think the original lever cap screw would have worked just fine, but maybe this screw is a replacement.

Luckily, I know the name of the craftsman of the plane (at least the last name). C Heiland is the person who made the plane. I googled “C Heiland Woodworker,” hoping I would find some information about him but had no luck. It would be awesome to have some provenance on the plane.

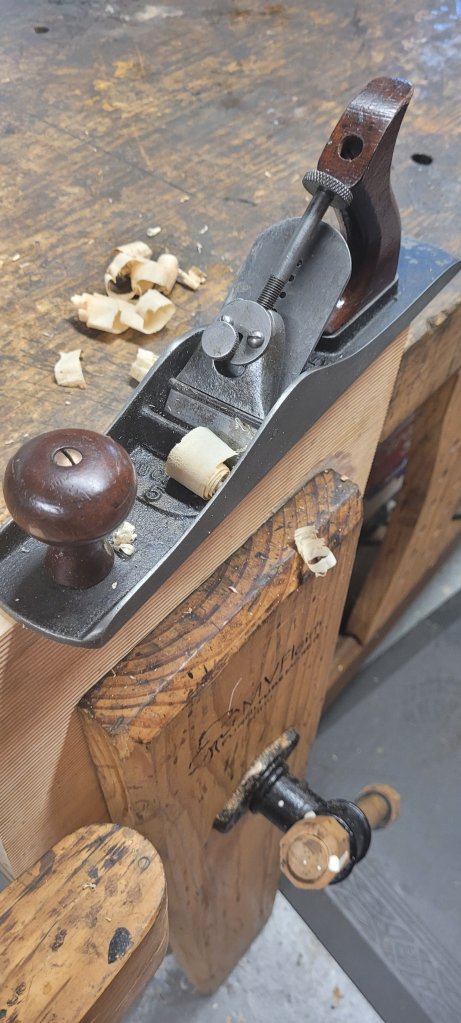
It’s a neat plane to look at, but I wanted to see how it performed, so I sharpened the blade and put it to work. The plane performs admirably. It was much better than the Buckeye plane I tried out from a few weeks ago.

Buckeye No 5 Plane

Several weeks ago, I won this Buckeye No 5 plane at auction. The look of the plane was something I had never seen before. I wanted to see how it would perform, so I took a closer look at the plane’s functions.

Buckeye planes were made by the Buckeye Saw Company, which was in business from 1904-1929, and they are known for this patented plane by John Muehl, who more likely sold his patent to The Buckeye Saw Co.

The plane has no frog. The blade simply rests on the casting of the bed, and the Norris style adjuster, pins into holes on the blade.

The lever cap acts as the cap iron as well, which usually is not a good sign for quality. The Norris style adjuster swings from left to right in order to adjust the blade from side to side.

The simplicity of the plane makes it impossible to adjust the gap in the plane’s mouth to produce a thin shaving.

I sharpened the blade to see how it performed. Because the plane is so primitive and basic, I couldn’t get a nice shaving out of it even after messing with it for a few minutes. At best, the plane would only be good for rough carpentry work, like trimming a door and not for fine cabinetmaking.

In the end, my opinion about the quality of this plane is……it sucks!

Ash Display Cabinet

The ash display cabinet I’ve been building for Anita is finally done. Took longer than I wanted but, working full time, restoring and selling antique tools, and doing honey-do lists around the house has eaten up all of my time. Anita will eventually put handles on the doors once she figures out which ones she wants, but for the most part, it’s done.

The cabinet is 48″ x 66″ x 16″ and is the first piece of furniture I made without using a single piece of plywood. I would have at least liked to have made the shelves out of 3/4″ plywood but my lumber supplier doesn’t carry it. The piece is extremely heavy and cost me about $500 to build. But, it’s still way cheaper than the $1600 price tag that was on the one at Pottery Barn. Plus, this is made from American hardwood and not some junky looking Chinese lumber.

To help speed up the build, I went out and bought a Festool Domino. I waited ten years to buy one until the day I could afford it, but that day never came. So, I bit the bullet and bought the tool as well as the Domino kit with the extra drill bits. So far, I love the tool. I was told by the sales rep at the store that you set the tool on the first setting one one side of the board, then switch to the second setting for the other side of the board. The wider slot gives you a little bit of play when aligning the boards similar to using a biscuit joiner.

I used the machine for the case as well as the joinery on the glass doors and it performed wonderfully. The Domino is one of those tools you wished you would have bought sooner.

The other thing I did differently on the piece versus others I have built was to put feet on the cabinet. In years past, when I built something, the sides of the case would be the feet of piece of furniture but, after studying antiques over the years, I noticed that the well built pieces would have feet glued to the bottom. This helps protect the sides by lifting them off the floor by a 1/16″. Having square feet also makes sticking furniture pads on the bottom a lot easier.

I already wrote about the wooden shelf supports a few weeks ago here. They work exceptionally well and can hold a massive amount of ironstone. I can’t even imagine all that weight on little brass pins.

Anita loves the cabinet, I love the cabinet, her friends love the cabinet, people on Instagram love the cabinet. It’s been a big hit and the money I saved building it, paid for my Festool Domino.. (see what I did there?)

Making a Roubo Style Workbench Part 1– revisited

I wrote this blog three years ago at Fine Woodworking.com and decided that I should bring it home to my blog. It’s in five parts but I will add a sixth part at the end to tell how the bench has held up. Enjoy!
It’s 2009 and I still haven’t made a new workbench I promised myself when I bought an Emmert patternmakers vise at an antique tool auction in Indianapolis last spring. After the auction I bought Workbenches by Chris Schwarz and was planning on building the Andre Roubo bench he built in the book. Then a couple of months ago, while attending  Woodworking in America Conference in Berea KY, I  saw Roy Underhill’s version of the Roubo bench and fell in love with it. The bench was solid as a rock with its back legs splayed out and it didn’t rack from side to side. Something my current bench is horrible with. Luckily there’s a write up of Roy’s Roubo bench in his new book The Woodwright’s Guide; Working Wood with Wedge & Edge. Because there were things that I liked in both benches, I decided to incorporate some of the features of both and design something that would fit my needs.
The two books that are instrumental for building the bench.
The design of the workbench. My Sketchup skills are still nonexistent so I have to design the old fashion way.

The bench will be eight feet long and made out of Southern Yellow Pine with my Emmert vise installed at the end. I’m going to try something that I’m not sure has ever been done before and build the legs and the stretchers out of pressure treated wood. I just like the idea of the added weight with pressure treated wood. Plus, I was able to buy 6×6’s for the legs and save some money verses buying more 2x stock and gluing them up to create a 5”x5” legs the way Chris does. I calculated how much material I need and bought (12) 2x10x8’s, (4) 2x12x8’s and (2) 6x6x8’s. The total cost was $132.00. Not bad considering I paid $150 for a piece of 8/4”x 8”x60” walnut when I built my Pennsylvania Secretary a few year ago.  The reason I didn’t make the entire bench out of pressure treated lumber is because ACQ lumber is very corrosive to metal. You need to use hot dipped galvanized or stainless steel fasteners when working with it. Since my vise is cast iron, it would end up corroding if I used ACQ pressure treated lumber for the top.

The lumber stickered and ready to dry. I need to find my moisture meter so I can see how dry the lumber is before I mill it to size.

After letting the lumber acclimate in my shop for about a week, I ripped the boards in half so that they would dry faster. My wimpy little table saw doesn’t have enough power to rip through 2x stock without binding, so I had to set the blade a little under ¾” high and make two passes, flipping the board over after the first pass. Due to the high moisture content some of the boards started to crook immediately once I took them off the table saw. Once the ripping was complete, I stickered all the boards to let them air dry for a couple of more weeks. Once dry I’ll start milling them to size.

I don’t know how this bench will turn out using pressure treated lumber but I figure I can describe some of successes and pitfalls I encounter while building it. I’ll keep you posted