Last week, my wife, Anita, and I were walking through Target buying some clearance Christmas crap when Anita spotted this dough bowl on the shelf. If you know who Chip and Joanna Gaines are from the HGTV show Fixer Upper, then you’re probably aware that they have their own line of home decor in Target called Magnolia Home. Originally this Magnolia Home bowl was $50.00, but it was on clearance for only $15.00. Anita asked me to make a dough bowl for her a couple of years ago, but the project never got finished even though I got a piece of wood for it at a local lumberyard. For $15.00, I figured I could reshape this thing to make it look like the expensive antique dough bowls found in antique stores.

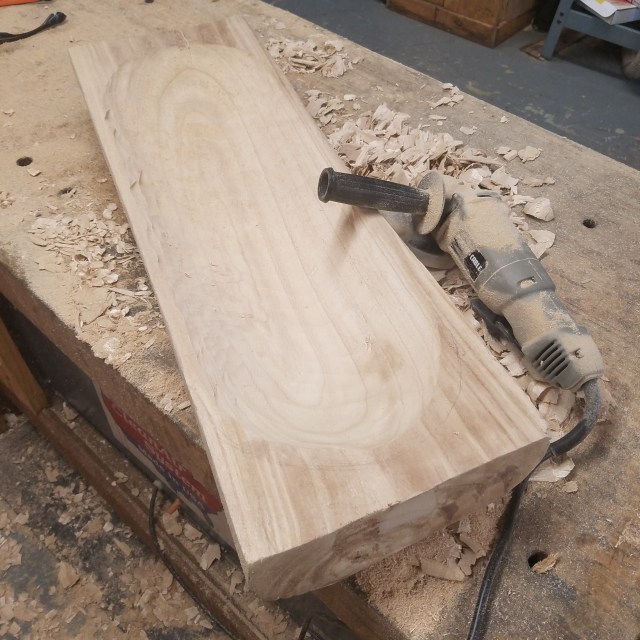
The first thing I did was cut the stupid handles off and try to deepen the inside of the bowl out with a Northwest adze. The bowl is made from paulownia wood, a native to east Asia that grows ridiculously fast. It’s easy to work, but your tools need to be sharp in order to cut the through the porous grain. I was using the adze for a few minutes, but didn’t feel I was getting anywhere so I turned to my angle grinder with a King Arthur grinding disc.

The grinder worked better, but it threw up a tremendous amount of dust. After a few minutes of that, I said screw it and stopped. The next time I use my grinder with that disc wheel, I’ll do it outdoors. Way too much dust for a basement shop.
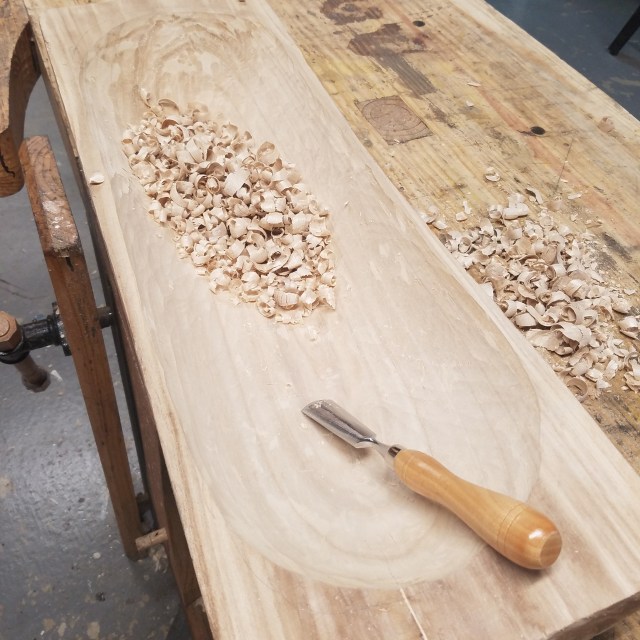
I ended up finishing the inside using a simple gouge. I’m not sure of the sweep of the gouge I was using, but I’m sure it was the wrong one. I bought a carving set at Costco about ten years ago and they are the only carving tools I own. If I was going to make a lot of these dough bowls, I’d buy the right tools for the job.
After I was satisfied with the depth of the inside, I drew around the edge to mark where I wanted perimeter of the bowl to be. I wasn’t designing this bowl using elements based on the golden ratio or from the proportions of vases from ancient Egypt. I simply wanted a bowl that looked organic in form and handmade.

I took the bowl over to my band saw and cut the ends off. You can see the rings of the paulownia wood and how fast the tree grows.

Chopping off the backside of the bowl was the toughest part. I used everything I could from axes, to chisels, to a drawknife. Whatever it took to get the job done I did as long as the tool was sharp as to not crush the end grain. The drawknife ended up working the best.

After a few hours, this is how the bowl came out. Turned out to be more of a pain in the ass than I thought it would, but my Anita likes it which is all that really matters. I doubt I’ll ever do it again unless I have a piece of green wood to start with.