Last weekend, my wife Anita bought this old side table at an antique mall. She loved the way it looked, but it was pretty wobbly and ready to fall apart. She asked me if I could stabilize it and I told her I could so she bought it.
The issue with the table was that it was coming loose in the back and the legs were wonky so she asked me to put a stretcher in the back to stanle everything.
A bigger problem with the table was actually its drawer. It was somewhat repaired back in the day but done improperly, so it really didn’t work at all. The one drawer bottom side was completely gone, so I had to deconstruct the drawer in order to fix it.
I grabbed a piece of scrap pine that matched well enough to use for the parts of the table I was going to fix. Then I cut and glued everything together.
I added a stretcher to back to stabilize the legs. I cut the piece to fit, and then I used my Festool Domino to cut the through tenon. There is nothing like using a 21st-century tool to repair a 19th-century table.
After the glue dried, I cut a Dao down the side of the drawer to fit the drawer bottom in. Then I nailed the bottom to drawer so that it would fit better and not fall in.
A couple of hours in the shop and the table is ready for another hundred years of service. I’m not going to do anything to the back stretcher to make it match the rest of the table. I doubt no one will even notice it.
A couple of weeks ago, I had the opportunity to attend the tool auction of Jim “Rooster” Brown. I knew Jim a little bit. He always helped out the Amish Tool Auction in Adams Co Ohio every 4th of July. I went to that auction every year for over fifteen years, and it was always something I looked forward to every year. Jim would help out the auctioneer Hess Auction Co as they sold Hostetler’s tools. I would always end up with a boatload of tools. So much so that one year, my Mom got mad at me for all the money I spent (about $500) when I came home with my loot.
Since it was an auction, I never spent too much time talking to Jim because he was too busy holding up and handing out tools during the auction but when I did talk to him he was a super nice guy. I remember one year, a Stanley No 444 Dovetail Plane came up for sale, and I ended up winning it for $200. Jim yelled out, “He stole it!” Everyone laughed, but I was happy that I did indeed steal it. I owned that plane for many years until I had to sell it due to being unemployed after losing my job.
Jim was a collector of Ohio made tools. He had thousands of them after collecting for decades. His collection consisted of hundreds of molding planes, cooper tools, axes, and saws. The first part of the auction was all of his axes, so I had time to look around and examine all the woodworking tools. I couldn’t believe what I was looking at.
Dozens of panel raiser planes, multiple scroll saws, cooper jointer planes, dozens of plow planes, and several tool boxes full of tools that sold as a complete set.
There was a Stanley No 1 plane that sold for $1450.00, and this panther saw that sold for $2625.00. I’ve never seen one in person, and I doubt I ever will again. Some of us thought that the winner overpaid, but one just recently sold for $3500.00.
This Ohio Tool Center Wheel Ivory Tip Plow Plane sold for $2700. The gentleman who won the bid was a personal friend of Jim’s, and he would show it to him every time he visited his home. He was ecstatic that he won his friends favorite plane.
This workbench sold for over $1400.00. I hope it won’t become a kitchen island but you never know these days. lol
This was Jim’s obituary. He worked for the post office for 30 years and was a founding member of the Ohio Tool Collectors.
During the auction, I started to get more involved and bid on the tools. Some of the hand planes I wanted went a little too high for me as a couple of Stanley No 2’s sold for $300 each. At first, I didn’t think I’d win anything, but about halfway through, things started to heat up for me. When they got to the table with all his panel raiser planes, they sold “Choice” off the table. After a couple of rounds, the auctioneer sold all the planes on the table at once. I thought to myself, “Holy shit,” so I got in view of the auctioneer and kept bidding. By the time the bidding ended, I ended up winning all the planes on the table (about 25) for a few hundred dollars. Then, a few minutes later, it happened again, and I ended up buying a second table full of planes for one money. After that, it was full go for me as I was bidding and winning multiple lots.
In the end, this is what I ended up winning. A total of 166 tools. The most tools I ever won and the most money I ever spent at an auction. But boy, did I have fun!
When I got home, I wrote in my book everything I won and what I paid for each tool. I could hear Jim call down from Heaven. “He stole it!”
Last weekend, my wife and I were antiquing in Dayton, Ohio, when we stopped in an antique store in Tipp City. I went into the back of the store when I saw this thing sitting on the shelf. I immediately knew exactly what it was as I owned one of these tools many years ago. It’s a No 40 Langdon Millers Falls Portable Mitre Box.
When I was a kid, I went to an Ohio Tool Collector Association meet-up and saw one of these miter boxes on a silent auction table. I thought it was cool as it was something I had never seen before. I put a silent auction bid of $20.00 and hoped for the best. Sure enough, I won the auction! The guy selling it wasn’t too happy about the price it received as he said that’s what he paid for it.
The tool is simple in its concept. There’s a fence that you clamp to a board and disc that you turn and set your angle with positive stops. You can even adjust the accuracy of the angle by adjusting the two screws on either side of the positive stop.
I wanted to try it out, so I grabbed a piece of scrap wood and clamped the miter gauge to it, then swung the fence to 45 degrees.
Since it’s made to be portable, the craftsman would just use a panel saw and cut the board while on the job site. The miter box is small enough that it would easily fit in a toolbox.
After I took a cut, I was surprised how accurate it was. That’s a pretty good 45 for trim carpentry work on a house.
Millers Falls made a compound angle version of this tool called the No 41, but I have never seen one in the wild.
I paid $15 for this miter box, which is cheaper than what I paid for the first one 35 years ago. People don’t know what these things are, so if you find one in the wild, chances are you’ll pick it up for a good price. I sold my first one years ago when I was unemployed and needed money. I really didn’t want to sell it back then as I thought I would never find another. Maybe the antique tool gods like me.
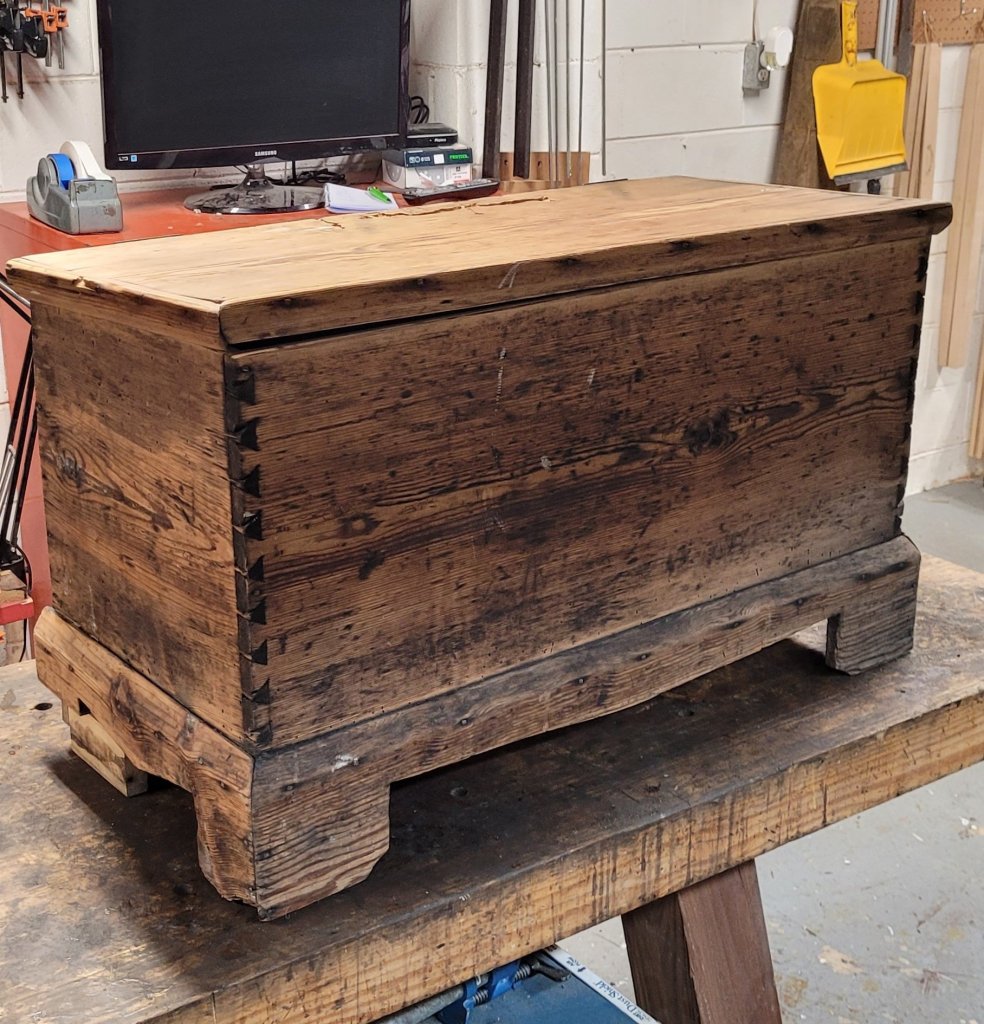
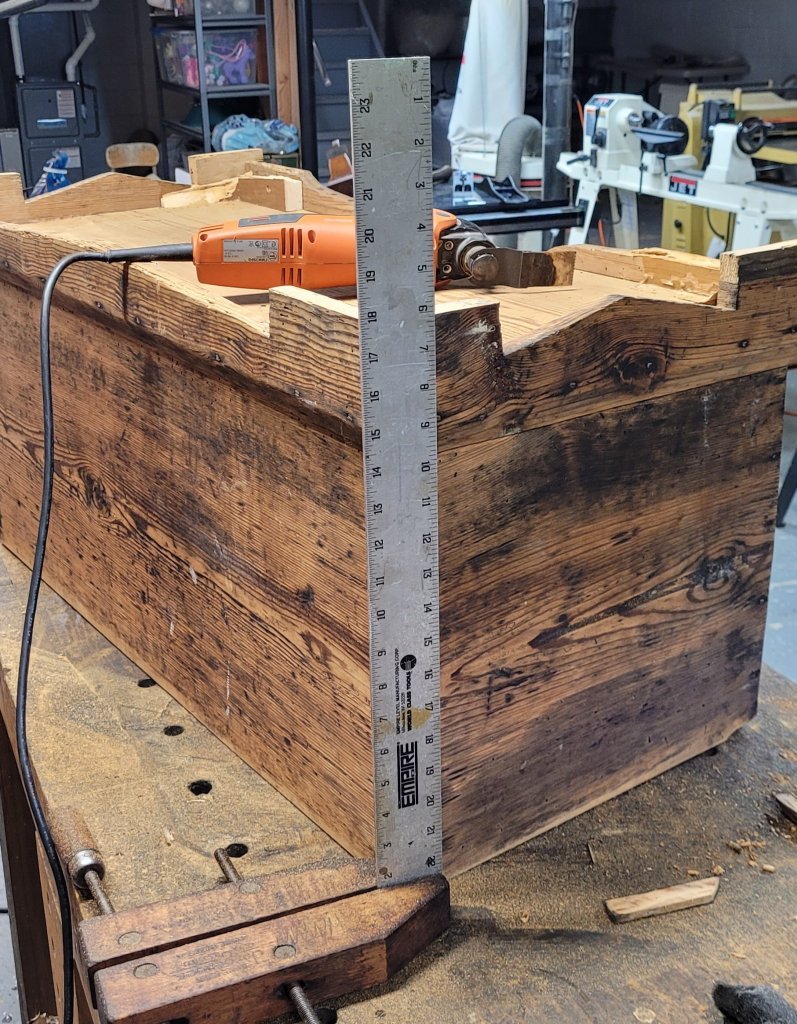
My wife came home from Florida with this old chest she bought off Facebook Marketplace for $20.00. She liked it because it was made from pine and had an old-world look to it. She asked me if I could repair it so it could be used as a coffee table.
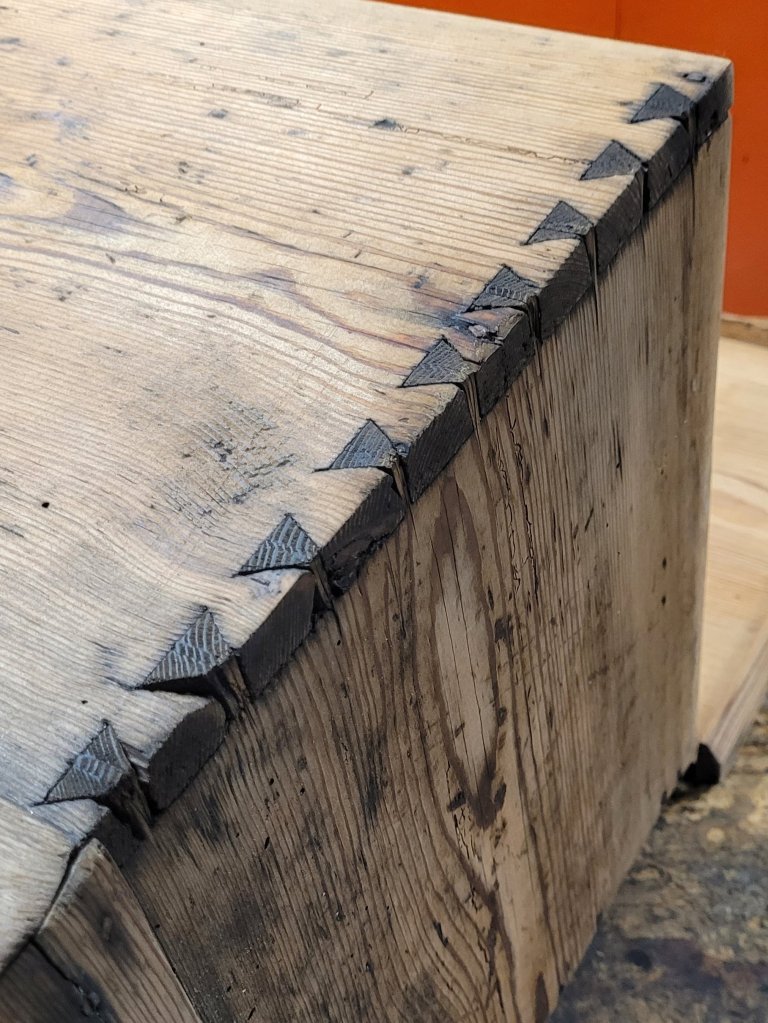
The chest had nice handcut dovetail joints on the front with really steep angles. So steep, they look like equilateral triangles. However, the back of the chest is just fastened together with a rabbet and some cut nails. I guess the craftsman who built the chest was tired of cutting so many dovetails that he opted for something easier for the back.
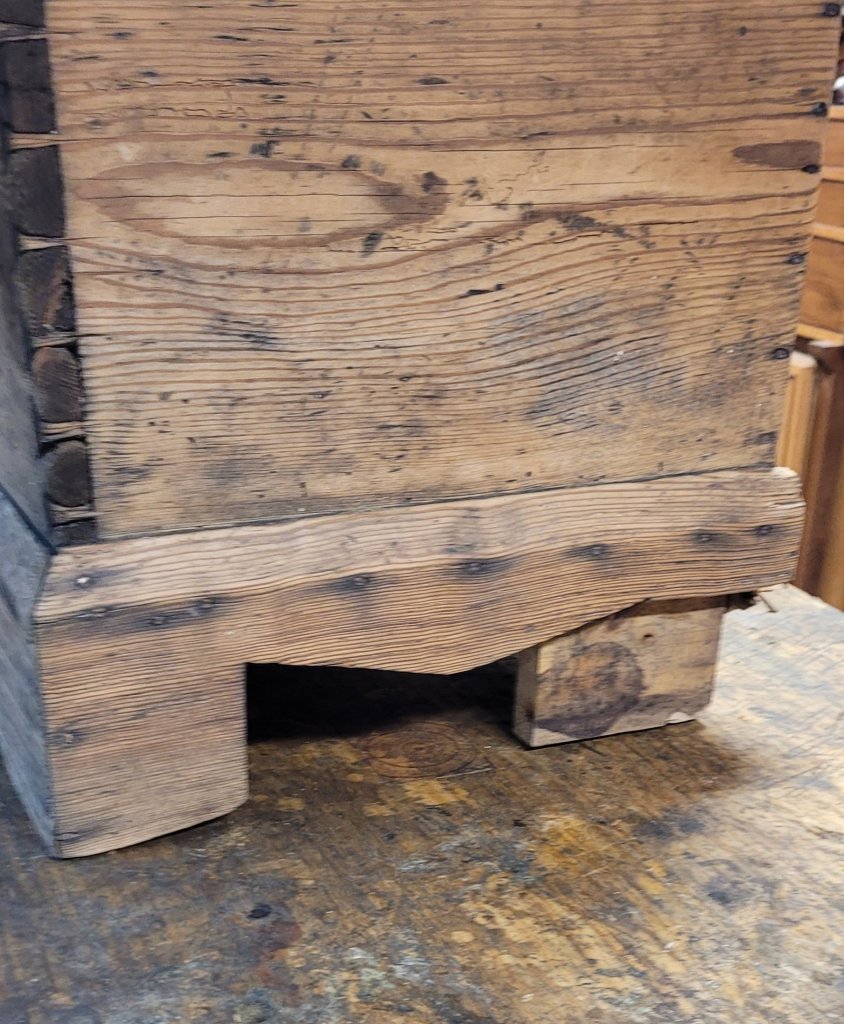
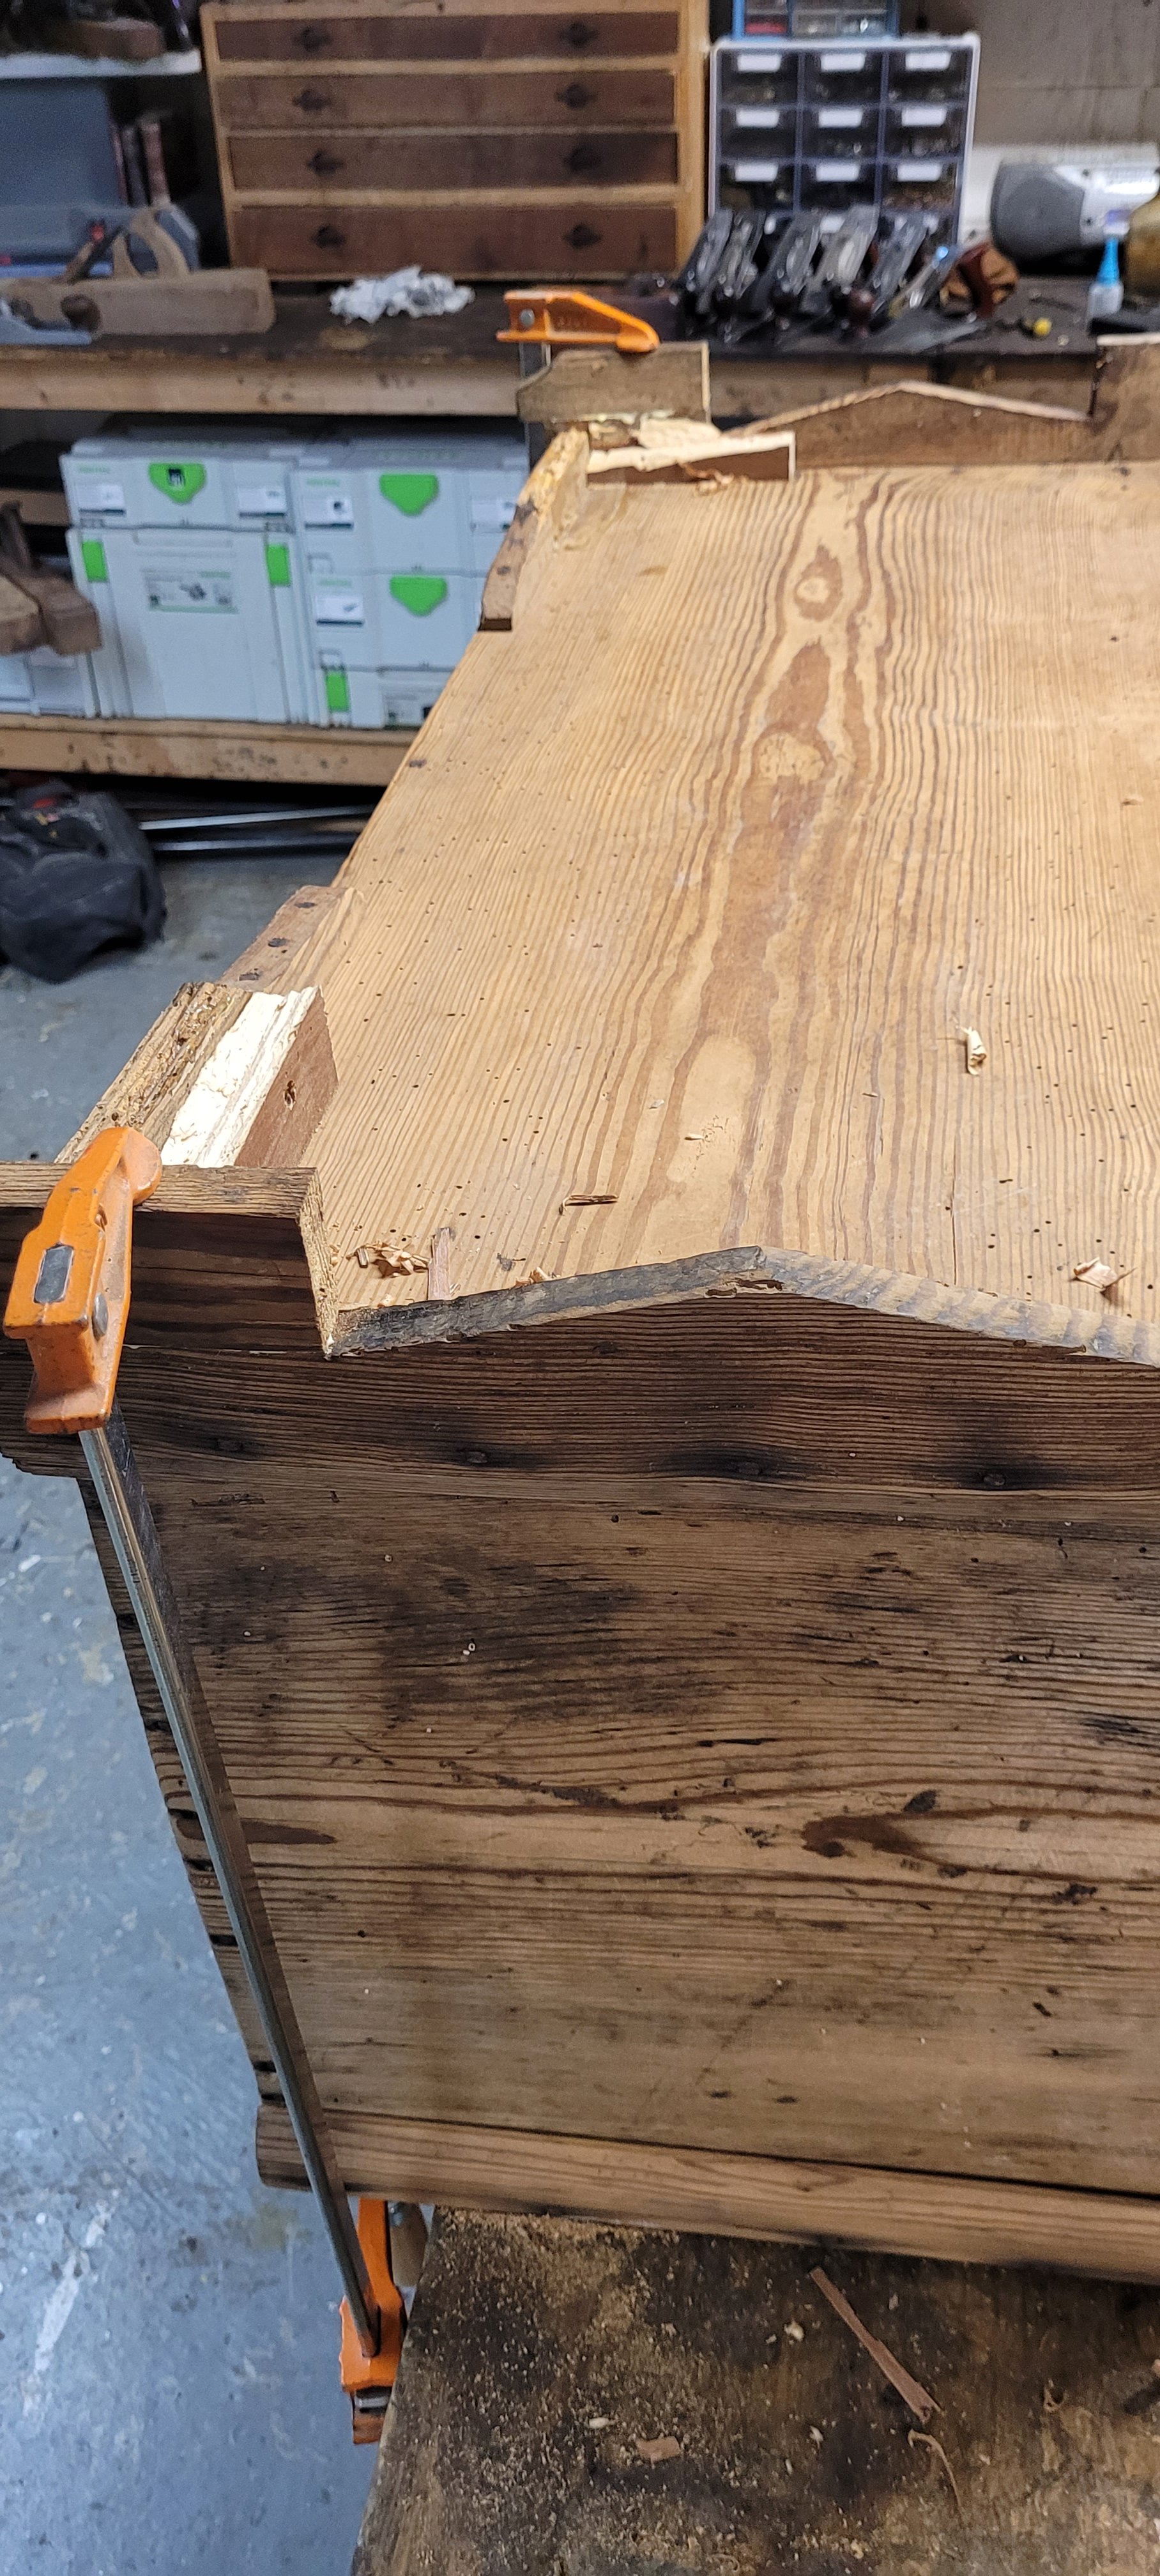
The bottom of the chest had a horrible repair to the back. Because the base was so tall, the wood failed and broke away. Somebody came in and simply installed L wood brackets to the back and screwed them in place with drywall screws.
Flipping the chest on its top, I broke off the terrible repair and cut the front feet of the chest to 18″ tall. I then took the off cuts and glued them to back of the feet that were missing.
Once everything was glued, I flipped the chest back over on its feet and checked how it looked. The narrower base was more pleasing to the eye and less prone to breaking since the feet were no longer so tall.
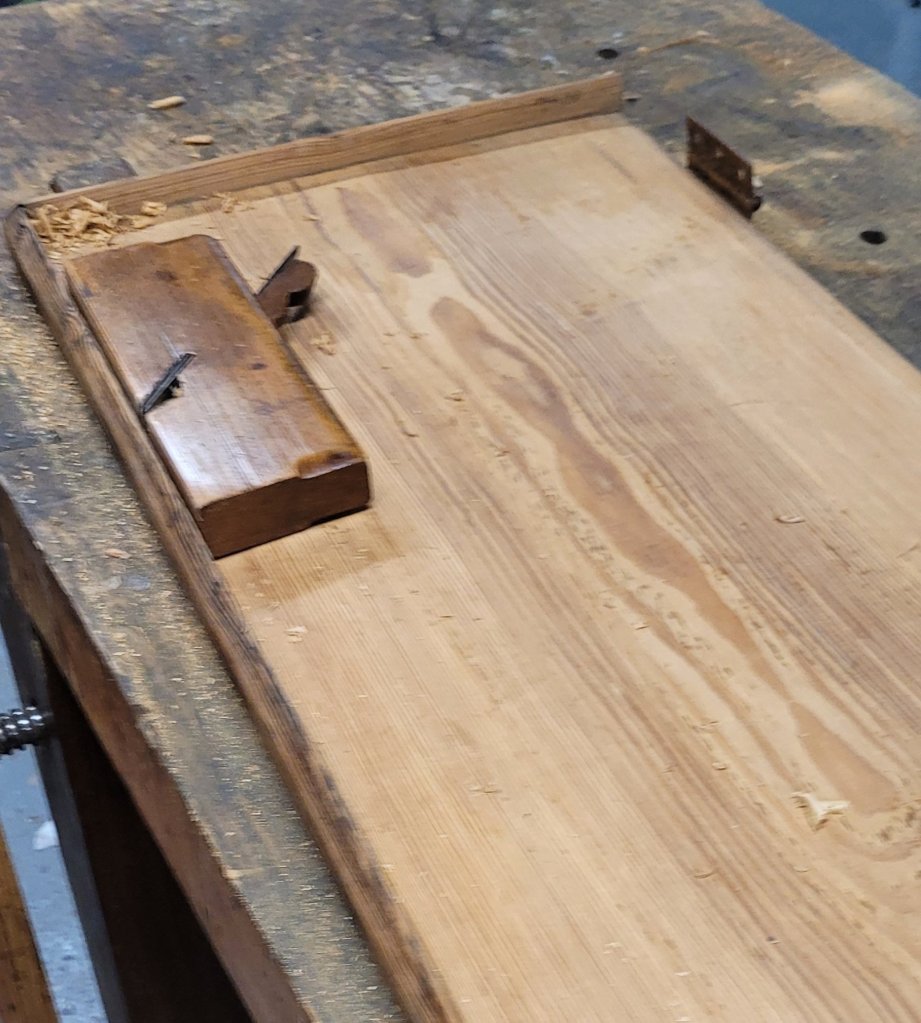
I then worked on the lid shaving away the inside of the front trim so that it would close around the chest. After a few minutes of shaving, the lid closed fine when I reinstalled it.
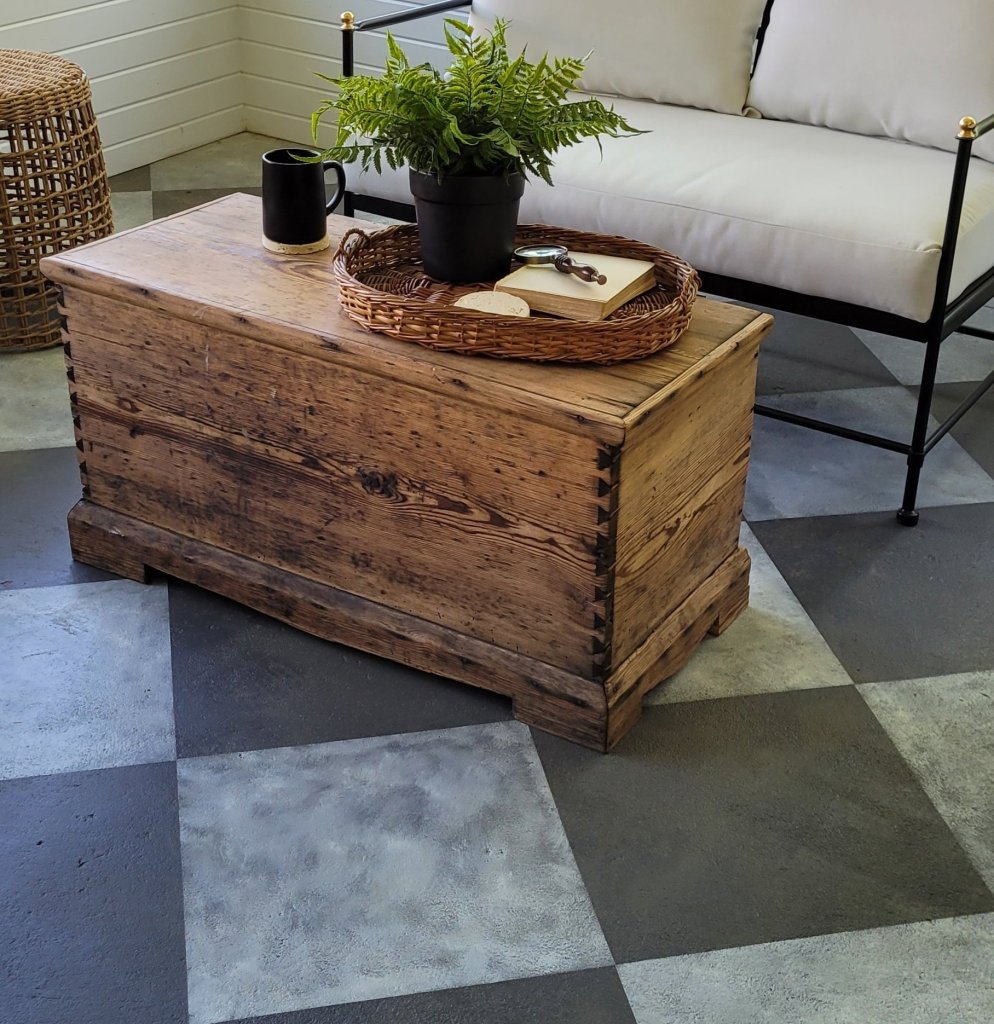
The chest now serves us well as a coffee table in our screened in porch. Hell of a coffee table for $20.00, and you can barely notice it has been repaired. Anita is ordering old looking chest handles for the sides as we both feel it would look nicer with them.
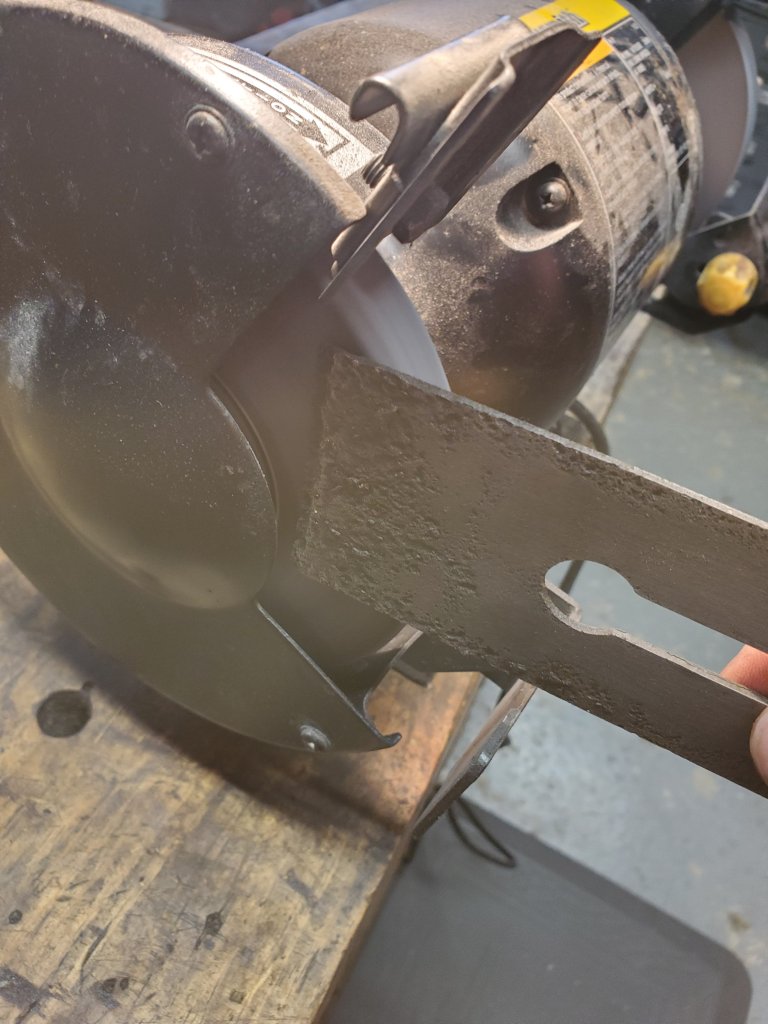
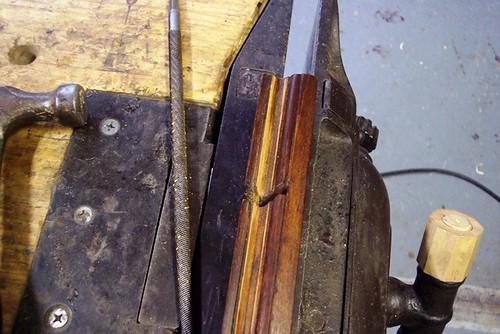
Every once in awhile I’ll come across a plane blade that is so heavily pitted and corroded, the best thing to do is to simply throw it away. This blade that came off a Stanley No 6 plane was no different. The problem was that I didn’t have a replacement blade to go with the plane I was restoring, so I was forced to see if I could get the blade to work again.
The first thing I did was take the blade over to my 8″ speed grinder and grind the face and back of the blade to remove the corrosion. I paid special attention not to heat the blade up too much so, I occasionally cooled it off in a bucket of water. Fortunately, the blade’s face had about a 1/4″ of metal at the bottom that wasn’t pitted, so I was hopeful I could still get a good edge out of it.
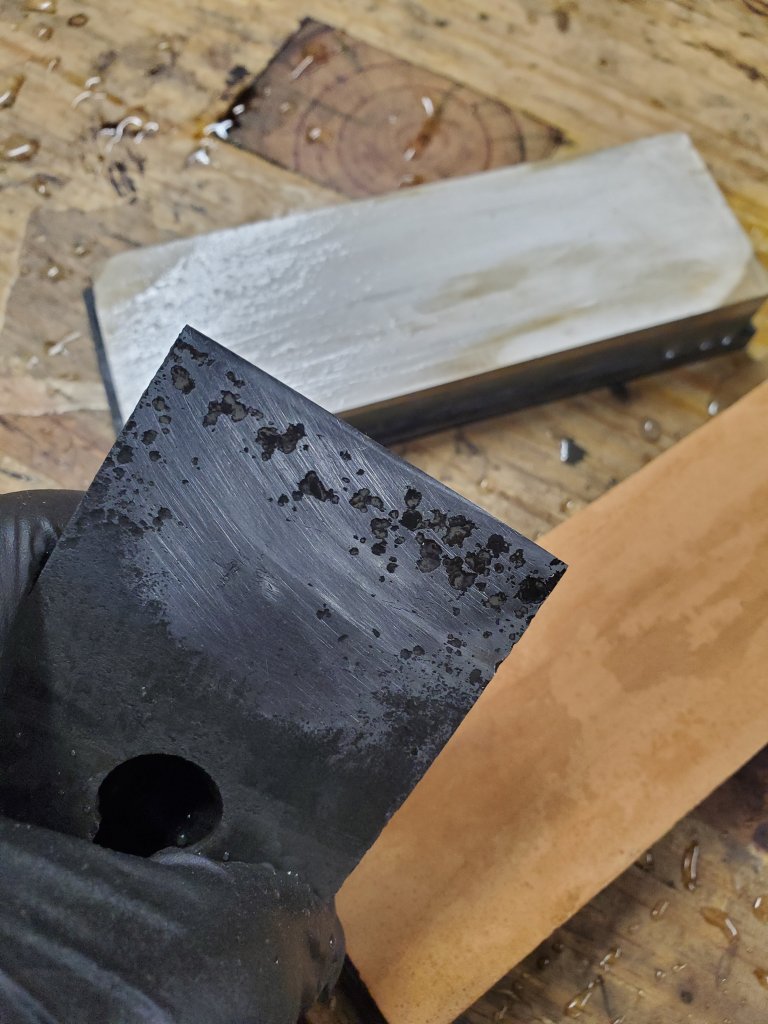
I took the blade over to my Tormek and ground a 25 degree bevel on it and honed the face flattler on the side of the Tormek grinding wheel the same way as I did with my 8″ speed grinder.
After the grinding was finished, I took the blade over to my water stones and sharpened it just as I do with any other blade. When I was done, there was a clean line of light at the tip of the cutting edge so I was hopeful it could achieve a nice cut.
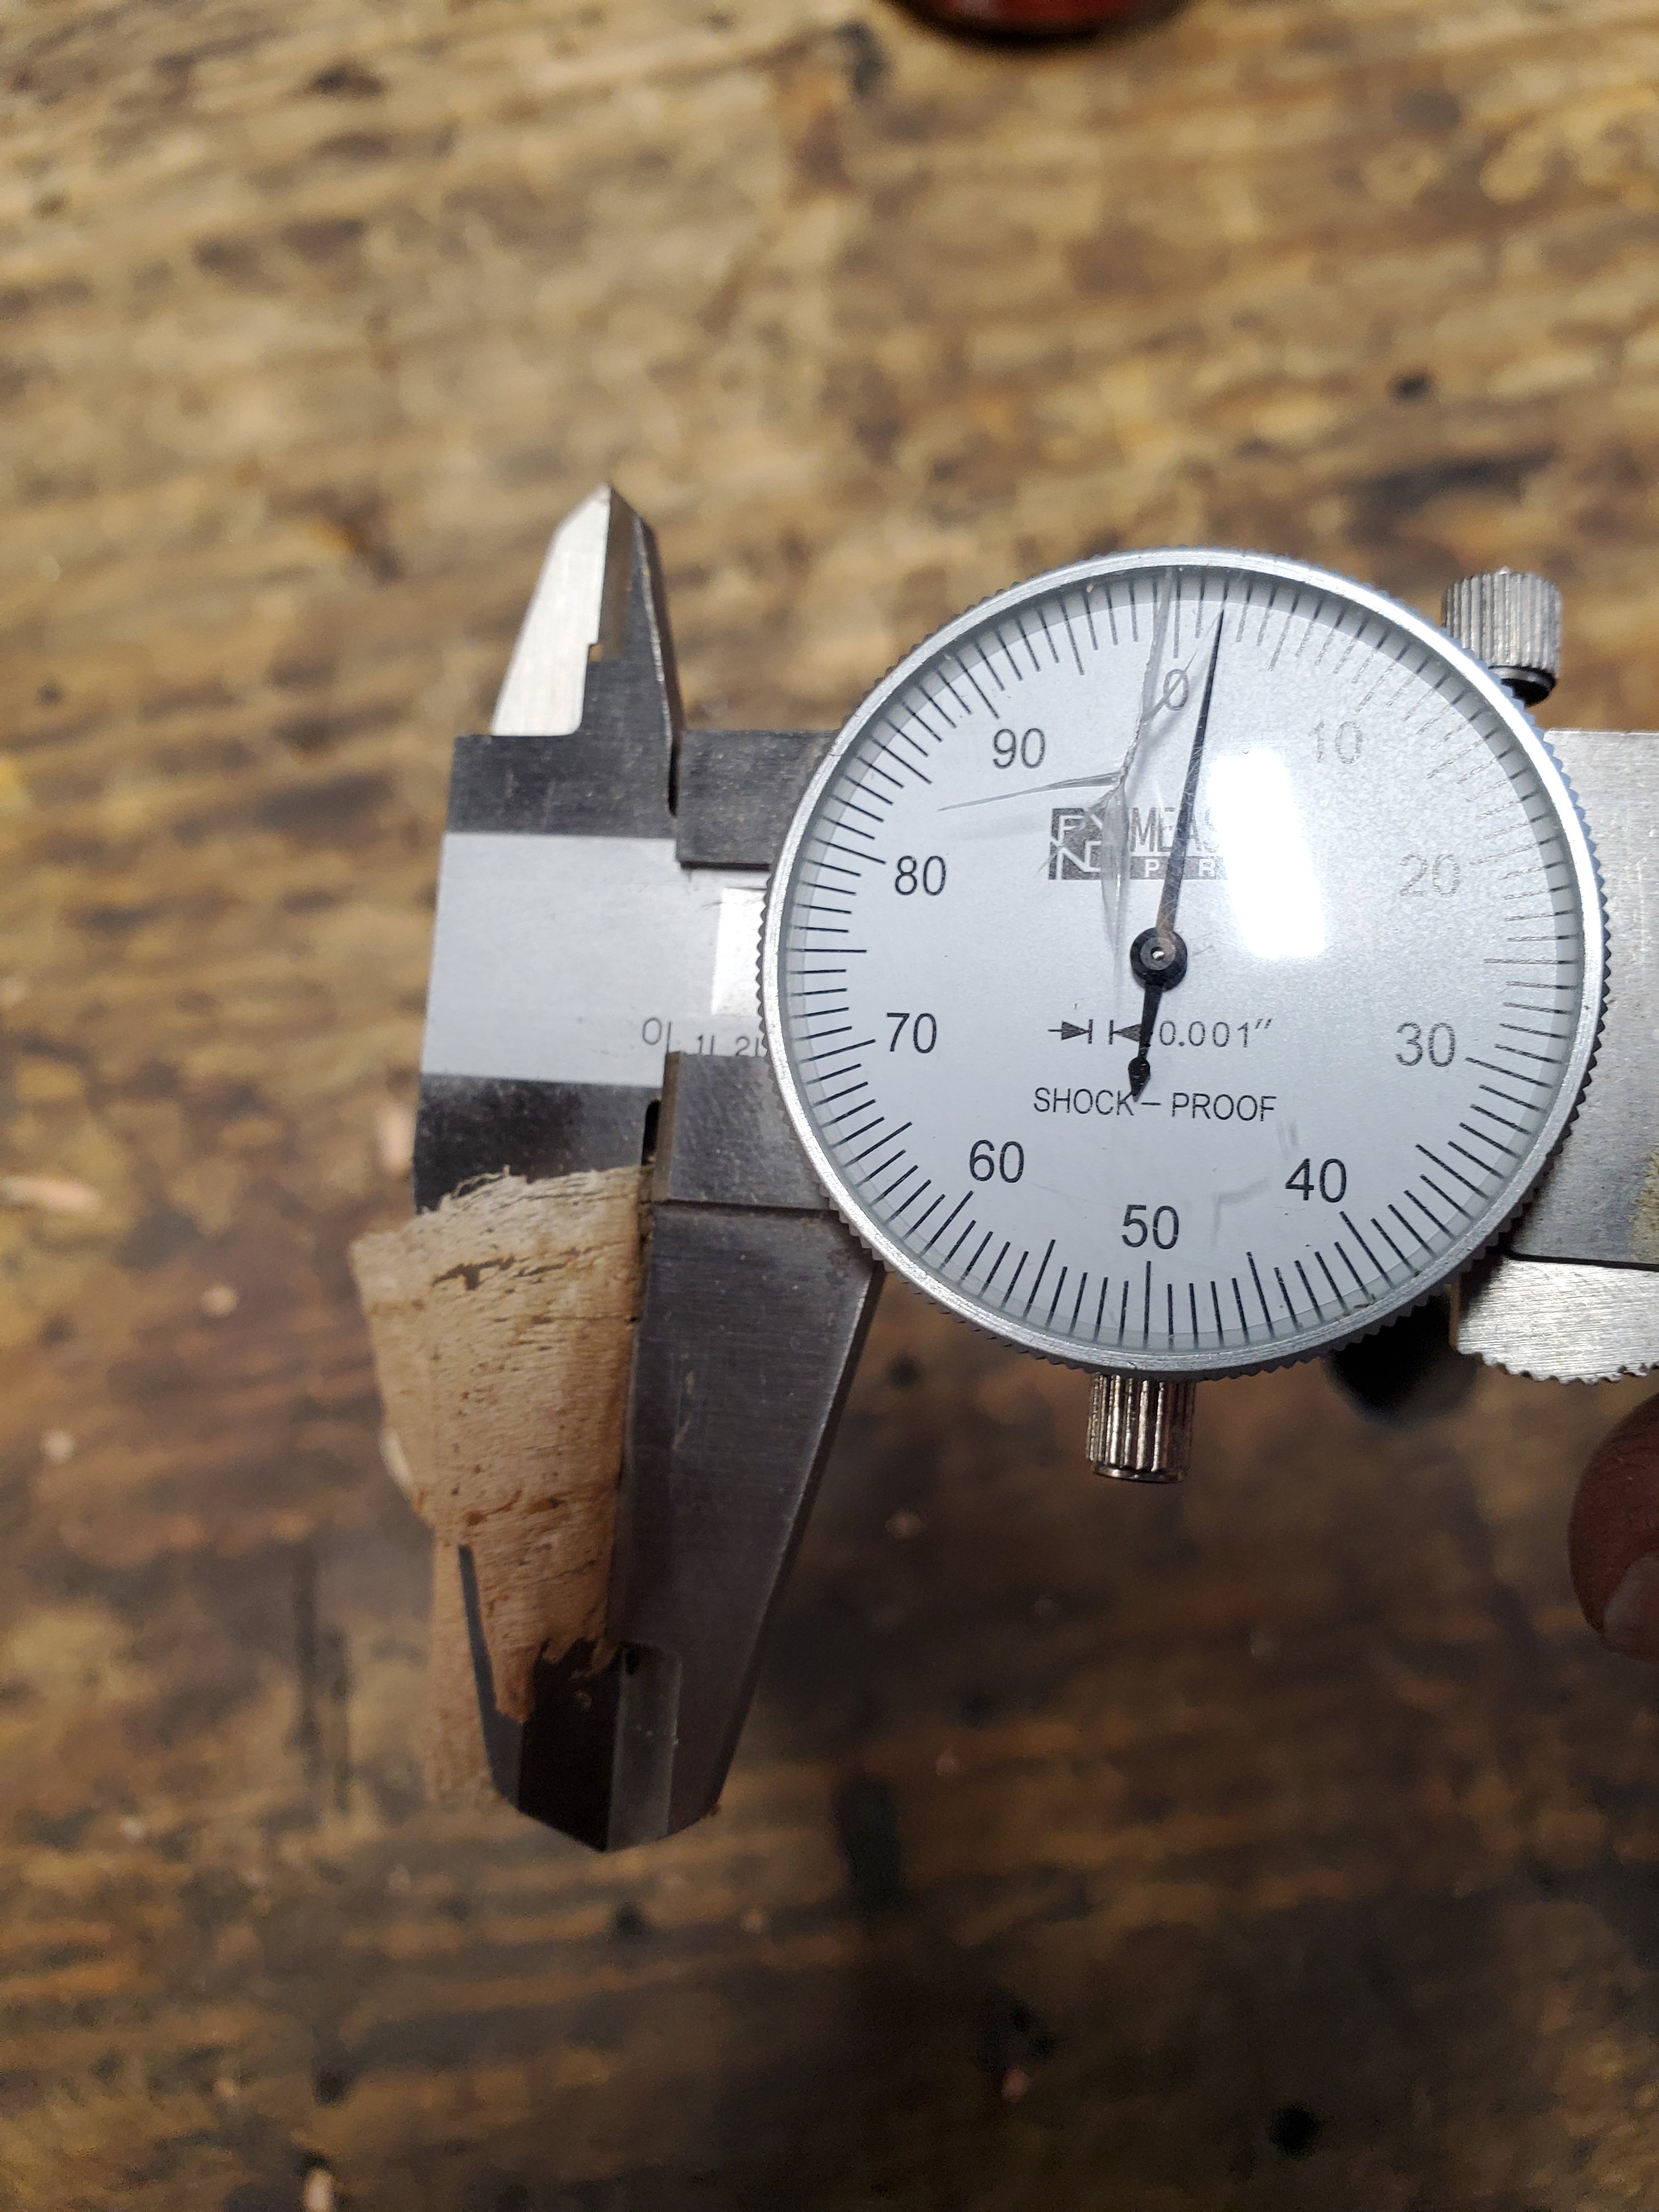
Placing the blade back into the plane, I tuned it up, and sure enough, this crappy blade cut pretty well. I took out my dial calipers, and the shavings measured .002″ thick. The blade will eventually need to be replaced, but at least the plane can function properly now.
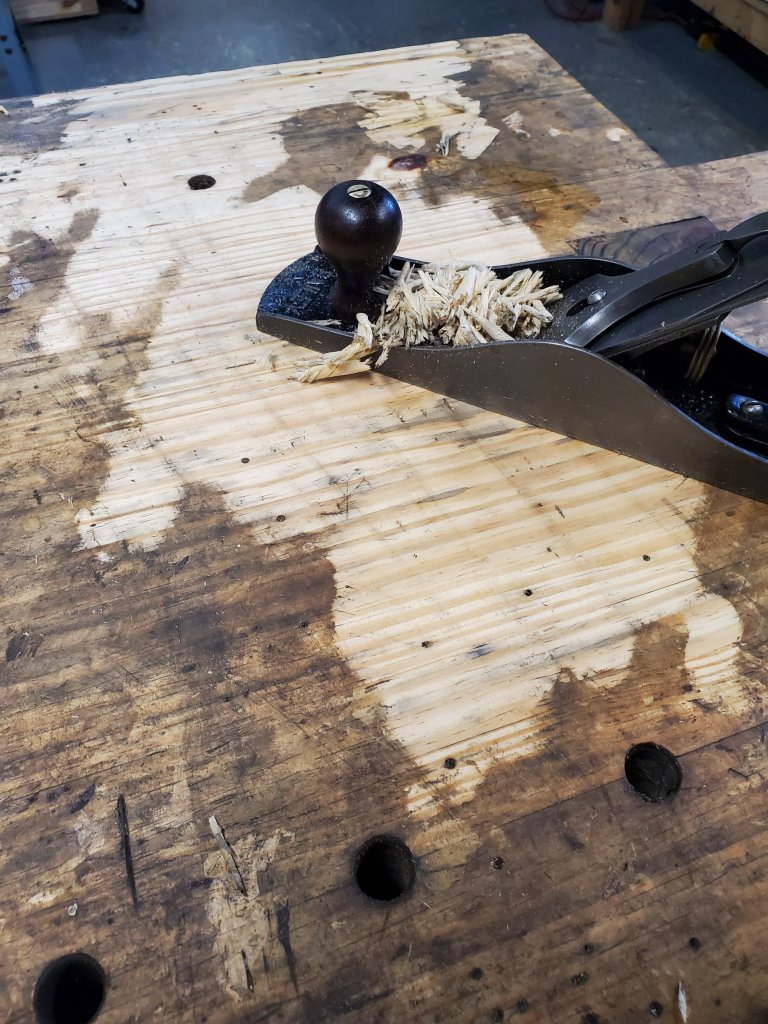
The plane performed so nicely, I used it to flatten my workbench.
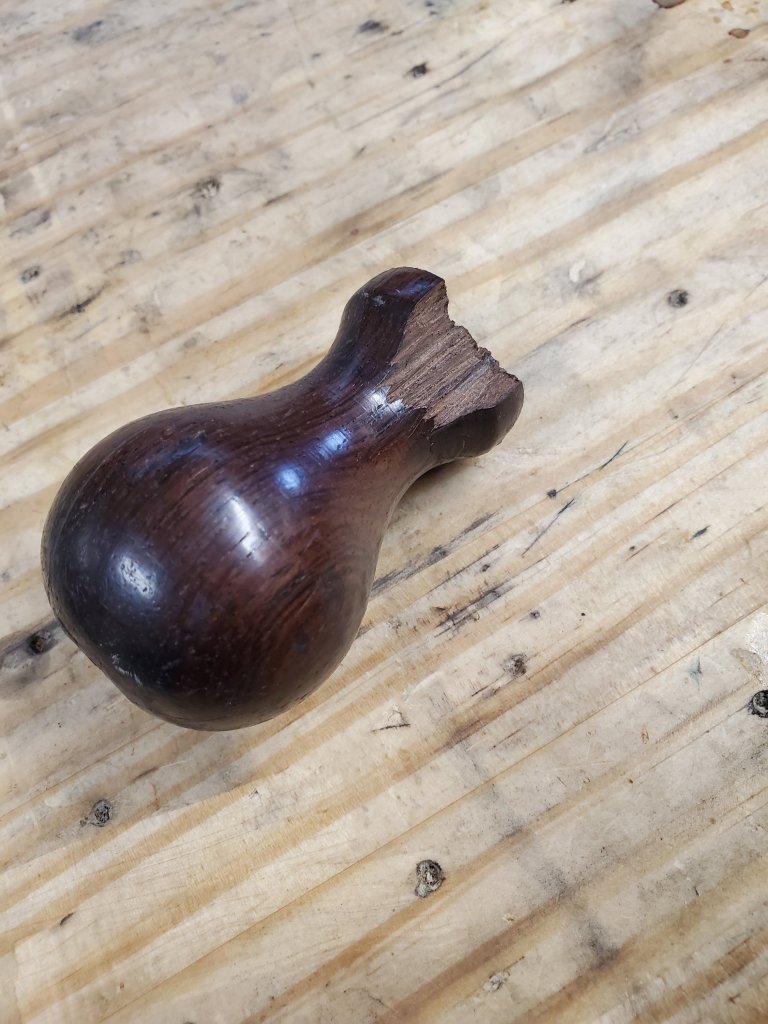
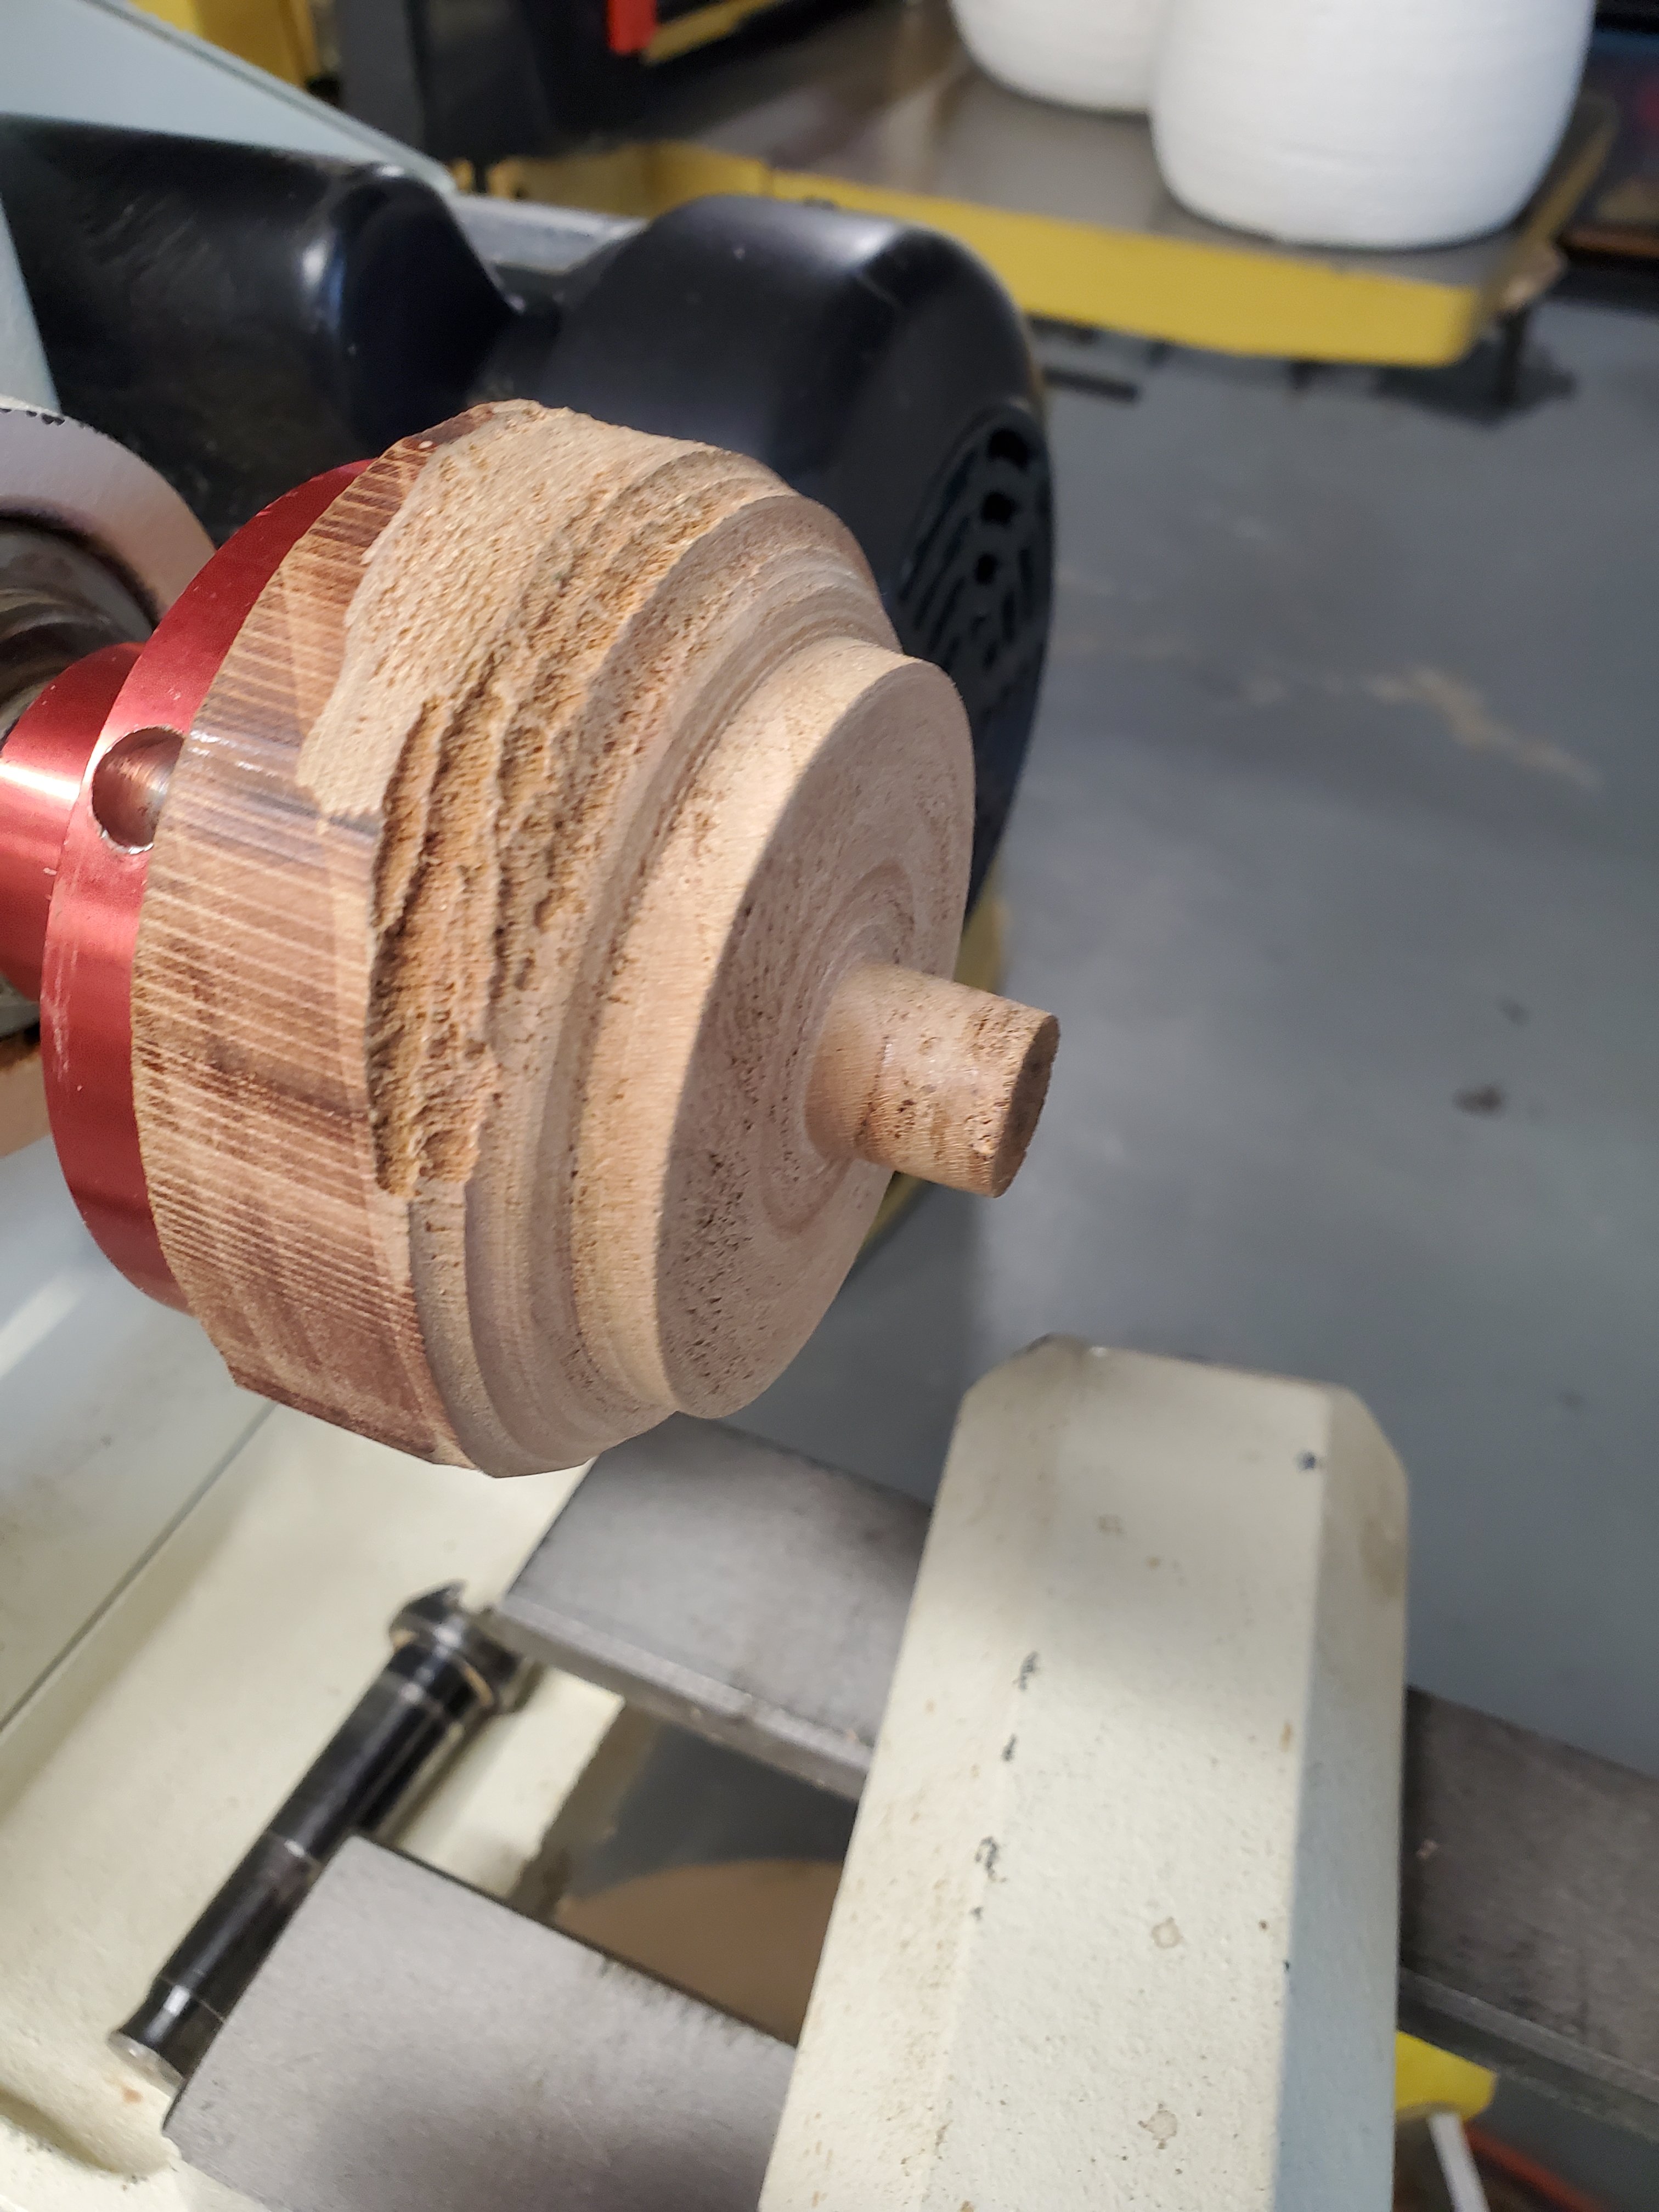
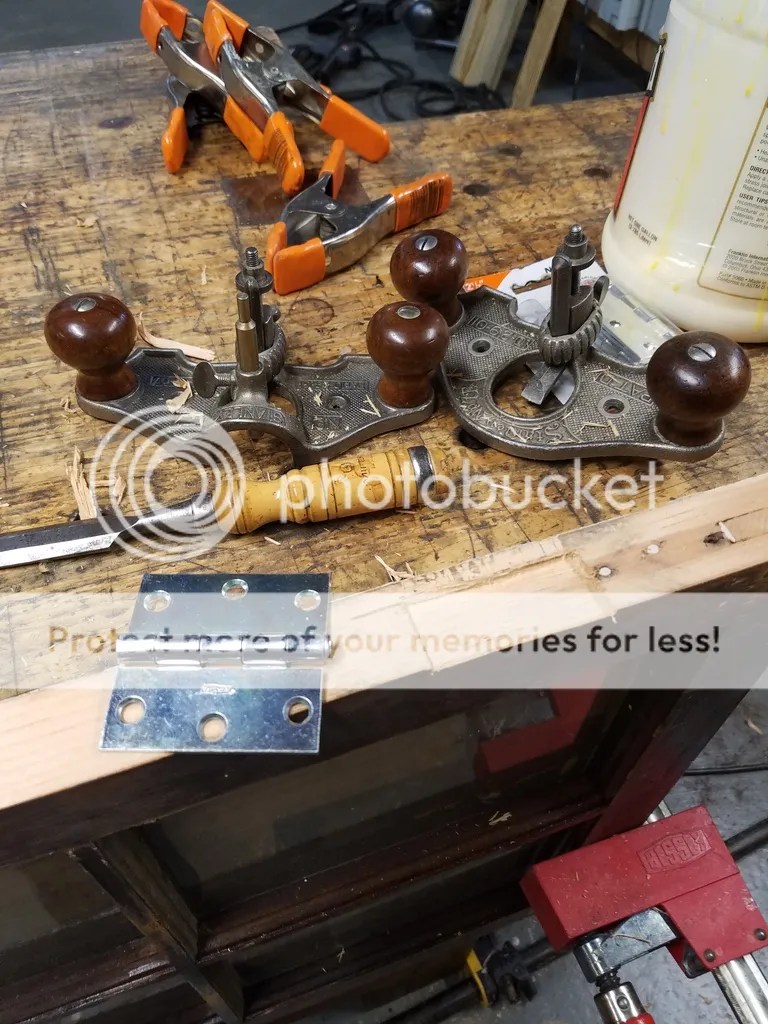
Sometimes when buying a plane, all the parts will be in good shape until you look at the front knob and see a big chunk missing from the bottom. I’ve repaired dozens of totes over the years, but I’ve never really tackled a knob as it looked like a big pain in the ass. So, I decided to give it a go and see how it turns out.
The first thing I did was shave the broken area smooth with a bastard file. It didn’t have to be completely clean, just good enough to hold some glue.
Then I took a piece of cocobolo scrap wood and glued it to the surface of the break. I paid careful attention to the orientation of the grain so the repair would look nicer. I used Gorilla Super Glue Gel as it works well gluing all type of rosewood woods together.
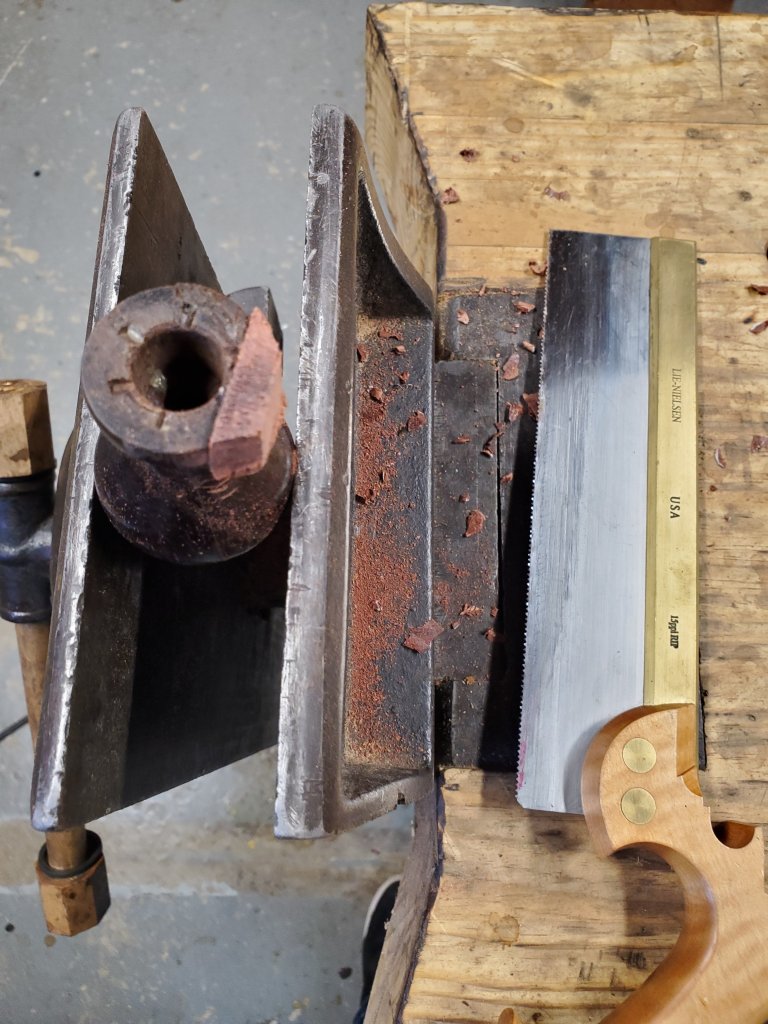
Once the glue dried, I cut off the excess with a dovetail saw and shaved the thick areas away with some chisels and gouges.
I wanted to shape the new area perfectly round with the rest of the knob so I created a little holding jig to be used on my lathe.
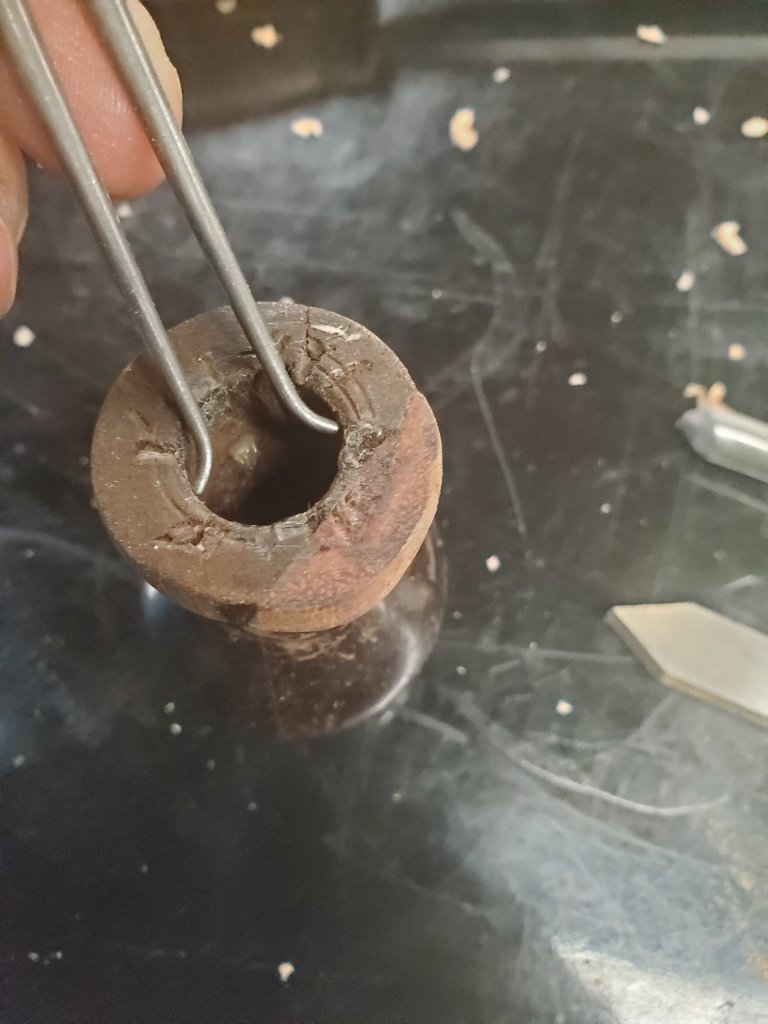
I measured the inside diameter of the knob’s mounting hole with inside calipers and transferred that measurement unto outside calipers, then turned a tenon to the measurement. Then I stuck the knob onto the tenon and stabalized the top of the knob with the lathe live center point.
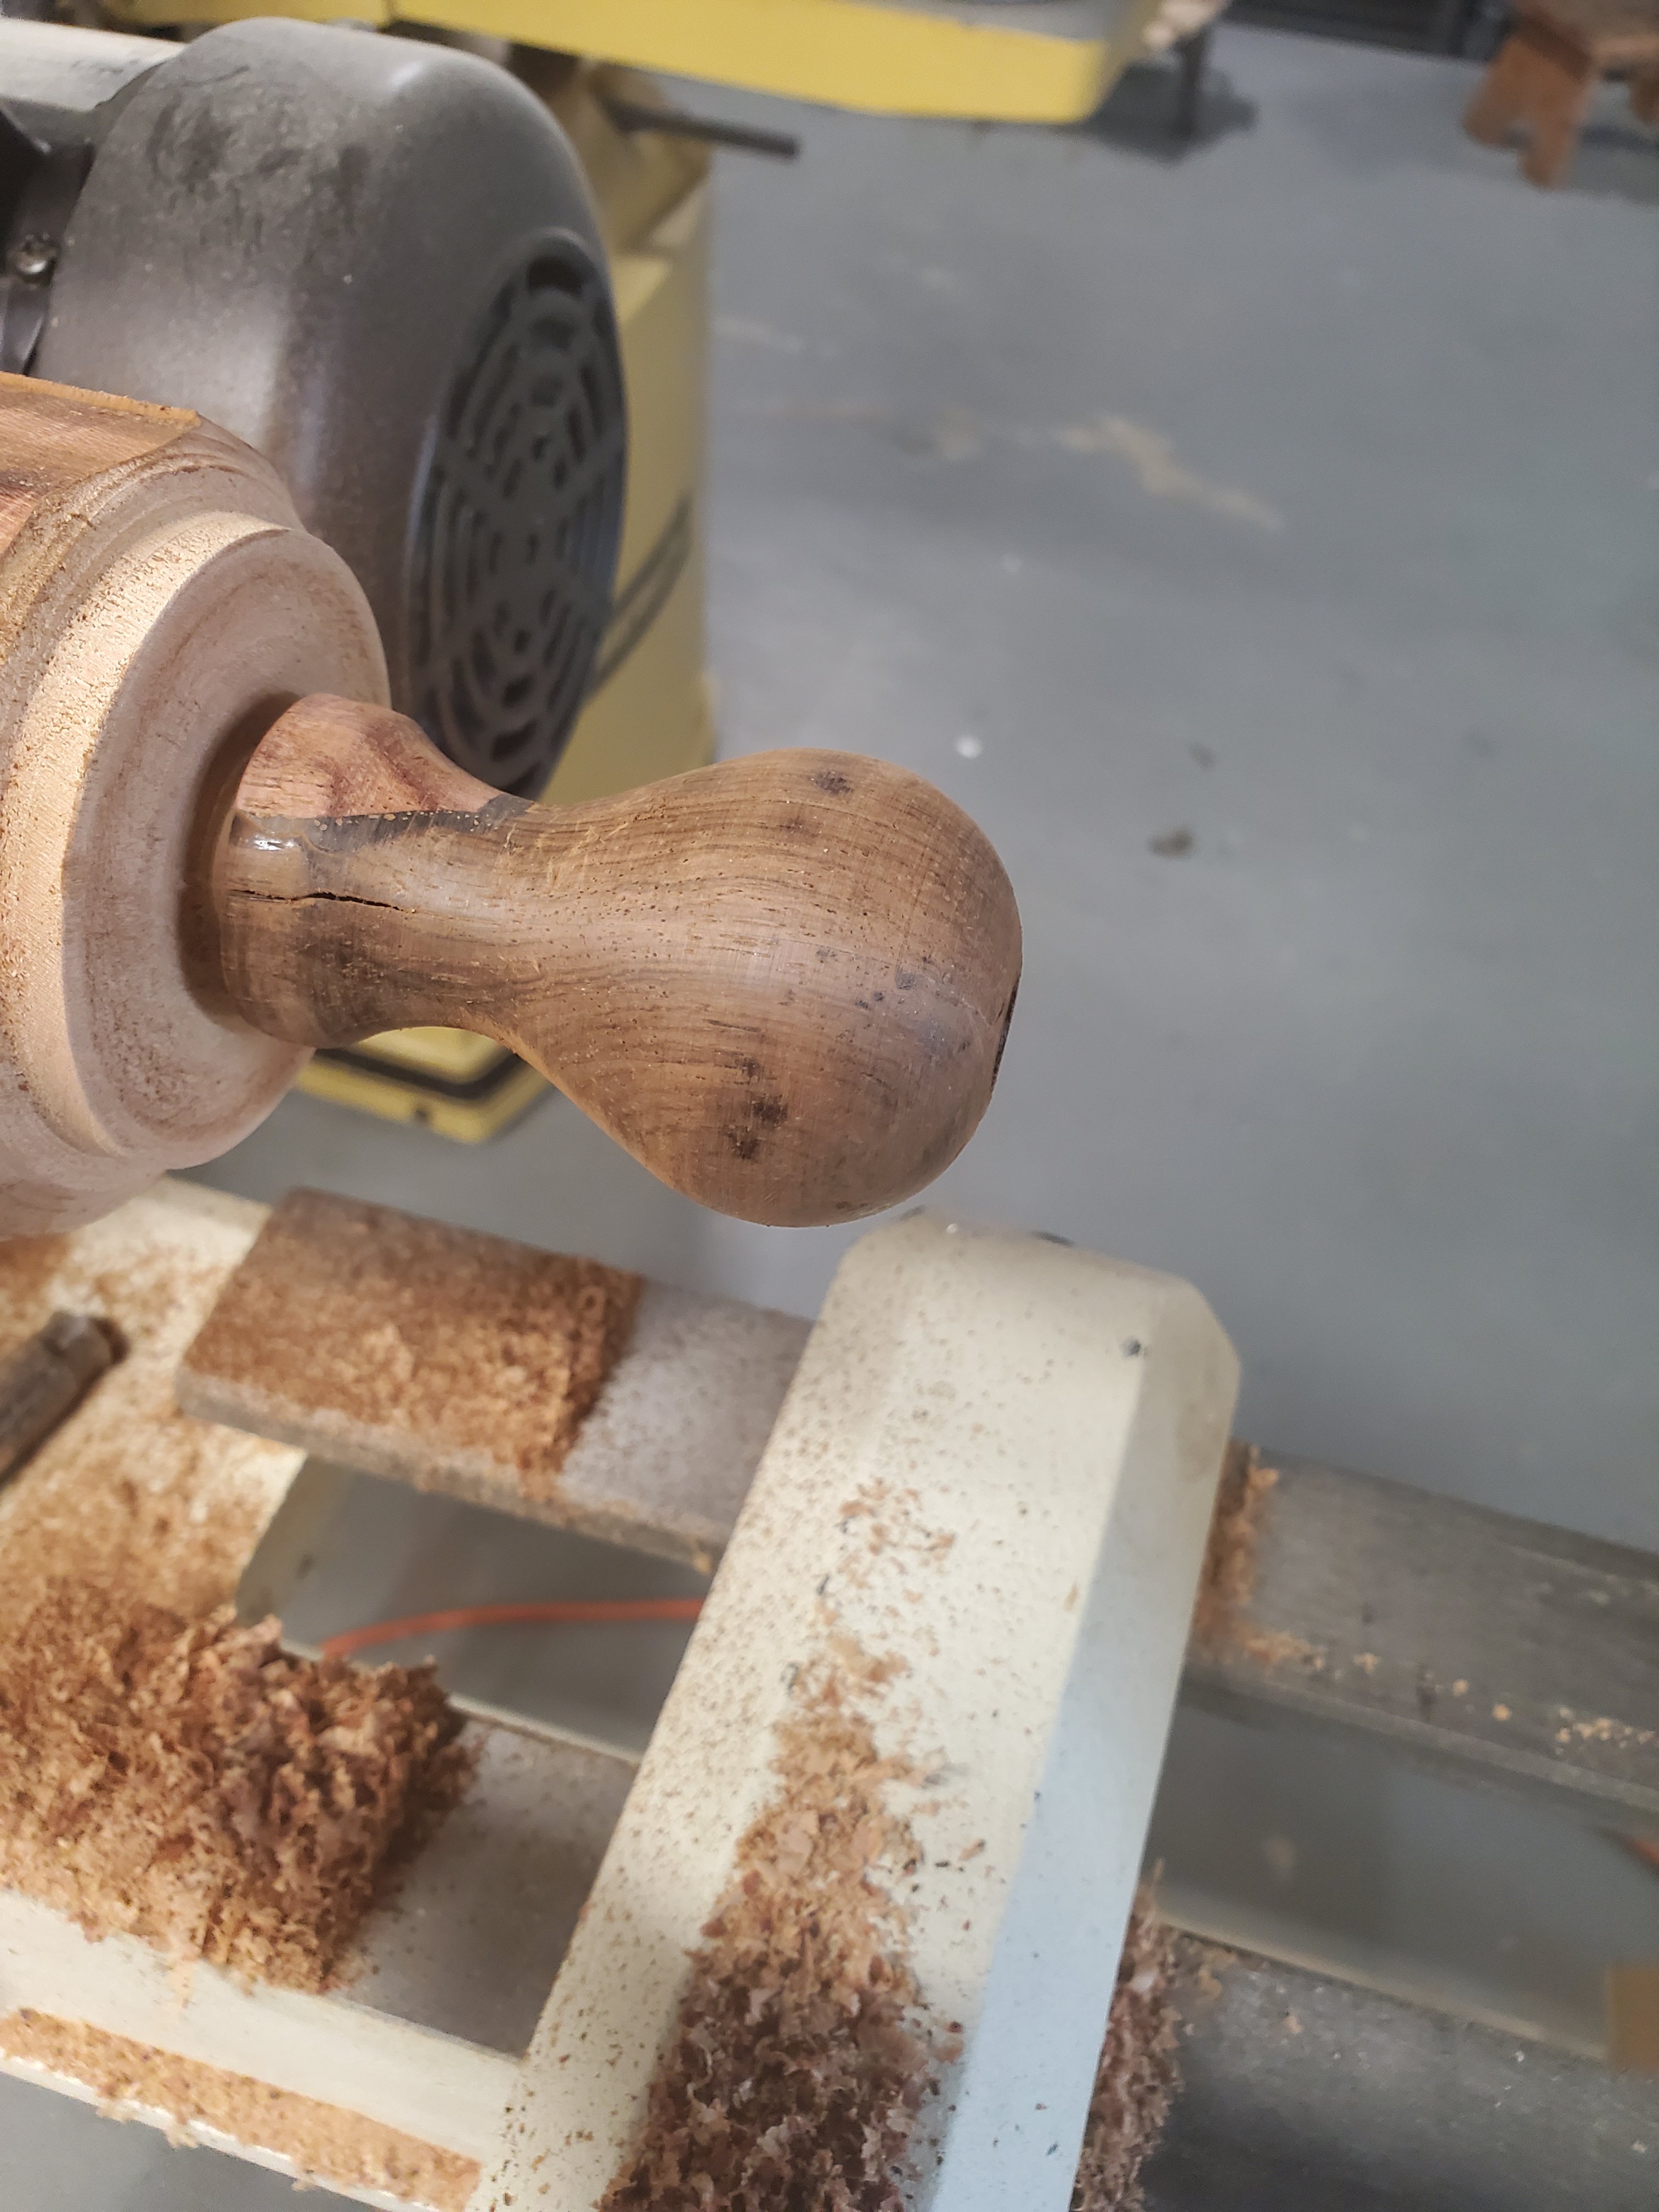
With the knob spinning nice and true, I carefully used a round scraper and gently turned the new piece of wood concentric with the knob. After a few minutes, and a little bit of sanding, the knob was finished.
I noticed that the knob had split just a little bit while it was turning, so I applied more super glue gel to the bottom of the knob to stabalize the wood.
The final step was to apply a couple coats of shellac to the knob and stick it back on the plane. Because the piece of cocobolo was a little lighter in color than the rosewood, I colored the cocobolo darker with a black Sharpie marker then wiped off the excess with some fine steel wool.
The end result came out fine. The knob looks complete and you can only notice the repair if you really look at it. In fact, the knob on the right was also repaired the same way, and you can hardly see it. Looks like I’ll have to start repairing more knobs from now on.
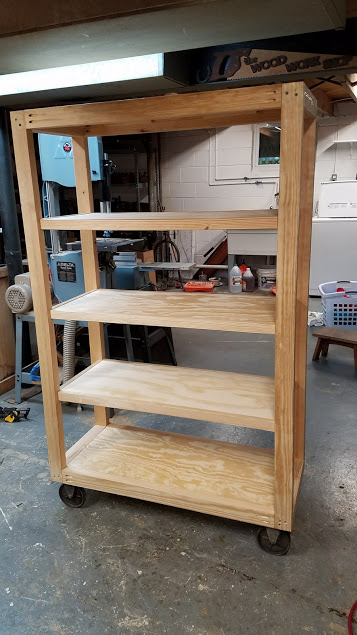
Several months ago, I started making a shelving unit out of southern yellow pine that my wife asked me to make for her booth. I got this far and it sat in my shop unfinished for months. After much contemplation, my wife and I both realized that the shelving unit was really too big to fit in our Ford Edge.
The best thing we could do, is take it apart and resize the thing smaller so we wouldn’t have to rent a trailer to transport it. Luckily, I put the shelf together almost entirely with pocket screws. The part that was glued, I cut apart on the band saw.
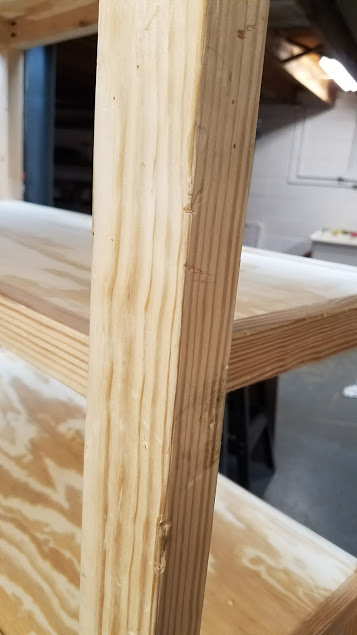
After, I cut the shelves shorter, I used my router and cut floating tenons on all the pieces instead of using pocket holes screws like I did before.
A few hours later, I had the new resized shelving unit put back together. The height stayed the same at five feet, but the length was cut down from five feet to forty inches so that it would fit in our car.
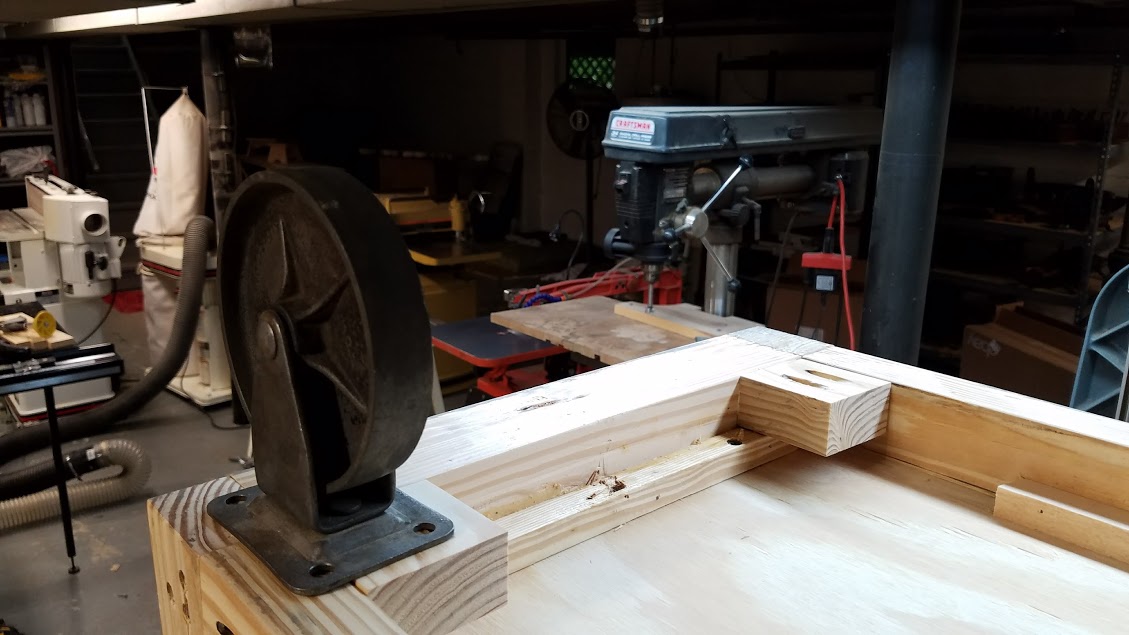
My wife always wanted the unit to roll so I added four old casters to the bottom. We actually bought the casters many months before we decided to make the shelving unit just in case someday we needed them.
With 1/2″ plywood installed for the shelves, the unit was built, but unfinished.
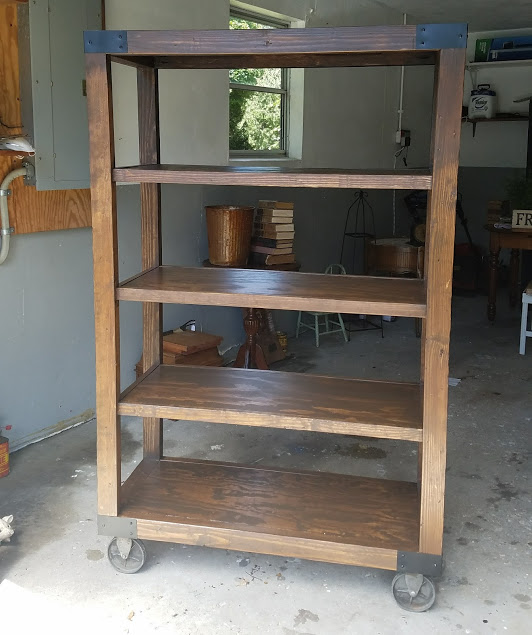
Anita wanted the unit to look somewhat old, so I smacked the wood around with a hammer and crowbar to give it an aged look.
I bought a few piece of thin gauge metal, drilled some holes in it, bent it over in my vise, painted them black, and screwed them to the corners of the shelving unit to give it a more industrial look. The brackets and the dark stain really makes the unit pop. Now it was ready to throw in the Edge and bring it to our booth. Saved us $50 not having to rent a trailer and we both feel it looks nicer then it did before.
My wife and I bought two old ten pane French windows a couple of years ago at a flea market. We knew as soon as we saw them that they would be perfect for the front of the shed. Even though they were in good shape, I had to trim off the edges a little bit so I could work with them.
After I took all the hardware off, I covered all the screw holes and areas with damage with two-part wood putty. The stuff did the trick as it was hard as a rock the next day.
These windows were very well made with through tenons. They appeared to be made from old growth white pine.
Because we wanted the windows to actually function, I had to build a window frame for each window. I took a 2 x 8, sliced it on my band saw, and milled the lumber down to 3/8″ thick on my planer. I then started to make the bottom sill with a slight chamfer to allow rain water to run off.
I built a frame to fit inside the window opening and sized the window to work inside the frame. I did a whole bunch of test fitting taking it back and forth from the shed. It took all day to make just one of the frames.
Once the window fit, I attached boards inside the frame so that the window would have a nice place to sit when closed.
I bought 2 1/2″ wide hinges with removable pins and laid out the mortises. I cut the mortises with a chisel and a router plane to make the depth of the mortise the same throughout its length.
I then test fitted the window in the frame before I went out to the shed to attach it.
Being very patient, I fitted the window frame to the opening with wood shims and tested the window. It took nearly two hours to fit this window so that it would operate to my liking.
Once the window fit well on the outside, I attached the frame to the opening with 15 gauge galvanized finish nails.
The next day, I built and installed the other window. They both came out really well and open and close with ease.
A simple scrap of cedar with a screw in the center acts as a latch for each window.
I’m constantly buying old molding planes at local auctions. I can usually pick them up for a song since they really don’t attract much interest from tool collectors. They come in various forms and sizes but the most common in the marketplace are hollows & rounds and beading planes. This plane is a cove and bead. A sweet little plane that is useful for adding little detail moldings on cabinets.
This plane is overall in good shape, just a little dirty and neglected. But a little elbow grease and a citric acid bath, it will tune up in no time.
The blade has some surface rust but no serious pitting. I dipped it in a citric acid solution which contained a tablespoon of citric acid with five cups of warm water. My trough is nothing more than a scrap piece of plastic gutter with an end cap glued to each end. It works well and hasn’t leaked in the past three years.
After the blade sat in the solution for a few hours, I scrubbed it clean with a piece of steel wool and washed it off in the sink. I then sharpened the back by lapping it on some water stones.
As far as the body, I didn’t do too much. I simply wiped it with 00 and 000 steel wool then applied a couple of coats of mineral-oil/orange-oil/beeswax solution to the body and wedge. I didn’t rub steel wool on it too much as I didn’t want the plane to look new. Since it’s over a hundred years old, it should look like it’s that old but in working order.
The biggest obstacle that you’ll face tuning up a molding plane is matching the blade to the soul’s profile. After decades of the wood expanding and contracting, losing moisture and drying up, it’s not unusual for the soul to change. This plane’s blade doesn’t match up perfectly to the soul. ideally the blade should protrude equally along the soul. Since it doesn’t I have two options. One is to reshape the blade to match the plane’s soul. Or two, reshape the soul a little bit to match the blade. The first option is the best since you don’t want to weaken the soul by removing wood away but in this case, so little wood needs to be removed, that option two would be much quicker.
I needed to remove a little bit of wood by the end of the bead so I took a bastard file and shaved it down. I periodically checked the blade in the plane to make sure I had a constant protrusion along the soul. Once it did, I was done.
Next I needed to see how the plane performed. I grabbed a piece of straight grain poplar and started planing. The plane shaved off perfect shavings with no clogs.
This is how the molding would look when installed. You can see how the shadows bring out the curves of the molding. A nice little detail that adds a touch of class to cabinetry.
The plane looks nice too. It still has a nice warm dark color and plenty of patina to show off its age. I could have bought a router bit to do the same thing, but where’s the fun in that?