Lie-Nielsen vs Stanley No 140 Plane

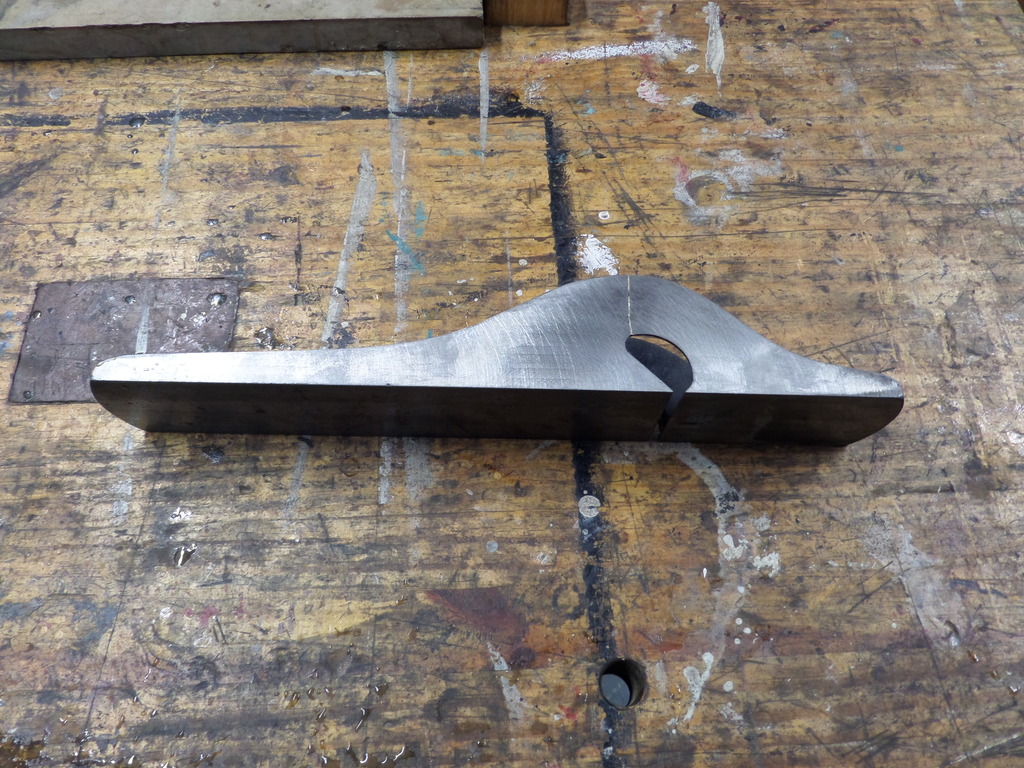
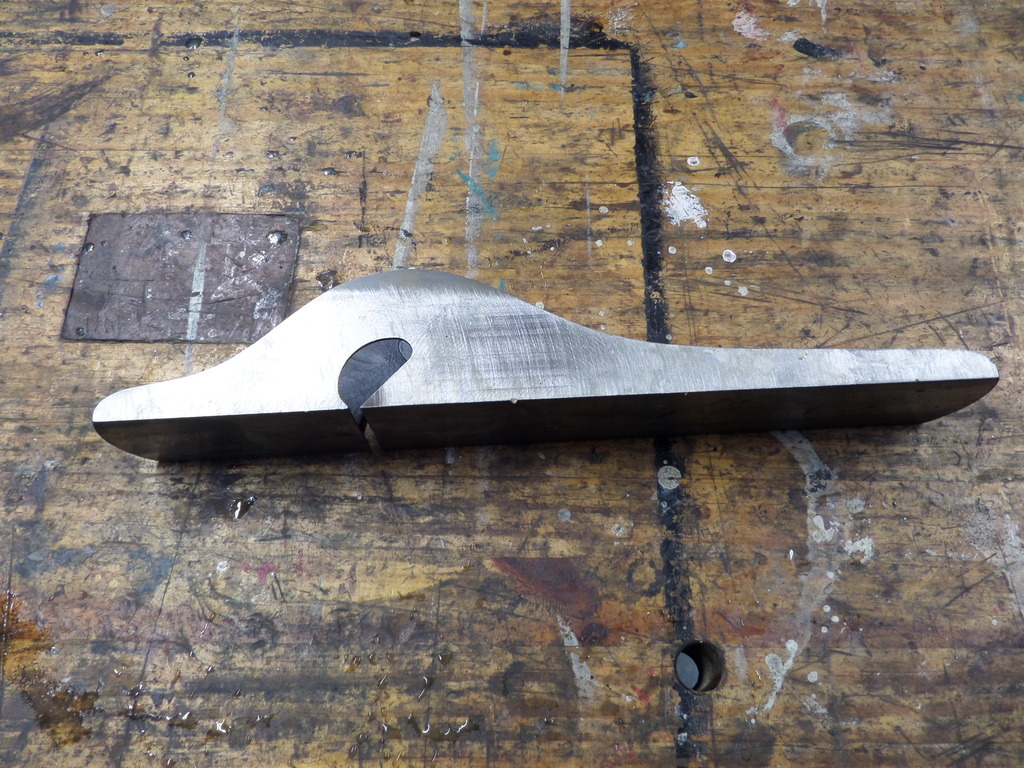
Apparently, Hell has frozen over as I bought a Lie-Nielsen plane. I never thought I would own one as restoring old Stanley’s is my gig but, I found this at an antique mall and couldn’t resist even though I already own a Stanley No 140 Rabbet Plane.

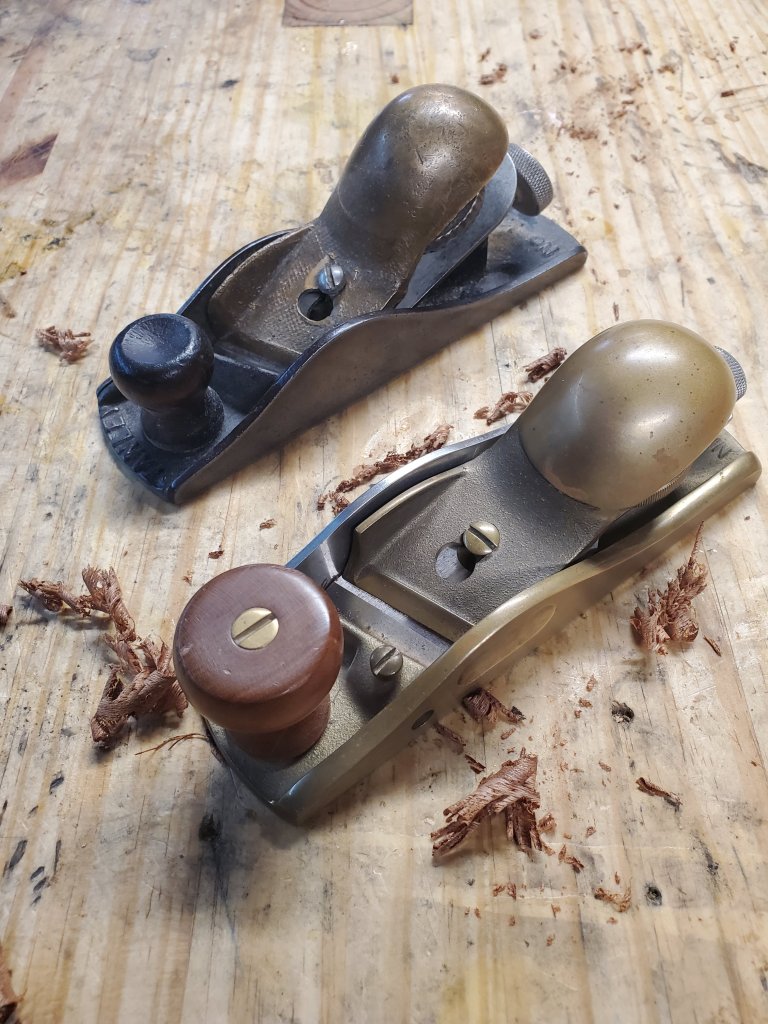
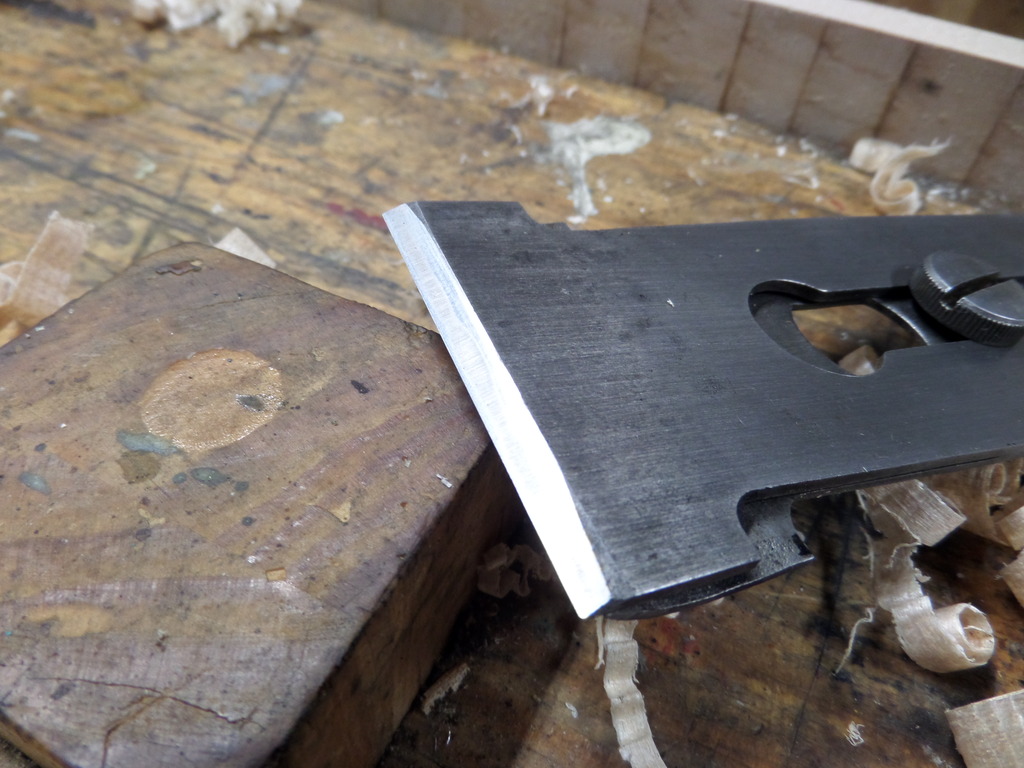
The two planes are very similar to eachother with the biggest difference is that L-N is a low angle plane. The other differences is that L-N has a thicker blade made from A2 tool steel, a cutter on the side to slice the wood fibers when using it across the grain, and a fence. This plane’s fence was missing so, I contacted Lie-Nielsen to see if a replacement fence could be bought. They told me to send them a picture of the plane to make sure it is the current version they produce. After they saw the picture I sent, they informed me that their fence probably won’t work as my plane is the earlier version. Oh well, I never wished my Stanley No 140 had a fence so maybe I would never use it anyway.

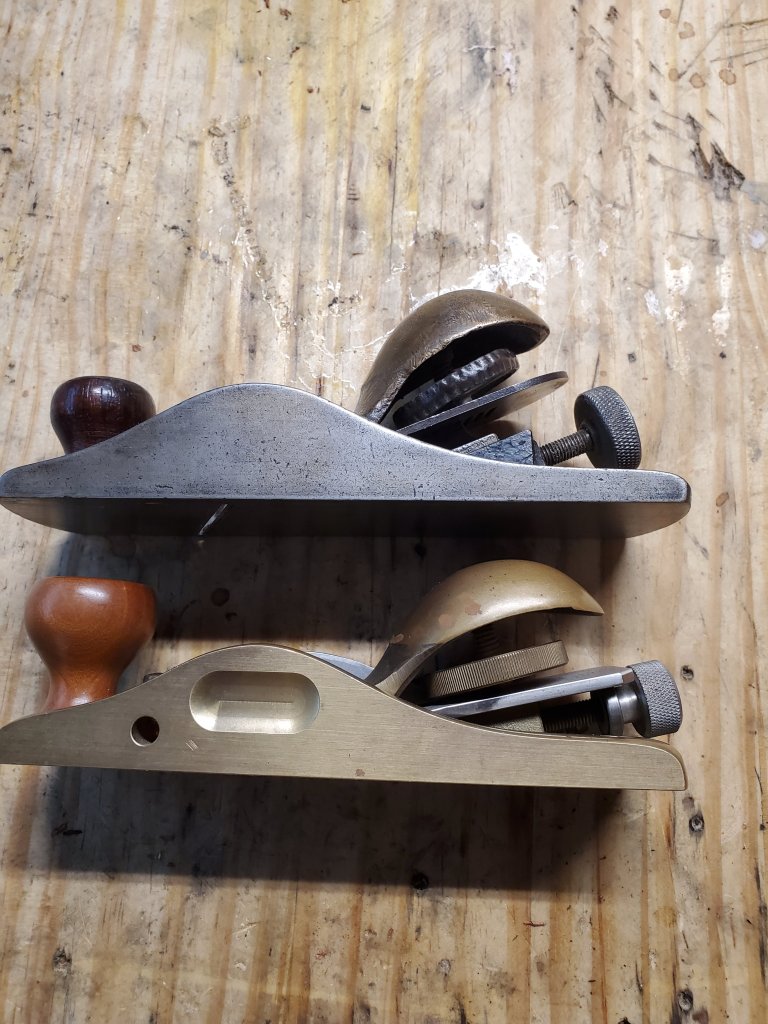
The planes are nearly identical in size as well, with Lie-Nielsen being a touch smaller. However, the Lie-Nielsen is a little bit heavier since it’s made of bronze as opposed to cast iron. The Lie-Nielsen feels much nicer in your hand. You can tell the difference in quality between the two as soon as you hold it.

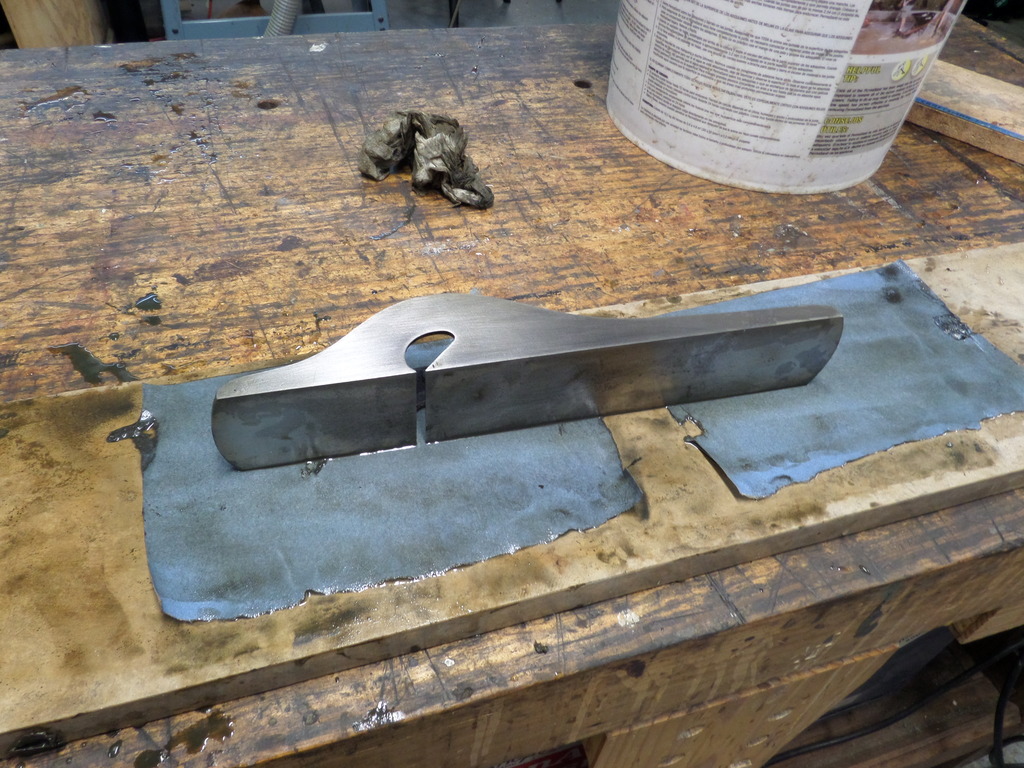
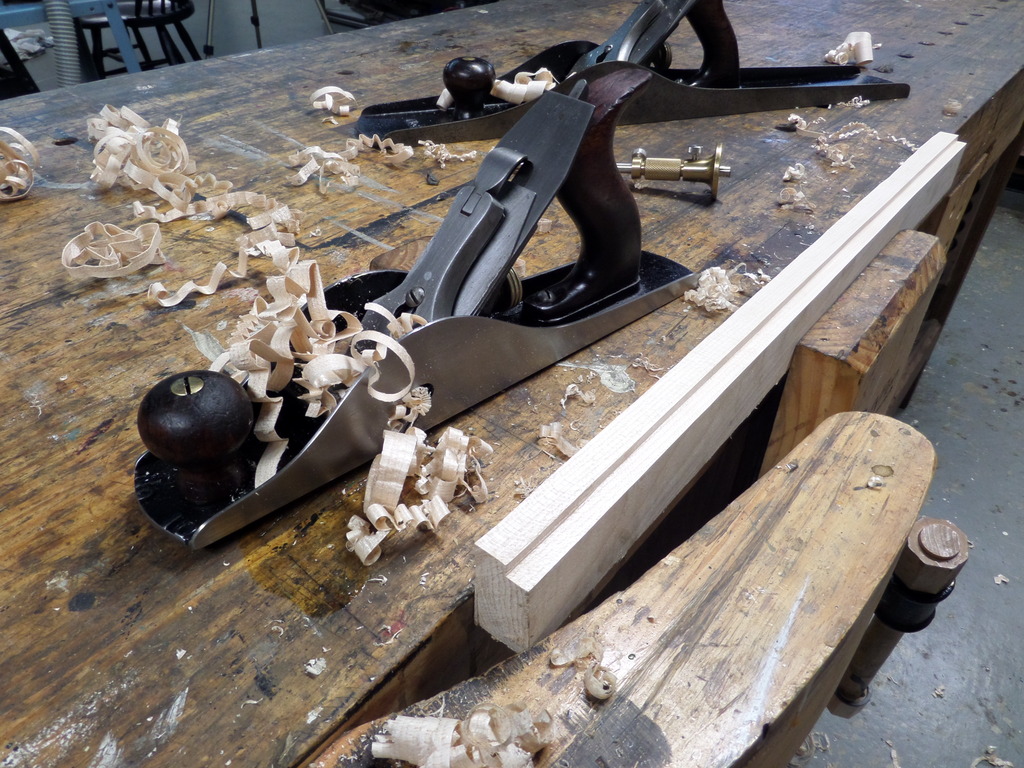
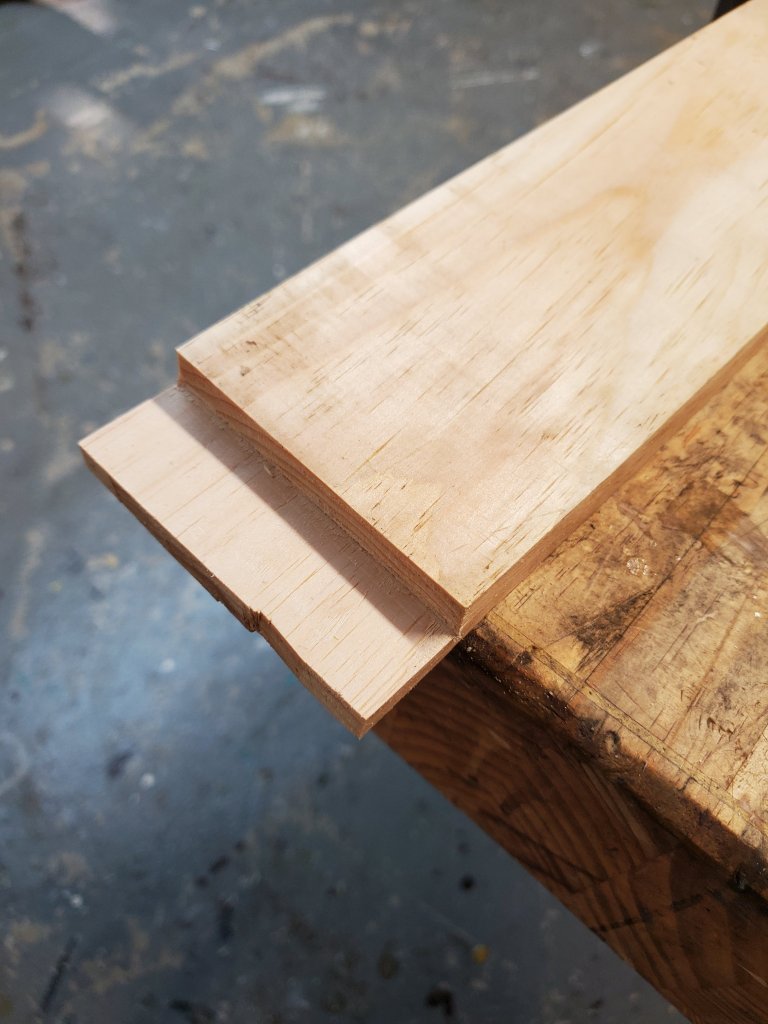
I wanted to see the difference of how each plane cuts, so I grabbed a piece of white pine and chopped a rabbet on the end. I then planed the rabbet clean with each plane.

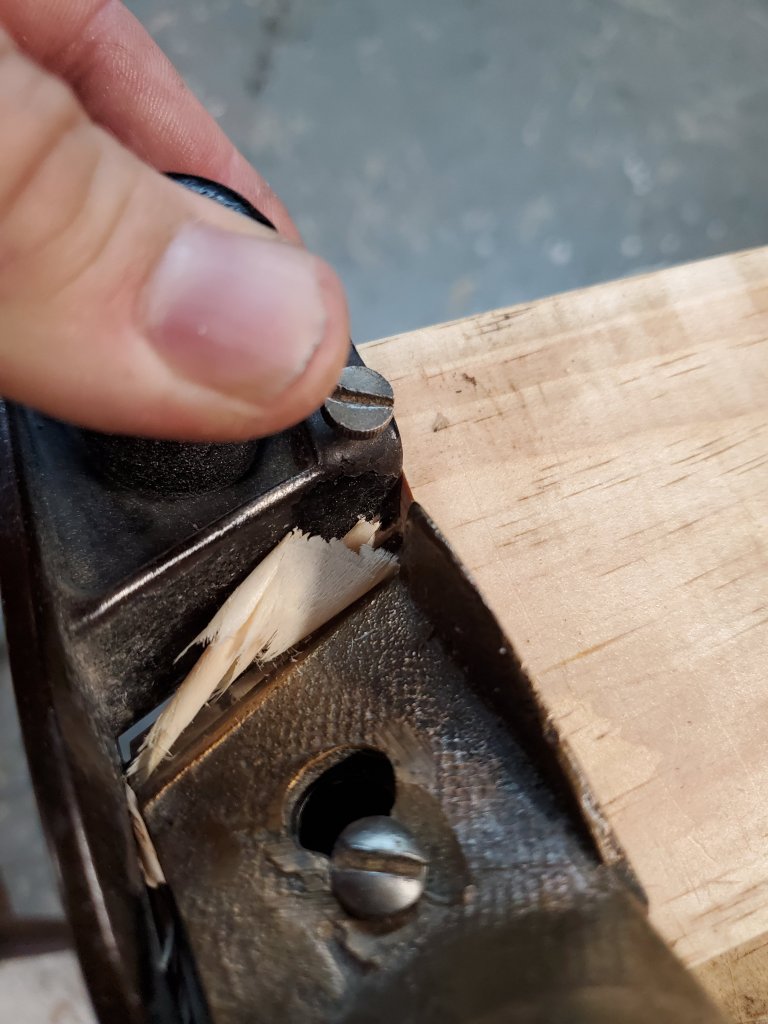
The Lie-Nielsen cut extremely well as it shaved the wood fibers like butter. Lie-Nielsen planes are extremely well made and worth the extra money if you’re not interested in restoring old Stanley planes.

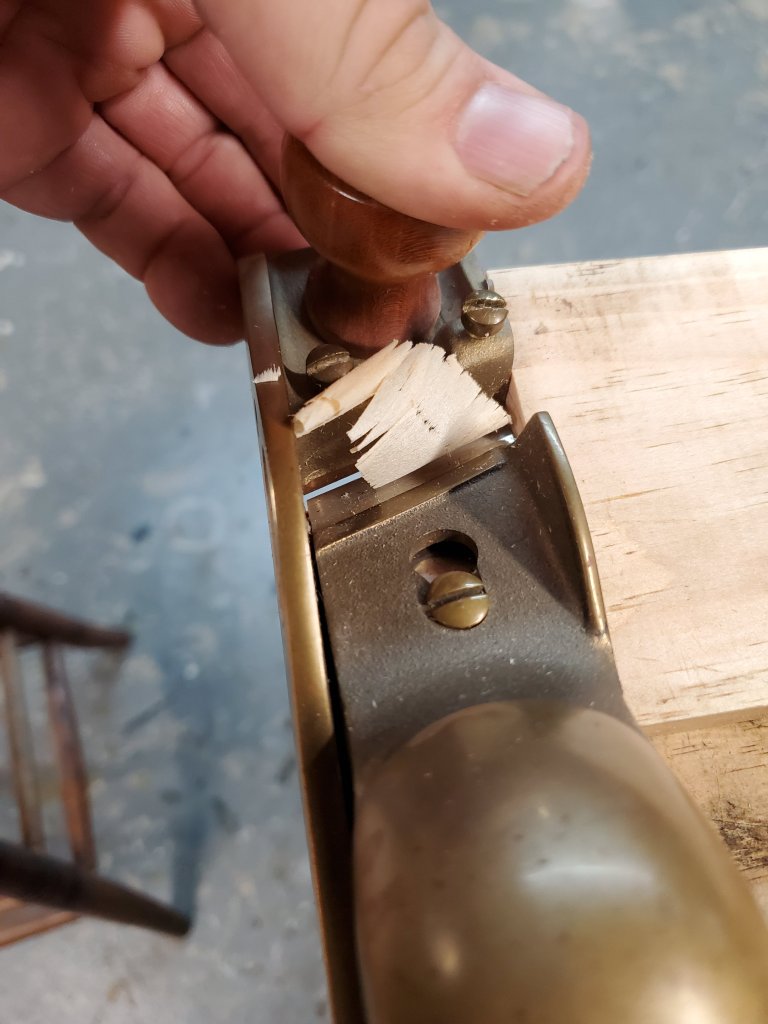
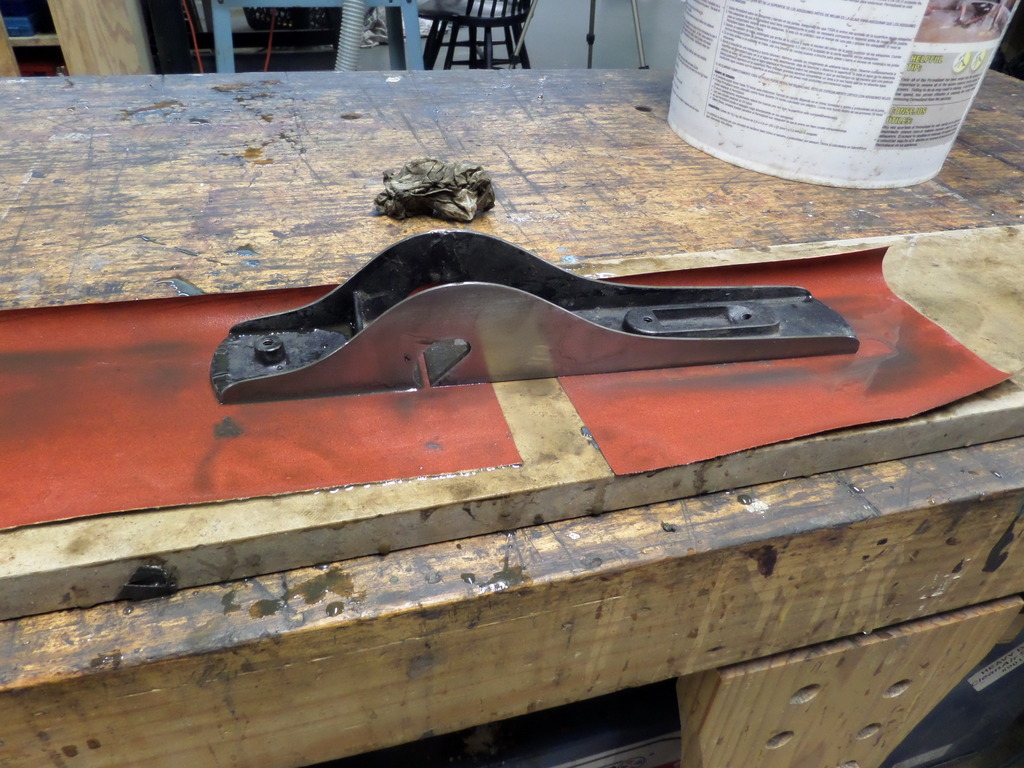
My tuned up Stanley No 140 also cut the wood fibers well. Not quite as nice as Lie-Nielsen but well enough to get the job done. You can see the shavings between the two planes are nearly identical. My Stanley No has user made bronze lever cap. It works so I never replaced it with a real lever cap. I’m cheap!

So, which is better? Lie-Nielsen wins hands down however, the price of the plane is nearly triple than that of a Stanley No 140 plane. You can find old Stanley No 140’s on eBay for around $100-150. Lie-Nielsen lists their No 140 for $385 on their website but is currently out of stock. Some used Lie-Nielsen No 140 planes have sold on eBay for over $500.

Whether or not the Lie-Nielsen is worth the extra money is up to you. Honestly, if I was a professional woodworker, I would buy Lie-Nielsen planes and depreciate their expense on my income statements. Being able to depreciate your tools is one of the nice benefits of being a pro. It’s no wonder why Lie-Nielsen tools are on backorder.

Restoring a Stanley No 10 Carriage Maker Rabbet Plane

Several months ago I picked up a Stanley No 10 Carriage Makers Rabbet plane with a welded sole at a local auction. I wanted to restore the plane and make it usable again so I took it all apart and soaked everything in a citric acid solution for a few hours.

SAMSUNG CAMERA PICTURES

Even thought the weld was done fairly well, the plane’s sides were no longer straight. Not the best situation for a plane that needs straight sides in order to cut a clean rabbet.

Fortunately, because the plane cracked only on one side, the bed was still relatively flat when it was welded back. If the bed would have been out of whack, I may have resorted to the garbage can as it would have been too much work to fettle flat.

I wanted the black removed from the sides as the previous owner painted the sides to cover up the weld. I spread some paint remover on it and let it sit for a few minutes before removing it with a putty knife. I then needed the sides to be straight so I started to fettle them with sandpaper on a marble base. Rubbing the bed back in forth, I could see the high and low spots on each side.

There was a lot of metal to remove, so I decided to take the bed to my stationary disc sander and carefully grind the bed using 80 grit sand paper.

SAMSUNG CAMERA PICTURES

Using the disc sander saved a lot of time, but it scratched the hell out of the surface. I made sure I moved the bed back and forth so that I wouldn’t do more damage than good.

Because the disc sander made a lot of scratches on the sides, I took the bed back to my marble base and used a variety of sand paper grits to remove as many scratches as I could.

SAMSUNG CAMERA PICTURES

I then focused on the bed, fettling it flat. I used a variety of sand paper from 150-400 grit. I worked on it for a few minutes until I was satisfied with the results.

SAMSUNG CAMERA PICTURES

Once the bed was done, I sharpened the blade using my Tormek sharpening wheel and water stones.

SAMSUNG CAMERA PICTURES

Since I ground some of the thickness of the sides away, you can see where the blade protrudes farther out of the side than normal. I could grind away the sides of the blade, but I wanted to wait and see how it performs first. If I was able to cut a clean rabbet with the way it was, I would just leave it alone.

SAMSUNG CAMERA PICTURES

Here she is after all the work has been done. It looks a lot better than the way I bought her, but I still needed to see if she works.

SAMSUNG CAMERA PICTURES

After setting the blade to the right depth, I tried it out on a scrap piece of wood. It cut nice little shavings with ease and can now be put in my arsenal of planes for use. Even though I spent a good day tuning this plane up, it gives me great satisfaction resurrecting an old tool back to life. Plus it saved me a ton of money versus buying a new rabbet plane.

SAMSUNG CAMERA PICTURES