New Life to a Beaten Up Dresser

My wife, Anita, and I went to the Springfield Extravaganza Antique Show last weekend looking for some things to buy. Me, it’s always antique tools, and for her, it’s modern farmhouse decor items for her to sell. We bought this old beat up five panel oak dresser for $20. For some reason during its life, the legs were cut off to make it shorter. The problem with that is it made the bottom drawer completely useless.

So, once we got it home, I took a look at it and saw that the bottom drawer was trashed so I took it over to my fire pit to burn. I did take the wooden knobs off the drawer just in case we could use them someday.

I knew I wanted the dresser to have legs again, so I took my sawzall and cut out the panels on the sides and back and then removed all the wood in the grooves.

Since the panels I cut out were already the perfect thickness, I ripped them into thin strips and used them to fill the gaps. A few clamps and glue did the trick.

After the glue dried, I trimmed and sanded the legs and threw the dresser upright. Boom! Now the dresser had legs again and didn’t look so pathetic. I then worked on the drawers to make sure they opened and closed well. I even rubbed paraffin wax on the bottoms of the drawers to make them slide easier. After a little bit of work, this dresser was useable again.

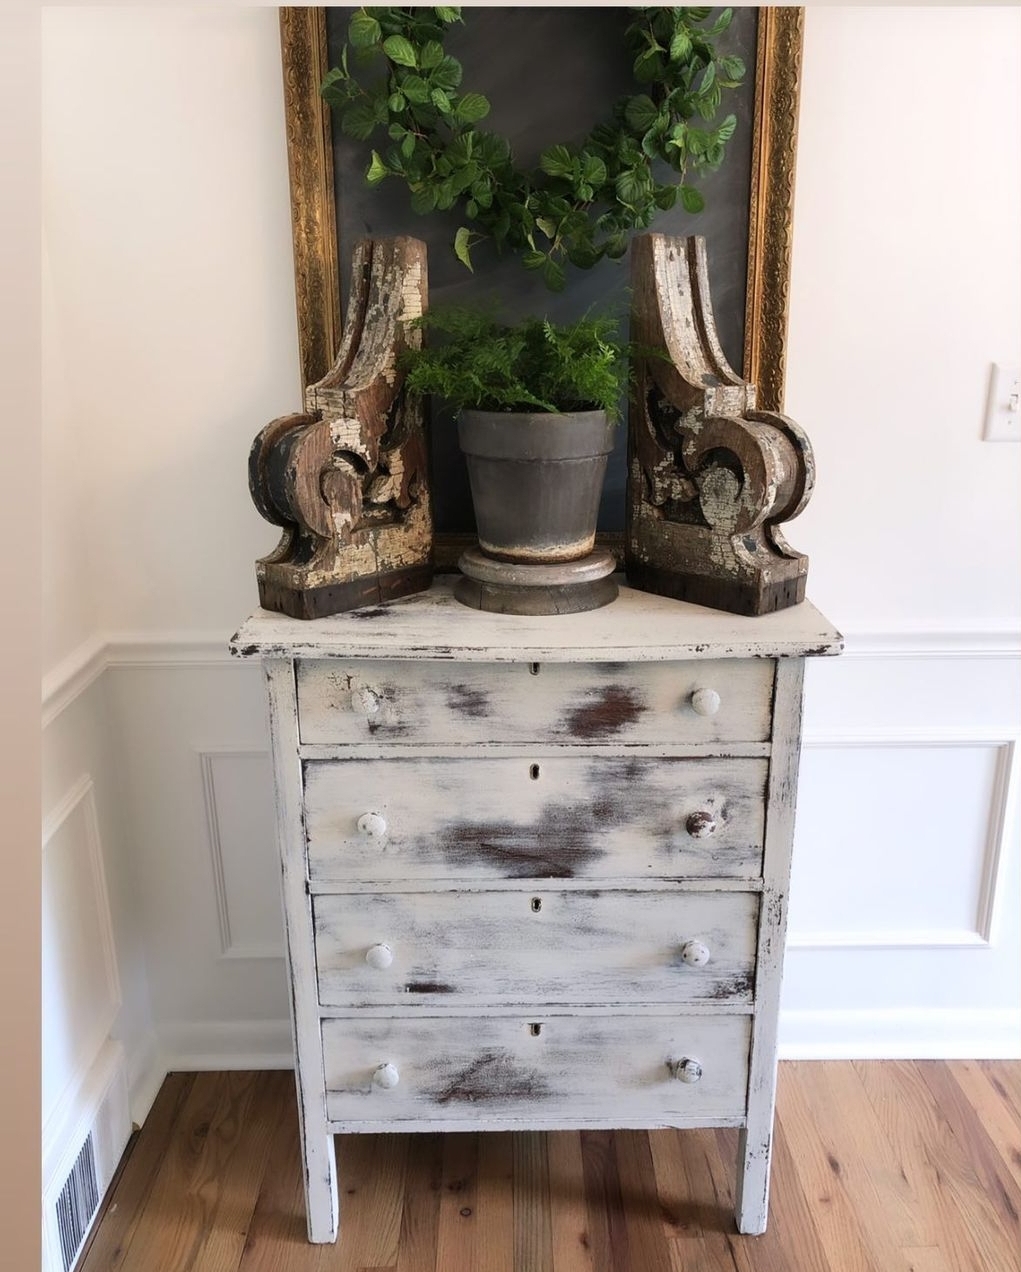
Now the part you hate! Anita painted the dresser white with milk paint and turned into a piece of shabby chic furniture. You may hate it, but some farmhouse decor lady will love it.

Revamped Dining Room Table and Chairs

As promised, I decided to throw up some before and after pictures of the dining room table and chairs my wife and I have been working on for the past few months. As you can see, the $10 chairs Anita picked up at a thrift store weren’t that attractive, but she saw the potential in them.

 photo chairs.jpg

A little bit of chisel work, paint and new fabric brought them from the ’70’s into the new millennium. Anita picked out the fabric at IKEA in order to save some money so the chairs end up being super cheap.

 photo chairs3.jpg

My farmhouse table I made twelve years ago was a massive beast, but it served it’s purpose. After replacing the top with 2×10’s and reducing the width of the table, it fit better in the room.

 photo 20150713_192149.jpg

In the end, the chairs and table look great with the decor of the room. I’m not sure if the Windsor chairs at the ends of the table will stay, but for now they provide extra seating for when we have company over (which is never).

 photo table_1.jpg

Replacing a stretcher bar on a stool

My wife was considering picking up this stool at an antique mall the other day and asked me if I could replace the stretcher bar in the middle. I told her more likely I could so she should go ahead and buy it.

The old stretcher was completely broken off and only the ends remained in the holes where it was attached. I took an 1/8″ drill bit and drilled a pilot hole in the middle of the holes on each end.

I then took a 1/2″ forstner bit and drilled out the hole cleaning it out. The pilot hole served as a guide for the point on my forstner bit so it would not wander off the center of the hole.

I then found a piece of scrap wood around the shop, measured how long the stretcher needed to be and then turned it so the middle was 1″ in diameter while tapering each end to 1/2″ in diameter.

Once the turning was done, I checked the fit of the stretcher at the hole. If the stretcher was a little tight, I shaved off some of the wood with a spokeshave so that the stretcher would fit in the hole nicely. I also had to loosen the legs a little bit by taking out the screws that held them to the frame to give me enough room so that the stretcher would pop into place. Once in, I screwed the screws back into place.

 A half hour of work and a piece of scrap wood, the stool had a replaced stretcher. Now it’s my wife’s turn to finish the stool.