
I built this cabinet nearly fifteen years ago and every few years I end up updating the tools that go inside it. It’s been about three years since I updated it, so I decided it was time for a change.

As you can see in the photo below, at one time I loved MicroPlane rasps. I stuck everyone I owned onto the left door. While they are nice rasps to use, I decided to delegate them to a nearby drawer instead. The Stanley short box handsaw had to go as well. I never used it, so it was pointless to have it take up so much valuable space.
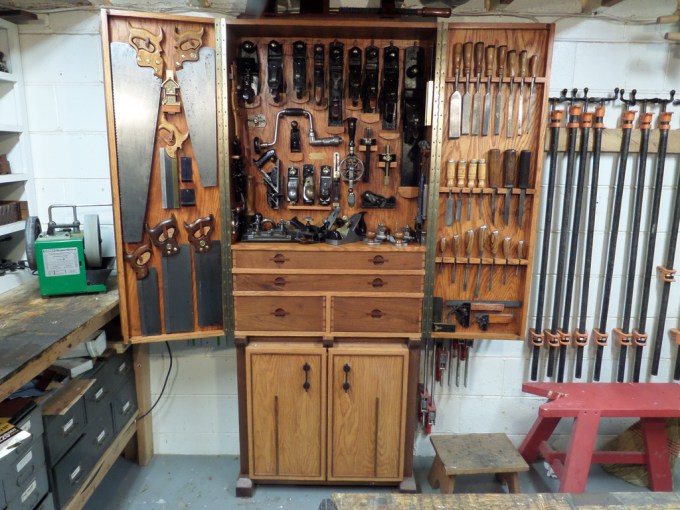
This is how the cabinet looks today. Over the years I’ve been learning a lot more about hand saws, so my collection of usable hand saws that I have restored has grown. I knew I wanted to incorporate them into the cabinet somehow which is one of the main reasons I decided to redesign the tool cabinet.

Hanging on the top of the left door, I have a E C Atkins rip saw that I made a new handle for it out of cherry, and a short Superior panel crosscut saw. In the middle is my original Lie-Nielsen dovetail saw I bought twenty years ago. Below it is another dovetail saw and two Disston back saws, one filed to saw rip and the other filed for crosscut.

I stuck my hammer on the right side by my Stanley No 8 jointer plane. By the hammer, I hung a couple of bevels and a Nobex square. Underneath the screwdrivers on the right door is where I hung more measuring tools. Since I’ve updated this cabinet numerous times over the years, if you look closely, you can see where the oak veneer has been torn off the plywood substrate. To conceal the damage, I stained the entire inside of the cabinet with Nutmeg Gel Stain. Thank God I didn’t make this thing out of African Mahogany as I have no qualms about damaging oak plywood.

The left side of the cabinet is where I stock a lot of my spokeshaves and Stanley No 66 Beader. I’d like to build a little rack for all my blades for my beader, but that will be another project for another day.
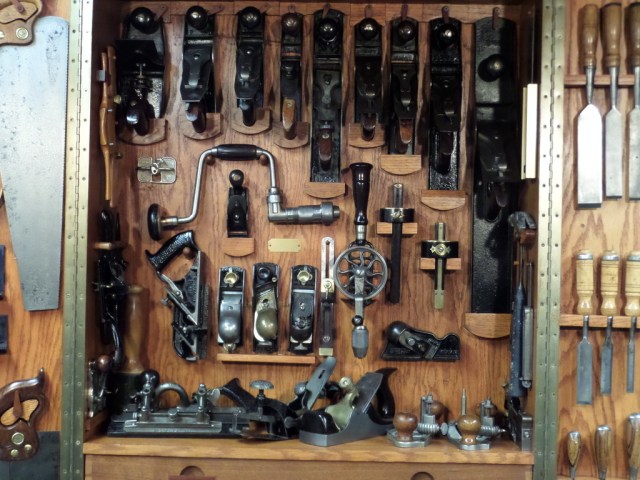
The middle of the cabinet was left untouched as there’s really no room to do any changes. Maybe the next time I update my tool cabinet, I’ll make room for all my Festool accessories. haha

Looks great!
LikeLike
Thanks! Truth be told, the cabinet could be much bigger as there are a lot more tools I’d like to put in it, but don’t have the room.
LikeLike
Would it be possible to upload the pics for the cabinet again?
LikeLike
Sure, I just fixed this post’s pictures. Only 49 more to go. lol
LikeLike