
My wife, Anita, came to me a couple of months ago saying she wanted a new bathroom cabinet. I made one when we remodeled the bathroom nine years ago, but for some reason, I made it rather narrow and too deep. It was only 24″ wide by 18″ deep. The cabinet worked, just not that well. Anita loves going to Ikea so when she came home with a brochure of a cabinet she saw in their showroom, I looked at it. It was a Hemnes cabinet for $329.00. I immediately thought to myself “that’s basically a box with doors. I can make a box with doors for a lot less than $329.00”. That’s the downside of marrying a woodworker. We always want to make a piece of furniture rather than buy it. The good thing, is we usually can make it for a lot less and customize the dimensions to fit our needs.

I convinced Anita that I could make the cabinet quick enough that she wouldn’t have to wait six months for it to be completed. I also told her I could make it 32″ wide as opposed to 36″ so the cabinet wouldn’t cover up part of our heat register in the bathroom. A few days later, we went to Home Depot and bought a 1/2″ thick of birch plywood for about $50.00. I cut the sheet down for 11 1/4″ wide to be used for all the parts. Once I got the sides cut, I routed a couple of 1/2″ wide dadoes in the sides for the bottom and middle shelf of the cabinet. I then used a jig made from peg board to bore the shelf pin holes on each side.

I cut the bottom and middle shelf to size and stapled them to the sides with my 1/4″ pneumatic stapler. Because I was going to apply 1/4″ thick x 2″ wide trim around the sides of the cabinet to act as a faux frame and panel, I wasn’t concerned about the driver marks in the wood made from the stapler.
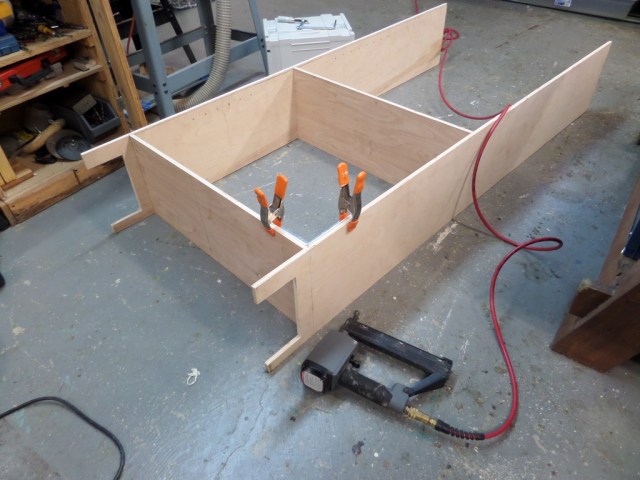
Next, I glued the 1/4″ x 2″ wood trim to the sides. Because I still needed to put a 3/4″ face frame on the front, the trim on the front side of the cabinet was only 1 1/4″ wide, not 2″. You can see in the picture how the trim on the right (the back) is wider than the trim on the left (the front).
Next I glued the 3/4″ face frame to the carcass. I used pocket hole joinery to attach the stiles to the rails. This was a super easy cabinet to build.

I added glue block to the inside top of the cabinet where I could screw the top to the carcass.

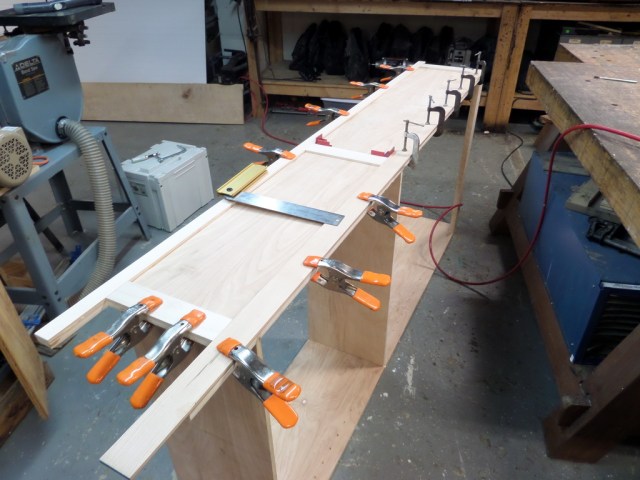
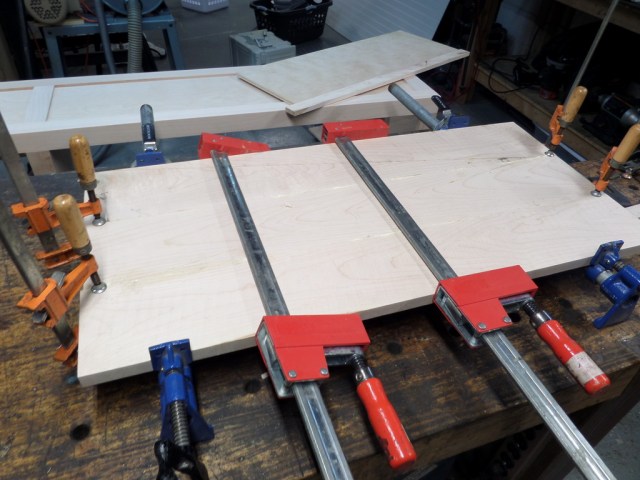
I wrote a post a few weeks ago where I described how I stretched a board to size after I cut a board too short. You can read it here. This is the board for the top of the cabinet being glued up after it was stretched.
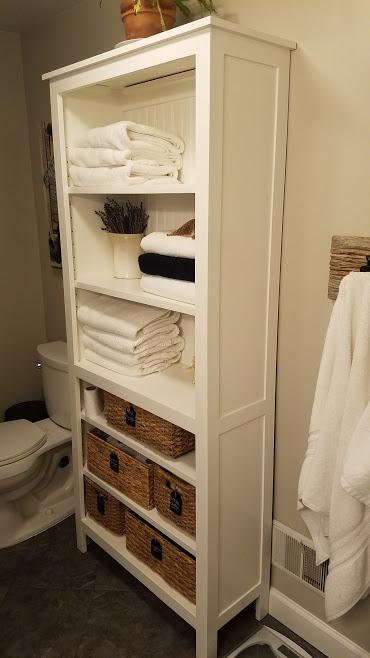
In the end, we decided not to add doors to the cabinet, but instead use baskets with open shelving. The woven baskets give the piece more character rather than having an entirely white cabinet with doors that would cover up the bottom shelves. We now have more room in the bathroom as the cabinet is only 12″ deep and is a lot more stylish.

Hi. What did you use as a back?
LikeLike