My wife Anita was getting ready for a design show she was doing called Over the Moon in Lawrenceburg, IN. She asked me to make a farm house table from basic 2 x 8’s I bought from Lowe’s. So I bought the wood and laid out the boards on the floor to see how big of a table she wanted. We ended up deciding on a table that was around 3′ x 5′.

When I bought the lumber, I chose boards with the straightest grain possible with very little or no knots. However, most of the boards I chose were still high in moisture content so I had to let them acclimate in my shop so they could dry out a little bit.
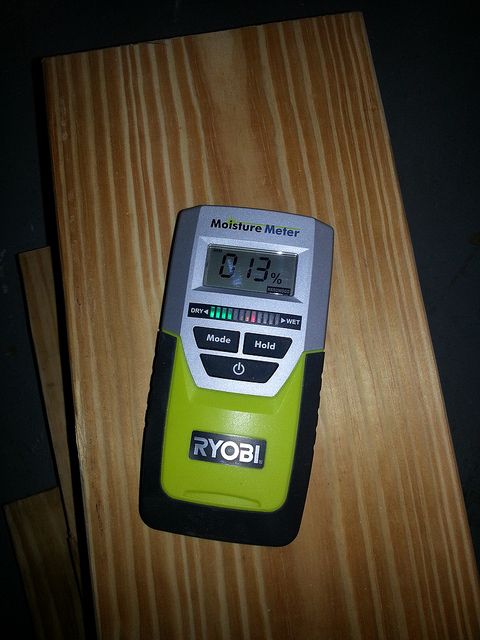
After milling the boards to one inch thick, I stickered them on the floor and placed a fan near them to help the boards dry out a bit. I placed weights on the top board just to prevent it from cupping. The paper towel underneath the weight is to prevent the iron of the weight staining the wood.

After about a week, the boards were down to a workable moisture content. You wouldn’t think that simply laying boards down for a week would change the moisture content that much, but it did.

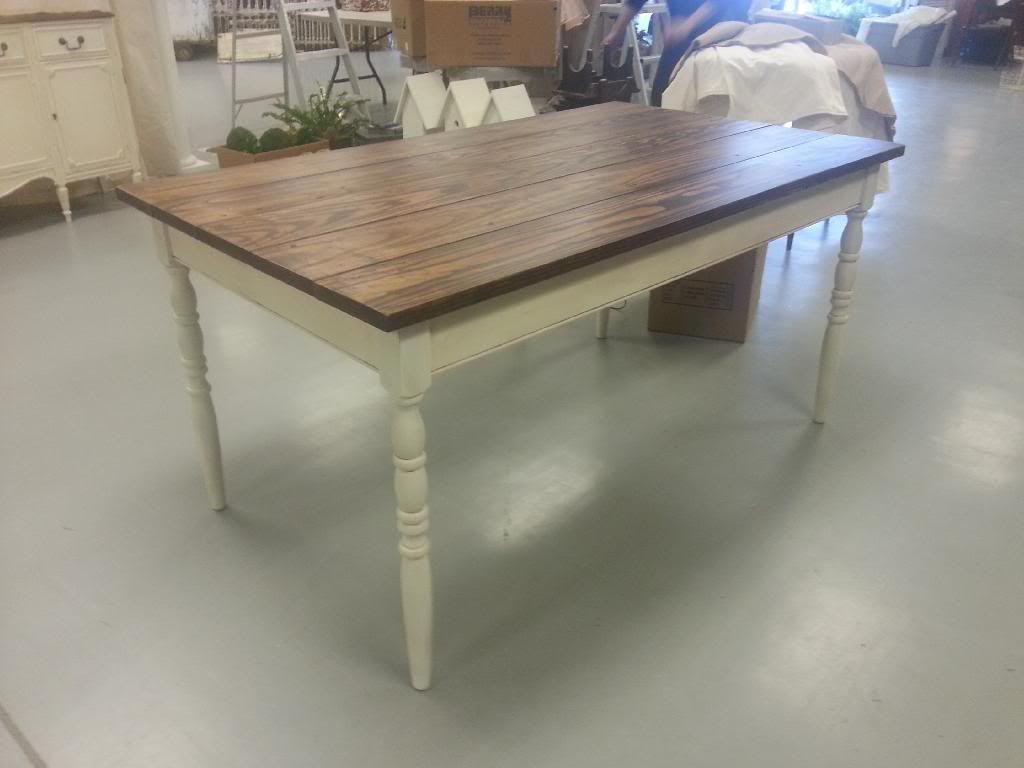
Anita already bought legs at an antique show back in the fall for about $10.00. All I had to do was make the frame and top and assemble it all together. I used a 3/8″ beading molding plane to put a bead on the sides of the table to give it a bit of detail.

It doesn’t get much simpler than this. I used pocket screws to attach everything together. The idea of a farm table is keep the joinery simple.

Anita stained the top with gel stain and painted the base with chalk paint. The table was too wide to get through my basement door so I had to finish it in the living room.

I asked Anita if she wanted me to attach the boards from the bottom so the fasteners wouldn’t show. She told me no. She said “just screw down the boards and fill in the holes with plugs”. So I did just that leaving about a 1/8″ gap between the boards for expansion and contraction of the wood. After I was done, Anita sanded the top again with 220 grit sand paper and reapplied some more stain.

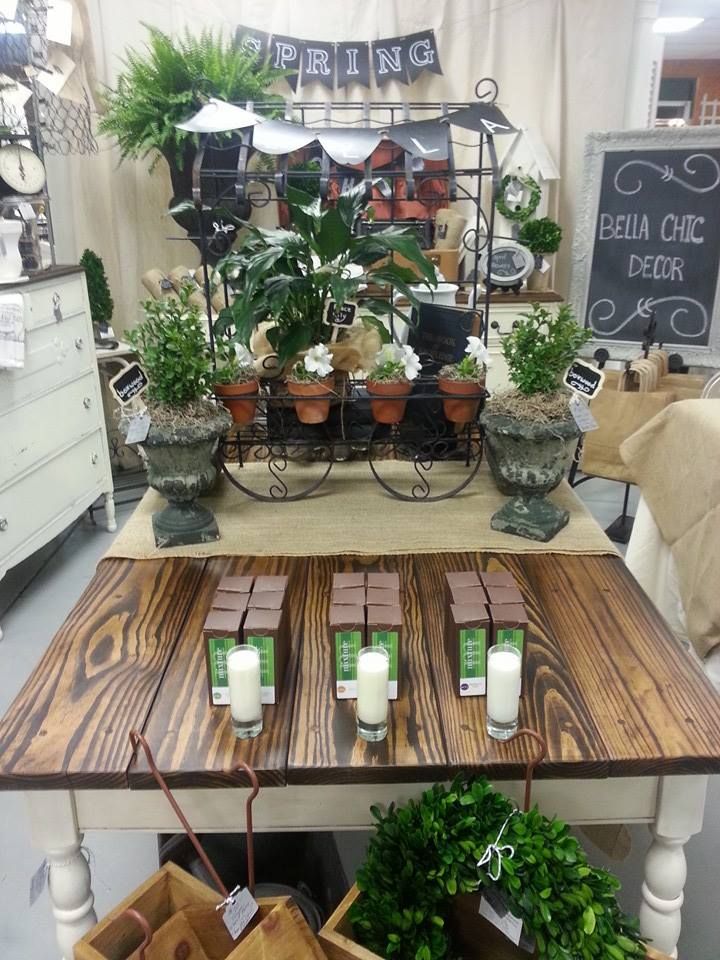
This is how the table looked when it was done and ready for the show. Anita applied a dark wax to the paint to highlight the details of the legs. She also waxed the top to give it some luster.
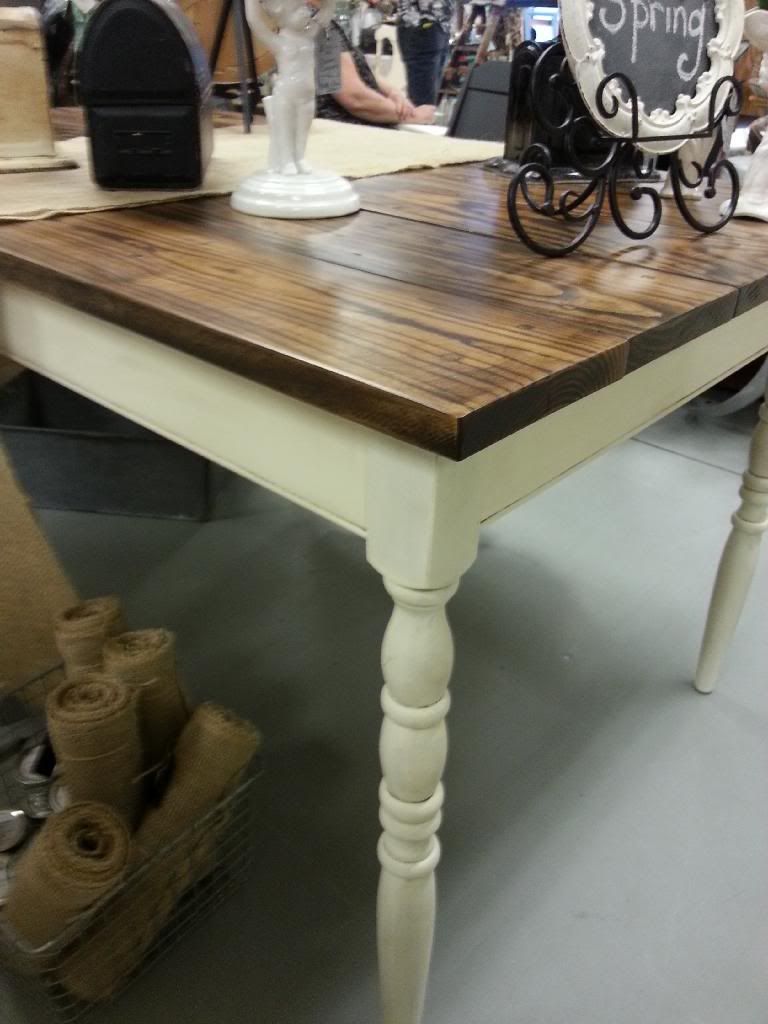
You can see some of the dark wax detail here.
Anita posted this picture of the table on her Facebook account right before the show started. One of her followers saw the picture and private messaged her asking Anita to hold the table, however Anita never saw her message. When the show opened, the young woman ran to her booth and asked if the table was still available. Anita said it was and the woman bought it right on the spot. It’s nice to know someone likes my work. haha.