My wife asked me to make a new table top for this table she bought. She wanted the top to look like old worn pine with a gray tone to it. Even though I had never tried it before, I thought it should be something that I could accomplish.

The first thing I did was to buy a couple of 2 x 6’s from Lowe’s and cut them so that I could create a 30″ round table top.

I wanted the 2 x 6’s to have some strength between them. I plowed a 1/4″ channel about 3/8″ deep though all the pieces so that I could fit a piece of poplar down the middle. Looking back at it, this may have been an unnecessary step as the glue should have held the pieces together good enough anyway since they were being edge glued. To give the top a bit of character, I chamfered the boards on each side so that the top would have the look of planked boards.

This is how the planks looked right before glue up. You can see how the slightly chamfered edges gives a little bit of character to the top making it look a bit old.

The next step was to cut it to a 30″ radius. I simply set up my plunge router to a circle jig and plunged the bit down a few times to cut out the circle.

Making the top was the easy part, but now I needed to antique it. I’ve heard about using distilled vinegar and steel wool to antique wood, but I never tried it before, so I bought a bottle of vinegar and dipped a steel wool pad in jar leaving it overnight.

When I applied the mixture, the wood immediately turned a dark brown. However, after it dried overnight the wood had a purple hue to it. It also raised the grain a little bit so I hit it with 220 grit sandpaper to remove the grit from the top.

Another big issue with the top, which is hard to see, is that it warped. When I was testing what type of dyes, stains or waxes to uses, I did it on the underside of the top. I think that all the oils and stain put the wood out of equilibrium causing the wood to warp. Oops!

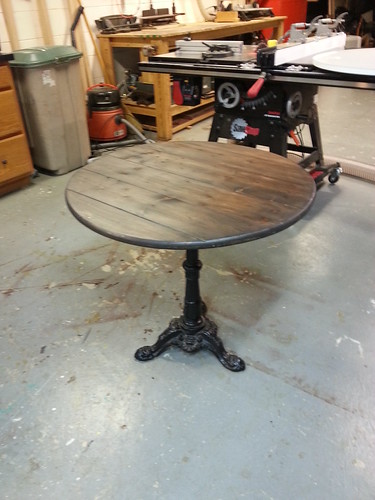
After the vinegar/steel wool mixture dried I wanted the top to be a little darker so I applied a coat of ebony Briwax. The top took on a darker color, but a little too dark for my taste. I probably should have tried some other type of wax or added another coat of vinegar/steel wool mixture to see how that would have turned out.

Overall the top came out okay, but it wasn’t the look I was going after, plus it’s warped. When doing things I have never done before, sometimes I get it right and other times I stink it up. I think this top may be headed out as fire wood. What do you think? Where did I screw up and how can you antique pine to a grayish tone?