Reclaimed Lumber in the Cincy/Dayton Area

If you’re in the need for some reclaimed lumber and live n the Cincinnati, Dayton area, there is a new place inside the Antiques Village Antique Mall in Centerville, OH that may have what you’re looking for. The booth is called Dayton Reclamation and Restoration Architectural Salvage and is in the back right of the antique mall.

 photo 20151028_124636.jpg

The booth is somewhat new as it’s only been open for a few months however, they do have a lot of reclaimed wood and architectural salvage like old doors and windows to choose from.

 photo 20151028_124241.jpg

 photo 20151028_124225.jpg

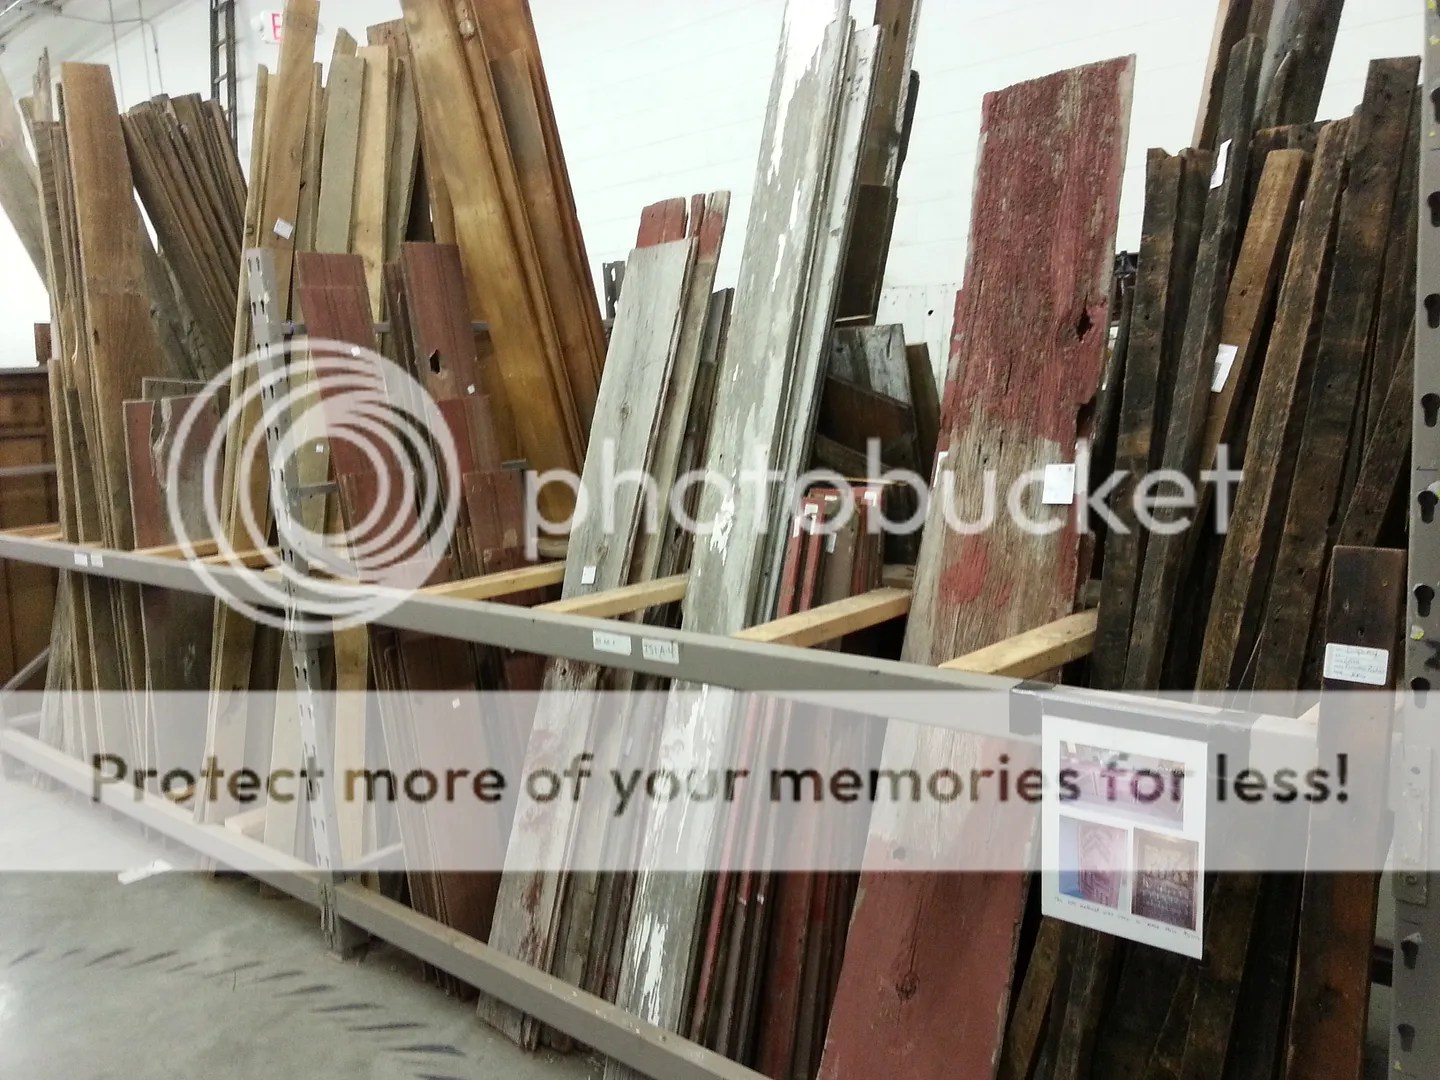
They also have a couple of racks of dimensional reclaimed wood in the front. The pricing is not bad with some 2″ x 6″ x 48″ pieces only being $4.00 a board. I didn’t buy anything because I have too much on my plate right now and don’t have a need for reclaimed lumber, but it’s nice to know where I can get it when I need it.

 photo 20151028_124214.jpg

This picture stinks, but it shows some of the longer pieces they have in stock. I didn’t notice any chestnut in the rack so I’m sure the majority of the wood is either oak or poplar. I’m sure the longer they’re in business, they’ll add to their inventory.

 photo 20151028_124203.jpg

And so it Begins- The Shed Part 1

I tore my old shed down one fall day and told myself that I would build a new one in the spring. That was seven years ago. Well, after seven years, I finally got my act together to build a new shed. One of the biggest issues in building it was how to build it level with a yard that is sloped downhill. I considered using deck blocks, but after watching a few YouTube videos, I decided to build a framed base.

 photo 20150830_143127.jpg

My wife, Anita, and I decided how big of a shed we wanted and where to put it in the yard. We opted for a 10′ x 14′ and laid it out in the yard with stakes and strings. I then used a line level to see how far off the ground the right side of the shed would be in the air. It’ll end up being about two feet in the air on the back right side which won’t look bad once we plant some shrubs around the shed.

 photo 20151011_161104.jpg

After we went to the home center to pick up the lumber. I cut and screwed the 2×6’s together into a 10′ x 14′ box. I measured corner to corner to make sure the box was square then attached boards on all four corners to keep it that way. I then grabbed some spray paint and sprayed the ground at the corners to show me where to dig my posts. After I dug the four holes 30″ deep, I stuck the 4×4’s in the ground and used clamps to hold the box to the posts. Then using a level, I leveled the box on all four sides, held it in place with clamps, then concreted the posts in place letting them dry over night.

 photo 20151011_150413.jpg

In the morning, I bolted the box in place with 3/8″ galvanized lag screws using four screws on each post. I then marked where my stringers would be and dug holes for two more posts in the middle of the shed so that the floor won’t sag.

 photo 20151019_092930.jpg

Attaching all the stringers and covering the base of the shed with 3″ deep of gravel stone with landscaping fabric underneath, the shed has a nice base. Now I need to go back to the home center to pick up more lumber.

 photo 20150830_143104.jpg

This is a drawing of the shed I designed. We already bought three old windows for the shed last year, so I incorporated them into the design. We’ll see how close the final shed will look to this drawing.

David Marks on Rough Cuts

Watching TV this morning I ran across a Rough Cuts episode that featured David Marks. He was showing Tommy Mac how to make one his famous turned vessels with an applied chemical patina. I’ve been a big fan of David Marks ever since I first saw him on his TV show Woodworks which was on HGTV and DIY Network many years ago. In fact, it was the main reason I ordered cable when I first moved into my house. I watched  his show religiously for about six years until HGTV and DIY pulled his show off the air by not renewing another season. I always thought that if Woodworks was on PBS, it would probably be still on the air today.

Woodworks was an awesome woodworking show where David made some awe inspiring modern looking furniture. David did a lot with bent wood lamination which helped me figure out how to build the back on my Windsor chairs since I had no access to fresh green lumber and a wood steamer. One episode David showed how to make your own plywood which motivated me to buy a vacuum press. It seemed that there was nothing that he couldn’t make. While he did have some nice tools, it seemed that everything he made was within a modest woodworkers budget. However, I still long to own one his Multi-Routers.

When I saw David today, it made me wish he still has his TV show. Maybe some PBS station out in California where David is from will offer him his own show again. Lord knows we could use another one. You can watch the episode of David on Rough Cut here.

http://www.tommymac.us/blog/episode-601-master-showcase-with-david-marks/

At one time you could watch old episodes of Woodworks online for free, but I haven’t been able to find the link. However, you can buy an entire season of his episodes on his website. If you’ve never heard of David Marks, or seen his work, I highly recommend you check him out.

http://www.djmarks.com/product-category/seasons/

Another Tool Auction

If you follow my blog, then you know I have an addiction to going to tool auctions and buying a boatload of planes. Well, not much has changed over the years except this auction was online a couple of nights ago. Today I went to the house to pick up my winnings to see what I won in person. Needless to say, I was pleasantly surprised with the quality of the tools I bought.

 photo blog 001_6.jpg

When looking on the lots, the auctioneer was very vague with their descriptions. They just grouped about ten to fifteen tools together and listed them as “Stanley Metal Planes”. One of the lots was nine Stanley Bed Rock planes with only four pictures of the total lot. I took a chance that they were in good shape so I placed my bid until I outbid all the other bidders. When I picked them up, I noticed that six of the nine were corrugated which put a big smile on my face.

 photo blog 002_5.jpg

The other planes I ended up winning were a couple of Stanley circular planes. Theses planes work really well and come in handy when properly tuned.

 photo blog 003_7.jpg

They had this Stanley No 77 Dowel Making machine as a “drill”. These machines are sweet to use. I only wish I could afford the extra heads they came with as they usually sell for over $100 a piece on eBay.

 photo blog 005_7.jpg

I also picked up this Stanley No 150 miter box with a Cincinnati Steel Saw Co back saw. I’ve owned one of these for twenty years and work great cutting small moldings.

 photo blog 006_3.jpg

Here are a couple of Stanley No 112 scraper planes. Another tool that you’re glad you own when you need it.

 photo blog 007_1.jpg

A couple of Stanley No 10 Rabbet planes. The one in the back has been welded as that is a common repair for these when they break in two.

 photo blog 008_2.jpg

I ended winning six pre-lateral Stanley bench planes. One of them has the wrong lever cap and a couple others have the wrong style of tote, but all have the proper blades which is good as usually these are found with an improper blade.

 photo blog 012_1.jpg

Most of these tools will eventually be restored and sold in my eBay store. http://stores.ebay.com/mvflaim. The pre-lateral planes are too collectible to be restored. Just a light cleaning will do. The tools in the bottom photo are the tools I’ve been working on the past few weeks and will be listed for sale soon.

 photo blog 015.jpg

Revamped Dining Room Table and Chairs

As promised, I decided to throw up some before and after pictures of the dining room table and chairs my wife and I have been working on for the past few months. As you can see, the $10 chairs Anita picked up at a thrift store weren’t that attractive, but she saw the potential in them.

 photo chairs.jpg

A little bit of chisel work, paint and new fabric brought them from the ’70’s into the new millennium. Anita picked out the fabric at IKEA in order to save some money so the chairs end up being super cheap.

 photo chairs3.jpg

My farmhouse table I made twelve years ago was a massive beast, but it served it’s purpose. After replacing the top with 2×10’s and reducing the width of the table, it fit better in the room.

 photo 20150713_192149.jpg

In the end, the chairs and table look great with the decor of the room. I’m not sure if the Windsor chairs at the ends of the table will stay, but for now they provide extra seating for when we have company over (which is never).

 photo table_1.jpg

Revamping Ugly Dining Chairs

The remodeling of our dining room continues. This time with new chairs. My wife was never that fond of the Windsor chairs I made about twelve years ago, so she bought four french style caned back chairs at a local thrift store for $10.00 each. They were in good shape, the only issue with them was that they had an ugly ass imitation claw bubble design thing on the front legs. Honestly, I have no idea what they were suppose to be or how they made the chair look more formal, but they were ugly.

 photo 20150524_110441.jpg

My wife Anita and I both agreed they had to go so I took out my low angle block plane and some files and I shaved away the bubbles on all four sides of the front legs. Since Anita was going to paint the chairs, it wasn’t a big deal that the original finish was removed exposing the bare wood.

 photo 20150523_215818.jpg

After Anita painted the chairs white, I made a template for the seats with 1/4″ hard board. I simply traced around the chair with the hard board on top and cut it out on my band saw. I had to pay attention to the two notches in the back of the chair seat so that when Anita put fabric on the seat, they would still fit.

 photo 20150822_171934.jpg

I didn’t have scrap 3/4″ plywood lying around in my shop, but I did have the original oak plywood top from my dining table I revamped last month. I removed some of the extra plywood around the edges where it thickened up the top and laid out my seat pattern on the board. I then used my jig saw to cut the seats out.

 photo 20150822_173649.jpg

After a little fiddling, the seats fit well to the chair frames.

 photo 20150822_184445.jpg

The rest of the work was in Anita’s hands. She used the seat bottom to trace around the batting for the chair and cut it using a pair of sharp scissors.

 photo 20150822_184924.jpg

 photo 20150823_105217.jpg

Then she started to staple the fabric on with upholstery staples. She used a Senco pneumatic stapler to make the job go much quicker.

 photo 20150823_121400.jpg

Here is one of the chairs finished. I have to admit, it looks a lot better than the Windsor chairs I made a few years ago. Once she finishes all four chairs, I’ll post some pictures that show the revamped chairs along with the revamped table together as a set.

 photo 20150823_123327.jpg

Revamping a Dining Table

About twelve years ago I built a dining table from the plans out of Woodsmith magazine. While it served it’s purpose, it wasn’t exactly the nicest thing in the house. I made the top out of a piece of low-grade oak plywood that I bought at Home Depot. Not only that, but the table was huge being 44″ wide. My wife Anita asked if I could make a new one, or at least make a new top that was more in style. We decided that making a new top out of southern yellow pine and try weathering it making it look aged.

 photo 20150713_192149.jpg

The easy part was buying four 2 x 10’s, ripping them 9″ wide by six feet long and gluing them together. After they were glued, I planed the tops of the boards straight removing all the mill marks in the process.

 photo 20150713_181813.jpg

After the top was planed and sanded with 150 grit sandpaper, Anita applied mixture of steel wool and apple cider vinegar onto the boards to tone down the yellowness of the southern yellow pine.

 photo blog 002_4.jpg

We thought it would be a good idea to stain the top while it was already on the table. I removed the original top of the table and flipped over the base onto the new top to decide how much I would need to cut the sides down.

 photo blog 004_6.jpg

After messing around with the legs for a few minutes, I decide that the sides should be 24″ wide.

 photo blog 005_6.jpg

I cut the sides to 24″ and rerouted the dado on both boards for the corner brackets. I then used pocket screws to re-attach the sides to the legs.

 photo blog 006_2.jpg

Using metal corner brackets, I simply attached the top to the base. The new top made the table look more like a farm table.

 photo blog 008_1.jpg

Anita then stained the table with Special Walnut, then Classic Gray stain from Minwax.

 photo 1437251379798.jpg

Once dry, she applied hemp oil and gave the top a good waxing. She then painted the base with grey chalk paint. When done, it looked like a completely different table.

 photo 20150724_171103.jpg

A close up the table you can see how the southern yellow pine took on a deep rich tone. You can also see how the original black paint shows through the grey paint after Anita sanded the base a little bit. This has been one of those projects we should have done years ago.

 photo 20150724_171113.jpg

A Saturday Afternoon at an Estate Auction

Not much has been going on lately with woodworking, but I have been picking up some more tools. Yesterday I went to a local estate auction and scored some serious tools. I saw the auction on AuctionZip a few days ago, but they only had a couple of pictures of a few tools. When I arrived at the auction and took a look around, I nearly crapped myself when I saw all the tools that were sitting on the tables.

 photo 20150627_152847.jpg

I have a blast at auctions as you can see with my winnings. I always try to remain reasonable and not get too carried away with my bidding. Fortunately, there weren’t a lot of tool collectors at the auction, so I was able to buy a whole bunch. In fact, most of the time I was bidding on several tools at once in one box.

 photo 20150627_152851.jpg

At the end of the day, I brought all the tools down to my basement and tried to calculate how many tools I actually bought. I had to separate the good tools from the junk that was packed in the boxes. I won a about a dozen junky block plane beds that ended up in the garbage can.

 photo 20150627_152909_1.jpg

In the end, I bought over 150 tools with nearly 100 planes. I’ll be busy over the next few months cleaning all these babies up.

 photo 20150627_152920.jpg

My first winning bid was for a box of steel wool for $8.00. I use a lot of steel wool when cleaning tools and I’m sick of buying those little packs for $5.00 at Lowe’s. I should have enough steel wool here to last me a couple of years.

 photo 20150627_152929.jpg

Probably the best buy of the day was this old BedRock 605 plane. It should be cleaned up and for sale in a few weeks.

 photo 20150627_152950.jpg