Woodworking in America

I stopped by the Marketplace at The Woodworking in America show in Covington, KY today after work. Living in Cincinnati I’m spoiled that I get to waltz right in like it’s no big deal when the majority of people who attend have to make travel plans and hotel accommodations. I attended the first WIA a few years back in Berea, KY and had a blast listening to presenters like Roy Underhill, Brian Boggs and Frank Klaus. However, the money has been too tight for me to afford to attend any of the seminars since then.

I picked up a few things while I was there, nothing much. I mainly went there to buy the book “By Hand & Eye” by George Walker and Jim Tolpin. I’ve read good things about it and knew Lost Art Press would have a booth so leaving with that was a no-brainer. I also picked up a couple of DVDs about using SketchUp. I’ve been wanting to learn how to use this design software for years but after fiddling around with it in the past, it never clicked. Hopefully the DVD’s will make a light bulb go off in my head.

I stopped by the Knew Concepts booth and looked at their fret saws again. I see them every year but they never bring any inventory to sell. They would give me a card and tell me to go on the website and use it for free shipping. Every year I took the card and just forgot about it. Well not this year. They finally brought saws to sell so I bought one.

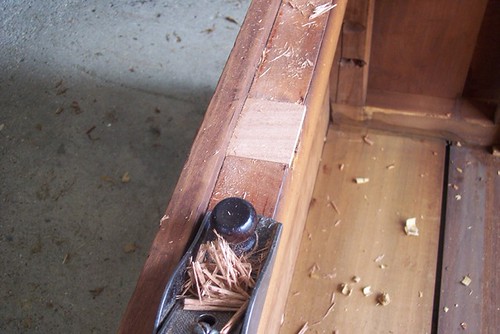
I’ve wanted one of these saws for a few years now. They are much stronger and hold the blade much stiffer than an ordinary coping saw. I’ll use it mainly for cutting the waste out of dovetails as well as some fret work from time to time. The difference between a Knew Concepts saw and a coping saw is night and day. I may turn a new handle for it out of cocobolo to beautify it someday, but I’m in no rush for that.

With my Knew Concepts saw, my coping saw is perfectly happy in his new home.

All in all, the Woodworking in America is a good show that’s worth going to. It’s not like The Woodworking Show that travels around the country. It’s mainly focused on hand tool woodworking so you won’t find a lot of power tools or boxes of discount belt sander sanding belts. About three quarters of the vendors focus on hand tools which is fine by me.

I was disappointed not to see Welch chair maker Don Weber again this year. He hasn’t attended in a couple of years and I’m not sure if he will again. I took a blacksmithing class from him a few years ago at his shop in Paintlick, KY. He’s extremely knowledgeable about woodworking and a hell of a craftsman, as well as down right a nice guy. I did talk to a few young chair makers who were selling some sweet ass chair making tools. I wanted to buy a drawknife sharpener and adjustable calipers but my funds were already spent. I got their cards so maybe sometime down the road I’ll buy them off the internet.


Using a Vacuum Press

Every once in a while I pull out a tool that I haven’t used in long time. I bought this vacuum press about ten years ago figuring I would use it all the time making custom plywoods out of exotic veneer but that’s never been the case. I think originally I saw David Marks use one on Woodworks and thought to myself that I had to have one. Even though I’ve only used this vacuum press about four times since I bought it, I’m still glad I did because now I need it.

I make thick wooden letters for my wife Anita. She paints them different colors and sells them in her booth. I usually make EAT which women display on their kitchen tables. The letters are made from 1 1/4″ MDF however, I can’t find a local supplier for 1 1/4″ thick MDF so I buy 1/2″ and 3/4″ MDF and laminated them together. Next month Anita is going to have a booth at a local Shabby Chic design show called Over The Moon in Lawrenceburg, IN. I figured I’d help her out and make more EATs and a few NOELs for Christmas. She sells them for $5 – $6 a letter which isn’t much but they are super easy and quick to make. Plus everyone she sells will help pay for the cost of the booth.

In order to laminate the two boards of MDF, I need the ability to properly clamp the boards together so that they press against each other equally. That’s where my vacuum press comes in handy. In order to maximize the torque of my vacuum press I built a clamping box for it. The box is nothing more than two 3/4″ MDF boards with grids cut on one side and glossy laminate on the other with the bottom board wrapped in a frame. The grids on the top help with air flow as the vacuum is working, and the laminate helps any glue squeeze out from sticking to the inside of the box.

Using the press is quite simple. I spread glue all over ope of the pieces I want to laminate making sure I get a 100% coverage. I get better results only spreading glue over one of the pieces and not both. When both pieces have glue on them, they tend to slide around when I put them in the box.  Once both pieces are stuck together, I place the top half of the box on top of them to act as the press when the air is removed.

I slide the entire box into the an industrial plastic bag with a nozzle on top and use a couple of wooden cauls to close the end of the bag. I then use as many clamps as needed to seal the bag so that it’s air tight.

I then hook up my vacuum press and turn it on for a few minutes to suck out all the air like a gigantic Food Saver machine.


You can see how tight the bag becomes once the vacuum starts working. After I’m satisfied with the pressure, I leave the boards to cook for a couple of hours. It’s important to turn off the vacuum and listen carefully for any air leaks that may be present. Notice the orange Jorgensen clamp at the bottom where I had to fold the plastic on top of itself in order to stop a leak. 

After a couple of hours, the boards come out perfectly laminated together. If you’re interested in learning more about vacuum presses, go to www.joewoodworker.com. It’s where I bought my vacuum and all the necessary accessories.

Empire Dresser

The Empire dresser is officially done. My wife Anita found some nice oil rubbed bronze drawer pulls on the internet after looking locally for some with no luck. It originally had glass knobs on it, but a few of them were in rough shape and not all of them matched. I think the drawer pulls she picked out look really nice and add to the character of the piece. She applied four to five coats of hemp oil to the dresser. It gives it a warm aged look without making it look too glossy.

I put a few hours in this as well. I had to strip all the old stain off, patch a veneer job, re-band all the drawer fronts with sapele, replace a brass key escutcheon, and reinforce some of the drawer bottoms with pieces of poplar.

She plans on selling this in her booth with her painted furniture and antiques this Saturday at a local street fair in Milford, OH called the Longstone Festival. She was lucky enough to get a booth as there is usually a waiting list every year. Hopefully it will sell there. I will let you know if it does. http://www.longstonestreetfestival.com/

Frames, Frames and more Frames

Last night, my wife Anita took me to an old frame factory in downtown Cincinnati. The factory stopped operating over a hundred years ago, but it looked like the frames hadn’t been touched since the workers packed up and went home.

Anita met a lady about a month ago who was selling some frames from the building and told us that she was going to have an open house on Aug 23rd to try to get rid of some more and invited us to come. Because Anita makes chalk boards out of old frames, she made an appointment with her to view the building before the open house to buy some of her frames, but going back to the open house was still a no-brainer as she wanted me to see the place.

When we arrived, there were people greeting us offering wine and cheese. I didn’t know if I was coming to a rummage sale or a gallery viewing, so I grabbed a glass of wine and headed upstairs. When I got up there, all I saw were tens of thousands of frames stacked everywhere. The floor was probably 5000 square feet and every inch was packed with old frames. It took five minutes just to absorb all of it as I wandered around checking everything out.

The factory stopped operating in 1910 and must have specialized in round and oval frames as there were thousands of them spewed out all over the floor. Every shape and size from tiny to gigantic were available as an oval. They did have some square frames available, but 95% were round of some shape. The owner said the building sat like this undisturbed since 1910.

Not all the frames were primed. They had some really nice ones made from mahogany in all sort of sizes. My wife bought a few of these before and cleaned them up with hemp oil. They look fantastic cleaned so she bought a few more last night . You can see the hundred years of dust that laid on these frames undisturbed.

Sadly, all the old machinery were long gone. I looked around the building for remnants of the machinery, but only came across this glue applicator directions inside one of the posts of the building. It’s from the Casein Manufacturing Company explaining how to properly use one of their mechanical glue pots.

The only big machine left was this nice old blower. There were a few pieces of duct work that went throughout the building, but I’m not sure what it was used for.

Anita ended buying 50 frames for $250. Dirt, dirt cheap as some of the old frames she picked out can go for as high as $35.00 a piece in antique stores. Now she needs to clean all of them up and turn them into chalk boards.

The Furniture Makers of Cincinnati 1790 to 1849

While shopping around a couple of antique stores in Lebanon, OH this weekend, I ran across this book placed on the bottom shelf of a bookcase in the back corner of the store. The book was “The Furniture Makers of Cincinnati 1790 to 1849” and it intrigued me since it was something that I was looking for a while. I have always known that back in the earlier 1800’s Cincinnati was the epicenter of the furniture industry, but I knew very little about any of the makers or furniture from that time.

The writer of the book Jane E. Sikes, who I can only imagine was Richard Gere’s mom, was a native Cincinnatian who held degrees from Bennett College and the University of Cincinnati. She researched and documented hundreds of cabinet makers, chair makers and turners during the earlier part of the 19th century and included their name, location, and year or years in which they operated in alphabetical order. She also wrote about the furniture industry in Cincinnati and the artisans who helped carve its future. If you’re from Cincinnati and would like to read the book yourself, you can buy a used copy on Amazon. http://www.amazon.com/Furniture-Makers-Cincinnati-1790-1849/dp/B002H2TIDE/ref=sr_1_1?ie=UTF8&qid=1376267859&sr=8-1&keywords=the+furniture+makers+of+cincinnati

During the earlier 1800’s, Cincinnati was the fifth largest city in the US and the largest in the West. Steamboats carried goods from the East and to New Orleans. Being a major port for travelers on the their way out west, Cincinnati flourished economically and by 1815, Cincinnati was exporting chairs and furniture out west, selling to the steamboat trade. Because of the expanding growth and the lush local forests, artisans from all over the world came to Cincinnati to help build the furniture that was in such heavy demand.

The book has a few pages of color plates showing furniture made in Cincinnati which is what I was really after.  Being a furniture maker from Cincinnati, I’d like to pay homage to the furniture makers before me by incorporating some of their shared styles into my own designs. Anytime I watch the Antiques Roadshow on PBS, I hear the Keno brothers talk about the Philadelphia style or New York style of furniture, but never hear them speak of a Cincinnati style of furniture. Unfortunately, there doesn’t appear to be any singular design that stands out as a Cincinnatian form as Sikes wrote, “It is difficult to attribute particular characteristics to Ohio furniture in general and Cincinnati in particular. However, there are certain pieces which have descended lineally in certain families and we know that these shapes are definitely the kind of furniture made here in 1820 and 1830.” However, she doesn’t go into detail what those shapes or pieces were.

As far as the furniture industry in Cincinnati is concerned, unfortunately, the Great Flood of 1832 wiped out a lot of the furniture makers who worked and lived downtown. The river was so high that year that it was reported by William Henry Harrison that steamboats were travelling down city streets. Seven of the major chair makers were decimated as all of their tools and paint were washed away down stream. After the flood in 1834, the sudden outbreak of Asian Cholera only added to their woes when as many as 100 people died a day from the illness. Steamboats weary of traveling to Cincinnati in fears of spreading the disease bypassed the city thwarting once again the chair makers who depended on the steamboat trade. Most of them closed up shop and went onto other trades.

While examining the pictures, I think there are some similarities in the curves of the pieces that I can incorporate in my own designs in the future. Since I have lived in Cincinnati for nearly thirty years, it only makes sense to continue the proud history of furniture makers who came before me.

Page 20 has a picture of the Book of Prices of the United Society of Journeymen Cabinet Makers of Cincinnati for the Manufacture of Cabinet Ware in 1836. Books like these were legal contracts for helping unionize furniture making. Whether or not they were adhered to is anyones guess.

One of the neatest furniture makers Sikes researched was an African-American man named Henry Boyd who was born into slavery in Kentucky on May 14, 1802 and then bought his freedom at the age of eighteen. He set up shop in Cincinnati and sold his furniture to people all over the South and Southwest. He began working in 1830 and by 1850 he employed 20 cabinet makers making beds for hotels. Some of his furniture can still be seen today at the Golden Lamb Inn, the oldest hotel and restaurant in Ohio in the city of Lebanon, just two doors down from where I bought the book. I have never eaten at the Golden Lamb but I’ve heard good things about the place. Looks like I’ll have to take my wife there soon and check out some of his furniture if possible. The Cincinnati Enquirer wrote an article about Henry Boyd a few years back. http://www.enquirer.com/editions/1997/02/21/loc_blackhistory.html

Somebody who owned the book before me was doing some research as there were still a couple of hand written notes tucked inside. This is definitely a great book that I will own for a long time. Maybe I’ll add my own notes to the book someday doing research on some Cincinnati furniture makers.

World’s Longest Yard Sale: US127 Corridor

My wife and I just returned from a five-day excursion on the The World’s Longest Yard Sale down US 127. The yard sale runs every year during the first weekend of August from Michigan down to Alabama. Last Wednesday, my wife Anita rented a Ford F-250 cargo van and we headed down to Chattanooga TN to spend the night. We picked up 127 around the Kentucky Tennessee border stopping at multiple yard sales running all the way to our hotel in Chattanooga. The next day we started heading up 127 back home.

Anita was looking for old furniture to fix up as well as things she could sell in her booth. I was looking for antique tools. We traveled over 1200 miles in five days traveling from Chattanooga, TN to Castine, OH and had an absolute blast. Nothing more fun than the thrill of the hunt. We ran into a little trouble at the top of Tennessee though. It was around 7:00 pm and we didn’t have a hotel booked. We drove all the way to Danville, KY hoping that a hotel on US 127 would have a room but they were all booked. We ended up driving all the way to Lexington, KY to find a room. The next day we got up and had a nice breakfast in neat little restaurant and headed back to Danville, KY to continue up US 127.

I picked up mostly a bunch of planes, some of them needing major cleaning, with a few miter boxes near the end of the trip. What’s amazing about my finds is that most of the planes I had bought had corrugated bottoms. I wasn’t specifically looking for corrugated planes but when I turned over a plane I was interested in, its bottom was corrugated. Twelve of the fifteen planes were that way. Amazing since corrugated planes are not as common as flat bottom planes in the market.

This is the shot of the bottoms of the planes with nearly all of them being corrugated. It’ll take a while but every one of these planes will be cleaned up and ready to be put back to use.

Near Danville, KY I ran into a guy selling a trailer full of cherry hardwood. I couldn’t buy the whole trailer but I did manage to pick up one of his slabs. This piece is 2″ x 16″ x 100″ and the offer was too good for me to pass up. Does anybody want to guess what I paid for this slab of cherry? Post a comment and I’ll let you know.

Empire Dresser Veneer Repair

I’ve been working the past couple of weekends on an old empire dresser my wife bought at an auction a couple of months ago. After we got the dresser home, we noticed that the dresser had some old repairs on it. It also had a poor stain job that looked like it was sprayed on with a paint sprayer since it was covered in orange peel. So I stripped off all of the stain with Soy Gel paint stripper and wanted to fix some the repairs.

At the top of the dresser was this veneer repair. What the original guy who repaired the dresser was trying to accomplish I’m not sure, but I believe that what was underneath this veneer at one time was a lock mechanism to lock the top drawer. The lock was long gone and we had no intentions of adding the lock back in, so I decided to fix this area of the dresser with a new piece of veneer.

The original veneer on the dresser was made from a piece of crotch mahogany. I didn’t have any mahogany veneer on me so I decided to fill it with a small piece of sapele. Sapele is often considered a poor man’s mahogany being about half the cost. Plus I really didn’t feel like buying an expensive piece of mahogany to fix this little area. The good thing about this repair is that it was dead center of the case so any new repair would still be symmetrical on both sides even if it didn’t match perfectly with the rest of the dresser.

I used a card scraper and ran a utility knife down the scraper scoring the veneer. I then pared away the rest with a paring chisel. After all the wood was removed, I flattened out the rest of the area as best I could so the new piece of veneer would sit flat.

After measuring the area, I cut a new piece of sapele from a scrap board and dried fitted in place. I gently planed across the face to level it with the rest of the veneer making sure I didn’t cut into the old veneer. After everything fit, I glued and clamped it to the dresser.

The piece fit but I wanted to match the color of the original mahogany veneer. I took another scrap piece of sapele and experimented with a few colors of water soluble dyes to see how well I could match it up to the original veneer. After a few attempts, I decided to use a couple of coats of Early Brown American dye with a very light coat of Mahogany stain.

The color turned out well. Not a perfect match but well enough. Once I get the drawers done, my wife will apply a few coats of hemp oil to bring out the natural beauty of the wood. I’ll post a picture when the dresser is done.