A Half Blind Dovetail Chisel

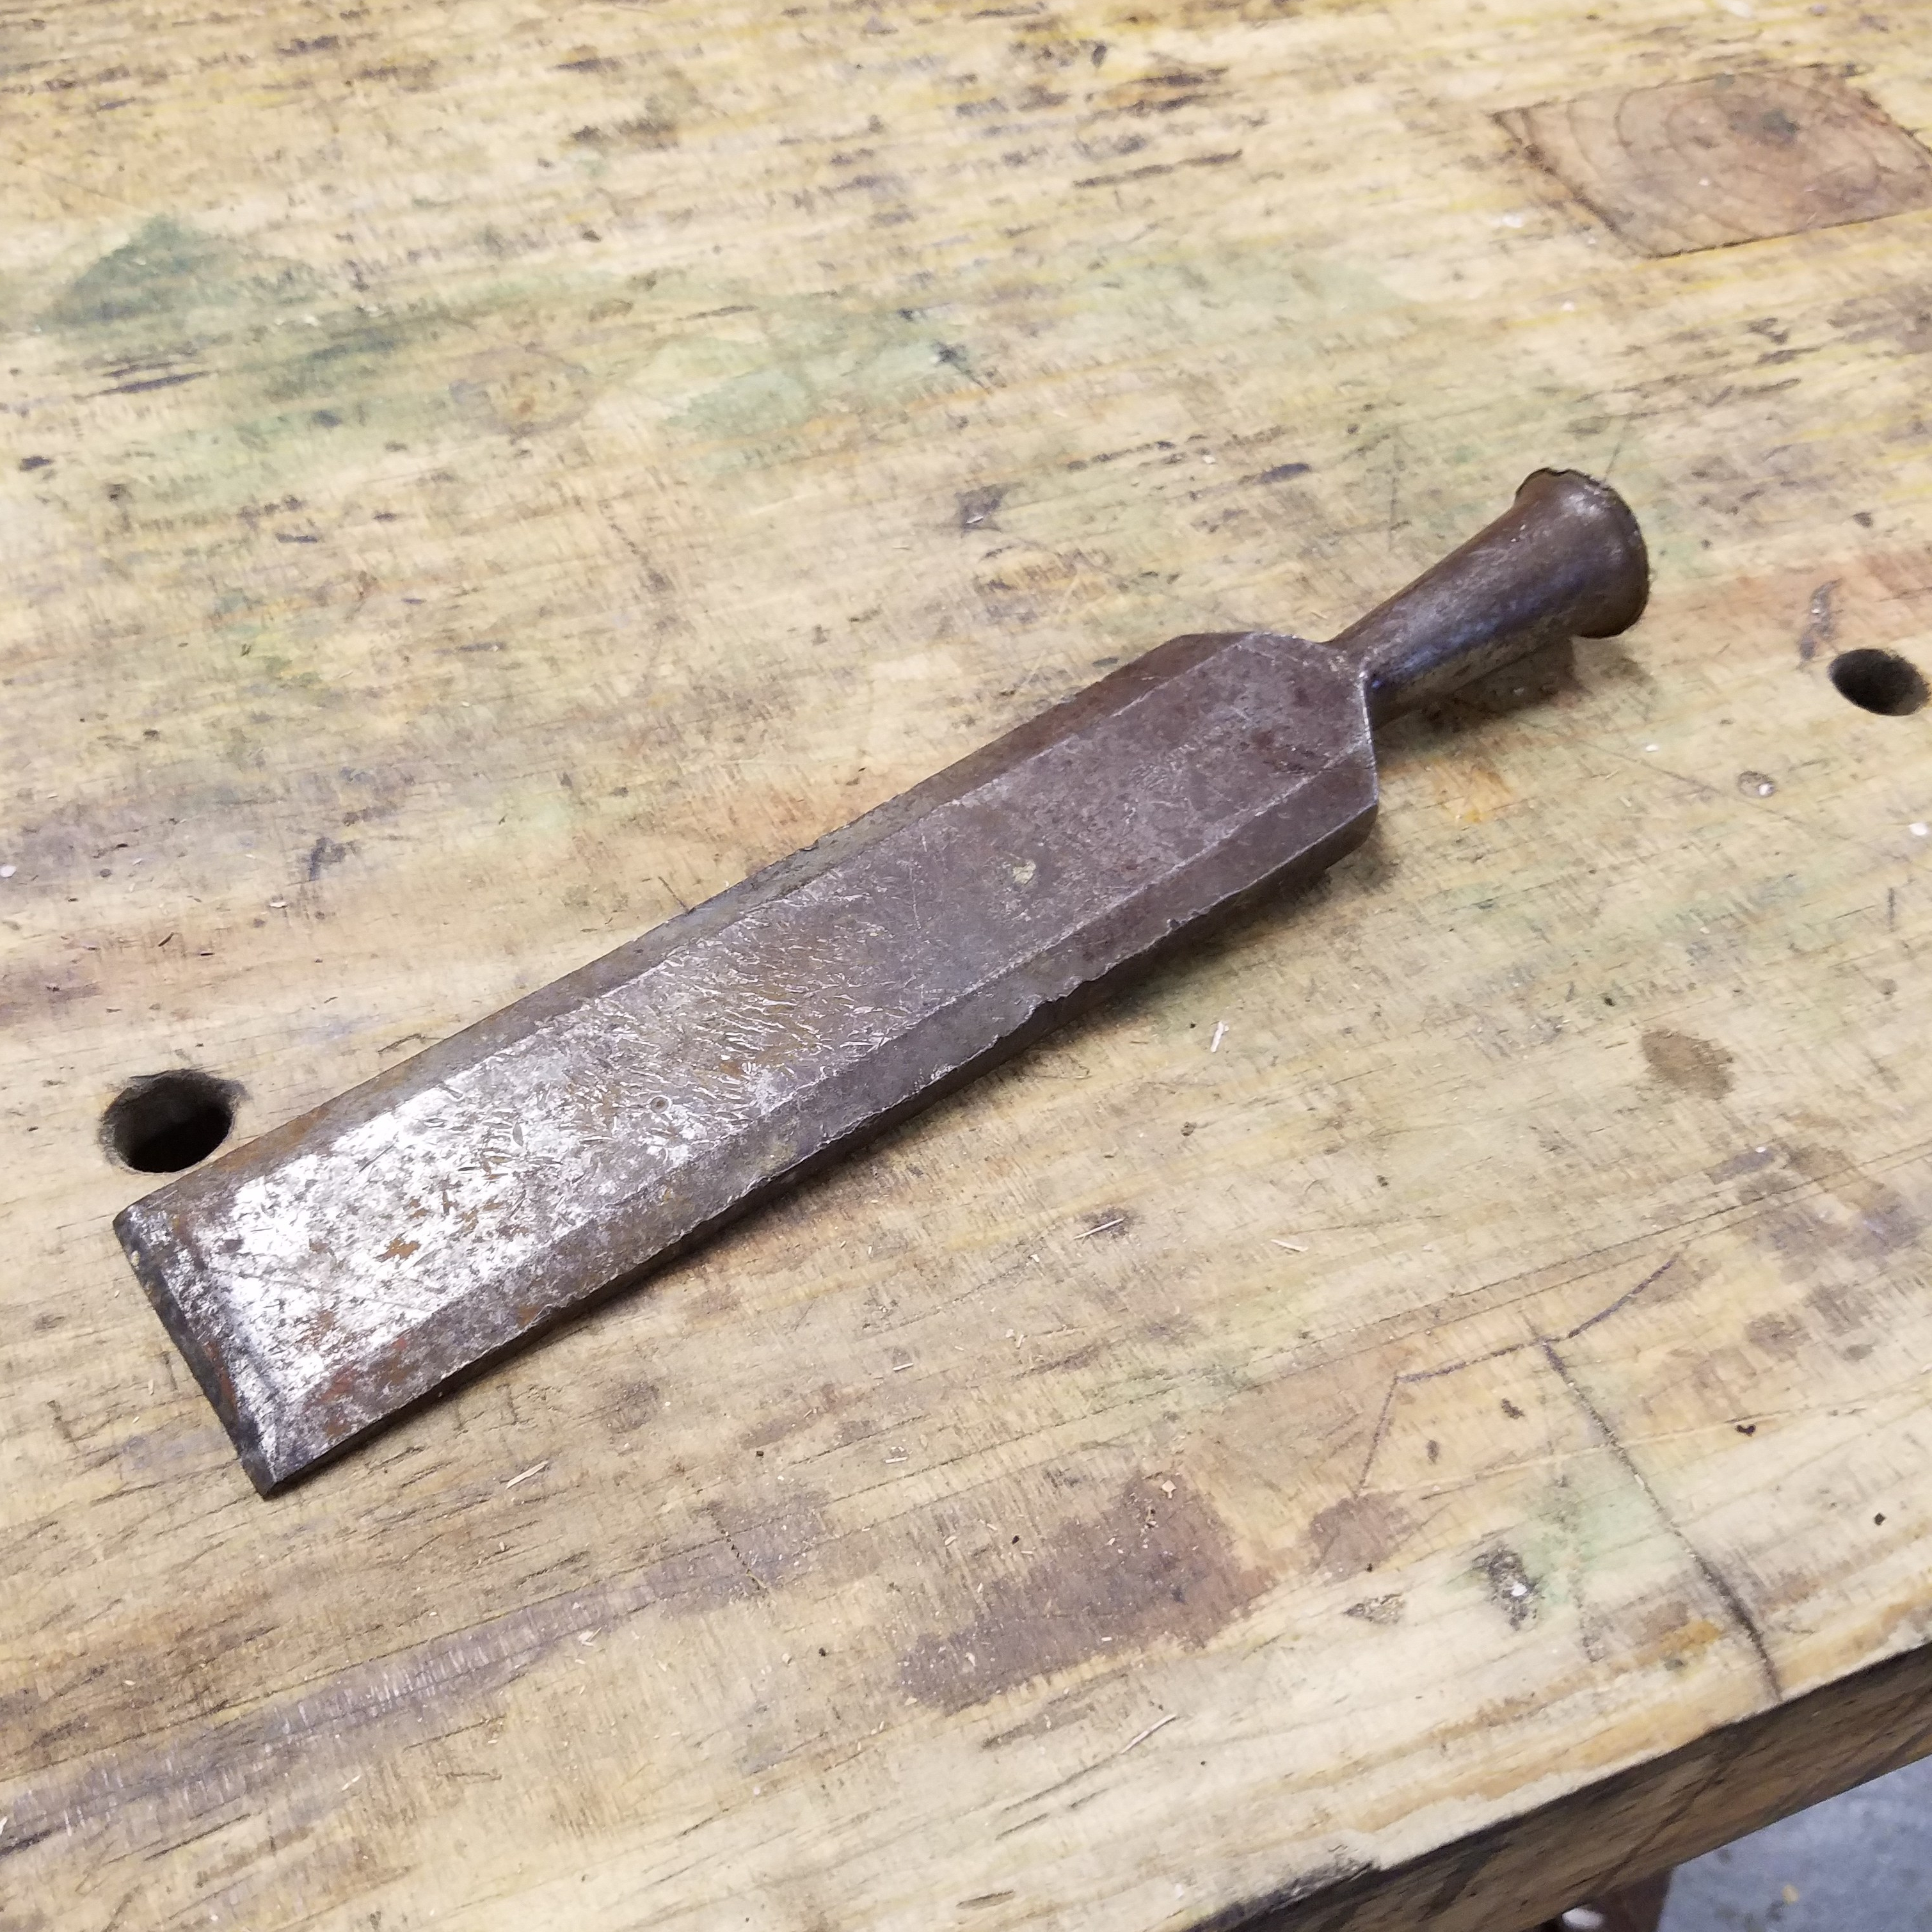
I’ve owned this 5/8″ firmer chisel for years. I’ve kept it around because I always wanted to reshape it and turn it into a chisel to clean out half blind dovetails but never got around to doing it. Since my wife is out of town, I have a lot of shop time right now, so I decided today would be the day.

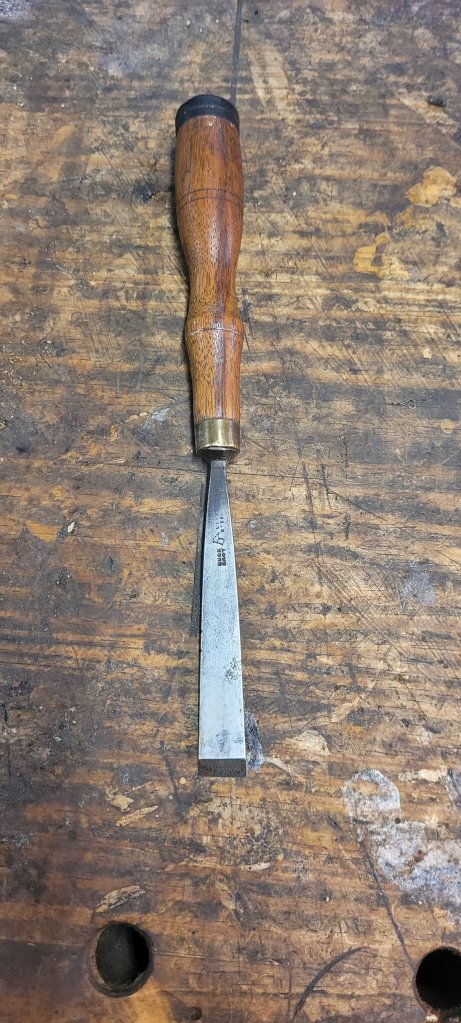
I used a sharpie to lay out a rough idea of what I wanted the blade to look like. I wanted it to be flared out on both sides, so when I clean up the inside of half blind dovetail pockets, the blade will get all the way into the corners.

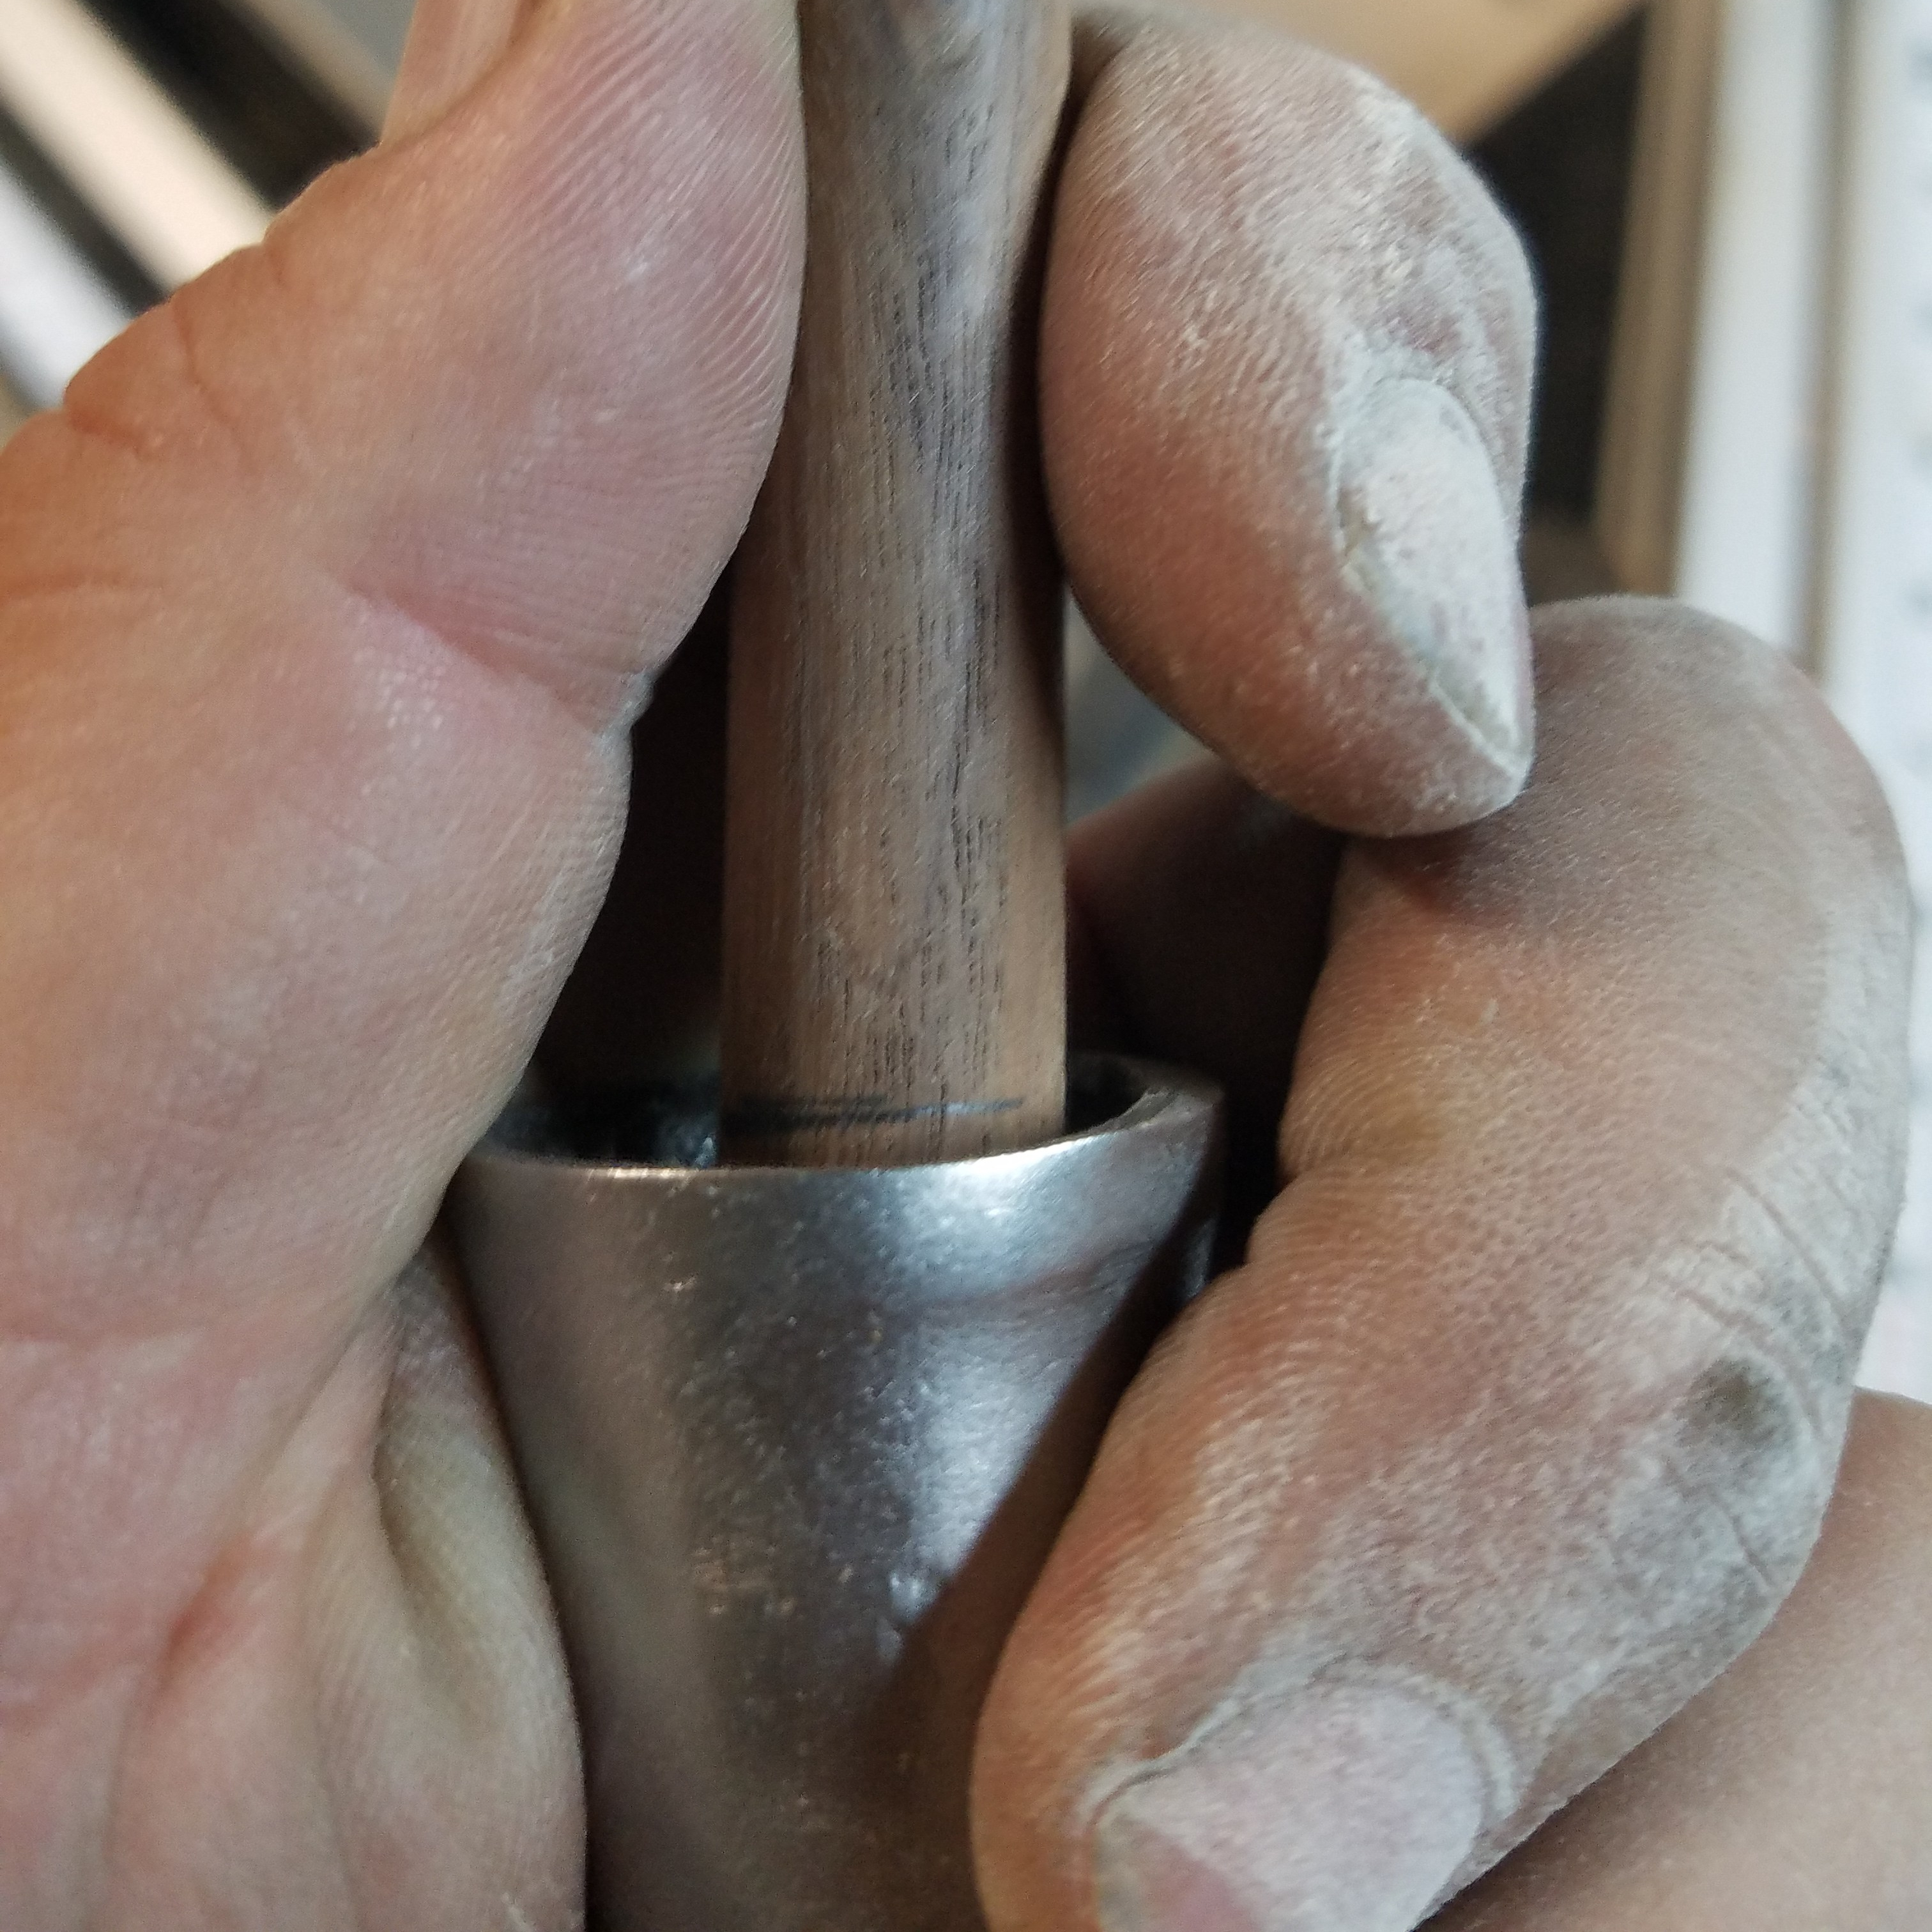
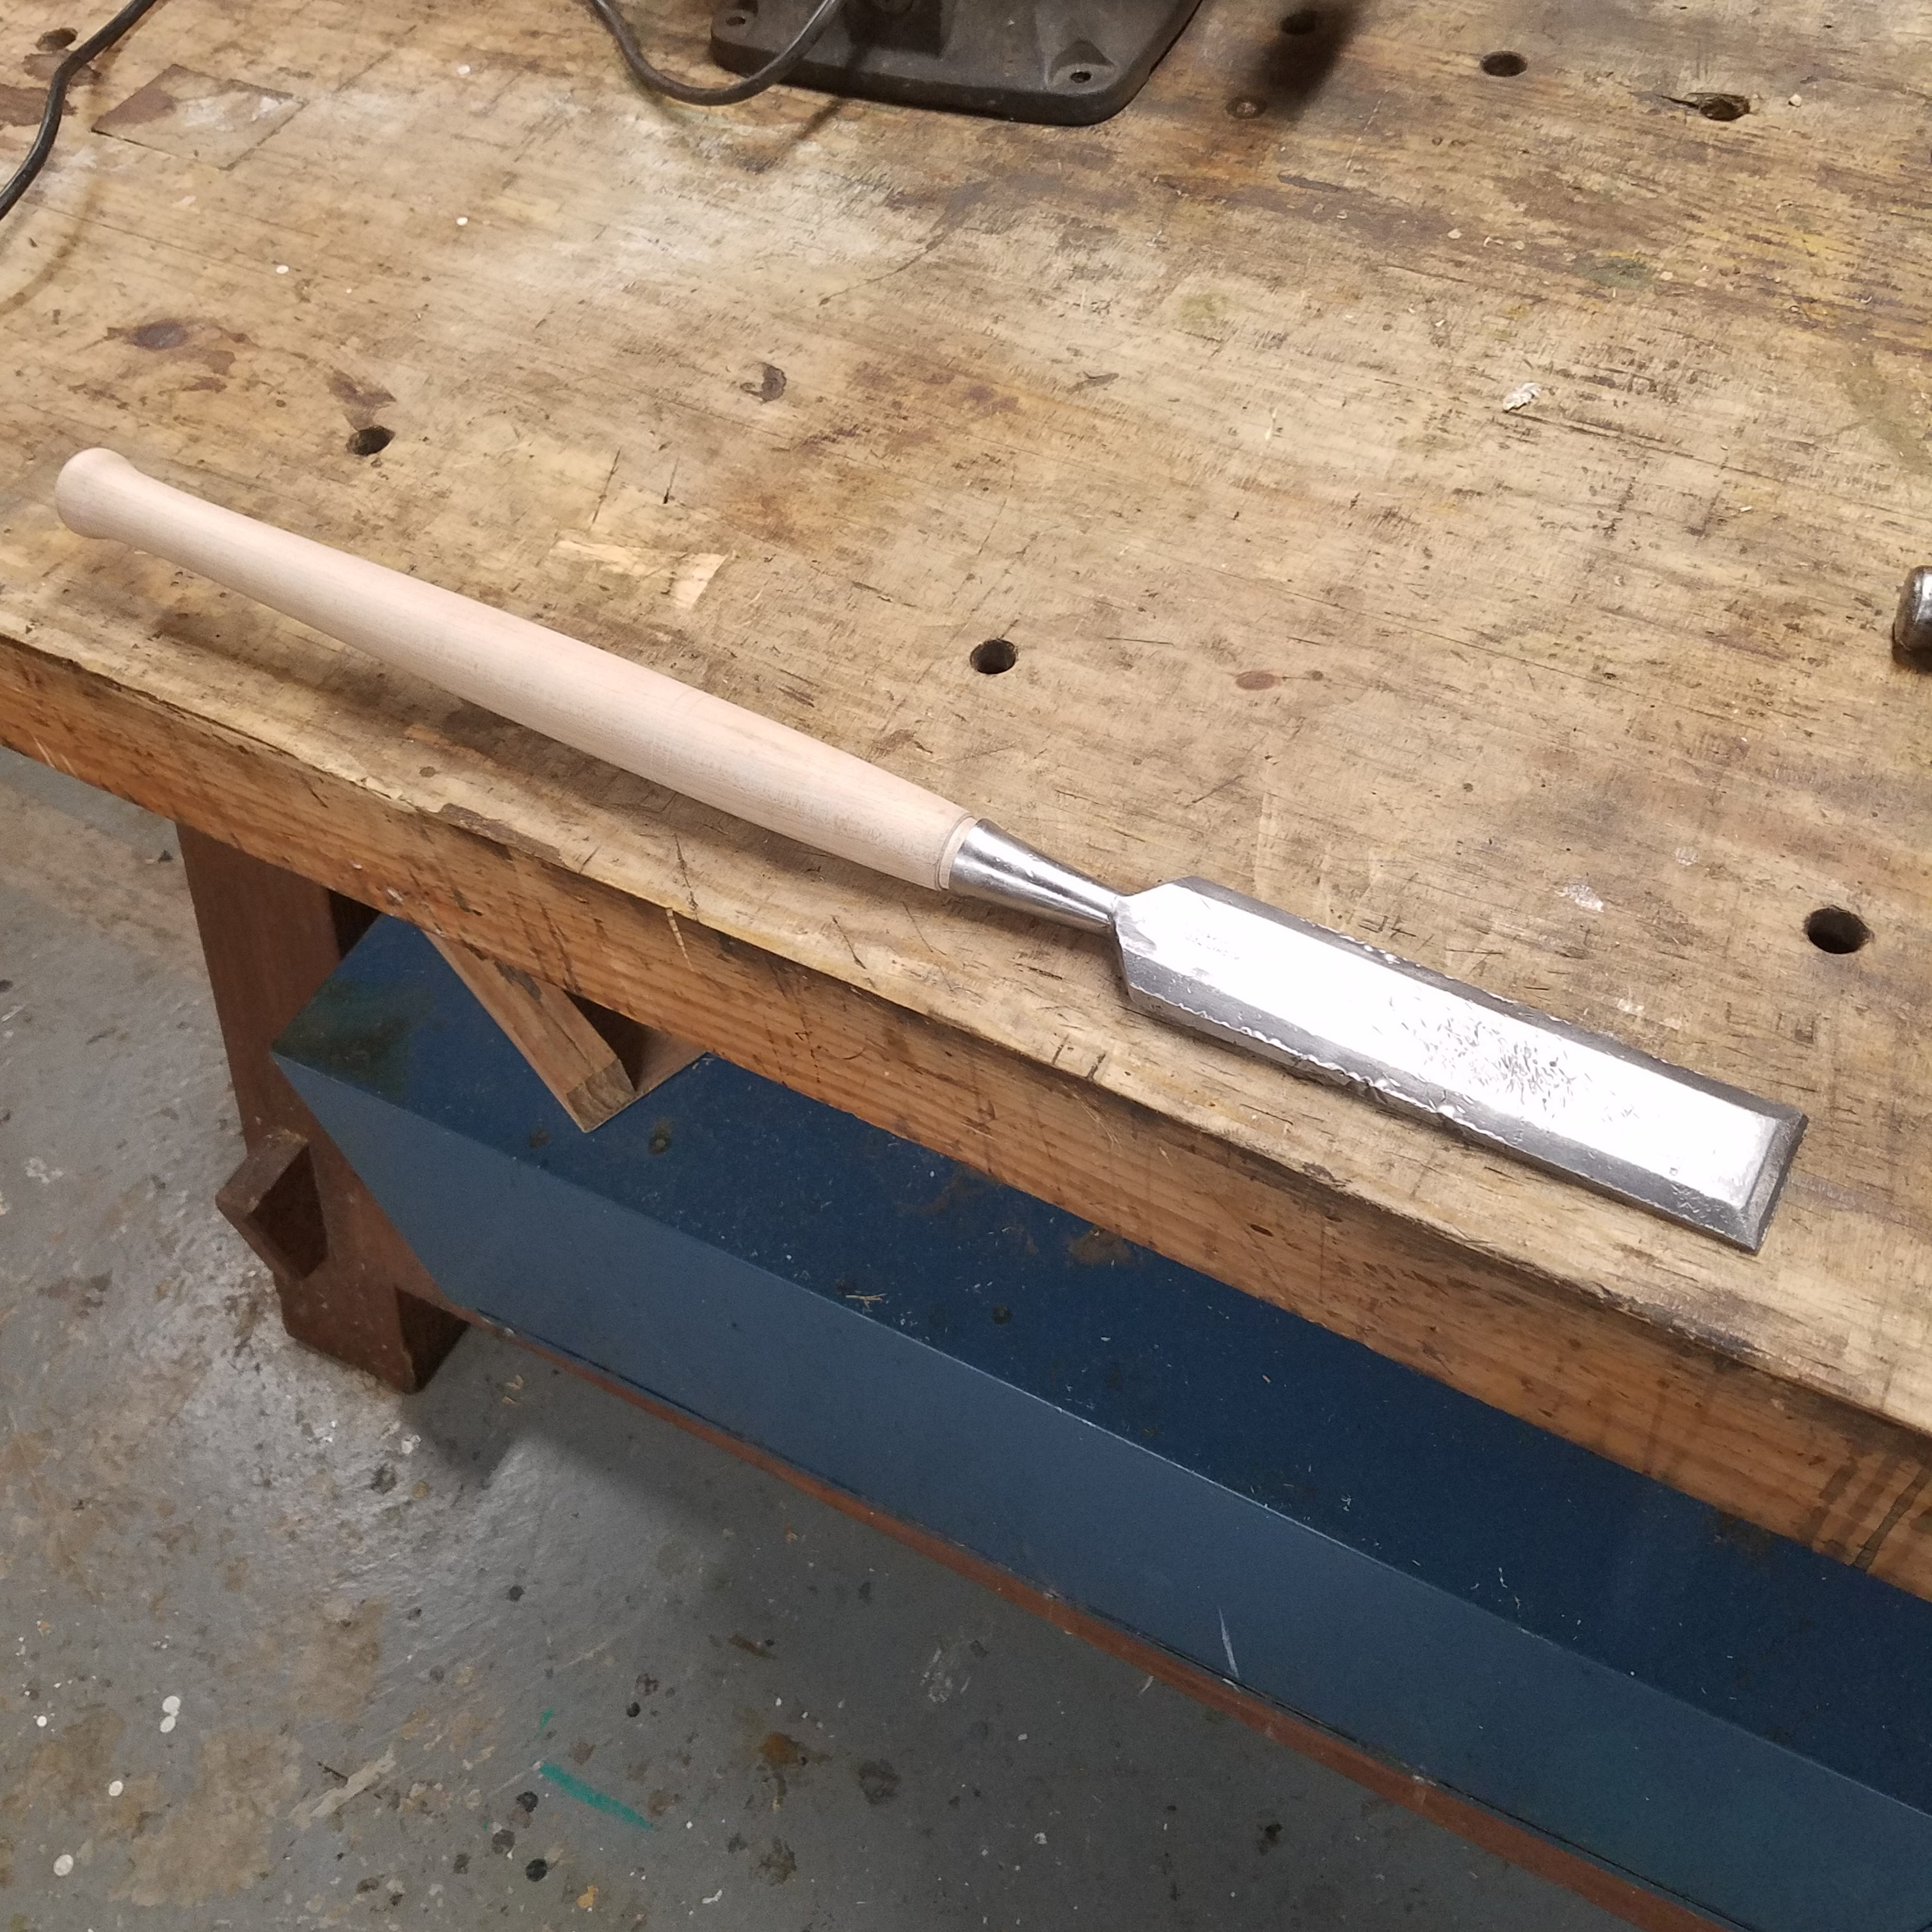
I took the chisel over to the bench grinder and carefully and slowly ground away the sides so as not to burn up the tool steel and have it lose its temper.

After a few minutes of grinding, I was happy with the overall look of the chisel. It wasn’t perfectly symmetrical on both sides, but I didn’t care. I would be the only one to use it, so I don’t have to impress anyone with my craftsmanship.

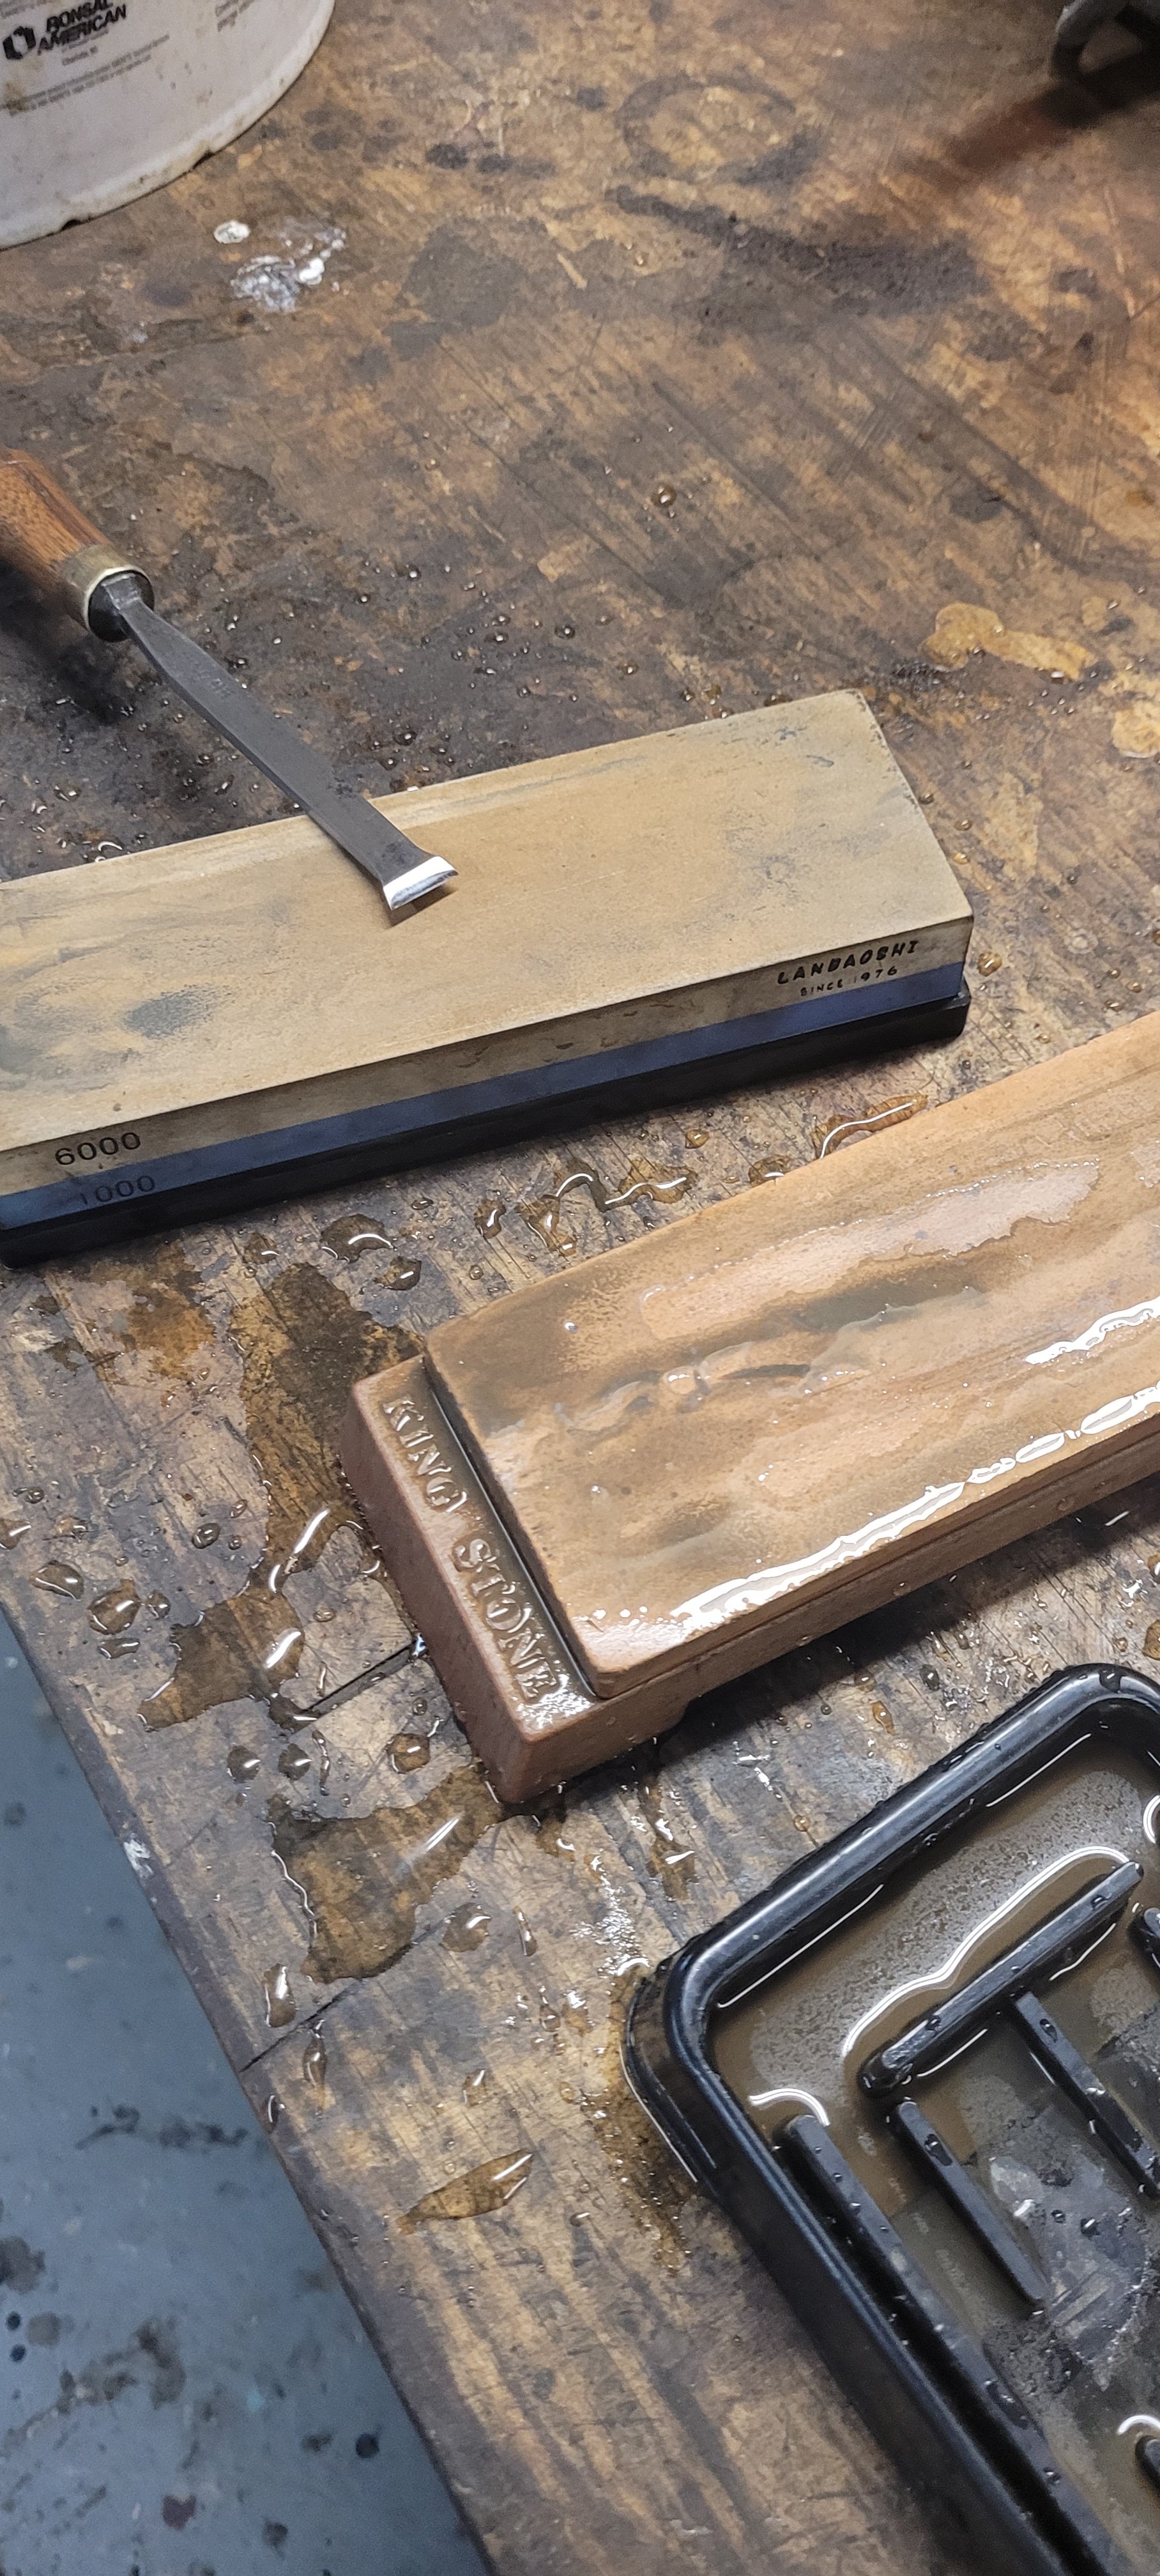
I then went on to sharpen the blade with my water cooled sharpening machine and a few water stones to hone the edge. I then polished the back of the blade to a mirror finish just in case I did get a visitor in my shop and wanted to impress them. Lol
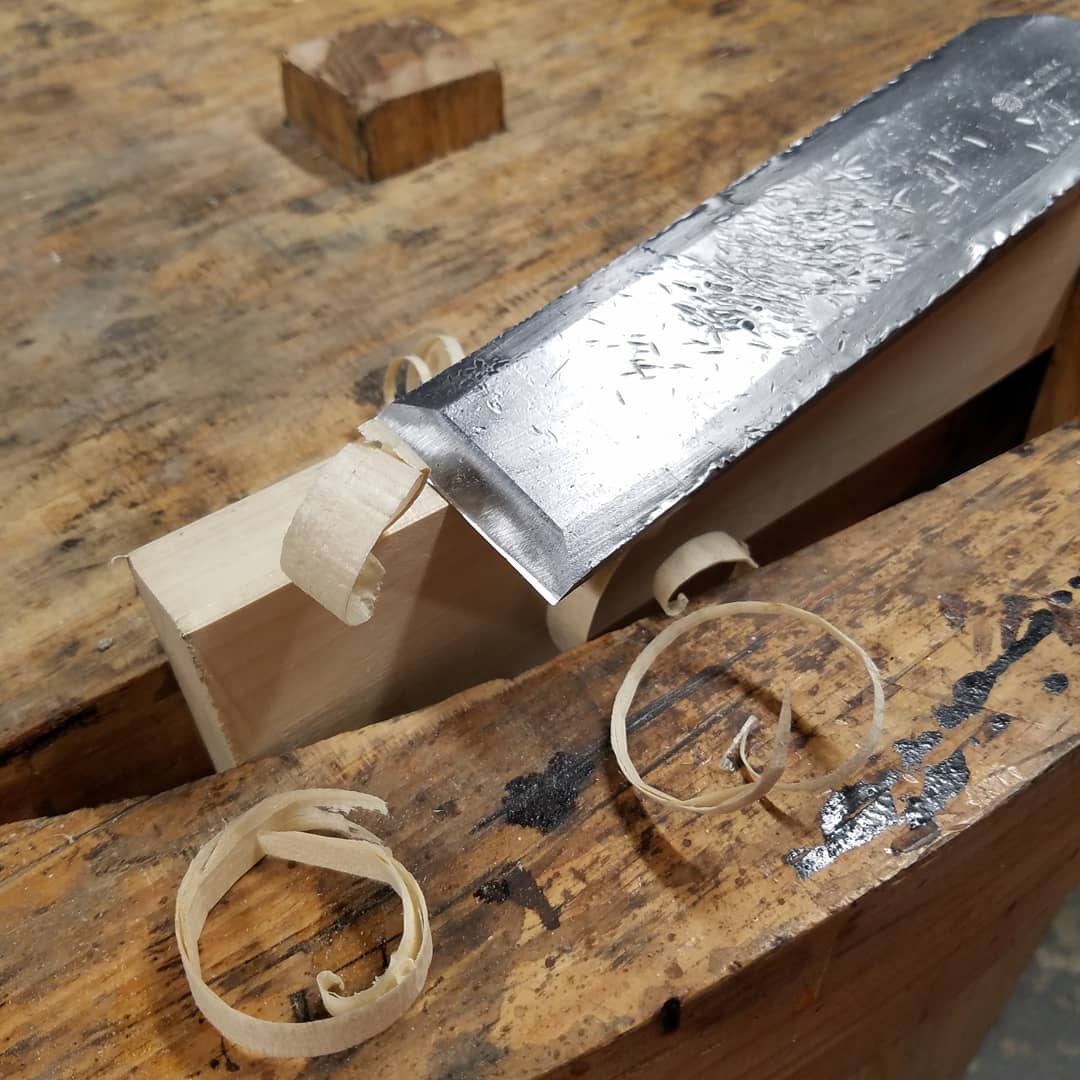
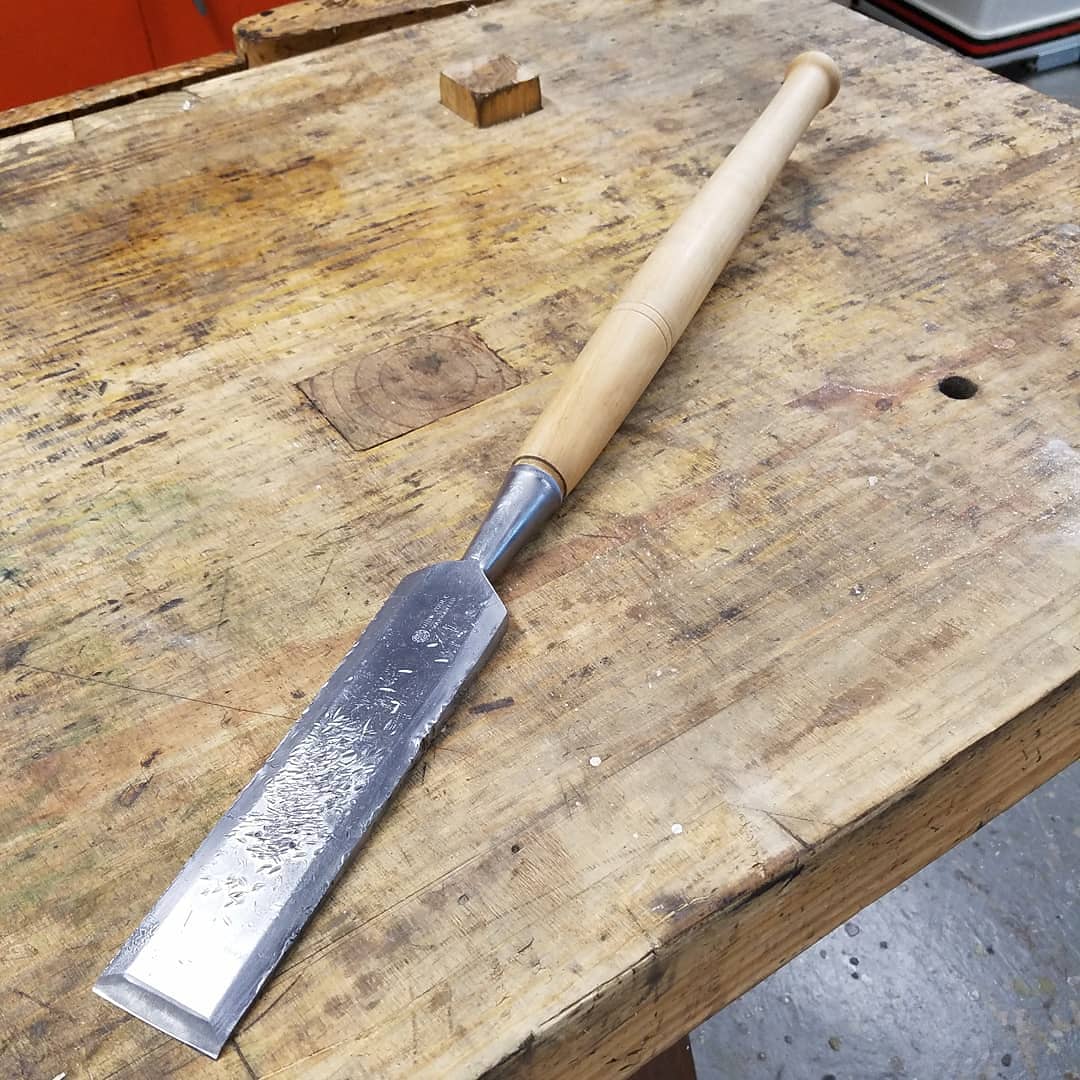
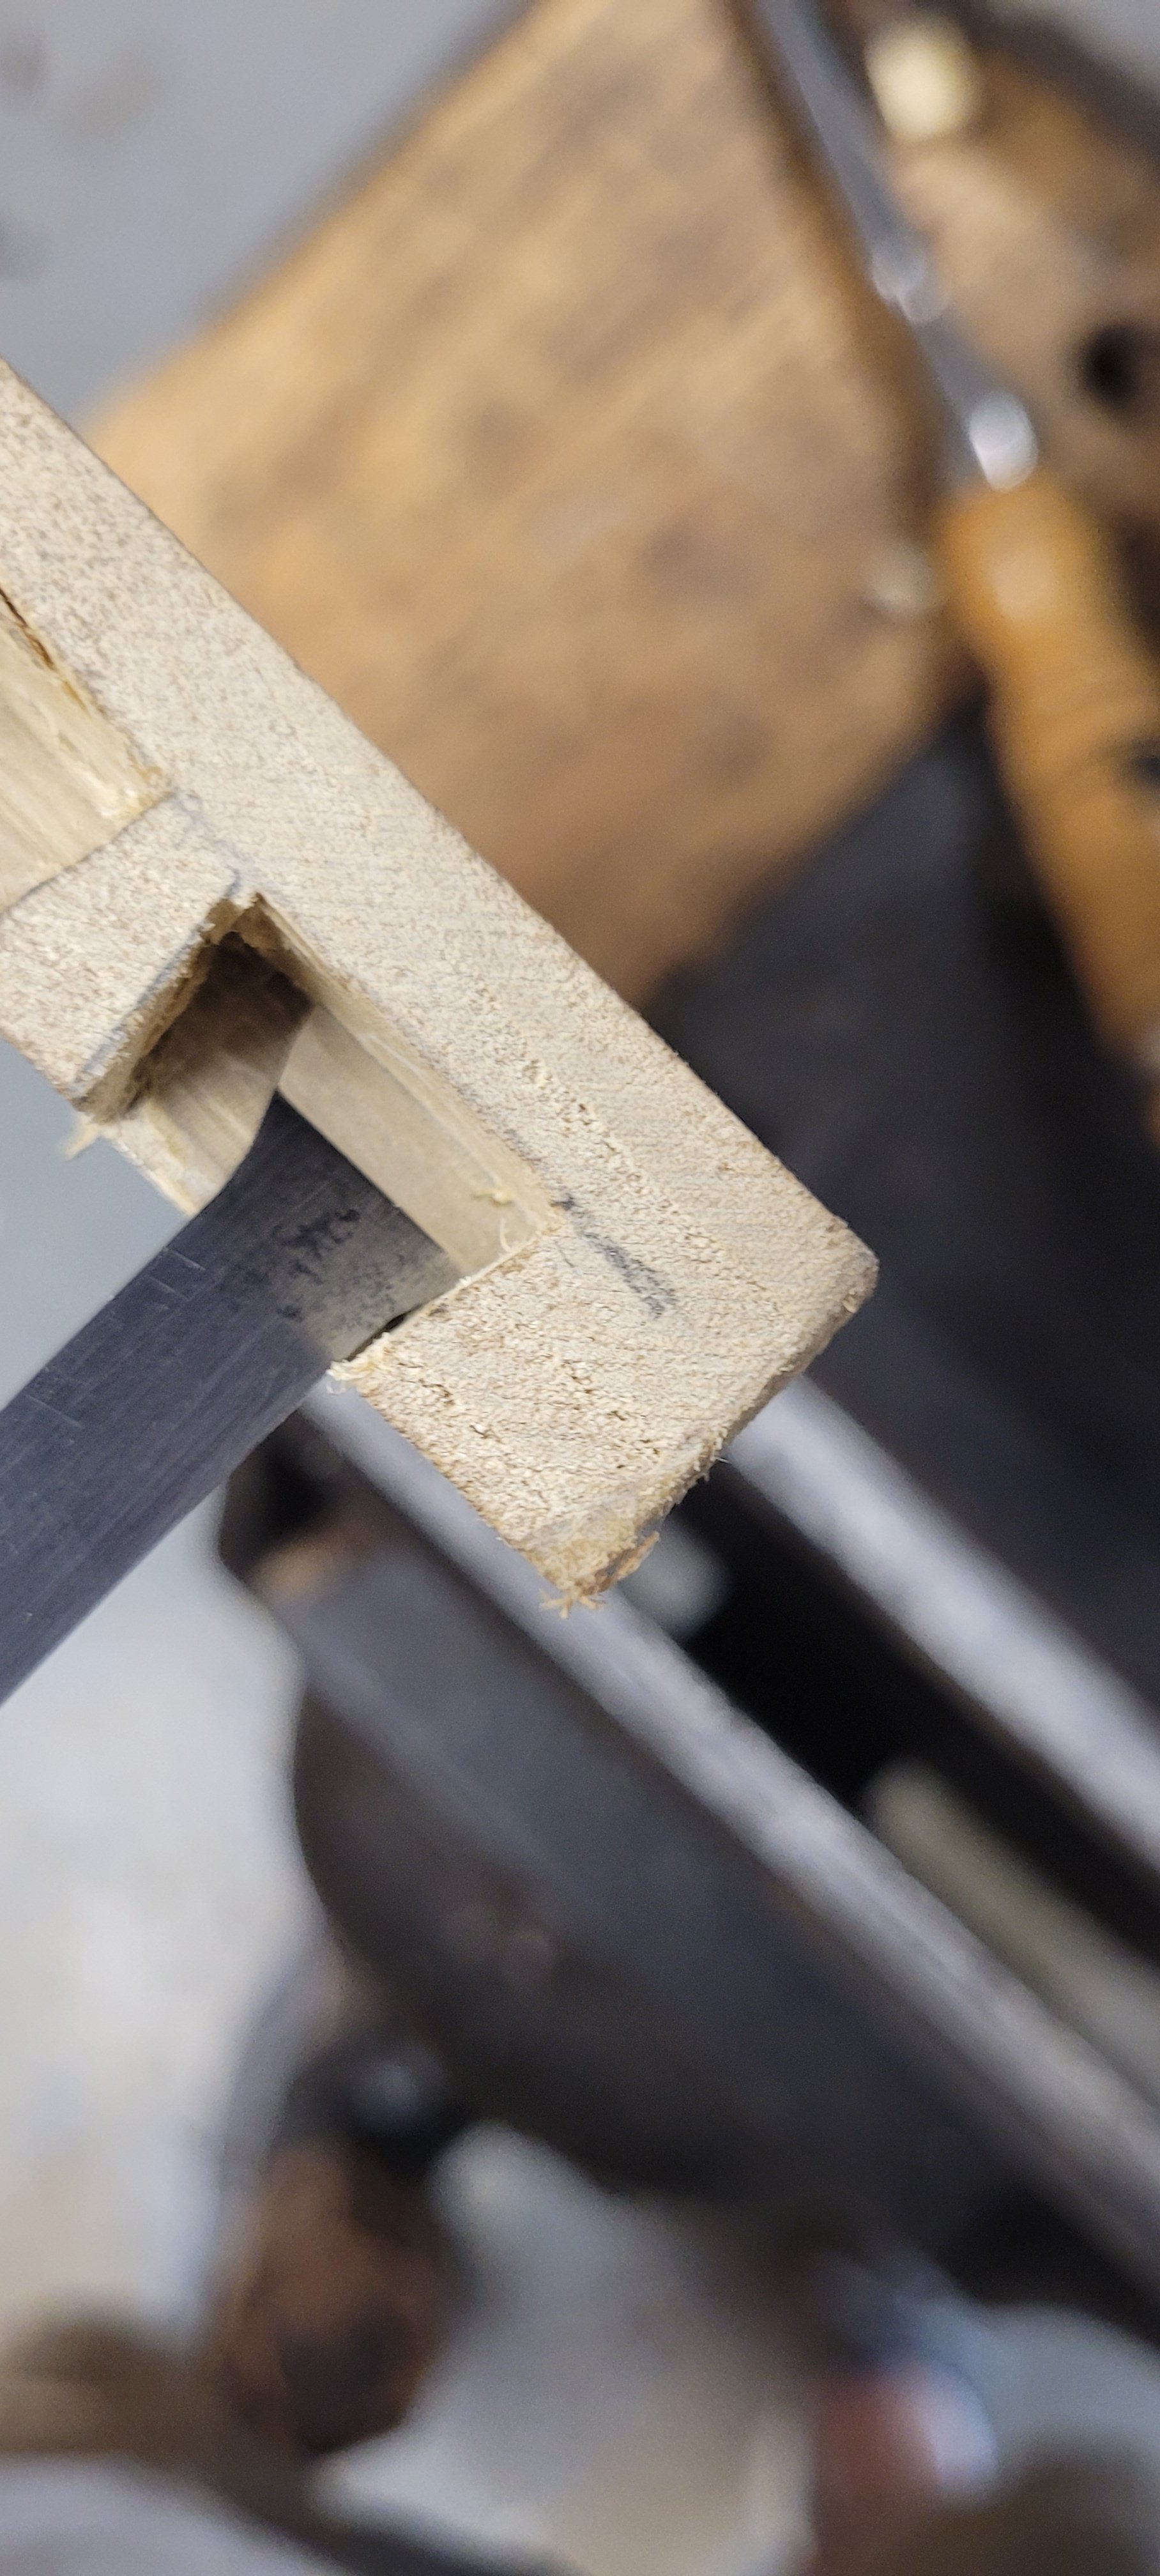
After the chusel was sharpened and honed, it was time to see how the chisel worked. I laid out a few half blind dovetails and sawed and cut out the waste with some bench chisels. Then I tried cleaning up the sides and bottoms with my new dovetail chisel. Sure enough, it cut beautifully! I was able to get into the corners of the pocket with this chisel, something that I had a hard time doing before with my normal bench chisels.

I made a little holder for the chisel and added it to my tool cabinet door. I put off doing this project for years, thinking it would have taken a lot of time to complete, but it ended up only taking about an hour. Figures.

Restoring a Chisel/Slick

Apparently, my last restore was somewhat lame, so I’ll step up my game a little bit and show you how I restored this slick.

I bought this blade on the Worlds Longest Yard Sale a couple of weeks ago. I saw it on the ground and thought it was just a big ass chisel. The guy selling it told me he got it from the Amish. I noticed it was made by the Ohio Tool Co, so I bought it figuring it wouldn’t be too hard to make a new handle for it. When I got home, I examined it next to my other chisels when I realized that I probably had actually bought the blade for a slick.  It was 2 1/2″ wide x 6″ long and much thicker than any of my 2″ firmer chisels. The top of it was mushroomed and the blade was blunt like someone used it as a cold chisel, but I was confident that I could bring it back from the dead.

20180805_152301-1.jpg

I started cleaning the slick the same way I start all my restores, by soaking it in a citric acid bath for a few hours, then cleaning up the metal with a brass wheel on a buffing machine.

20180814_173357.jpg

The pieces of the handle still remained inside the socket of the slick, so I had to drill it out in order for the new handle to fit.

20180814_173748.jpg

In order to get rid of the mushroomed socket, there was no way I was about to heat up the end of the slick and reform the socket, so I decided just to grind the mushrooming away on my bench grinder. I figured I lost about a 1/4″ to 3/8″ of the total length of the socket grinding away the mushrooming.

20180814_175348.jpg

I grabbed a piece of 1 1/2′ maple and turned a handle that was about 16″ long. I looked in an antique tool catalog for a picture of a slick’s handle that I could use as a pattern. It was a very simple design with a knob on the end and a slight curve in the middle. This photo is the wood before I turned it to shape.

20180814_181112.jpg


The trickiest part about making a new handle for a chisel or slick is to measure the angle and thickness of the taper to properly fit in the socket. I took a 1/2″ thick dowel and placed it down the center of the socket and marked the top with a pencil. This gave me the length of the taper.

20180814_183209.jpg

Setting my calipers to  1/2″ to turned the bottom of the handle until the calipers slipped by.

20180814_183640.jpg

Next, I measured the diameter of the hole at the top of the socket and set my calipers to that measurement, then shaved down the wood until the calipers slid pass. This gave me the length and the proper shape of the inside of the socket.

20180817_204138.jpg

20180814_183826.jpg

After I cut the handle from the lathe, I sanded the end of the knob and hit the handle down into the socket with a wooden mallet. This is the trickiest part of the operation as you really don’t get a second shot. Once the wood seats inside the socket, it’s not coming out. The socket was slightly oval inside from all the whacking by the Amish guy, so the handle was tough to fit all the way down, but it still solidly seated in there.

20180814_185124.jpg

Next, I focused on the blade and sharpened it on my grinder and honed the edge with my water stones. I used 1000, 6000, and 12000 grit water stones respectfully.

20180814_185934.jpg

I bet it’s been a long time, if ever, since this blade has been this sharp. You can see how the top of the blade is all chewed up. It’s as if the guy used the top of the blade as a plate for tin punching.

IMG_20180814_201332_996.jpg

I flattened the back with my water stones as well. I didn’t go over board with the flattening. Just enough to give a good cut.

20180814_195432.jpg

Here’s the slick in use. It cuts wood like butter.

IMG_20180814_201333_006.jpg

I added hemp oil to the handle to give it some protection. I’m not sure if I will ever use this slick, but it’s nice to have it in case I do.  The best part is restoring it wasn’t that hard as it only took a couple of hours, but the tool will last me a lifetime.

IMG_20180814_201332_990.jpg

Repairing the Foot of a Walnut Table

A few weeks ago, my wife and I, were visiting thrift shops in Cincinnati when we ran across a round walnut table for $20.00 at Goodwill. There was nothing special about it. It had a dull flat finish and was missing the extension wings that go in the middle. It even had two feet that were broken. Anita asked me if I could remake them and I told her I could, so we took it home.

20180121_113259.jpg

In order to fix the feet, I grabbed some scrap walnut and glued pieces to them to re-sculpt the feet.

20180121_133246.jpg

Once the glue dried, I cut the arch of the foot with my band saw, then I sawed off the sides with a hand saw.

IMG_20180127_142412_194.jpgIMG_20180127_142412_192-1.jpg20180127_122245.jpg

Next, I stuck the leg on the lathe and turned the pad of the foot.

IMG_20180127_142412_201.jpg

I then brought the foot over to my workbench and carved the rest of the foot by hand using chisels and rasps.

IMG_20180127_142412_203.jpg

After shaping the foot was complete, I started to sand the leg with 80 grit sand paper working down to 220 grit.

IMG_20180127_142412_206-1.jpg

With the foot finished, I was happy with the way it turned out as it matched the other two. I then repeated the same steps for the other broken foot.

IMG_20180127_142412_208-2.jpg

Noticing the top was solid walnut, I decided to sand off the dull stained finish. You can see how bland the table was when we bought it.

20180128_111309.jpg

A few minutes of sanding, the table was really starting to shine again.

20180128_121515.jpg

After applying three coats of hemp oil, you can see how the table has been brought back to life having much more character between the sap and heart wood of the walnut. Looks much nicer than the boring spray toner stain that was on it before. This piece will be a nice addition in my wife’s booth as a display table.

IMG_20180130_172822_954.jpg