
Apparently, my last restore was somewhat lame, so I’ll step up my game a little bit and show you how I restored this slick.
I bought this blade on the Worlds Longest Yard Sale a couple of weeks ago. I saw it on the ground and thought it was just a big ass chisel. The guy selling it told me he got it from the Amish. I noticed it was made by the Ohio Tool Co, so I bought it figuring it wouldn’t be too hard to make a new handle for it. When I got home, I examined it next to my other chisels when I realized that I probably had actually bought the blade for a slick. It was 2 1/2″ wide x 6″ long and much thicker than any of my 2″ firmer chisels. The top of it was mushroomed and the blade was blunt like someone used it as a cold chisel, but I was confident that I could bring it back from the dead.

I started cleaning the slick the same way I start all my restores, by soaking it in a citric acid bath for a few hours, then cleaning up the metal with a brass wheel on a buffing machine.

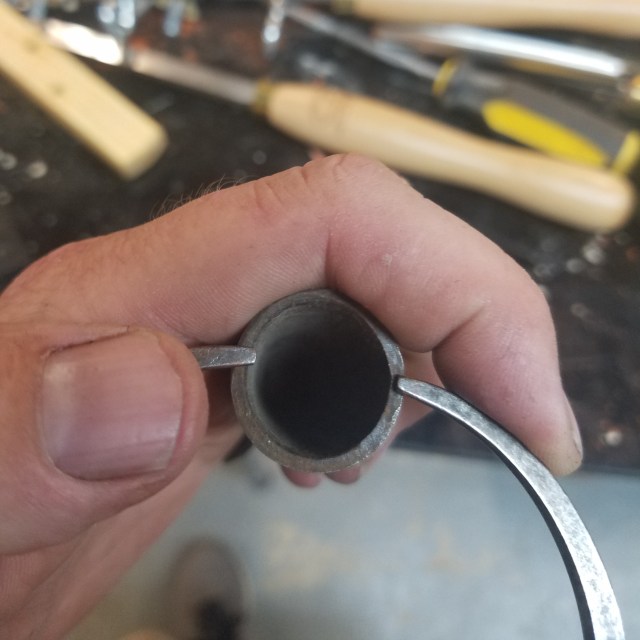
The pieces of the handle still remained inside the socket of the slick, so I had to drill it out in order for the new handle to fit.

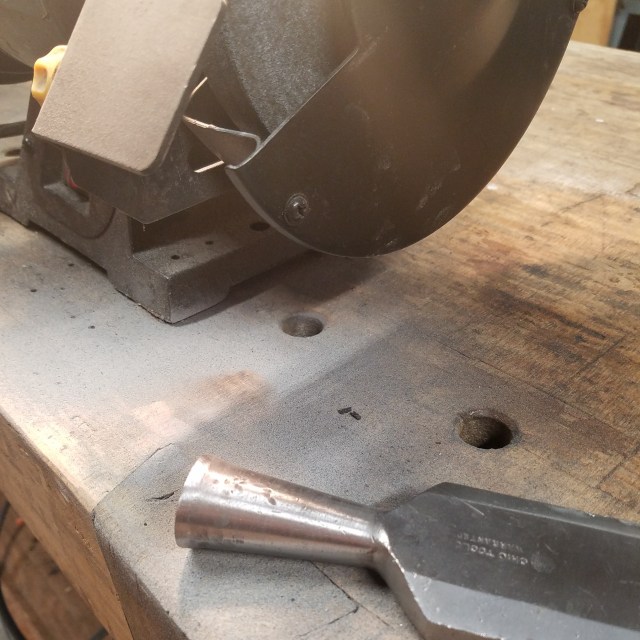
In order to get rid of the mushroomed socket, there was no way I was about to heat up the end of the slick and reform the socket, so I decided just to grind the mushrooming away on my bench grinder. I figured I lost about a 1/4″ to 3/8″ of the total length of the socket grinding away the mushrooming.
I grabbed a piece of 1 1/2′ maple and turned a handle that was about 16″ long. I looked in an antique tool catalog for a picture of a slick’s handle that I could use as a pattern. It was a very simple design with a knob on the end and a slight curve in the middle. This photo is the wood before I turned it to shape.

The trickiest part about making a new handle for a chisel or slick is to measure the angle and thickness of the taper to properly fit in the socket. I took a 1/2″ thick dowel and placed it down the center of the socket and marked the top with a pencil. This gave me the length of the taper.

Setting my calipers to 1/2″ to turned the bottom of the handle until the calipers slipped by.

Next, I measured the diameter of the hole at the top of the socket and set my calipers to that measurement, then shaved down the wood until the calipers slid pass. This gave me the length and the proper shape of the inside of the socket.

After I cut the handle from the lathe, I sanded the end of the knob and hit the handle down into the socket with a wooden mallet. This is the trickiest part of the operation as you really don’t get a second shot. Once the wood seats inside the socket, it’s not coming out. The socket was slightly oval inside from all the whacking by the Amish guy, so the handle was tough to fit all the way down, but it still solidly seated in there.

Next, I focused on the blade and sharpened it on my grinder and honed the edge with my water stones. I used 1000, 6000, and 12000 grit water stones respectfully.

I bet it’s been a long time, if ever, since this blade has been this sharp. You can see how the top of the blade is all chewed up. It’s as if the guy used the top of the blade as a plate for tin punching.

I flattened the back with my water stones as well. I didn’t go over board with the flattening. Just enough to give a good cut.

Here’s the slick in use. It cuts wood like butter.

I added hemp oil to the handle to give it some protection. I’m not sure if I will ever use this slick, but it’s nice to have it in case I do. The best part is restoring it wasn’t that hard as it only took a couple of hours, but the tool will last me a lifetime.


Can’t imagine using a slick with no way to control depth of cut as shown in the finished picture. Riding the bevel allows control of the depth of cut.
The restoration is magnificent.
LikeLiked by 1 person
Yeah, you’re right. Same way as a draw knife, bevel down. Thanks
LikeLike