I bought a Disston D8 Thumb Hole Rip Saw and wanted to restore it. The saw was in pretty good condition when I bought it. The only issue it had was that the back of the handle was broken with a chip missing from it. It’s a pretty common issue as that is where your thumb and index finger ride when sawing, so it’s under a lot of friction.
I wanted to repair it, so I carefully carved out an area to glue a new piece of apple wood in its place.
After the glue dried, I shaped and sanded the wood to match the rest of the handle. It came out well , it just needed a little bit of wood putty to close up the gaps between the new wood and handle.
After the putty dried, I sanded the whole handle and applied a few coats of shellac to it. The handle looked nice, but the putty stood out like a sore thumb.
This is where I put my artistic hat on. Playing with a paint kit, I mixed up a few colors of red, brown, and yellow, mixing them around to get the best matching shade I could create. It wasn’t about creating the perfect color but laying three different colors down so that it would blend with the rest of the handle.
After a few minutes of painting, I was happy with how it turned out, so I let it dry.
The saw came out nice, and the broken end of the handle won’t dig into my skin when I’m using it. Now that is all left to do is to sharpen the blade and put it to use.
A couple of weeks ago, my wife and I were antique hunting in Dayton, Ohio, where I ran into this old level in the back of a barn. I figured it was a Stanley Rule and Level Co level, but the amount of brass in the front intrigued me as it wasn’t the usual design I see all the time.
I really don’t restore levels too often, but I decided to ask how much it was as I thought it would be a fun little restoration project. After the lady told me $10.00, I took it home.
Restoring it was pretty straightforward. I applied some citrus based paint stripper on it to remove the old grime, then washed it off with a soapy dish liquid. Then I applied elbow grease to buff out brass with steel wool and liquid brass cleaner. Then, coated the level with a few coats of shellac.
You can see on the side that it’s faintly stamped 11, which I figured makes it a Stanley No 11. Stanley made No 11’s in mahagony and rosewood. When I was cleaning the wood, I got excited thinking the level was made from rosewood, but I’m pretty sure it’s mahagony. The fact that the brass is only the corners and not completely covering the end makes it an older level.
You can see the Stanley Rule & Level Co. so it’s possible it’s before they acquired their plane line.
I’m not sure how to date the level as I am unaware of a type study on Stanley Levels, but if I had to take a guess, I’d say it’s around 1860-80’s in age. And it’s in pretty nice shape for being as old as it is.
Does anyone know how old it is? Drop a comment and let me know.
I’ve owned this Ohio Tool Co Moving Fillister Plane for a while now. It was missing its fence and screw when I bought it, so I decided it was time to make a new one for it.
I started by cutting a blank from some brass stock I bought on eBay. The blank I cut out was 3/8″ x 2″ x 3″.
Luckily, I have another fence off another moving fillister plane I could use as a template. While the dimensions weren’t the same, I custom drew what the fence should look like on the brass stock.
After I cut out the shape on the band saw, I punched a spot where my 3/8″ drill bit will drill a hole for the center on the fence. Then I kept moving down the fence drilling holes in the center.
I needed to remove some of the back of the fence, so I went back to the band saw to do the job.
Then, I cut off some of the face of the fence to thin it up and shaped the bottom of it with my files.
In the end, I was happy with my results. Not too shabby, as this was the first thing I have ever fabricated out of brass.
Now I needed to make the screw to hold it in place. Again, I had a screw from another plane that I could use to find something similar at the hardware store. I ended up buying a 5/16″ x 1″ screw from Home Depot, but I had to grind it round on my belt sander.
I then filed the top to a dome shape and used a hacksaw to file a slot in the top.
I polished the screw up, cleaned the body of the plane, and put everything together. The plane came out really nice and performs well after I sharpened the blade.
Another plane has been saved from the garbage bin of life and is back to use for the next hundred years.
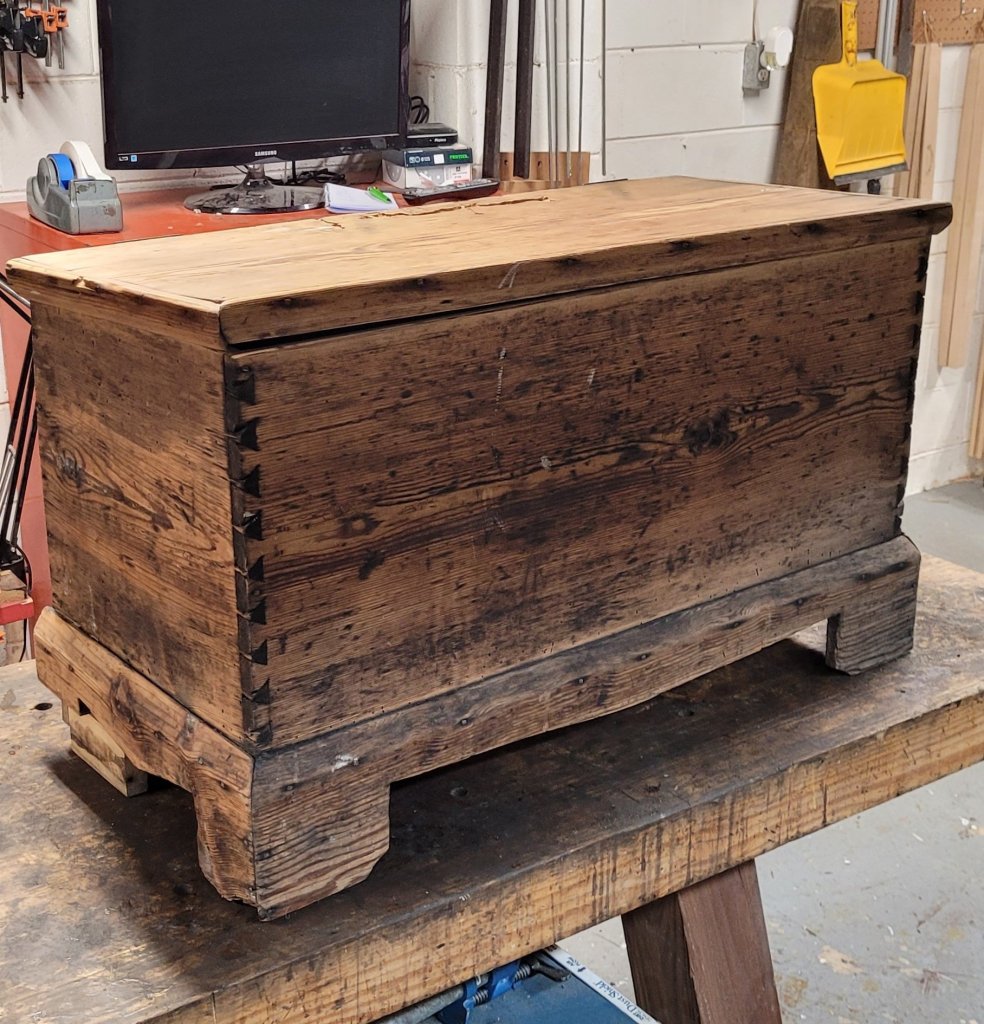
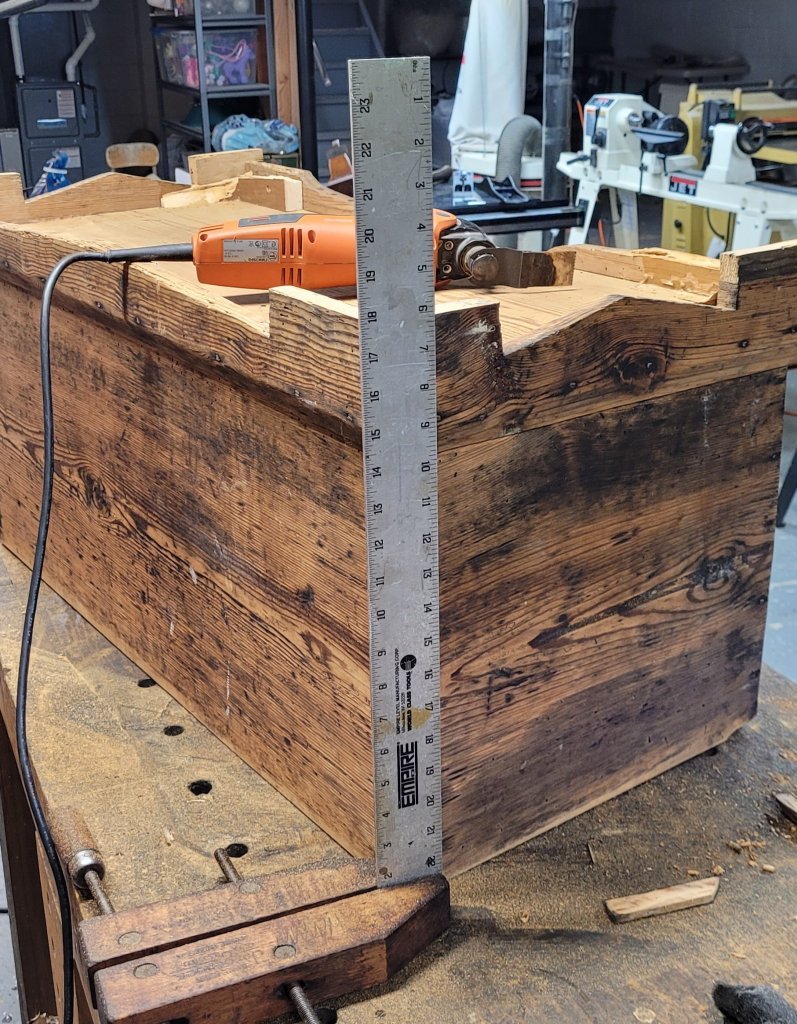
My wife came home from Florida with this old chest she bought off Facebook Marketplace for $20.00. She liked it because it was made from pine and had an old-world look to it. She asked me if I could repair it so it could be used as a coffee table.
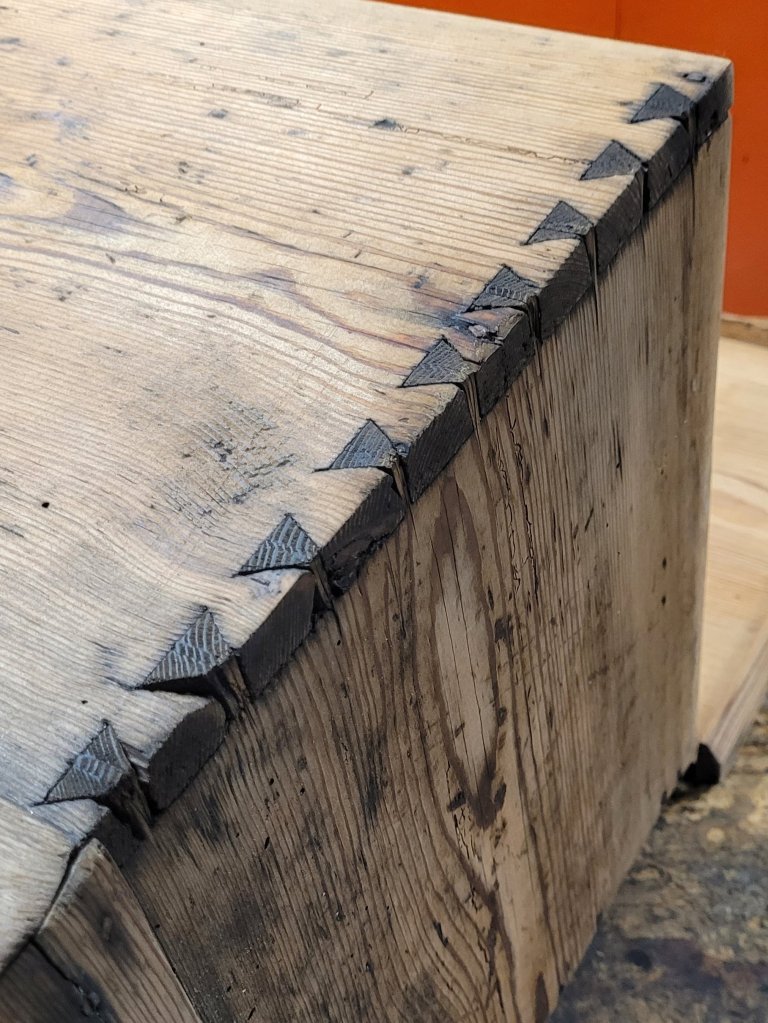
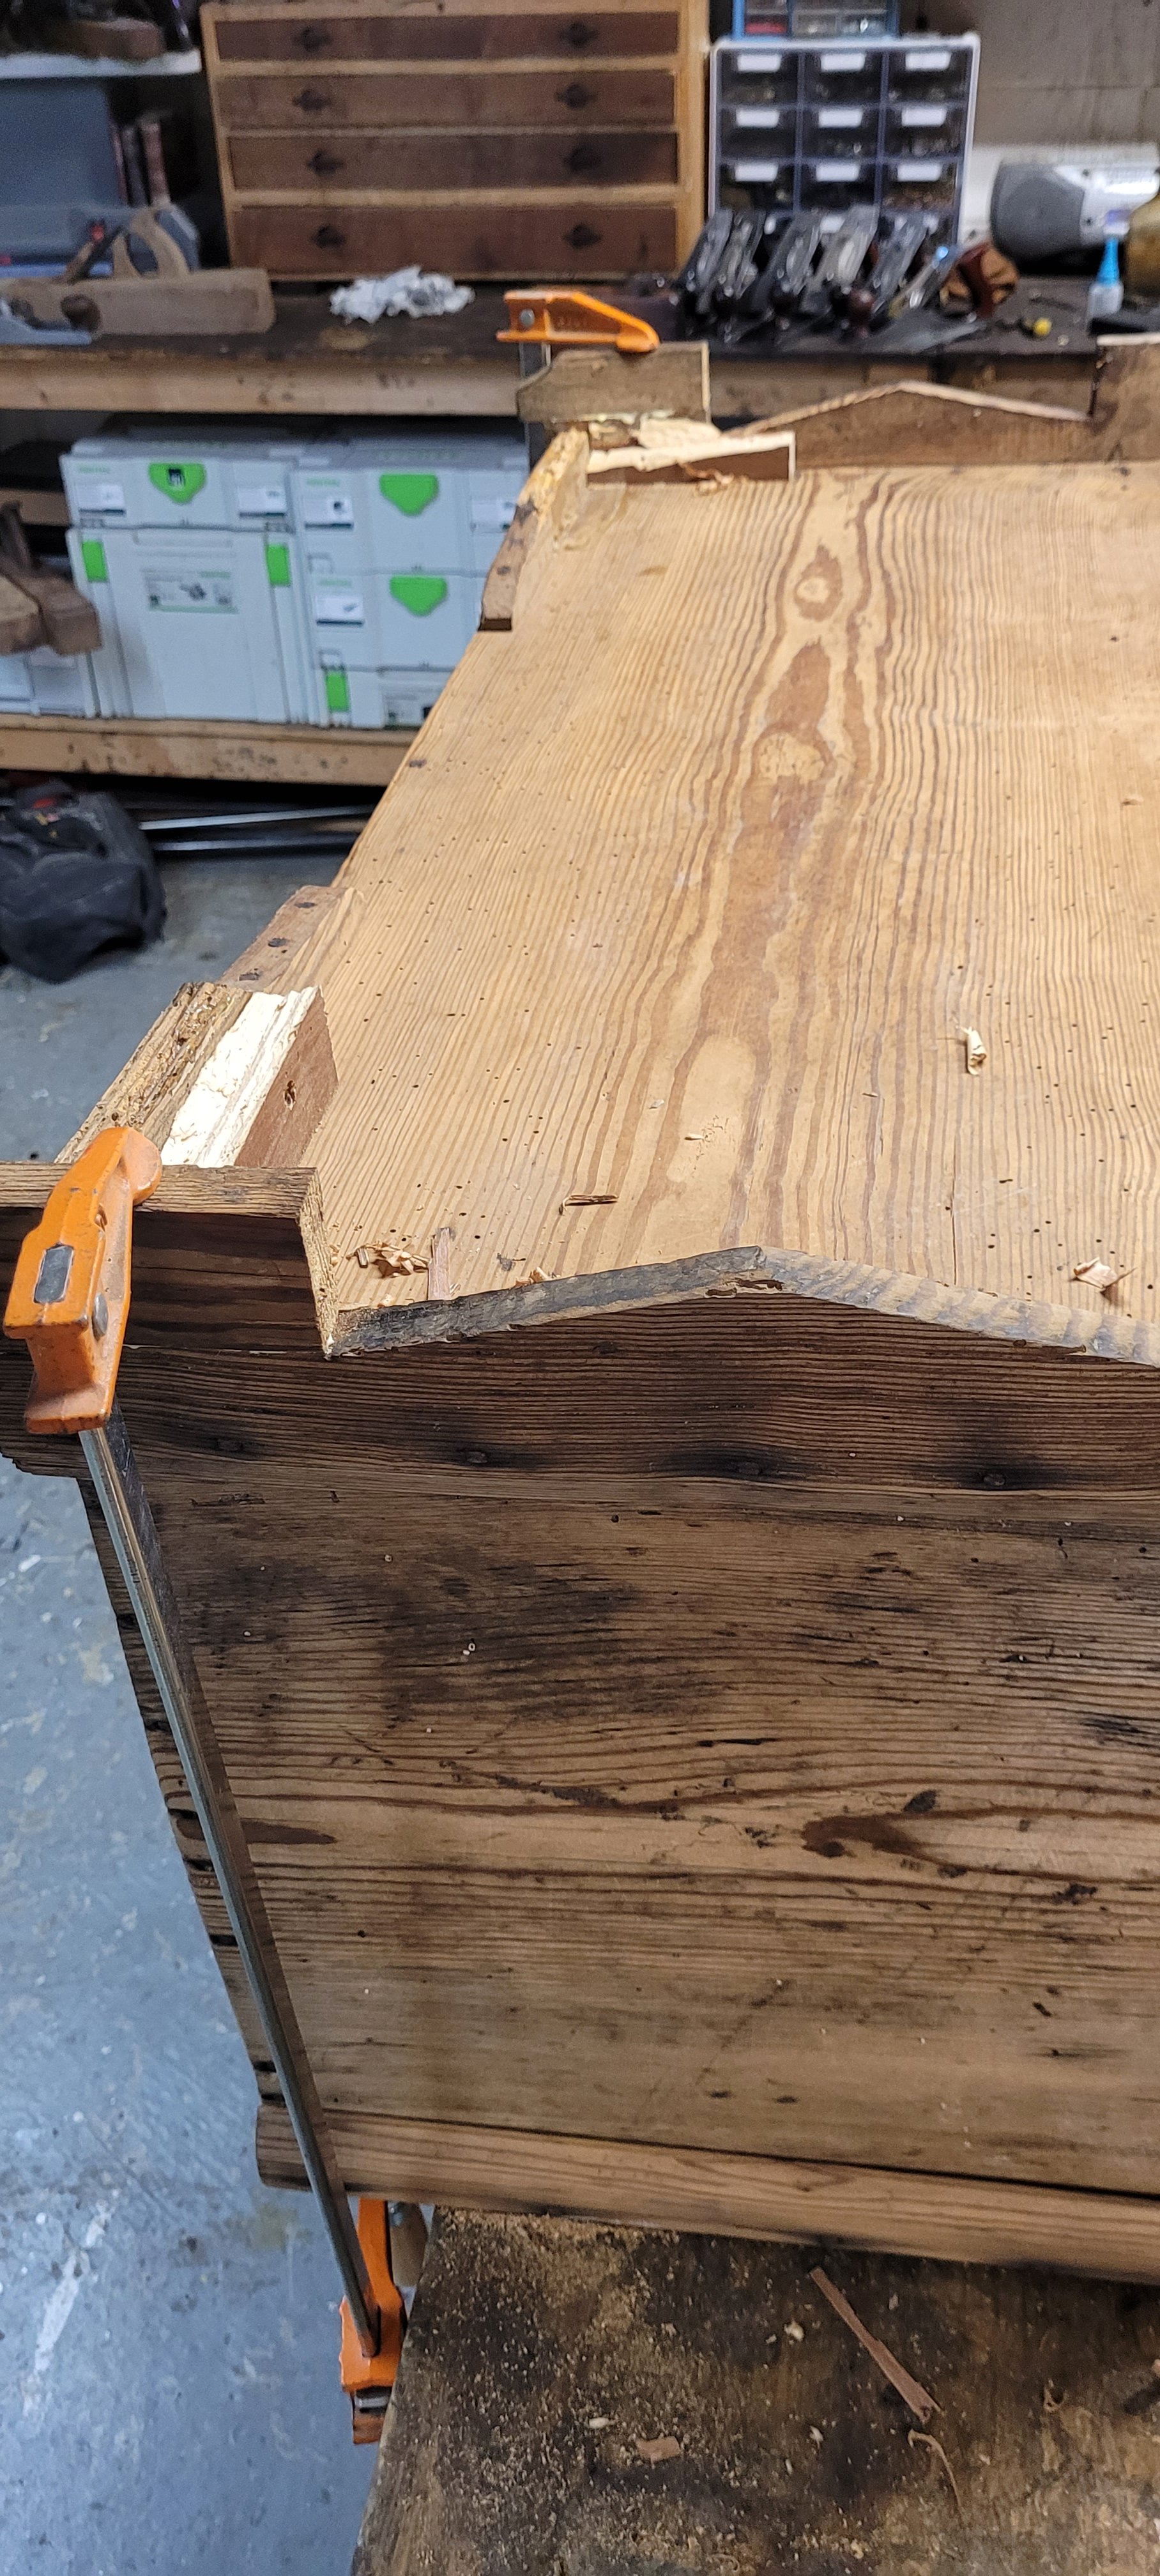
The chest had nice handcut dovetail joints on the front with really steep angles. So steep, they look like equilateral triangles. However, the back of the chest is just fastened together with a rabbet and some cut nails. I guess the craftsman who built the chest was tired of cutting so many dovetails that he opted for something easier for the back.
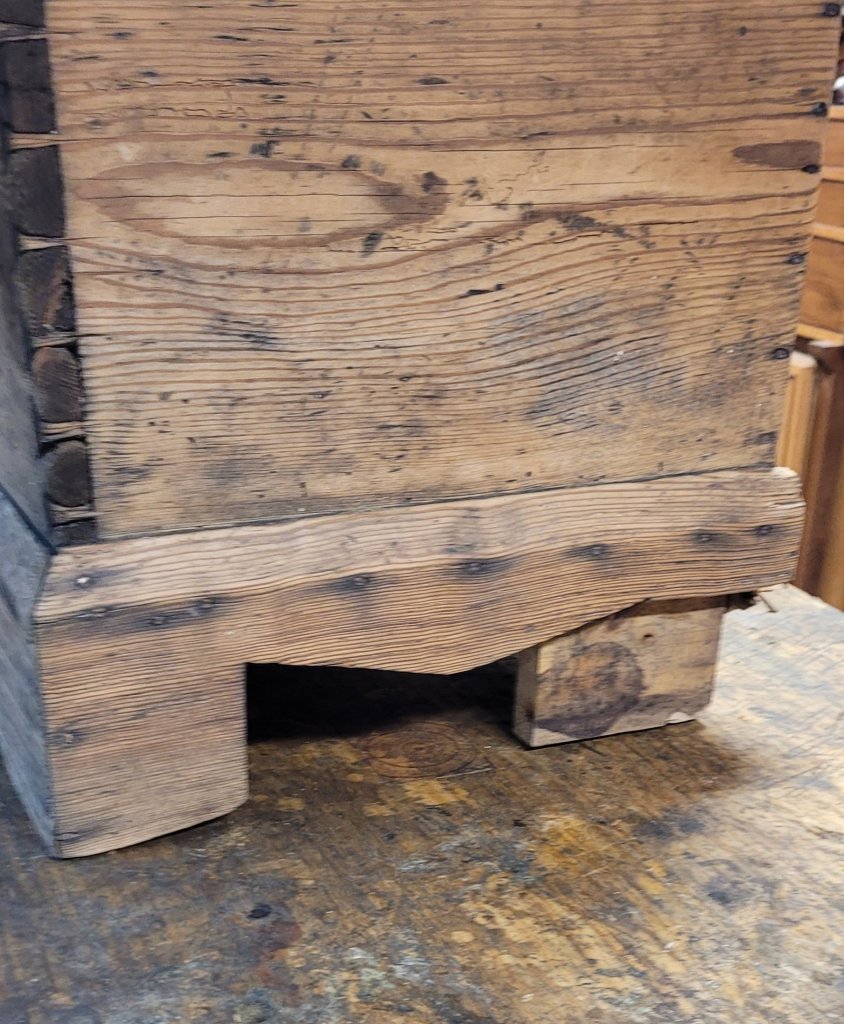
The bottom of the chest had a horrible repair to the back. Because the base was so tall, the wood failed and broke away. Somebody came in and simply installed L wood brackets to the back and screwed them in place with drywall screws.
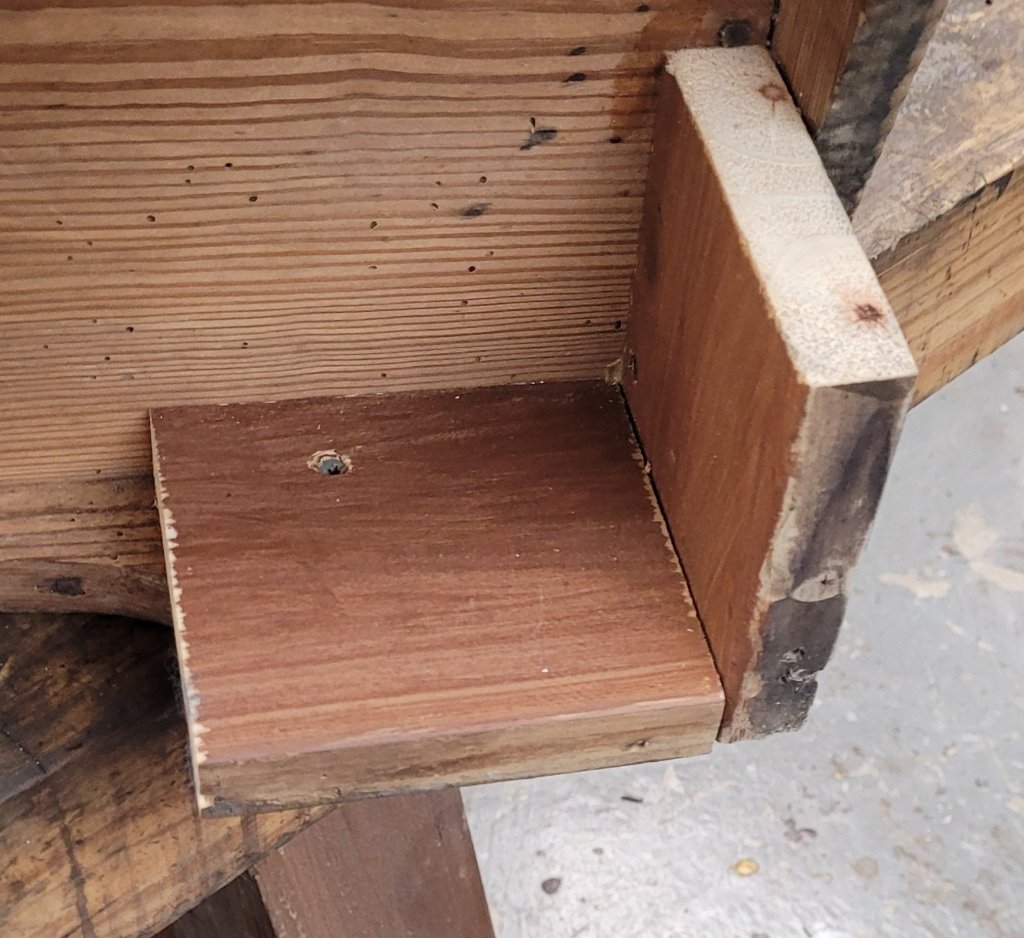
Flipping the chest on its top, I broke off the terrible repair and cut the front feet of the chest to 18″ tall. I then took the off cuts and glued them to back of the feet that were missing.
Once everything was glued, I flipped the chest back over on its feet and checked how it looked. The narrower base was more pleasing to the eye and less prone to breaking since the feet were no longer so tall.
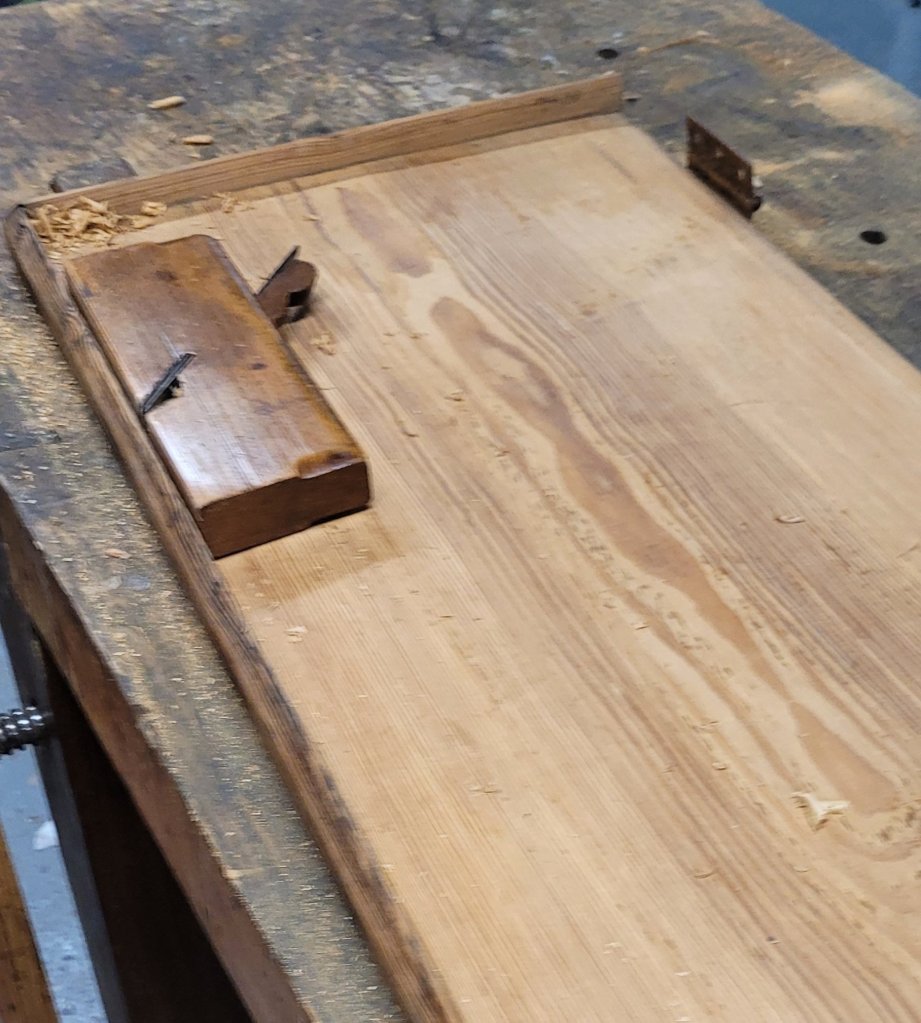
I then worked on the lid shaving away the inside of the front trim so that it would close around the chest. After a few minutes of shaving, the lid closed fine when I reinstalled it.
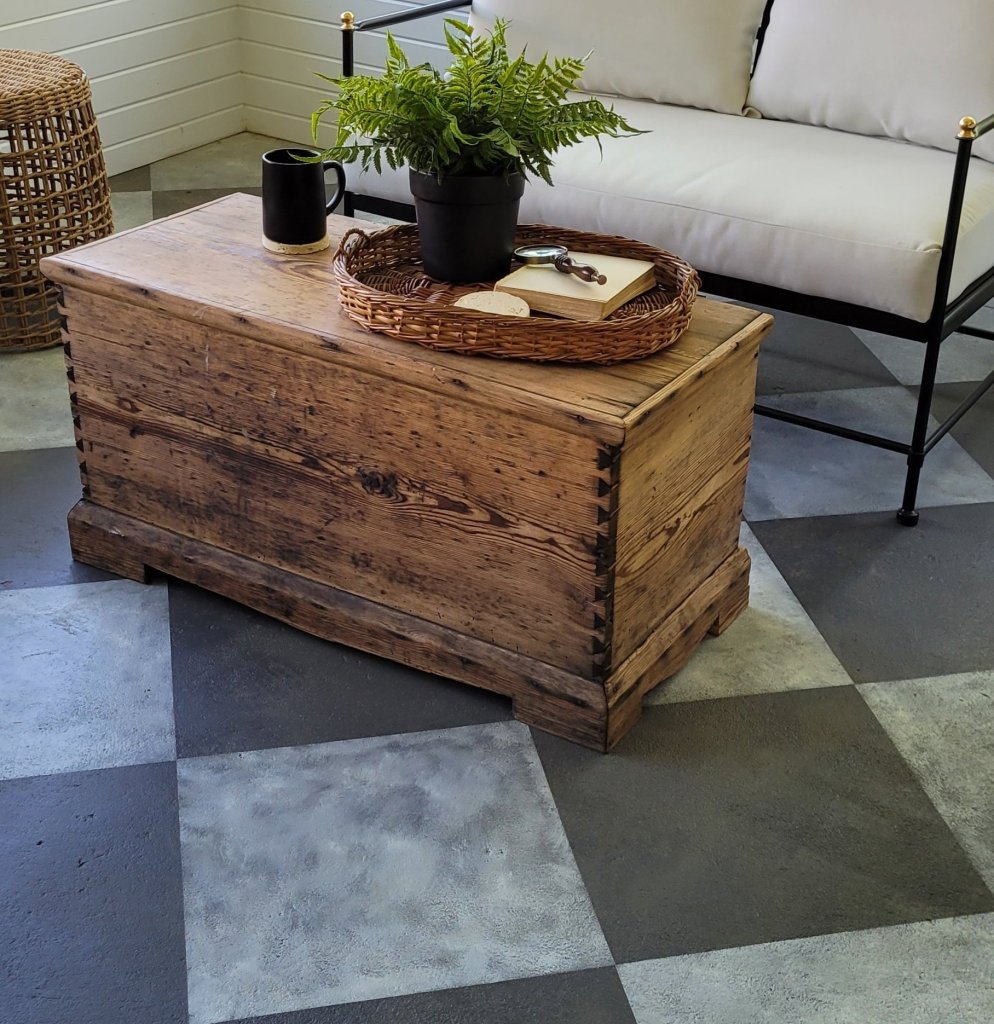
The chest now serves us well as a coffee table in our screened in porch. Hell of a coffee table for $20.00, and you can barely notice it has been repaired. Anita is ordering old looking chest handles for the sides as we both feel it would look nicer with them.
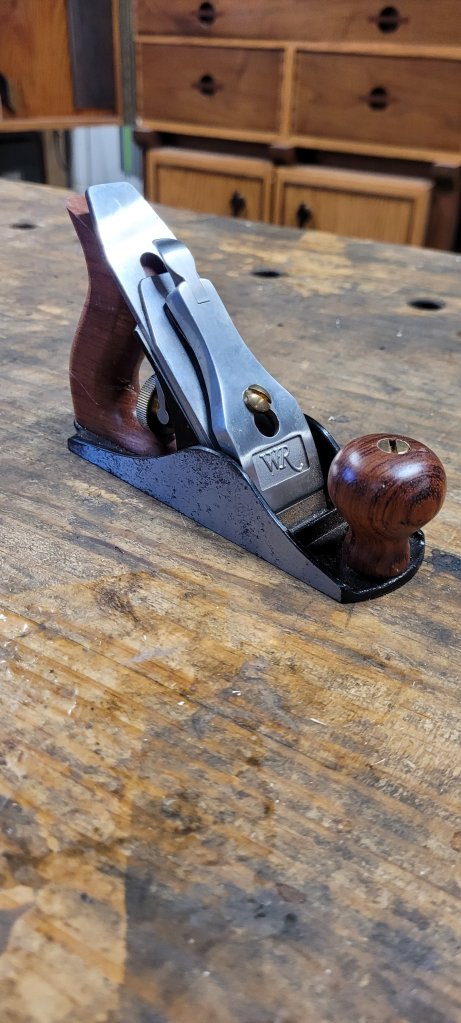
A few months ago, I bought this Woodriver No 1 Plane on eBay after missing owning my Stanley No 1 Plane that I bought at an antique show a couple of years earlier. I had to sell my Stanley No 1 because at the time, I needed the cash, but I still enjoyed using it for the short time I owned it.
I wanted to buy a Lie Nielsen No 1 plane, but those have shot up in price over the past couple of years as well. When I wrote my article about “Using a Stanley No 1 Plane,” you could buy a Lie Nielsen for about $200. Now, their prices fetch anywhere between $500-800 because apparently Lie Nielsen is no longer making them, and collectors are grabbing them up.
Woodriver No 1 planes are technically still available, but they have been on backorder from Woodcraft for over a year, which is why I had to hunt eBay for this little guy. Whether or not they come off backorder is anyone’s guess.
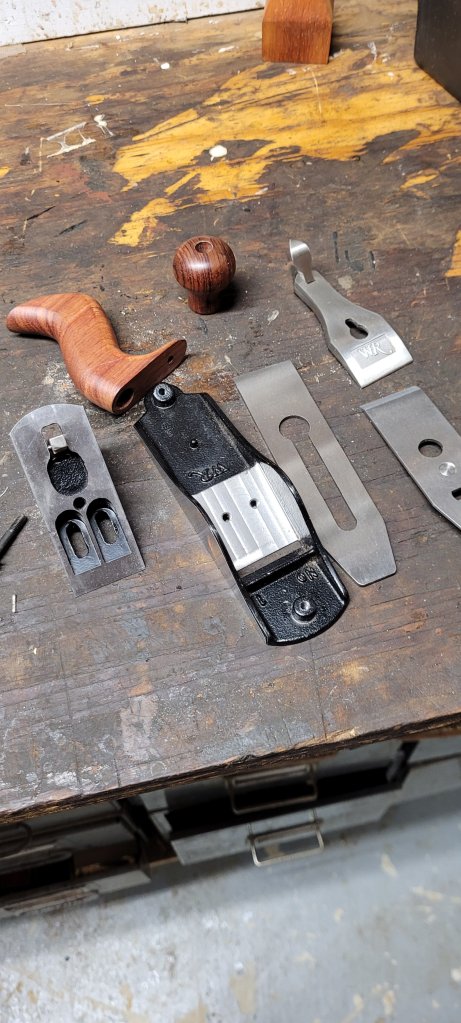
The plane needed a little cleaning, so I took it apart and polished all the parts, removing surface rust. I noticed the edges were sharp from the milling process, so I cut them down with a file and some 120 grit sand paper.
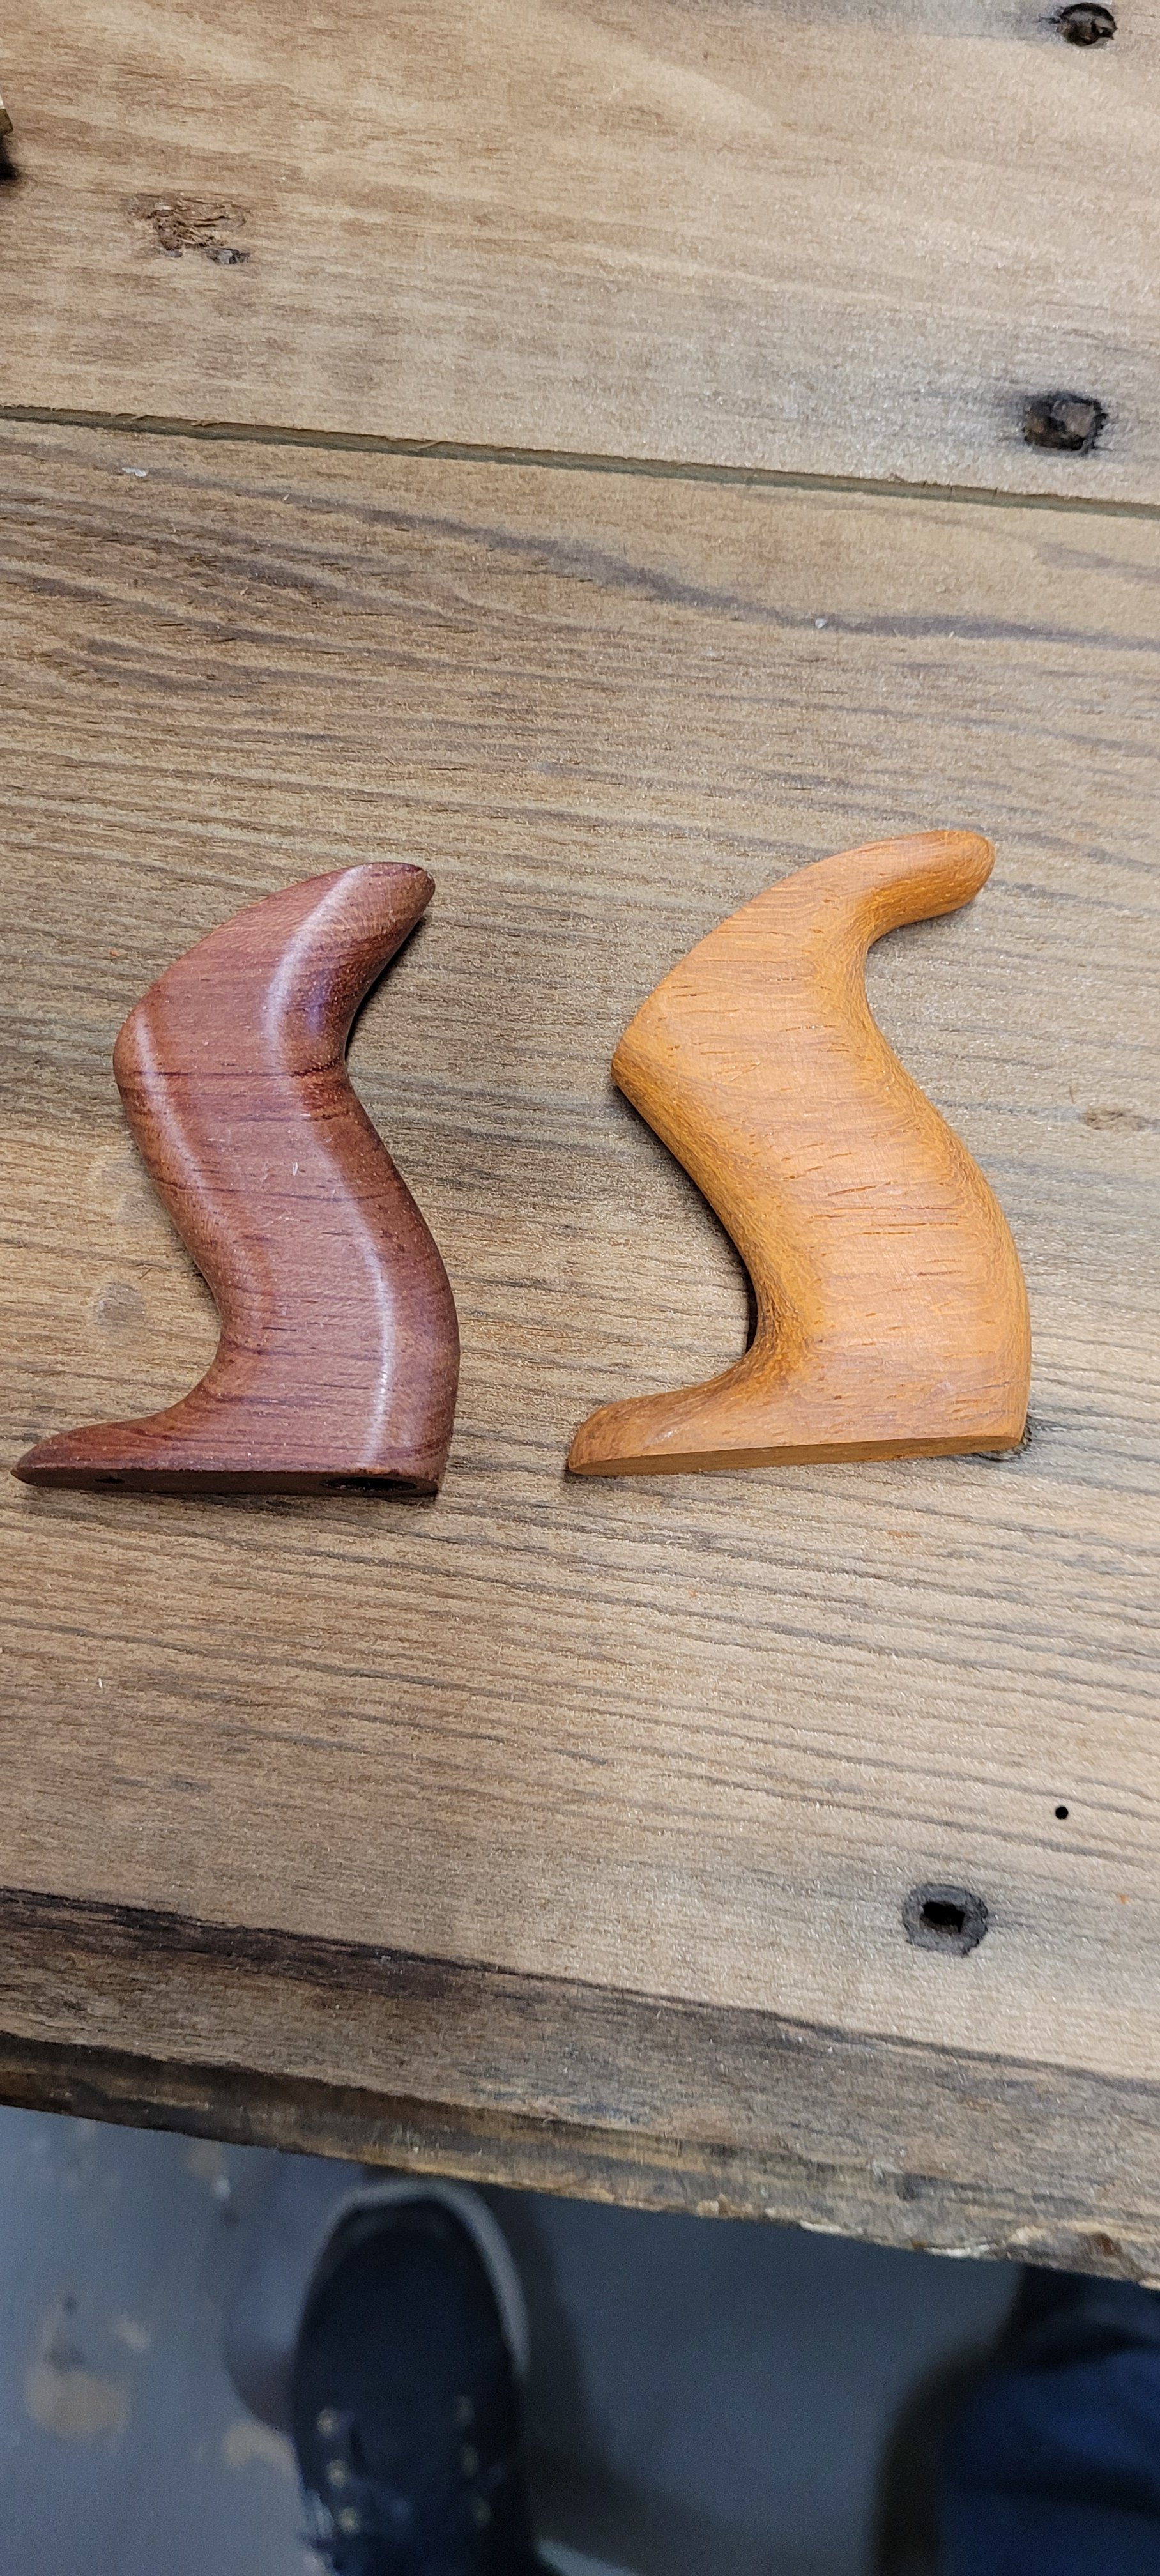
The one thing I didn’t like about the plane was the shape of the rear tote. I originally wanted to replace the handle with Brazialian Rosewood, but I couldn’t source a piece that was cheap enough, so I settled with a scrap piece of Paduak. I’m partial to the look of Stanley’s older totes, so I drew out a design that I thought looked close enough to the old Stanley planes.
I simply used chisels and files and rounded the edges of the tote. I played around with the overall shape of the tote a few times until I was satisfied with the overall look.
After the shaping was done, I had to drill the holes for the nut and threaded rod. I stuck a 1/8″ dowel through the Woodriver tote and transferred that angle onto my new tote. Then, I drilled the center hole through the body and larger holes on the top and bottom of the tote to fit the nut on top and the raised hump on the bed.
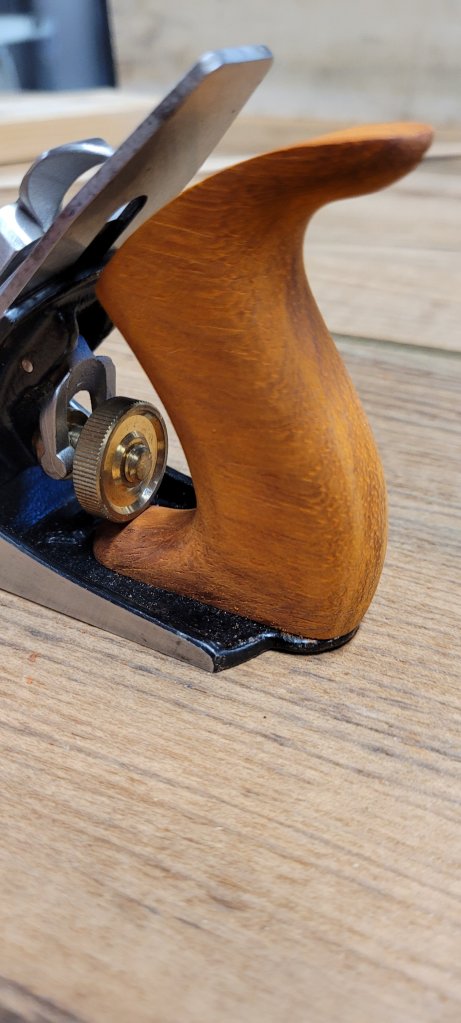
Once I put the tote onto the plane, I examined how it fit. I noticed that the front part of the tote was a little too tall for the brass adjustment screw to move freely. So I reshaped the front of the tote, giving the screw more clearance to move.
I sanded the tote smooth and applied dark walnut Danish oil on the tote to tone the reddish color down a little bit. I contemplated making a new knob as well, but I decided against it. I’m hoping that the color of the Paduak will darken over time and match the knob better in color.
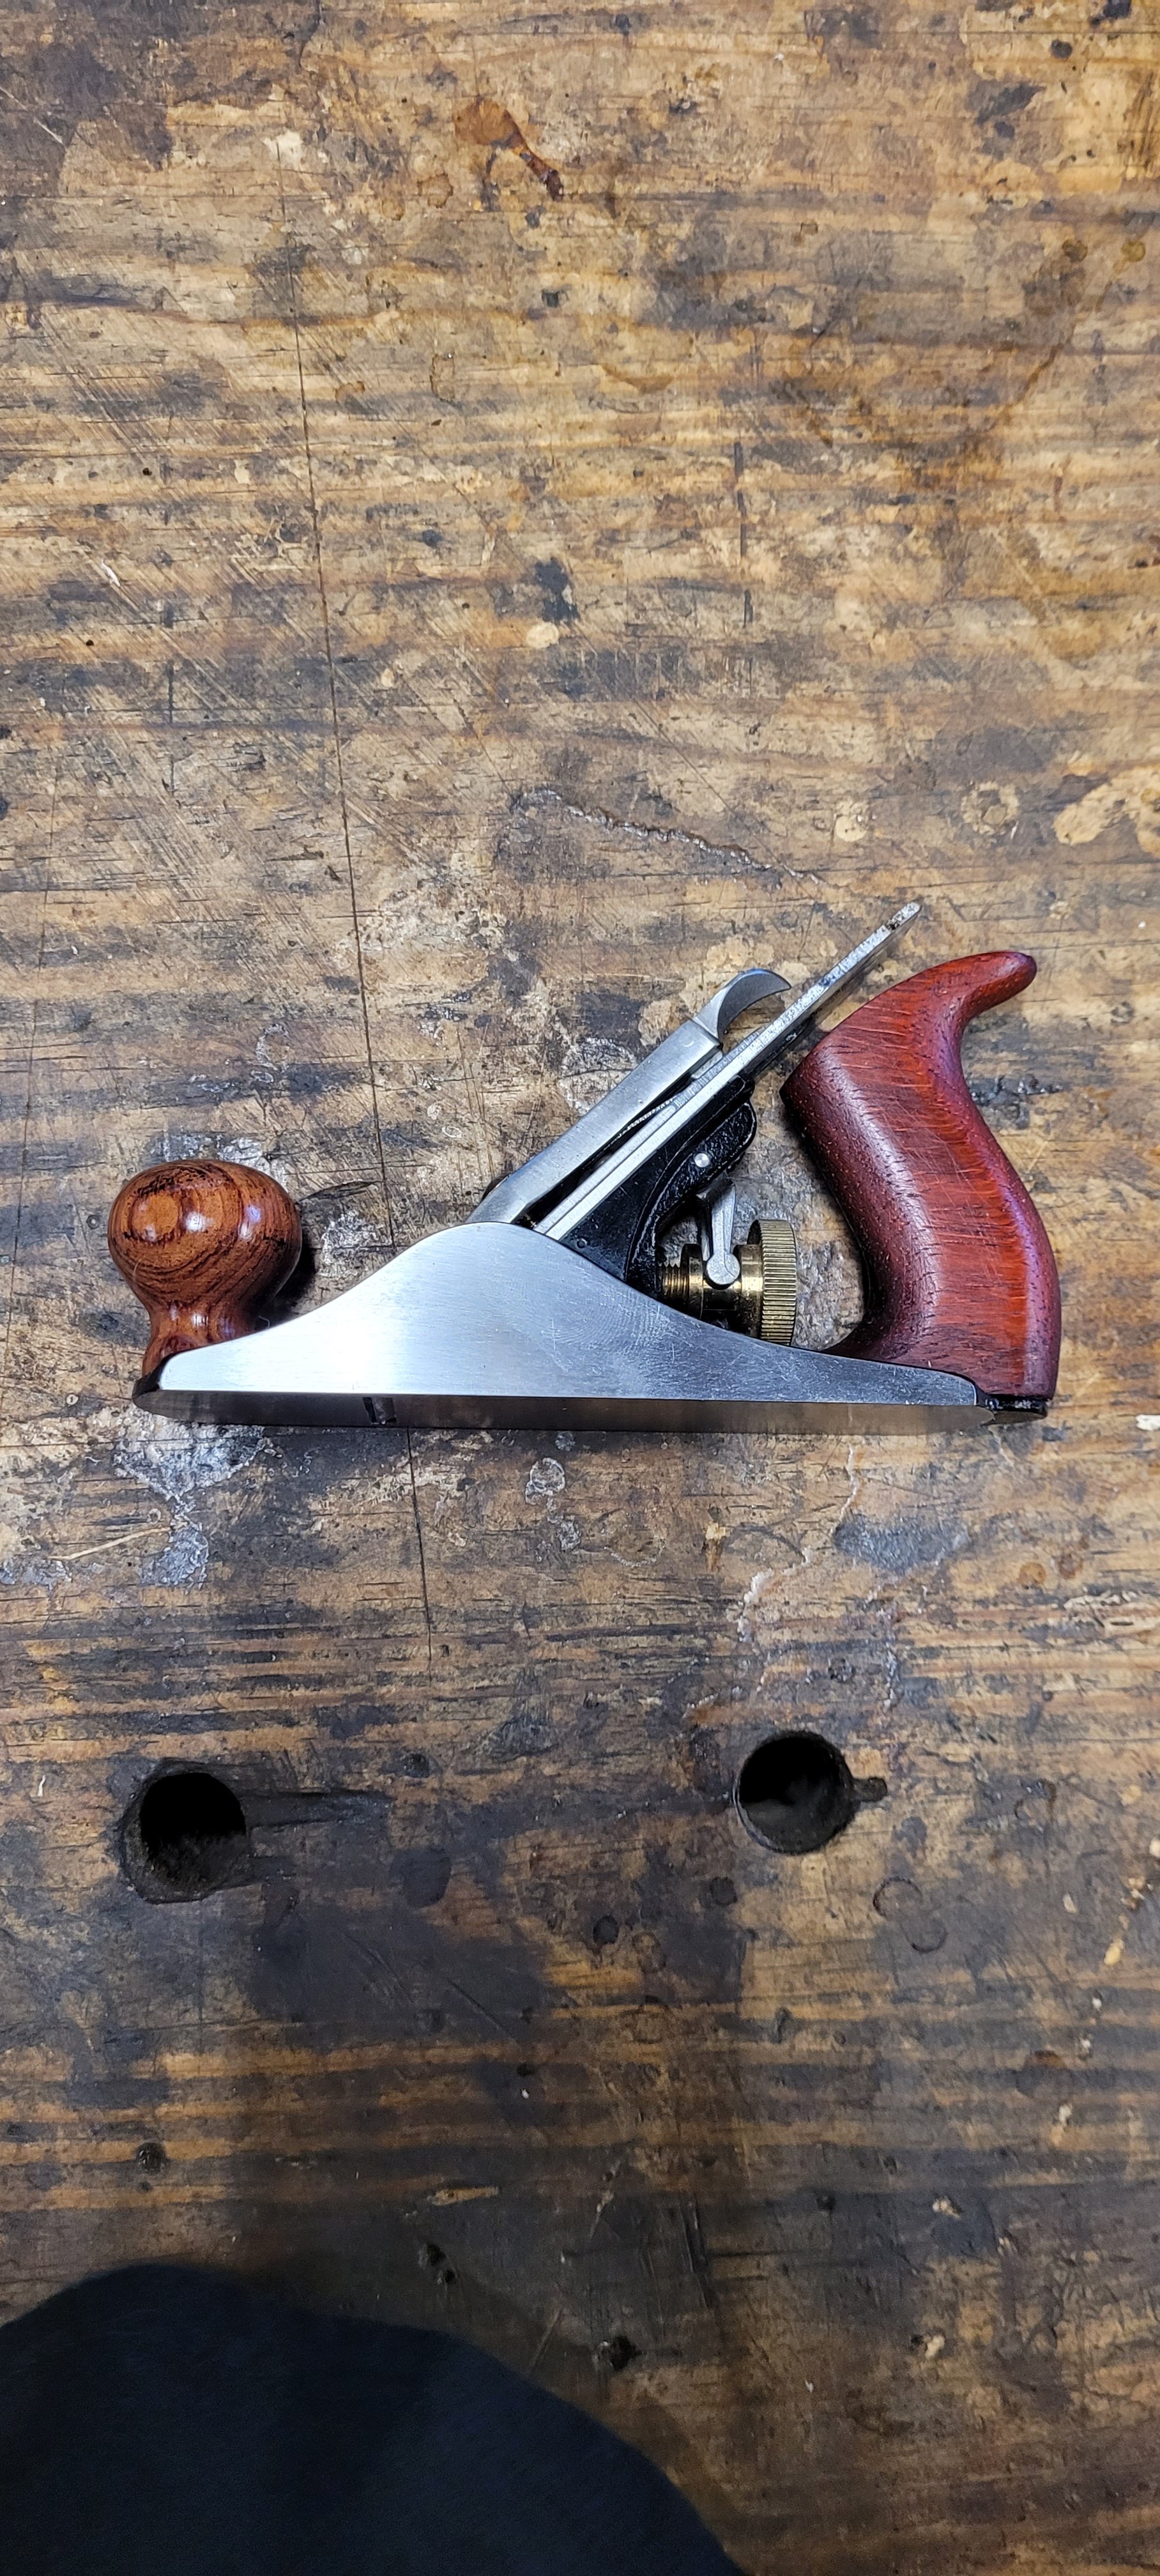
Here’s the plane all cleaned up with a new tote. Looks nice, but I still would like to make Brazialian Rosewood handles someday.
I sharpened the blade to see how it performed. I grabbed a scrap piece of birch with some swirly grain and went to work. The plane worked admirably. I really do think these little guys were made to clean up rough grain produced by larger planes.
I don’t think Woodriver No 1 Planes are as nicely machined as Stanley or Lie Nielsen planes, but for the price, they’re a good substitute.
Last weekend was the Springfield Extravaganza. It’s one of my favorite antique shows that happens in May and September in Springfield, Ohio. The fairgrounds is full with over 2000 dealers selling all sorts of antiques and the occasional junk. I look forward to it as much as the World’s Longest Yard Sale up and down US127 in August.
Luckily, I found some planes this time at the show. Many times in the past, I would only be able to pick up a Stanley plane or two, but this year, the Antique Tool Gods were with me as I ended picking up almost ten Stanley planes. None are exceptionally rare but all will make nice users. In fact, the rarest plane I bought was a Union X6 vertical post plane.
Ironically, the only tools I bought this weekend were planes. I was looking for drills, chisels and saws but there weren’t too many available. The one saw I had an interest in was a Disston Thumbhole D8 rip saw that was in a barrel with 50 other saws. When I asked the guy what he wanted for it, he replied “$50 per saw, unless you want all of them, then they’re $7.00 each.” I quickly put the saw back and walked away.
I’ll spend the next few weeks cleaning my planes up, but I’m not too sure how long that’ll take me as I just started my new job today (I got promoted) as I may end up working more hours with this new gig than I did before. However, I’m optimistic I’ll get back in the shop soon.
You can follow me on Instagram to see how the planes end up looking. I’ll remove the rust and sharpen the blades so that they can be put back to work. In fact, I just posted a couple of pictures of a Stanley No 71 Router Plane I restored after finding it at a yard sale earlier this month.
Every once in awhile I’ll come across a plane blade that is so heavily pitted and corroded, the best thing to do is to simply throw it away. This blade that came off a Stanley No 6 plane was no different. The problem was that I didn’t have a replacement blade to go with the plane I was restoring, so I was forced to see if I could get the blade to work again.
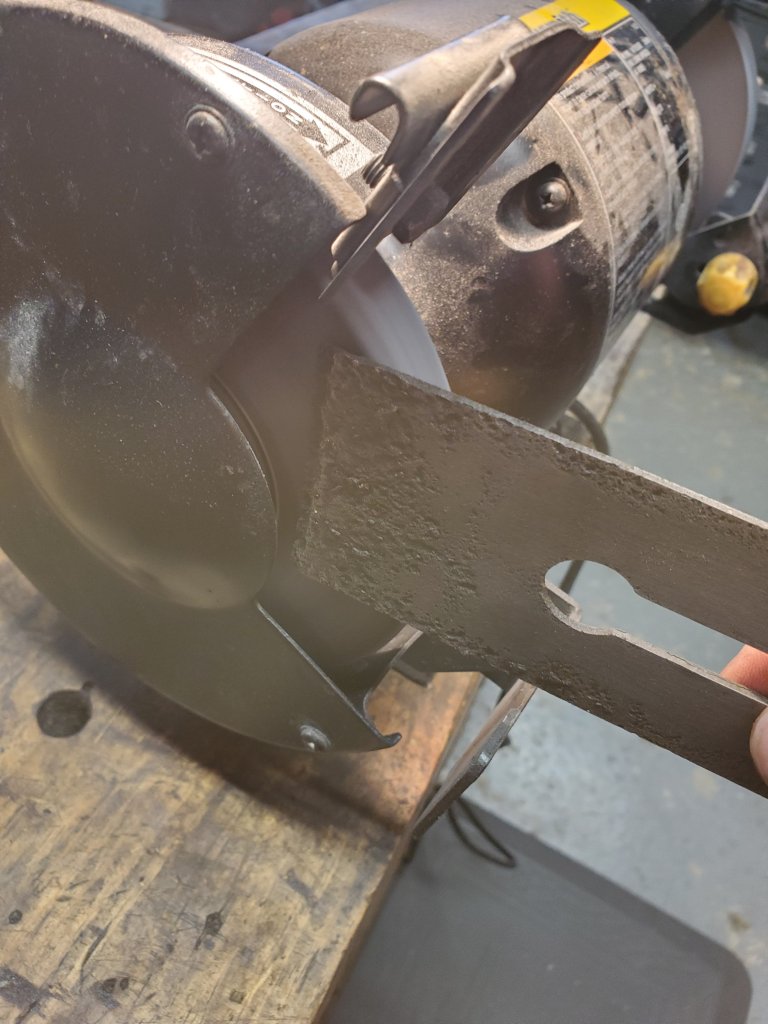
The first thing I did was take the blade over to my 8″ speed grinder and grind the face and back of the blade to remove the corrosion. I paid special attention not to heat the blade up too much so, I occasionally cooled it off in a bucket of water. Fortunately, the blade’s face had about a 1/4″ of metal at the bottom that wasn’t pitted, so I was hopeful I could still get a good edge out of it.
I took the blade over to my Tormek and ground a 25 degree bevel on it and honed the face flattler on the side of the Tormek grinding wheel the same way as I did with my 8″ speed grinder.
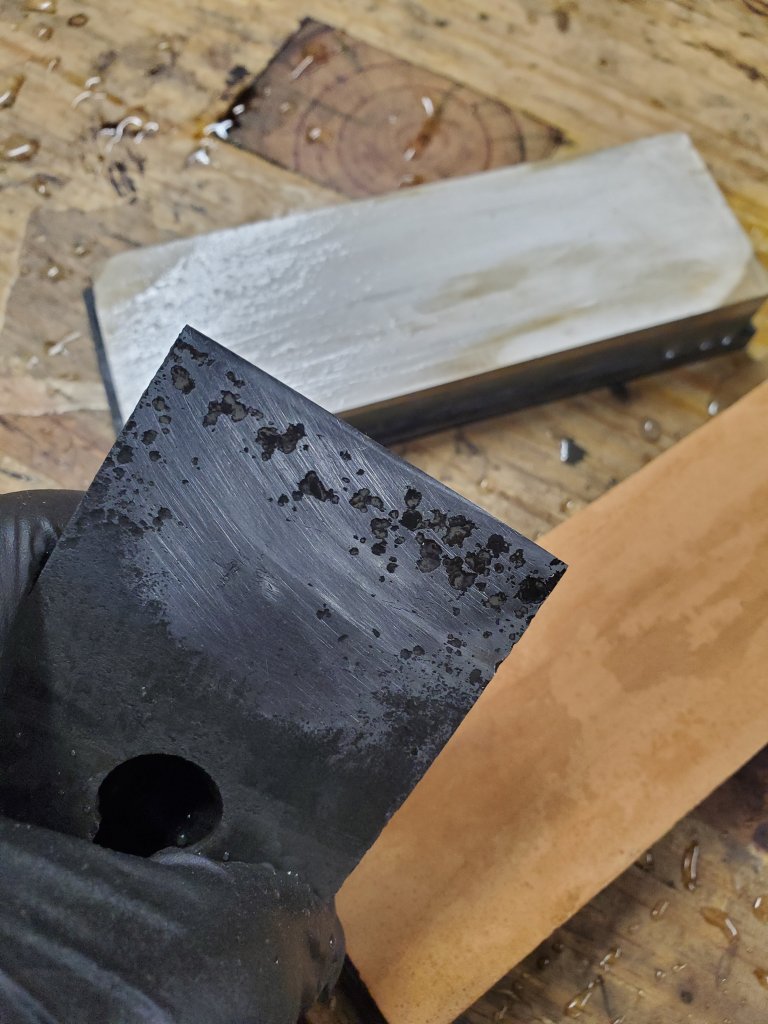
After the grinding was finished, I took the blade over to my water stones and sharpened it just as I do with any other blade. When I was done, there was a clean line of light at the tip of the cutting edge so I was hopeful it could achieve a nice cut.
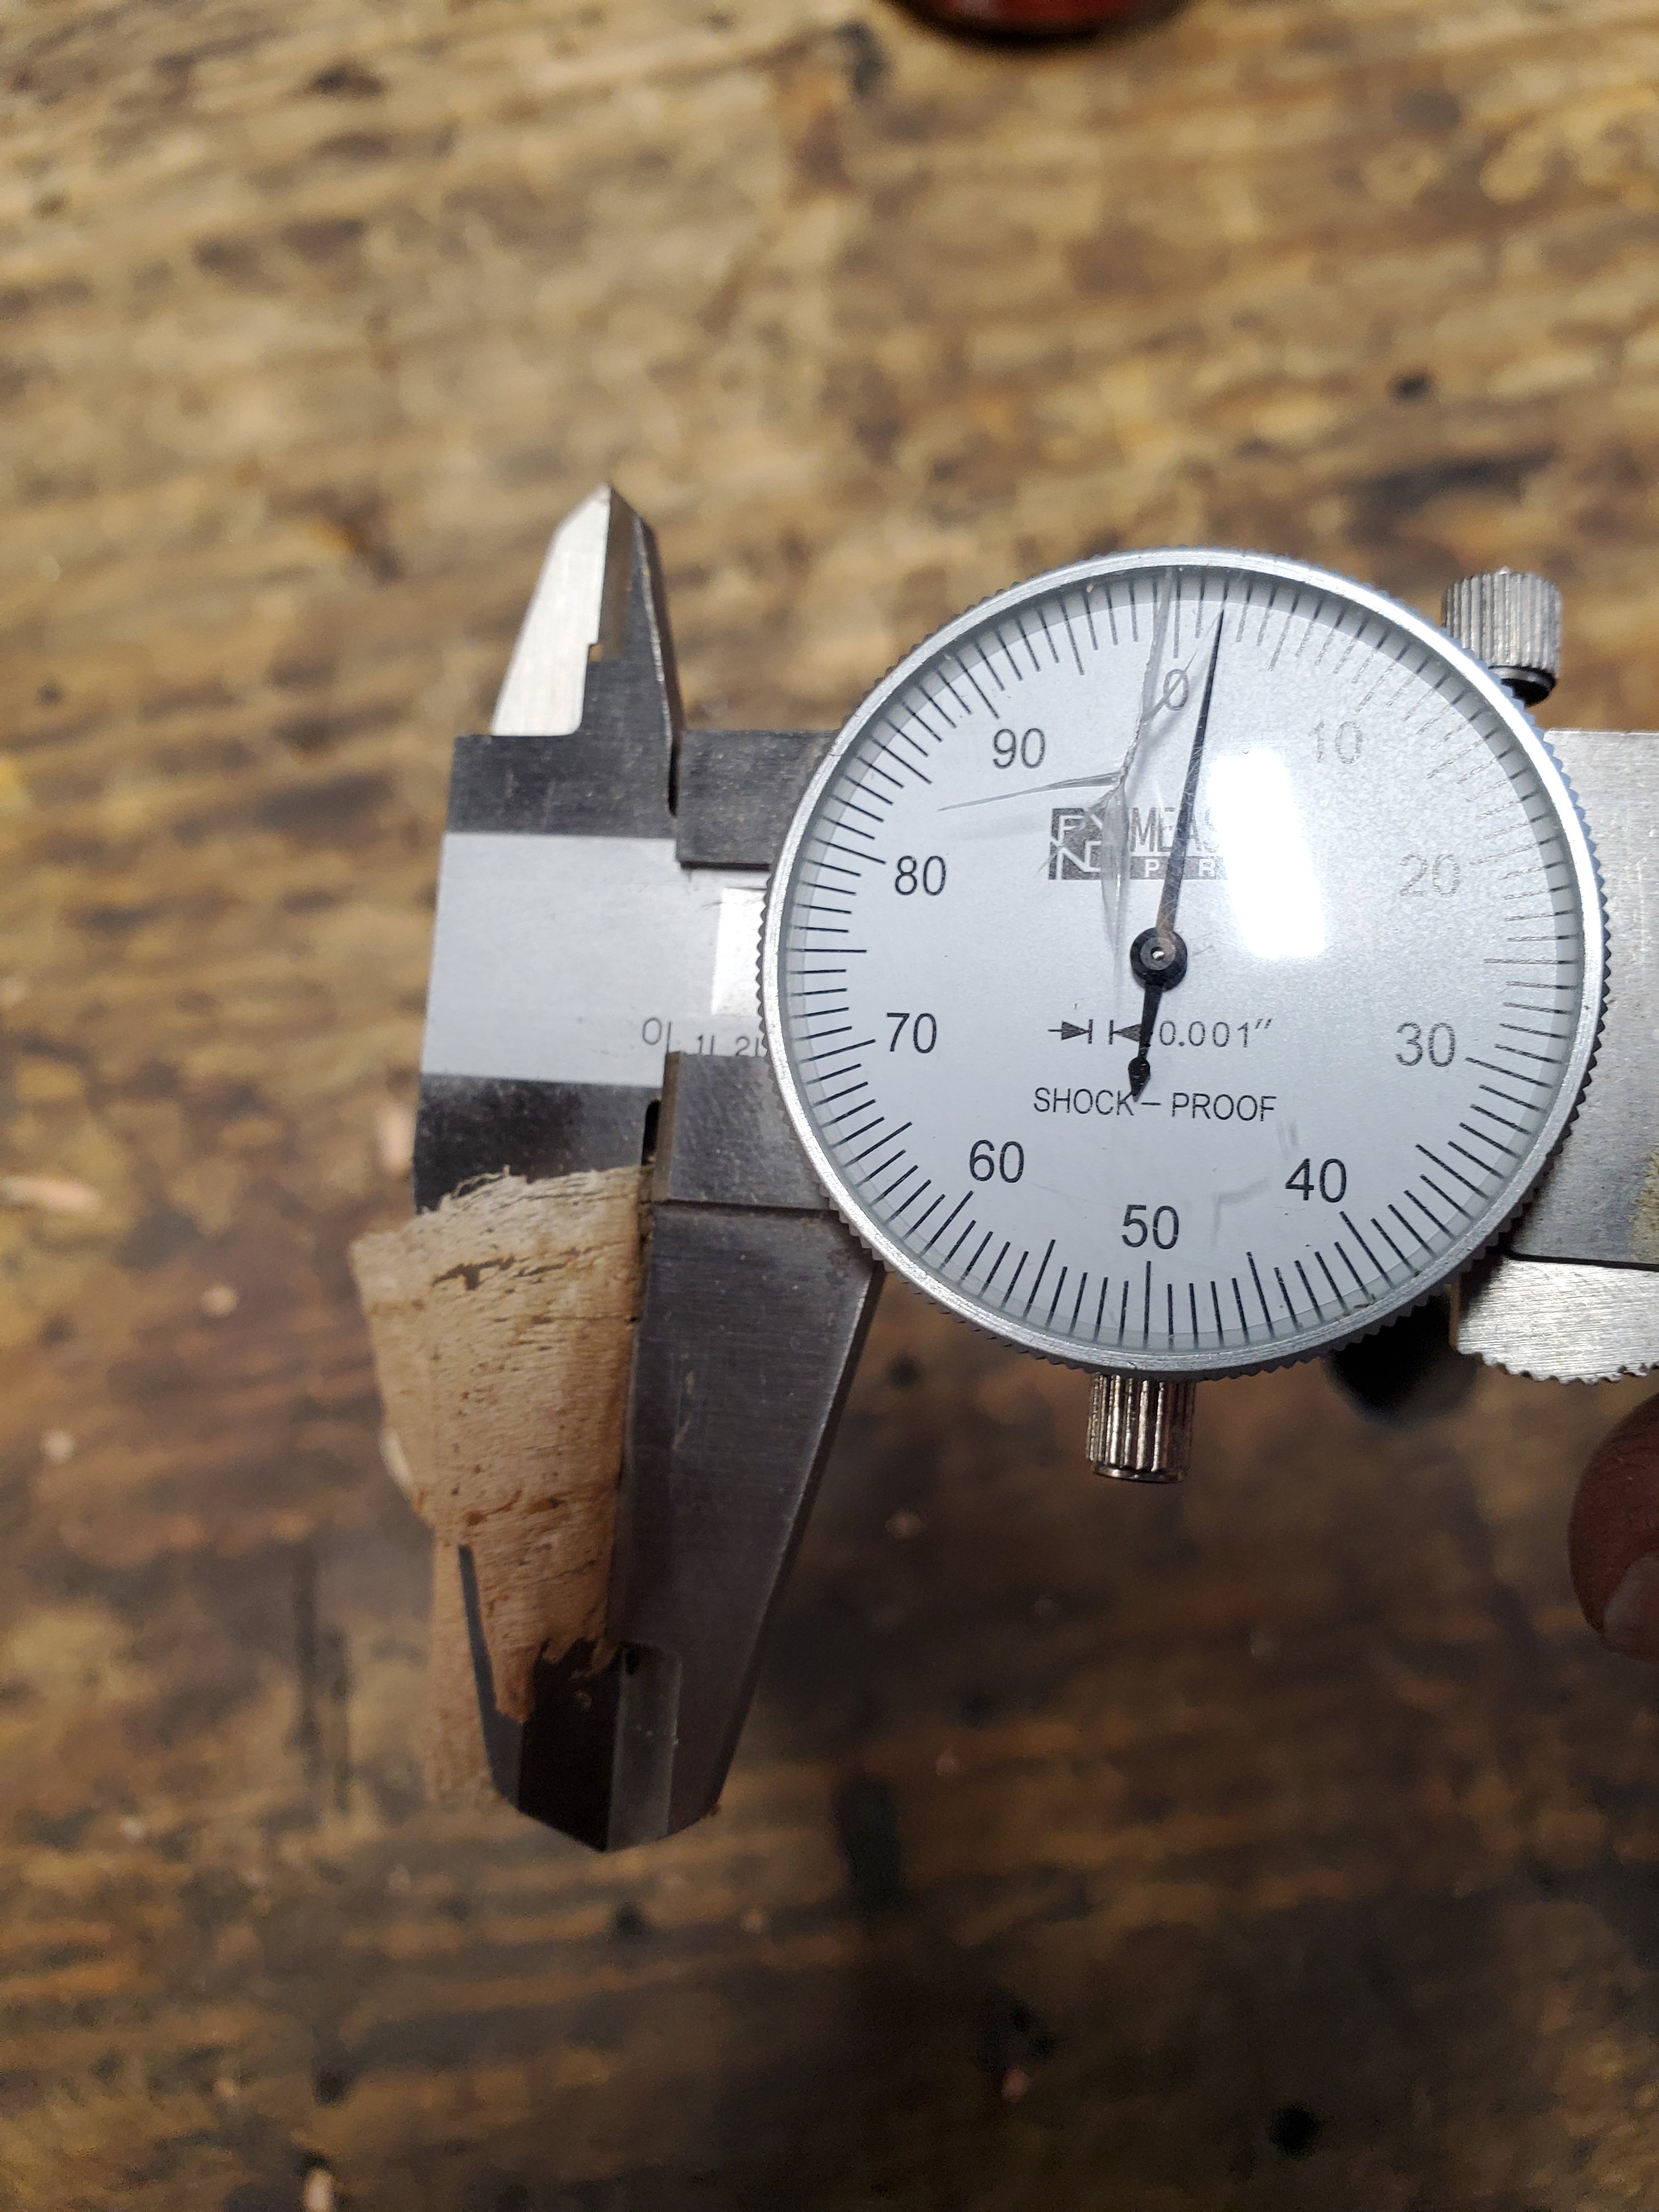
Placing the blade back into the plane, I tuned it up, and sure enough, this crappy blade cut pretty well. I took out my dial calipers, and the shavings measured .002″ thick. The blade will eventually need to be replaced, but at least the plane can function properly now.
The plane performed so nicely, I used it to flatten my workbench.
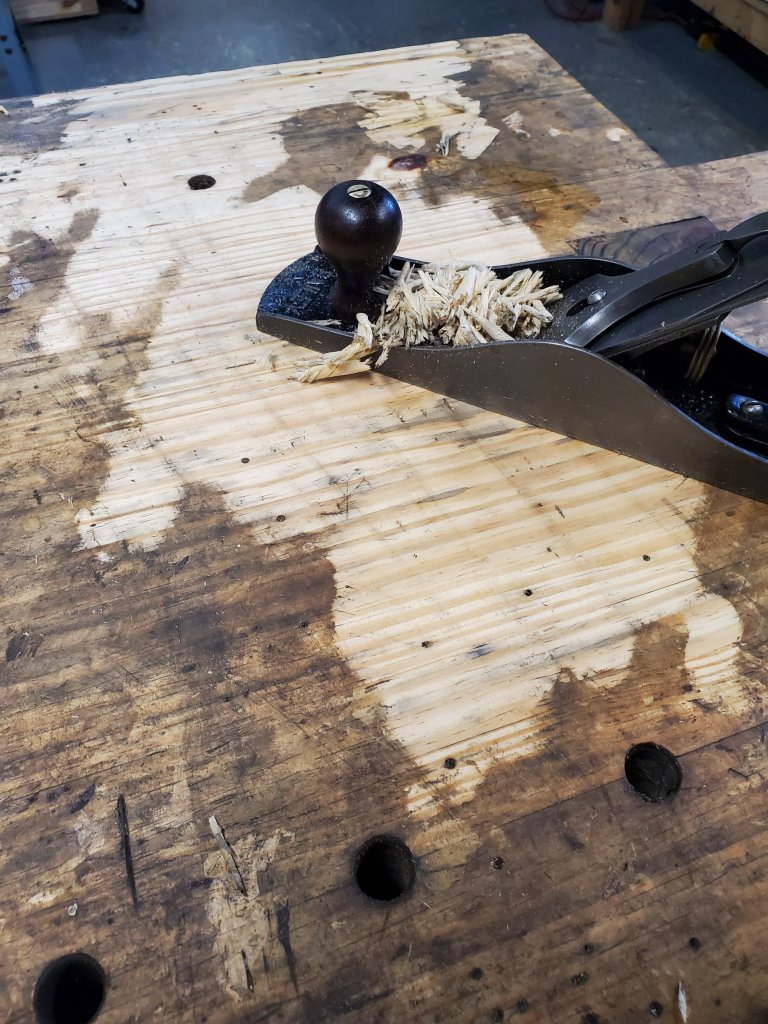
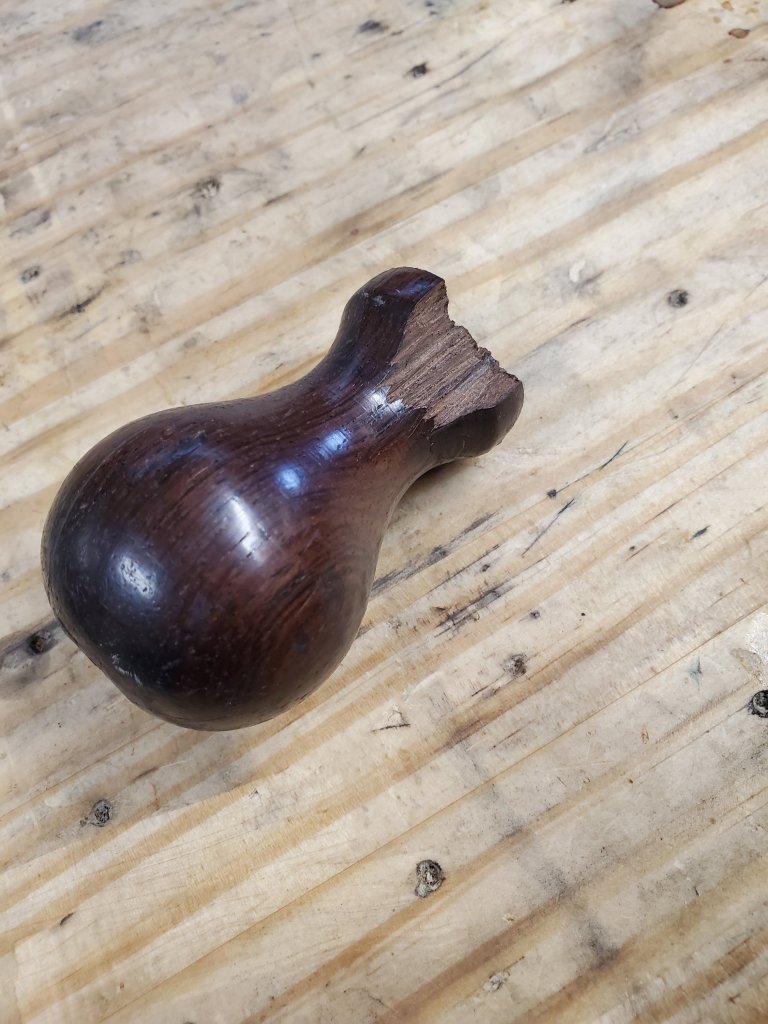
Sometimes when buying a plane, all the parts will be in good shape until you look at the front knob and see a big chunk missing from the bottom. I’ve repaired dozens of totes over the years, but I’ve never really tackled a knob as it looked like a big pain in the ass. So, I decided to give it a go and see how it turns out.
The first thing I did was shave the broken area smooth with a bastard file. It didn’t have to be completely clean, just good enough to hold some glue.
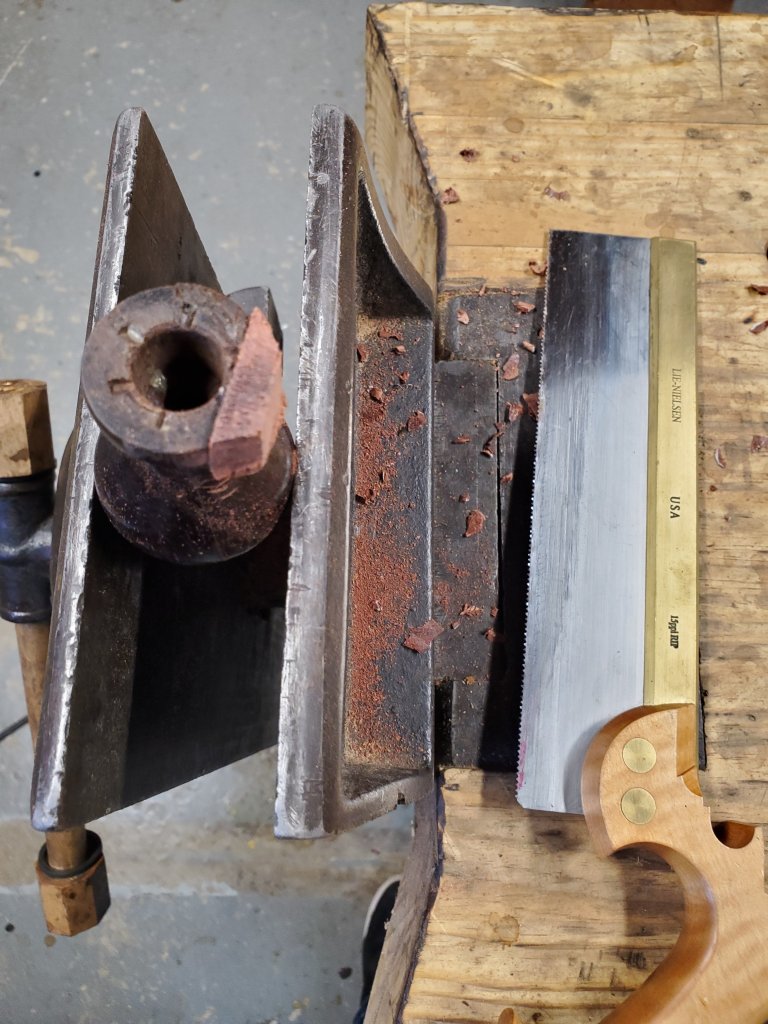
Then I took a piece of cocobolo scrap wood and glued it to the surface of the break. I paid careful attention to the orientation of the grain so the repair would look nicer. I used Gorilla Super Glue Gel as it works well gluing all type of rosewood woods together.
Once the glue dried, I cut off the excess with a dovetail saw and shaved the thick areas away with some chisels and gouges.
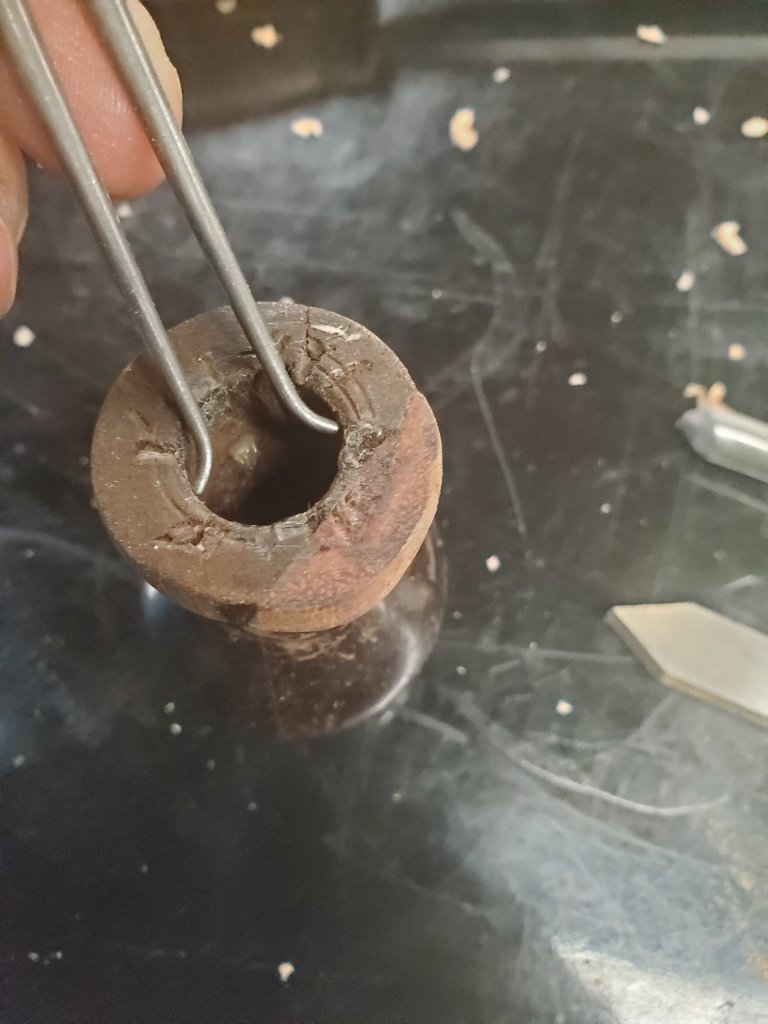
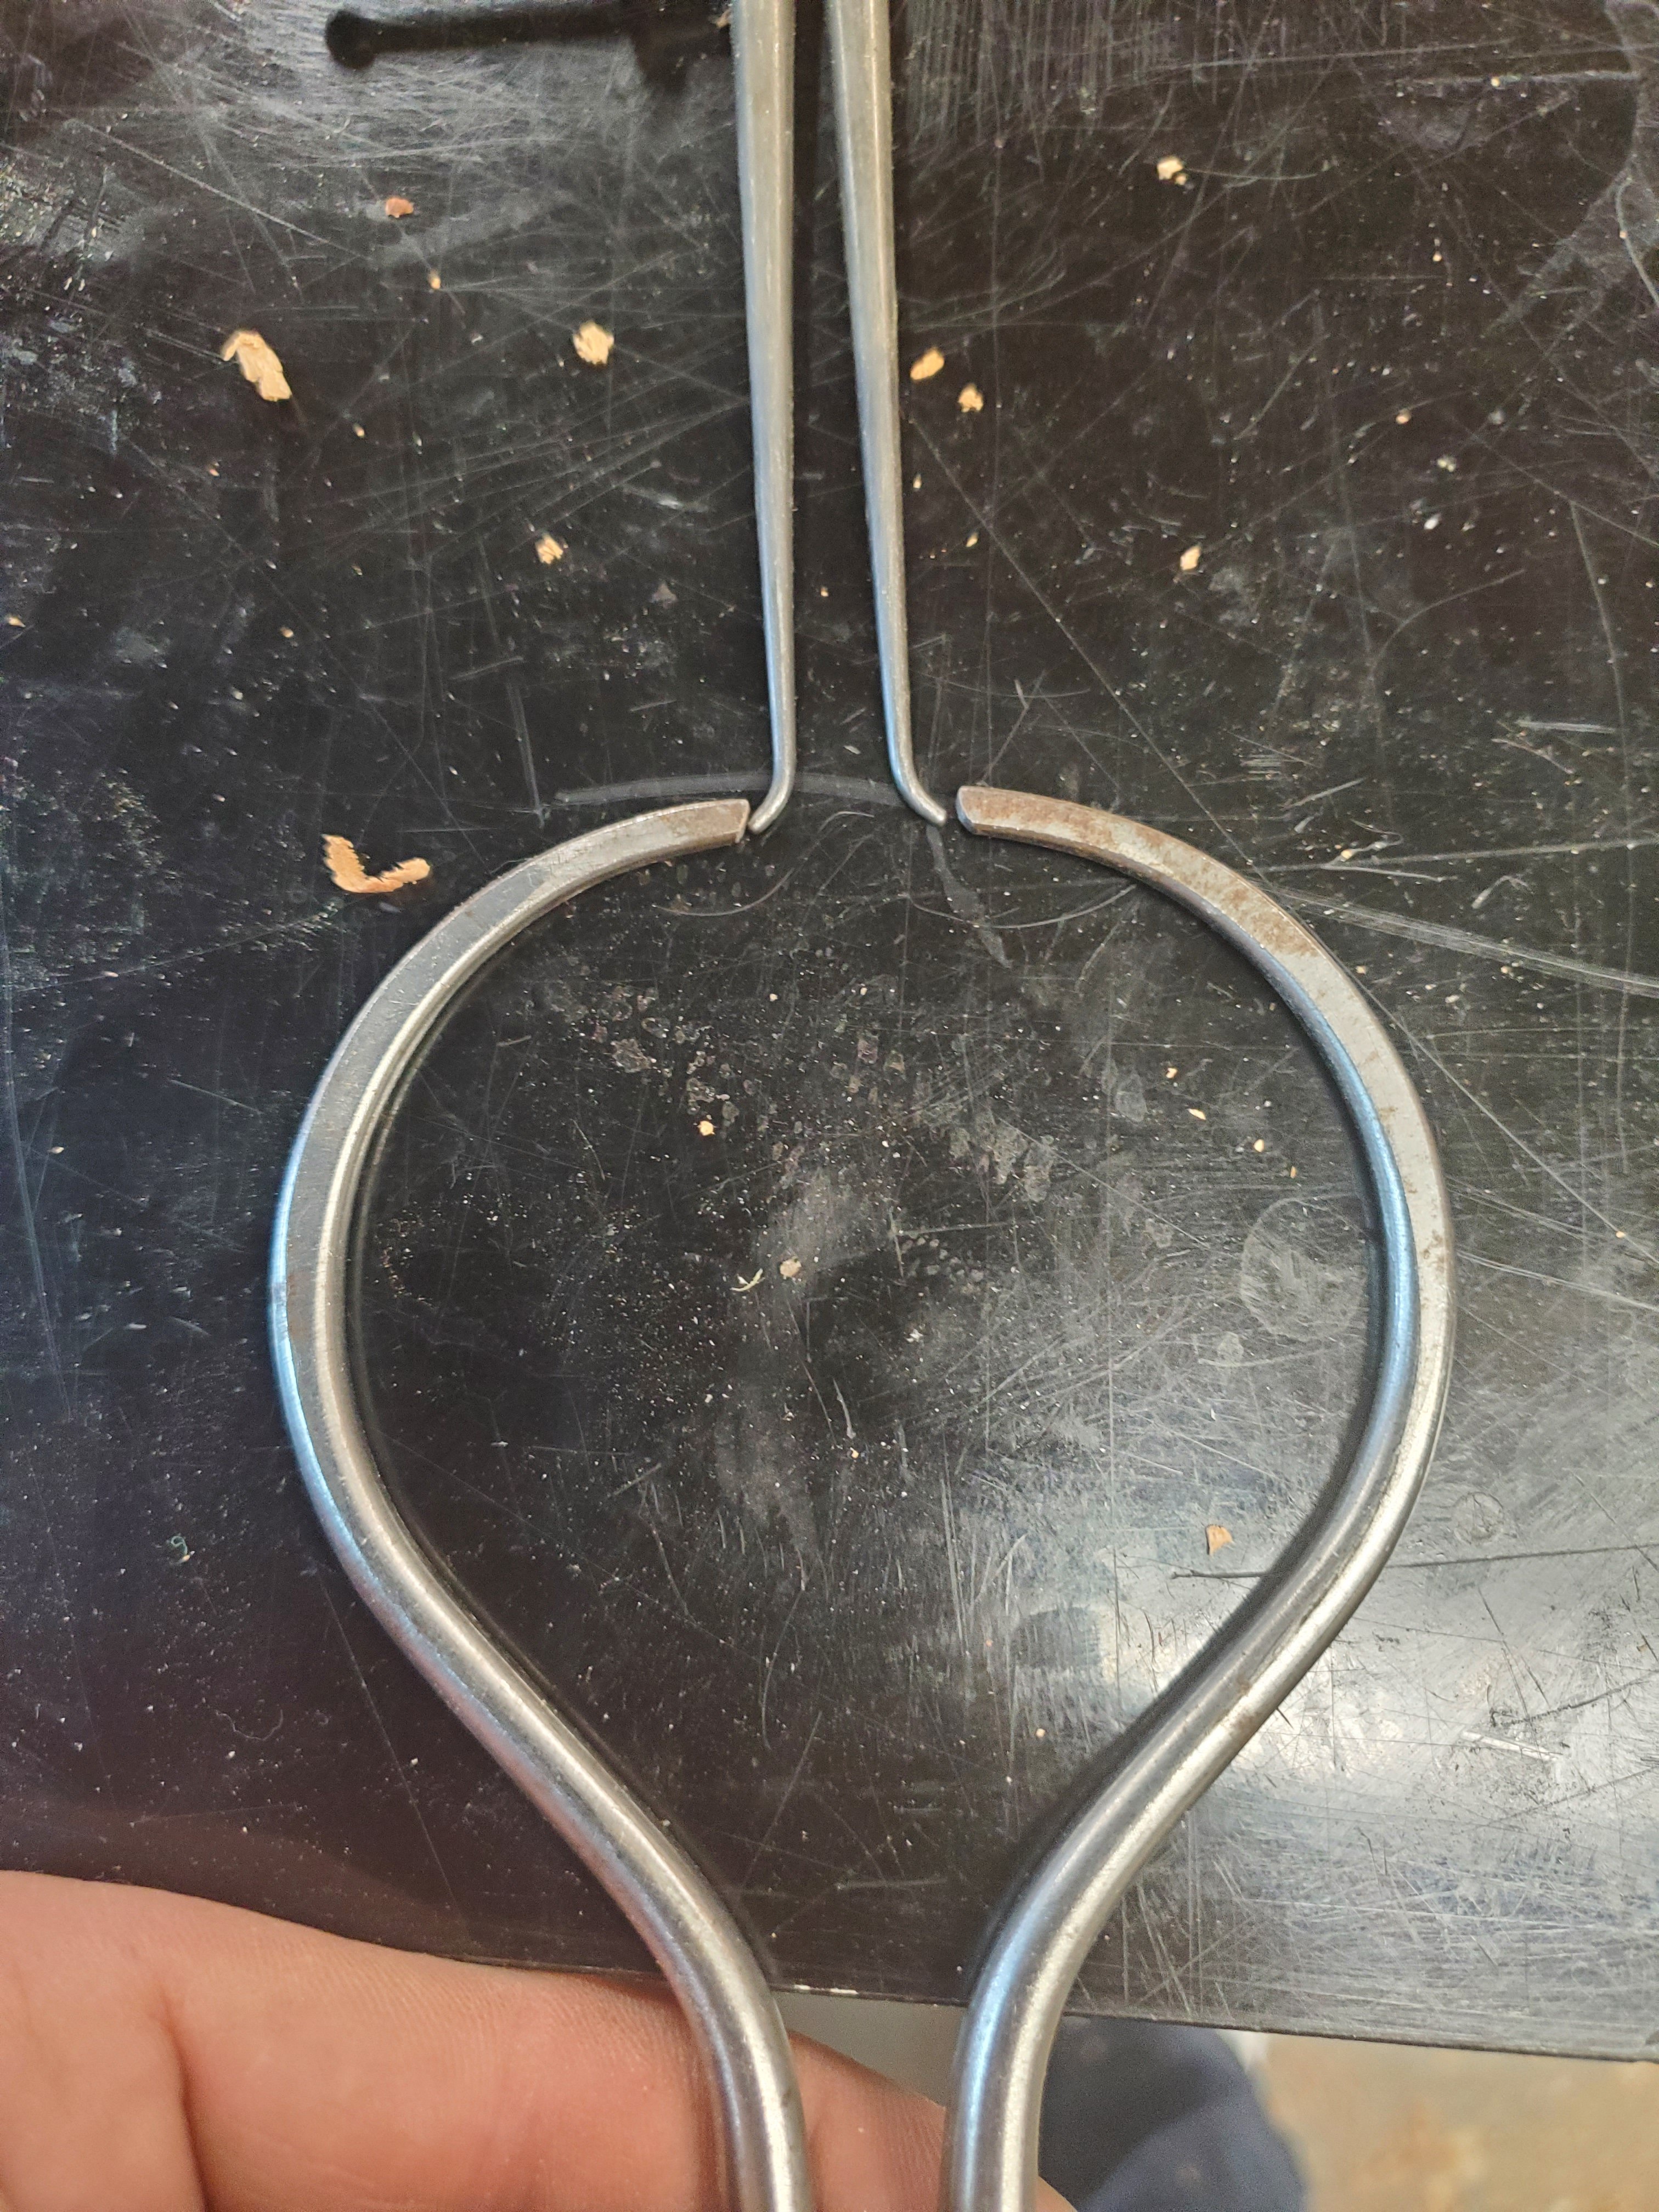
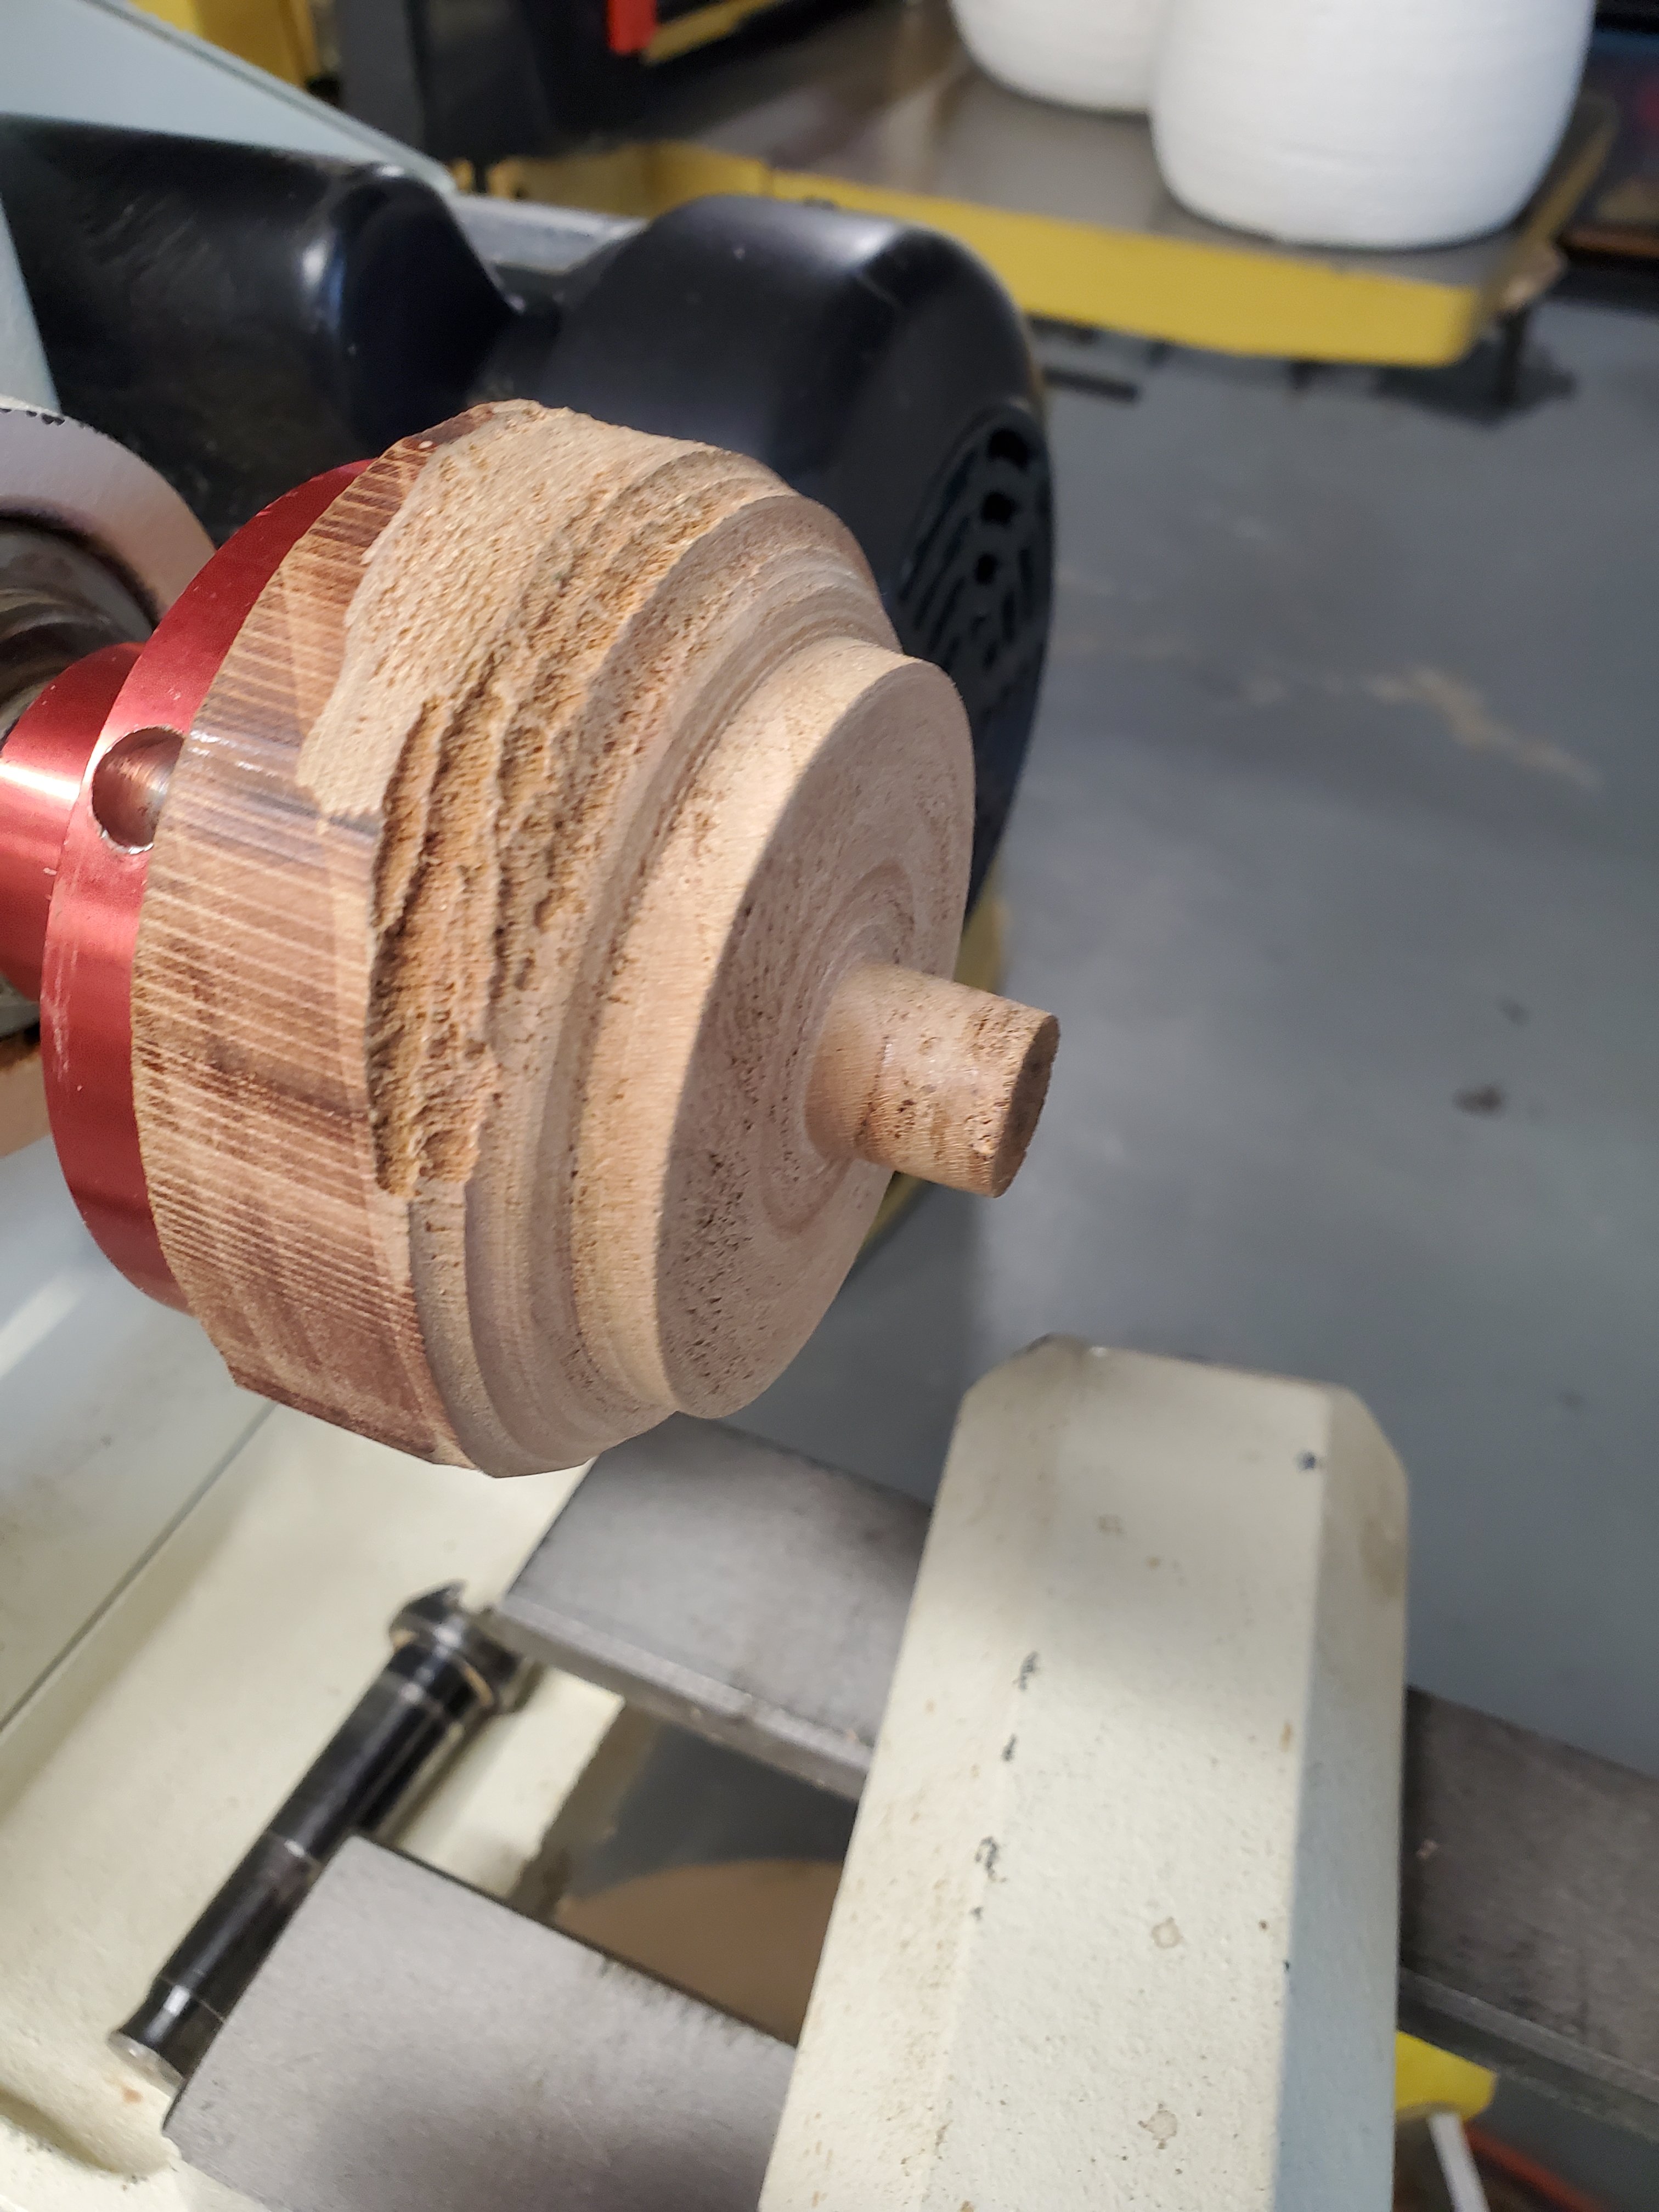
I wanted to shape the new area perfectly round with the rest of the knob so I created a little holding jig to be used on my lathe.
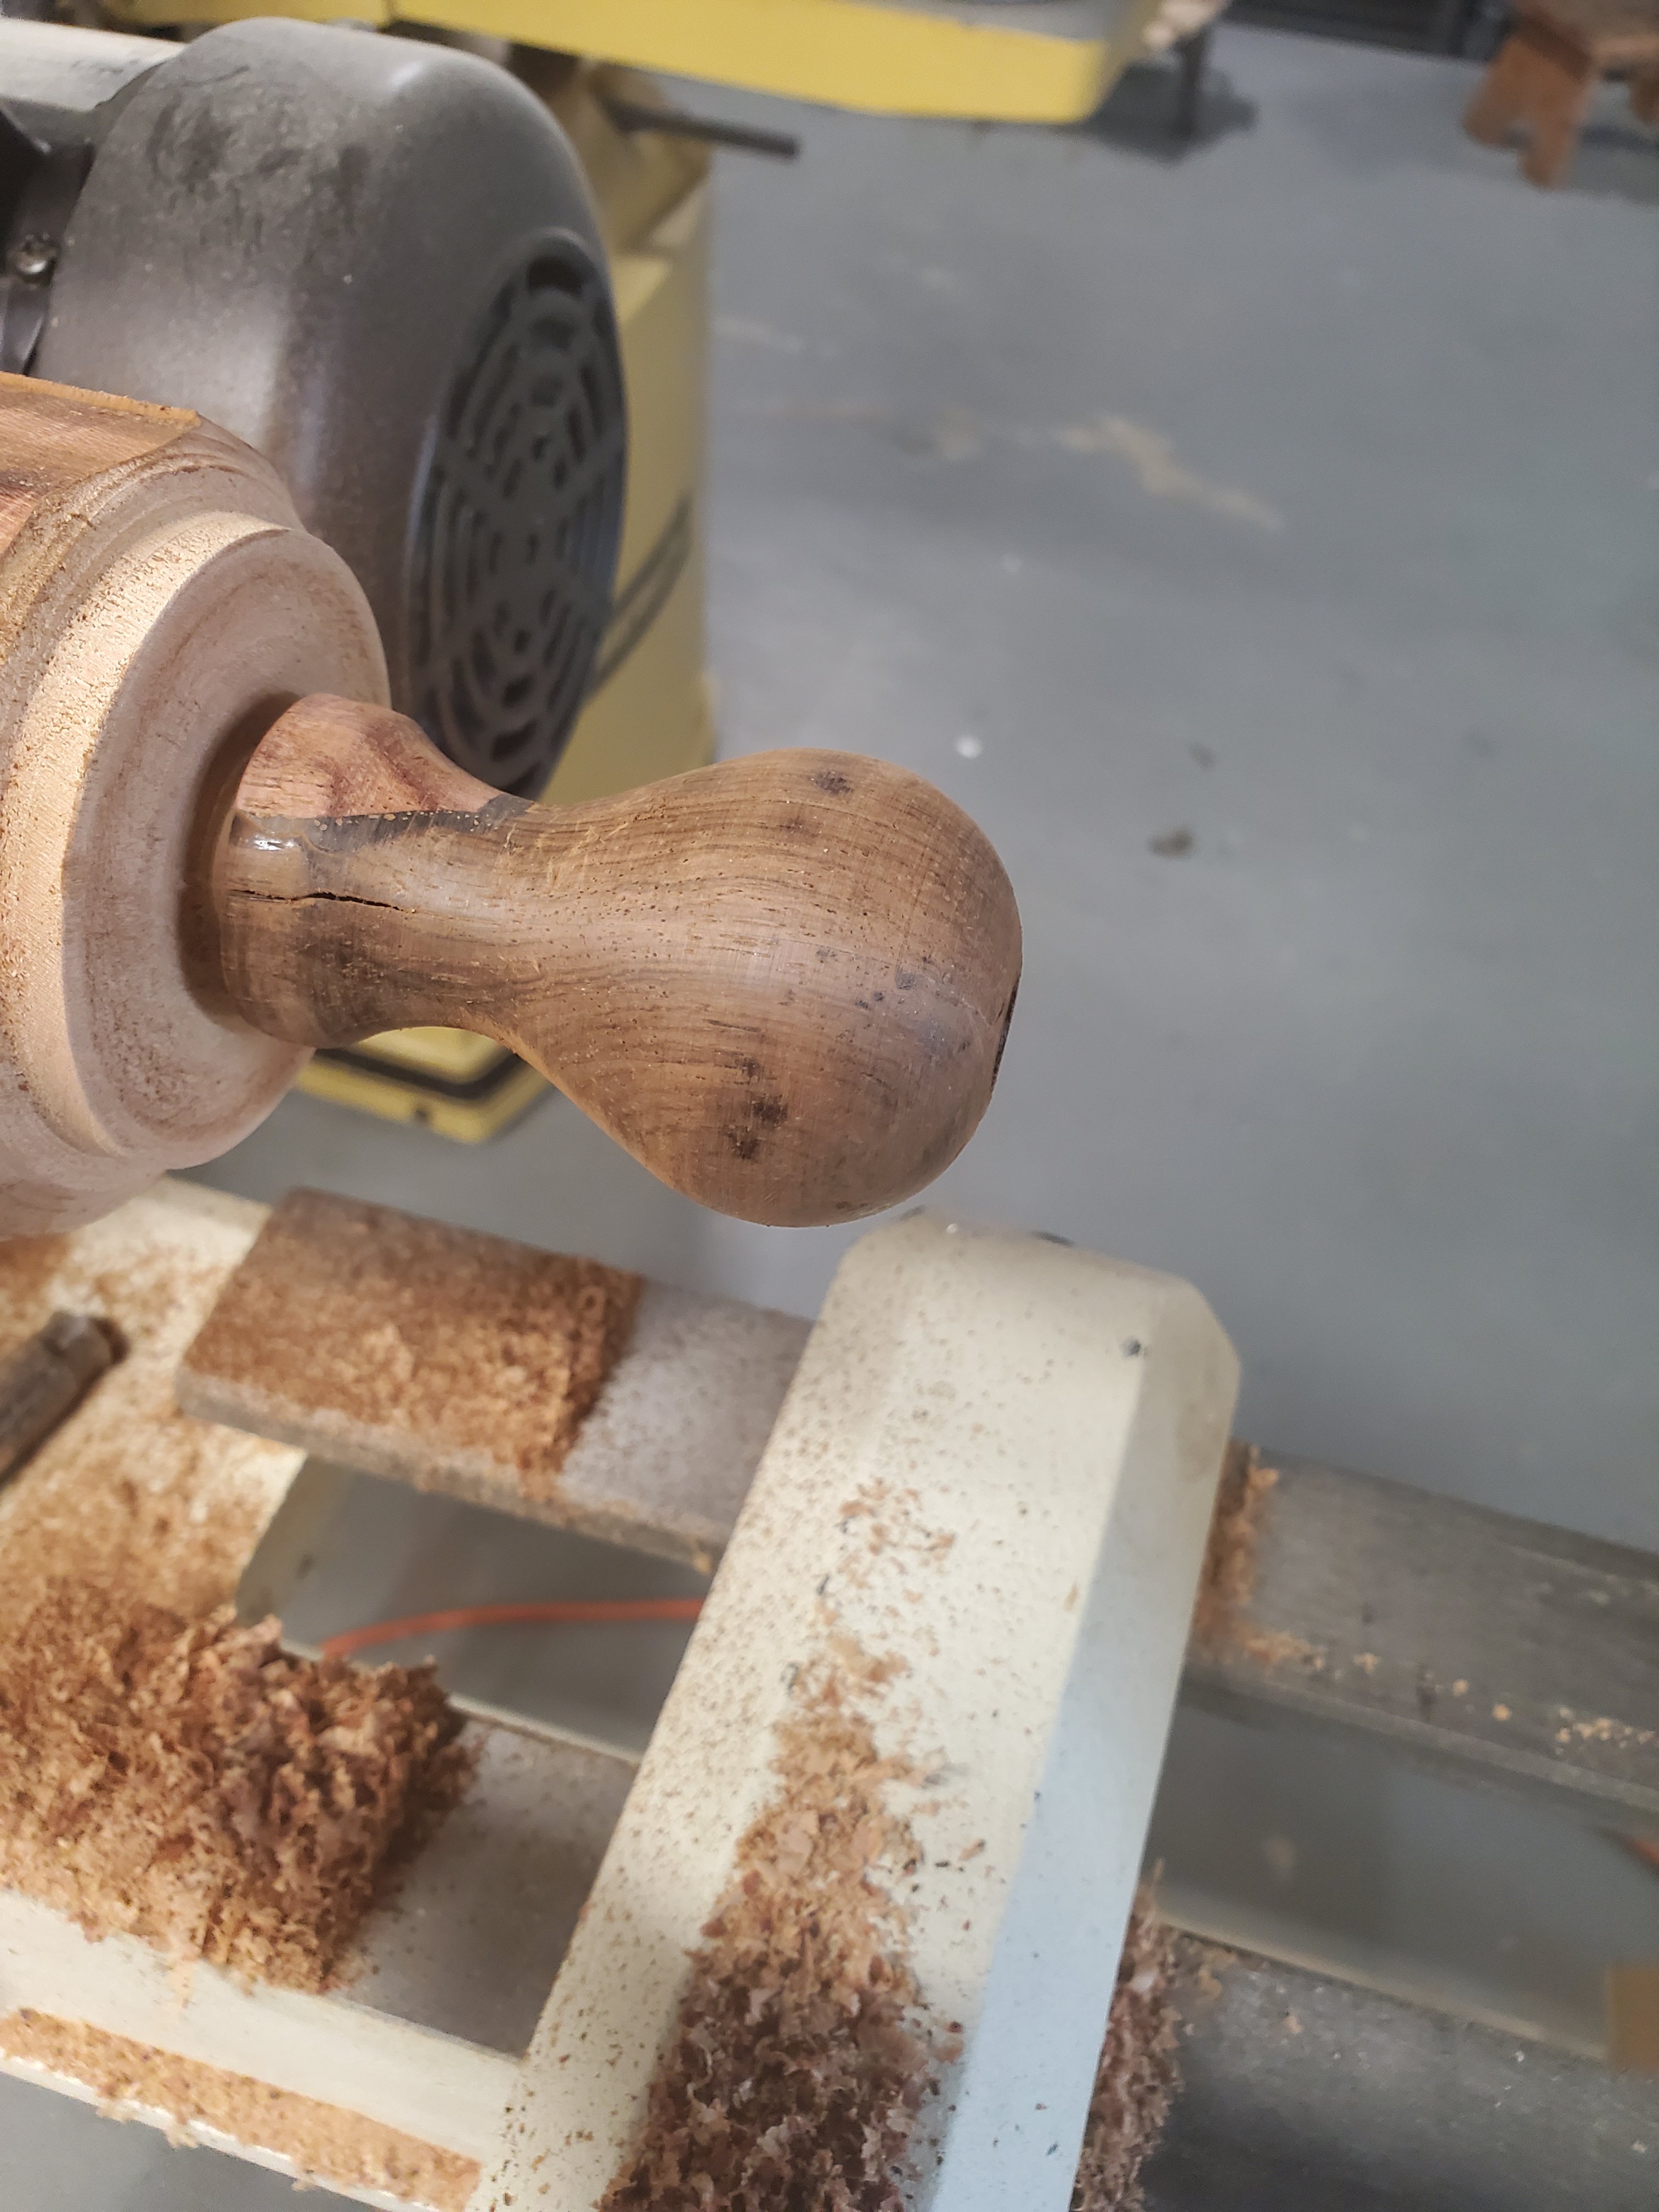
I measured the inside diameter of the knob’s mounting hole with inside calipers and transferred that measurement unto outside calipers, then turned a tenon to the measurement. Then I stuck the knob onto the tenon and stabalized the top of the knob with the lathe live center point.
With the knob spinning nice and true, I carefully used a round scraper and gently turned the new piece of wood concentric with the knob. After a few minutes, and a little bit of sanding, the knob was finished.
I noticed that the knob had split just a little bit while it was turning, so I applied more super glue gel to the bottom of the knob to stabalize the wood.
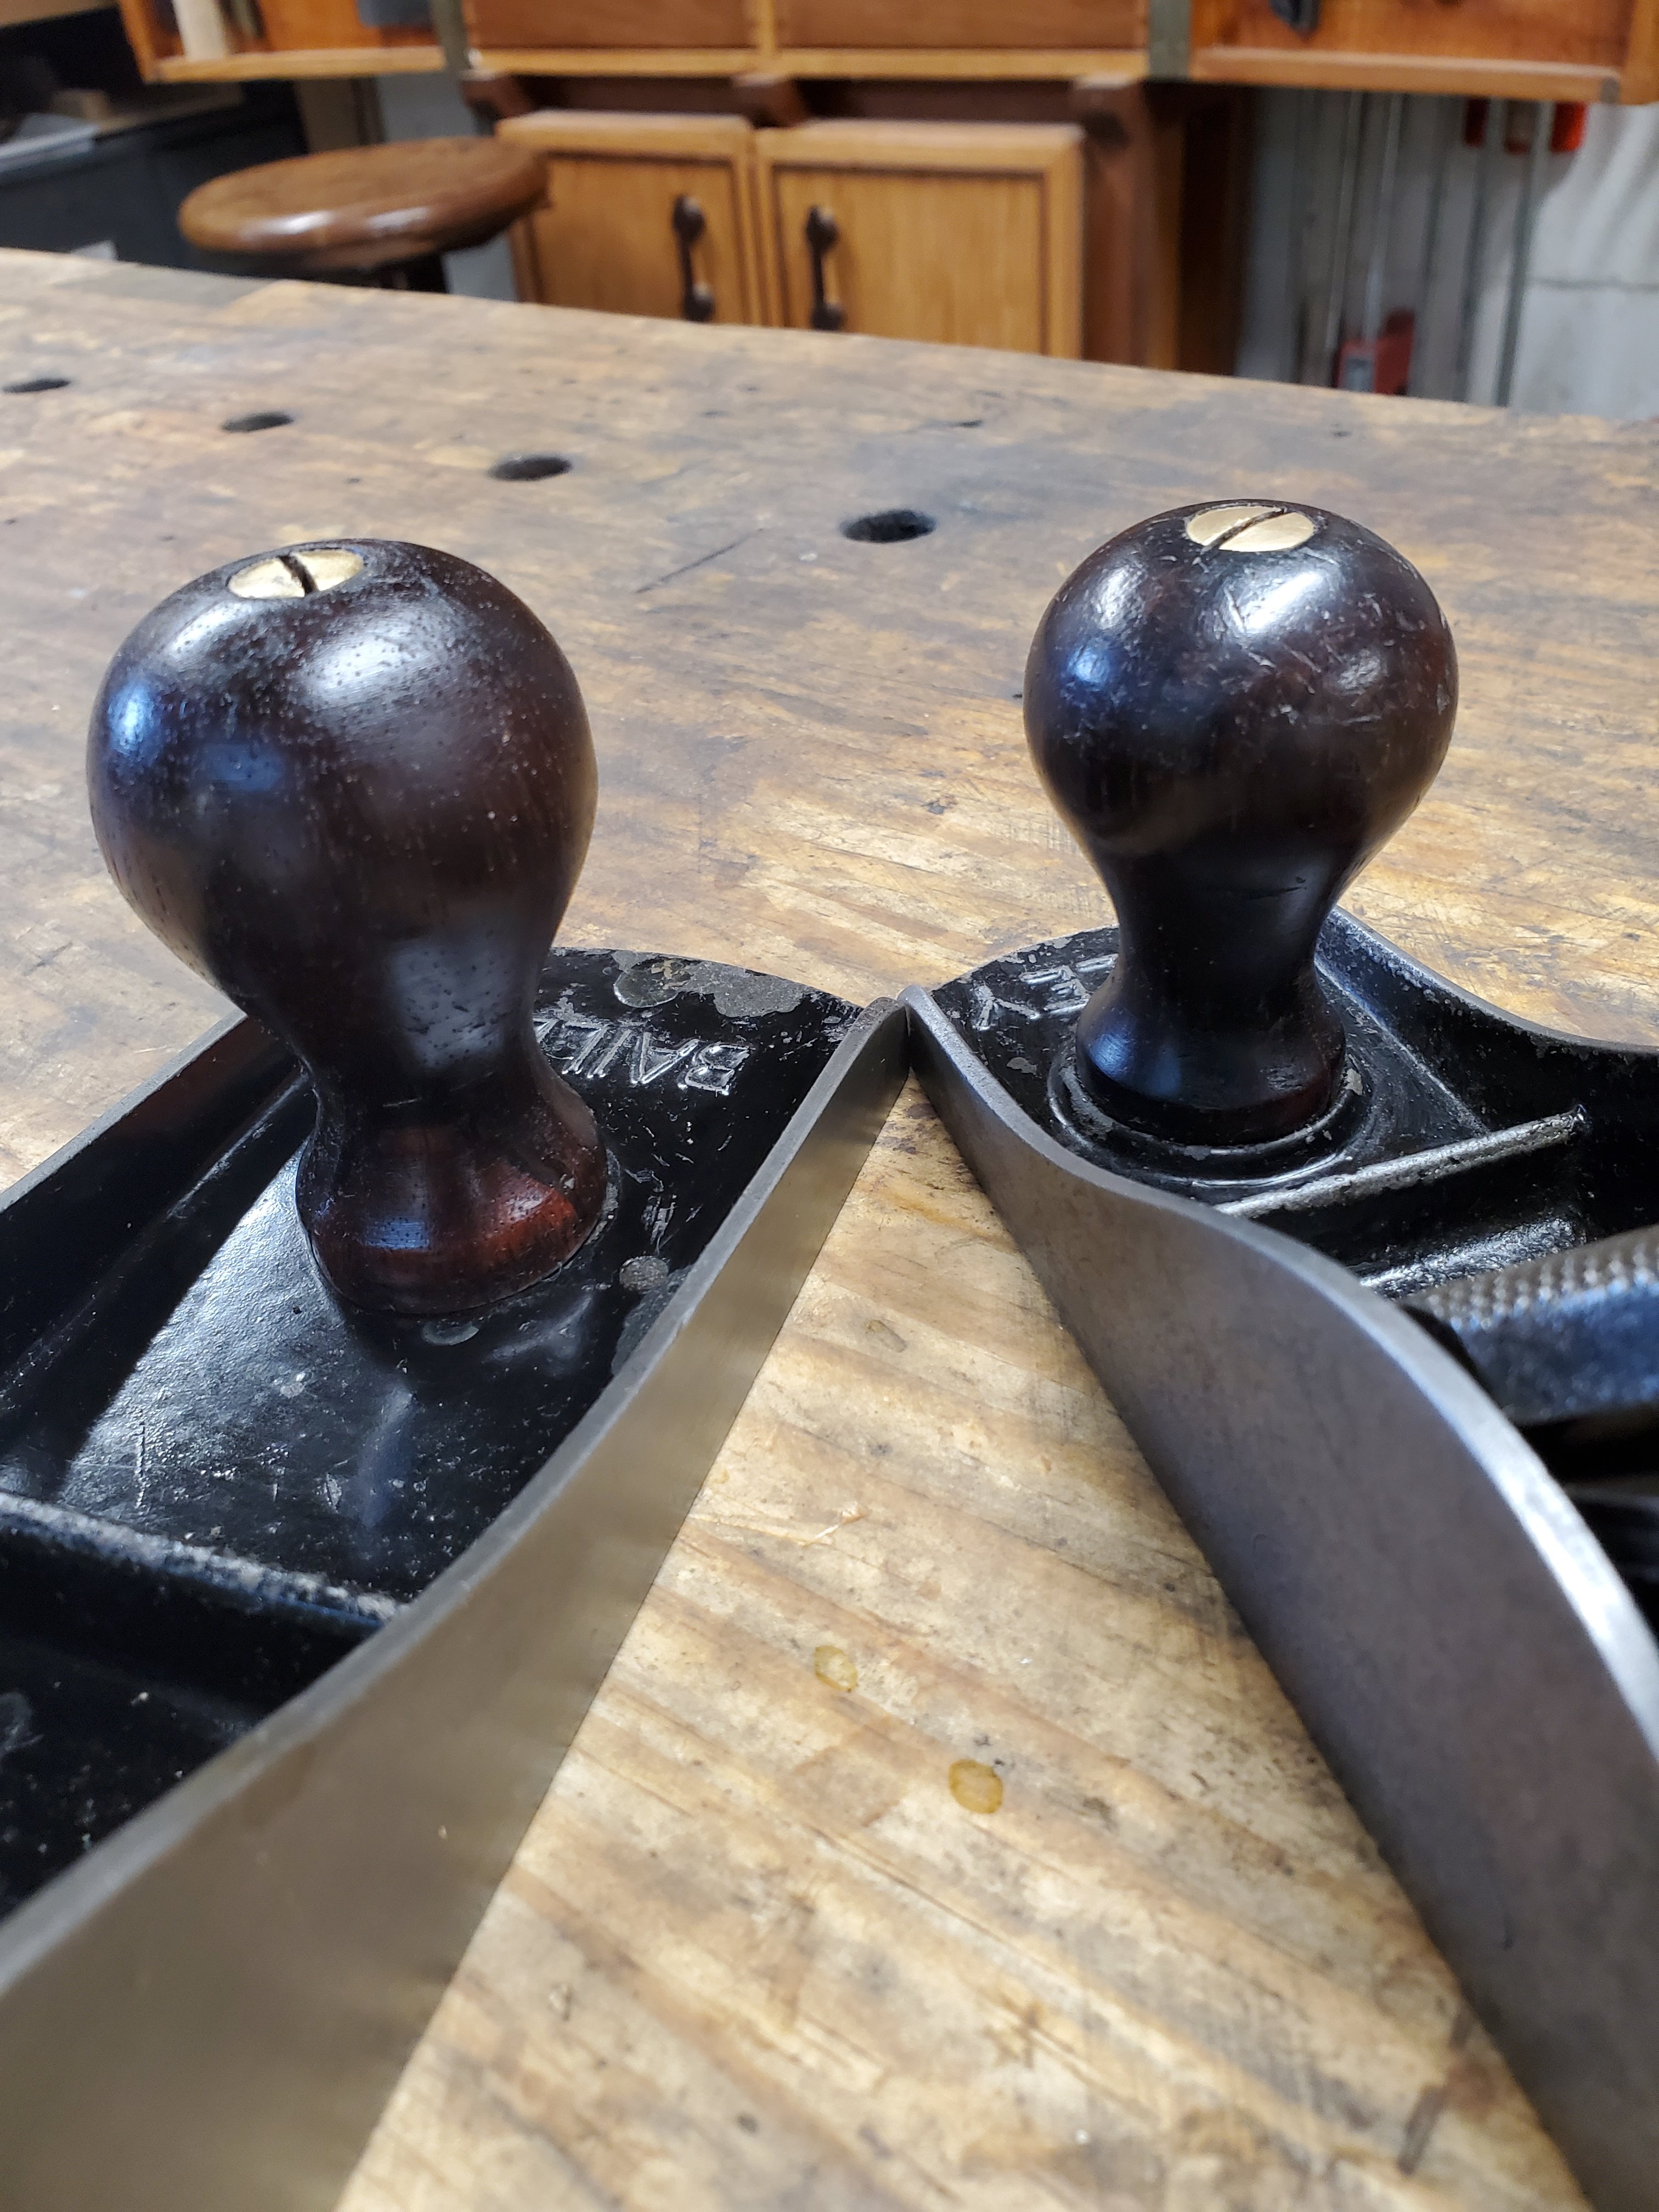
The final step was to apply a couple coats of shellac to the knob and stick it back on the plane. Because the piece of cocobolo was a little lighter in color than the rosewood, I colored the cocobolo darker with a black Sharpie marker then wiped off the excess with some fine steel wool.
The end result came out fine. The knob looks complete and you can only notice the repair if you really look at it. In fact, the knob on the right was also repaired the same way, and you can hardly see it. Looks like I’ll have to start repairing more knobs from now on.
Last week I received a message in my Instagram messaging page. I’m small potatoes on Instagram as I only have a few thousand followers, so I don’t get many messages. The ones I do get, the majority of them are some sort of spam bullshit trying to hack my account, so I usually don’t pay much attention to them.
However this time, the message was from one of my followers. Johnson21800 sent me a couple of pictures of his Great Grandad’s Stanley No 32 Jointer Plane. He said he was so inspired by my posts on restoring tools, he decided to restore his Great Grandad’s plane.
Here’s the plane all cleaned up and restored. I think Peter does a better job than I do!
The fact that Peter would send me pictures of his plane that he restored after watching my feed humbles me. It makes feel good inside that I inspire people to restore and use these old tools that just sit around collecting dust. It’s pretty much the reason I post so many antique tools on Instagram.
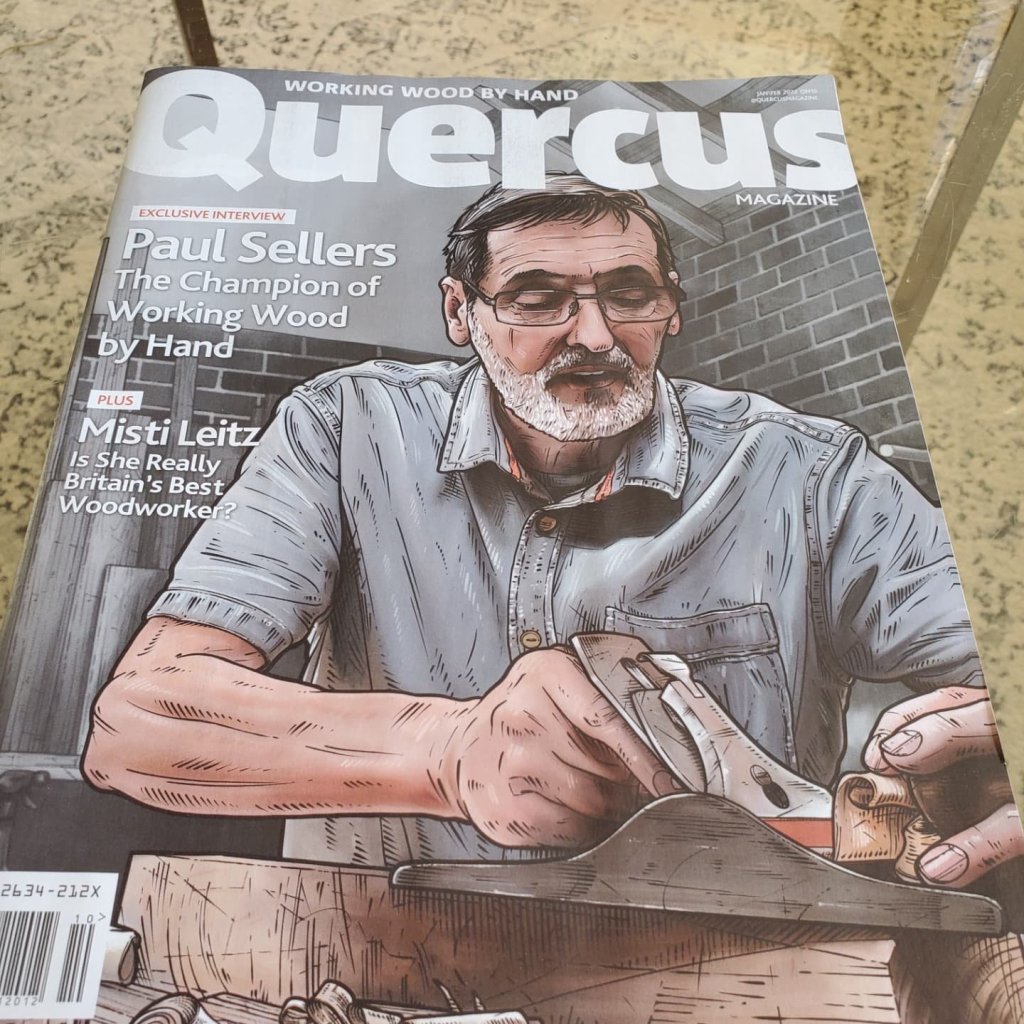
Well, I finally wrote an article for a woodworking magazine. It’s called Quercus and it’s based in the UK. I was asked by the editor Nick Gibbs through Instagram if I would be interested in writing an article about how and why I restore old planes. I jumped at the chance as writing for a woodworking magazine has always been a dream of mine.
I restored an old Stanley No 5 plane and documented my progress, then wrote out my article the same way as I write a blog, then sent him the file along with the pictures. It took a few months for the article to get published but, I’m in the magazine along with Paul Sellers.
When I received my copy, I was amazed by the content that was in it. The magazine features woodworkers from all around the world and their process of how and why they work with wood. There’s not too many “How To” articles and the magazine primarily focuses on hand tool woodworking so, don’t expect an article about “Building the Perfect Router Table” in it. The only other magazine that I would compare to it would be Mortise and Tenon magazine.
This is the plane that I restored for the article. I was planning on selling it, but now it carries sentimental value to me. I asked Nick if he would like for me to do another article but he hasn’t gotten back to me yet. This may be a one-off, but maybe not. Maybe I could be a constant contributor to the magazine. Wish me luck.