My Basement Shop

I’ve had this blog for almost nine years and I’ve never bothered to show you my shop. I really don’t know why. Maybe it’s because I don’t think it’s all that special but below is a short video I posted to Instagram the other day.

I’ve had this shop for the past seventeen years when I bought the house in 2002. Before that, I had a shop in my parent’s basement when I started working with wood when I was a kid. Back then, I had a bunch of bench top power tools. Almost all of those tools have been upgraded. The only power tools that remains from the shop in my parent’s house are the band saw, jointer, and drum sander.

The king of the shop is my tool cabinet which I finished building in 2001. The inside has changed a lot over the years as I added to my tool collection. I doubt it’ll ever be finished as I’m constantly buying new tools to put in it and selling the tools I don’t use that much. It sits behind my workbench for easy access. The majority of the tools in the cabinet are antiques that I restored but I do have some brand new tools in there like a Lie Nielsen dovetail saw and a Veritas shoulder plane.

The workhorse of the shop is my Roubo workbench. Made from southern yellow pine, I based it off Chris Schwarz’s Roubo and Roy Underhill’s Roubo workbench. I use the hell out of it so it’s dirty. I never get any visitors to my shop so I don’t care that it’s not made from hard maple and looks perfectly new. I just use it.

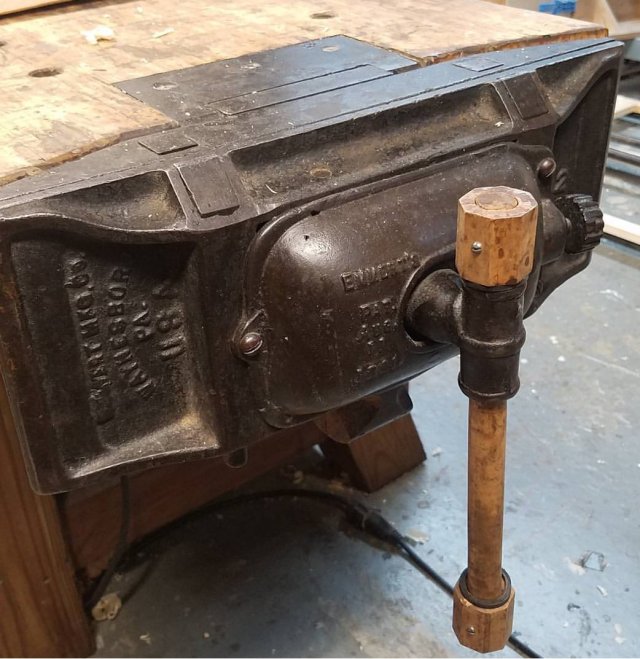
At the end of the bench is my Emmert Turtleback Patternmakers Vise. I LOVE this vise. I bought it 20 years ago at an antique tool auction for about $500. It’s worth every penny. This vise gives me plenty of flexibility when clamping work pieces in it as it swivels 360 degrees and swings up. If you ever have a chance to buy one of these vises, do it! You won’t regret it.

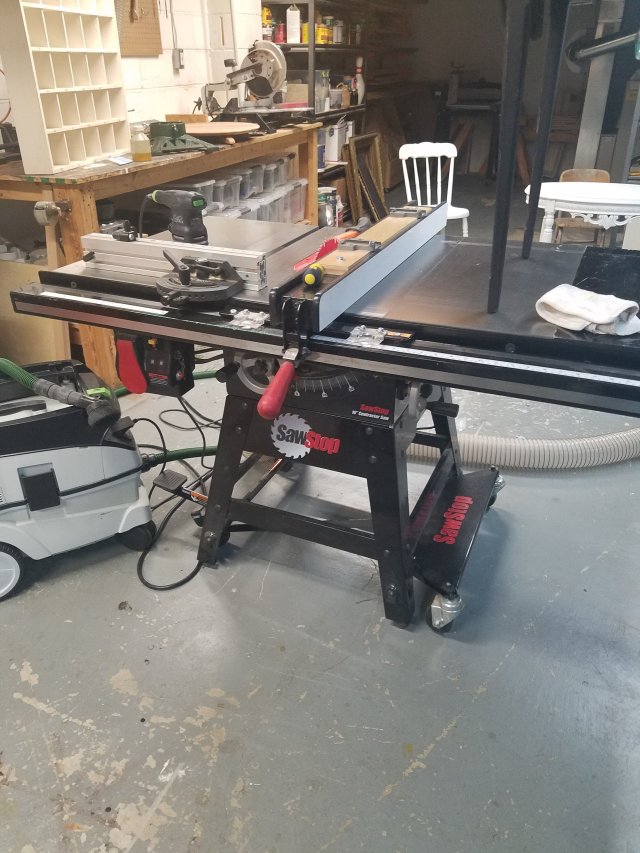
In the middle of the shop is my SawStop table saw. I have no complaints about the saw. I tripped it three times. Twice was from the blade hitting my aluminum miter gauge. The third time it was the tip of my thumb. I was ripping thin strips of wood and every time I ripped the stock to make a strip, my left hand got closer to the blade. Like a dumb ass I didn’t notice the position of my thumb until it was too late. Luckily, it tripped and the tip of my thumb was spared. I sent the tripped cartridge back to SawStop and they sent me a free replacement. My thumb just needed a band-aid.

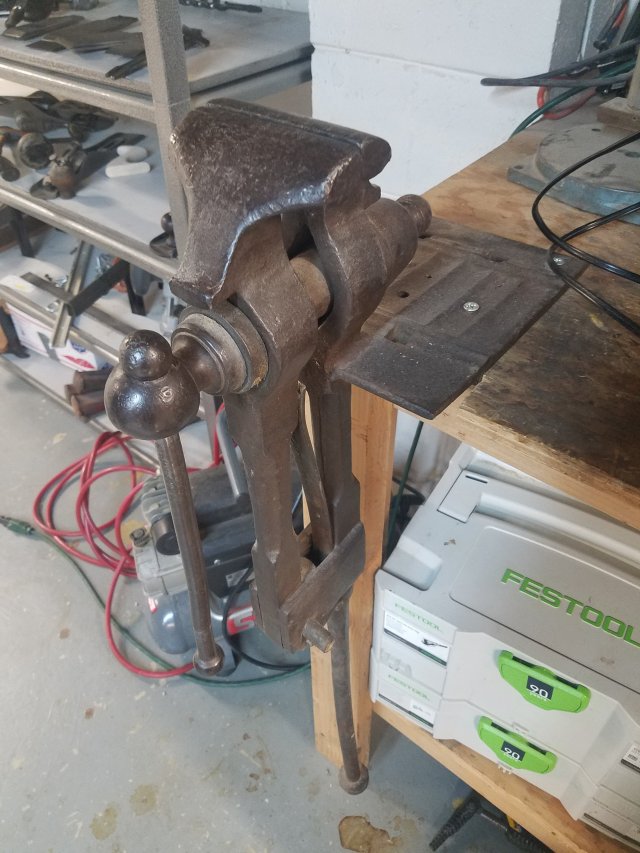
Another nice vise I own is a blacksmith vise. Because I do a lot of antique tool restorations, this thing comes in handy whenever I have to do some metalwork. It’s another one of those tool you don’t realize how nice it is to own until you use it.

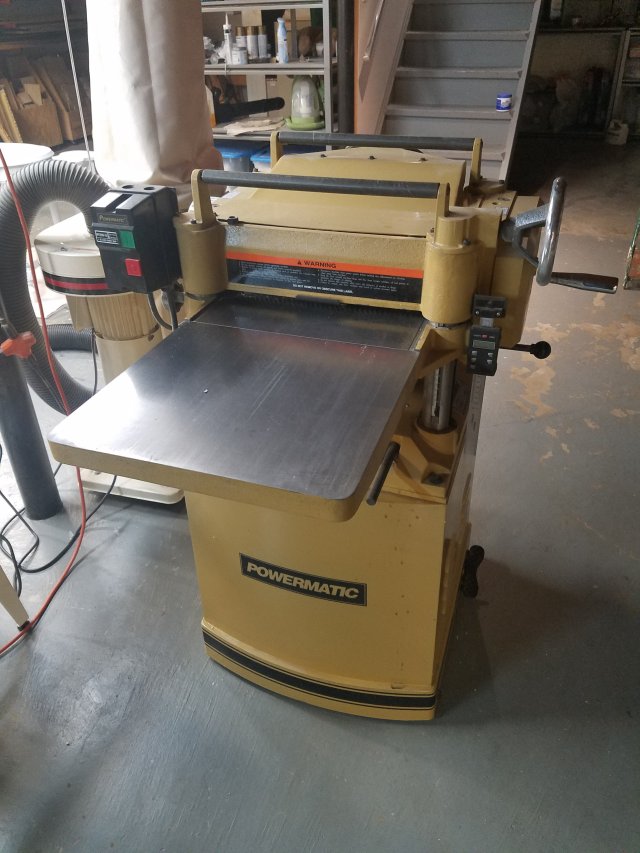
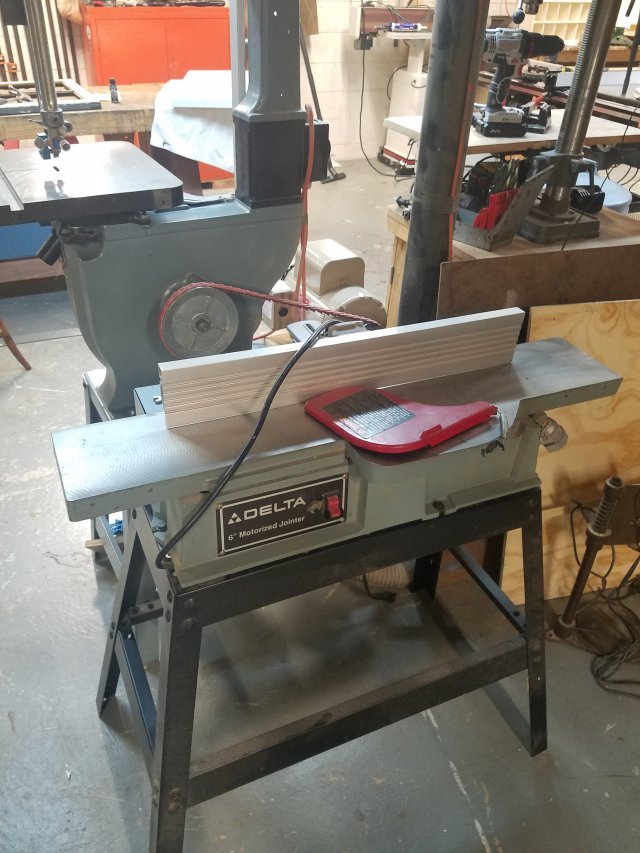
On one side of my shop are my power tools. I’ve owned them for years with the Delta jointer going back to when I was a kid. I souped up my Delta band saw with a 6″ riser block and a 1 hp Baldor motor. My 15″ Powermatic planer is one of the best tools I ever bought.

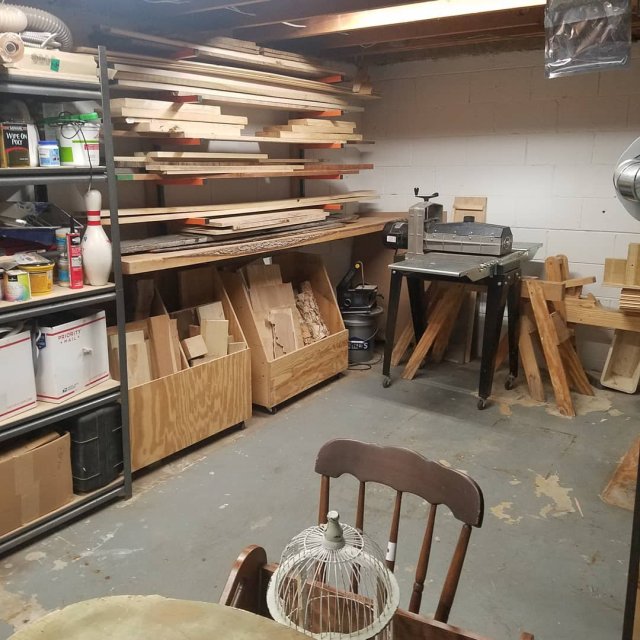
In the corner of my shop is my lumber rack. I buy lumber when I need it so the majority of the boards on the rack are scrap wood. I have one or two boards of certain species but not enough to build a piece of furniture. I simply don’t have the money or the room to stock up on lumber.

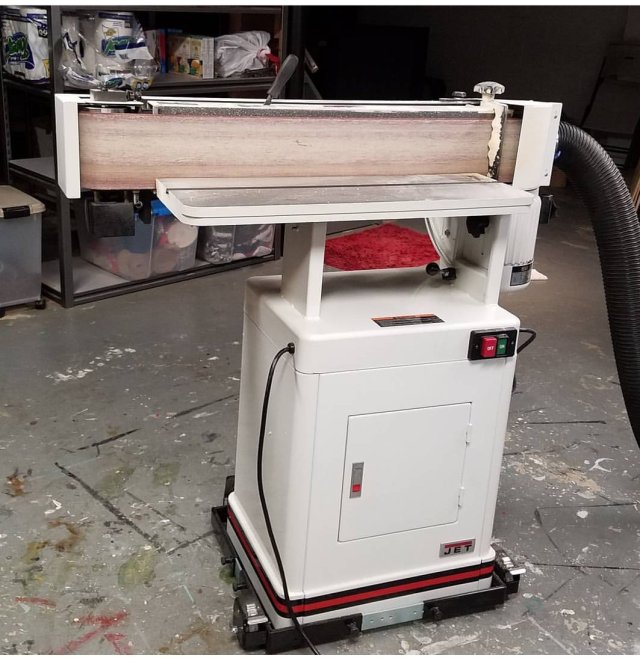
One of my favorite power tools I own is my Jet oscillating edge sander. I wanted one of these for years until I pulled the trigger a couple of years ago. I love this machine as I use it on nearly everything I build. For years I used a home made disc sander jig attached to my lathe. My only regret about this sander is not buying it when I first wanted it.

All in all, I’m happy with my shop, I just wish it wasn’t in my basement. I’d love to own nicer power tools like a 12″ jointer or a heavy duty lathe, but there’s no way I could get them down basement steps. Or more importantly, get them back up when I move.

American Flag Tree

I don’t get many custom orders as I’m usually too busy with my day job and restoring antique tools to do them anyway. However, my wife’s friend asked her if I could make him some American flag trees. She showed me a picture of what he wanted and it seemed simple enough, so I told her I could make them for him.

img_20170527_103306_163

These trees were offered by Martha Stewart a few years ago on her website but, have since been discontinued. The only thing I had to go on was the fact that they were about 20″ tall. Assuming the whole tree was 20″ tall, I figured the largest diameter of the post was probably 1 1/2″ in diameter. I glued some maple together and created 2″ square stock to turn on my lathe. I then used my Peter Galbert calipers to turn the stock to 1 1/2″ in diameter down the whole shaft.

20170527_104237

Studying the photo, I eyeballed the shape of the post, cutting the bottom of the vases to 1″ in diameter. I cut a little finial on the top and a cove and bead detail on the bottom that kind of looks like an old cast iron pot. Again, all eyeballing with no plans. Just imagining things in my head.

img_20170527_113100_496

At the bottom, I turned a 3/4″ diameter tenon. This will fit in a hole I will drill in the base with my drill press. I use a 3/4″ open end wrench to turn the tenon the perfect size.

20170527_113655

After about an hour on the lathe, I turned all four posts and pads for the trees. They are all similar but, none of them are an exact copy of one another.

img_20170527_154519_361

The tree has four rows of flags with six flags on each row. In order to mark the holes in right spot, each hole would have to be 60 degrees away from each other (360 degrees / 6 = 60 degrees). Instead of grabbing my protractor and trying to mark every 60 degree angle, I took my compass and set it to the radius of the post. I then walked around the circumference of the circle marking it at every spot. That left me with six equal segments that were perfectly spaced from one another.

20170527_155904

I did the same thing on the other end of the post starting at the same point. I then drew lines down the post and took a straight edge, lining up the lines on each end of the post marking where the holes would go on the top of the vases. I only marked on the first and third vase for those marks. On the second and fourth vases, I marked a line in between the first and third marks so that the flags on the tree were more spaced apart.

20170527_160959

Even though I figured out where the holes went on the tree, I still wasn’t comfortable drilling my holes in the final piece. I took a scrap post and did all the markings again and used a 1/4″ drill to drill holes in the post at a 60 degree angle. After I drilled all the holes and stuck the flags in, the sample turned out well.

20170604_1651371

When it was time for the real drilling, I took my time. Putting the post back on the lathe, I lined up the marks of the post so they were perpendicular to the lathe bed. This way I only had to worry about the angle of my drill bit as I knew I could sight down the bed of my lathe keeping the bit drilling straight down the shaft. I drilled about an inch in using a brad point drill bit.

20170604_170559

After drilling all 24 holes and giving the piece a light sanding, I drilled a hole in my base and glued the post into it. This is a simple project that I can bang out in case my wife’s friend wants more than the four I made him.

img_20170604_174613_024

Replacing a stretcher bar on a stool

My wife was considering picking up this stool at an antique mall the other day and asked me if I could replace the stretcher bar in the middle. I told her more likely I could so she should go ahead and buy it.

The old stretcher was completely broken off and only the ends remained in the holes where it was attached. I took an 1/8″ drill bit and drilled a pilot hole in the middle of the holes on each end.

I then took a 1/2″ forstner bit and drilled out the hole cleaning it out. The pilot hole served as a guide for the point on my forstner bit so it would not wander off the center of the hole.

I then found a piece of scrap wood around the shop, measured how long the stretcher needed to be and then turned it so the middle was 1″ in diameter while tapering each end to 1/2″ in diameter.

Once the turning was done, I checked the fit of the stretcher at the hole. If the stretcher was a little tight, I shaved off some of the wood with a spokeshave so that the stretcher would fit in the hole nicely. I also had to loosen the legs a little bit by taking out the screws that held them to the frame to give me enough room so that the stretcher would pop into place. Once in, I screwed the screws back into place.

 A half hour of work and a piece of scrap wood, the stool had a replaced stretcher. Now it’s my wife’s turn to finish the stool.

When good chairs go bad

So I’m sitting at the table one night with my wife when I hear a loud crack and a thud hit the floor. A look over to my right and my wife is sitting on the floor with a dumbfounded look on her face. Seems the windsor chair I made seven years ago finally gave in and failed. No way was I about to blame it on the cheese cake she ate 30 minutes earlier so I quickly grabbed the chair and noticed where I made my mistake. I turned to her with a red face and apologized. Talk about embarrassing.

chair 001

It was the tenon on the leg where it attached to the seat. I made the mistake of not tapering the leg all the way into the seat but rather, I turned a 3/4″ tenon at the end instead. At the time I was building the chair, it was an easier thing to do but that tenon created a weak spot in the joinery and the years of use as well as the changes in humidity in the seasons finally made the joint fail.

chair 003

I didn’t want to throw the chair away since the top half of it was still good so I decided to lick my wounds and make new legs for the chair. This time the right way and not the half-ass way.

chair 012

I drilled relief holes in top of the seat where the legs popped through and removed the remaining tenons from the seat. Next I took the four holes and tapered them with a tapered auger and some files and rasps.

blog 001

Then milling up some stock, I turned four new legs and three stretchers. Using my shaving horse, I trimmed the corners of all the parts before I turned them on the lathe.

blog 002  blog 003

Once the legs were turned, I fitted them into the new tapered holes of the seat for a nice fit. Trial and error was key here as I constantly had to check the hole for the proper taper.

blog 009 blog 006

Once all four legs were dry fitted I measured the distance between the legs and turned three stretchers. Two on the side and one in the middle connecting the two. Then I used hot hide glue and glued all the parts together. Hide glue gives me a lot more open working time than yellow glue and is the glue of choice for a lot of chairmakers.

blog 011 blog 014

The chair was back in business. I just needed to clean up the top of the legs that poked through the seat and drive a wedge on top so they won’t move in the joint.

Then it was time to trim the bottom of the legs flush with the floor. Since the chair rocked a little bit from the unevenness of the legs, I took a piece of sandpaper, laid it on my table saw and sanded the longer leg even to the rest of them.

blog 017 blog 019

All I have to do now is sand and repaint the chair and it’ll be good as new. Oh.. and remake the legs for five other chairs.

blog 012