
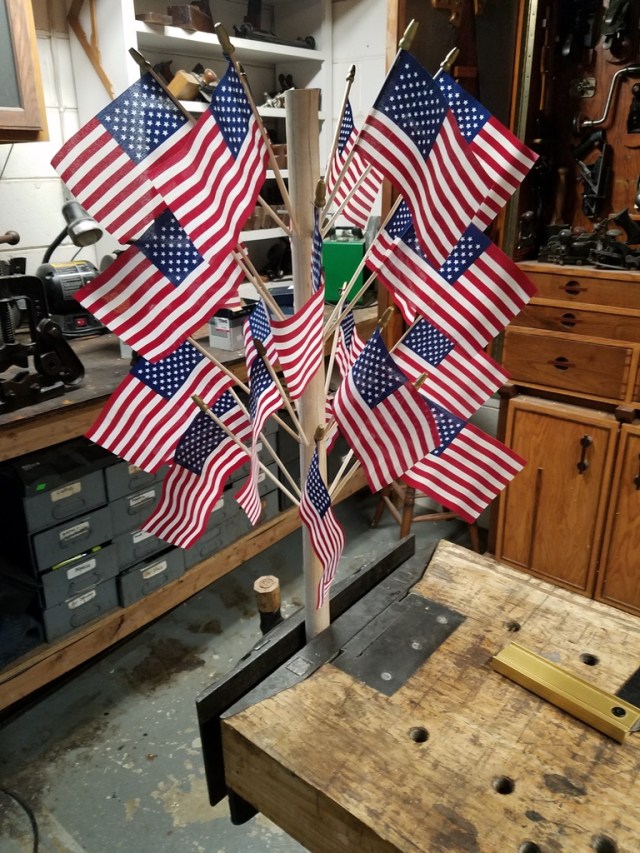
I don’t get many custom orders as I’m usually too busy with my day job and restoring antique tools to do them anyway. However, my wife’s friend asked her if I could make him some American flag trees. She showed me a picture of what he wanted and it seemed simple enough, so I told her I could make them for him.
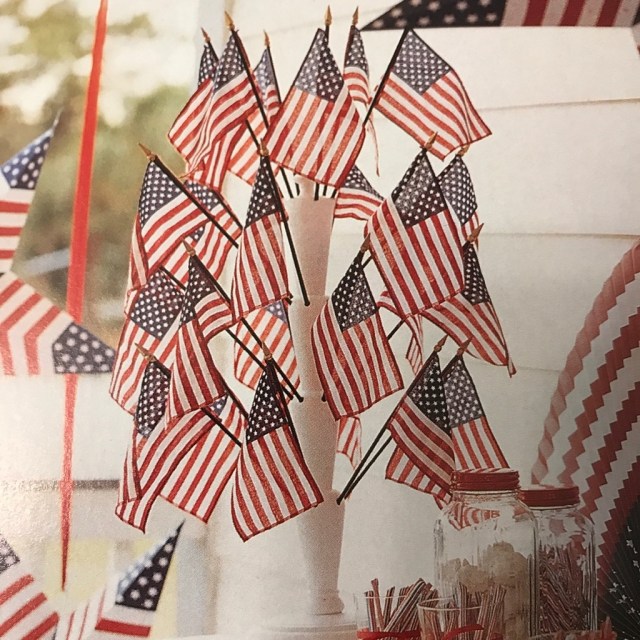
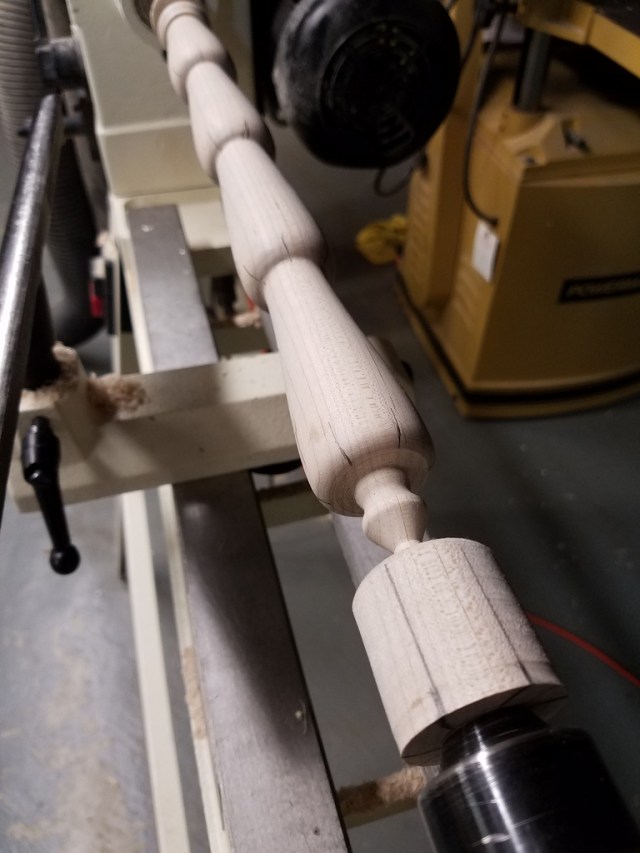
These trees were offered by Martha Stewart a few years ago on her website but, have since been discontinued. The only thing I had to go on was the fact that they were about 20″ tall. Assuming the whole tree was 20″ tall, I figured the largest diameter of the post was probably 1 1/2″ in diameter. I glued some maple together and created 2″ square stock to turn on my lathe. I then used my Peter Galbert calipers to turn the stock to 1 1/2″ in diameter down the whole shaft.

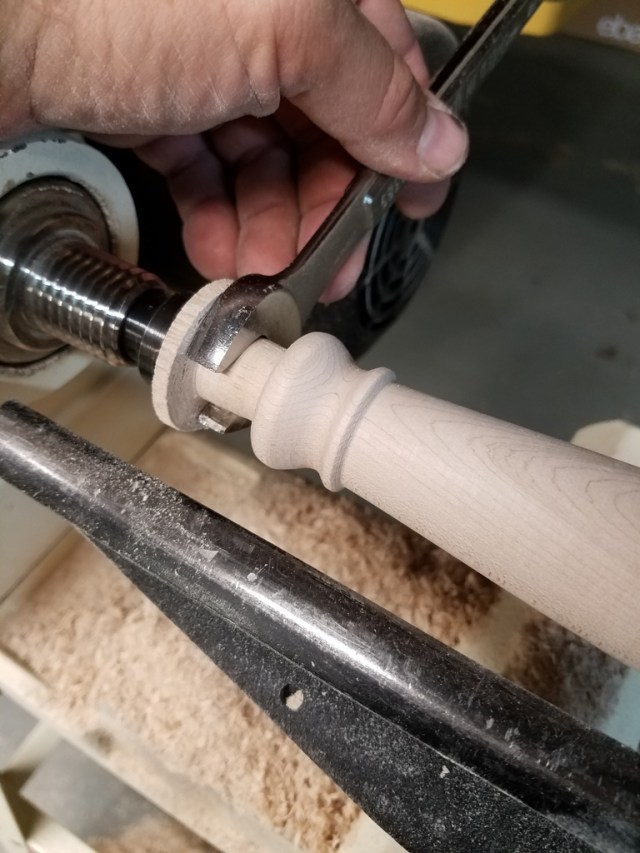
Studying the photo, I eyeballed the shape of the post, cutting the bottom of the vases to 1″ in diameter. I cut a little finial on the top and a cove and bead detail on the bottom that kind of looks like an old cast iron pot. Again, all eyeballing with no plans. Just imagining things in my head.
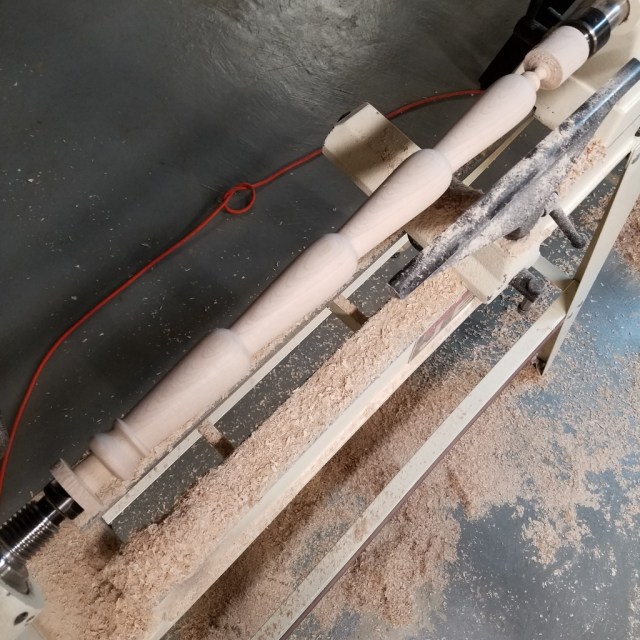
At the bottom, I turned a 3/4″ diameter tenon. This will fit in a hole I will drill in the base with my drill press. I use a 3/4″ open end wrench to turn the tenon the perfect size.
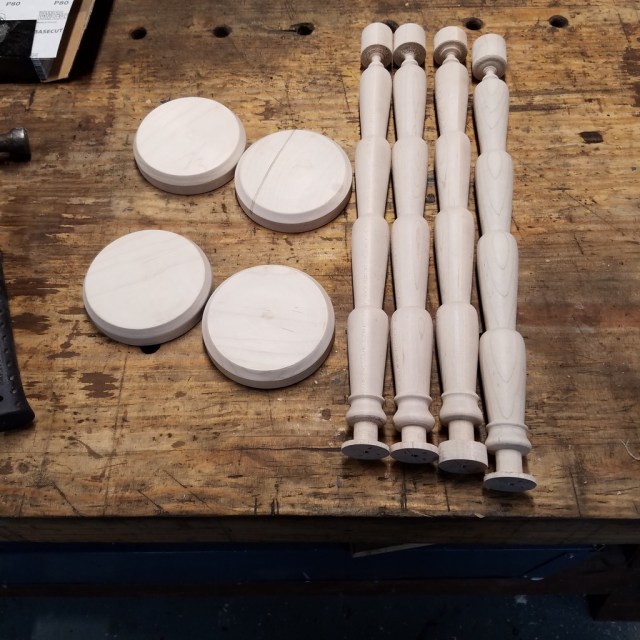
After about an hour on the lathe, I turned all four posts and pads for the trees. They are all similar but, none of them are an exact copy of one another.
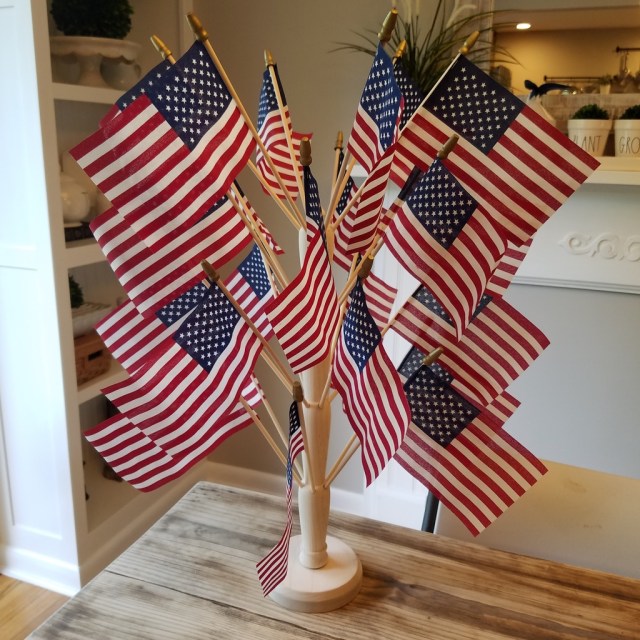
The tree has four rows of flags with six flags on each row. In order to mark the holes in right spot, each hole would have to be 60 degrees away from each other (360 degrees / 6 = 60 degrees). Instead of grabbing my protractor and trying to mark every 60 degree angle, I took my compass and set it to the radius of the post. I then walked around the circumference of the circle marking it at every spot. That left me with six equal segments that were perfectly spaced from one another.
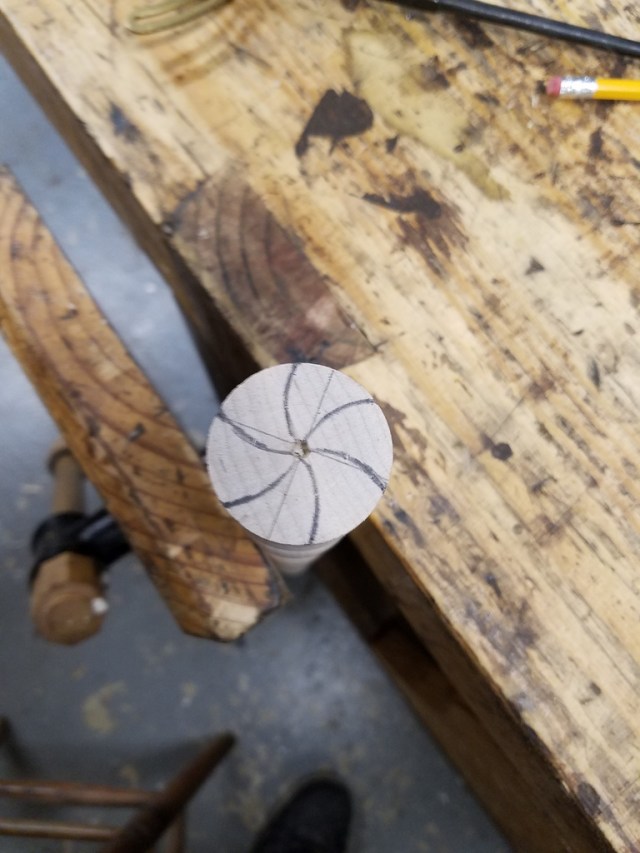
I did the same thing on the other end of the post starting at the same point. I then drew lines down the post and took a straight edge, lining up the lines on each end of the post marking where the holes would go on the top of the vases. I only marked on the first and third vase for those marks. On the second and fourth vases, I marked a line in between the first and third marks so that the flags on the tree were more spaced apart.
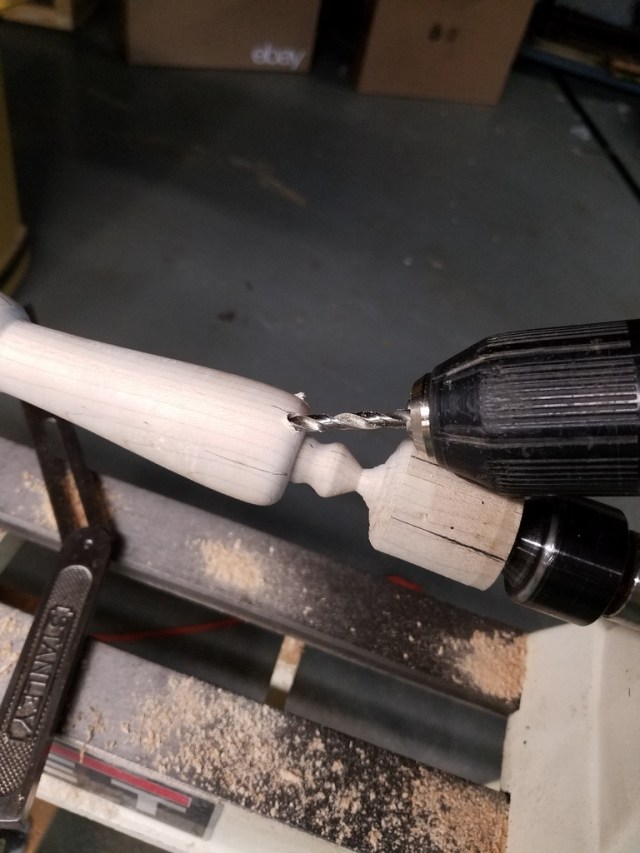
Even though I figured out where the holes went on the tree, I still wasn’t comfortable drilling my holes in the final piece. I took a scrap post and did all the markings again and used a 1/4″ drill to drill holes in the post at a 60 degree angle. After I drilled all the holes and stuck the flags in, the sample turned out well.
When it was time for the real drilling, I took my time. Putting the post back on the lathe, I lined up the marks of the post so they were perpendicular to the lathe bed. This way I only had to worry about the angle of my drill bit as I knew I could sight down the bed of my lathe keeping the bit drilling straight down the shaft. I drilled about an inch in using a brad point drill bit.
After drilling all 24 holes and giving the piece a light sanding, I drilled a hole in my base and glued the post into it. This is a simple project that I can bang out in case my wife’s friend wants more than the four I made him.

Beautiful work. You’re posts are really wonderful to read. Your attention to detail is well noted. Thanks,Mike
Hemi1955 on Instagram
LikeLike
Thanks Mike! I take a lot of pictures because my writing ability is not that great. Plus, my grammar sucks. My wife is constantly telling me to edit my posts because of poor grammar. I think I got a D- in Business Writing in college. haha
LikeLike