Making a Harvest Display Table

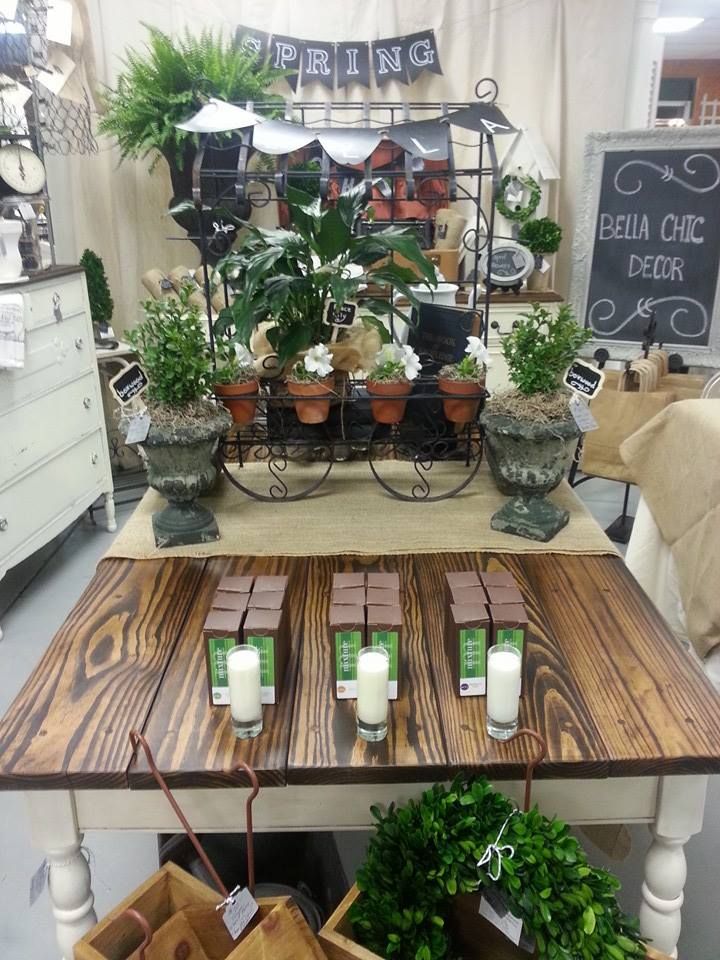
A few months ago, I built a Harvest Table for my wife to use in her booth to sell some of her antiques. You can read the blog post here. She still has that table, but she asked me to build another one for another booth she has. I went to a local antique store that sells reclaimed wood and bought a 4″ square posts and three pieces of barn wood siding. I have a picture of the wood on instagram. Unfortunately, I deleted the original photo from my phone before I uploaded it to photobucket to share here.

I started this harvest table in much the same way as the first one, turning the legs on the lathe. The major difference is that this table was turned with reclaimed birch instead of douglas fir 4×4’s that I bought at Lowe’s. Turning reclaimed lumber is probably not the smartest thing to do since you never know what the integrity of the wood is as it may snap off while on the lathe injuring you, but I thought I’d take my chances.

A couple of the pieces I wanted to turn had some nails stick stuck in the wood. I grabbed a chisel and hammer and I dug into the wood to extract all nails I could find. There were a couple of nails that were too deep to grab, so I carefully turned the leg, stopping every few strokes making sure I wasn’t near the top of the nail.

 photo 20160905_195121.jpg

While a couple of the posts had nails holes in them, the other two had old worm holes. I turned each leg the same and in the end, they were full of character. You can see the final four turned legs here.

 photo 20160905_195135.jpg

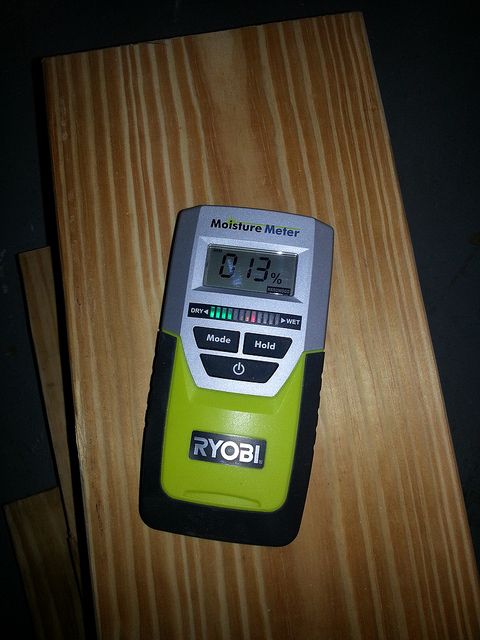
With the legs turned, I focused my attention on the top. I took the three slabs of barn wood siding and brought them together to determine how wide the top of the table could be. The boards were only 3/4″ thick and I wanted the top to be thicker, so I took some scrap OSB boards I had laying around from when I was building my shed and built a substrate for the boards.

 photo 20160904_183146.jpg

I glued and screwed the OSB to the siding gluing in the middle of the boards and screwing on the ends. The siding is so old that I figure the expansion and contraction of the wood would be very minimal. Even if they did crack, it would just add more character to the top of the table.

 photo 20160905_161649.jpg

I added some pine edging to cover up the OSB substrate underneath the top boards. Cutting the corners is where my miter trimmer comes in handy. I love that thing!

 photo 20160905_160457.jpg

Flipping the top back over, I figured out where the legs should go. I kept the design simple by using a scrap pieces of edging that were 1 3/8″ wide and making them gauges to show me where the legs should go. Easy P-easy.

 photo 20160905_162059.jpg

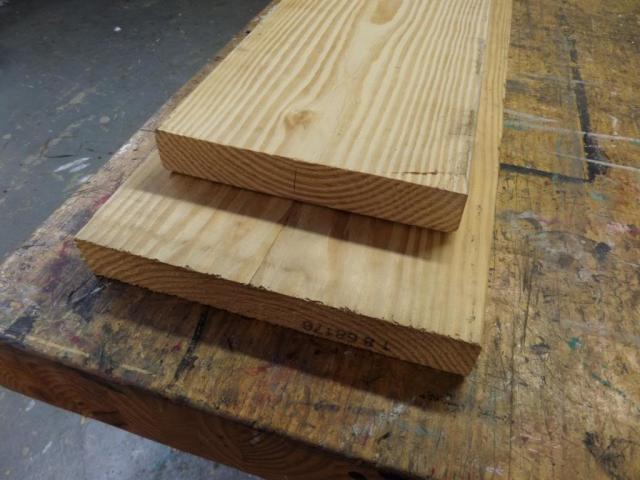
Next was to make the frame of table. I grabbed a 2×12 and milled it to 3/4″ thick by 5″ wide pieces and cut them to fit between the legs.

 photo 20160905_163615.jpg

I then channeled my inner Scott Phillips of The American Woodshop and used my Kreg Pocket Hole Jig and screwed the frame to the top. I was trying to build this table as quick and as easy as possible. I wasn’t trying to win a woodworking contest with this table.

 photo 20160905_170752.jpg

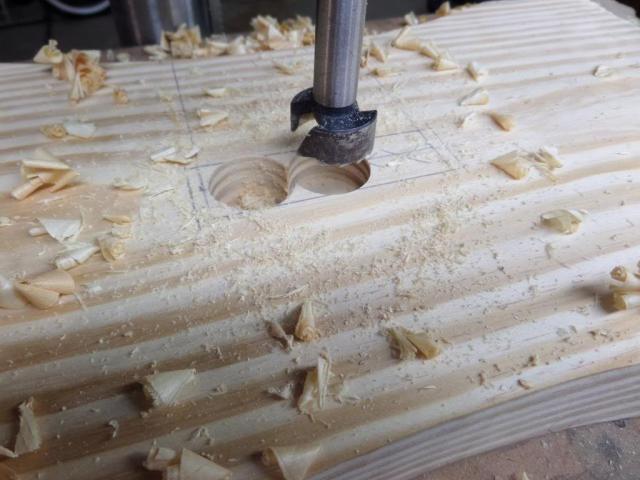
I still needed to attach the legs to the frame so I drilled a pilot hole in the legs and screwed in 3/8″ hanger bolts.

 photo 20160905_175850.jpg

I then simply drilled a hole in the corner brackets, fed the bolt through the hole, and tightened it in place with a nut. As the nut tightened to the corner bracket, it drove the leg tight to both sides of the frame. Attaching the legs this way makes it possible to take them off and carry it out of my basement shop.

 photo 20160905_181837.jpg

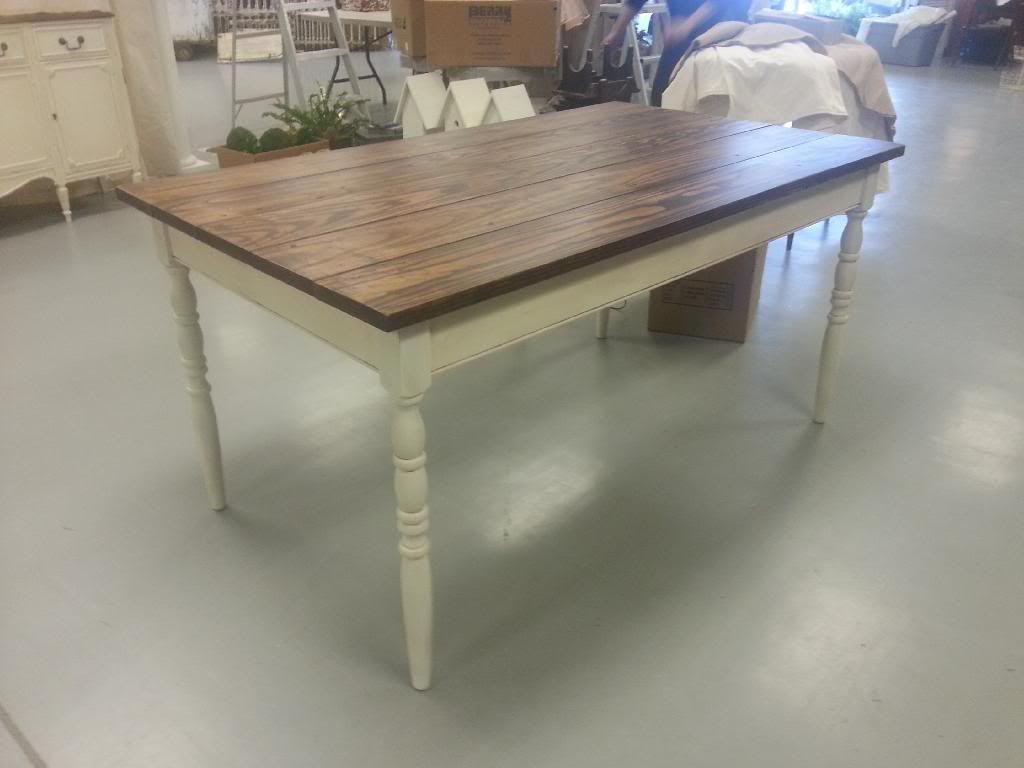
Flipping it back over, the table was built. Super simple and super fun. I posted this picture on instagram and it has been my most liked picture, ever!

 photo 20160905_195802.jpg

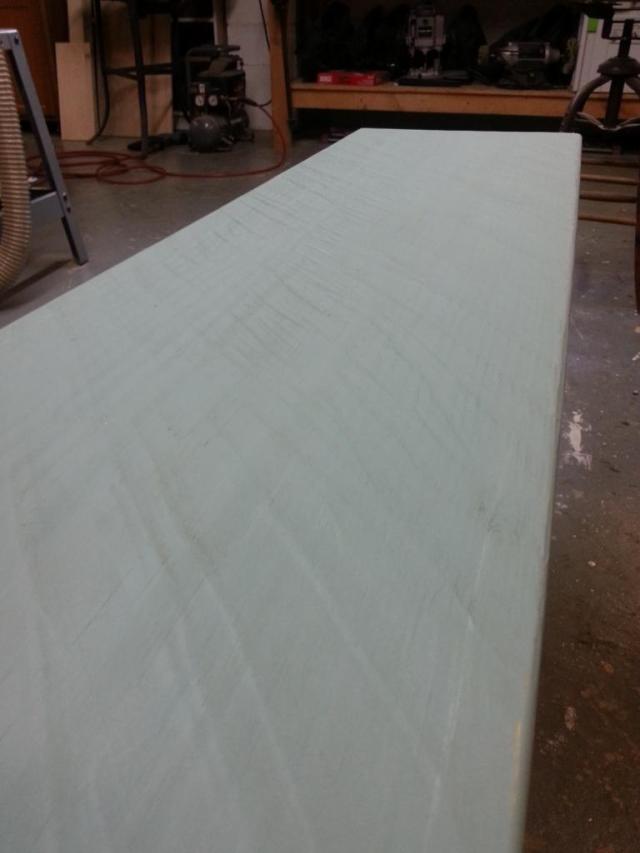
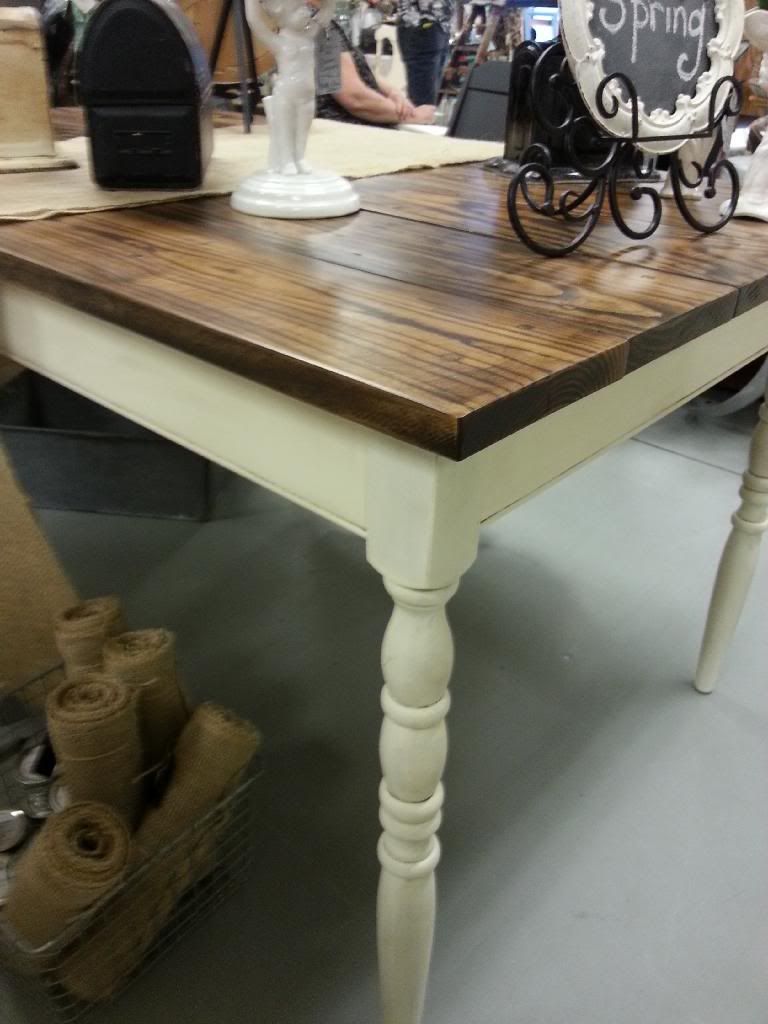
The final picture is the table with an antique stain applied to it. I’m happy with the way it turned out and so is my wife.

 photo 20160906_183410.jpg

Building a Shed Part VI

Getting the roof done, it was back to working with wood, which is what I like. I had already started a little bit of the siding trying to shore up the shed so I could get up on the roof without being nervous with all the rocking and rolling going on up there. All the siding I bought was 8″ wide, 10′ long tongue and groove pine board. I scarfed joint the back row pieces so that I could nail them together at a 2×4.

 photo 20160613_204151.jpg

By far the easiest part to side was the left side. We did that one week day after work before I started the roof. Since the shed is 10 feet wide, I simply nailed them to the frame with 2 1/2″ 15 gauge galvanized finishing nails.

 photo 20160614_171504.jpg

Fast forward a few days and after I shingled the roof, the majority of the siding was up. I originally started to use short pieces between the windows in order to use up some of the scraps. However, the more I thought about it, the more I realized that if I continued to do it this way, by the time I got down to the bottom of the window opening, with my luck, my bottom board wouldn’t line up with boards directly on top. Instead, I opted to cover up the window opening and later cut out where the window went. I did the side window the same way, but didn’t snap a photo of the before shot.

 photo 20160620_193200.jpg

I took my jig saw and ran down the opening cutting away the wood leaving about 1/4″ from the 2 x 4’s.

 photo 20160620_193818.jpg

Then, being a woodworker, I ran a flush trim bit on my router and routed the siding flush to the 2 x 4’s.

 photo 20160620_194144.jpg

Siding was nearly complete except for the small bottom piece to cover up the 2 x 8 flooring. Now it’s on to the windows.

 photo 20160620_200544.jpg


Building the Shed Part III

Remember this thing? Probably not. I started building this 10′ x 14′ shed late last year. I waited nearly two months for the deck boards to come in from Home Depot, but by the time they came in, it started to get cold for the year.

 photo 20151224_133134.jpg

Fast forward six months, I decided to get off my duff and start building the shed again. I went back to Home Depot and bought a bunch of 2 x 4’s and a few 2 x 6’s and framed out the walls.

 photo 20160610_203334.jpg

My wife bought a nice old sixteen pane window for the shed a couple of years ago and we decided to place it on the side of the shed. I measured it and framed it out making sure there was a little gap on all sides so it would be easy to install.

 photo 20160610_203348.jpg

The front of the shed will have two more old windows with big double doors in the middle. I laid the window in the frame to see where I wanted the header. We decided that all the windows and the tops of the doors will be placed at the same height.

 photo 20160611_073430.jpg

My buddy Dave came over in the morning one Saturday so that we could raise the walls and build the rafters for the roof. The four walls went up with ease and everything was plum and square. Good measuring on my part I guess.

 photo 20160611_092746.jpg

After we installed the top plate to the wall, we played around with angles for the roof until decided to use the 3′, 4′, 5′ Pythagorean theorem method. We cut a test rafter to see how it looked and cut out the birds mouth so that the rafter would fit on the walls nicely. I wanted the rafters to hang over the walls about one foot.

 photo 20160611_114503.jpg

Cutting the angles for the rafters was easy since there was a 31.62 degree measurement on my sliding compound miter saw. We cut all the wood and made seven rafters in about an hour.

 photo 20160611_131234.jpg

Since the the total length of the roof was 16′ long, we ended up making another rafter that sat in the middle of the shed so that the OSB plywood would have something to nail to at the end.

 photo 20160611_142744.jpg

I trimmed the OSB plywood to the proper size on the second row so that I would have about a 2″ gap at the top for a ridge vent. We got a boatload done in one day and I was happy I finally started to build the shed again.

 photo 20160611_151625.jpg


Making an Apothecary Cabinet Drawer

My wife bought an apothecary cabinet that was missing one of its drawers. I took a look at how they were built and assured her that I could make another one. The drawer was about 6 1/2″ tall x 8″ wide x 7 1/2″ deep.

 photo 20160521_132458.jpg

The drawers are made of pine so I grabbed a scrap 2 x 8 and drew a couple of lines down the edges. The side of the drawers were about 3/8″ thick, while the drawer front was 3/4″ thick.

 photo 20160521_133253.jpg

I took each piece and cut kerfs down the lengths of their edges making it much easier to rip them off at the band saw. This saves the band saw’s blade and motor as it won’t have to strain as much.

 photo 20160521_133755.jpg

After they were ripped on the band saw, I took them over to the planer and sized them up to proper thickness.

 photo 20160521_134533.jpg

I made the drawer bottom out of mostly quarter sawn pine, so it wouldn’t expand and contract as much with changes in humidity. It too was about 3/8″ thick.

 photo 20160521_135708.jpg

Focusing on the front, I cut a 3/8″ x 3/8″ rabbet on each end the same thickness as the sides of the drawer.

 photo 20160521_140219.jpg

I then used my little Record plow plane and planed a 1/4″ groove down the sides and front boards that started about 7/16″ up from the bottom. This way the 3/8″ thick bottom will not rub as the drawer is being pulled in and out. You can do this step on the table saw, but I really enjoy using this little sucker.

 photo 20160521_140912.jpg

I cut a 3/8″ dado on each side of the drawer side so that the drawer back would fit nice and snug.

 photo 20160521_141719.jpg

Using my Stanley No 140 rabbet block plane, I chamfered three sides of the drawer bottom to fit inside the 1/4″ groove I plowed with my plow plane.

 photo 20160521_142406.jpg

Dry fitting the piece, I made sure everything fit properly and was square. The extra length of the drawer bottom and top of the back was quickly trimmed off at the table saw.

 photo 20160521_142850.jpg

Once everything fit well, I glued the sides and back and pinned the drawer with 18 gauge brad nails. I didn’t use any glue on the bottom as I want it to move with changes in humidity.

 photo 20160521_143848.jpg

After about an hour, I ended up with a nice little drawer for my wife’s apothecary cabinet. I’ll have to use vinegar and steel wool to age the pine. My wife will probably repaint the entire piece so the drawer front will match all the others.

 photo 20160521_145607.jpg


Harvest Table

A few moths ago my wife, Anita, and I picked up some old barn wood flooring in Dayton to be used for a harvest table she wanted me to build for her booth. While the wood sat in the basement, she kept looking for the right legs to use for the table. In the end, she opted for me to make some out of Douglas Fir 4×4’s I could buy from Lowe’s. She searched Pinterest for a leg she liked and printed off a picture so I could make it.

 photo ebay 014.jpg

I looked at the picture and started to turn something like it on the lathe. I kept the top of the leg similar to the picture, but changed the bottom to be a bit more simpler. After a few tweaks, I was happy with the end result. Now the challenge was to make three more legs that matched this one.

 photo ebay 017.jpg

I used a piece of scrap wood and marked every major location where there was a bead or valley in the board. I then used calipers to measure those increments and carefully tried to copy them to the next turning.

 photo ebay 019.jpg

After several minutes of careful turning, my second leg looked very similar to the first one on top. Even if the legs weren’t exactly the same, it was fine as they would be far enough away from one another that your eye wouldn’t be able to see the difference.

 photo ebay 023.jpg

If you’ve never turned Douglas Fir, I highly recommend it. It sucks..sucks bad. The crap chips like crazy even with sharp turning tools. Fortunately since the harvest table was suppose to look old, the chips wouldn’t be a big deal.

 photo ebay 022.jpg

After a couple of hours, I turned four legs that sort of looked like one another. The final step was to put them back on the lathe and use my parting tool to cut them at all the same length which was 30″ tall.

 photo ebay 026.jpg

The simplest part about building the harvest table was actually building it. I simply screwed the skirt onto the legs using 2″ screws. I didn’t even bother plugging the holes.

 photo ebay 028.jpg

I used cleats and pocket hole screws to keep the sides from bowing. I then attached the top onto the cleats using 1 1/4″ screws. Super simple.

 photo ebay 029.jpg

This was the table before sanding the grime off the boards.

 photo ebay 031.jpg

This is the table after a couple coats of white milk paint.

 photo blog 002_8.jpg

As you can see, once sanded, the milk paint gives the table a nice worn look. Even though this table breaks three of the seven deadly sins of woodworking, it works for it’s intended purpose. Just don’t expect to see it in a woodworking magazine anytime soon. All that matters is that Anita is very happy with it and finally has the harvest table she has always wanted.

 photo blog 003_10.jpg

Revamping a Dining Table

About twelve years ago I built a dining table from the plans out of Woodsmith magazine. While it served it’s purpose, it wasn’t exactly the nicest thing in the house. I made the top out of a piece of low-grade oak plywood that I bought at Home Depot. Not only that, but the table was huge being 44″ wide. My wife Anita asked if I could make a new one, or at least make a new top that was more in style. We decided that making a new top out of southern yellow pine and try weathering it making it look aged.

 photo 20150713_192149.jpg

The easy part was buying four 2 x 10’s, ripping them 9″ wide by six feet long and gluing them together. After they were glued, I planed the tops of the boards straight removing all the mill marks in the process.

 photo 20150713_181813.jpg

After the top was planed and sanded with 150 grit sandpaper, Anita applied mixture of steel wool and apple cider vinegar onto the boards to tone down the yellowness of the southern yellow pine.

 photo blog 002_4.jpg

We thought it would be a good idea to stain the top while it was already on the table. I removed the original top of the table and flipped over the base onto the new top to decide how much I would need to cut the sides down.

 photo blog 004_6.jpg

After messing around with the legs for a few minutes, I decide that the sides should be 24″ wide.

 photo blog 005_6.jpg

I cut the sides to 24″ and rerouted the dado on both boards for the corner brackets. I then used pocket screws to re-attach the sides to the legs.

 photo blog 006_2.jpg

Using metal corner brackets, I simply attached the top to the base. The new top made the table look more like a farm table.

 photo blog 008_1.jpg

Anita then stained the table with Special Walnut, then Classic Gray stain from Minwax.

 photo 1437251379798.jpg

Once dry, she applied hemp oil and gave the top a good waxing. She then painted the base with grey chalk paint. When done, it looked like a completely different table.

 photo 20150724_171103.jpg

A close up the table you can see how the southern yellow pine took on a deep rich tone. You can also see how the original black paint shows through the grey paint after Anita sanded the base a little bit. This has been one of those projects we should have done years ago.

 photo 20150724_171113.jpg

Weathering Pine, 2nd Attempt

Several months ago I wrote a blog about weathering pine with little success. Well, I decided to give it another try. My wife had heard of using a mixture of apple cider vinegar and steel wool to coat the wood to give it a grey finish. We heard of using regular vinegar and steel wool, but apparently, the tannins of the apple cider penetrates the fibers of the wood to give it a richer older look.

 photo 20150222_173633.jpg

I gave the mixture a shot on a piece of southern yellow pine and poplar to see how it would turn out. At first, the wood hardly changed at all.

 photo 20150222_173642.jpg

However, after twenty-four hours, you can see how the mixture turned the wood dark on both the poplar and southern yellow pine. However, even though the wood did react, my wife was looking for something that looked more grey and less muddy brown.

 photo blog 001_2.jpg

I tried applying some ebony paste wax to the wood, but that didn’t turn out well at all. It just made the wood look more muddy.

 photo blog 002_2.jpg

I then decided to do something a little different and burn the wood with a propane torch.

 photo blog 003_3.jpg

After the wood was burnt, I used a piece of steel wool to remove the charcoal from the surface. This left the board with a texture where the early wood and late wood were at different levels.

 photo blog 004_3.jpg

I was impressed by the way the wood looked and felt that I applied clear and ebony paste wax on the sample to see how each half turned out.

 photo blog 005_3.jpg

I was so intrigued by this method that I flipped over the board and tried this technique on the whole board and applied the clear and ebony paste wax on each half.

 photo blog 002_3.jpg

Even though I didn’t create the look my wife was looking for, I really like how the wood looks after trying this technique, especially with the clear wax top coat. I’ll have to try it out on a completed project sometime. Now only if I could figure out how to make new pine look old without leaving it outside for six months.

Roubo Style Workbench

Walking around an antique store called Ohio Valley Antique Mall in Cincinnati this weekend, I ran upon this massive beast in one of the aisles. An eight foot long authentic Roubo style workbench. I’ve seen dozens of old workbenches before, but for some reason this guy stuck out to me. The previous owner screwed nickel-plated hooks on the front of it for someone reason. Probably to hold coffee cups or some other nonsense.

 photo 20140831_125018.jpg

What made this bench stick out was the splay of the front leg along with the leg vise. I imagine this was done to prevent the workbench from racking when sawing. The cast iron vise hardware turned smooth and could still tighten with something with a good grip.

 photo 20140831_130955.jpg

It had an old planning stop hole used for planning boards. Oddly the area around the hole was all worn down. When I see wear marks on old pieces like this, it makes me wonder what type of work the craftsman did to make those types of marks. Though it does appear he was sawing on the right side of the planning stop.

Another interesting clue is that it is quite possible that at one point there was another vise installed on top. The three holes around the lighter circular area is possibly where he bolted down a machinist vise onto the bench.

 photo 20140831_130947.jpg

The legs were jointed together with a simple bridle joint however, the legs were not jointed into the bench’s top. More likely the top was just bolted down to the legs somehow. I didn’t feel like moving everything around in the booth to get a better look.

 photo 20140831_131003.jpg

The bench top was a good 12″ wide x 4″ thick piece of pine. It had a tool tray in the back that appeared to be in real good shape given it’s age. Notice how there are no bench dog nor holdfast holes in the top.

 photo 20140831_131011.jpg

Who knows where this bench will end up. Probably in someone’s home as a kitchen island, but for a cool $700 it can be all yours.

 photo 20140831_125018.jpg

Making a Bench from Dimensional Store Bought Lumber

When my wife Anita does shows, I’m always looking for something that I can make fairly quickly that she can sell in her booth to help pay for some of her fees. After helping her do shows over the past couple of years, I’ve noticed that small benches are quite popular. They’re nice to stick out on front porches or foyers or even mud rooms. In fact, some people even use a bench as the seating for one side of their kitchen table.

10407335874_d0e82a20d0_z

I designed this bench to be made from a 2″ x 12″ and a 2″ x 8″ that are eight feet long. However, if you change the dimension of the stretcher a little bit, it could be made form a 2″ x 12″ x 10′. The only issue doing that is you need to make sure your 2″ x 12″ x 10′ is choice wood with no splits at the end of the board because you’ll need nearly every inch of it. It doesn’t matter to me because I can’t fit a ten foot board in my car anyway, so I bought a 2″ x 12″ x 8′ and 2″ x 8″ x 8′ for under $20.00.

ww001

The construction of the bench is super simple. I make the legs 9″ wide x 16″ long. I measure down 2 1/2″ from top and bottom on each side and use the lid from my garbage can to draw an arch connecting the two marks. Then I cut it off the arches on my band saw. I sanded the arches smooth on my oscillating spindle sander.

ww012

The feet are 5″ wide x 10 3/4″ long. I draw a 1″ radius on both sides and remove the material with chisels, planes and files.

I want the bench to have four feet so I take two of the pads and cut grooves in them on my table saw. Once all the grooves are cut, I remove the waste with my bench router and plane everything smooth.

When designing the stretcher, I did nearly the same thing as the legs. I measured 2 1/2″ from each side and make a mark. Then I find the stretcher center and mark 2 1/2″ off each side of the center. I swing a compass set at a 12″ radius connecting the marks creating the arches for the stretcher.

ww015

In order for the legs to attach tot the stretcher, I bored a 1″ x 4″ mortise through the legs with a 1″ forstner bit and cleaned it up with chisels. The tenons I cut on the table saw and band saw and cleaned them up with my rabbet plane.

After all the parts are sanded, I dry fitted everything together to make sure the bench looked right. I wanted the tenons to have a mechanical fastener along with the glue, so I drilled two 1/4″ holes through the side of the legs going through the tenons.

20140823_123357

I grabbed some scrap oak and split a few splitters of wood with a chisel. The pins run down the grain making them exceptionally stronger since the grain follows the strength of the wood. I sized the pins by punching them through my Lie-Nielsen dowel plate. I shaved the pins a little bit with my spoke shave so they would start to fit through the 1/4″ hole of the dowel plate. Once the pin starts to fit in the hole, I pound the hell out of it.

20140823_123402

After I was satisfied with the way the bench stretcher fitted to the legs, I started gluing and screwing everything together, I placed glue of the pins and inserted them into the tenons of the bench. I didn’t bother draw boring the holes of the tenon. I was already satisfied with the tightness of the joint.

20140825_171145

The bench was painted a duck egg blue and waxed over top. The next bench I make will probably be a different color. Maybe a black or grey as neutrals are always popular.

20140825_170758

You can see the detail of the top where the scrub plane left little ridges in the wood giving the bench a bit of detail. It definitely looks better than having a plain board for the seat of the bench.


Making a Farm House Table

My wife Anita was getting ready for a design show she was doing called Over the Moon in Lawrenceburg, IN. She asked me to make a farm house table from basic 2 x 8’s I bought from Lowe’s. So I bought the wood and laid out the boards on the floor to see how big of a table she wanted. We ended up deciding on a table that was around 3′ x 5′.

When I bought the lumber, I chose boards with the straightest grain possible with very little or no knots. However, most of the boards I chose were still high in moisture content so I had to let them acclimate in my shop so they could dry out a little bit.

After milling the boards to one inch thick, I stickered them on the floor and placed a fan near them to help the boards dry out a bit. I placed weights on the top board just to prevent it from cupping. The paper towel underneath the weight is to prevent the iron of the weight staining the wood.

After about a week, the boards were down to a workable moisture content. You wouldn’t think that simply laying boards down for a week would change the moisture content that much, but it did.

Anita already bought legs at an antique show back in the fall for about $10.00. All I had to do was make the frame and top and assemble it all together. I used a 3/8″ beading molding plane to put a bead on the sides of the table to give it a bit of detail.

It doesn’t get much simpler than this. I used pocket screws to attach everything together. The idea of a farm table is keep the joinery simple.

Anita stained the top with gel stain and painted the base with chalk paint. The table was too wide to get through my basement door so I had to finish it in the living room.

I asked Anita if she wanted me to attach the boards from the bottom so the fasteners wouldn’t show. She told me no. She said “just screw down the boards and fill in the holes with plugs”. So I did just that leaving about a 1/8″ gap between the boards for expansion and contraction of the wood. After I was done, Anita sanded the top again with 220 grit sand paper and reapplied some more stain.

This is how the table looked when it was done and ready for the show. Anita applied a dark wax to the paint to highlight the details of the legs. She also waxed the top to give it some luster.

You can see some of the dark wax detail here.

Anita posted this picture of the table on her Facebook account right before the show started. One of her followers saw the picture and private messaged her asking Anita to hold the table, however Anita never saw her message. When the show opened, the young woman ran to her booth and asked if the table was still available. Anita said it was and the woman bought it right on the spot. It’s nice to know someone likes my work. haha.