I’ve owned this Ohio Tool Co Moving Fillister Plane for a while now. It was missing its fence and screw when I bought it, so I decided it was time to make a new one for it.
I started by cutting a blank from some brass stock I bought on eBay. The blank I cut out was 3/8″ x 2″ x 3″.
Luckily, I have another fence off another moving fillister plane I could use as a template. While the dimensions weren’t the same, I custom drew what the fence should look like on the brass stock.
After I cut out the shape on the band saw, I punched a spot where my 3/8″ drill bit will drill a hole for the center on the fence. Then I kept moving down the fence drilling holes in the center.
I needed to remove some of the back of the fence, so I went back to the band saw to do the job.
Then, I cut off some of the face of the fence to thin it up and shaped the bottom of it with my files.
In the end, I was happy with my results. Not too shabby, as this was the first thing I have ever fabricated out of brass.
Now I needed to make the screw to hold it in place. Again, I had a screw from another plane that I could use to find something similar at the hardware store. I ended up buying a 5/16″ x 1″ screw from Home Depot, but I had to grind it round on my belt sander.
I then filed the top to a dome shape and used a hacksaw to file a slot in the top.
I polished the screw up, cleaned the body of the plane, and put everything together. The plane came out really nice and performs well after I sharpened the blade.
Another plane has been saved from the garbage bin of life and is back to use for the next hundred years.
I bought this unmarked antique plow plane sometime during my life. I have bought so many tools over the years, I often can’t remember when or where I got them. Not to mention what I paid for them, which can be a problem if I want to try to make money when I want to sell the tool.
The plane was complete, but the arm was broken in half, missing the bottom of it. The original owner simply stuck a big bolt from the top of the arm through the fence.
I had some Applewood in my shop for fixing handles of my Disston saws and also to turn tool handles. I grabbed a small piece and traced the outline of the good arm, and shaped a new one.
I cut the bad part of the arm off at the bandsaw and found the center of the threaded rod so that I could drill a hole down the center of it.
Unfortunately, the rod was too tall to do this on my drill press, so I had to do it free hand using a square to keep my rod at 90 degrees keeping me in line to drill a straight hole.
Once I drilled a 5/16″ hole about a 1/2″ deep, I stuck a center point in it.
Then, I pushed the center point into my new arm end and used that point to drill another 5/16″ hole into the new piece.
Thankfully, when I glued a dowel into both holes and clamped it for a few hours, the new arm was straight and looked similar to his brother.
The last thing to do was clean up the rest of the plane. I used some Citristrip to remove all the crud off the plane and washed everything with dish soap and water.
After the restoration was complete, I grabbed my antique tool reference catalogs to see if I could find out who made this plane. It turns out that it is a Denison & Co Boxwood Plow Plane. The bottom fence and nuts on my plane are nearly identical to the one in the picture.
The plane came out really well even though I used Applewood while the plane is Boxwood. The color matches well enough and will darken to a nice reddish color similar to Disston saw handles.
You can see where the plane was repaired in its past with a big screw in the brass skate that goes all the way through its body. Plus, there are four screws going up from the bottom of the body for some reason. I see no cracks as to why they are there.
I’ll keep the plane and put it in my arsenal. It’ll be a perfect plane to use since it’s not in original condition.
Last weekend was the Springfield Extravaganza. It’s one of my favorite antique shows that happens in May and September in Springfield, Ohio. The fairgrounds is full with over 2000 dealers selling all sorts of antiques and the occasional junk. I look forward to it as much as the World’s Longest Yard Sale up and down US127 in August.
Luckily, I found some planes this time at the show. Many times in the past, I would only be able to pick up a Stanley plane or two, but this year, the Antique Tool Gods were with me as I ended picking up almost ten Stanley planes. None are exceptionally rare but all will make nice users. In fact, the rarest plane I bought was a Union X6 vertical post plane.
Ironically, the only tools I bought this weekend were planes. I was looking for drills, chisels and saws but there weren’t too many available. The one saw I had an interest in was a Disston Thumbhole D8 rip saw that was in a barrel with 50 other saws. When I asked the guy what he wanted for it, he replied “$50 per saw, unless you want all of them, then they’re $7.00 each.” I quickly put the saw back and walked away.
I’ll spend the next few weeks cleaning my planes up, but I’m not too sure how long that’ll take me as I just started my new job today (I got promoted) as I may end up working more hours with this new gig than I did before. However, I’m optimistic I’ll get back in the shop soon.
You can follow me on Instagram to see how the planes end up looking. I’ll remove the rust and sharpen the blades so that they can be put back to work. In fact, I just posted a couple of pictures of a Stanley No 71 Router Plane I restored after finding it at a yard sale earlier this month.
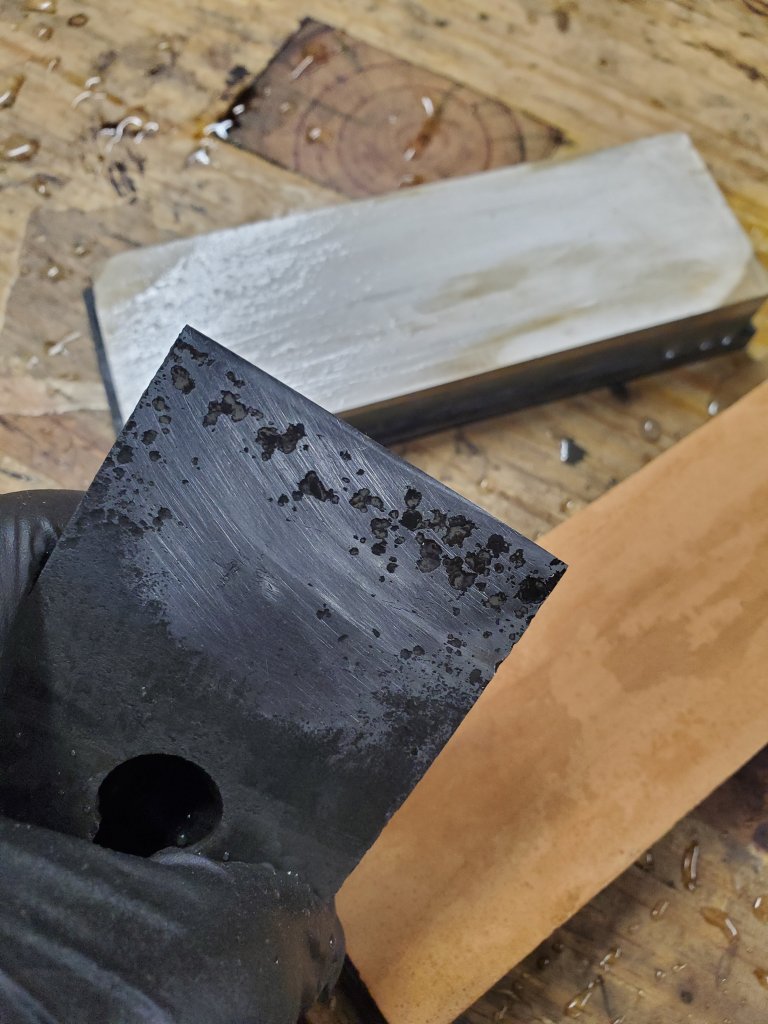
Every once in awhile I’ll come across a plane blade that is so heavily pitted and corroded, the best thing to do is to simply throw it away. This blade that came off a Stanley No 6 plane was no different. The problem was that I didn’t have a replacement blade to go with the plane I was restoring, so I was forced to see if I could get the blade to work again.
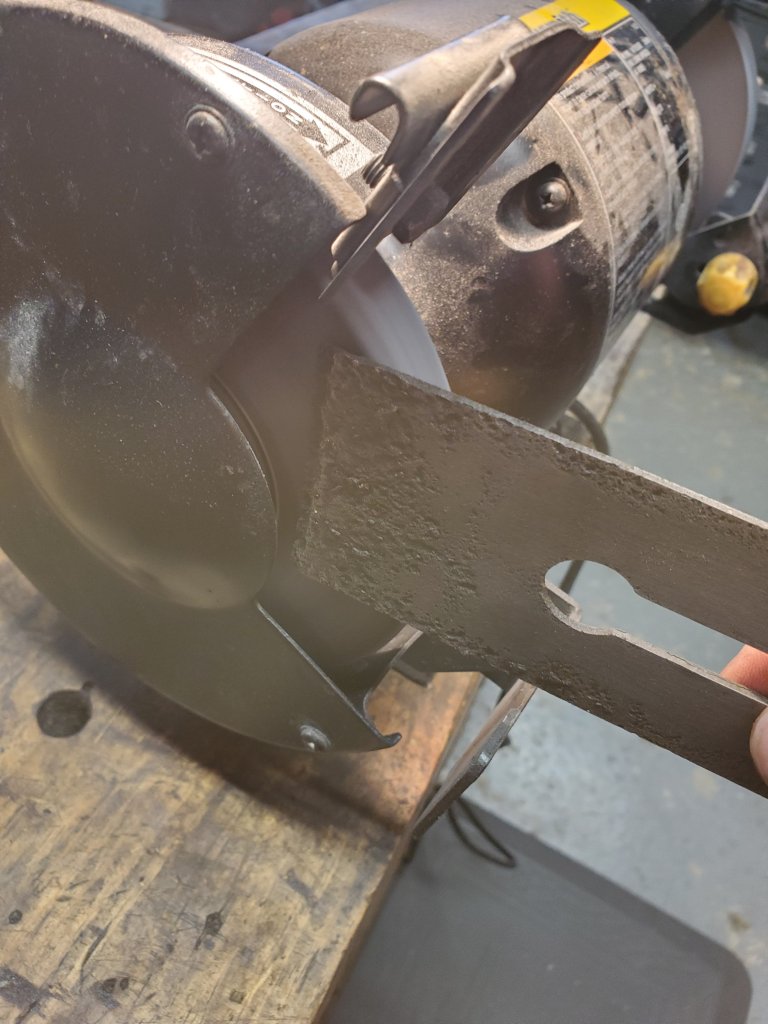
The first thing I did was take the blade over to my 8″ speed grinder and grind the face and back of the blade to remove the corrosion. I paid special attention not to heat the blade up too much so, I occasionally cooled it off in a bucket of water. Fortunately, the blade’s face had about a 1/4″ of metal at the bottom that wasn’t pitted, so I was hopeful I could still get a good edge out of it.
I took the blade over to my Tormek and ground a 25 degree bevel on it and honed the face flattler on the side of the Tormek grinding wheel the same way as I did with my 8″ speed grinder.
After the grinding was finished, I took the blade over to my water stones and sharpened it just as I do with any other blade. When I was done, there was a clean line of light at the tip of the cutting edge so I was hopeful it could achieve a nice cut.
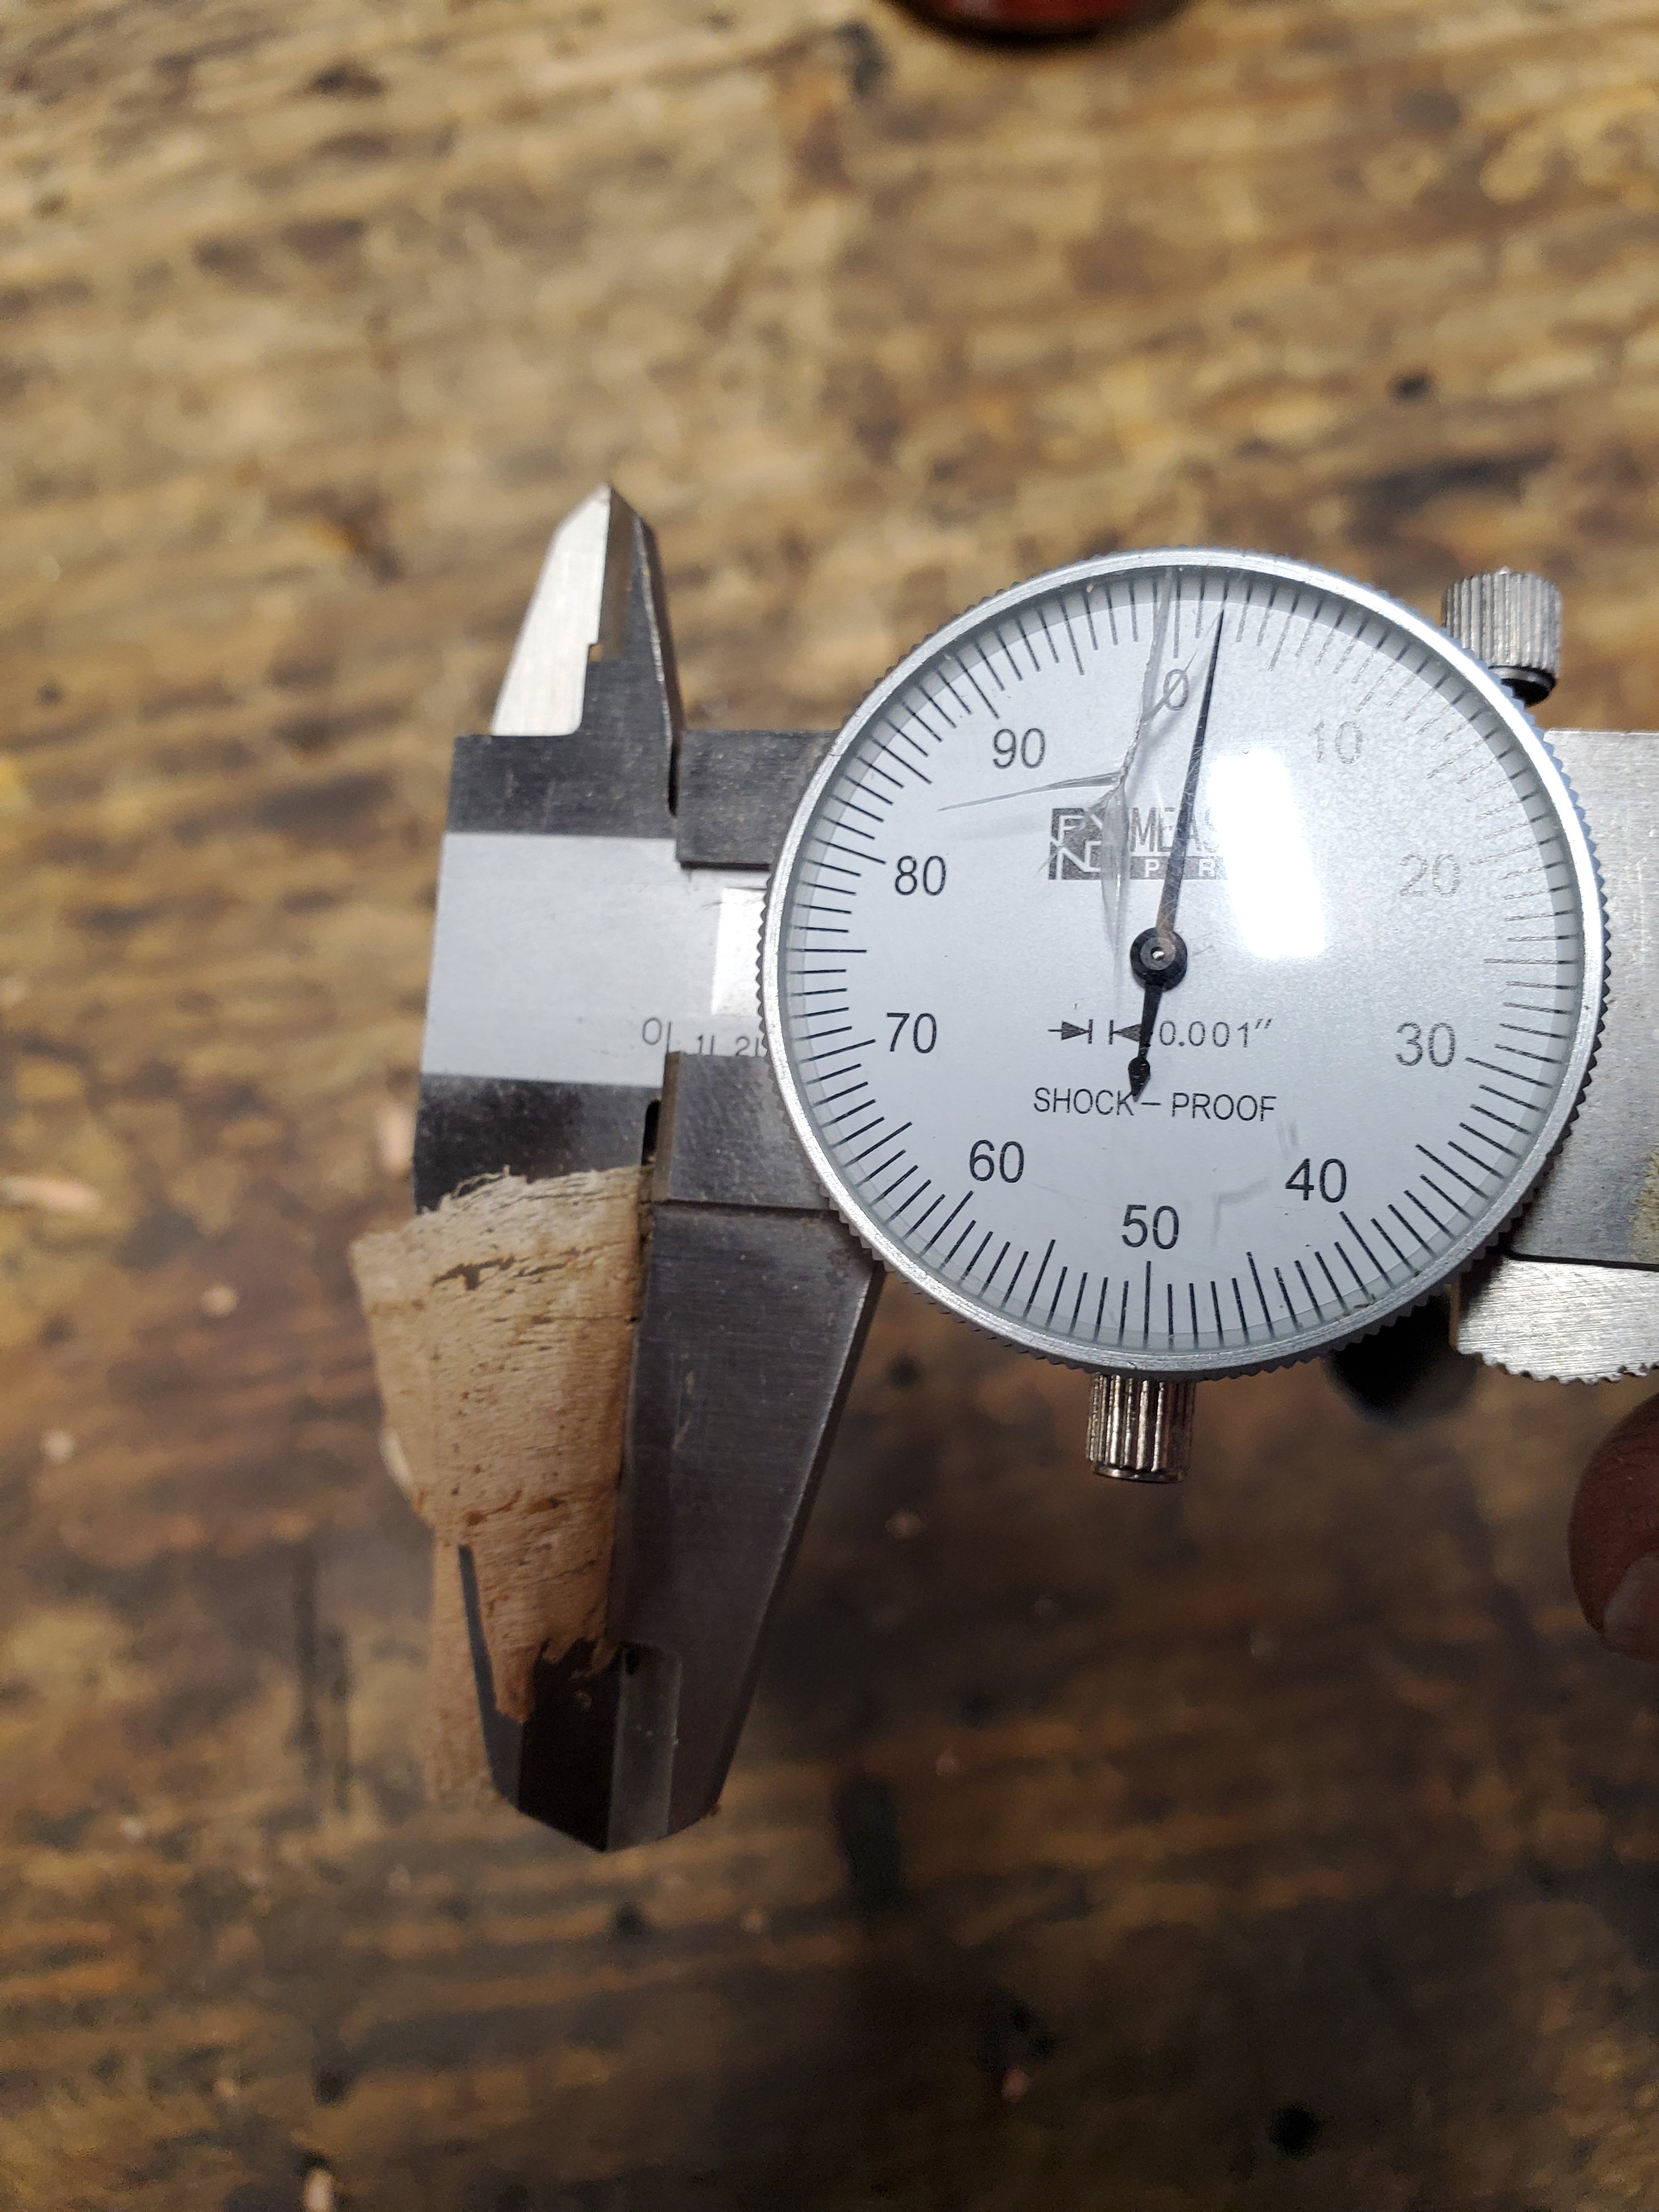
Placing the blade back into the plane, I tuned it up, and sure enough, this crappy blade cut pretty well. I took out my dial calipers, and the shavings measured .002″ thick. The blade will eventually need to be replaced, but at least the plane can function properly now.
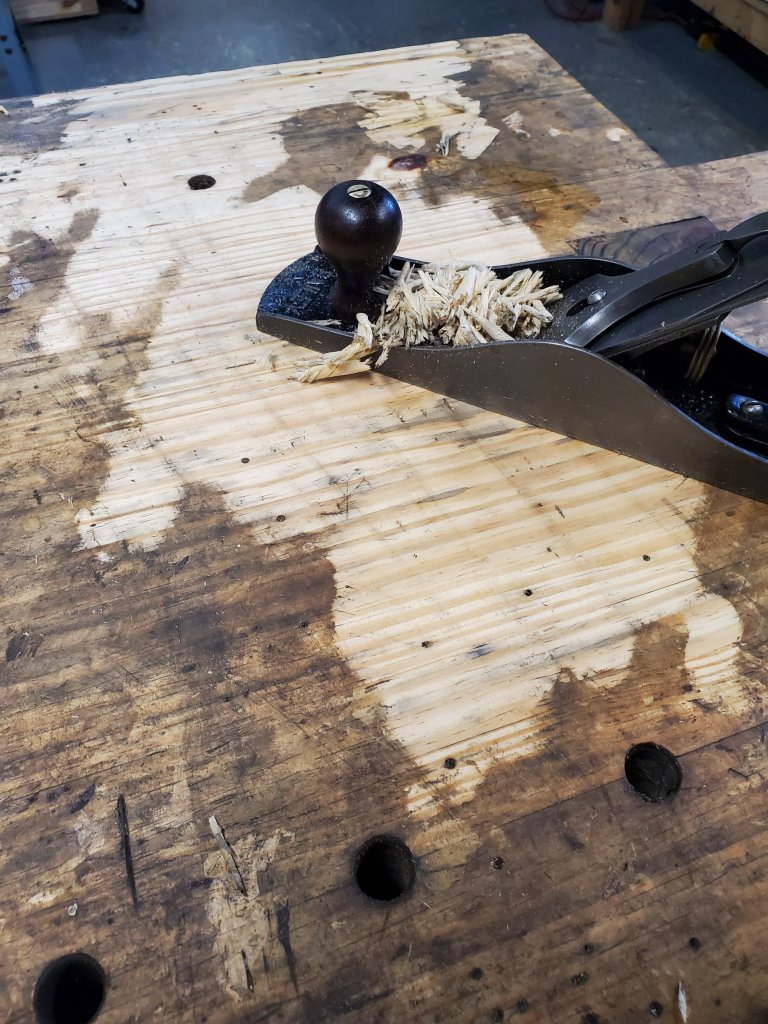
The plane performed so nicely, I used it to flatten my workbench.
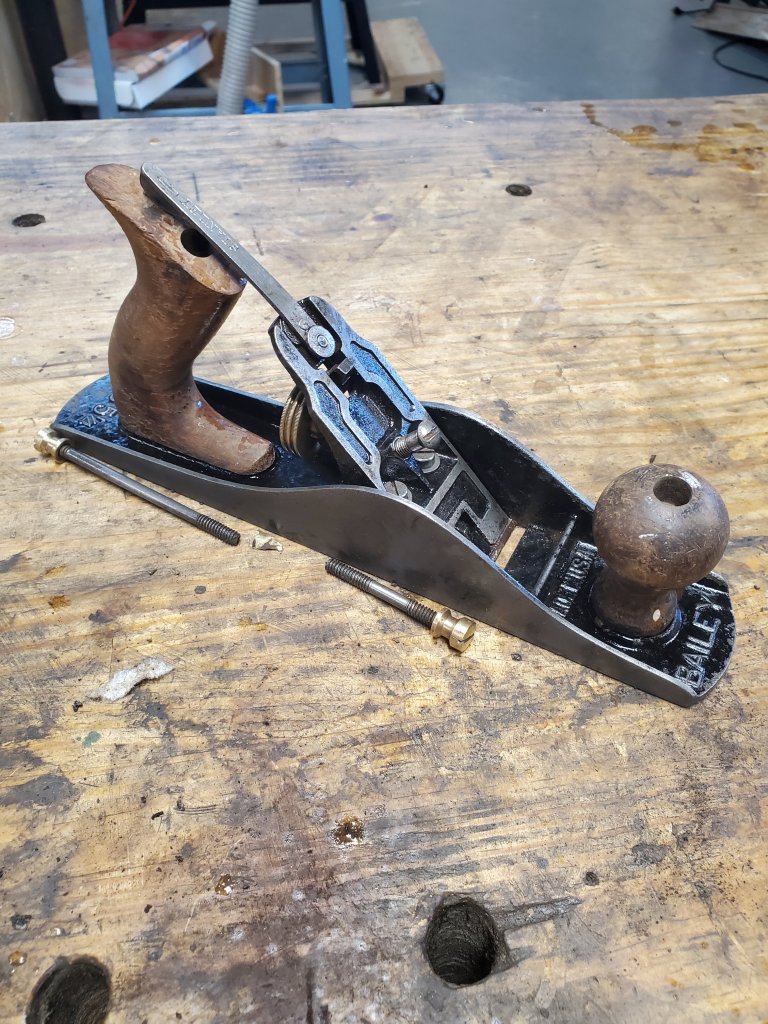
A few weeks ago, I stopped by an antique store in New Paris, OH across the state line from Richmond, IN and bought a Stanley No 5 1/4 plane strictly for the parts. The plane was missing the blade and lever cap but the price was right so I took it home.
When I cleaned up the plane a little bit, I noticed it was stamped Cincinnati Public Schools. I thought that was pretty cool since I live in Cincinnati, even though I went to Sycamore High School and not CPS. After thinking about it, a light bulb went off in my head.
I’ve owned this Stanley No 5 1/4 ish plane for years however, the plane is not marked 5 1/4 on the bed. I think it was either a Four Square plane or maybe a plane that came with a tool cabinet kit. I use it from time to time and it works well, it just sucks that it’s brazed on one side. I’m not sure where that lever cap came from as it looks like a transitional plane lever cap.
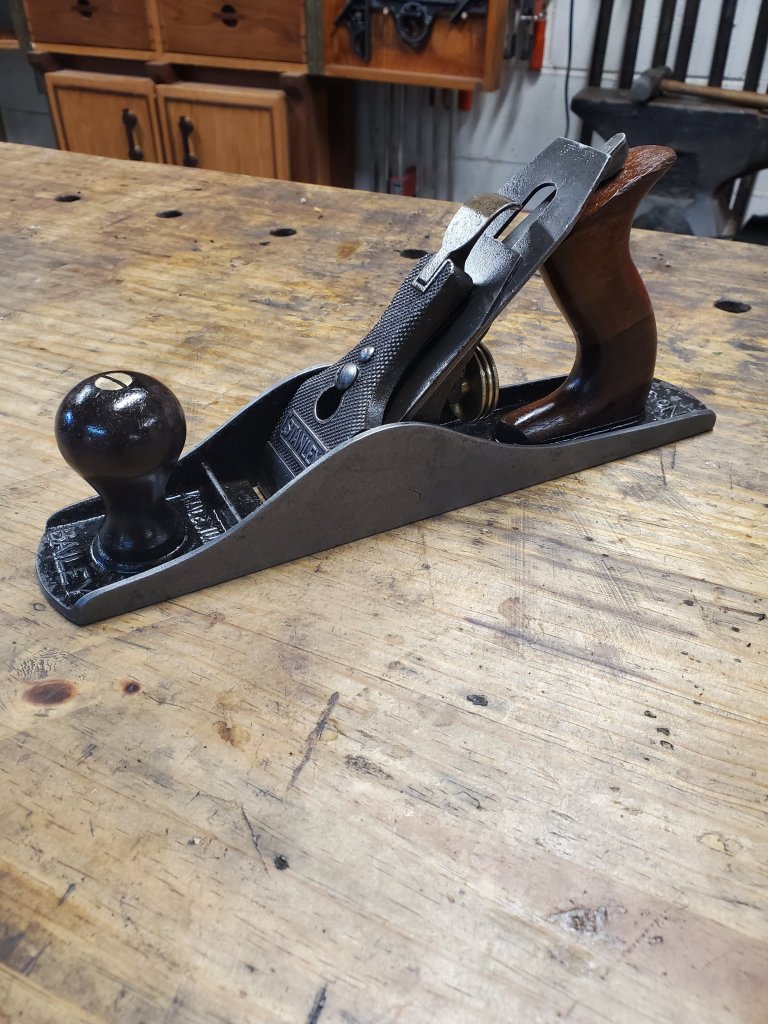
I ended up deciding to take the blade and lever cap from the old plane and put it on my new 5 1/4 plane and keep this one in my tool cabinet bidding the old brazed bed goodbye. After I cleaned all the parts, the plane came out pretty nice.
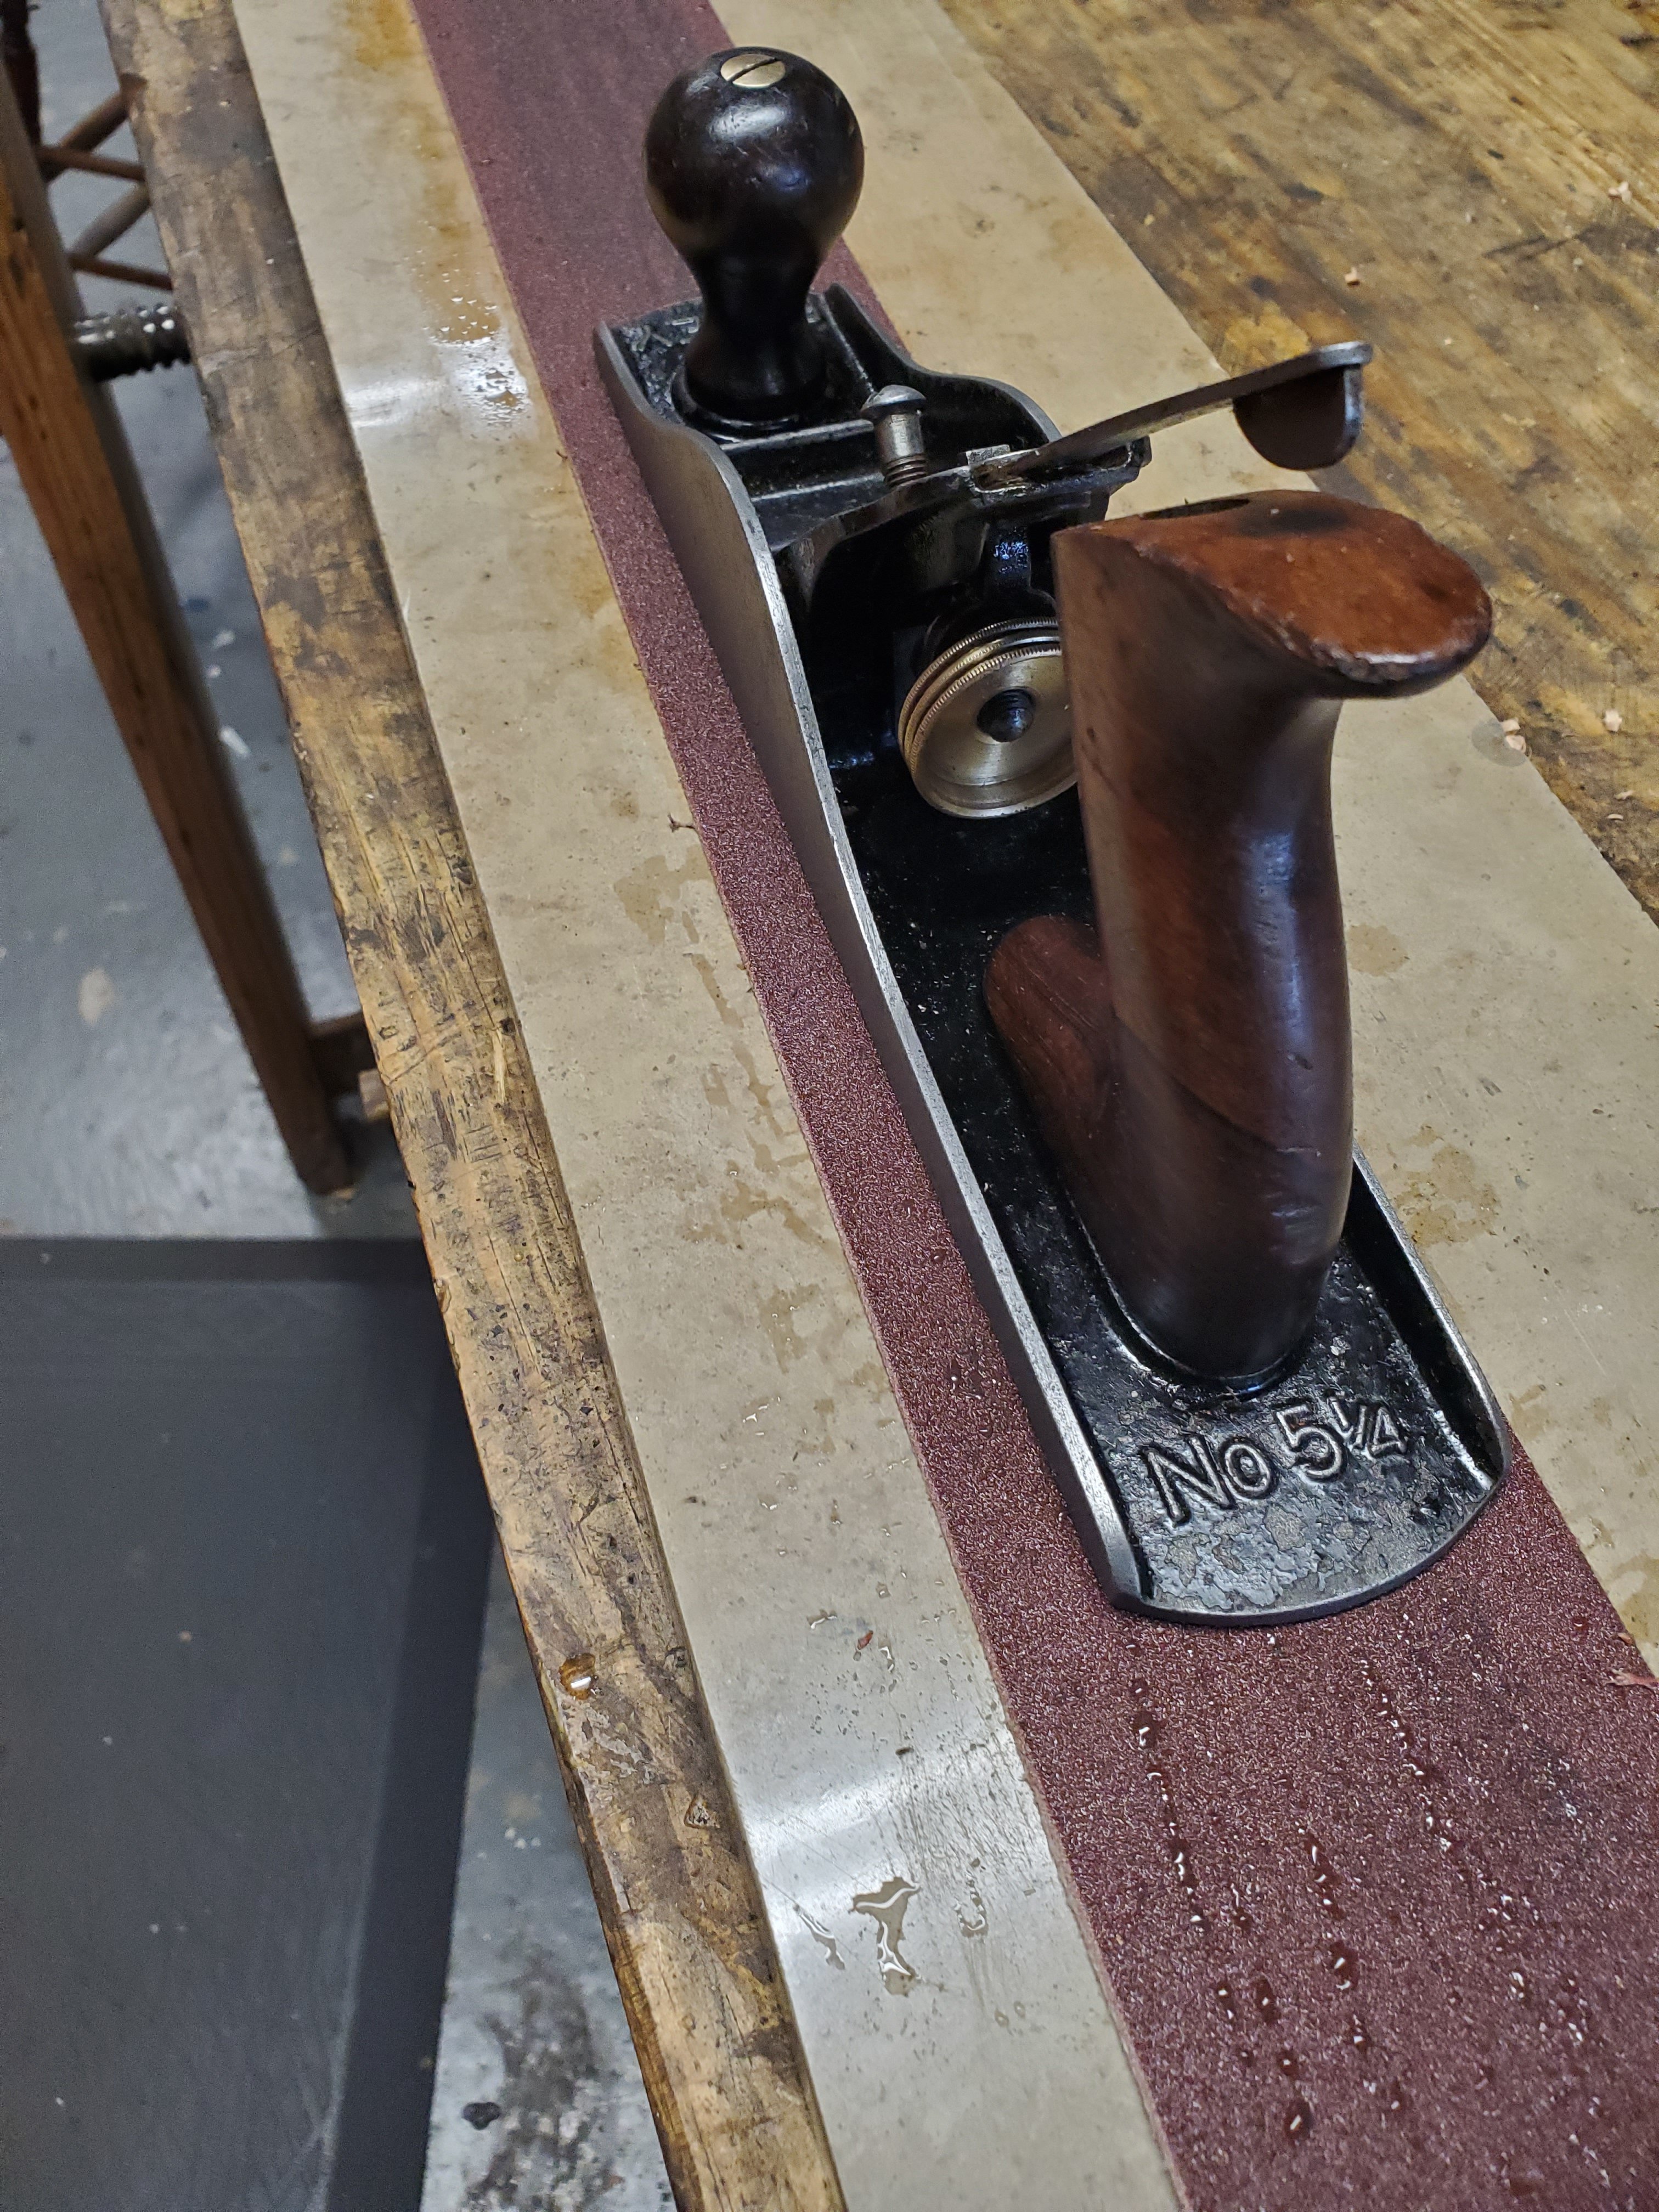
I used the plane right away to see how it cut. It worked okay but I decided to see if the bed needed to be fettled so I gtabbed some sandpaper and an old window sill to act as a surface plate and went to work.
After several minutes of fettling and changing the grits, I was happy with the outcome. Some people fettle their beds until there are no pits left on the bed and it obtains a mirror finish, but I don’t have the patience for that. As long as the front of the bed, the front and back of the mouth, and the back of the bed are even with eachother, I’m happy.
I went back to the board to see how the plane cuts and it works like a dream. Now I have a new Stanley No 5 1/4 with the provenance from my back yard.
Some people may wonder what the intended purpose of a 5 1/4 plane is, and for that, I’m not entirely sure. It’s a little too big to excel as a good smoother and a little too small to be a good jack plane. If I had to guess, I think Stanley made this size plane as well as a No 2 size plane for kids. Kid’s hands are much smaller than adults so smaller planes work well for them. The fact that this plane was marked Cincinnati Public Schools, it was more likely used by little kids in shop class. Nevertheless, I still enjoy using this plane in case one of my other planes is not set up right or it’s blade is dull.
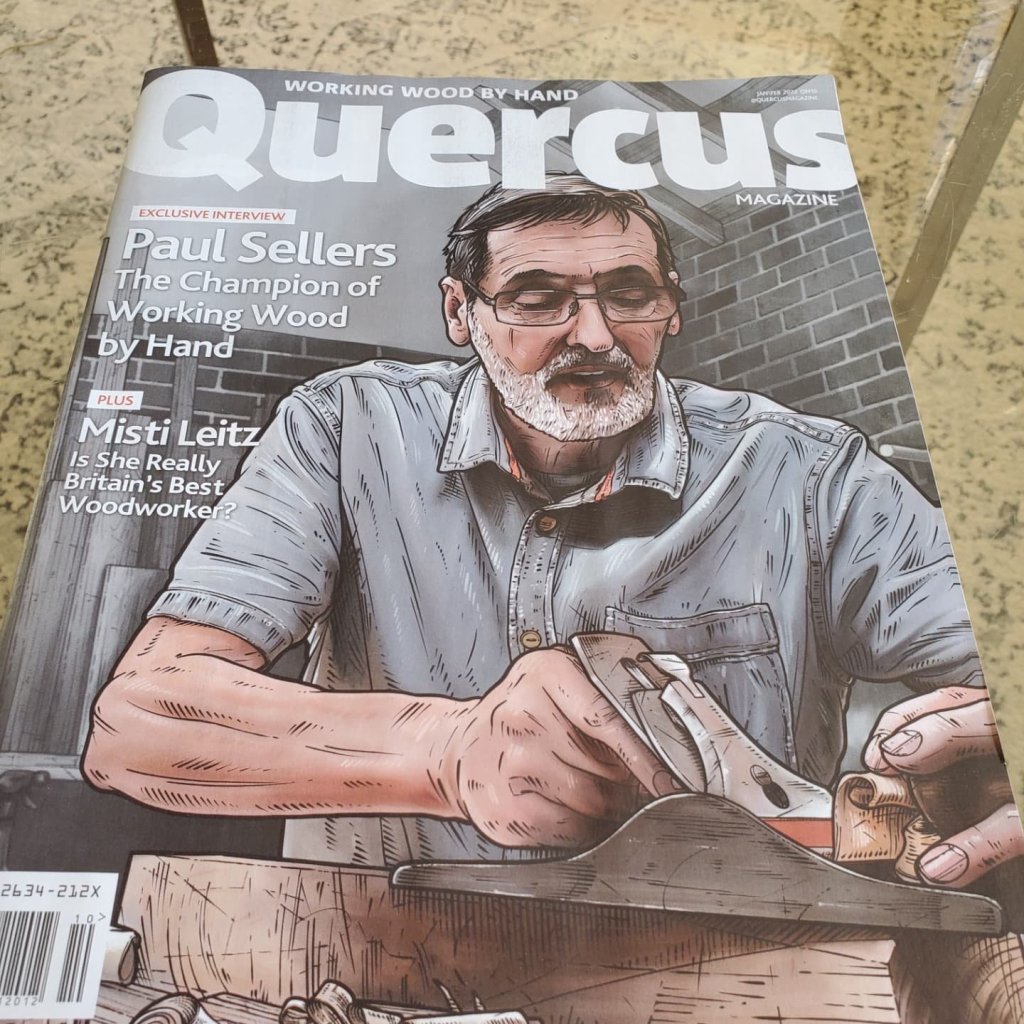
Well, I finally wrote an article for a woodworking magazine. It’s called Quercus and it’s based in the UK. I was asked by the editor Nick Gibbs through Instagram if I would be interested in writing an article about how and why I restore old planes. I jumped at the chance as writing for a woodworking magazine has always been a dream of mine.
I restored an old Stanley No 5 plane and documented my progress, then wrote out my article the same way as I write a blog, then sent him the file along with the pictures. It took a few months for the article to get published but, I’m in the magazine along with Paul Sellers.
When I received my copy, I was amazed by the content that was in it. The magazine features woodworkers from all around the world and their process of how and why they work with wood. There’s not too many “How To” articles and the magazine primarily focuses on hand tool woodworking so, don’t expect an article about “Building the Perfect Router Table” in it. The only other magazine that I would compare to it would be Mortise and Tenon magazine.
This is the plane that I restored for the article. I was planning on selling it, but now it carries sentimental value to me. I asked Nick if he would like for me to do another article but he hasn’t gotten back to me yet. This may be a one-off, but maybe not. Maybe I could be a constant contributor to the magazine. Wish me luck.
Several months ago I posted pictures of plane totes I repaired on Instagram. A couple of my followers asked if I could make a video showing how I do it. So, I obliged and posted a video. Here is the video.
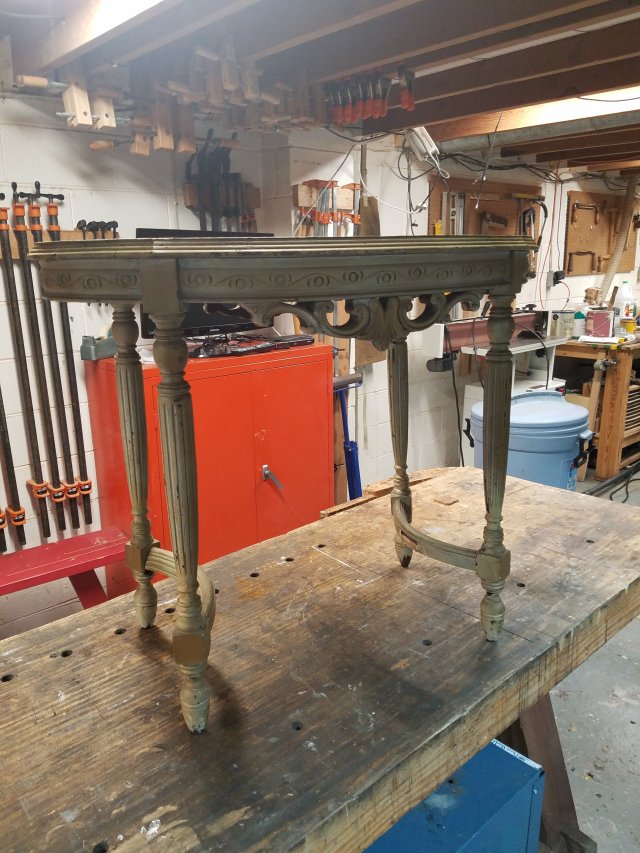
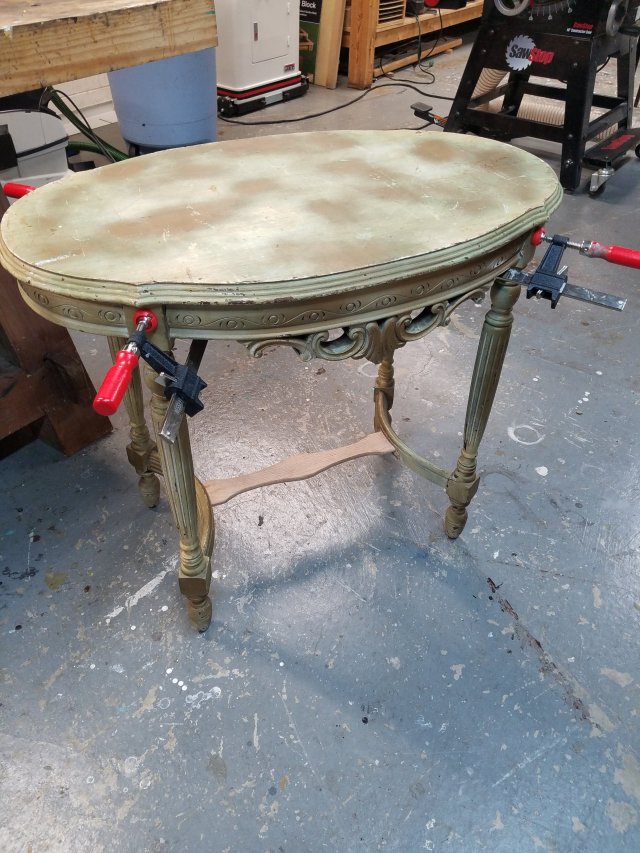
My wife bought an accent table at a local thrift store yesterday. She hesitated on buying it because it needed some work but I assured her that I could fix it quickly.
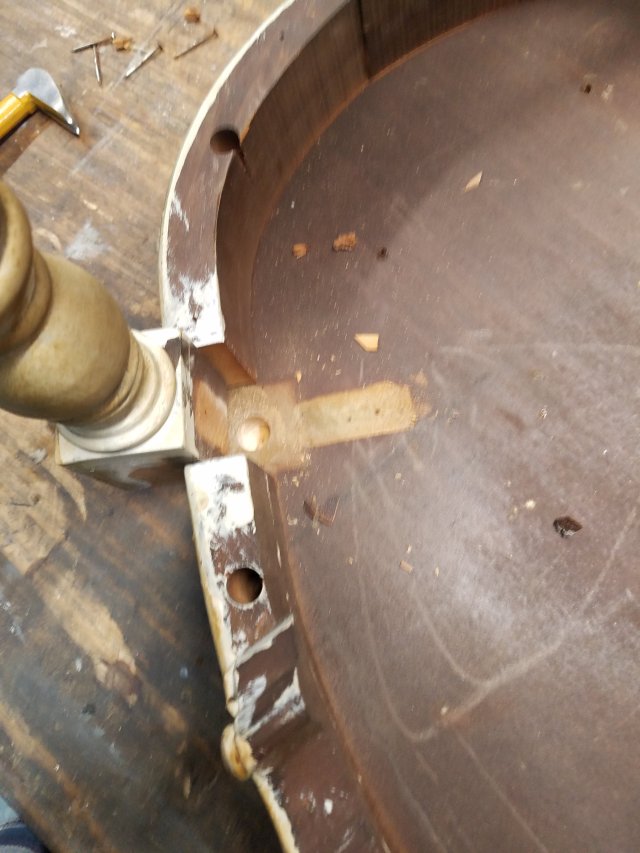
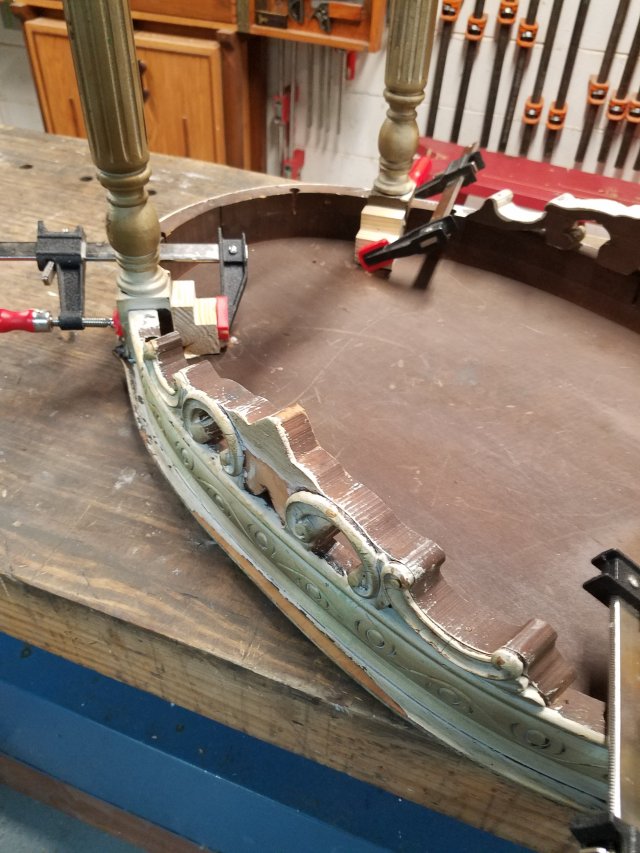
When we got it home, I examined how to repair the stretcher and make the legs not so wobbly. It seems that someone else tried to repair the stretcher in the past with no luck.
After popping off the glue blocks, I noticed that the only joinery on the legs was a dowel rod and some glue. It’s no wonder why they wobbled. I’m not sure how old the table is but it’s made from mahogany and the fasteners are straight slotted screws. My guess would be around the 1940’s but that’s just a guess.
If I was to restore this table properly, I’d used mahogany for the stretcher and make it similar to the original but I’m by no means a professional furniture restorer. If anything, I’m closer to the craftsmen you see on Flea Market Flip where people buy a $40 wheel barrow at an antique show, turn it into a coffee table and sell it at a New York City art show for $450. Except, I don’t do that dramatic transformation on pieces and don’t get anywhere close to those prices. (Personally, I think that show is fake). My wife will eventually paint the table so I just grabbed some scrap wood.
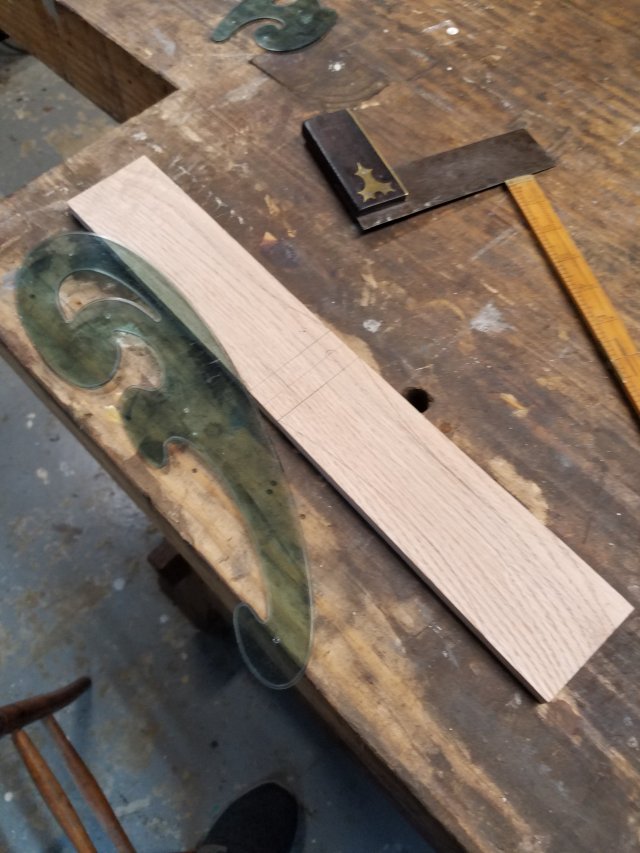
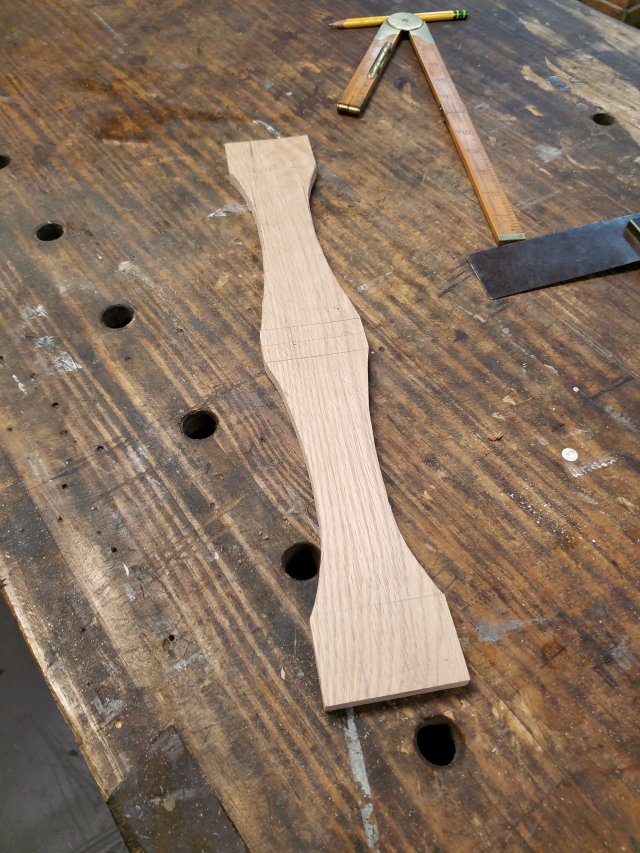
I grabbed some red oak and planed it down to 3/8″ then drew some arches on it with my french curve. Then it was onto my band saw and spindle sander to cut and sand the stretcher to shape. I just whipped this shape up in my head without much thought. I think it’ll do fine.
To break the edges of the stretcher and give it curves, I used my specialty scraper with various radius’s cut out and scraped the edges to shape using the 1/2″ radius.
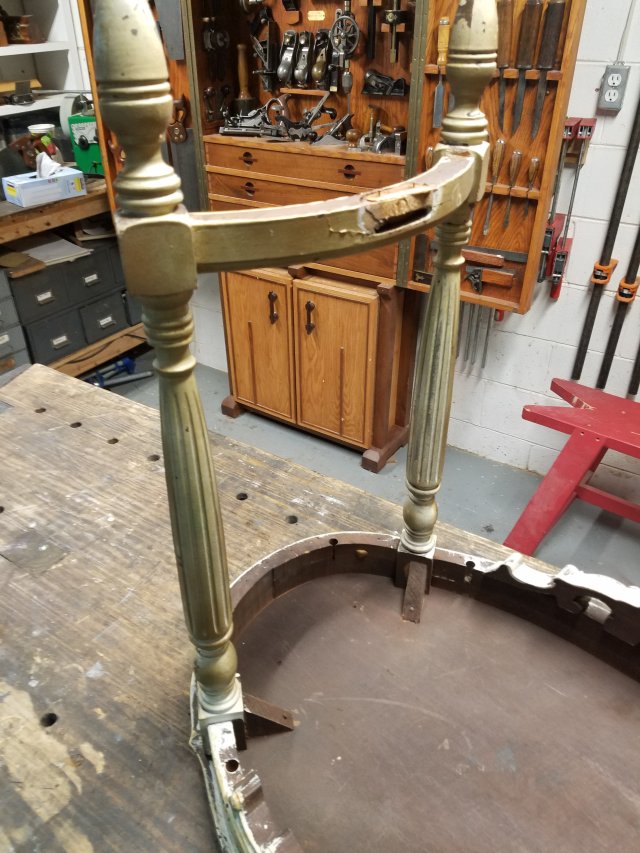
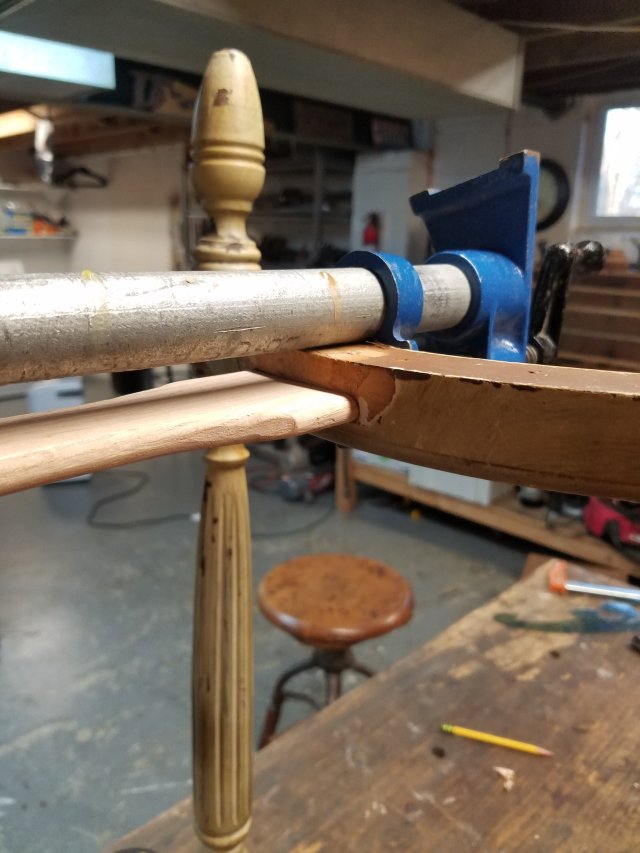
Cutting the piece to proper length took a little trial and error, but I eventually got it to seat in the mortises with the legs being perpendicular to the top when the table was flipped over.
Then I grabbed some scrap pieces and glued and pinned hefty glue blocks onto the legs to hold them to the top better.
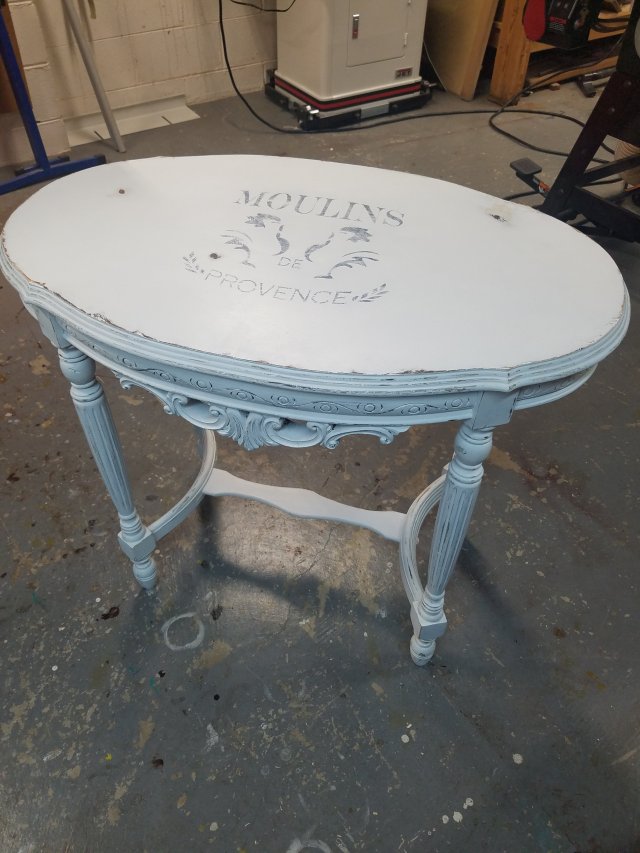
Here’s the table all glued up waiting for paint. My wife will paint the table either white, or black, or green, or duck egg, or whatever. I’ll have to wait and see which one she picks. I’ll throw a picture up when she’s done. Merry Christmas!
UPDATE 1-20-20; Anita painted it white with a stencil on top.
This past Saturday I had the honor of being the guest speaker at the Cincinnati Woodworking Club. I arrived at the church around 9:00 am and Bill, the gentlemen who originally contacted me, told me I’d be the last speaker around 10:45 am. I thought to myself “Oh God, I’m the headliner. I hope I live up to their expectations.” There was about 50-60 people at the meeting which was way more than I thought would be there. I kind of hoped I would only be speaking to around twenty to calm my nerves.
Like any club, the meeting started off with some administrative stuff and talking about building toys for a toy drive. A few members spoke before me demonstrating projects they built or woodworking classes they took. There were a few really nice pieces that members brought in to show off.
I started off talking about how my Grandpa got me into collecting old tools as a kid when he gave me his jewelers drill press. Then I talked about my tool cabinet and how it came to be. I’ve been collecting antique tools since I was a kid and the tool cabinet was born out of necessity as a place where I could store all the old tools I used. When I was young, living at my parents place, my tool collection was on the other side of the basement being displayed on book shelves. I had to walk outside the shop to the other side of the basement in order to pick up a tool I wanted to use. My idea was the tool cabinet would separate my “good” antique tools from my users. I told the audience that my cabinet looks a lot nicer in pictures than it does in person because every time I reorganized the inside, I tore the veneer from the oak plywood where a tool holder was attached to the wood. If you examine the cabinet in person, you’ll see a bunch of tears and mismatched stain where I couldn’t remember which stain color I used the last time.
I then went on and talked a little bit about my work bench and described how it’s based on Chris Schwarz’s benches in the Workbench Book and Roy Underhill’s Roubo bench he built on his show. My bench is a user and is dirty from years of use. Once in awhile, I’ll clean the top off with a hand plane or belt sander just to give me a fresh surface.
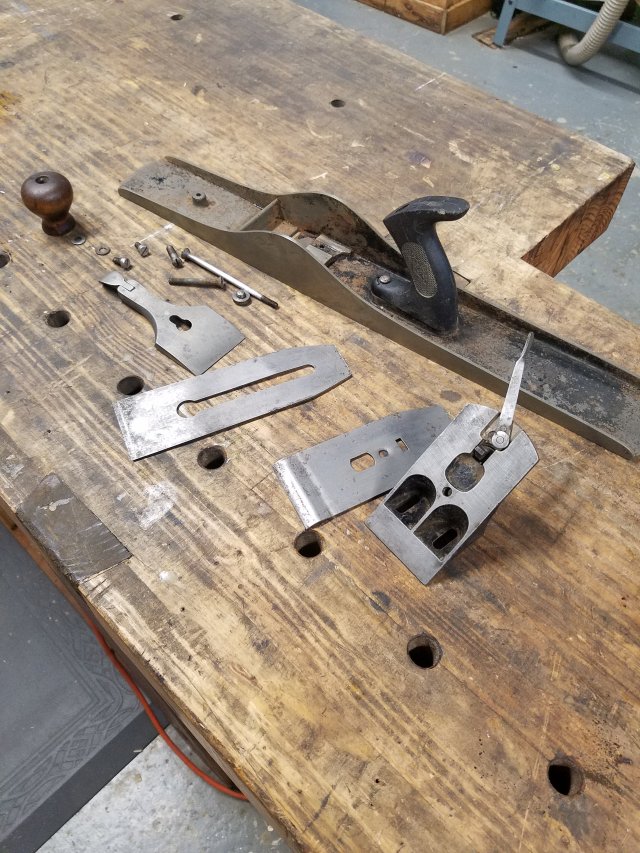
Then I started to discuss how I restore old planes. This is a Diamond Edge Jointer I picked up on The World’s Longest Yard Sale this summer. The plane was a good candidate since it was made by the Sargent Tool Company a competitor of Stanley Tools.
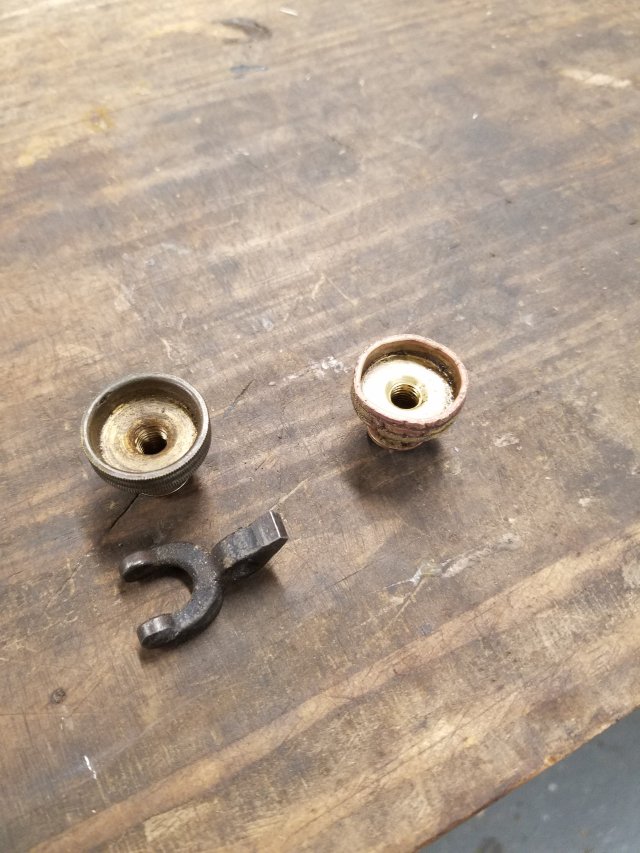
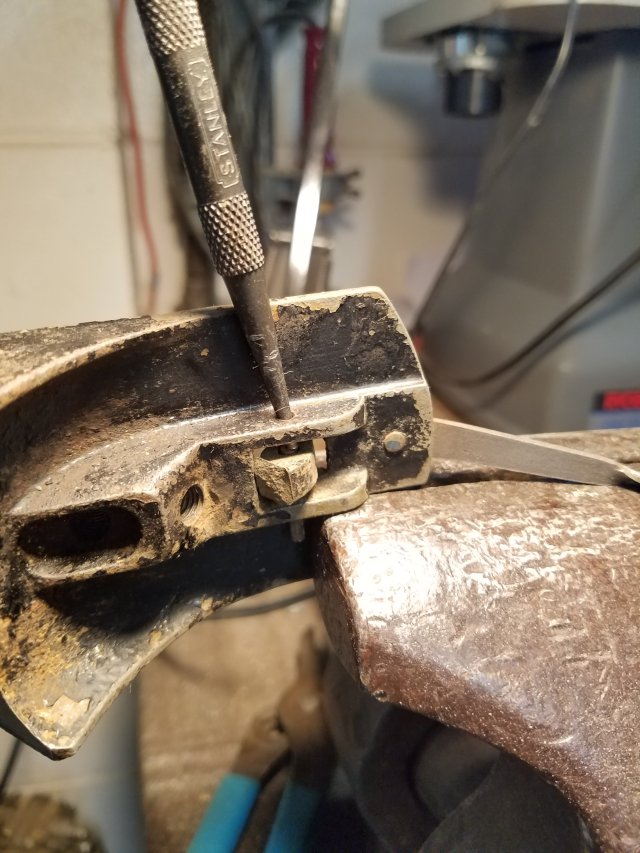
Anytime I buy and old tool, I roll the dice that I’ll be able to restore it. Most times I win, but once in a while I’ll buy something that needs additional work. I didn’t notice at the time, but this plane’s yolk broke off the frog and needed to be replace.
Luckily, I had the proper replacement parts in stock from other planes I couldn’t restore. The yolk and the brass adjustment knob from an old Stanley plane worked as replacements.
To fix the frog, I simply punched out the pin that holds the yolk in place and inserted the new yolk, punching the pin back in place to repair the tote. It took literally five minutes. Once the brass adjustment knob was screwed back on, the frog was as good as new.
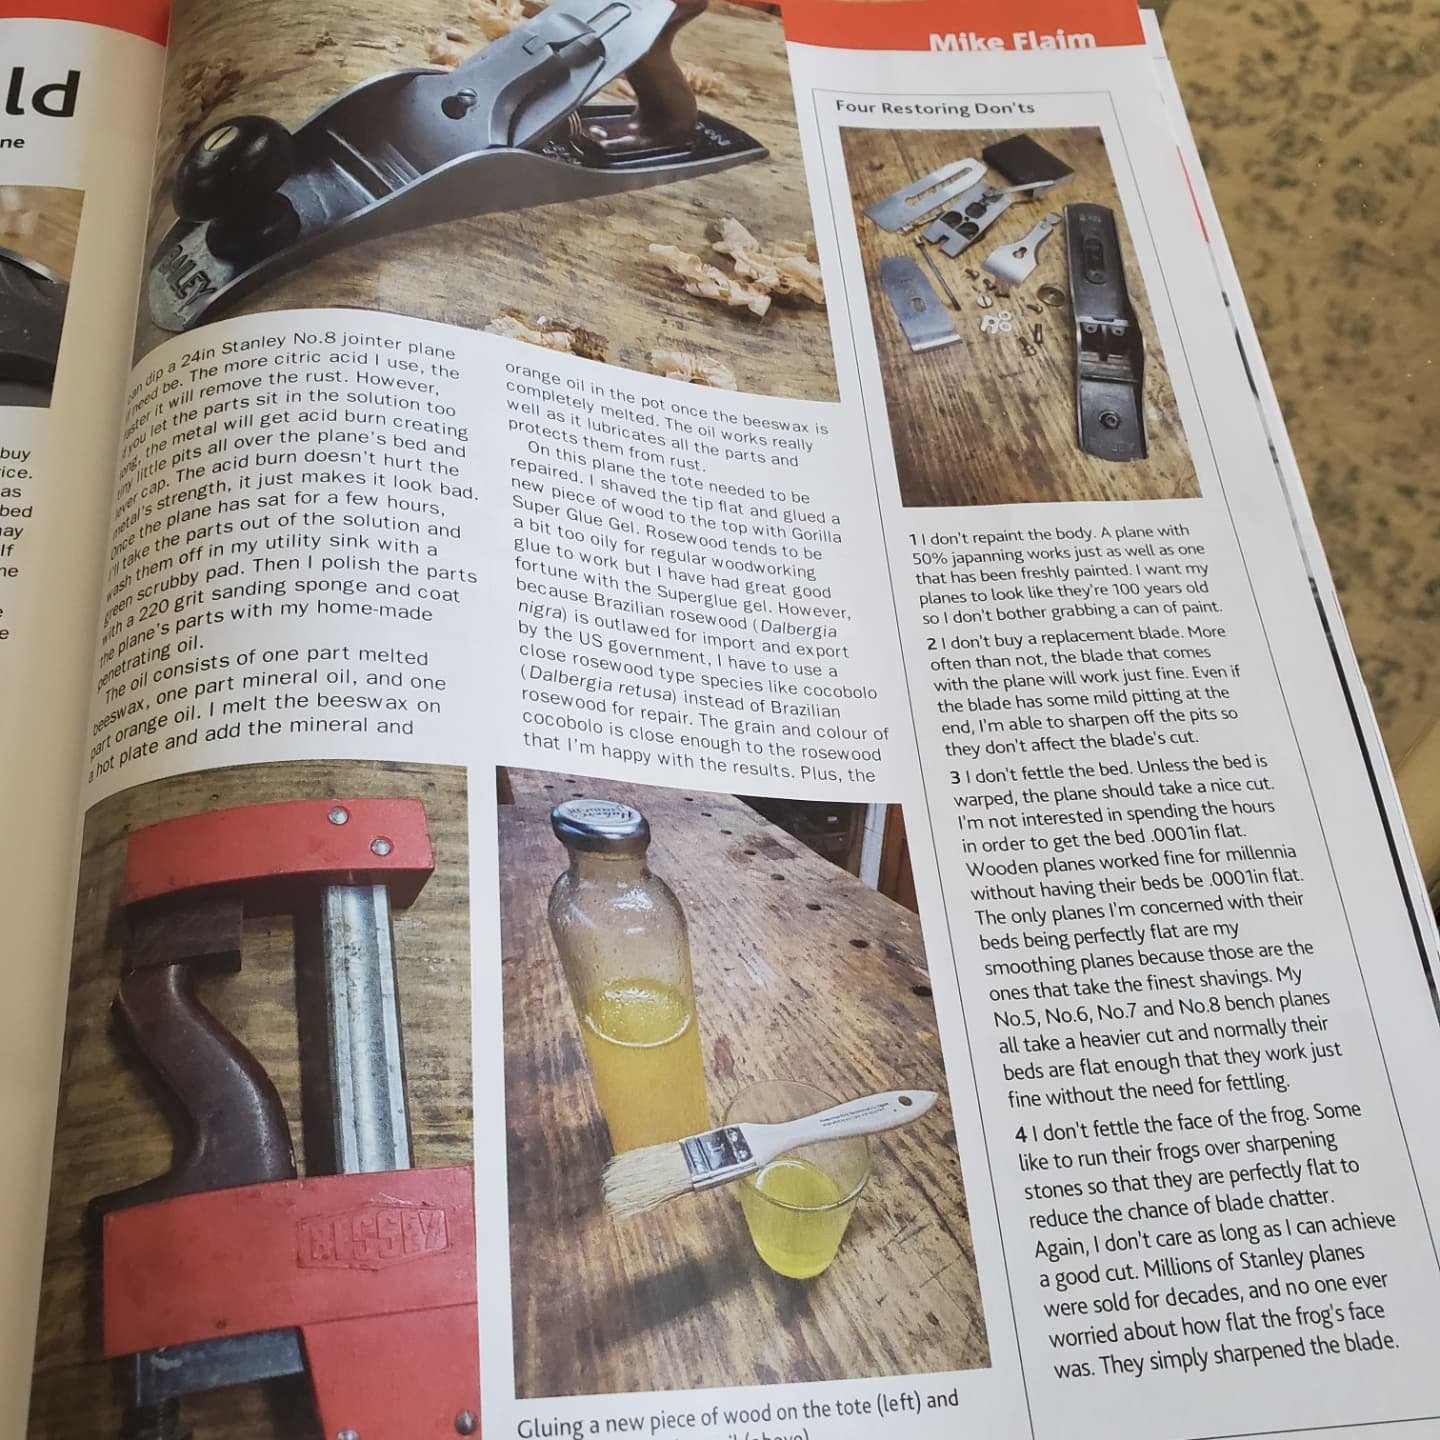
Once I determined the plane could be restored, I told them I dip all the plane parts in a citric acid bath. I allow the parts to sit in the bath for a couple of hours making sure that they don’t sit too long or I’ll get acid burns on the metal.
Wiping the rust off the metal with a drywall sanding sponge, the plane was looking in good shape and ready to be buffed.
I took the parts outside to use my wire wheel to buff out the metal. I told the audience I have this machine outside because the little wires fly off the wheel. If I use the machine in my shop and this happens, I’ll walk around at night and get a nice little wire stuck to the bottom of my foot. So, outside this thing stays.
I then discussed my tool solution I make to coat my tools. It’s made up of a slice off of a beeswax candle, one part orange oil, and one part mineral oil. I take the slice of beeswax and melt it in a pot on a hot plate. Once the wax is melted I add equal parts of mineral and orange oil and stir it up. The solution works great and works just as well as Kramers Antique Improver for pennies of the price.
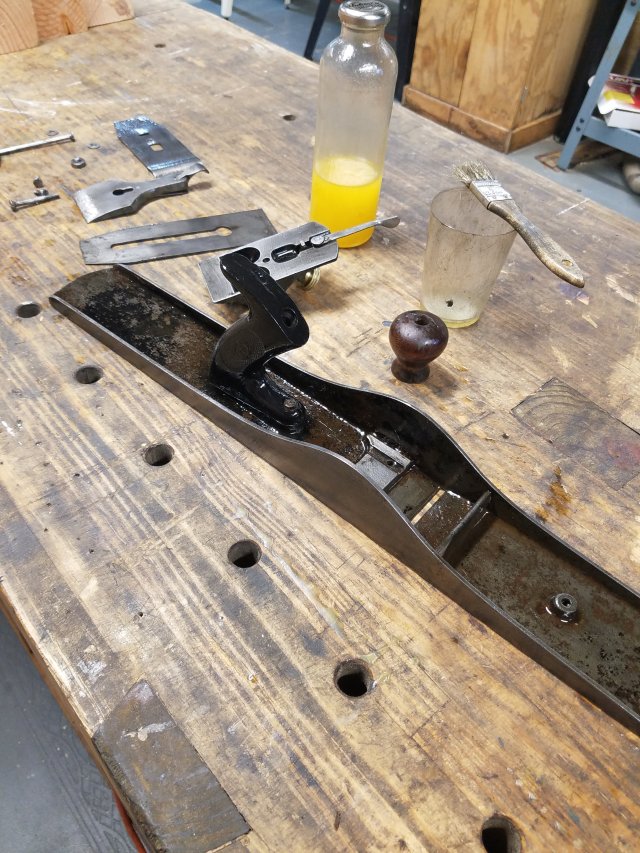
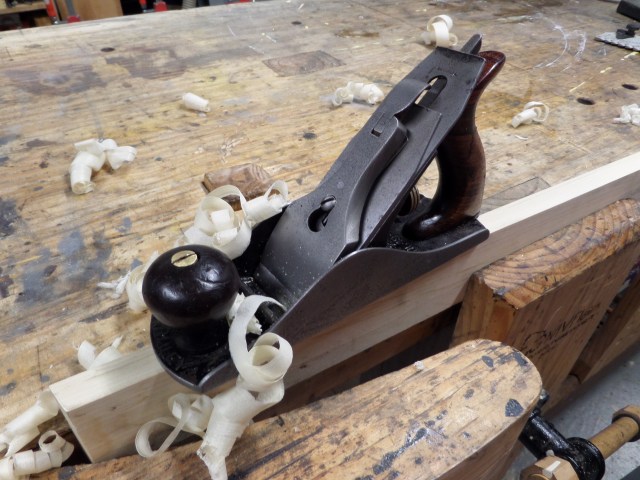
This is the plane put back together. If I wanted to just put this thing on my shelf, I would be done but I want to see if I can get this guy to work again.
Here’s the plane blade when I bought it. Many people think that when you buy an old plane, you have to buy a new blade because the old one won’t work anymore. I always try to see if I can get the original one sharp first.
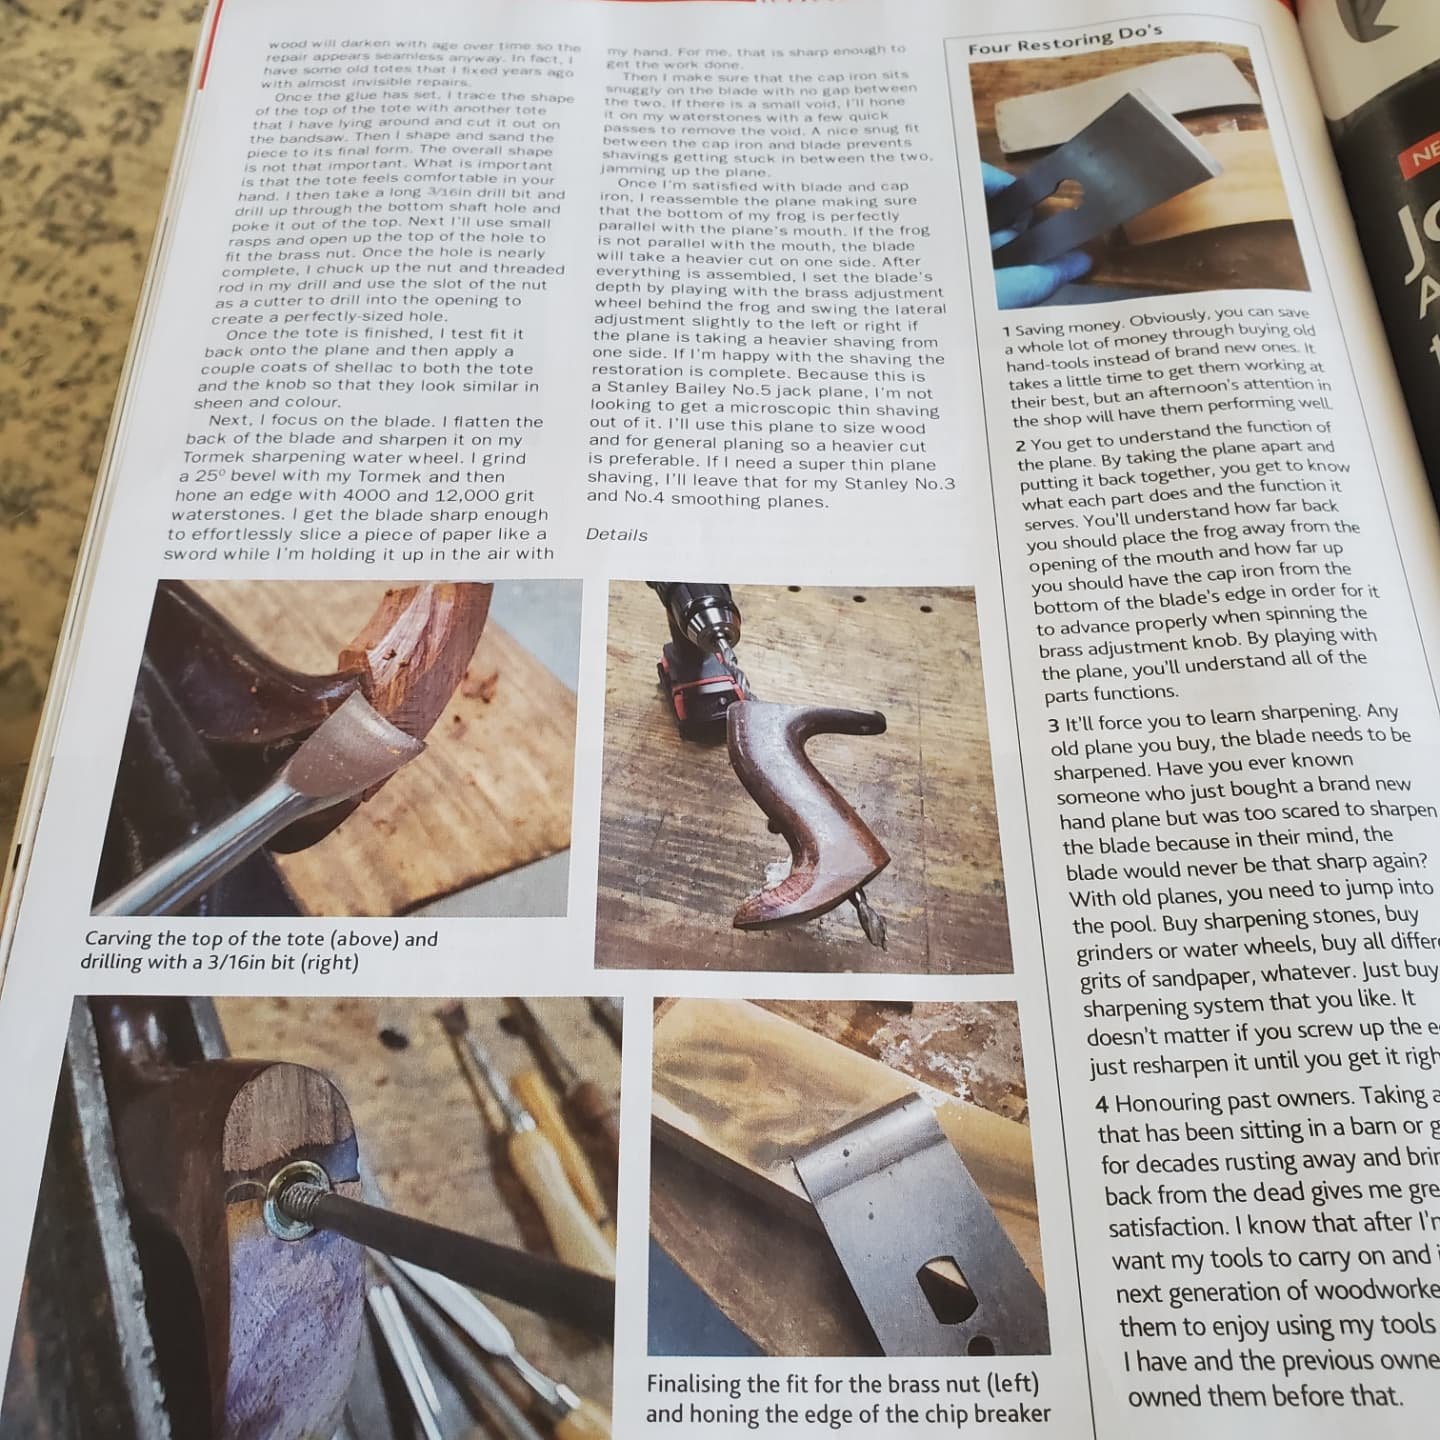
Using my slow speed grinder, I flatten the back of the blade to remove as much of the pitting as I can. I only care about cleaning up 1/4″ of the bottom of the blade as this will be the only part of the blade that needs to be tuned.
Then I use the plane jig and grind a 25 degree bevel to the edge using my Tormek slow speed grinder.
After that, I’ll hone the edge of the blade using 4000 and 12000 grit water stones. At this point, it’s sharp enough to shave the hairs off of my arm.
Setting the cap iron back on the blade about 1/8″ behind the cutter, I stick both back on the plane to see how it cuts. With a little bit of work, I was able to get whisper like shavings from the plane without buying a new blade or even worrying about flattening the bed with sandpaper. I brought the plane with me to the meeting and used it on a scrap piece of poplar to show how the plane performs. I then passed the scrap wood around the audience so that they can see how smooth the plane made the wood.
I told the audience that it basically took me an afternoon to transform the plane to make it work again as it will make a nice user for the next 100 years.
Hopefully, I inspired a few of the them to hunt for old planes to see if they can tune them up themselves. All I know is that I really enjoyed giving my presentation and a few of the members came up to me after the meeting to tell me how much they enjoyed me speak. And no one threw tomatoes at me.
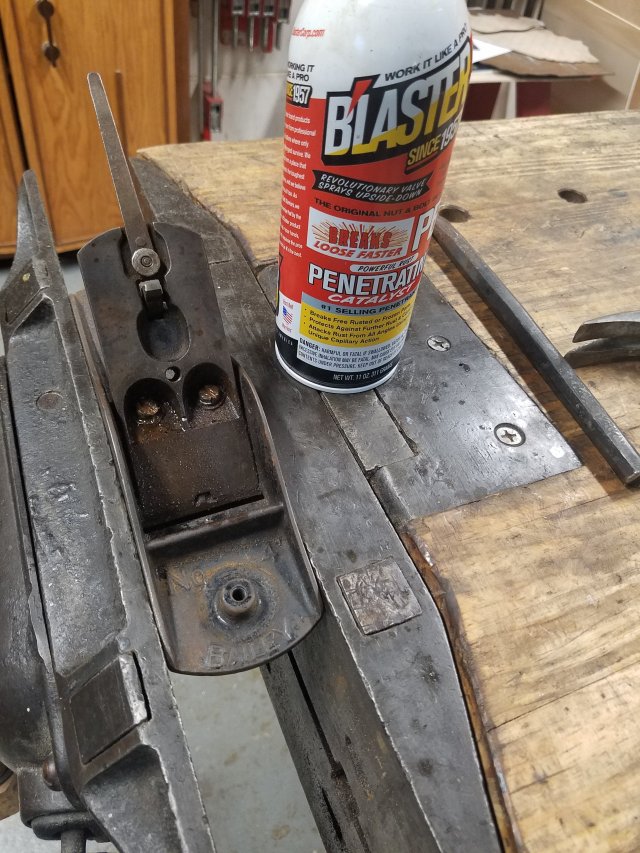
Every once in awhile I’ll buy an old tool that gives me some grief. This time it was the frog that wouldn’t come off the bed of a Stanley No 4 plane due to some rusted screws. Normally, when screws won’t budge, I use the oldest trick in the book, and tighten them before I try to loosen them. This will often break the seal of rust and allows me to unscrew the bolt with no problem. But that didn’t work this time. Not even a shot of PB Blaster could save the day.
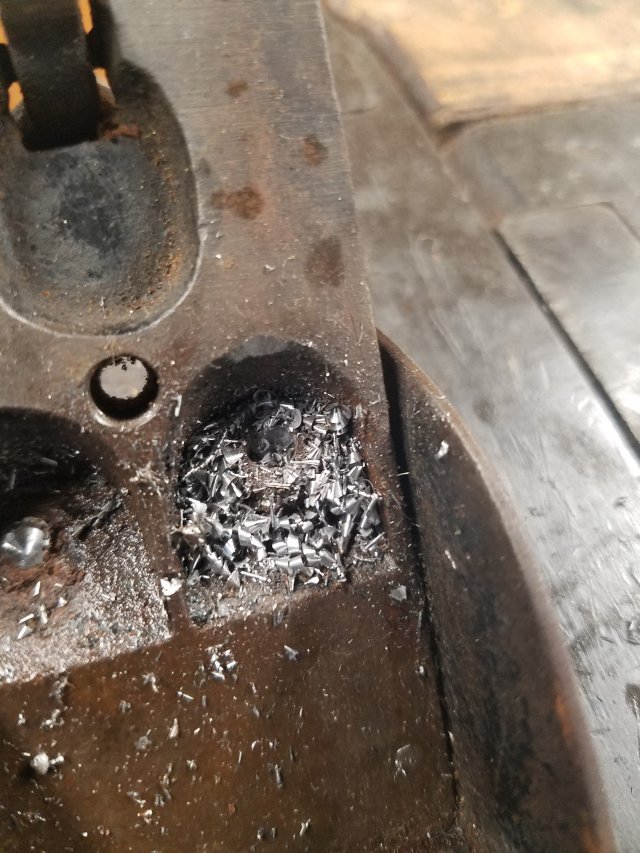
I ended up having to drill through the top of the head to break it apart from the threads so the frog could come free. I’ve read where some people use propane torches to heat up the screws and free the rusted threads that way but, my shop is in my basement and don’t feel like stinking up the whole house with the flames off of a propane torch.
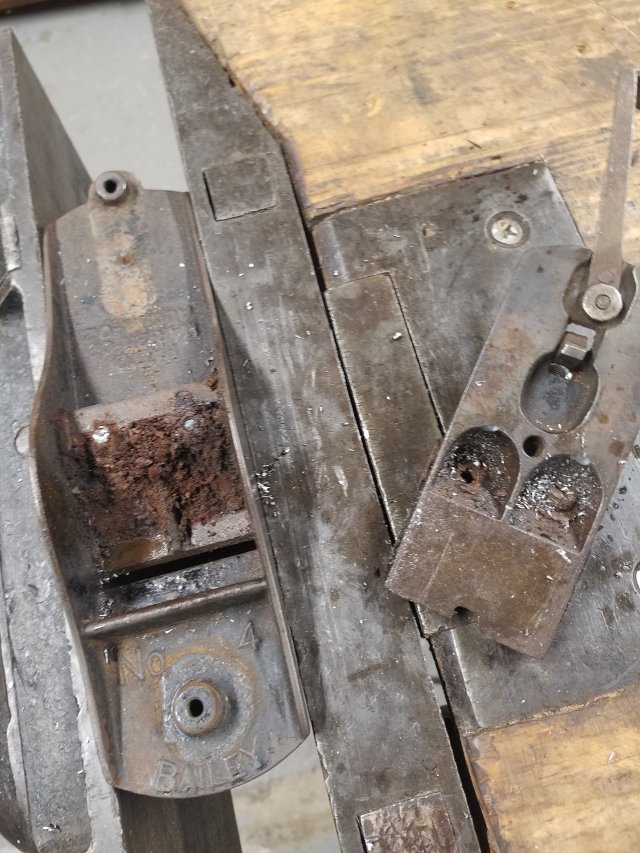
After a few minutes of drilling, the frog came off of the bed. You can see all the gunk that’s been trapped underneath the frog for decades.
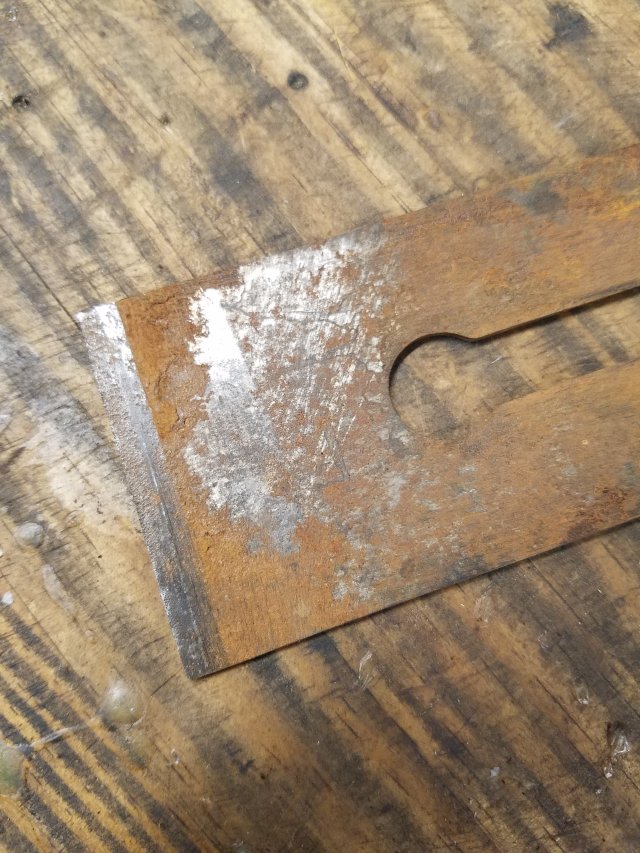
Now that the frog is removed, I was left with another problem. The threads of the left screw stood proud of the bed while the threads of the right screw are inside the bed.
Removing the left threads was simple, a little bit of oil and some channel locks and it unscrewed easily. The right one, not so much.
For the right one, I used a 11/64″ drill bit and carefully drilled through the threads of the screw paying careful attention not to damage the interior threads of the bed. When the majority of the screw is removed, I used a dental pick and cleaned out any remaining metal inside the threads so that new screws would seat nicely.
Grabbing a couple of spare screws I had lying around, I tested them inside the cleaned out holes. They worked just fine. Now it was time to continue on with the restoration job. I dipped all the metal parts of the plane in a citric acid bath to remove all the rust.
With all the parts cleaned up and the blade sharpened, the plane was restored to working order. Another plane saved from the scrap heap.