
This past Saturday I had the honor of being the guest speaker at the Cincinnati Woodworking Club. I arrived at the church around 9:00 am and Bill, the gentlemen who originally contacted me, told me I’d be the last speaker around 10:45 am. I thought to myself “Oh God, I’m the headliner. I hope I live up to their expectations.” There was about 50-60 people at the meeting which was way more than I thought would be there. I kind of hoped I would only be speaking to around twenty to calm my nerves.
Like any club, the meeting started off with some administrative stuff and talking about building toys for a toy drive. A few members spoke before me demonstrating projects they built or woodworking classes they took. There were a few really nice pieces that members brought in to show off.

I started off talking about how my Grandpa got me into collecting old tools as a kid when he gave me his jewelers drill press. Then I talked about my tool cabinet and how it came to be. I’ve been collecting antique tools since I was a kid and the tool cabinet was born out of necessity as a place where I could store all the old tools I used. When I was young, living at my parents place, my tool collection was on the other side of the basement being displayed on book shelves. I had to walk outside the shop to the other side of the basement in order to pick up a tool I wanted to use. My idea was the tool cabinet would separate my “good” antique tools from my users. I told the audience that my cabinet looks a lot nicer in pictures than it does in person because every time I reorganized the inside, I tore the veneer from the oak plywood where a tool holder was attached to the wood. If you examine the cabinet in person, you’ll see a bunch of tears and mismatched stain where I couldn’t remember which stain color I used the last time.

I then went on and talked a little bit about my work bench and described how it’s based on Chris Schwarz’s benches in the Workbench Book and Roy Underhill’s Roubo bench he built on his show. My bench is a user and is dirty from years of use. Once in awhile, I’ll clean the top off with a hand plane or belt sander just to give me a fresh surface.

Then I started to discuss how I restore old planes. This is a Diamond Edge Jointer I picked up on The World’s Longest Yard Sale this summer. The plane was a good candidate since it was made by the Sargent Tool Company a competitor of Stanley Tools.

Anytime I buy and old tool, I roll the dice that I’ll be able to restore it. Most times I win, but once in a while I’ll buy something that needs additional work. I didn’t notice at the time, but this plane’s yolk broke off the frog and needed to be replace.

Luckily, I had the proper replacement parts in stock from other planes I couldn’t restore. The yolk and the brass adjustment knob from an old Stanley plane worked as replacements.
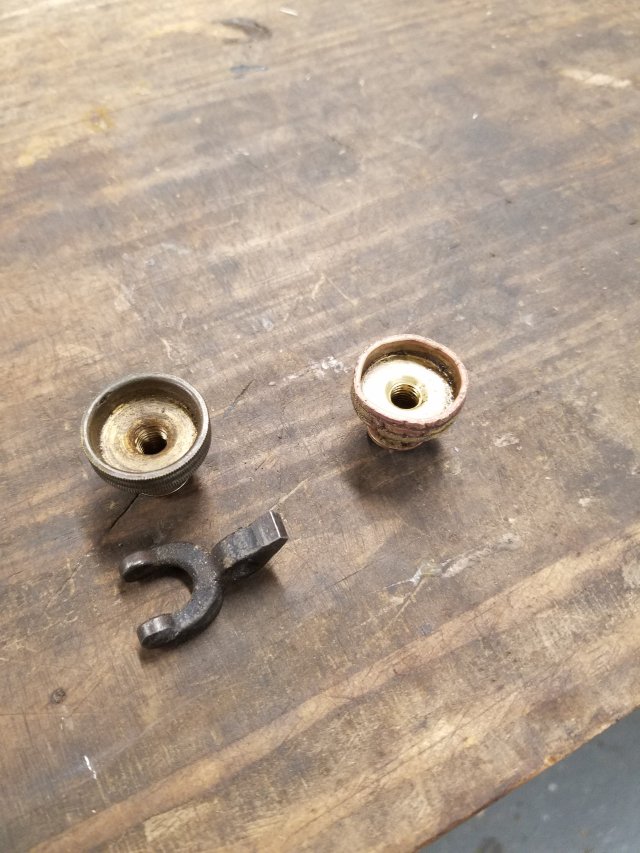
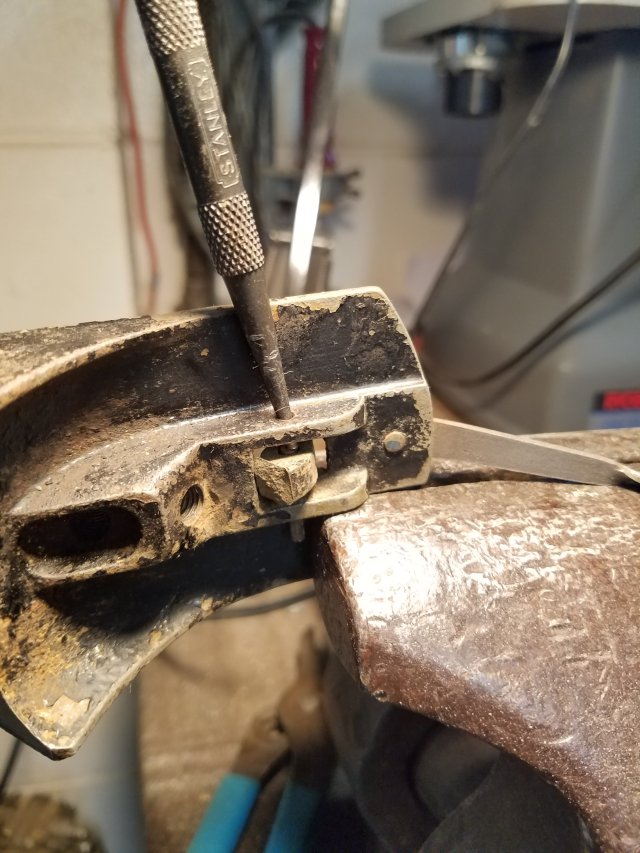
To fix the frog, I simply punched out the pin that holds the yolk in place and inserted the new yolk, punching the pin back in place to repair the tote. It took literally five minutes. Once the brass adjustment knob was screwed back on, the frog was as good as new.
Once I determined the plane could be restored, I told them I dip all the plane parts in a citric acid bath. I allow the parts to sit in the bath for a couple of hours making sure that they don’t sit too long or I’ll get acid burns on the metal.

Wiping the rust off the metal with a drywall sanding sponge, the plane was looking in good shape and ready to be buffed.
I took the parts outside to use my wire wheel to buff out the metal. I told the audience I have this machine outside because the little wires fly off the wheel. If I use the machine in my shop and this happens, I’ll walk around at night and get a nice little wire stuck to the bottom of my foot. So, outside this thing stays.

I then discussed my tool solution I make to coat my tools. It’s made up of a slice off of a beeswax candle, one part orange oil, and one part mineral oil. I take the slice of beeswax and melt it in a pot on a hot plate. Once the wax is melted I add equal parts of mineral and orange oil and stir it up. The solution works great and works just as well as Kramers Antique Improver for pennies of the price.
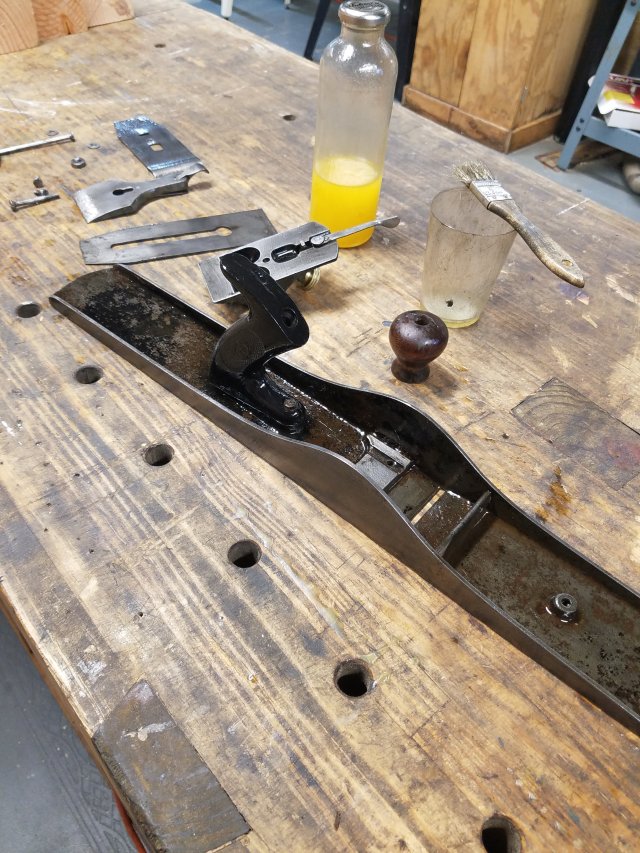
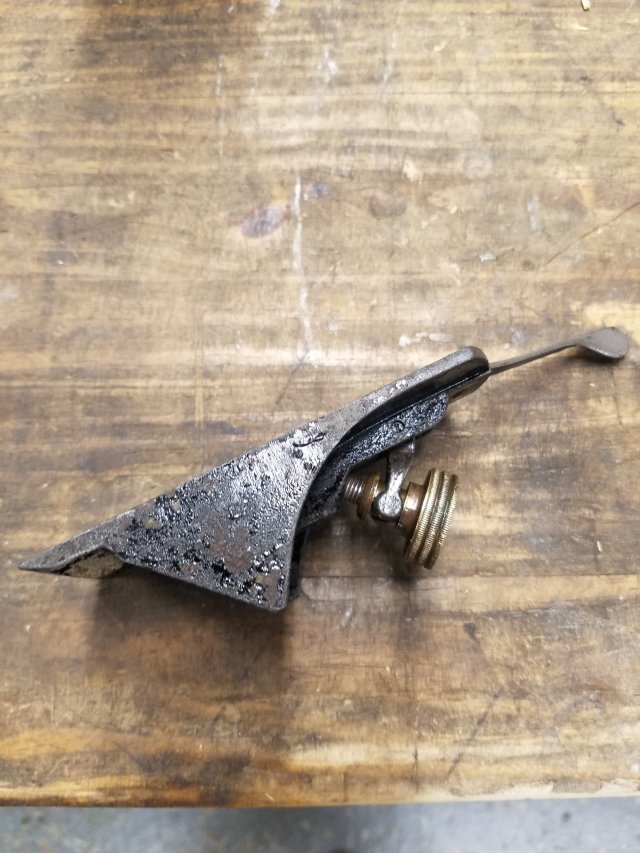
This is the plane put back together. If I wanted to just put this thing on my shelf, I would be done but I want to see if I can get this guy to work again.

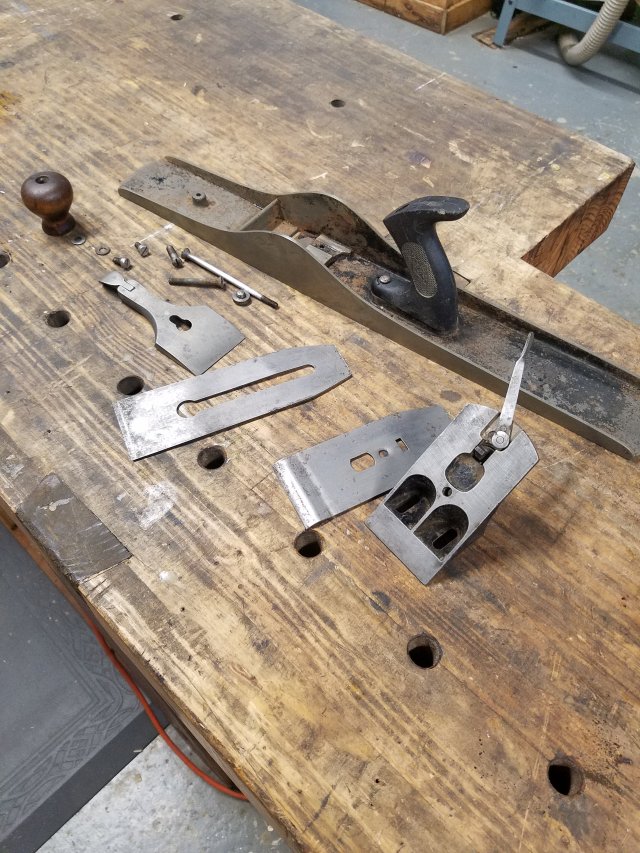
Here’s the plane blade when I bought it. Many people think that when you buy an old plane, you have to buy a new blade because the old one won’t work anymore. I always try to see if I can get the original one sharp first.
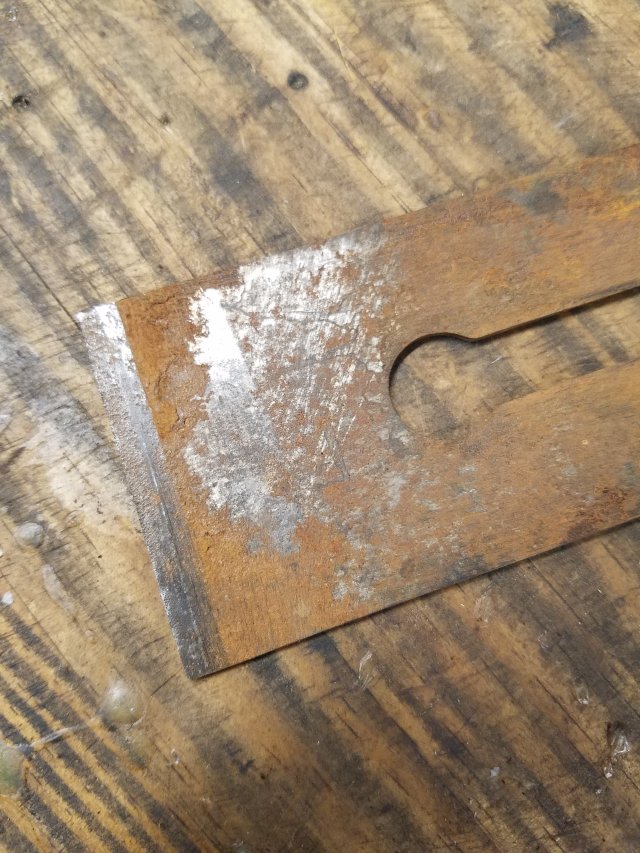
Using my slow speed grinder, I flatten the back of the blade to remove as much of the pitting as I can. I only care about cleaning up 1/4″ of the bottom of the blade as this will be the only part of the blade that needs to be tuned.

Then I use the plane jig and grind a 25 degree bevel to the edge using my Tormek slow speed grinder.

After that, I’ll hone the edge of the blade using 4000 and 12000 grit water stones. At this point, it’s sharp enough to shave the hairs off of my arm.

Setting the cap iron back on the blade about 1/8″ behind the cutter, I stick both back on the plane to see how it cuts. With a little bit of work, I was able to get whisper like shavings from the plane without buying a new blade or even worrying about flattening the bed with sandpaper. I brought the plane with me to the meeting and used it on a scrap piece of poplar to show how the plane performs. I then passed the scrap wood around the audience so that they can see how smooth the plane made the wood.

I told the audience that it basically took me an afternoon to transform the plane to make it work again as it will make a nice user for the next 100 years.
Hopefully, I inspired a few of the them to hunt for old planes to see if they can tune them up themselves. All I know is that I really enjoyed giving my presentation and a few of the members came up to me after the meeting to tell me how much they enjoyed me speak. And no one threw tomatoes at me.

Thanks for coming, I enjoyed your presentation.
LikeLiked by 2 people
Thanks Kieth, it was fun.
LikeLike
I think that it is a credit to you that you can stand up and speak about your chosen subject. I’ve tried to do some videos and all I can hear is blah blah. Well done.
LikeLiked by 2 people
thanks. there were some blah, blah, blah’s coming out of my mouth. lol
LikeLike
Mike, I have received nothing but positive feedback regarding your presentation. You did a great job. No one would have expected this was your first speaking engagement.
LikeLiked by 2 people
Thanks Bill, Maybe I can come back one day and demonstrate Course, Medium, and Fine cut planes if your members would be intersted in that.
LikeLike
I’m halfway through restoration on this Zenith.
https://wb8nbs.files.wordpress.com/2019/09/0475_800.jpg
LikeLiked by 2 people
haha. there you go. that’s awesome
LikeLike
Good for you for passing on to others what you have learned. I’m sure my guild could learn a thing or two from you.
LikeLiked by 2 people
Let me know if you want me to come down and talk to them. haha
LikeLiked by 1 person