Fixing a Childs Rocking Chair

My wife’s cousin’s husband (does that make him my cousin in-law?) has a childhood rocking chair he wanted me to fix. My wife Anita brought to me and asked me what I could do with it. I looked it over for a few minutes and noticed that it had old glue repairs and screws all over the place trying to hold everything together. It must mean a lot to him if he tried so hard to keep intact, so I decided that it I’ll give it my best to return this chair to its former glory.

The first thing I had to do is carefully disassemble the top of the rocker and save as many pieces as possible. The seat was a piece of MDF that I was going to use as a template for the new seat.

The crest rail was all beaten up so I had to cut a new piece out of poplar using the original as a template.

I then used the holes off the old crest rail as a pattern for the new crest rail and drilled the appropriate size holes.

Since I was using the seat as a template, transferring the holes to the new seat was easy. I simply stuck the auger bit in the hole at the appropriate angle and drilled through. I realize that in theory that this doesn’t exactly work because the angle in which I drilled the holes through the new seat won’t perfectly line up with the where the holes are in the original seat, but the difference was miniscule and not enough for me to be concerned with.

After the holes were drilled, I shaped the seat on the band saw and cleaned up the edges with rasps and files.

I needed to make new spindles underneath the arm stretchers as one of them looked like a dog chewed on it. Luckily I had a couple of short 5/8″ dowels that would work.

I needed to put a 1/2″ tenon on them to fit in the 1/2″ holes I drilled through the seat. I used my tenon cutter and brace to do the job cutting a tenon on both ends of both pieces.

The test fit looks pretty good. Now I needed to make 3/8″ dowels for the back spindles.

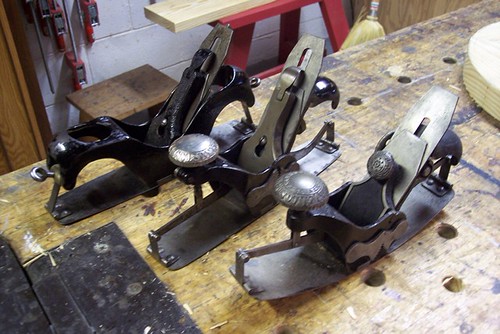
I didn’t have a 3/8″ dowels on hand but I do have my Stanley No 77 dowel machine with a 3/8″ cutter in it. I actually sold this tool on eBay earlier this year, but the guy I sold it to claimed it was damaged in shipping so he returned it. I took it as a sign that I should keep it.

I grabbed some maple and cut 7/16″ square stock on the table saw. I then took the stock and shoved it into the cutter while turning the handle which makes the cutter head spin cutting the square stock round.

In no time flat I get perfect 3/8″ dowels. I cut them to size and stuck them in the holes to act as the back spindles.

After some sanding and glue, the rocking chair is back in business. Now Anita will paint it and give it back to her cousin’s husband.

UPDATE 12/24/13

The rocking chair has been repainted just in time for Christmas. My wife Anita did a nice job painting it with chalk paint and distressing it a little bit. We’re on our way to my Anita’s cousin’s house to deliver it to her husband. I’m sure it will be well received.

World’s Longest Yard Sale: US127 Corridor

My wife and I just returned from a five-day excursion on the The World’s Longest Yard Sale down US 127. The yard sale runs every year during the first weekend of August from Michigan down to Alabama. Last Wednesday, my wife Anita rented a Ford F-250 cargo van and we headed down to Chattanooga TN to spend the night. We picked up 127 around the Kentucky Tennessee border stopping at multiple yard sales running all the way to our hotel in Chattanooga. The next day we started heading up 127 back home.

Anita was looking for old furniture to fix up as well as things she could sell in her booth. I was looking for antique tools. We traveled over 1200 miles in five days traveling from Chattanooga, TN to Castine, OH and had an absolute blast. Nothing more fun than the thrill of the hunt. We ran into a little trouble at the top of Tennessee though. It was around 7:00 pm and we didn’t have a hotel booked. We drove all the way to Danville, KY hoping that a hotel on US 127 would have a room but they were all booked. We ended up driving all the way to Lexington, KY to find a room. The next day we got up and had a nice breakfast in neat little restaurant and headed back to Danville, KY to continue up US 127.

I picked up mostly a bunch of planes, some of them needing major cleaning, with a few miter boxes near the end of the trip. What’s amazing about my finds is that most of the planes I had bought had corrugated bottoms. I wasn’t specifically looking for corrugated planes but when I turned over a plane I was interested in, its bottom was corrugated. Twelve of the fifteen planes were that way. Amazing since corrugated planes are not as common as flat bottom planes in the market.

This is the shot of the bottoms of the planes with nearly all of them being corrugated. It’ll take a while but every one of these planes will be cleaned up and ready to be put back to use.

Near Danville, KY I ran into a guy selling a trailer full of cherry hardwood. I couldn’t buy the whole trailer but I did manage to pick up one of his slabs. This piece is 2″ x 16″ x 100″ and the offer was too good for me to pass up. Does anybody want to guess what I paid for this slab of cherry? Post a comment and I’ll let you know.

Using a Circular Plane

If you get into woodworking much, you’re bound to get tired of always building square cabinets and start incorporating curves into your work. With modern woodworking equipment, it’s easy to cut shapes on the band saw then clean up the edges with random orbit sanders but if you’re a hand tool enthusiast, there is a long forgotten plane you should bring into your arsenal.

Stanley made several versions of circular planes in their hay-day. Out of the three versions; Stanley No 13, No 20, and No 113, the No 113 is by far the most commonly available in the marketplace. When Stanley introduced it, sales took off because its top center wheel allowed the user to adjust both sides of the bed at the same time.

The 113 came in different versions as the years went by. A side-wheel blade adjuster later became the more common Bailey blade adjuster. My personal No 113 is the side-wheel adjuster. It was the first 113 I ever bought and I tuned it up nicely. However many people prefer the Bailey adjuster since it works just like a normal bench plane.

By turning the top center wheel, you flex the bed in a concave or convex shape. The shape of the bed doesn’t necessarily have to be the exact shape of the wood you’re planing. The idea is to support the bed enough so that the blade will make constant contact with the wood.

The blade on a 113 is the same width of a Stanley No 3 so finding replacement blades shouldn’t be a problem. In fact, the mouth is a large enough at the base you can even use after market blades from Hock or Lie-Nielsen. However, after market chip breakers will not work because of the position of the frog adjustment tongue hole.

Using a circular plane is much like using a spokeshave. You want to plane down the grain as much as possible which means you’re going to constantly change the position of the plane on the work piece. If you plane up the grain, you’ll get blade chatter and tear out as the plane will literally bounce off the work piece. Skewing the blade at an angle will help produce a better cut as the blade will shear the wood fibers the same way a vegetable slicer cuts a cucumber.

Because of the divergent and changing grain, it’s critical that your blade be sharp. When planing, you’ll often produce two types of shavings. The first being regular shavings as you plane with the grain, then finer curly shaving as if you were planing end grain.

The true benefit of using a circular plane is the consistency you get when shaping the curve. Any high spots will get planed first revealing low spots in the work piece. After more planing, the piece will take on a consistent shape.

If worst comes to worst and you can’t remove plane chatter and tear out due to the grain rising, you can always remove it and smooth the shape with a sharp spokeshave.

One of the most common misconceptions about using circular planes is that people think that they only work with wood that is circular in shape. That’s simply not true. You can plane ovals and soft curves just as well. In fact a few years ago when I built my Roubo workbench, I used the No 113 to finalize and smooth the shape of my crochet.

The only manufacturer that makes a new circular plane nowadays is a company called Kunz which will run you $300 on Amazon. I have never used one so I can’t tell you how well they work. Neither Lie-Nielsen nor Lee Valley have versions of their own so buying an old Stanley may be your best bet. They run between $100-200 depending on condition. All I know is that if you’re in the market for one, buy it now before Chris Schwarz writes a blog about them making their prices double.

Oh Boy, I Did It Again

Well I went to another antique tool auction yesterday. This one was in Jeffersonville, OH about half way between Cincy and Columbus and good deals were to be had as you can see in the photo.

I only picked up a few Stanley bench planes. After the auction I went to in Indy a couple of weeks ago, I have enough Stanley planes to last me awhile.

I’m a sucker for molding planes and these were too good of a deal to pass up. Several of them I snagged for under $10.00 each.

All the profiles of the molding planes I bought. I realize that you can make nearly every molding profile with a good set of hollow and rounds which I already have, but I can’t resist the opportunity to buy some complex molders. Some of these I’ll keep for myself, the rest I’ll sell.

I also picked up a few hand saws as well for under $5.00 a piece. Three of them were Disston thumb hole saws that are gaining popularity on eBay lately. I’ll clean them up and throw them on eBay to see what they bring.

Here’s a neat pair of shears I picked up for $6.00. I really don’t know anything about old shears and have no idea what they’re worth but my wife will stick it in her booth for sale.

A couple of sash molding planes a froe. I had a nice sash molding plane before and sold it only to regret it later so I’ll probably keep one of them. I’m definitely keeping the froe. Working green wood has always been an ambition of mine and this froe will come in handy. It looks like it was made from old leaf spring from a car.

The two scores I got were a Stanley No 141 with the fillister bed and blade and a Stanley No 603C corrugated bench plane. I may hold onto the 141 until I find some regular blades for it and then sell it.

All I know is that I’m going to be very busy for a while cleaning all the tools I bought this past month.

The Nicest Plane You’ll (Probably) Never Buy

If you’re in the market for a smooth plane, chances are you’ll probably consider one of two options. Buy a new one from a top tool-maker like Lie-Nielsen or Veritas which can set you back $200-350, or buy an old Stanley and fix it up. However there should be a third option on your list.

The Millers Falls No 9 smooth plane is one of the nicest production smooth planes you can buy for the money. In most cases, you can buy one for a lot less than a comparable Stanley No 4 plane and get the same quality of plane.

The differences between a Stanley No 4 and a Millers Falls No 9 are minimal. Both planes use 2″ wide blades. Both are about 9″ long and weigh about 4 lbs. They both have a frog adjustment screw in the back (some older Stanley’s don’t have this feature). In fact, the only main difference between the two is that the Millers Falls uses a two piece hinged lever cap that supposedly holds more pressure on the blade and chip breaker reducing blade chatter.

Both planes are about 9″ long with the Millers Falls being 1/8″ longer. If the bed is pitted a little bit it’s not a big deal as the pits won’t affect the plane’s performance. Consider them micro corrugations.

These two planes both have a frog adjustment screw in the back making it easier to adjust the opening of the mouth for the blade. Stanley’s made before 1907 don’t have this feature but I don’t think it’s a really big deal since once you set the opening of the mouth, you rarely reset it.

The handles on Millers Falls are made of beech hardwood with some older ones being made from cherry. In my experience, these are actually better than the rosewood Stanley used. Although prettier than the stained beech, a lot of Stanley’s with rosewood handles tend to break at the tip since the rosewood is more brittle than beech or cherry.

The nicest difference the Millers Falls No 9 has over the Stanley No 4 is the price you can pick one up for. Basically nobody really wants these things because all the collectors want Stanley’s. Even woodworkers when buying old tools typically gravitate toward Stanley’s more than their competitors since there are far more Stanley’s in the market place. However, if you keep a keen eye out, you can buy an old Millers Falls for about $10.00. I know because I just picked up a few Millers Falls No 9’s for $10.00 each a few weeks ago at antique shows.

As far as the price of Stanley No 4’s expect to pay $40.00 or more for a nice one since dealers will want top dollar for them. I’ve seen some mint Stanley No 4’s go for $150 on eBay.

Getting the Millers Falls No 9 cleaned up and ready to use is no different from an old Stanley. If rusty, dip the parts in citric acid for a few hours and then polish the metal to a shine with steel wool. If necessary, fettle the bed flat with 220 – 400 grit sand paper then sharpen the blade. The results will be stunning for a $10.00 plane as I was able to achieve a plane shaving of .003″ by only sharpening the blade. So thin in fact, that you can literally see through the wood shaving.

As a final note, if you’re the type of person who likes to use several smooth planes with a different cut setting, (hence the reason you don’t need to reset the blade with the frog adjustment screw), a good idea is to have a Stanley No 4 set to a medium-cut and a Millers Falls No 9 set to a fine-cut so it’s easy to determine which plane has the proper cut set to it.

A day at a tool auction

Last weekend I went to an antique tool auction in Indianapolis and picked up a few planes. Needless to say I went hog-wild with my bidding. All the planes were sold in lots which brought the price per plane down a bit. Even with all the good deals I got, I never spent so much at a tool auction.

I bought several Stanley circular planes as well as No 3’s, 4’s, 6’s, Gage 5C, block planes, and No 71 1/2 router. All of them are in nice shape with nice clean rosewood handles, full blades and no rust.

I also bought a lot of transitional planes but they were all sold in lots with five or more so I couldn’t refuse.

I also won a box of woodies which had a cooper’s croze, old woman’s tooth router and two cute little panel raisers. One of those panel raisers I’ll keep while the rest I’ll sell.

I’m a sucker for old molding planes. I have over 150 in my arsenal and still counting. I’ll more likely keep all these unless I already own that profile then I’ll sell it.

Box of measuring instruments. Lots of calipers and dividers in there and a few do-dads I have no idea what they do.

Some of the tools that were in the box I’ll keep for myself. Buy a box full of tools, sell the ones you don’t need to pay for the ones you keep. End up getting free tools which is not a bad deal.

Once I get all these tools cleaned up I’ll throw them on eBay. The money I make will help pay for my medical bills from when I was in the hospital last month. Wish me luck.

Removing a rusted bolt on a Stanley plane

I’ve cleaned up a lot of planes over the years and most of them come apart pretty easy. However once in a while I’ll get one that’s a bugger to take apart. 

This Stanley No 5 I bought was pretty rusted when I picked it up. In fact the only reason I bought it was because the rosewood handles were in nice shape. I as took it apart, one of the bolts that holds the frog down was seized. I sprayed it with BP Blaster several times and tried numerous flat-headed screw drivers to loosen it with no luck.

I knew it was lost cause to save the bolt so I ended up drilling a 1/4″ hole through the top of the bolt and then use a 5/16″ drill bit to widen the hole.

Once the bolt was weakened, I used a cold chisel and a hammer to smack the head of the bolt off and then I was able to remove the frog.

The only part of the bolt that remained was the bottom half that was still screwed into the bed.

I gently unscrewed the threads with some channel lock pliers making sure the threads wouldn’t break off in the bed.

I have a lot of spare bolts from Stanley planes I have taken apart over the years so finding a suitable replacement was a breeze. Not the prettiest Stanley No 5 but with a coat of black japanning, it would look a lot better. Since the body of the plane is so rusty and pitted, the blade will need to be replaced since it too is pitted.

A real Stanley No 55 Plane

A few weeks ago I picked up an old Stanley No 55 plane at an auction. In all my years in buying old tools, I’ve never seen an old Stanley No 55 quite like this one. Stanley referred to the 55 as a molding machine in itself. It came with 55 blades which interchange with the plane to cut different profiles. Stanley even provided a booklet with the plane to help the user create some of the different profiles.


When I won the plane at auction, all the parts where there except the screwdriver but who cares about the screwdriver other than a collector anyway? What made this 55 special were the two dozen extra blades that the original owner cut and used with the plane.

If you know anything about a Stanley 55, you know that one of the reasons that most examples that are found out in the wild are in pristine condition is because they were hardly ever used. The plane is notorious for being too complicated to set up with its various fence and sliding section adjustments. Most craftsmen simply gave up and stuck it on the shelf to sit and collect dust.

However, this plane was different. Most all of the blades were sharpened and ready to cut. Even some of the complex cutters had scuff marks on them from where they were used.

But what was most intriguing part of the plane was the extra cutters that came with it. These cutters weren’t special cutters available from Stanley at the time. These were probably handmade by the craftsman himself. The mere fact that this craftsman knew not only how to use the blades that came with the plane, but went so far as to make a couple of dozens of extra cutters and put them to use makes me green with envy.

I admit that I have messed around with a Stanley 55 plane in the past. And while I was able to make some of the simple profile blades cut well, I had very little luck with the complex ones. The biggest problem with cutting complex profiles with a Stanley 55 is the fact that the plane rides on skates and does not compress the wood in front of the blade like a wooden complex molding plane does. You often end up getting a lot of tear out in the grain ruining the piece you’re cutting.

So how this craftsman got the plane to work well enough to motivate him to make his own cutters and put them to work baffles me. The one thing I do know about making the Stanley 55 work well is to use straight grain wood and have a very sharp blade to avoid tear out. Apparently this guy was a master with the plane getting these complex blades to work. I just wish he would have left a pamphlet on how he did it.

Thanks USPS

So I sold this Stanley No 8 plane on Ebay two weeks ago for about $82.00. I get an email from the buyer last week claiming that he received it broke. It’s not too often that tools I ship end up broken during shipping but when it happens it makes me want to go down to the post office and go postal on someone.

Over the years, I’ve shipped hundreds of planes all over the world to places like Canada, Italy, Australia, England and France. Every time I take care in making sure the plane is well packed and well protected. But when I finished packing this boy to California, a little voice in my head told me I better add insurance to the bill.

A couple of years ago it was the buyers responsibility to pay for insurance when they paid for the item. Now Ebay turned that responsibility onto the seller. So if you sell something expensive through Ebay without insurance and it breaks during shipping, you’re responsible even though the buyer didn’t pay for insurance. I don’t ship everything I sell with insurance because it adds expense to the shipping and handling charge and buyers often get turned off to an auction if they feel the shipping charge is too high.  But thankfully I had enough foresight to pay the insurance for this plane.

When the buyer emailed me it broke, I told him to file a claim through Ebay so they would know the plane broke during shipping. I used Ebay’s third-party shipping insurance called ShipCover and not the USPS. Once the claim was filed, I went through Ebay’s dispute center where they acted as a mediator between the buyer and seller.

As soon as the buyer filed his claim, Ebay immediately froze the money he sent me through PayPal until the dispute was resolved. That can be a hairy situation if you already spent the money your buyers sent you. If there isn’t enough money in your account to cover the disputed item, Ebay will often take the money from your bank account. Talk about a sticky situation if you start bouncing a bunch of checks because Ebay froze your money.

Luckily I had enough money in PayPal and after he filed his claim, I filed mine to ShipCover through Ebay. A few days go by and I received the plane back from the seller. My frozen money went back to him and I was rewarded the $82 from ShipCover. The dispute was settled and life goes on.

User vs Collectible Stanley Planes

Sometimes I’ll see people ask the simple question on woodworking forums on whether or not an old plane they picked up at a garage sale is worth anything. While chances are it’s worth what they paid for it, every once in a while they found a real gem. The key is finding out what Type of Stanley plane you have.

About twenty years ago Roger K Smith wrote a Type Study on the different features of Stanley planes through the years.  It was originally printed in Patented Transitional and Metallic Planes in America Volume I and then later used in John Walter’s book Antique and Collectible Stanley Tools Guide to Identity and Value. Unfortunately both books are out of print and tough to acquire but fortunately for us, some people have uploaded the info to the internet. Below is one of the links. http://www.tooltrip.com/tooltrip9/stanley/stan-bpl/bailey-types.htm

This Type Study is considered to be the most accurate information to date on the manufacturing of Stanley planes, however it should be noted that Stanley Works never built planes based on these Type Studies. They simply build planes with whatever parts they had lying around. So it is quite possible to have a plane that fits all the criteria of a certain Type Study but may have a part or two with an earlier or later Type to it.

Below are two Stanley No 5 planes that to an untrained eye, may look quite similar to one another but are worlds apart as far as value. The plane on the left is a Type 2 which was made from 1869-1872. The one on the right is a Type 13 made from 1925-1928.

The easiest way to tell if your plane is collectible or not is to see if there is a lateral adjustment on the frog. Planes without this lever are known as Prelateral planes. There are four Type Studies that were Prelateral planes, Type 3 being the most rare. If you come into contact with a Type 3 plane, don’t do anything to it. It’s gold to tool collectors.

The second easiest way to see if you have a collectible Stanley plane is to see where the round hole on the plane’s blade is. If it’s on top like the blade on the left, it’s a Prelateral plane blade. Why Stanley changed the position of the hole from the top to the bottom, I have no idea. The hole is there to put the cap iron nut through the blade without having to fully remove it. Seems like a silly feature  to me but that’s just me. Every plane blade ever made has this feature so I’m obviously missing something.

Another feature that distinguishes really old Stanley planes from the users is the lever cap. If your lever cap is solid without any recesses, it’s rare. I guess metal was a precious commodity back then and every ounce counted. Do the solid lever caps work better? I doubt it. It’s just a lever cap.

The fourth feature that separates the collector from the user is the brass adjustment knob in the back of the frog. I guess Stanley was trying to save money anyway they could back in the 1870’s and putting a recess in the adjustment knob saved them $.001 in brass. But hey, $.001 was a lot of money back then.

A fifth major feature is the shape of the tote. It was still being made out of rosewood but the shape on later Stanley’s became more streamed line. Stanley probably heard complaints from customers about the totes being uncomfortable so they redesigned  the shape. But that’s my guess. It wasn’t cost savings because they didn’t switch to birch hardwood until the 1940’s.

Now it’s your call of you want to use one of these old planes in your shop on a day-to-day basis. All I know is I sold the Type 2 on eBay for $175.00 while the Type 13 commonly goes for $40.00. With the economy the way it is today, if I had an old collectible Stanley plane, I’d sell it and buy a later version with a little bit more bells and whistles for a quarter of the price and fill up my truck with a tank of gas and take my wife out for dinner with the remainder of the money.