
I spent last weekend putting back up the crown molding in our dining room. Before I began, I did a YouTube search on installing the stuff. I came across a video of a guy who cuts his inside corners by angling his compound miter saw to 30 degrees then swings his saw to 35 degrees to make his cuts. I tried his technique but I couldn’t get my cuts to line up at all. The inside cuts where fine, but when I tried the 45 degree outside cut around my built-in cabinets, I couldn’t get both to line up.
Frustrated, I did another search, but this time through Google. That’s where I came across a video of Tom Silva of This Old House. In it he should how he coped the inside corner. Then it clicked that’s how I did it before. You simply install one end of the corner up straight on the wall, then cope the other side with a coping saw. I figured if I get advise from anyone, I’ll get it from Tom Silva as he knows what he’s talking about.

This is the back side of the coped piece. I had to file the backside a little bit so it would fit nicer. I posted some of these pictures on Instagram and a trim carpenter made a comment that he appreciated me doing it the right way. He said some contractors give him grief coping his corners but it actually saves time once you know what you’re doing.

Not a perfect fit by any means but it will work. I discovered when learning to cope crown molding; the first one will be garbage, the second try will be a little bit better, the third attempt will almost be there, the fourth one will work, the fifth one will be nicer, and the sixth cope you’ll finally figure it out. The problem is that by the time you figure it out, you’ll be done with the room.
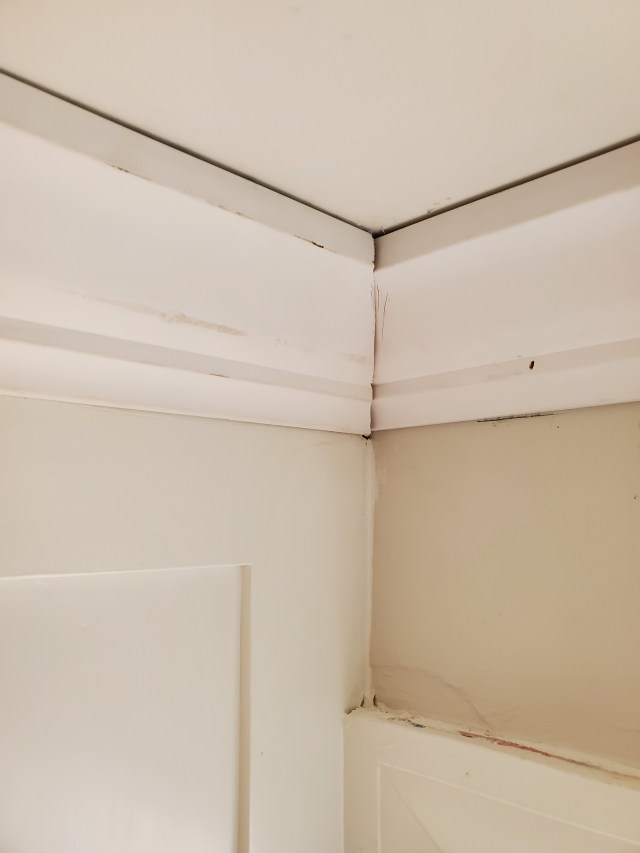
My final inside corner was my best as I figured it out. If the measurement of the wall was 87 5/8″ long, I cut 45 degree angle on my miter saw and coped it. Then I measure from the bottom on the cope out 87 1/2″ and cut it straight 90 degrees on the miter saw. This way this gave me a 1/8″ to play with when I installed it up on the wall. The 1/8″ gap on the wall won’t matter because it will be covered by the cope of the next piece. All you’ll end up seeing is a small little hole at the bottom of the molding that will be filled with caulk.

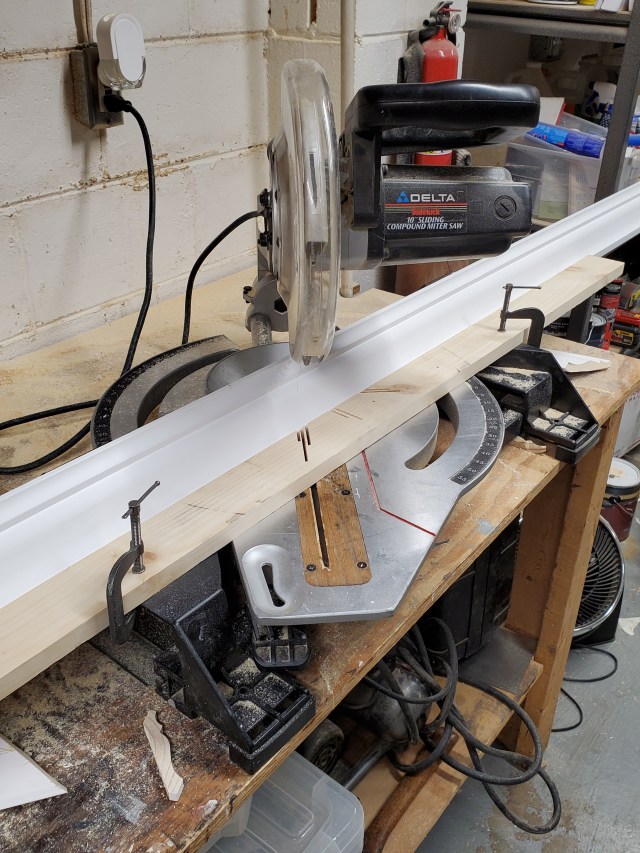
The biggest trick in cutting crown is that you have to cut it upside down. I installed a fence to the miter gauge so that the crown laid the same way it will on the wall so my cuts will be more accurate.
I spent all day doing the dining room and down the hall. I had to scarf joint the molding down the hall because my pieces were only 12′ long.

I had to do eight inside corners and three outside corners.

Any minor errors in the cuts gets filled with caulk and the nail holes gets puttied. Once the molding is lightly sanded and painted, I’ll look like a professional trim carpenter.


Nice work, not easy though! First time I was shown this I had an “ah ha” moment — so that’s why it’s called a coping saw!!
LikeLiked by 1 person
Thanks. It sucks just when you figure it out, you’re done. Only had to do the dining room and hall.
LikeLike
Haha, chances are if you have to do it again you’ll go through the entire learning curve all over!!
LikeLiked by 1 person