Board and Batten Bedroom

Over the past few weekends, Anita and I have been busy updating our spare bedroom. We use the room as our home office but even that is a stretch since the only thing in there is our printer and WIFI cable box. We don’t even have a desk in the room so it’s been more of a holding area for the antiques she sells online and a table for packaging things up to ship.

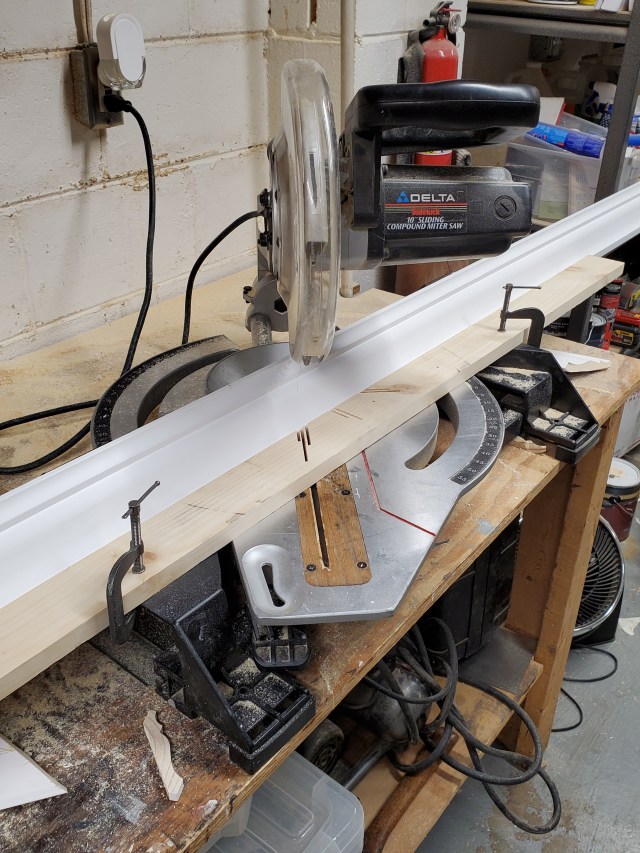
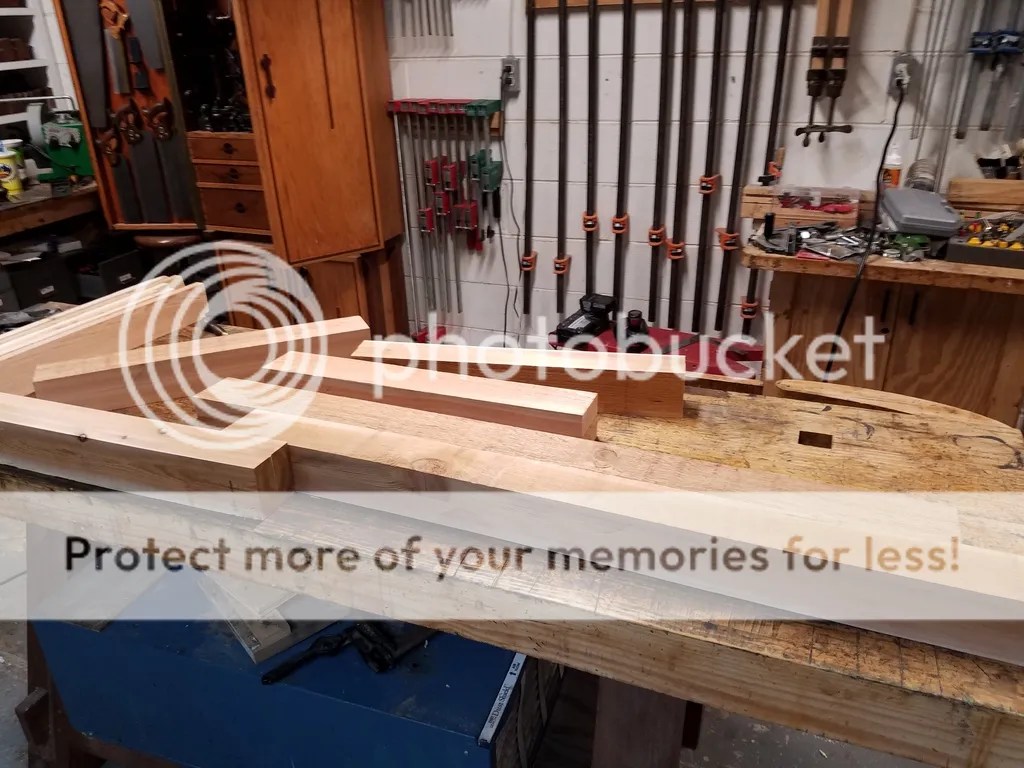
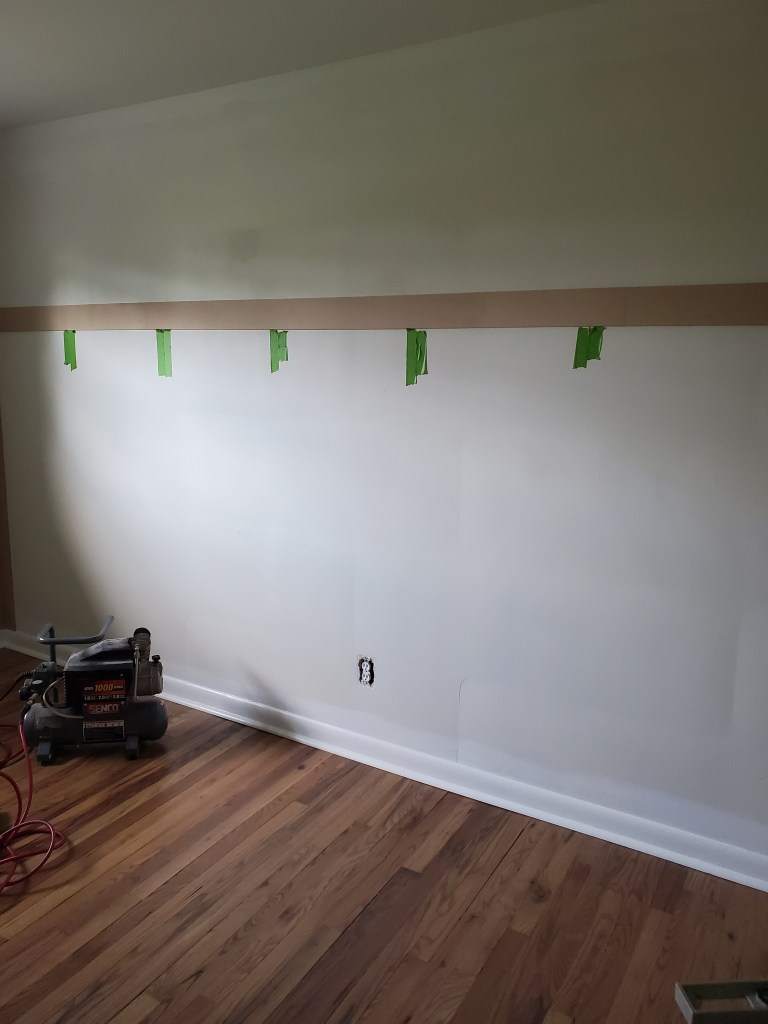
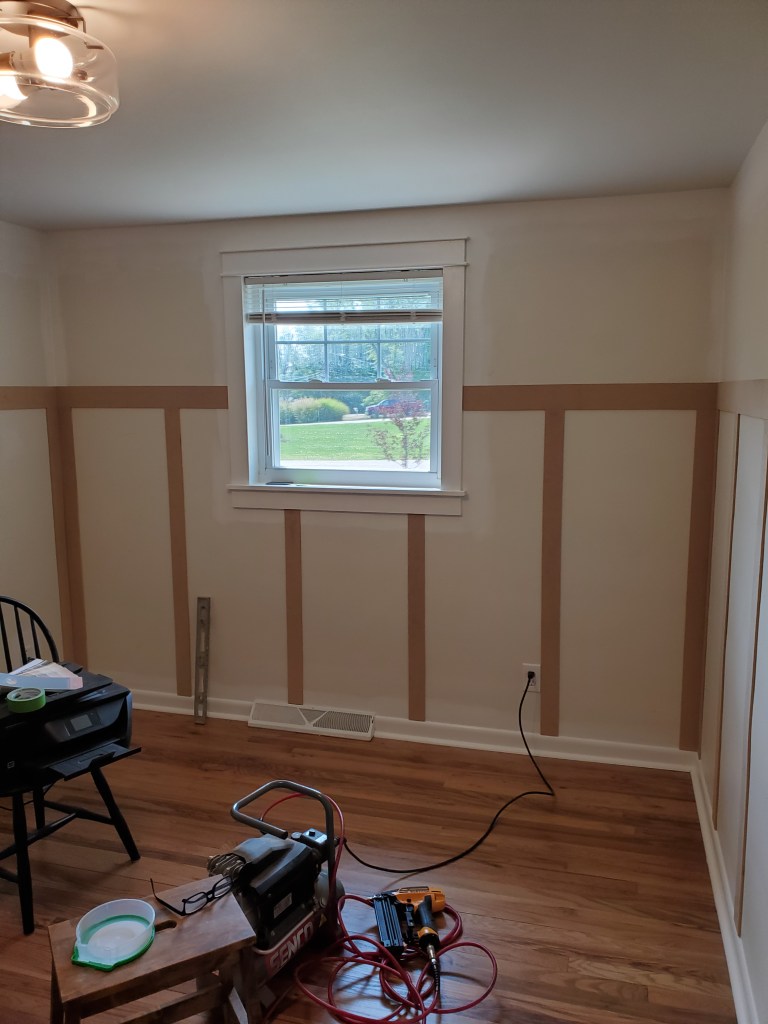
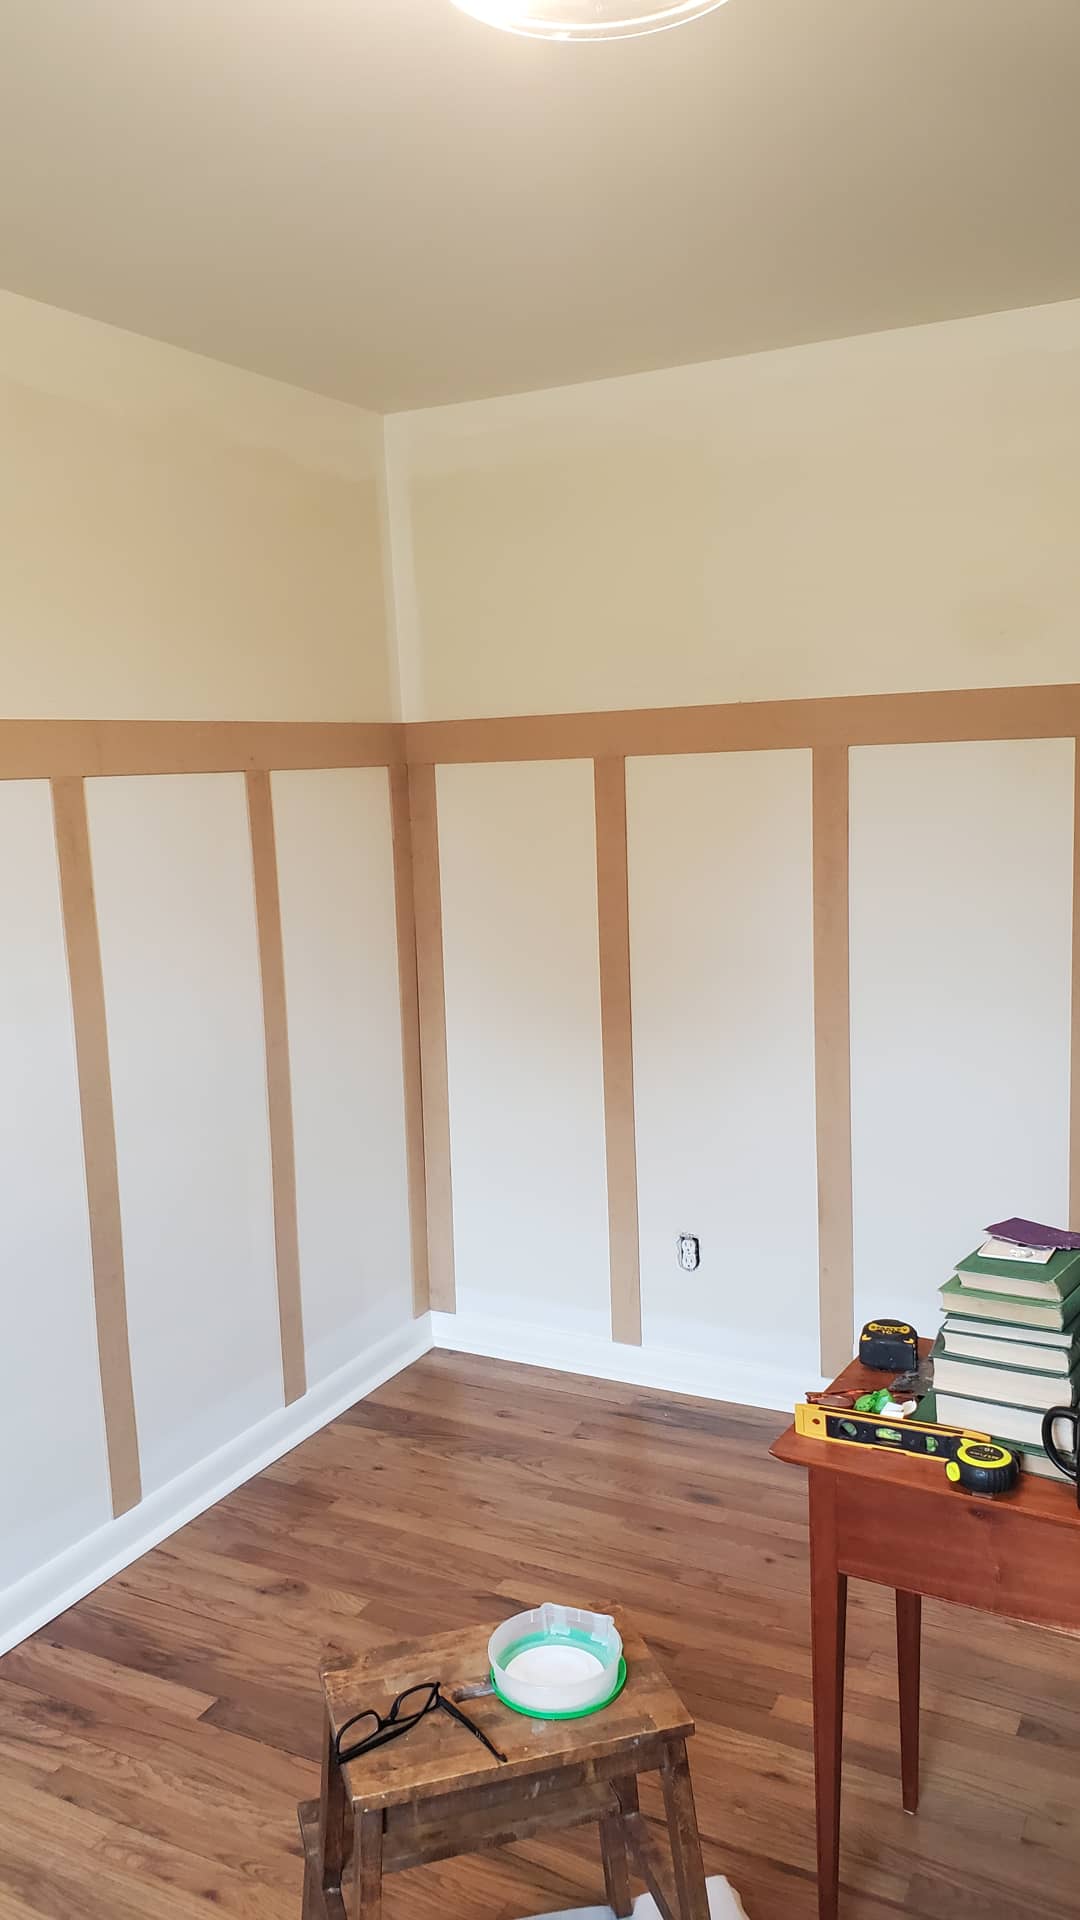
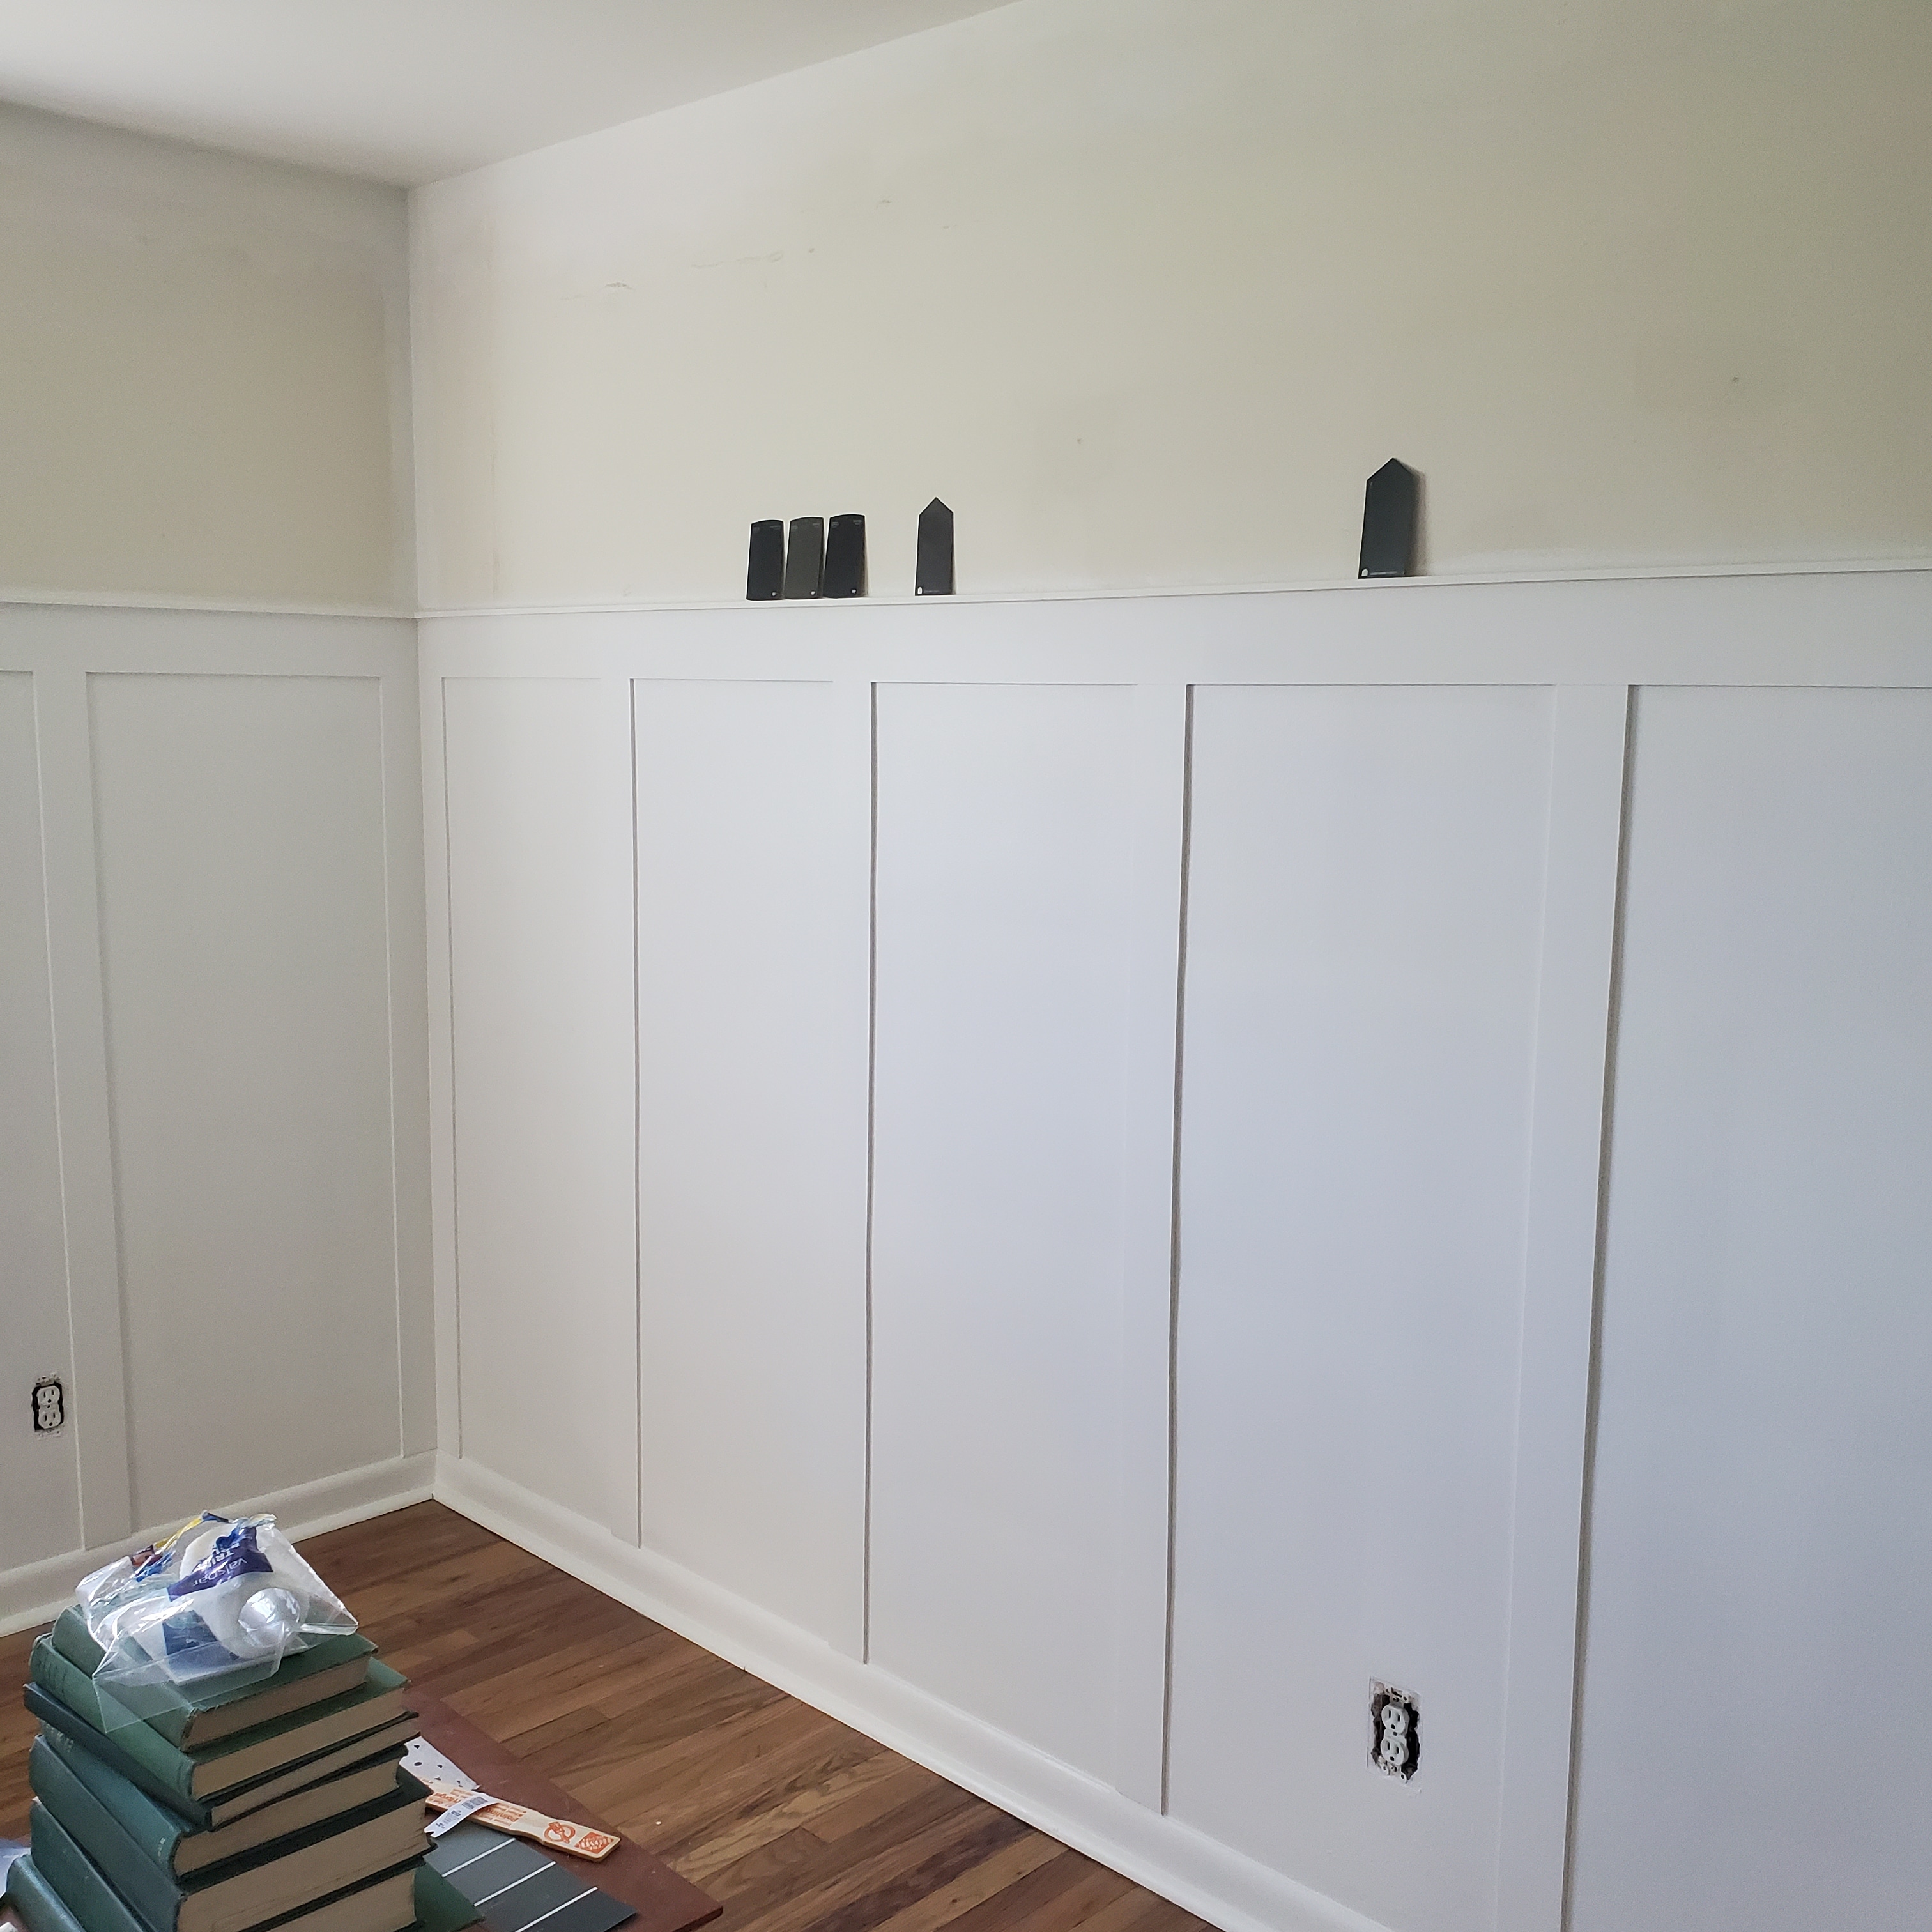
She got tired of the drabby feel of the room and wanted to give it some style so she asked me if I could cut up some wood for board and batten trim work. I went out and bought two sheets of 1/4″ mdf and ripped 4″ wide slats for the top of the trim. We nailed the top boards about 5 feet from the floor.

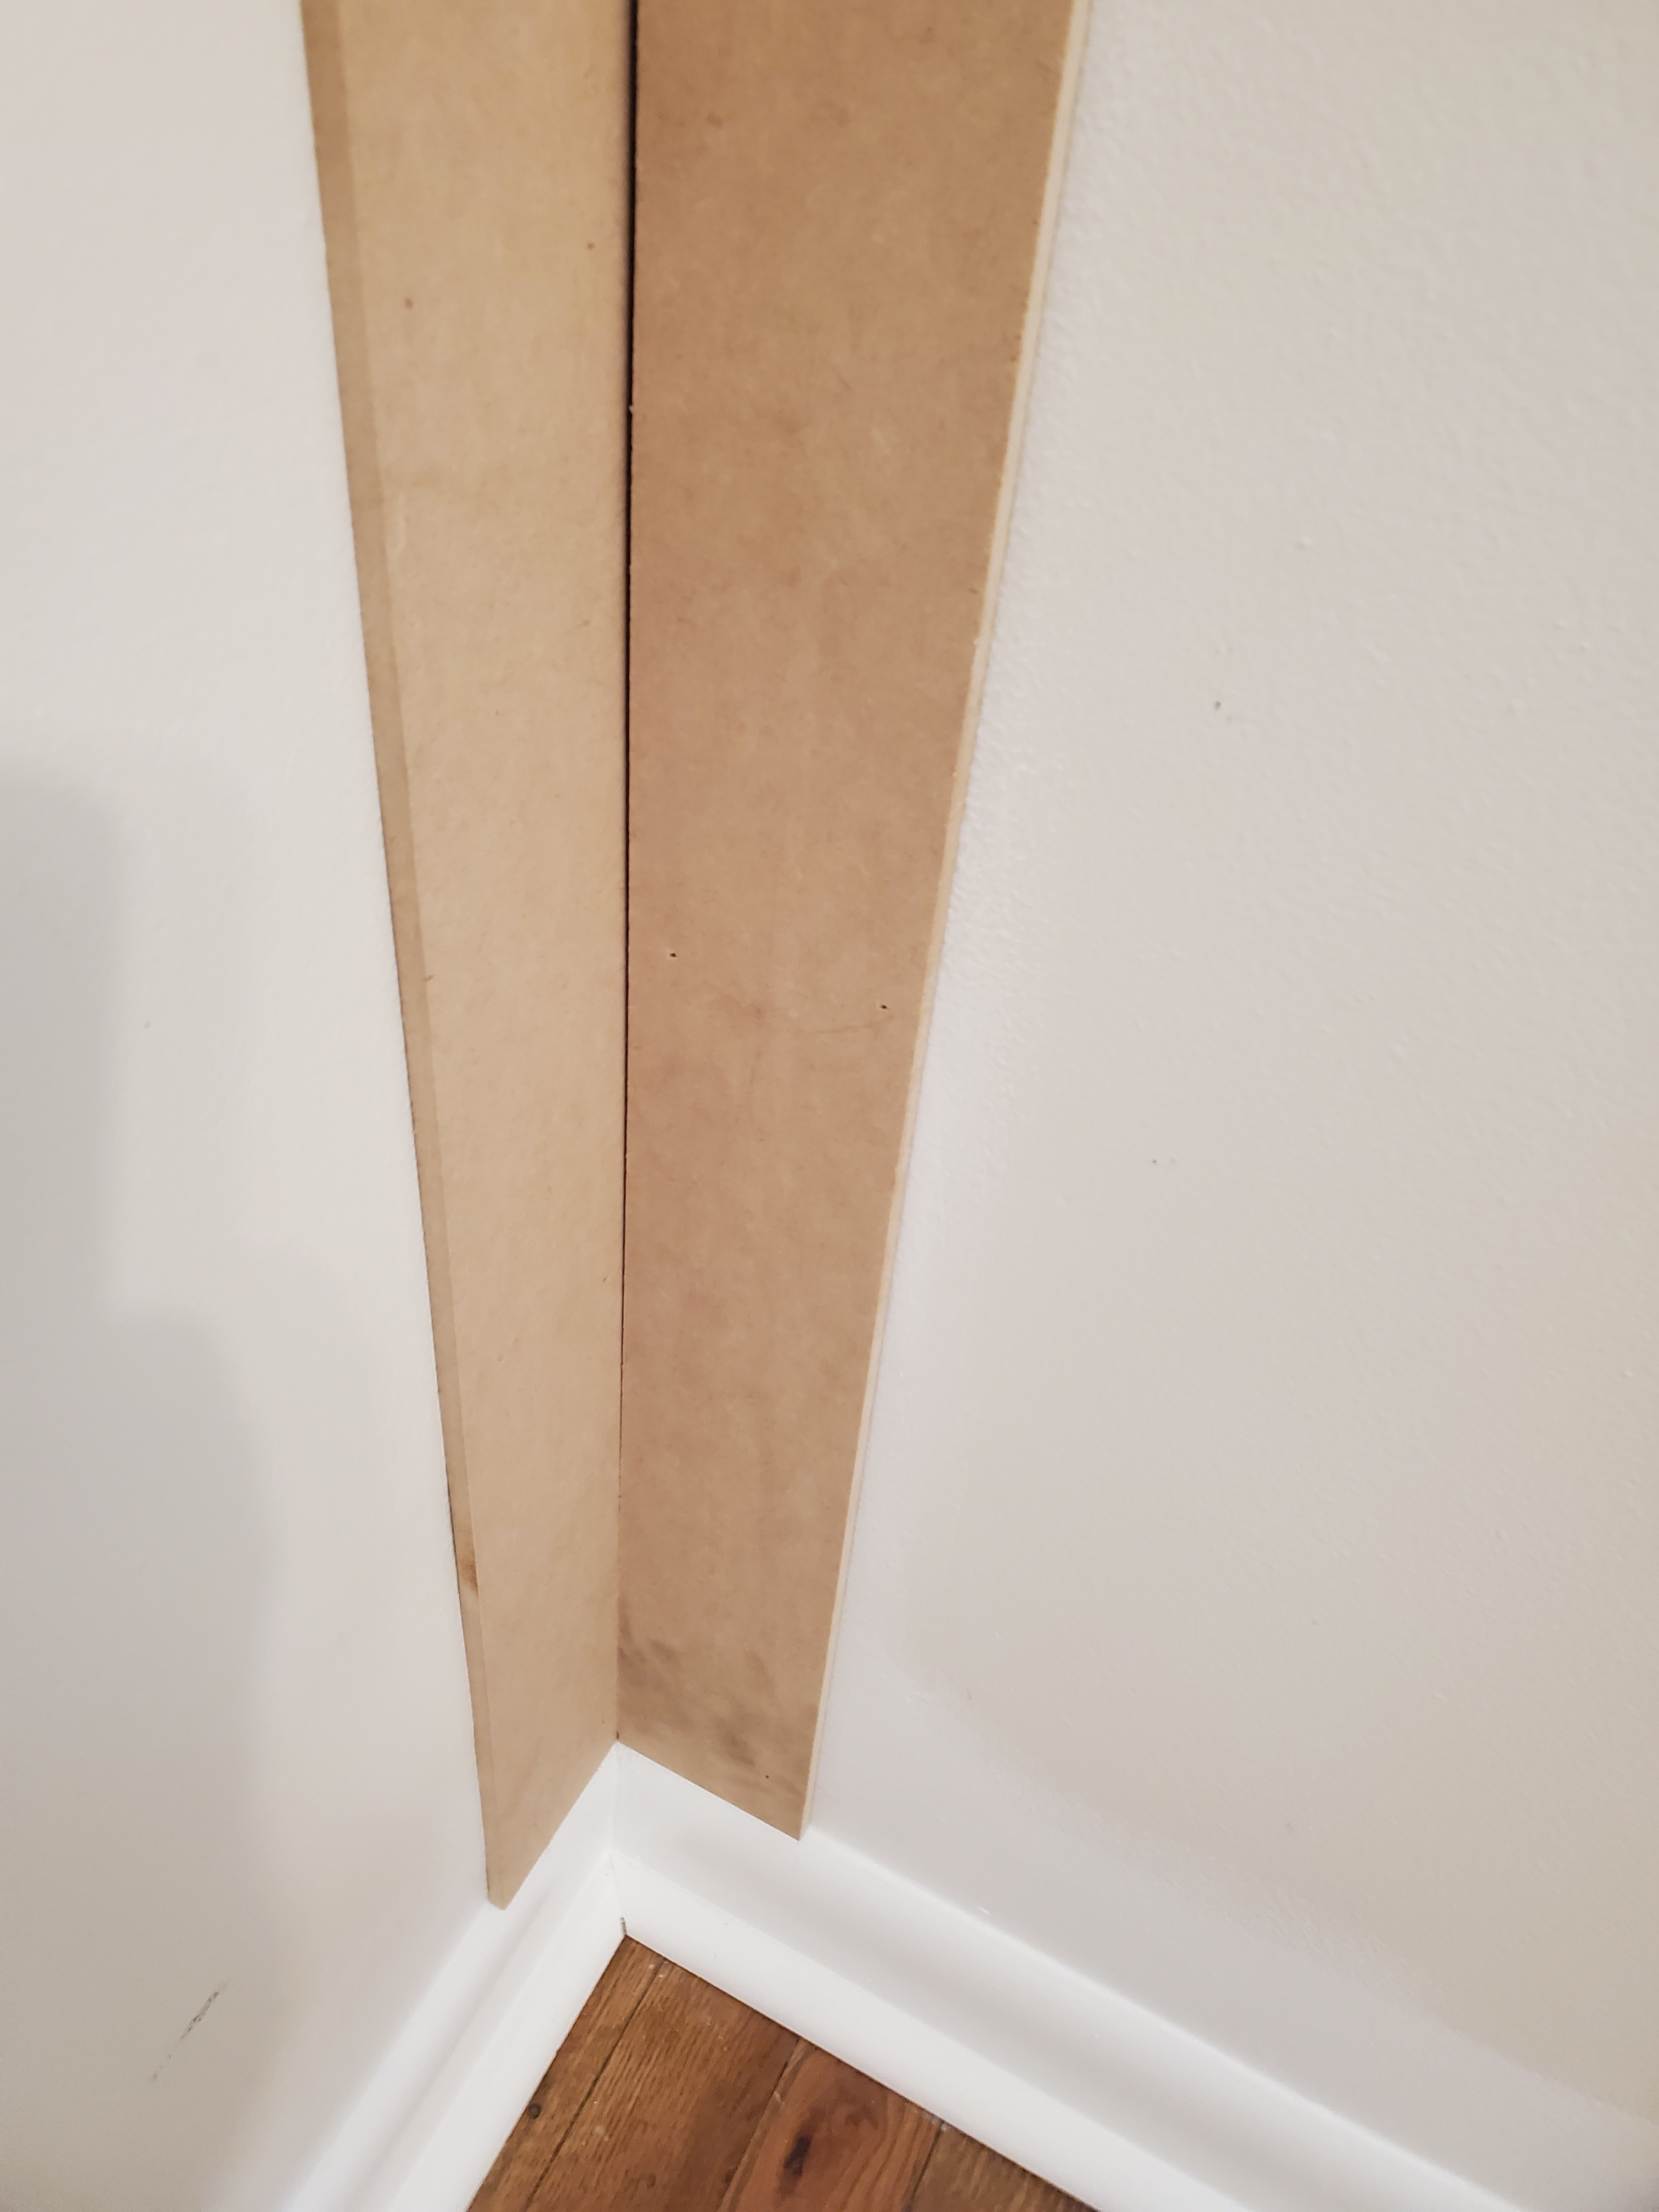
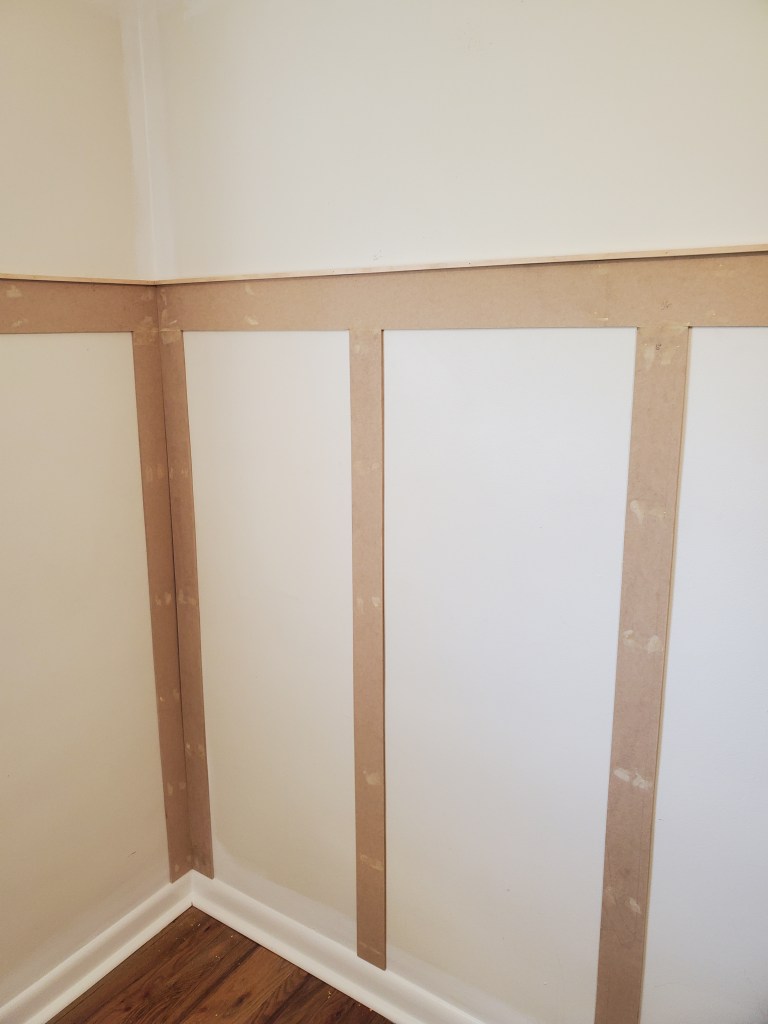
Next I ripped 3″ wide slats and nailed two of them next to eachother in all four corners of the room. I knew the fit in the middle wasn’t going to be perfect due to the bow of the wall so, the gap in the middle was going to have to be filled with caulk.

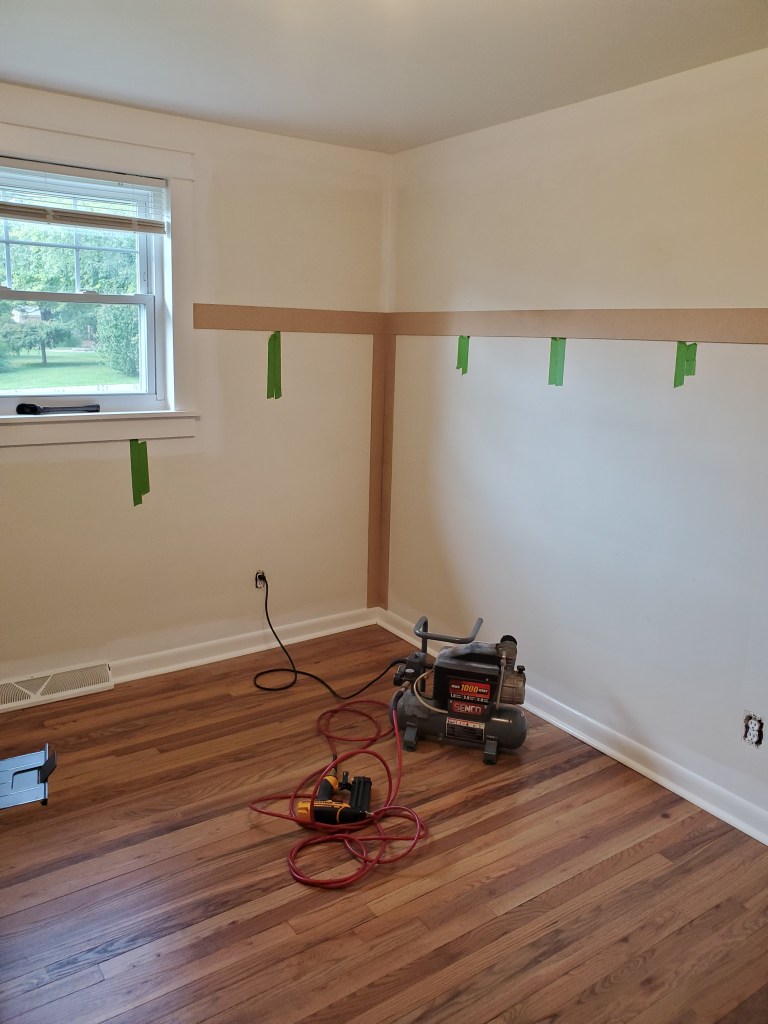
Playing around with painters tape, we calculated the spacing in between the slats. We took the measurement between the two slats in the corner, minus the 3″ per slat and divided by the number of slats we wanted on the wall. It took a little bit of time to figure out how many slats per wall looked the best, but in the end, the slats on each wall were around 18″-22″ apart. Obviously, each wall had it’s own measurement so no two walls were the same. On a couple of walls, we had to fudge number a little bit so that the slat would miss an electrical outlet but, your eye will never see the difference.

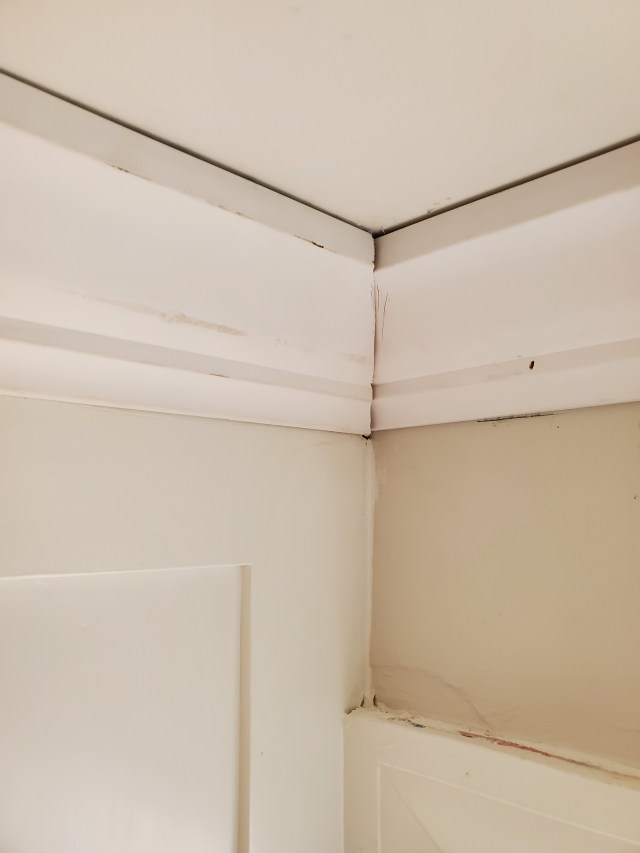
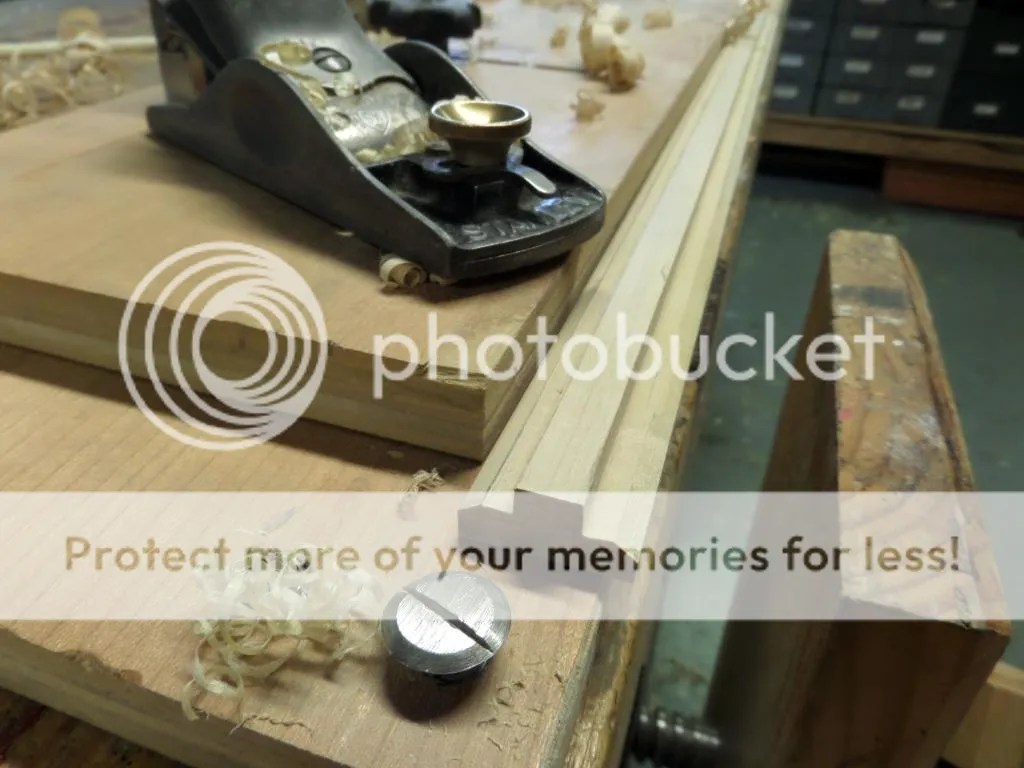
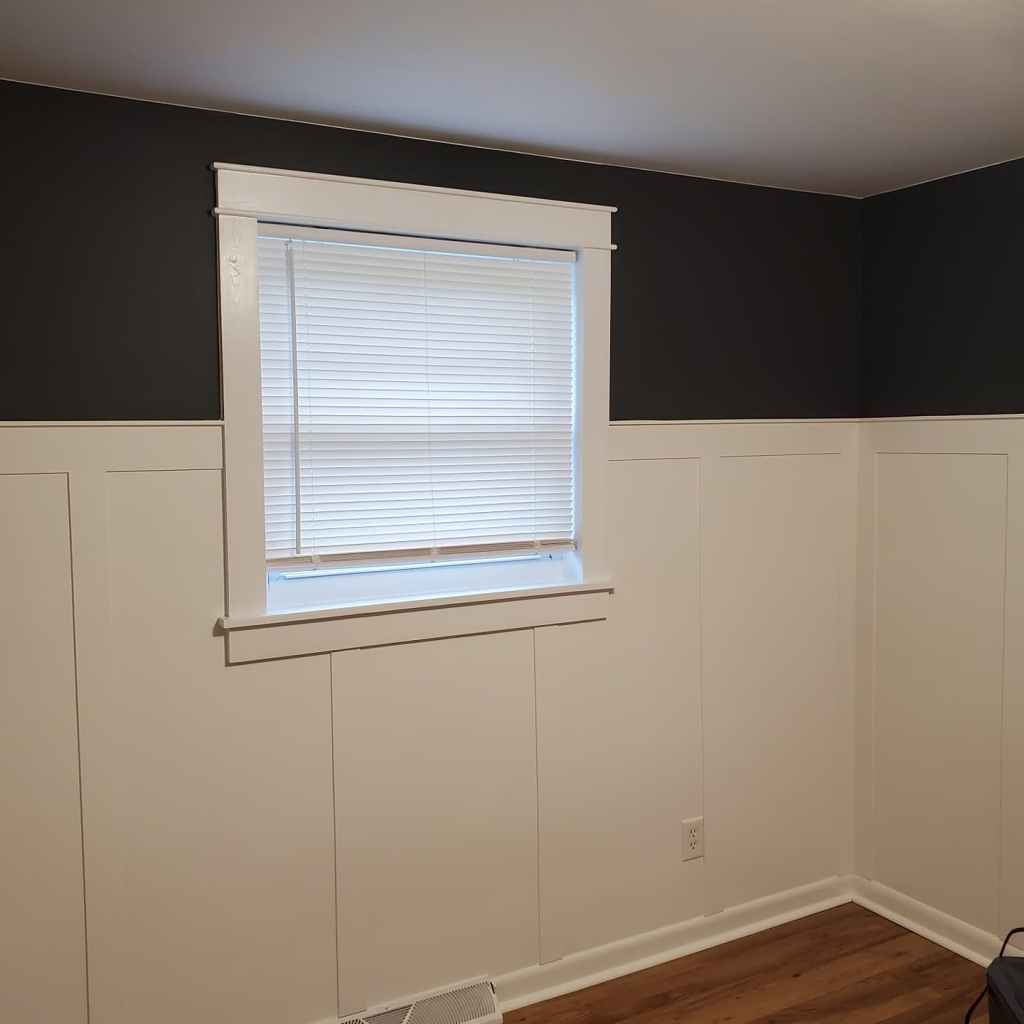
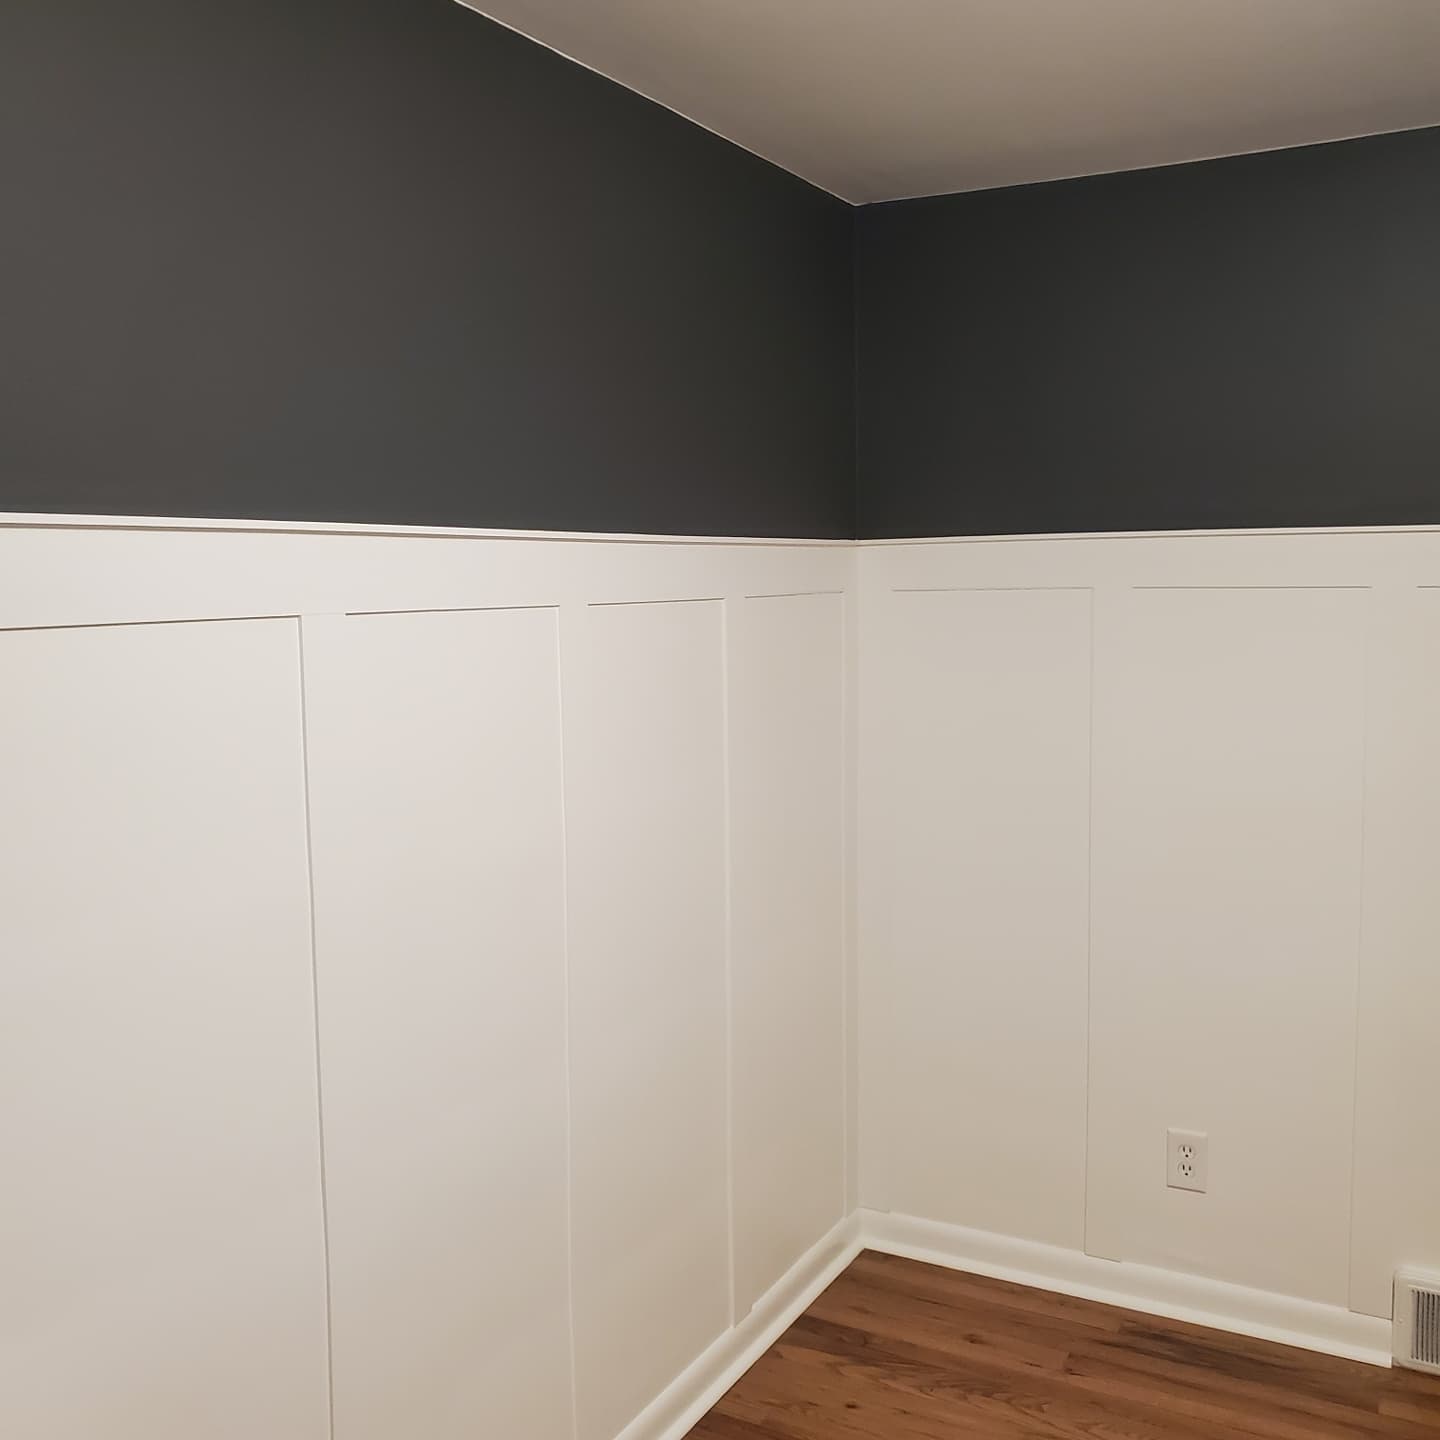
After the slats were nailed up, I ripped some pine 1/2″ thick x 3/4″ wide and nailed a ledge on top of the top board. This finished off the trim with a nice clean look. We played around with molding at Home Depot trying to determine which molding would look the best, but in the end, simpler was better.

Once all the nail holes were filled, everything was lightly sanded. Then Anita caulked and painted the bottom of the walls an off white color.

She decided on a color called Carbon Copy for the top and applied a couple coats to the top side of the wall. The room has a lot more style now and it only took about $200 in material and paint to do. Now we finally have an office that looks like an office, except we still don’t have a desk or any other office furniture.

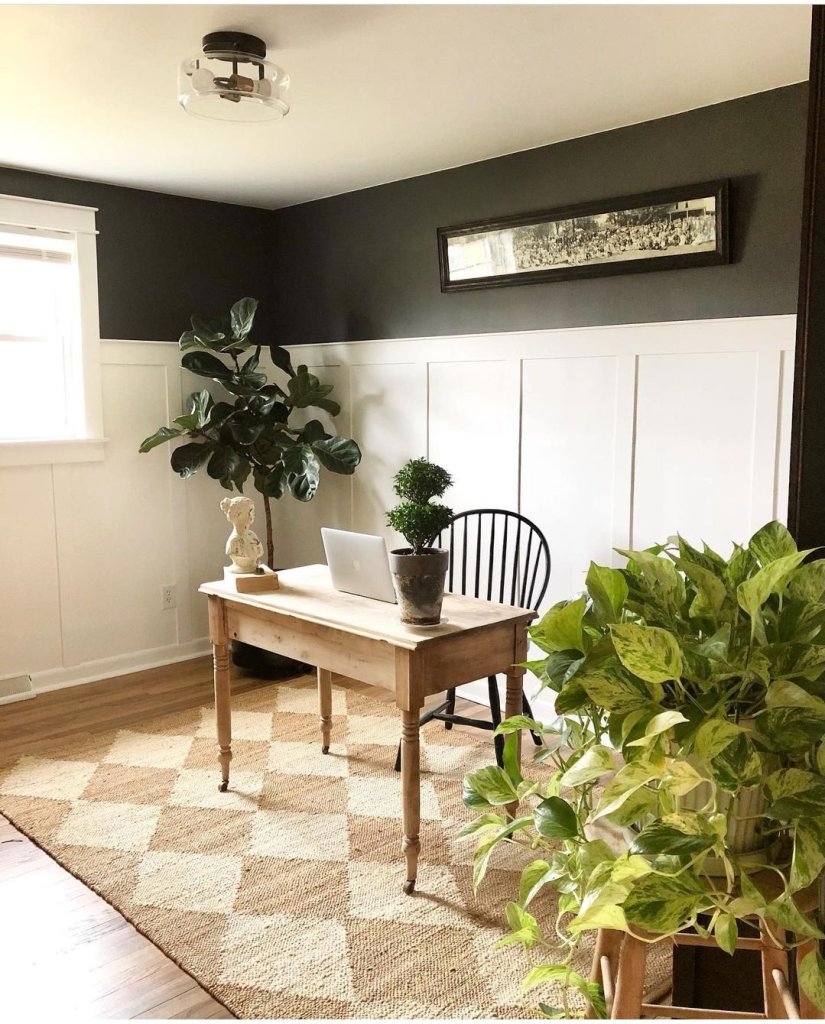
UPDATE: Here is the bedroom furnished.

Coping Crown Molding

I spent last weekend putting back up the crown molding in our dining room. Before I began, I did a YouTube search on installing the stuff. I came across a video of a guy who cuts his inside corners by angling his compound miter saw to 30 degrees then swings his saw to 35 degrees to make his cuts. I tried his technique but I couldn’t get my cuts to line up at all. The inside cuts where fine, but when I tried the 45 degree outside cut around my built-in cabinets, I couldn’t get both to line up.

Frustrated, I did another search, but this time through Google. That’s where I came across a video of Tom Silva of This Old House. In it he should how he coped the inside corner. Then it clicked that’s how I did it before. You simply install one end of the corner up straight on the wall, then cope the other side with a coping saw. I figured if I get advise from anyone, I’ll get it from Tom Silva as he knows what he’s talking about.

This is the back side of the coped piece. I had to file the backside a little bit so it would fit nicer. I posted some of these pictures on Instagram and a trim carpenter made a comment that he appreciated me doing it the right way. He said some contractors give him grief coping his corners but it actually saves time once you know what you’re doing.

Not a perfect fit by any means but it will work. I discovered when learning to cope crown molding; the first one will be garbage, the second try will be a little bit better, the third attempt will almost be there, the fourth one will work, the fifth one will be nicer, and the sixth cope you’ll finally figure it out. The problem is that by the time you figure it out, you’ll be done with the room.

This image has an empty alt attribute; its file name is 20200628_103357.jpg

My final inside corner was my best as I figured it out. If the measurement of the wall was 87 5/8″ long, I cut 45 degree angle on my miter saw and coped it. Then I measure from the bottom on the cope out 87 1/2″ and cut it straight 90 degrees on the miter saw. This way this gave me a 1/8″ to play with when I installed it up on the wall. The 1/8″ gap on the wall won’t matter because it will be covered by the cope of the next piece. All you’ll end up seeing is a small little hole at the bottom of the molding that will be filled with caulk.

This image has an empty alt attribute; its file name is 20200705_125211.jpg

The biggest trick in cutting crown is that you have to cut it upside down. I installed a fence to the miter gauge so that the crown laid the same way it will on the wall so my cuts will be more accurate.

I spent all day doing the dining room and down the hall. I had to scarf joint the molding down the hall because my pieces were only 12′ long.

I had to do eight inside corners and three outside corners.

Any minor errors in the cuts gets filled with caulk and the nail holes gets puttied. Once the molding is lightly sanded and painted, I’ll look like a professional trim carpenter.

Inexpensive Window Trim

The windows in our house aren’t much to talk about. Just 36″ square vinyl windows in a typical ranch. I’m not sure how old they are as I know they aren’t original to the house, but were here when I bought it fifteen years ago. My wife, Anita, wanted to jazz them up a bit and give them some character, so she asked me to make trim to go around them.

20170312_105920

The first thing we did, was to take out the marble sill, which was the hardest part. Sometimes they get stuck inside the frame, so I had brake them apart in order for them to come loose. If I was lucky, I could cut the sealant around the sill and jimmy it loose.

20170312_105942

I made a new sill out of 7/8″ thick maple. I tried to get rift sawn material so it wouldn’t warp too bad. I cut notches on both sides of the sill so it would stick out on the wall so the 1×4’s could lay on top of it.

20170312_123610

We wanted the header to have character so we took a 1×6 of pine and attached a 1×2 on the top. We then laid a cove molding on the 1×6.

20170312_1235571

Using my small miter box, I was able to cut the tiny pieces of cove for the ends.

20170318_122351

I then took a piece of pine 1/2″ thick and used my block plane to shape the corners and ends to create a bullnose. I pinned everything together  with my 18 gauge pneumatic nailer to complete the header.

img_20170312_142516_891

Back at the window, I measured, cut, and nailed the rest of the pieces to the wall using a 15 gauge finish nailer. I trimmed the maple sill so that there would be a 3/4″ overhang to sides on both ends.

img_20170312_202015_986

Here’s the close up of the header nailed to the wall. The 1/2″ thick bullnose hangs over 1/2″ on both sides of the frame.

20170323_203246

After filling the nail holes with putty, Anita caulked, primed, and painted the window trim. We did both windows in our bedroom the same way. The next step is to frame around the closet, paint the room, get a new headboard, new blinds, ceiling fan, rug, etc… I don’t know, ask Anita, she’s the designer. haha

Building a Shed Part X

The same weekend it was too hot to work on the shed, was the same weekend I built the corbels. I sell to 26 Lowe’s and 14 Home Depot’s in the Cincinnati-Dayton area, and in all those stores, only one of them carried cedar 2 x 4’s. So, I’m lucky to be building these corbels out of cedar instead of douglas fir. I glued two cedar 2 x 4’s together to give me a post 3″ thick. I then cut the posts to 25″, 25″ and 46″.

 photo 20160724_111841.jpg

I sized the 25″ long posts to two 12″ lengths. I then built a sled for my table saw so I could cut one of the ends to a 45 degree chamfer. The stop on the sled made sure all the cuts were the same on each side.

 photo 20160724_114450.jpg

Flipping the post over with each cut, I quickly made the soft point for the front of the corbels.

 photo 20160724_114601.jpg

I made eight of these pieces. Two of the eight, I will save for a trellis that I will build over the side window.

 photo 20160724_115544.jpg

I then took the 46″ long pieces and cut them to 12″ long with 45 degree cuts on each end.

 photo 20160724_120046.jpg

I got lucky with my first post as I was able to avoid a large knot in the middle.

 photo 20160724_120626.jpg

The woodworking Gods were with me that day as I was able to avoid another large knot on the other post.

 photo 20160724_121321.jpg

I wanted a 45 degree chamfer on the bottom of the back of the corbels, so I moved the stop over on my sled and reattached it in the proper place.

 photo 20160724_122630.jpg

Using exterior wood glue, 3″ deck screws and 1 1/2″ long, 1/4″ crown galvanized staples, I fastened the hell out of the corbels as I built them.

 photo 20160724_123819.jpg

Eight corbels are all the same. I took the best two corbels and set them aside for the trellis as it will be stained and not painted.

 photo 20160724_131837.jpg

When it cooled down, I fitted the corbels into the soffit. I used a level to accurately scribe where I needed to cut and then used my Fein Multi-Master to cut away the wood.

 photo 20160731_152000.jpg

As luck would have it, the width of my level was pretty much the correct location of where I needed to cut. I attached the corbels to the trim of the shed with 1 1/2″ long 15 gauge pneumatic nails.

 photo 20160731_152644.jpg

After a few minutes of work, one side of the shed was done.

 photo 20160731_160233.jpg

The shed is getting really close to being complete. We just need to build a platform in the front for a step, build and attach the trellis over the side window, build shelving inside, paint/stain the shed, add landscaping, and possibly add electric. Shit, we’re not that close after all. HAHA.

 photo 20160731_190224.jpg


Building a Shed Part IX

I’ve been as motivated to work while it’s 100 degrees as I was when it was 30 degrees, so the shed has been sitting the past few weeks acclimating to the sun. The good news is that it has given me time to work in my nice cool basement workshop building the doors and corbels. I bought ten more 8′ long 8″ wide siding and slid five of them together to figure out how much to cut off the end boards to make a nice centered door.

 photo 20160723_131952.jpg

After figuring how much to trim off the end boards, I clamped them together and stapled 4″ cedar trim across the top and bottom. I used 1/4″ crown galvanized staples 1 1/2″ long.

 photo 20160723_142050.jpg

I attached the sides and center rail the same way. I used a liberal amount of Titebond III exterior glue to help hold everything together.

 photo 20160723_143520.jpg

I flipped the door over and did the same thing on the other side. I left the door over hang the inside trim about 2″ so that the bottom of the door would be flush with the bottom of the siding. I attached one board on the back at the diagonal to strengthen the door.

 photo 20160723_145540.jpg

I built the other door exactly the same way with the only difference being the diagonal board was going the other way.

 photo 20160723_155948.jpg

After the weather cooled down a bit, I took the doors out to the shed to see how they fit. In a perfect world they would fit perfectly, however I don’t live in a perfect world and I’ve never built anything perfectly. So, I had to trim the doors down to size about 1/4″ and shave down one end about 1/8″ less than the top.

 photo 20160731_121507.jpg

After fiddling around with the doors, they fit well enough for me to be happy. I used large hand screw clamps and clamped the inside of the doors to the frame opening. I then attached three hinges per door while they were clamped.

 photo 20160731_121836.jpg

After they were hung, they stuck a little bit at the top. I grabbed my block plane and shaved away the tops of the doors so that they would open and close freely.

 photo 20160731_130231.jpg

Installing the locking handle was a breeze. A simple hole drilled through the door allowed the stem to pass through. I then attached the inside handle with a set screw.

 photo 20160731_133941.jpg

I needed the left door to stay put while the right door was locked, so I drilled a 5/8″ hole through the floor and used two-part epoxy to glue a small piece of 1/2″ copper pipe inside the hole.

 photo 20160731_140154.jpg

I then attached the door hardware to the left door so that the bar would fit nicely in the hole.

 photo 20160731_140308.jpg

I did the same thing for the top of the door except I used a 1/4″ copper coupler instead of a 1/2″ pipe.

 photo 20160808_151638.jpg

I trimmed out the inside of the door the same way I did with the windows. I took a 2 x 6 and ripped into three pieces that were 3/8″ thick by 2″ wide and attached them with finish nails.

 photo 20160731_145234.jpg

I’m happy with the way the doors turned out. Now on to the corbels.

 photo 20160731_150347.jpg

Building a Shed Part VIII

Moving forward with the shed, I installed the large fifteen pane window on the right side of the shed. Being so big and heavy, I screwed some scrap siding boards to the corners so I could lay the window in the frame and shim around the window until it was plum and square.

 photo 20160709_113900.jpg

With the window secure, I used scrap siding for the inside of the window frame and nailed it to the 2 x 4 framing.

 photo 20160709_122307.jpg

I then started to build the window trim by taking away one piece of the scrap wood and replacing it with 4″ wide cedar. I nailed it to the siding with 15 gauge galvanized finish nails. The bottom and top of the trim over hang the sides by 1″ on each side, with the top angled at 10 degrees. I then nailed a piece of cedar to the top for a little added detail.

 photo 20160709_163946.jpg

Putting up the trim was one of the easiest parts of building the shed so far. The cuts were simple and straight forward. Home Depot even had 3 1/4″ wide cedar boards so that I didn’t have to rip  4″ boards down to wrap the corners properly.

 photo 20160709_192205.jpg

I nailed the trim around the two front windows very much the same way as the side window.

 photo 20160709_180351.jpg

The only difference is that I had to cut a notch on the side trim boards to fit around the window sill. I had a follower tell me on my last post that I need to add a drip edge to the bottom of the sill to prevent water from going inside the shed wall. I’ll do that soon by either cutting a shallow groove or a gluing bead of wood underneath the bottom.

 photo 20160709_180345.jpg

Here’s a quick shot of the side finished with the trim. It’s starting to really look like a shed now. I just have to install three  corbels around the roof line and a cedar trellis above the window. Stay tuned.

 photo 20160710_131615.jpg

I wanted to work on the door frame, so I took two of the 2 x 6’s that I used to make the scaffolding and ripped them on the table saw.

 photo 20160710_132138.jpg

I cut almost half way through the wood on the table saw and then finished up the cut on the band saw.

 photo 20160710_133540.jpg

After they were ripped, I planed them down to 3/8″ on the planer. I only need one of the shorter boards so the other one will provide heat to make S’mores.

 photo 20160710_133746.jpg

I attached the boards to the inside of the front door frame. The boards did two things. First, it cleaned up the edges with a full piece of wood, especially on the top. The second is it kept the top trim of the door level with the top trim of the windows because I used 3/8″ wood to make the window frames as well.

 photo 20160710_145408.jpg

The trim has been installed around the door frame with a similar top detail in the middle. Now it’s on to make the two front doors.

 photo 20160710_155633.jpg

Installing Crown Molding

Last weekend I proceeded to work on the dining room by installing crown molding around the ceiling. I already built and installed bookcases that went on either side of the sliding glass doors a couple of weeks ago. Now I needed to complete the look by installing crown molding at the top.

 photo 20150412_150125.jpg

Before I began, I watched a YouTube video with Tom Silva of This Old House to give me the idea of how to cut the molding. The trick was flipping the board over and cut the trim upside down. Clamping a board on the saw table helped kept the trim at the proper angle.

 photo 20150412_150149.jpg

The molding around the bookcases wasn’t too bad as the sides were 90 degrees to each other. However, when I ran a piece down the one side of the dining room to the hallway, is when I got tripped up. I may be able to hand cut dovetails, but a trim carpenter I am not. I have no idea how they cope one end of the crown to fit perfectly, then make a perfect cut nine feet away to make a tight corner to a wall that is out of square. I gave it my best attempt and attached the crown to the wall. I then tried to figure out the other angle the other piece of trim would need to be to make the corner look nice. However, every cut I made was way off. I tried about a dozen times to make it work with no luck. I became so frustrated, that I decided to quit Saturday afternoon and reconsider continuing with the room or just take everything down except the crown around the bookcases.

 photo 20150412_150202.jpg

I woke up Sunday morning and decided to give it another shot. I messed around with the other side of the crown molding for a couple of hours until I was satisfied with how it looked. Below is a picture of the finished corner. I had to shave a lot of the molding away with rasps so each piece would match. I probably should have sanded the pieces better, but I was so frustrated with it I said “screw it”!

 photo 20150417_083632.jpg

Fitting the crown for inside corners was a bit tricky as well. Even after I coped the ends, I had to file the back of the molding so that it would fit in place. However, after practicing coping a few times, I got better at it.

 photo 20150412_150137.jpg

This was the final piece I cut to finish the job. It was a bit tricky as I had to cut the trim at the correct length as well as perfectly cope each end so everything fitted nicely.

 photo 20150412_154146.jpg

After everything was done, Anita started to apply the first coat of paint. Next I’ll be working on the chair rail and the faux wainscoting molding squares I made a couple of weeks ago. I’ll throw up a few pictures of the finished dining room and hallway when I’m done.

 photo 20150415_082726.jpg


Video of Making Trim

A few weeks ago I wrote about how I was able to recreate trim that my wife wanted to put on our walls. I had some time this weekend to make all 36 pieces of trim each about 24″ long. It was fun making the trim, but after number twenty, it started to get old. Thankfully, it only took me a few minutes to cut the profile in the wood once I milled the rabbets into each side of the wood.

I decided to do a short video showing the process better than just showing it in pictures. Enjoy!

Making Faux Wainscoting Trim Molding

My wife, Anita, is planning on sprucing up our hallway by installing faux wainscoting on the walls. It’s a simple approach by installing chair rail and trim in a rectangular fashion down the wall.

We went to Lowe’s and Home Depot to find the type of trim to use for the rectangles. Unfortunately, there was nothing available in the trim section of each store. Then, we saw the special order trim display at Lowe’s of exactly what we were looking for. The only problem was that Lowe’s sells these pieces in pre-made rectangles which wouldn’t work for our hallway. I told Anita that I could probably make the trim with my molding planes, so I snapped a picture of it and went to work.

 photo 20150307_143103.jpg

I milled a piece of poplar 1/2″ thick x 1 1/8″ wide and drew the lines of the molding on the wood.

 photo blog 003_4.jpg

I then planed a 3/8″ rabbet a 1/4″ deep on each side of the stock with a couple of rabbet planes.

 photo blog 004_4.jpg

I then beveled the edges about 1/8″ with my block plane.

 photo blog 005_4.jpg

After the bevels were created, I used a small palm gouge to chisel a shallow channel down both sides of the molding.

 photo blog 006.jpg

This channel allowed my No 2 round molding plane a place to ride to create the cove on the sides.

 photo blog 008.jpg

I then used a couple of hollow planes to create the bead on top of the molding. After the bead was created, I sanded the piece clean to remove any tool marks.

 photo blog 009.jpg

The final step was to miter the piece to see how it looked. I used my small miter box and miter trimmer to create perfect 45 degree angles.

 photo blog 012.jpg

I have to say, it’s pretty damn close to the display piece at Lowe’s. Now I’ll have to figure how many linear feet Anita will need to create the rectangular boxes down the hallway. I’m glad I figured out how to create the molding as it’s a bunch of fun to make.