
The windows in our house aren’t much to talk about. Just 36″ square vinyl windows in a typical ranch. I’m not sure how old they are as I know they aren’t original to the house, but were here when I bought it fifteen years ago. My wife, Anita, wanted to jazz them up a bit and give them some character, so she asked me to make trim to go around them.

The first thing we did, was to take out the marble sill, which was the hardest part. Sometimes they get stuck inside the frame, so I had brake them apart in order for them to come loose. If I was lucky, I could cut the sealant around the sill and jimmy it loose.

I made a new sill out of 7/8″ thick maple. I tried to get rift sawn material so it wouldn’t warp too bad. I cut notches on both sides of the sill so it would stick out on the wall so the 1×4’s could lay on top of it.
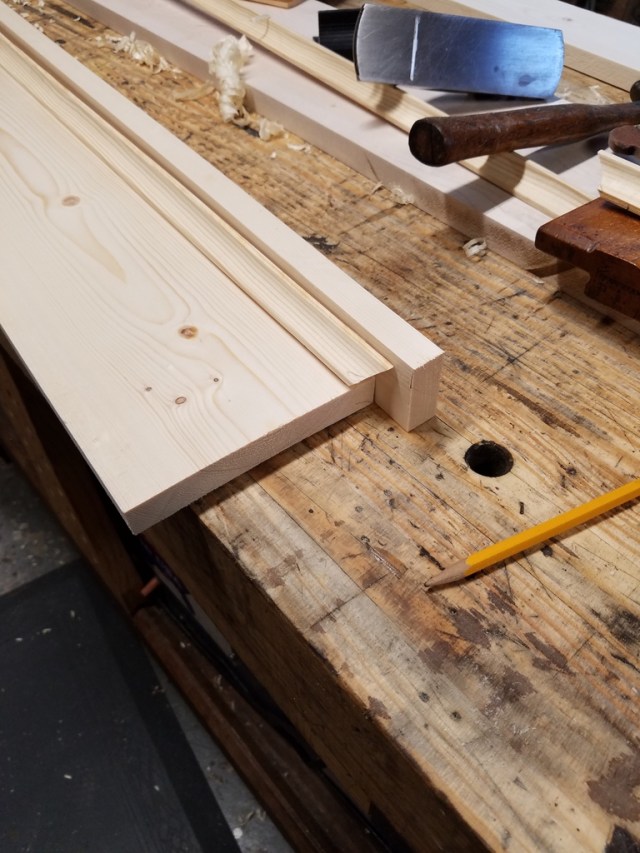
We wanted the header to have character so we took a 1×6 of pine and attached a 1×2 on the top. We then laid a cove molding on the 1×6.

Using my small miter box, I was able to cut the tiny pieces of cove for the ends.
I then took a piece of pine 1/2″ thick and used my block plane to shape the corners and ends to create a bullnose. I pinned everything together with my 18 gauge pneumatic nailer to complete the header.

Back at the window, I measured, cut, and nailed the rest of the pieces to the wall using a 15 gauge finish nailer. I trimmed the maple sill so that there would be a 3/4″ overhang to sides on both ends.

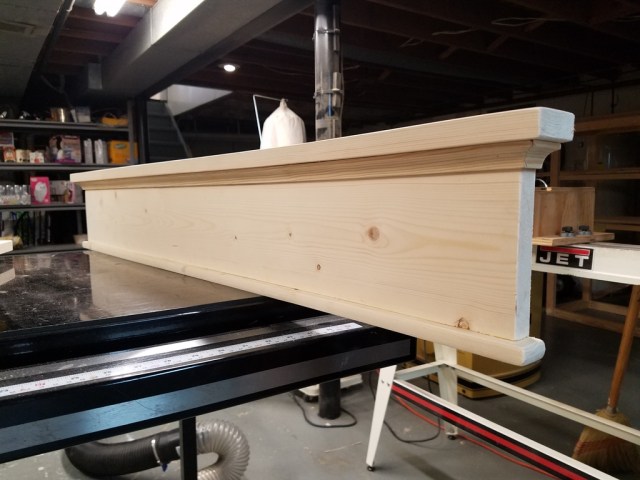
Here’s the close up of the header nailed to the wall. The 1/2″ thick bullnose hangs over 1/2″ on both sides of the frame.

After filling the nail holes with putty, Anita caulked, primed, and painted the window trim. We did both windows in our bedroom the same way. The next step is to frame around the closet, paint the room, get a new headboard, new blinds, ceiling fan, rug, etc… I don’t know, ask Anita, she’s the designer. haha

Excellent job. Looks great. Good design
LikeLike
Thanks! Once everything was cut, they went up in a flash
LikeLike
Wow! That makes a visual difference.
You write, that you wanted the header to be bulky.
What in general had been your guidelines for width and other dimensions for this trim? (By eye, by material on hand, …)
LikeLike
My wife and I went to Home Depot to pick up the wood. They have a section in the lumber department that carries various widths of dimensional pine. We picked three 1 x 4’s to frame around the window, a 1 x 6 to be the header, a couple of 1 x 2’s that would be the details of the trim, and a piece of 3/4″ cove molding. I planed down and sized one of the 1 x 2’s to 1/2″ thick to be the bullnose piece. The rest of the design was completely by eye as to what overhangs would look appropriate. Thanks Mike
LikeLike
Good work. 🙂
LikeLike
Looks great! Very nice work.
LikeLike