
Who knew? I can buy my citric acid for derusting my tools straight from the grocery store. At $8.49/lb, I’ll have to see if it’s a better deal than eBay.

Who knew? I can buy my citric acid for derusting my tools straight from the grocery store. At $8.49/lb, I’ll have to see if it’s a better deal than eBay.
While scouring antique malls looking for tools, I ran across this nice rip saw stuck in the back corner of a booth. It’s a Disston D8 Thumb Hole saw and considering it’s age, it was in very nice condition. Even though it had some rust on the blade, I knew it would clean up just fine.

The first thing I did was take the saw apart and dip the blade in a bath of water with food grade citric acid. I let it sit overnight allowing the acid to eat all the rust off the blade.

While the blade cooked, I focused my attention on the handle. Using Soy-Gel paint stripper, I cleaned all the gook and grime off the apple wood handle using a steel wool pad.

Here’s the handle wiped off after just a few minutes of paint stripper on it.
In the morning, I took the blade out of the bath and wiped it down with a paper towel. The blade was clean from rust, but was dull from the cook. I grabbed some drywall sponges and lightly sanded the blade. I then polished it with a variety of Sand Flex sanding sponges.

Here’s the blade after the polishing was done. You can see how the blade was slightly pitted. Unfortunately because of the pitting, the etching was no longer present, but the saw will still make a fine user.

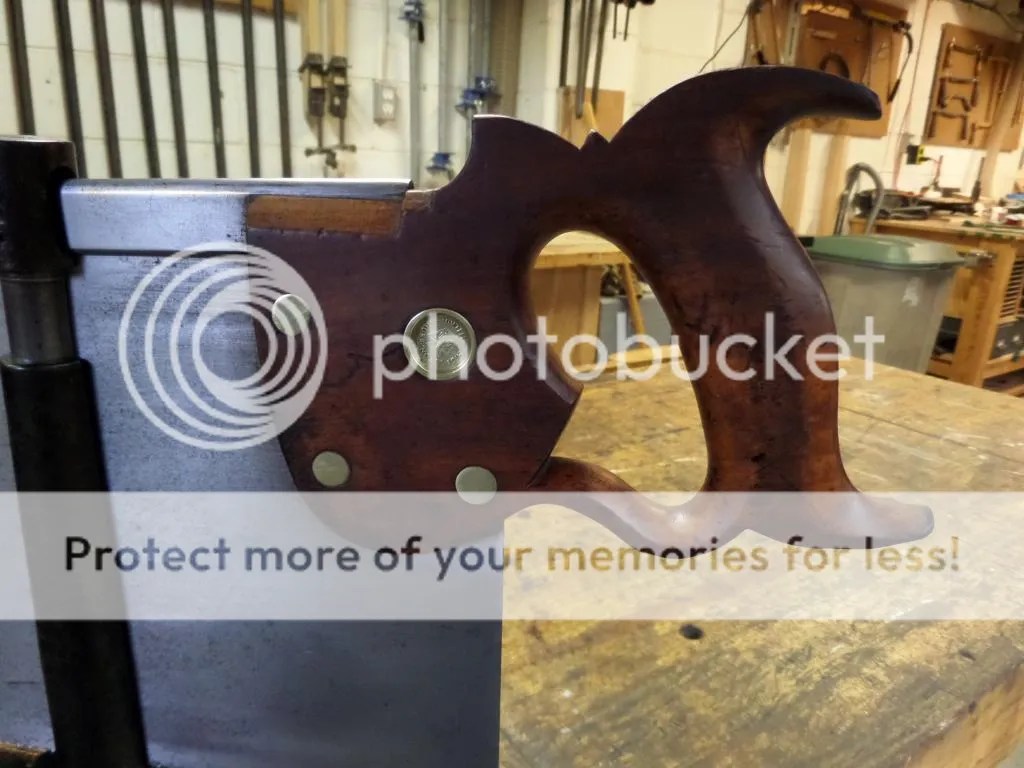
After applying a couple of coats of shellac to the handle and putting it back together, the saw looked far better than when I bought it.


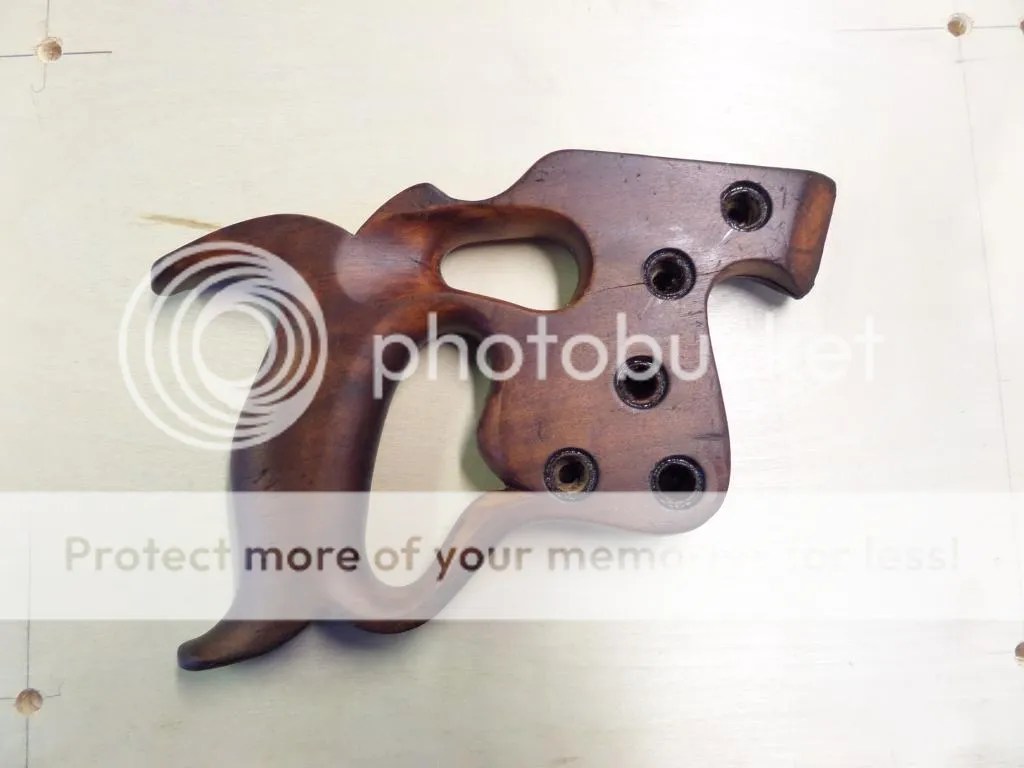
Here’s a close up of the handle. You can see the crack at the bottom of the handle. A little bit of glue was all that was needed to fix it.

The saw looked nice, but it needed to be sharp in order to work well. I took some Dykem layout fluid and spread it over the teeth of the saw so that I can see what I was doing better when filing the teeth.

I used a file to joint the teeth flat then filed the flats away with a triangular file. If you’ve never attempted to sharpen a saw before, I recommend you start with a rip saw like this. It’s a pretty simple saw to sharpen and the big teeth are easy enough to see. For a video on how to sharpen a saw, you can look at this YouTube video of Frank Strazza of the Heritage School of Woodworking. The video is a little long, but Frank does a good job explaining the steps.
Here are the teeth after I sharpened the saw. I’m not the world’s best saw sharpener, but I can get the job done.

Here’s a picture of the saw performing in mid cut. It stayed straight on the line and cut the wood like butter.

Finally I made a short video showing the saw’s performance.
Sometimes life gives you the answer so clearly that you’re too blind to see. Just a few days ago I read on the “Working by Hand” blog a post about removing tool japanning with Soy Gel. https://workingbyhand.wordpress.com/2015/01/23/plane-body-finish-removal-soy-gel/
Soy Gel is a 100% soybean based paint remover that has no toxic fumes and is really safe for the environment. I bought a bottle for my wife about a year ago so she could remove the paint off a piece of furniture she bought. I rarely repaint planes so, I never gave much thought about using it to remove the black japanning from a plane. Well apparently according to the post, it does the job quite well.
So, this weekend while I was busting my knuckles cleaning up the bed of an old Stanley Liberty Bell plane with steel wool, I opened up my cabinet to grab another piece of wool when my bottle of Soy Gel was staring at me right in the face. I looked at the bottle, then looked at the plane bed and thought “I wonder if it would help”?
I grabbed the bottle, squirted some on the bed, spread it around with my steel wool pad and let it sit there for a bit. Sure enough after just a few seconds, the dirt and grime just melted away when I rubbed it off with the steel wool.

I was amazed it worked so well. Then I was angry at myself that I didn’t think of it any sooner. How could I be so blind? Here’s the before and after shot of the side of the plane.


All these years of busting my knuckles trying to clean up the wood from old planes with nothing but steel wool and a whole bunch of elbow grease, and I could have just been using Soy Gel the whole time to make the job a whole lot easier. Oh well, I learn something new everyday. Here is a couple of shots of the plane all cleaned up. I guess someone liked my cleaning job as the plane sold within a few hours of being listed on eBay.


A couple of weeks ago I posted on a Facebook page called “The Collectors of Antique/Vintage Tools” about a Lion Miter Trimmer I just restored. A few people in the group replied to my post asking what the tool did. I was surprised that so many people weren’t aware of this tool, that I decided to talk about it here.

I’ve owned an AMT miter trimmer for over twenty-five years and love it. They are simple tools that were popular for people who made picture frames back in the day. You use it by swinging the arm pulling the knife through the piece of wood, slicing off perfect little curls precisely at whatever angle you set the fence at.

The miter trimmer has fences on each side that can be positioned between 90 -45 degrees. There are adjustable stops at 90 and 45 that can be fine tuned with a screwdriver. Once you swing the fence to whatever angle you want, you tighten the wing nut on top locking the fence in place. As you can see in the photo, this machine also has layouts for 60 and 67 1/2 degrees.

After fiddling with the machine for a few minutes, I positioned the adjustable stops precisely were they needed to be. As you can see, the stop is a little shy from the 45 degree scribe line on the bed. I’m not sure why this is, but the tool is probably over 100 years old, so it’s allowed to be off a little.

You can see how the tool slices off perfect little shavings. When I was restoring the tool, I took the knives off and sharpened them on my Tormek using the Tormek knife jig. Before I sharpened them, the knives couldn’t cut butter.


The main reason I love my miter trimmer is that it cleans up the cuts that are made from my miter box and saw. For safety reasons when doing delicate trim work, I like to use my little miter box instead of a powered miter saw.

However, the saw doesn’t leave the wood with a nice enough cut.

Not only that, the miter box doesn’t even produce a perfect 45 degree angle throwing the two pieces out of square.

Here are the two pieces after they’ve been trimmed up with the miter trimmer.

The proof is in the pudding here. All the joints fit nicely together and the frame is a perfectly square inside. No wonder why picture framers loved these things.

Another good use of a miter trimmer is doing outside corners like attaching molding to a bookcase or cabinet. Here is a piece of molding that I cut with one of my molding planes.

If I stick the piece in my miter trimmer and try to trim it up normally, you can see how the inertia of the cut pulls the molding off the bed. There’s simply not enough surface area in the front of the molding to keep the piece stable.

The cut it produces this way is garbage. Not only is it not 45 degrees, it’s not even a straight cut.

The way to get around this, is to take the body off a combination square and clamp it to the fence of the trimmer. Use a scrap piece of wood and cut a 45 degree angle to the end with the trimmer. Then use the cut as a gauge to accurately place the combination square under it. It’ll take a little time and a few test cuts, but once you have the combination square properly position, you’re ready to go. Note: You can buy an attachment from Grizzly for about $30 which does the same thing as this, but I’m not sure if it will work on old Lion Miter Trimmers.

Now you can use the bottom of the molding to rest against the fence for support and make a perfect 45 degree cut.


Repeat on the other side of the trimmer for the other side of the molding and you’ll get a super clean and accurate joint.

Unfortunately, the website for the original Lion Miter Trimmer no longer works which makes me believe they are no longer in business. http://www.lionmitertrimmer.com It’s a shame because the tool is truly an awesome piece of machinery.
Earlier this week, my wife won a chest of drawers from an online auction. Sure enough when we get it home and examine the piece, we discovered there was significant water damage to the chest that the auction company failed to mention (what a surprise!). In fact, one of the drawers was so bad that the bottom plywood was peeling away. She asked me if I could fix it, so I went to Home Depot and bought a piece of 1/4″ X 24″ X 48″ underlayment plywood for about $5.00.

The first thing I did to the drawer was carefully pop off the glue blocks from the under side with a paring chisel as I was planning on reusing them.

I then carefully popped off the drawer runner being careful not to damage it. Fortunately, it wasn’t glued to the drawer bottom making it easy to clean up.

Then with a dead blow hammer, I gently popped off the sides of the drawers hoping not to damage the dovetail joints.

After cutting the new piece of plywood to size, I saw that the new drawer bottom was a little thicker than the original, so I widened all the grooves to the drawer with my table saw.

Once all the grooves were widened, I dry fitted the drawer back together making sure everything fitted properly.

I then glued the drawer back together including the support blocks back on the bottom.

After about a half an hours worth of work, the drawer was back in business and nicely fitted back in the piece.

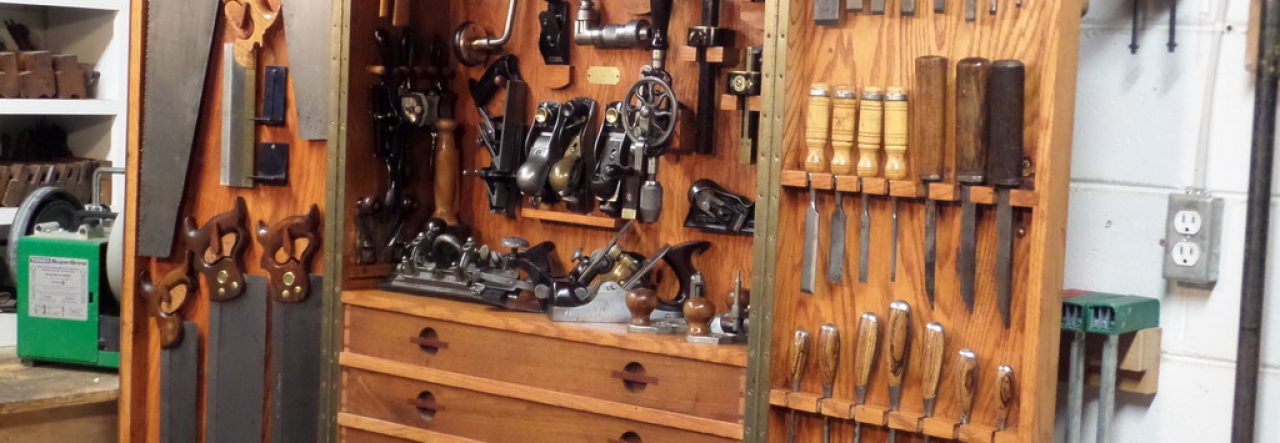
Over the past couple of months I’ve been going gangbusters cleaning all my old tools I bought during the fall. So much so, that I haven’t really done any woodworking to even blog about. So, I figured I’d show you the massive Langdon Mitre Box that I bough this summer now that it’s all cleaned up. I took a few pictures and shot a video to give a better idea of the miter box’s massive size.




As you can see in the pictures below, the miter box was repaired at some point in it’s life. I don’t think it ruins the value of the box too much as I bet that I could buy a regular sized Langdon Mitre Box and use the parts to swap the foot and locking bar.


Now I’m not sure what I should do with it. On one hand, I think the miter box is really cool and I’ll probably never find another one as long as I live. But on the other hand, I bet I could sell this thing for a pretty penny and pay off some of my credit card bills. I also really have nowhere to store the thing. I really don’t want to sit it in my shop as I’m afraid it’ll get damaged from all the banging and clanging that goes on down there. But, I doubt my wife would approve of it sitting proudly on our mantel in the living room. So, for right now it’s sitting on the shelf with all the other antique tools that I’ll eventually sell on eBay. What do you think I should do with it?
Over the past few months I’ve been making these French style bookcases for my wife. They’re pretty popular as they usually sell within a couple of weeks in her booth. The nicest part of the bookcase is the design of the cross bars that mimic the design of the Eiffel Tower. The design also makes the bookcase lighter and feel more open as opposed as having closed sides making the bookcase feel heavy.

Adding the cross bars isn’t so difficult when you take your time and measure everything correctly. When I start to build the cross bars, I rip 3/4″ square stock out on the table saw and sand them smooth on my drum-sander. I take one of the bars and clamp it to both back styles of the bookcase. I then strike a line to show me the correct angle that needs to be cut.

I take the bar over to my old school Stanley No 140 miter box and cut it close to the line, but not on it. I could do this on a power miter saw, but I feel that’s way too much power for doing delicate work like this.

After the cutting the bar on my miter box, I size it to the line by carefully trimming it with my AMT miter trimmer. I love this tool, but a miter trimmer is the Rodney Dangerfield of woodworking. For whatever reason, it simply gets absolutely no respect in the hand tool world. I guess hand tool purest would rather use a shooting board and plane, but this thing has never let me down in the twenty-five years I’ve owned it.

When the bars are properly fitted, they are super tight against the styles. So much so that it is very tough to even fit them in place. Having the bars fit this tight is actually very important because they will be glued in place without any mechanical fasteners other than a 23 gauge micro pin toe nailed to the styles.

Once I’m happy with the fit, I then scribe a line on each bar where the bars meet to create a half lap joint.
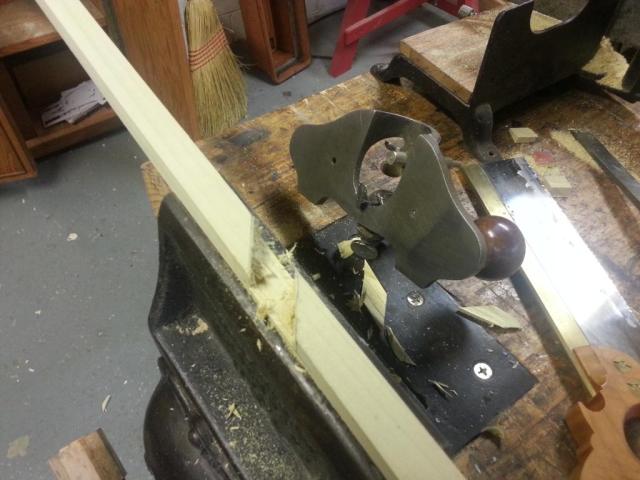
With a dovetail saw, paring chisel, and router, I carefully remove the material between the lines. The depth of the router blade is exactly half the thickness of the bar ensuring the bars are flush to each other when they are fitted together.

After the joint is cut, I test fit the pieces to make sure everything looks good. An important thing I do when installing the bars is to place witness marks on the bars and styles so that I know which direction the bars goes when it’s time for installation.

The cross bars on the sides of the bookcase are done exactly the same way. When it comes to installing all the cross bars, I glue and nail them to the styles. Because I plan on painting the bookcase, I don’t care about the nail holes. I just fill them in with wood putty. I use 18 gauge pneumatic nails and nail the side cross bars from the front and back of the styles. The back cross bars, I glue and toe nail them with 23 gauge pin nails to the back styles.
Walking around an antique store called Ohio Valley Antique Mall in Cincinnati this weekend, I ran upon this massive beast in one of the aisles. An eight foot long authentic Roubo style workbench. I’ve seen dozens of old workbenches before, but for some reason this guy stuck out to me. The previous owner screwed nickel-plated hooks on the front of it for someone reason. Probably to hold coffee cups or some other nonsense.

What made this bench stick out was the splay of the front leg along with the leg vise. I imagine this was done to prevent the workbench from racking when sawing. The cast iron vise hardware turned smooth and could still tighten with something with a good grip.

It had an old planning stop hole used for planning boards. Oddly the area around the hole was all worn down. When I see wear marks on old pieces like this, it makes me wonder what type of work the craftsman did to make those types of marks. Though it does appear he was sawing on the right side of the planning stop.
Another interesting clue is that it is quite possible that at one point there was another vise installed on top. The three holes around the lighter circular area is possibly where he bolted down a machinist vise onto the bench.

The legs were jointed together with a simple bridle joint however, the legs were not jointed into the bench’s top. More likely the top was just bolted down to the legs somehow. I didn’t feel like moving everything around in the booth to get a better look.

The bench top was a good 12″ wide x 4″ thick piece of pine. It had a tool tray in the back that appeared to be in real good shape given it’s age. Notice how there are no bench dog nor holdfast holes in the top.

Who knows where this bench will end up. Probably in someone’s home as a kitchen island, but for a cool $700 it can be all yours.
When my wife Anita does shows, I’m always looking for something that I can make fairly quickly that she can sell in her booth to help pay for some of her fees. After helping her do shows over the past couple of years, I’ve noticed that small benches are quite popular. They’re nice to stick out on front porches or foyers or even mud rooms. In fact, some people even use a bench as the seating for one side of their kitchen table.
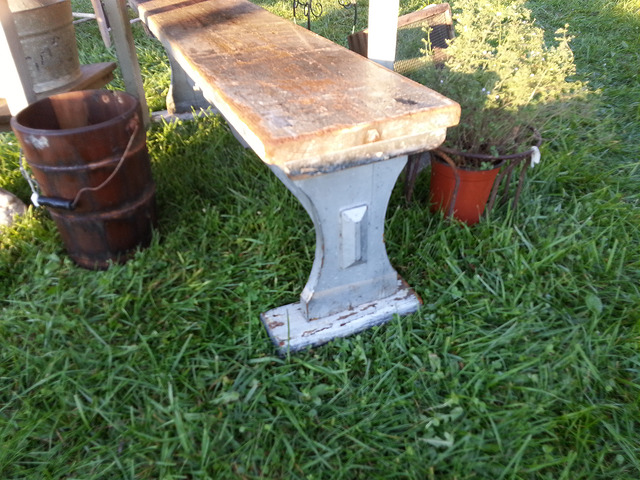
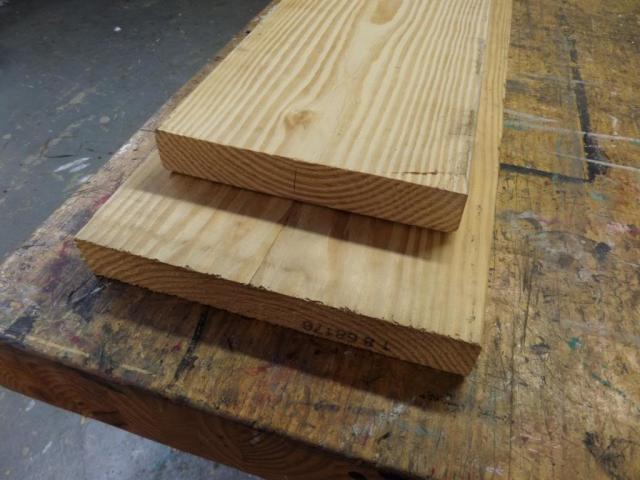
I designed this bench to be made from a 2″ x 12″ and a 2″ x 8″ that are eight feet long. However, if you change the dimension of the stretcher a little bit, it could be made form a 2″ x 12″ x 10′. The only issue doing that is you need to make sure your 2″ x 12″ x 10′ is choice wood with no splits at the end of the board because you’ll need nearly every inch of it. It doesn’t matter to me because I can’t fit a ten foot board in my car anyway, so I bought a 2″ x 12″ x 8′ and 2″ x 8″ x 8′ for under $20.00.
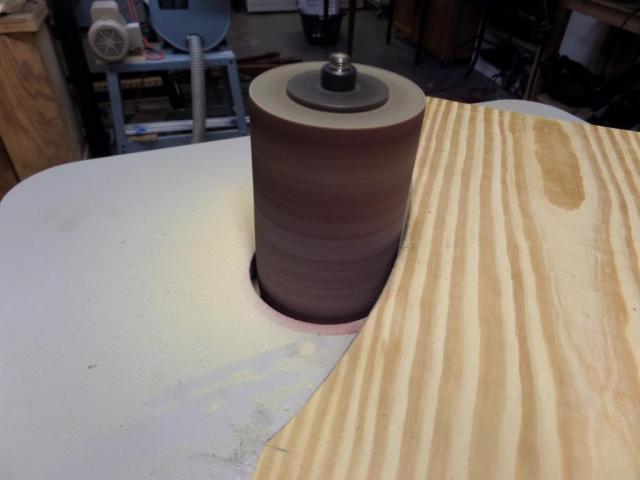
The construction of the bench is super simple. I make the legs 9″ wide x 16″ long. I measure down 2 1/2″ from top and bottom on each side and use the lid from my garbage can to draw an arch connecting the two marks. Then I cut it off the arches on my band saw. I sanded the arches smooth on my oscillating spindle sander.
The feet are 5″ wide x 10 3/4″ long. I draw a 1″ radius on both sides and remove the material with chisels, planes and files.
I want the bench to have four feet so I take two of the pads and cut grooves in them on my table saw. Once all the grooves are cut, I remove the waste with my bench router and plane everything smooth.
When designing the stretcher, I did nearly the same thing as the legs. I measured 2 1/2″ from each side and make a mark. Then I find the stretcher center and mark 2 1/2″ off each side of the center. I swing a compass set at a 12″ radius connecting the marks creating the arches for the stretcher.
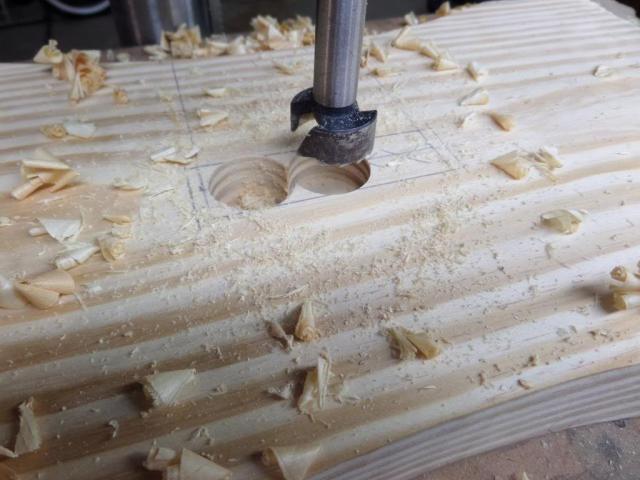
In order for the legs to attach tot the stretcher, I bored a 1″ x 4″ mortise through the legs with a 1″ forstner bit and cleaned it up with chisels. The tenons I cut on the table saw and band saw and cleaned them up with my rabbet plane.
After all the parts are sanded, I dry fitted everything together to make sure the bench looked right. I wanted the tenons to have a mechanical fastener along with the glue, so I drilled two 1/4″ holes through the side of the legs going through the tenons.

I grabbed some scrap oak and split a few splitters of wood with a chisel. The pins run down the grain making them exceptionally stronger since the grain follows the strength of the wood. I sized the pins by punching them through my Lie-Nielsen dowel plate. I shaved the pins a little bit with my spoke shave so they would start to fit through the 1/4″ hole of the dowel plate. Once the pin starts to fit in the hole, I pound the hell out of it.

After I was satisfied with the way the bench stretcher fitted to the legs, I started gluing and screwing everything together, I placed glue of the pins and inserted them into the tenons of the bench. I didn’t bother draw boring the holes of the tenon. I was already satisfied with the tightness of the joint.
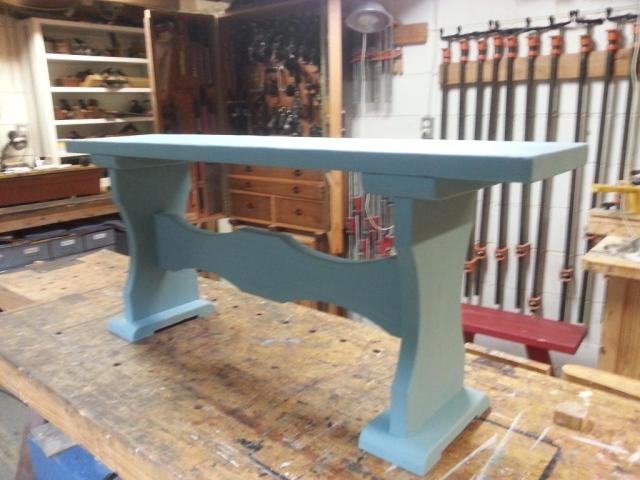
The bench was painted a duck egg blue and waxed over top. The next bench I make will probably be a different color. Maybe a black or grey as neutrals are always popular.
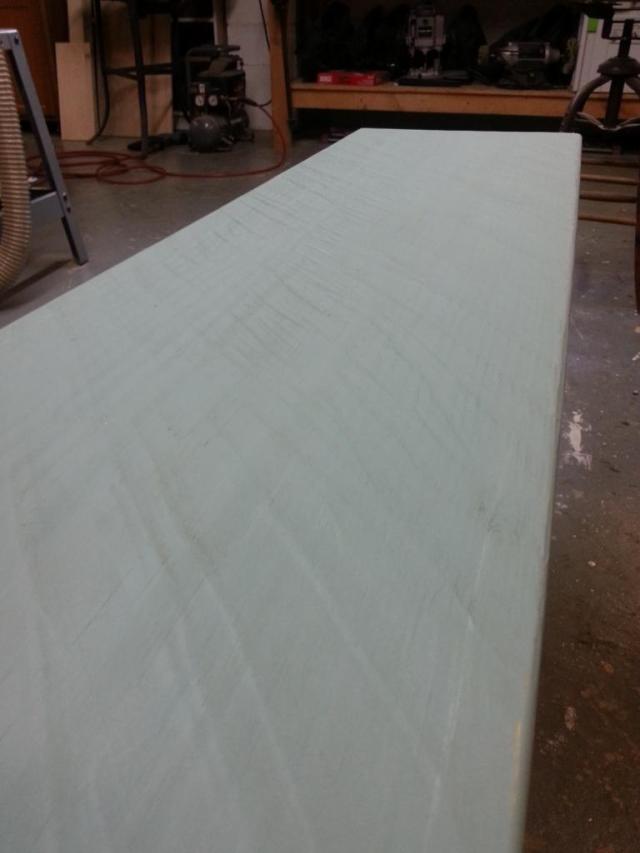
You can see the detail of the top where the scrub plane left little ridges in the wood giving the bench a bit of detail. It definitely looks better than having a plain board for the seat of the bench.

