American Windsor Chairs

Several months ago, I was reading a post on the Lost Art Press, and someone asked Chris Schwarz which book on Windsor chairs he thought was the best. Chris mentioned American Windsor Chairs and said it’s worth getting if you can find it cheap enough. Curious, I checked Amazon and saw one was for sale for $300. Then I checked eBay and saw one seller was asking $40 plus shipping, so I jumped on it.

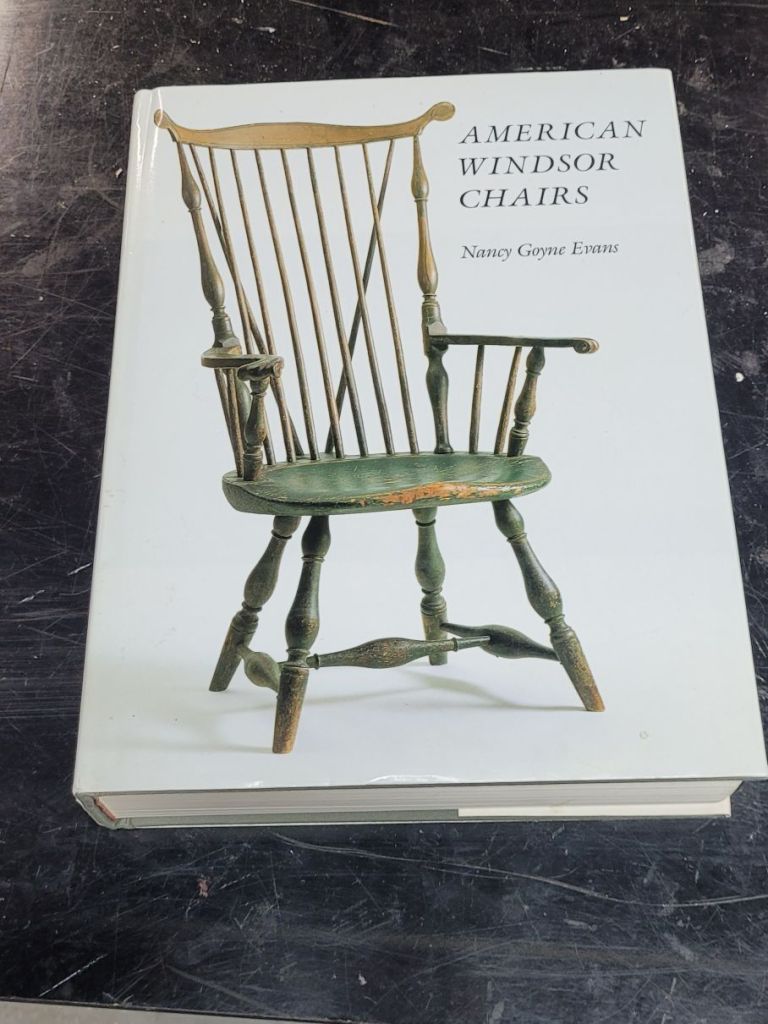
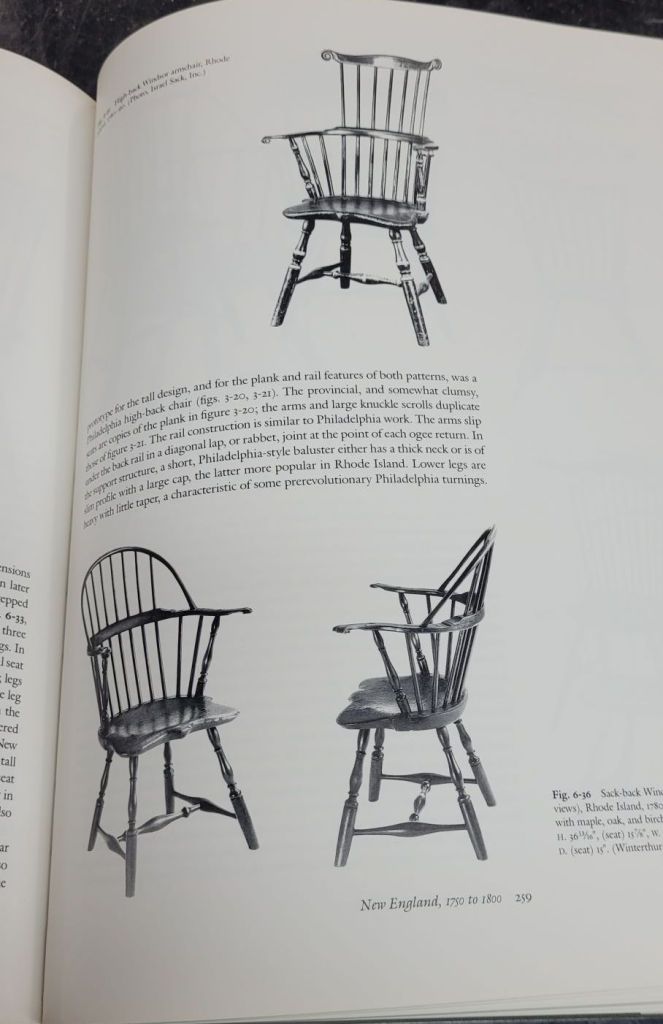
Written by Nancy Goyne Evans, the book is over 700 pages with 1000 illustrations of chairs of various makers. The book starts with the classic European design and how the chairs evolved in America with first handcrafted chairs to mass-produced units in the 1850s. The book is categorized by geographic region and describes the differences in Windsor chairs in different regions of the country. It’s extremely detailed with stories about some of the makers and their business practices. If you have a passion for Windsor chairs and their designs, then this a must-have book you need to own.

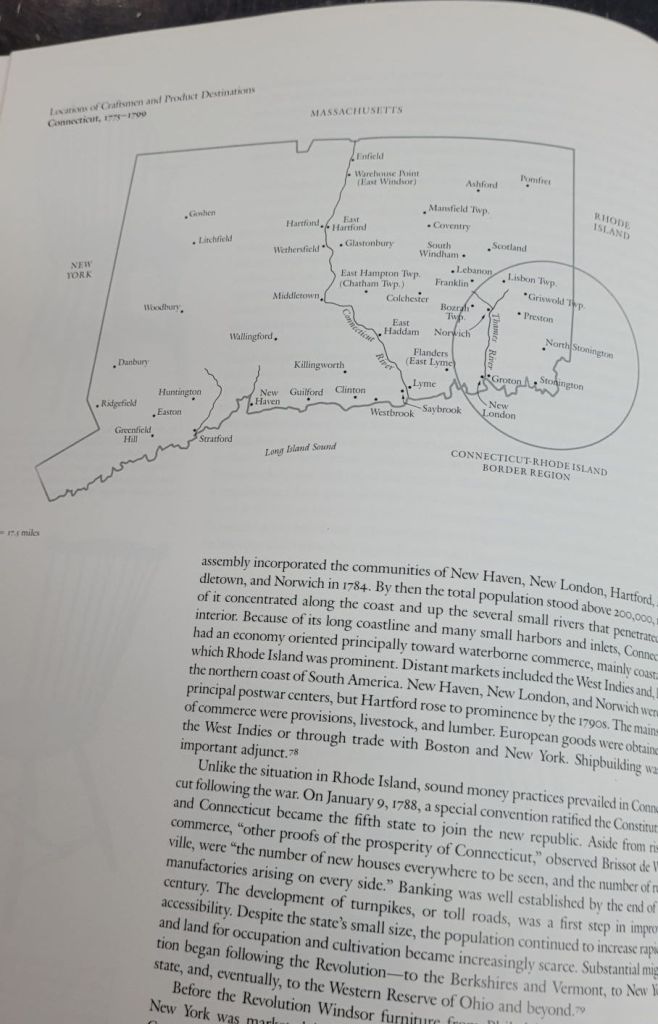
In the back of the book, there are reference pages where it lists the chair makers and the time of their business. Simply look up their name and determine where and when the chair was made. It’s an excellent reference book you’ll enjoy owning if you’re lucky enough to find one at a reasonable price.

If you own a Windsor chair and would like to know when it was made, drop me a comment, and I’ll look it up and see if I can find more information for you.

Restored Dry Sink

I haven’t been spending too much time in the shop the past few months since I’ve been working on the shed during the summer and fall, but I did have time today to work on an antique dry sink my wife bought at a local sale.

The cabinet was in good condition, but the top was off as the hinges had broken. I noticed that they were too small for the top, so I grabbed some larger hinges I had around to replace the small, broken ones.

After removing the old broken hinges, I made a jig to route a perfect sized recess in the cabinet and top to accept the new hinges. I found this jig while reading Michael Pekovich’s book “Foundations of Woodworking”. The idea of the jig is to make a cutout in a piece of wood the exact length and depth of the hinge, then use a small flush cut patternmakers bit to route out a recess that’s the perfect size of the hinge.

After making the jig and routing a few test pieces to make sure it worked, I placed it over the cabinet back and the lid to route out the recess for the new larger size hinges.

After a few minutes, the hinges fit, and I shaved down the top of the cabinet for the lid to fit flush. This was a quick and easy project that will make this dry sink serve another 100 years. Plus, I’m finally back in the shop after a few months’ absence.

The Encyclopedia of Shaker Furniture

Yesterday I went to an antique show in Columbus, Ohio when I stumbled upon this book in one of the booths. When I first saw it, I thought the book was huge so, I browsed through it to see what was in it.

After looking through the pages for a few minutes and seeing the book originally sold for $125.00, I decided the $20.00 the guy wanted for it was too good to pass up.

I’ve had several books on Shaker furniture over the years, but none are as comprehensive as this one. The first 85 of 576 pages in this book goes into detail of how the Shakers came to be, their daily life, the tools and practices they used, and the different types of furniture each community made. There were over twenty different Shaker communities during the 18th and 19th century with a few of them only lasting a few years. The book talks about the different design and building practices the Shakers brought to their community as no one was born a Shaker. When you compare the furniture of one community to another, you can see suttle design differences between the two.

There must be over 1000 pictures of furniture along with the dimensions and descriptions of each piece. If nothing else, it makes an excellent reference book on Shaker design.

The book is so nice, it’s no wonder why it still sells for over $100 on eBay and Amazon. If you can find one that’s affordable, get it, you’ll be glad you did.

Here is the Introduction from the author himself to get a better understanding of the book’s purpose.

Shelf Support Brackets

The past few weeks I’ve been building a display cabinet for my wife out of ash. Things have been going well with the build and when it came to adding a way to hold the adjustable shelves, I wanted to use an old method that I’ve seen numerous times on antique furniture.

It starts with a couple of pieces of 1 1/2″ wide wood laying out 1″ diamter holes down the middle. The holes are 3″ apart on center. I taped the two pieces together so that when the holes are bored, the pieces mirror eachother.

I then ripped the pieces apart in the middle giving me four brackets that are similar to one another. I then installed each piece in the corner of the cabinet with glue and a few 23 gauge pins. This gives me perfect alignment when I install the shelf brackets.

The brackets are nothing more than a 1″ wide ash with a roundover on each end. I decide to add another 1″ piece of wood onto the stretcher. This gives me the opportunity to adjust the height of the shelf inside the cabinet by one inch. It’s helpful if the shelf needs to be a little bit higher, but I don’t want to move the stretcher three inches to the next notch.

Overall, I love the look of the wooden shelf dividers. I’ve done the 1/4″ holes drilled up and down the sides with brass pins for years and was never a big fan of them. To me, this looks a bit more authentic.

Pennsylvania Secretary

I built this Pennsylvania Secretary back in 2004. It was an article in Fine Woodworking Magazine by Ronnie Bird. I fell in love with the idea of making a piece as complicated as this with it’s intrical cubbies and drawers.

The door panels and desk lid were all sliced from a single piece of 2″ thick walnut. I sliced the wood by hand with my hand saw because the 13″ width of the wood was too wide for my band saw that could only rip stock 12″ wide. I remember it being a major pain the ass.

I used a bread board edge on the lid so that it wouldn’t warp. The joint works well because seventeen years later, the lid is still perfectly flat.

I cut the curvature of the drawers on a band saw and smoothed them with my oscillating drum sander. The panel on the small door was a piece of crotch walnut.

There are a few hidden compartments inside the desk where I kept my silver dollar coins that my Mom gave me before she passed away. The columns slide open to keep important documents but I never stored anything in them.

The drawer fronts were sliced from a single piece of curly walnut that I laminated onto a walnut substrate for each drawer. I cut the cabriolet feet on the band saw and then glued each side together.

The lid opens up to act as a working desk but it actually sucks as a desk. The lid is too high off the ground for my liking.

I built the sides and case with 7/8″ thick walnut with red oak secondary wood. I used red oak because I had a boatload of it when I bought a bundle of it from the company I used to work for. They sold it as oak fence boards so the quality of the wood was not the best. I didn’t care because it was seconday wood but it made the piece extremely heavy. I should have used white pine or poplar instead.

I used plywood on the back and drawer bottoms because the expense of making it was getting out of hand. I paid over $600 for all of the brass hardware and the walnut cost me over $800.

As nice as this piece is, it’s been used as a junk drawer all these years as we just store a bunch of crap in it. I used to store my cd collection in the top cabinet but I sold a lot of them a few years ago on half.com when I was uploading my collection into a digital format.

The secretary has been sitting in our garage ever since we got hit with the tornado last year. After the tornado, we had to take all of our furniture out of the house and into pods in our driveway while our house was being put back together. When everything was done, we never brought it back into the house because it’s too big and heavy to move.

I currently have it for sale on Facebook Marketplace for $1800 but I’ll be surprised if anyone buys it. It’s not an antique so it doesn’t have any value in that way and no one buys big pieces of furniture like this anymore. I may have to donate it or just keep it in the garage.

The secretary was fun to make, but I wouldn’t make it again. All it’s good for is to take pictures and show people “look what I made.”

UPDATE 7-16-21. After zero bites on Marketplace for weeks, I lowered to $500. We’ll see if it sells.

UPDATE 8-20-21 it never sold.

Console Table

I made this table for my wife last year but never blogged about it. Kind of stupid to call yourself MVFlaim Furnituremaker if you never blog about making a piece of furniture. While I was building it, I took a bunch of pictures of the process and intended to show all the steps, but apparently a bug crawled up my ass and for some reason, I deleted all the photos I took. I guess I was having a bad day. So, I had to search my Instagram account to find some pictures to load here.

The five foot long table is a common table you’d find in any furniture store. The table is really nothing special. In fact, the most unique feature of the piece is the drawer fronts with chair caning panels.

I simply made three drawer fronts with a rabbet in the back. I then glued chair canimg on a plywood panel and stuck it in the rabbeted recess. Since the drawer fronts are stuck to the front of each drawer box, the plywood remains stable inside the rabbet and doesn’t move around. I had photos of the entire process but that bug was in my butt pretty far up so they’re gone forever.

I fitted the carcass together and glued and screwed the bottom rails and shelf.

Joinery I used was mortise and tenons I cut on the table saw and chopped with a 3/8″ mortising chisel. The top rail was joined with a hidden dovetail.

Legs were cut from 2″ square poplar boards I glued up and tapered on the band saw. I then cleaned them up with my smooth plane.

This is the table before Anita painted it dark gray and applied the gold handles. Maybe the next peice of furniture I make I’ll be in a better mood and won’t delete the pictures of my progress.

Resizing another Shelving Unit

I was in the process of building another shelving unit for my wife’s new booth in Milford, Ohio. She originally asked me to build it four feet long. However, once I started to attach the shelves to the unit, she wasn’t too thrilled with the overall dimensions. I asked if she wanted it cut down to 36″ long instead of 48″, but she was afraid that it would be too much work. I assured her that I could cut it down without much problem.

20170916_143343.jpg

I slapped the unit on top of my workbench and carefully measured where the rails were to be cut. I then grabbed my Festool plunge saw and rail system, clamped it to the lines and ran down the rail cutting as deep the blade would go.

20170916_145039.jpg

I then flipped the unit off the bench and cut the two attached shelves in half.

20170916_145418.jpg

After one side was free, I unscrewed the pocket holes and broke away the rails with a hammer. I then cleaned the side up with a random orbital sander.

20170916_145846.jpg

I then flipped the other side of the unit back onto the bench and re-drilled the pocket holes to the shortened rails. For the two shelves that already had plywood nailed in place, I had to bust out the plywood with a hammer.

20170916_151515.jpg

After about twenty minutes, the shelving unit came back together a foot shorter. I cut the remaining plywood to the new measurements and installed them using cleats on the inside of the rails.

20170916_153255.jpg

Now it was time for the antique shutters to be screwed onto the sides.

20170916_184259.jpg

After a coat of black paint, the shelving unit looks really nice in her new booth.

20171012_202337.jpg

The Furniture of The White House

Last week my wife and I decided to take a trip out to Washington DC. She had never been there and I went there on a summer trip when I was in the seventh grade. She booked tickets to go to the White House by contacting our local congressman, Steve Chabot, several weeks in advance.

We arrived at the White House at  7:15 am and stood on the outside by a fence before our tour began at 7:30. The guards made us walk into a fenced corral only to make us leave ten minutes later. None of us knew what was going on until we saw the Secret Service walk down that corral with bomb sniffing dogs after we left. Once we passed that part of security, we had to go though three more security check points before we were ever allowed inside.

The first piece of furniture I saw was a china cabinet with a bunch of presidential plates inside. I whipped out my phone and took as many pictures of the furniture as I could. A lot of the rooms were roped off so I couldn’t get too many close up details of most of the furniture.

20170614_075210

Here is the detail of the cabinet’s molding.

20170614_075241

Here’s a shot of the hand cut dovetails on the drawer. What’s going on with that bottom dovetail? It looks like I cut that one.

20170614_075248

Detail of the finial.

20170614_075316

More details of the cabinet.

20170614_075317

Nice round table with a piece of glass to protect the top.

20170614_075346

Mahogany deck and chair inside one of the rooms.

20170614_075350

A nice hall clock stood on top of a small set of stairs.

20170614_075443

A closer look at the clocks face.

20170614_075459

A nice drop leaf table with a piece of glass fitting over only one side of the drop leaf.

20170614_075632

A mahogany chair sitting in the room with a closeup of the chair’s detail.

20170614_075641

20170614_075649

Another table with a piece of fitted glass to protect the top.

20170614_075749

Inside the Red Room with a couple of chairs and what looks like a round game table which I doubt was unless you were playing Q-Bert.

20170614_075809

This secretary desk was my favorite. This stood on the back-end of the Red Room.

20170614_075830

20170614_075839

20170614_075842

A long dining table where President Trump holds dinners with guests. He was planning on having his birthday dinner here later that night.

20170614_075924

Another side table outside the dining room. Notice the plastic on the bottom to protect the table’s claw feet from visitors.

20170614_075941

Even the doors are made incredibly well with a beaded detail down the edge.

20170614_075446

20170614_080126

After we left the White House, the Secret Service rushed us across the street as they didn’t want anyone lallygagging around in the front. After our tour, we walked down the street to a Starbucks to get some coffee where we found out that while we were inside the White House, it was the same time that some goofball loser shot the Congressman in Alexandria, VA which was one of the reasons for the heightened security.


Revamping a Dining Table

About twelve years ago I built a dining table from the plans out of Woodsmith magazine. While it served it’s purpose, it wasn’t exactly the nicest thing in the house. I made the top out of a piece of low-grade oak plywood that I bought at Home Depot. Not only that, but the table was huge being 44″ wide. My wife Anita asked if I could make a new one, or at least make a new top that was more in style. We decided that making a new top out of southern yellow pine and try weathering it making it look aged.

 photo 20150713_192149.jpg

The easy part was buying four 2 x 10’s, ripping them 9″ wide by six feet long and gluing them together. After they were glued, I planed the tops of the boards straight removing all the mill marks in the process.

 photo 20150713_181813.jpg

After the top was planed and sanded with 150 grit sandpaper, Anita applied mixture of steel wool and apple cider vinegar onto the boards to tone down the yellowness of the southern yellow pine.

 photo blog 002_4.jpg

We thought it would be a good idea to stain the top while it was already on the table. I removed the original top of the table and flipped over the base onto the new top to decide how much I would need to cut the sides down.

 photo blog 004_6.jpg

After messing around with the legs for a few minutes, I decide that the sides should be 24″ wide.

 photo blog 005_6.jpg

I cut the sides to 24″ and rerouted the dado on both boards for the corner brackets. I then used pocket screws to re-attach the sides to the legs.

 photo blog 006_2.jpg

Using metal corner brackets, I simply attached the top to the base. The new top made the table look more like a farm table.

 photo blog 008_1.jpg

Anita then stained the table with Special Walnut, then Classic Gray stain from Minwax.

 photo 1437251379798.jpg

Once dry, she applied hemp oil and gave the top a good waxing. She then painted the base with grey chalk paint. When done, it looked like a completely different table.

 photo 20150724_171103.jpg

A close up the table you can see how the southern yellow pine took on a deep rich tone. You can also see how the original black paint shows through the grey paint after Anita sanded the base a little bit. This has been one of those projects we should have done years ago.

 photo 20150724_171113.jpg

Why my Wife Hates Woodworking Magazines

I received the latest issue of a major woodworking magazine a few days ago and my wife Anita was flipping through it. She came across an article about making a cabinet that hid a high end mixer and in disgust, threw the magazine down and said “why would anyone make this piece of shit?” For years she’s been telling me that the projects in these woodworking magazines I subscribe to often have articles with outdated projects that were only popular in the 1980’s. I never really thought about it until she said that.

She does have a point. The writer of the article wrote that the “appliance garage acts like a cabinet effectively cloaking an unsightly blender.” I don’t know about anyone else, but my wife prizes her Kitchen Aid mixer. She would never even think about hiding it on her countertop. If anything, she would highlight it.

Don’t get me wrong, not all the projects in the woodworking magazines I get are outdated, but it does seem sometimes the furniture that are featured would look nice in my Grandma’s house. So much so, that when I look for designs of furniture that hip and popular, I often look at design magazines. Below is the latest issue of Country Living. When flipping through it, I came across several pieces of furniture that would appeal to a younger generation and would be fun to build.

ebay 012

Here’s a nice deck lounge chair that looks like it would fit nicely on a cruise ship. The chair would be made out of weather resistant wood and would be a challenge to build with all the hinging and sculpted parts. This chair would look real nice on the cover of a woodworking magazine.

Here’s a simple bench made from reclaimed wood. These types of benches are real hot right now in the marketplace. In fact, anything made from reclaimed wood is hot. It’s hard to even find old barn wood on Craigslist in my area and when I do, the owner wants a premium for the wood. A project like this could be tackled in a weekend and would be a real hit with young women.

The real nice piece for me in the magazine is this architect’s desk that these ladies are sitting at. The wood looks to be made from stained maple or birch and apparently has some wrought iron hardware on it. It would be hard to draw a plan from this little photo, but it could be done. If a woodworking magazine featured this desk on their cover I bet it would be a hit.

These are just a few examples of the many furniture that are in these design magazines. If you have time, go to your local bookstore, grab a cup of coffee and browse through some of them looking for ideas. You may be surprised what inspires you. By the way, take a look at what is on the counter in the background on the cover of the Country Living magazine.