Video of Making Trim

A few weeks ago I wrote about how I was able to recreate trim that my wife wanted to put on our walls. I had some time this weekend to make all 36 pieces of trim each about 24″ long. It was fun making the trim, but after number twenty, it started to get old. Thankfully, it only took me a few minutes to cut the profile in the wood once I milled the rabbets into each side of the wood.

I decided to do a short video showing the process better than just showing it in pictures. Enjoy!

Adding Cross Bars to a French Style Bookcase.

Over the past few months I’ve been making these French style bookcases for my wife. They’re pretty popular as they usually sell within a couple of weeks in her booth. The nicest part of the bookcase is the design of the cross bars that mimic the design of the Eiffel Tower. The design also makes the bookcase lighter and feel more open as opposed as having closed sides making the bookcase feel heavy.

Adding the cross bars isn’t so difficult when you take your time and measure everything correctly. When I start to build the cross bars, I rip 3/4″ square stock out on the table saw and sand them smooth on my drum-sander. I take one of the bars and clamp it to both back styles of the bookcase. I then strike a line to show me the correct angle that needs to be cut.

20140914_175028


I take the bar over to my old school Stanley No 140 miter box and cut it close to the line, but not on it. I could do this on a power miter saw, but I feel that’s way too much power for doing delicate work like this.

20140914_175414

After the cutting the bar on my miter box, I size it to the line by carefully trimming it with my AMT miter trimmer. I love this tool, but a miter trimmer is the Rodney Dangerfield of woodworking. For whatever reason, it simply gets absolutely no respect in the hand tool world. I guess hand tool purest would rather use a shooting board and plane, but this thing has never let me down in the twenty-five years I’ve owned it.

20140914_181649

When the bars are properly fitted, they are super tight against the styles. So much so that it is very tough to even fit them in place. Having the bars fit this tight is actually very important because they will be glued in place without any mechanical fasteners other than a 23 gauge micro pin toe nailed to the styles.

20140914_180408

Once I’m happy with the fit, I then scribe a line on each bar where the bars meet to create a half lap joint.

20140914_180757

With a dovetail saw, paring chisel, and router, I carefully remove the material between the lines. The depth of the router blade is exactly half the thickness of the bar ensuring the bars are flush to each other when they are fitted together.

20140914_181522

After the joint is cut, I test fit the pieces to make sure everything looks good. An important thing I do when installing the bars is to place witness marks on the bars and styles so that I know which direction the bars goes when it’s time for installation.

20140915_182435

The cross bars on the sides of the bookcase are done exactly the same way. When it comes to installing all the cross bars, I glue and nail them to the styles. Because I plan on painting the bookcase, I don’t care about the nail holes. I just fill them in with wood putty. I use 18 gauge pneumatic nails and nail the side cross bars from the front and back of the styles. The back cross bars, I glue and toe nail them with 23 gauge pin nails to the back styles.


Roubo Style Workbench

Walking around an antique store called Ohio Valley Antique Mall in Cincinnati this weekend, I ran upon this massive beast in one of the aisles. An eight foot long authentic Roubo style workbench. I’ve seen dozens of old workbenches before, but for some reason this guy stuck out to me. The previous owner screwed nickel-plated hooks on the front of it for someone reason. Probably to hold coffee cups or some other nonsense.

 photo 20140831_125018.jpg

What made this bench stick out was the splay of the front leg along with the leg vise. I imagine this was done to prevent the workbench from racking when sawing. The cast iron vise hardware turned smooth and could still tighten with something with a good grip.

 photo 20140831_130955.jpg

It had an old planning stop hole used for planning boards. Oddly the area around the hole was all worn down. When I see wear marks on old pieces like this, it makes me wonder what type of work the craftsman did to make those types of marks. Though it does appear he was sawing on the right side of the planning stop.

Another interesting clue is that it is quite possible that at one point there was another vise installed on top. The three holes around the lighter circular area is possibly where he bolted down a machinist vise onto the bench.

 photo 20140831_130947.jpg

The legs were jointed together with a simple bridle joint however, the legs were not jointed into the bench’s top. More likely the top was just bolted down to the legs somehow. I didn’t feel like moving everything around in the booth to get a better look.

 photo 20140831_131003.jpg

The bench top was a good 12″ wide x 4″ thick piece of pine. It had a tool tray in the back that appeared to be in real good shape given it’s age. Notice how there are no bench dog nor holdfast holes in the top.

 photo 20140831_131011.jpg

Who knows where this bench will end up. Probably in someone’s home as a kitchen island, but for a cool $700 it can be all yours.

 photo 20140831_125018.jpg

Making a Bench from Dimensional Store Bought Lumber

When my wife Anita does shows, I’m always looking for something that I can make fairly quickly that she can sell in her booth to help pay for some of her fees. After helping her do shows over the past couple of years, I’ve noticed that small benches are quite popular. They’re nice to stick out on front porches or foyers or even mud rooms. In fact, some people even use a bench as the seating for one side of their kitchen table.

10407335874_d0e82a20d0_z

I designed this bench to be made from a 2″ x 12″ and a 2″ x 8″ that are eight feet long. However, if you change the dimension of the stretcher a little bit, it could be made form a 2″ x 12″ x 10′. The only issue doing that is you need to make sure your 2″ x 12″ x 10′ is choice wood with no splits at the end of the board because you’ll need nearly every inch of it. It doesn’t matter to me because I can’t fit a ten foot board in my car anyway, so I bought a 2″ x 12″ x 8′ and 2″ x 8″ x 8′ for under $20.00.

ww001

The construction of the bench is super simple. I make the legs 9″ wide x 16″ long. I measure down 2 1/2″ from top and bottom on each side and use the lid from my garbage can to draw an arch connecting the two marks. Then I cut it off the arches on my band saw. I sanded the arches smooth on my oscillating spindle sander.

ww012

The feet are 5″ wide x 10 3/4″ long. I draw a 1″ radius on both sides and remove the material with chisels, planes and files.

I want the bench to have four feet so I take two of the pads and cut grooves in them on my table saw. Once all the grooves are cut, I remove the waste with my bench router and plane everything smooth.

When designing the stretcher, I did nearly the same thing as the legs. I measured 2 1/2″ from each side and make a mark. Then I find the stretcher center and mark 2 1/2″ off each side of the center. I swing a compass set at a 12″ radius connecting the marks creating the arches for the stretcher.

ww015

In order for the legs to attach tot the stretcher, I bored a 1″ x 4″ mortise through the legs with a 1″ forstner bit and cleaned it up with chisels. The tenons I cut on the table saw and band saw and cleaned them up with my rabbet plane.

After all the parts are sanded, I dry fitted everything together to make sure the bench looked right. I wanted the tenons to have a mechanical fastener along with the glue, so I drilled two 1/4″ holes through the side of the legs going through the tenons.

20140823_123357

I grabbed some scrap oak and split a few splitters of wood with a chisel. The pins run down the grain making them exceptionally stronger since the grain follows the strength of the wood. I sized the pins by punching them through my Lie-Nielsen dowel plate. I shaved the pins a little bit with my spoke shave so they would start to fit through the 1/4″ hole of the dowel plate. Once the pin starts to fit in the hole, I pound the hell out of it.

20140823_123402

After I was satisfied with the way the bench stretcher fitted to the legs, I started gluing and screwing everything together, I placed glue of the pins and inserted them into the tenons of the bench. I didn’t bother draw boring the holes of the tenon. I was already satisfied with the tightness of the joint.

20140825_171145

The bench was painted a duck egg blue and waxed over top. The next bench I make will probably be a different color. Maybe a black or grey as neutrals are always popular.

20140825_170758

You can see the detail of the top where the scrub plane left little ridges in the wood giving the bench a bit of detail. It definitely looks better than having a plain board for the seat of the bench.


Restoring a Potting Table

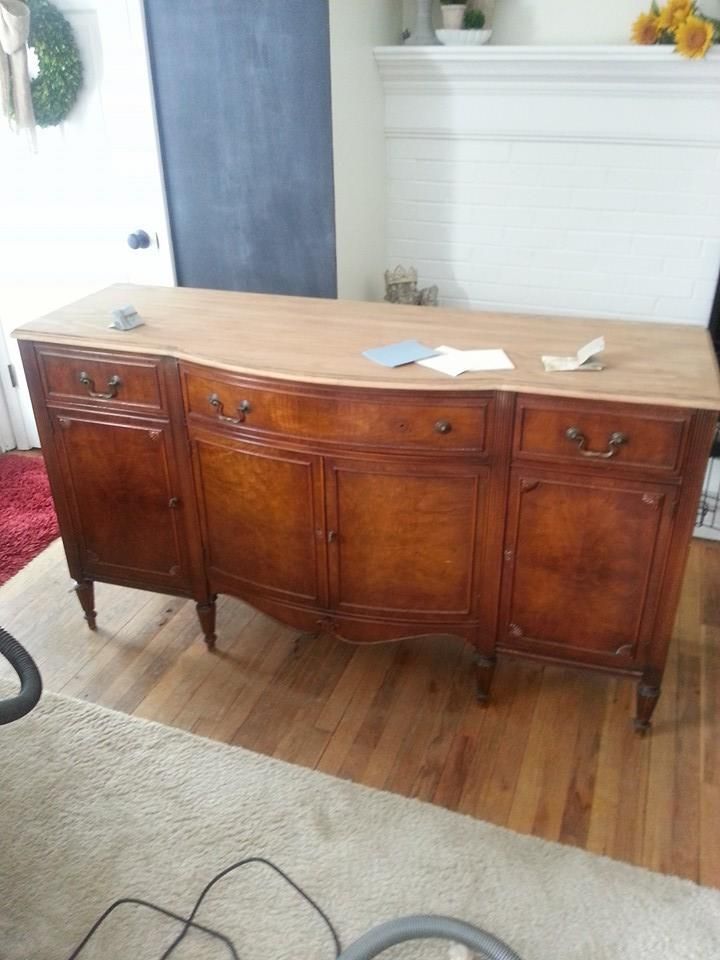
I bought this table last year at a flea market for $4.00. Missing the drawer, the guy selling it considered throwing the table away as he thought it wasn’t worth much. At the last minute, he decided to bring it to the flea market and see if anyone would buy it. Well I guess I was the sucker because I whipped open my wallet and handed him four crisp one dollar bills for it.

I’m not quite sure if the table was built with the two bins in it or if it was retrofitted later on with them. In any event, I decided to keep them and see if I could bring the table back to life.

blog

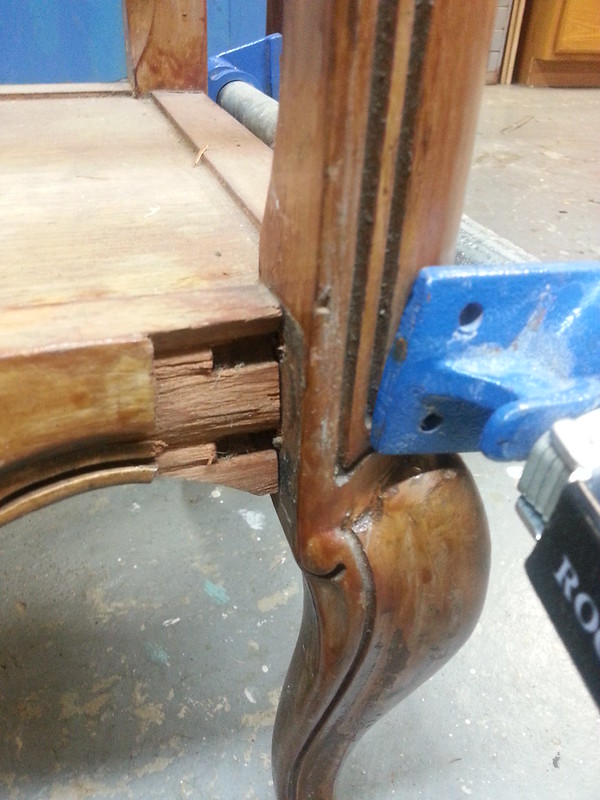
Other than missing a drawer, the real big problem with the table was that there was a piece missing off the front near the leg where the dowel joints failed. I shaved away the roughness of the front with a rasp so that I could attach a new piece of wood to it.

blog

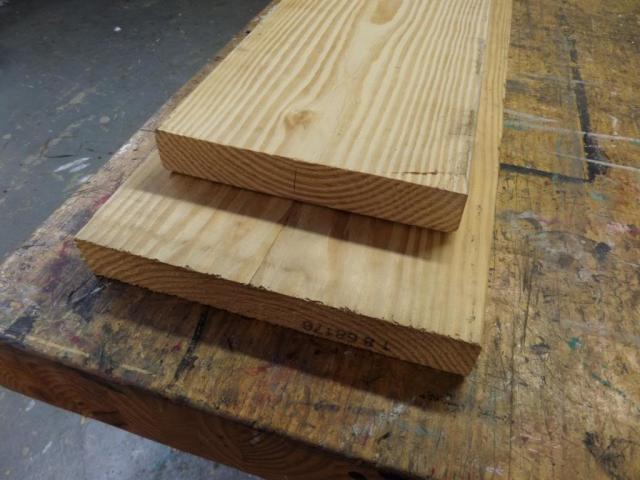
Once I carved out a new piece out of poplar, I glued everything together. I’m by no means a carver, but I was satisfied with the end result. I knew the table would eventually be painted so it wasn’t a big deal if the moldings didn’t match up perfectly.

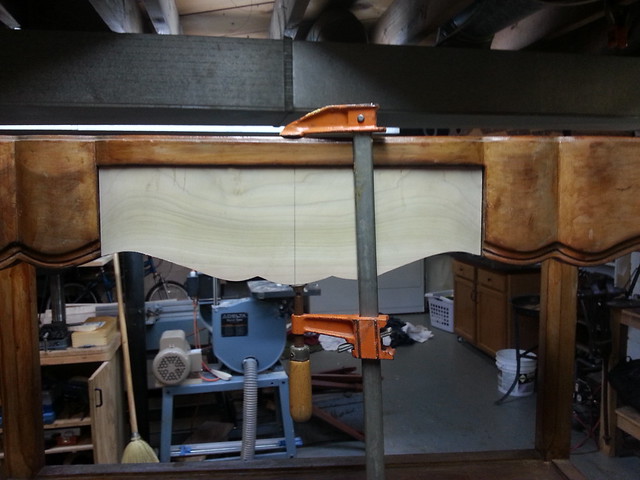
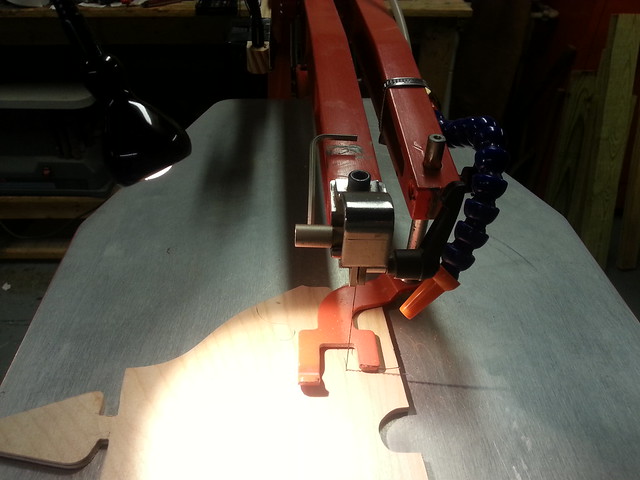
Next I had to make a new drawer. I grabbed some more poplar and traced out the front of drawer by mirroring the shape of the back of the table. I also had to shape the contour of the front to match the curve of the front of the table. I did everything on the band saw and smoothed the wood with rasps and sandpaper.

blog

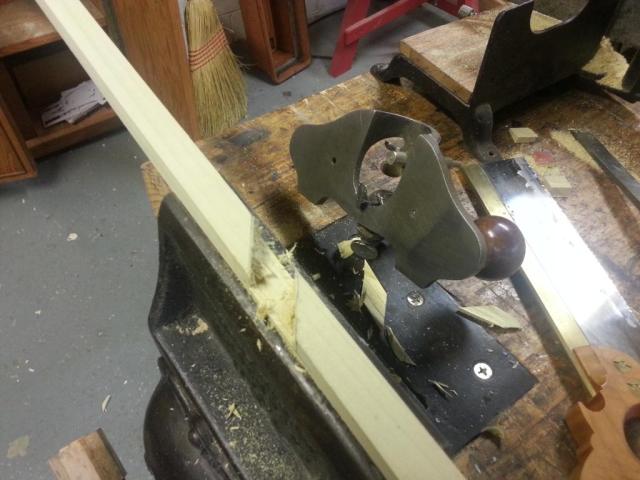
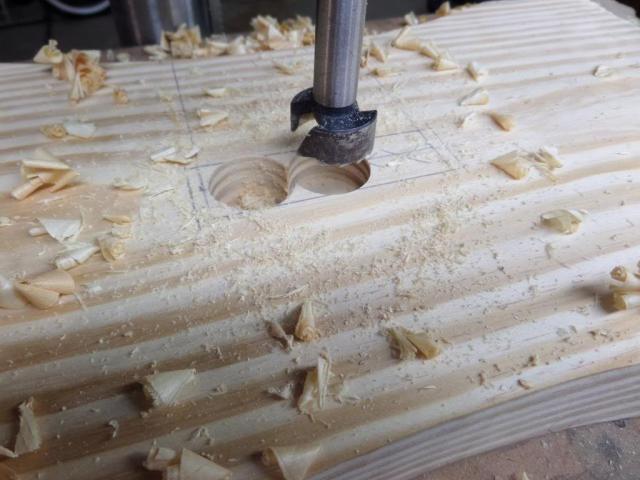
Back to more carving. I used my carving chisels and scooped out the front to match the curvature of the molding. I then used my Dremel and carved a 1/16″ groove down the front to match the groove of the molding. It took about an hour to do all the carving.

blog

Deciding how to attach the drawer front to the sides of the drawer, I opted to simply use a stopped rabbet joint and pin the sides to the front. I considered using a router bit and my router table to cut the stopped rabbets, but I figured I could cut them by hand just a s quick. I used my marking knife and scored the fibers of the wood where I wanted the rabbet to be. Then I very carefully pared away the wood with a chisel. Once I got so deep, it became easier to remove the waste without damaging the drawer front. It was very similar to chopping out the waste on the side of a tenon.

blog

The drawer was built using 1/2″ poplar and 1/4″ plywood for the bottom. The biggest deal with making a drawer is making sure the thing is square. Having a drawer shaped like a rhombus is just asking for trouble.

blog

The running stick was still in the table so I had to make a new runner for it. Whipping one up on the table saw and fastening to the table was no big deal. In order for the drawer to run properly, I used double stick tape and fastened to the runner to make sure it was in the right spot. Once the drawer fitted perfectly, I glued the runner to the bottom of the drawer.

A few hours in the shop and the new drawer fits nicely in the table.

blog

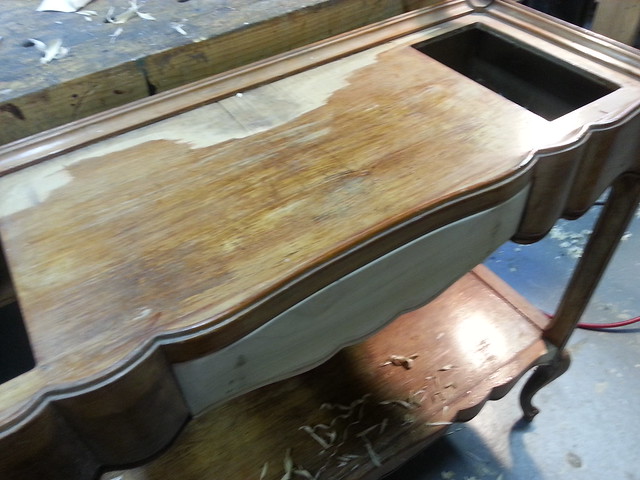
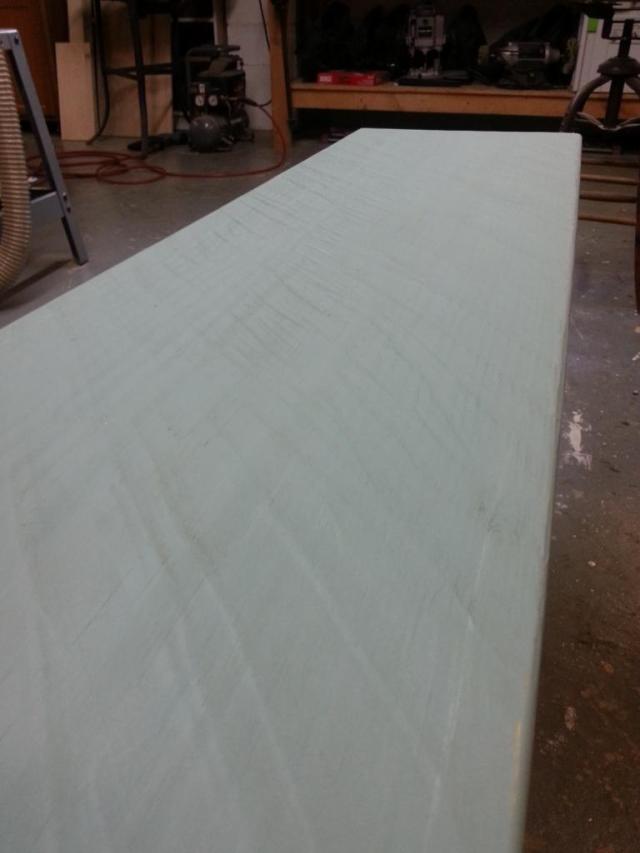
The table had some water damage to the top which caused the veneer to chip and break away. Making a new top for the table didn’t appeal to me, so I tried and out-of-the-box approach. I mixed up a batch of auto body filler and spread it over the top where it was missing the veneer and left it to dry.

blog

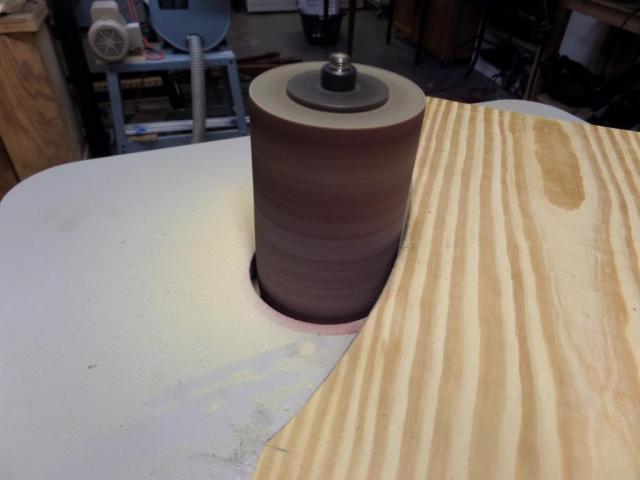
I did this step outside because the body filler stinks to high heaven. After the Bondo dried, I sanded the high spots with 80 and 150 grit sandpaper.

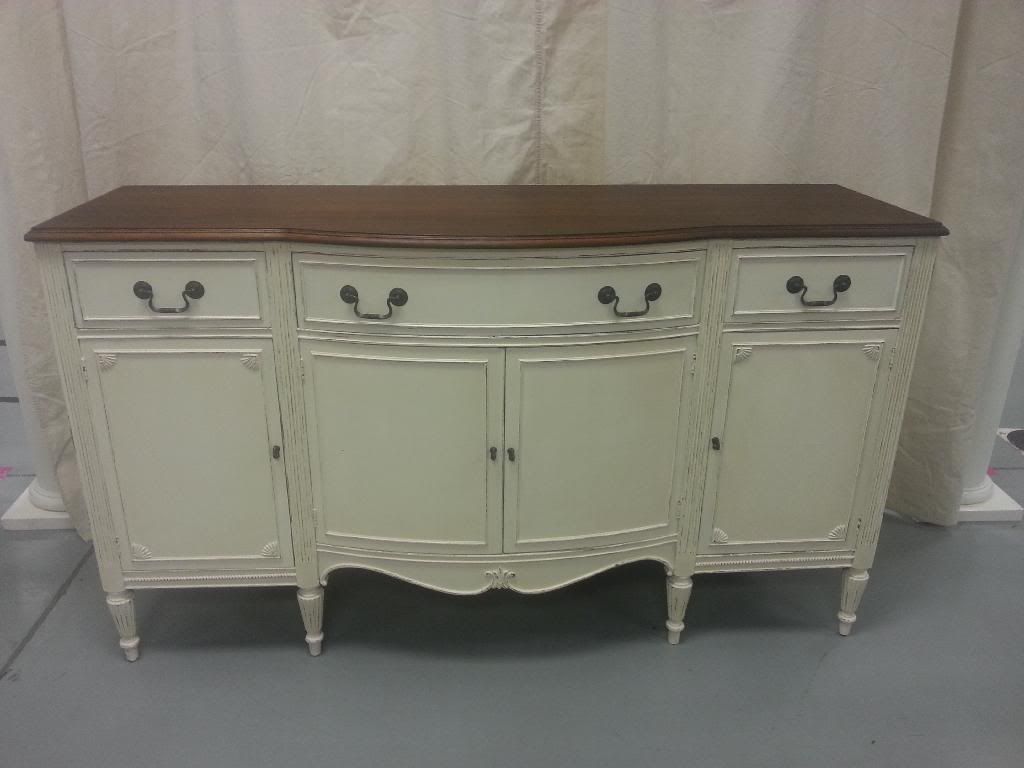
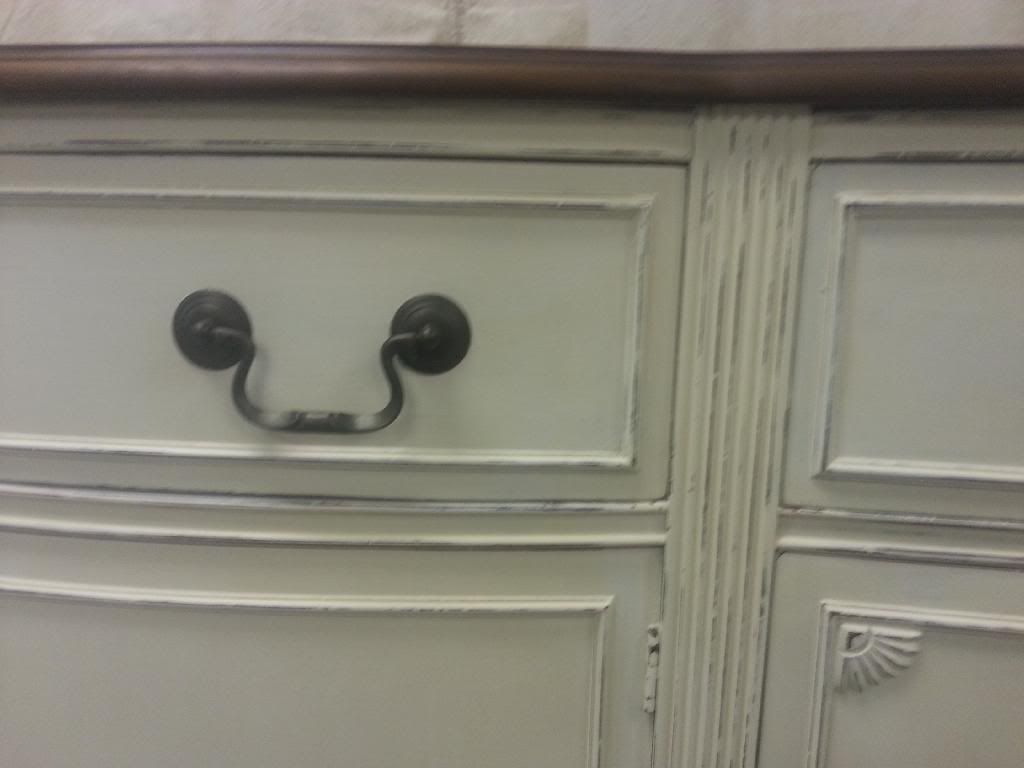
Here’s the finished table with a few coats of paint. My wife Anita painted it and sanded through the coats to give the table a worn look. I don’t think the table turned out too shabby considering I only paid $4.00 for it.

Why my Wife Hates Woodworking Magazines

I received the latest issue of a major woodworking magazine a few days ago and my wife Anita was flipping through it. She came across an article about making a cabinet that hid a high end mixer and in disgust, threw the magazine down and said “why would anyone make this piece of shit?” For years she’s been telling me that the projects in these woodworking magazines I subscribe to often have articles with outdated projects that were only popular in the 1980’s. I never really thought about it until she said that.

She does have a point. The writer of the article wrote that the “appliance garage acts like a cabinet effectively cloaking an unsightly blender.” I don’t know about anyone else, but my wife prizes her Kitchen Aid mixer. She would never even think about hiding it on her countertop. If anything, she would highlight it.

Don’t get me wrong, not all the projects in the woodworking magazines I get are outdated, but it does seem sometimes the furniture that are featured would look nice in my Grandma’s house. So much so, that when I look for designs of furniture that hip and popular, I often look at design magazines. Below is the latest issue of Country Living. When flipping through it, I came across several pieces of furniture that would appeal to a younger generation and would be fun to build.

ebay 012

Here’s a nice deck lounge chair that looks like it would fit nicely on a cruise ship. The chair would be made out of weather resistant wood and would be a challenge to build with all the hinging and sculpted parts. This chair would look real nice on the cover of a woodworking magazine.

Here’s a simple bench made from reclaimed wood. These types of benches are real hot right now in the marketplace. In fact, anything made from reclaimed wood is hot. It’s hard to even find old barn wood on Craigslist in my area and when I do, the owner wants a premium for the wood. A project like this could be tackled in a weekend and would be a real hit with young women.

The real nice piece for me in the magazine is this architect’s desk that these ladies are sitting at. The wood looks to be made from stained maple or birch and apparently has some wrought iron hardware on it. It would be hard to draw a plan from this little photo, but it could be done. If a woodworking magazine featured this desk on their cover I bet it would be a hit.

These are just a few examples of the many furniture that are in these design magazines. If you have time, go to your local bookstore, grab a cup of coffee and browse through some of them looking for ideas. You may be surprised what inspires you. By the way, take a look at what is on the counter in the background on the cover of the Country Living magazine.

PS Wood Machines 21″ Scroll Saw

A few weeks ago my wife and I went down to Louisville, KY for the day. There’s a new antique mall where we live called the Peddler’s Mall and noticed that there were several more of them in Louisville. So we figured we’d make a day of it and check out the malls down there. Well, the trip was nearly a waste of time as most of the stuff that was for sale in all of the Peddler’s Mall were junk. Nearly every booth was a bunch of yard sale crap where people would try to sell things like Scooby Doo drinking glasses for a buck.

Near the end of the day, I strolled down the aisle and caught my eye on an old scroll saw for $99.00. The saw was sitting on its stand in the back of the booth and had duct tape wrapped around it. I checked it over for a second and looked at Anita. She looked back at me and asked “what are you going to do with that thing?” I didn’t have an answer as I wasn’t in the market for a new scroll saw. So we left the mall and drove back home.

On my way back home I couldn’t get the saw out of my mind. I really didn’t need a new scroll saw as I don’t do all that much scrolling, but I have always longed to own a Hegner. Out of curiosity, I pulled up eBay on my phone and typed in “PS Wood 21″ scroll saw” and saw that used ones sell for $400. Ugh, I should have bought it!

A couple of weeks go by and my boss asked to do some market research in Louisville. The rep for Louisville, knew I was coming down to help him out with the research, so he asked if I wanted to have lunch with him at his favorite Chinese buffet. It sounded good to me, so he gave me the address. As soon as I pulled into the parking lot of the buffet, low and behold, the Peddler’s Mall with the scroll saw was right across the street. I told myself that after lunch that I was going back in to see if the saw was still there.

I walked into the store and went back to the booth. Luckily it was still sitting there for $99.00. I checked over the saw again and it seemed like everything was there. The only thing that it needed was a new diaphragm for the blower and a new belt. I asked a worker if there was anyway I could plug it in to see if the motor worked. She told me that there was an outlet up by the registers, so I picked up the saw and carried it all the way to the front of the store. I had to unwrap the duct tape that was holding the arms down so that they could move. As soon as I turned the switch on the saw worked just fine. Happily, I bought the saw and shoved it into my car.

blog

After cleaning the saw up a little bit, it worked fine. I bought the new blower and belt along with a selection of scroll saw blades to make the saw perform better. Now I wanted to snazz it up a little bit by adding a light to it so I could see what I was cutting. I ended up buying a cheap clamp-on light from Ikea for $15.00.

I needed a way for the light to hold onto the saw. I tapped the two holes on the left side arm and threaded a couple of screws into them to hold a wooden arm.

I wanted the light to have a cleaner look rather than just have it clamp onto a wooden arm. I drilled a hole through the top of the arm to be able to feed the wire of the light through.

blog

I carefully removed the clamp portion of the light and spliced the wire to feed it through the hole. I used electrical tape to re-attach the wires and hold everything onto the arm. I guess I could have painted the arm black for style points, but no one will probably see the saw other than me.

The light turned out well as it’s a much better scrolling with proper lighting. I’ll be using this saw for decades and loving it.

blog

What Do You Think of this Style of Furniture?

Having a woodworking blog, I know that a lot of people who follow me are also woodworkers. And if I know woodworkers, it is that they love wood grain. So much so, that the whole idea of painting a piece of furniture that they make is often considered sacrilegious. However, I also know that many women who usually buy furniture for their home would rather have a piece of furniture that goes with their décor. Beautiful wood grain is something many of them don’t even think about when picking out a piece. So I decided to do a little nonscientific poll to see what people think of the following piece of furniture.

This is a buffet my wife bought at an auction. She wanted to paint the base, but leave the top a natural wood tone. She sanded the top and oiled it with hemp oil. Some people call this type of furniture restyle Shabby Chic. I’m not sure if this is technically Shabby Chic or French Country or whatever. My wife calls it Elegant Farm House style.

Below you can see some of the detail of the wood after it’s been painted. To me, the architectural details of the moldings stick out a little more and are not muddled in the wood grain when the piece has been distressed. But what do you think?

http://i1207.photobucket.com/albums/bb475/mvflaim/buffet-1.jpg?t=1396789538

Please feel free to Share this post. The more people who see it and vote, the better.

My 100th Post

Well this is my 100th post on my blog. I just want to thank all of you who find what I write interesting enough to subscribe to my blog. It was just six months ago when I told everyone that I had 100 followers. Today I have 175 and growing.

I started this blog because for years I’ve always wanted to write a book about restoring antique tools similar to Michael Dunbar’s book Cleaning, Restoring and Tuning Classic Woodworking Tools. It’s been out of print for years and I felt that the it was a side of woodworking that wasn’t paid enough attention to. However, sitting down and writing a book is for the birds as I don’t have the patience for that. I could however take a bunch of pictures of tools I was cleaning up, write about the processes and throw them on a blog. That’s why a lot of my posts are about old tools. I don’t know if I’ll ever write the book about restoring old tools though. I just found out a couple of weeks ago that Popular Woodworking is working on a second edition of Dunbar’s book.

I never thought I would ever get anything out of this blog. I mean sure it would be nice to have some advertising on the side of the page and make a little bit of money off of it. Hell, I’d use the money to pay for my golf league or take my wife out to dinner. But I’m not doing this trying to make a living or make a name for myself. For the most part, no one even knows who I am. I’ve never been mentioned on any other woodworking blogs like Chris Shwarz’s blog or The Wood Whisperer. So the fact that I have 175 followers after a couple of years isn’t half bad.

I did get a call from American Woodworker magazine editor Glen Huey a couple of weeks ago. As you may know, F+W Media which owns Popular Woodworking bought New Track Media a few months ago which owns American Woodworker. With the change over, Glen was appointed to be the editor of Am Wood. He contacted me asking if I would be interested in writing a few articles about making furniture from construction grade material like 2 x 8’s or cheap hardwood like poplar. He has read my blog and was impressed with some of the stuff I’ve been able to make with it and thought it might make a good article for the magazine. I jumped at the chance as writing for woodworking magazines has been a dream of mine ever since I was 11 years old when I bought issue #3 of Wood magazine. I ran down to the corporate office in Blue Ash, OH last week and met with Glen for about an hour. I’m in talks with him right now about some ideas of furniture I could make so, hopefully I’ll have a couple of articles under my belt by the end of the year.