the.antiquetool.restorer

A few weeks ago I was at work at the Sakrete plant putting Belgard A Frames in my truck when one of them slipped and fell on top of my phone that was laying on my tailgate. It immediately cracked the screen and my phone became completely useless unable to swipe anything on the home screen.

So, the next day, I run out and get a new Samsung phone, and luckily, I was able to transfer all my data from my old phone to the new phone through the cloud. I had to log back into all my accounts but at least they were still active. Everything but Instagram.

When I try to log into my mvflaim_furnitutemaker Instagram account on my new phone it wanted me to put in my access codes. I wrote down access codes several months ago just in case someone hacked my account and I could retrieve it back. My wife has known a lot of people who’ve had their Instagram accounts hacked and suggested I get access codes in case it happened to me.

None of the access codes that I wrote down worked so, I decided to log in through my Facebook account. When I did that, it still asked for the six digit login codes. It then said that you could get these codes from a third party Duo Mobile or Google Authenticator software you set up on your phone.

So then I installed Google Authentication software on my phone which would give me a random six digit code every 30 seconds. When I try to log in and put those codes in, it still didn’t work.

So now I’m pissed screwing with Instagram for several days trying to get back into my account. I tried to log back in to get help and clicked “get support” which asks me if I have a picture of myself. I don’t take many, if any, selfies of myself but do have a few photos of me on my feed. It then has me take a 360 degree video of my face so it could recognize it was me. Every time I tried, it emailed me back saying it can’t verify the video is me. I took over two dozen videos of my head over the past few weeks and everytime, the AI software still will not recognize my face.

It’s so bad that now, the software won’t even pull up when I try to take another video of me saying there is a bug with the software. So basically, I’m fucked.

So, I bit the bullet and decided to create a new Instagram page and call it the.antiquetool.restorer. But now I have to start all over again gaining followers.

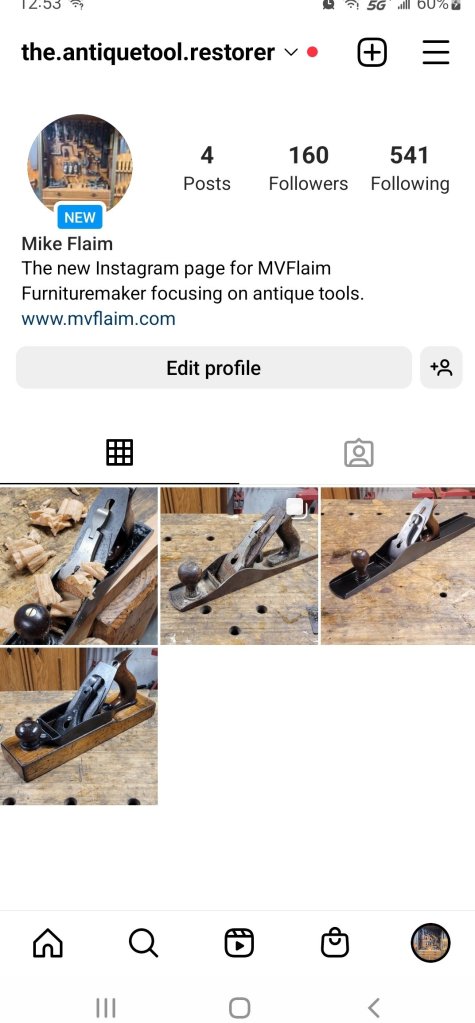
It took me nine years to get over 4k followers as I’m not a tech savvy social media guru. It just sucks so bad. All that hard work getting all the followers is just pissed away simply by getting a new phone.

UPDATE: After a few months of the.antiquetool.restorer, I said, “screw it,” and changed my name to “mvflaim.” But I’m still pissed I can’t get back into my old account.

Nicest Compliment I ever Received

Last week I received a message in my Instagram messaging page. I’m small potatoes on Instagram as I only have a few thousand followers, so I don’t get many messages. The ones I do get, the majority of them are some sort of spam bullshit trying to hack my account, so I usually don’t pay much attention to them.

However this time, the message was from one of my followers. Johnson21800 sent me a couple of pictures of his Great Grandad’s Stanley No 32 Jointer Plane. He said he was so inspired by my posts on restoring tools, he decided to restore his Great Grandad’s plane.

Here’s the plane all cleaned up and restored. I think Peter does a better job than I do!

The fact that Peter would send me pictures of his plane that he restored after watching my feed humbles me. It makes feel good inside that I inspire people to restore and use these old tools that just sit around collecting dust. It’s pretty much the reason I post so many antique tools on Instagram.

Porter Cable Restorer- Customer Service Excellence

A few days ago, I was working on this farmhouse table flattening the underside of the top with my Porter Cable Restorer sander. I wrote a post about the sander a couple of years ago saying how nice of a tool it is to use. Granted, I don’t use the tool all that much as I don’t work with reclaimed wood too often, but it works well as a quick belt sander.

I was sanding the top down when I noticed some black streaks on the wood. I stopped and turned the tool over when I saw the sandpaper drum moved to the right eating into the housing flap.

I thought to myself that I must have the drum in backwards so I flipped the sandpaper drum around and kept going. Then I noticed the sandpaper was now eating into the body of the sander.

I thought to myself “what the hell??” I looked at the sander to see if there was any way to tighten the sandpaper to the drum as I do with my oscillating drum sander, but there was nothing to tighten.

I had no idea what I did wrong as I’ve used the tool in the past with no problems. I follow the guy who invented the Restorer on Instagram, Robert Kundel Jr, and sent him a picture of the tool and asked him what I did wrong. He wrote back to me apologizing that there was an issue with some of the sandpaper drums not being made to spec and he would send me a new unit. Sure enough a few days later, a new unit arrived at my doorstep.

These are drums that were not made to spec. I bought them on clearance at Lowe’s. They are now going into the garbage. Lowe’s is now starting to carry the Craftsman Restorer which is more likely the same as the Porter Cable as they are both owned by Stanley Black & Decker. I’ll buy the Craftsman sanding drums for now on.

You can see the difference between the two drums. The used one is about an 1/8″ wider in diameter causing it to move while being used.

I always read about great customer service from Lie-Nielsen and Lee Valley on woodworking forums. Robert at Inventor of the Restorer needs to be on the list as well. He went far and beyond what was appropriate. I would have been happy with just a new sleeve of correct drums as the sander still works.

Enlarging an Image

Over the past few months, I’ve been making and selling these Ohio signs in our booths in the antique malls we rent space in. They’re super simple to make. Just old scrap wood I have lying around, painted and stained to make it look like old barn wood. Then I cut the wood out from a pattern and attach the pieces to a plywood back.

20171217_103234.jpg

They’ve been so popular, I decided to make a Kentucky one as well since Cincinnati is near the Kentucky border. The Ohio signs are about 15″ x 16″ so I knew I wanted the Kentucky one to be about 24″ long. The problem was that I didn’t have a map of Kentucky that was 24″ large. I decided to Google image a map of Kentucky and print it out on my printer. That left me with a map that was 10 1/2″ long, but I didn’t have a scaling ruler that would work for that size.

20171217_103207.jpg

I decided to make a scaling ruler where 10 1/2″ equals 24″ in scale. I grabbed a piece of plywood and ran a line down the board 10 1/2″ wide. I then took my ruler and put the end of the ruler on the line and angled it so that the 12″ mark would be at the other end of the board. I then made a mark on every 1/2″ increment giving me 24 equal units for the 10 1/2″ length.

20171217_103432.jpg

I then drew the lines down the board, grabbed a scrap stick and transferred those increments to the board creating my scaled ruler. The units didn’t have to be perfect. I was just trying to get an approximate measurement.

20171217_103712.jpg

I then used that scaled ruler and marked lines on both the horizontal and vertical axis of the map creating a grid.

20171217_104430.jpg

I then drew 1″ grids on the piece of plywood and drew the pattern of the map onto the wood carefully transferring the image of each little box to the corresponding box on the plywood. This is very similar to games I played as a kid where you would have to create a picture based off random shaded box patterns.

20171217_105652.jpg

Once the pattern was transferred, I cut it out on the band saw. The template ended up being 24″ long by 12″ tall.

20171217_124233.jpg

Here’s the finished Kentucky sign. I shared this image on Instagram and someone wants me to make him one. The work is already paying off. Merry Christmas!

20171217_165411.jpg

Jet Oscillating Edge Sander

A couple of weeks ago, my local tool supply company I’ve been buying my power tools for the past twenty-five years, Edward B Mueller Co, was having a spring tool sale. I looked through the email and saw that they were offering the Jet oscillating edge sander for $1019.00, which matched Amazon’s price, but they were also offering $95.00 in free accessories. I’ve wanted one of these machines for a while, but was unsure how useful they were since I’ve never tried one myself. I went over to Woodnet.net and asked the guys over there what their thoughts were on them. Everyone who owned one came back that they loved theirs and they use it on nearly every project they work on. So, I decided to bite the bullet and bring one home to my shop. Along with the sander I also got a mobile base and an extra sanding belt with my $95.00 in free accessories.

img_20170525_101236_323

After dragging the sander out of my car, I had to slide it down the basement steps. But before I did that, I took a lot of the parts out of the box to lighten the load. I built the cabinet first and slipped my mobile base underneath before I tried to stick the main unit on it.

img_20170526_212943_898

Thankfully, I have a strong wife as we were able to lift it up on the cabinet after I took off the cast iron table.

img_20170527_091324_818

After about an hour to put everything together, the sander was up and running. I hooked up my dust collector to it and turned the beast on to see how it worked. The sander is awesome and the oscillating function works well.

20170527_101254

While reading the reviews for the machine on Amazon, one of the biggest complaints people had with it was the fact that the cast iron table was too heavy to  move on your own. So, I went to the flea market this weekend and bought an old car jack for $5.00. I slid the jack under the table, loosen the knobs, jacked it up a little bit, then tighten back the knobs. Works great! Plus the jack is small enough to fit inside the cabinet.

20170603_145624

Yesterday I was building a coffee console table for my wife that had “X” cross braces on each side of the table. I scribed the angle on the crossbar, cut it off heavy on the band saw, and then cleaned up the piece on my edge sander.

20170603_172028

It works perfectly and leaves a super clean finish. All I can say is that I love this tool! I can easily see using it on nearly everything I make. For years, I used to chuck up a 12″ disc to my lathe and stick a sand paper disc onto it to turn it into a disc sander. I used it so much that I used my lathe as a sander more than I did for turning. I’m happy to say that lathe is going back to being a lathe.

20170603_172047

Refurbishing a Dresser into a Wine Cabinet

Back in the summer, my wife bought a dresser from a couple in Kentucky on the Longest Yard Sale for $20. The dresser wasn’t in the best shape as most of the drawers were beat up , but we decided to buy it anyway because we knew we would be able to re-purpose it into something other than a dresser.

20170114_175247

We decided to turn the dresser into a wine cabinet so I had to remove the rails from the middle of the case. I grabbed my Fein MultiMaster and cut off the tenons that attached the rails to the frame.

20170114_182131

I cleaned up the middle of the case and strengthened the case where it needed with glue and clamps.

20170114_183046

The cabinet opening was 25 1/2″ square so I designed the inside to accommodate as many wine bottles as possible. I played with different measurements until I decided on 4″ square holes to fit the wine bottles.

20170114_192909

While building a couple of grids, I test fitted them to make sure they would hold a wine bottle without falling through. I made the grids from southern yellow pine and each bar is about 3/4″ square, 12″ long with a chamfer on the front.

img_20170115_131238_044

I built the rest of the grids and tested their fit again. The cabinet would be able to hold 25 wine bottles.

img_20170115_143857_253

Since the bottom of the cabinet was now open to the floor, I added a piece of 1/4″ plywood to the base of the cabinet.

20170115_163753

And because I added the plywood to the bottom, I had to trim a 1/4″ off the bottom to all my grids. Using my panel cutter and a hand clamp, I was able to cut all the grids to the same length.

20170115_163758

After test fitting everything together, all the grids came together nicely. I installed a 1/4″ piece of plywood to the back of the grids so that the wine bottle wouldn’t fall through the back.

img_20170115_165248_517

Satisfied with the grids, I turned my attention to the drawer and glued a new piece of wood to the bottom of one side as it was damaged. The drawer wasn’t opening smoothly so this repair helped out a lot.

20170115_173721

Because the grids were freshly cut wood, I wanted to age them to match the piece, so I brushed on an apple cider vinegar and steel wool solution to darken them up.

img_20170116_165959_411

My wife painted the inside of the case black and the outside grey with milk paint to let some of the original finish show through. She then stained the top with a gel stain and applied three coats of Waterlox varnish. This cabinet is now ready for years of use under its new life.

img_20170120_171649_577

Making a Harvest Display Table

A few months ago, I built a Harvest Table for my wife to use in her booth to sell some of her antiques. You can read the blog post here. She still has that table, but she asked me to build another one for another booth she has. I went to a local antique store that sells reclaimed wood and bought a 4″ square posts and three pieces of barn wood siding. I have a picture of the wood on instagram. Unfortunately, I deleted the original photo from my phone before I uploaded it to photobucket to share here.

I started this harvest table in much the same way as the first one, turning the legs on the lathe. The major difference is that this table was turned with reclaimed birch instead of douglas fir 4×4’s that I bought at Lowe’s. Turning reclaimed lumber is probably not the smartest thing to do since you never know what the integrity of the wood is as it may snap off while on the lathe injuring you, but I thought I’d take my chances.

A couple of the pieces I wanted to turn had some nails stick stuck in the wood. I grabbed a chisel and hammer and I dug into the wood to extract all nails I could find. There were a couple of nails that were too deep to grab, so I carefully turned the leg, stopping every few strokes making sure I wasn’t near the top of the nail.

 photo 20160905_195121.jpg

While a couple of the posts had nails holes in them, the other two had old worm holes. I turned each leg the same and in the end, they were full of character. You can see the final four turned legs here.

 photo 20160905_195135.jpg

With the legs turned, I focused my attention on the top. I took the three slabs of barn wood siding and brought them together to determine how wide the top of the table could be. The boards were only 3/4″ thick and I wanted the top to be thicker, so I took some scrap OSB boards I had laying around from when I was building my shed and built a substrate for the boards.

 photo 20160904_183146.jpg

I glued and screwed the OSB to the siding gluing in the middle of the boards and screwing on the ends. The siding is so old that I figure the expansion and contraction of the wood would be very minimal. Even if they did crack, it would just add more character to the top of the table.

 photo 20160905_161649.jpg

I added some pine edging to cover up the OSB substrate underneath the top boards. Cutting the corners is where my miter trimmer comes in handy. I love that thing!

 photo 20160905_160457.jpg

Flipping the top back over, I figured out where the legs should go. I kept the design simple by using a scrap pieces of edging that were 1 3/8″ wide and making them gauges to show me where the legs should go. Easy P-easy.

 photo 20160905_162059.jpg

Next was to make the frame of table. I grabbed a 2×12 and milled it to 3/4″ thick by 5″ wide pieces and cut them to fit between the legs.

 photo 20160905_163615.jpg

I then channeled my inner Scott Phillips of The American Woodshop and used my Kreg Pocket Hole Jig and screwed the frame to the top. I was trying to build this table as quick and as easy as possible. I wasn’t trying to win a woodworking contest with this table.

 photo 20160905_170752.jpg

I still needed to attach the legs to the frame so I drilled a pilot hole in the legs and screwed in 3/8″ hanger bolts.

 photo 20160905_175850.jpg

I then simply drilled a hole in the corner brackets, fed the bolt through the hole, and tightened it in place with a nut. As the nut tightened to the corner bracket, it drove the leg tight to both sides of the frame. Attaching the legs this way makes it possible to take them off and carry it out of my basement shop.

 photo 20160905_181837.jpg

Flipping it back over, the table was built. Super simple and super fun. I posted this picture on instagram and it has been my most liked picture, ever!

 photo 20160905_195802.jpg

The final picture is the table with an antique stain applied to it. I’m happy with the way it turned out and so is my wife.

 photo 20160906_183410.jpg