New Life to a Beaten Up Dresser

My wife, Anita, and I went to the Springfield Extravaganza Antique Show last weekend looking for some things to buy. Me, it’s always antique tools, and for her, it’s modern farmhouse decor items for her to sell. We bought this old beat up five panel oak dresser for $20. For some reason during its life, the legs were cut off to make it shorter. The problem with that is it made the bottom drawer completely useless.

So, once we got it home, I took a look at it and saw that the bottom drawer was trashed so I took it over to my fire pit to burn. I did take the wooden knobs off the drawer just in case we could use them someday.

I knew I wanted the dresser to have legs again, so I took my sawzall and cut out the panels on the sides and back and then removed all the wood in the grooves.

Since the panels I cut out were already the perfect thickness, I ripped them into thin strips and used them to fill the gaps. A few clamps and glue did the trick.

After the glue dried, I trimmed and sanded the legs and threw the dresser upright. Boom! Now the dresser had legs again and didn’t look so pathetic. I then worked on the drawers to make sure they opened and closed well. I even rubbed paraffin wax on the bottoms of the drawers to make them slide easier. After a little bit of work, this dresser was useable again.

Now the part you hate! Anita painted the dresser white with milk paint and turned into a piece of shabby chic furniture. You may hate it, but some farmhouse decor lady will love it.

Fixin’ Up a Buffet

If you follow my blog, then you know that my wife and I have a couple of booths in antique malls where we buy and sell antiques. Occasionally we’ll buy old furniture and fix it up. This is a buffet we found at a yard sale for dirt cheap. It had some issues, but the price was too good to pass up, plus I knew I could make it usable again.

20180827_180939.jpg

The first issue I had to take care of was the stretcher on the bottom looked like a dog gnawed on it.

20180827_180950.jpg

The easiest thing to do was simply cut it off. Since Anita was going to paint the piece, I wasn’t too concerned about the dowel cut offs showing. Removing the stretcher didn’t cause the buffet to lose any stability.

20180827_181429.jpg

The biggest issue the buffet had was the runner on the large drawer on top was  completely broken off. There was no way  to properly repair it so I decide to make a new one out of some scrap wood.

20180827_181907.jpg

I milled a new piece to size and then used my Stanley No 45 plane to plow a 1/4″ groove down the middle on both edges.

IMG_20180827_192515_937.jpg

I then cut a wide groove down the face of the piece with my table saw and cleaned it up with my router plane.

IMG_20180827_192515_930.jpg

With a tenon cut on the end of the piece and a rabbet cut on the other end, the new piece worked perfectly in the old drawer. I tacked down the runner to the back of the drawer with a couple of small nails.

20180827_190817.jpg

After the drawer was fixed, I shaved down the edges of the doors with a block plane so that they would close better. Once the buffet was functional again, Anita painted the piece with milk paint.

20180916_192155.jpg

You can see how the milk paint gives the buffet old world character. This piece should sell quick in the booth.

20180916_192201.jpg

A Quick Harvest Table

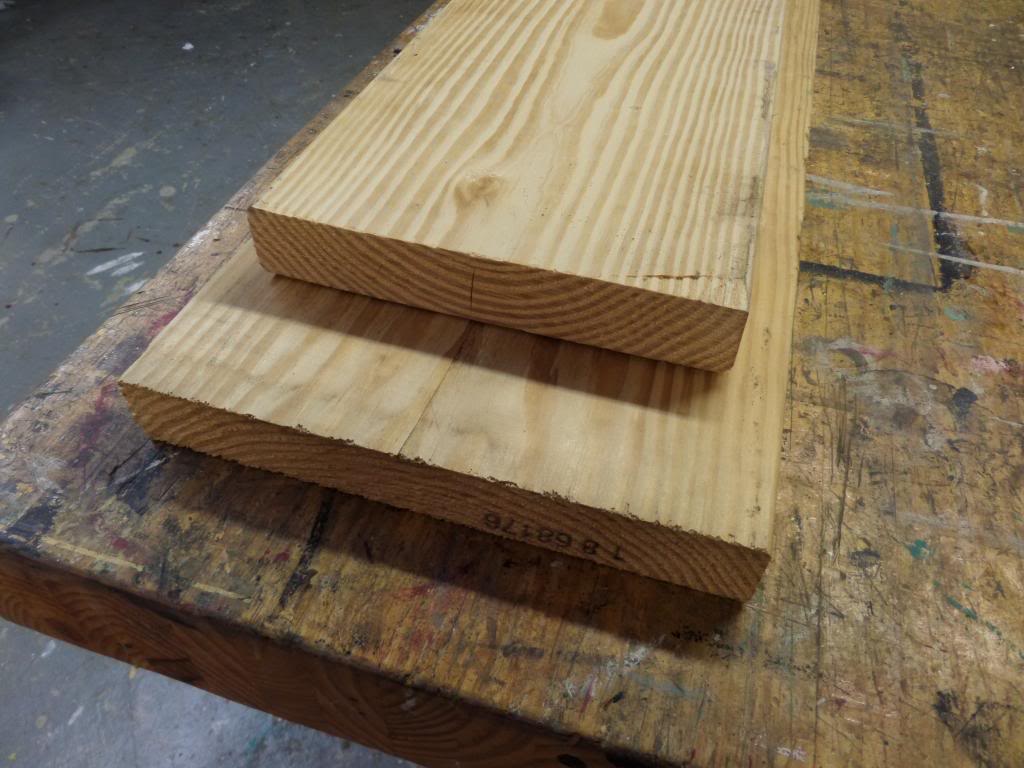
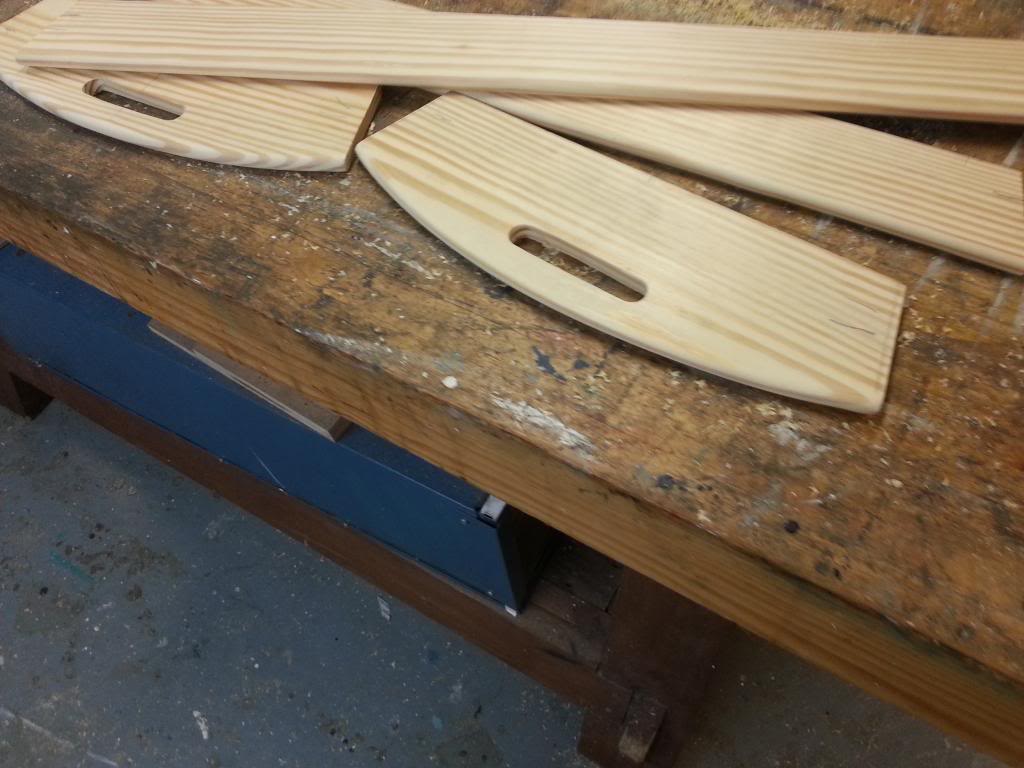
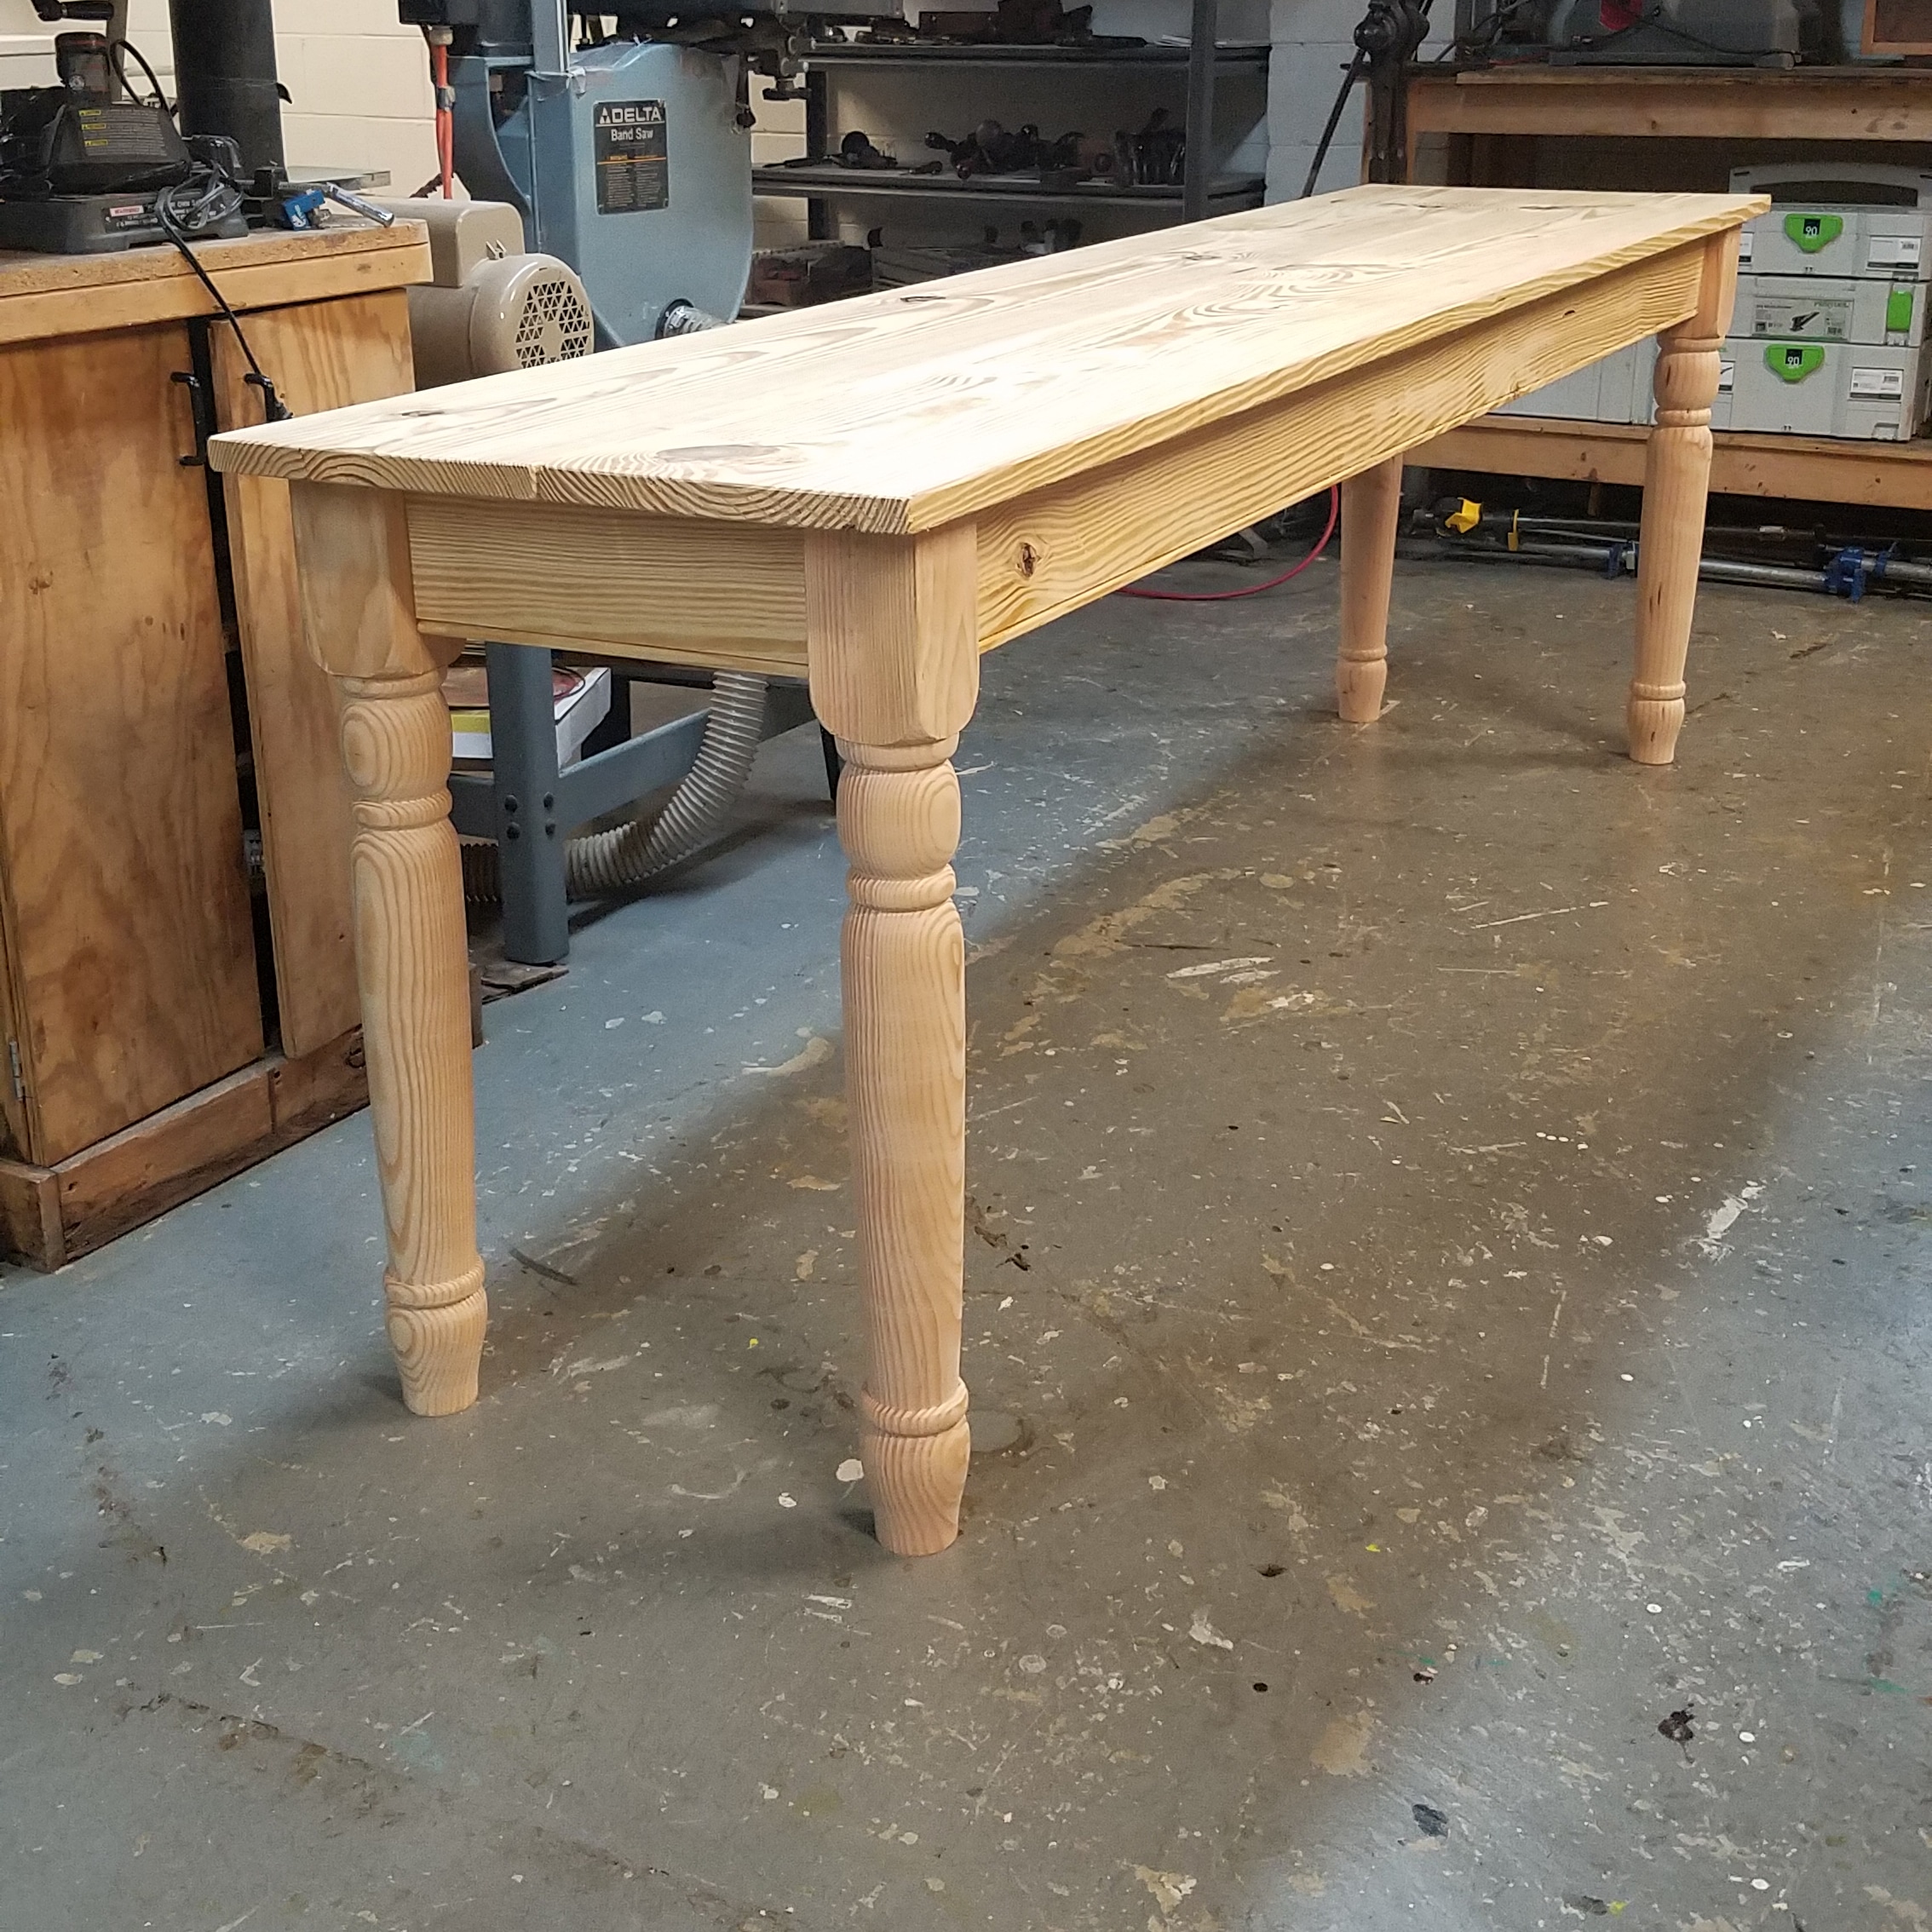
My wife, Anita, wanted me to make another farmhouse table for her. She sold the last one I made several months ago and missed how it looked in her booth. So, I went to Home Depot and bought three 2×12’s and two 4×4’s.

20180609_164634.jpg

Two of the 2 x 12’s I bought, I planed down to 1″ with my surface planer. It did a fine job, but I had three garbage cans full of shavings that I had to burn in my fire pit in order to get rid of.

20180609_191531.jpg

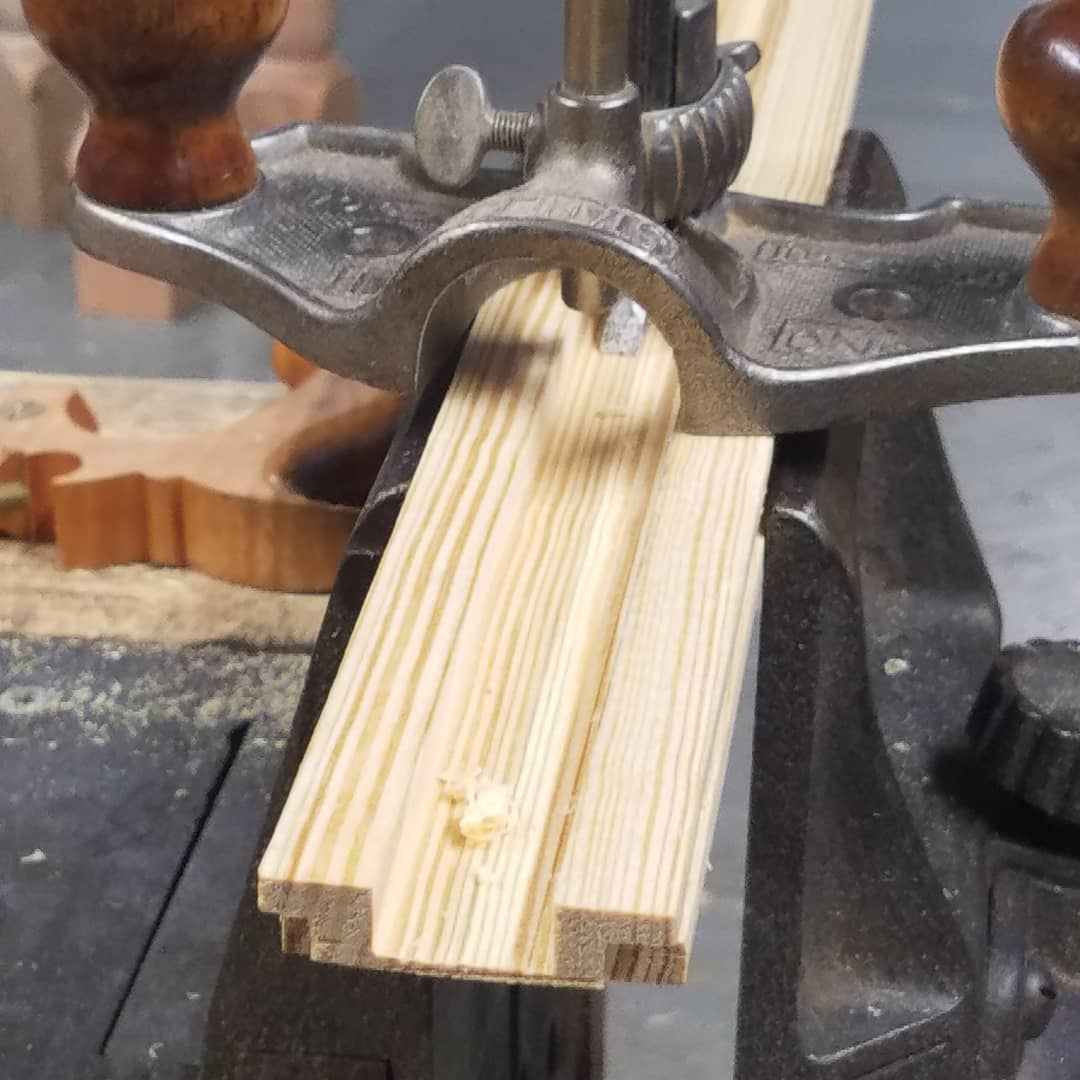
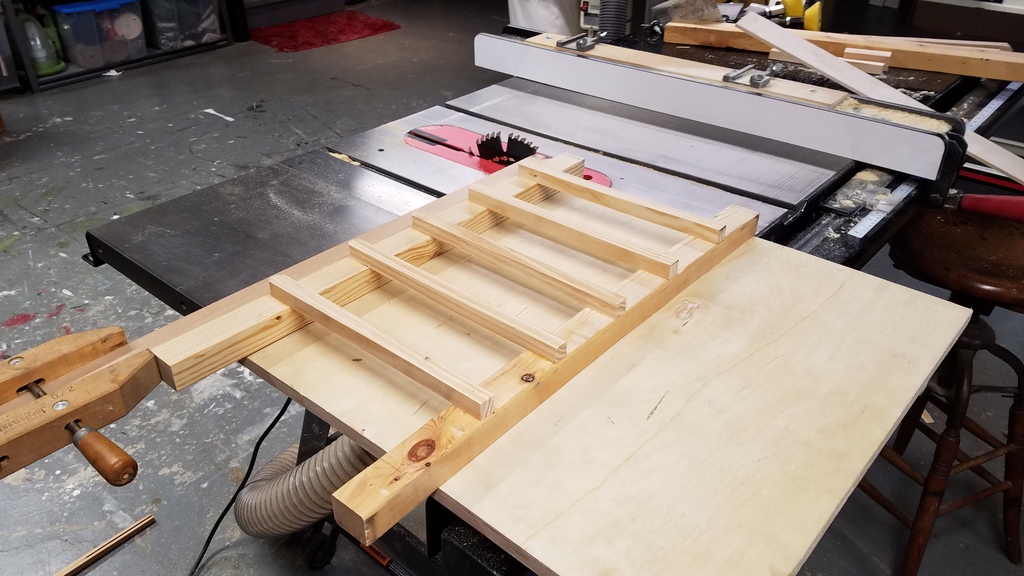
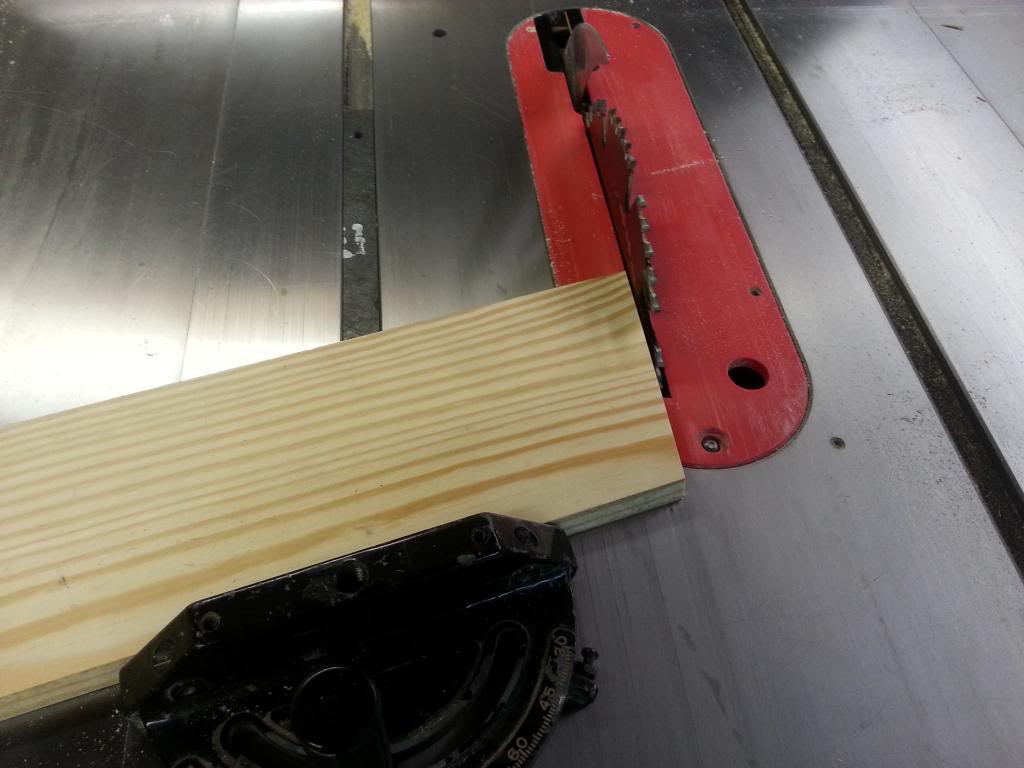
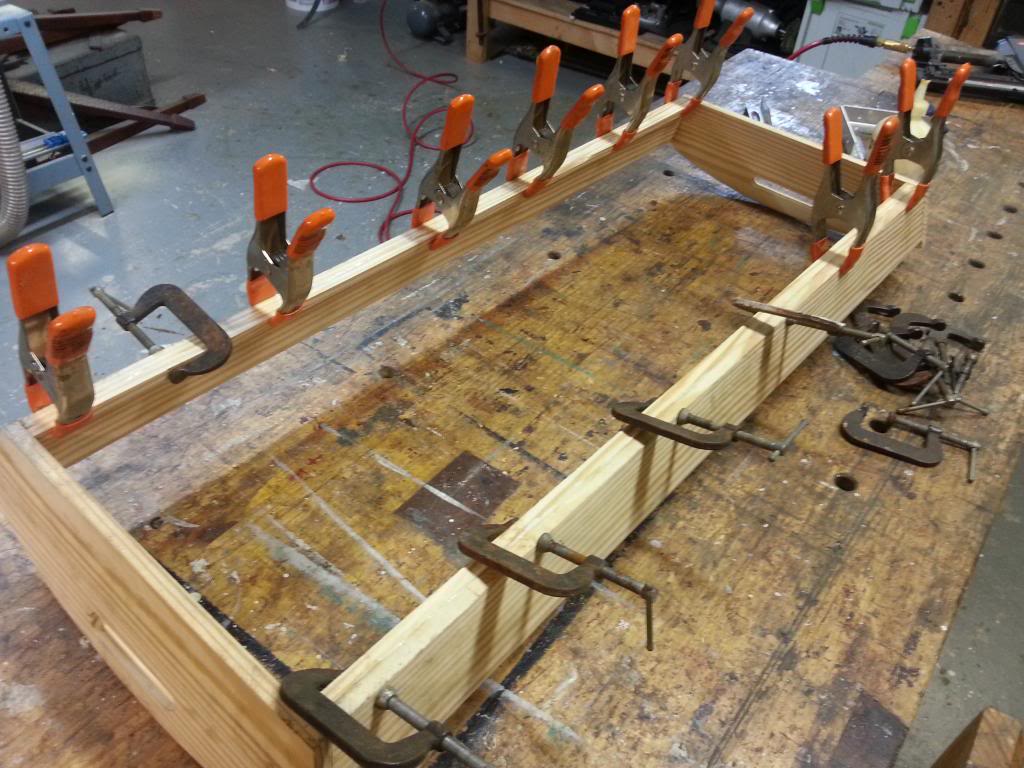
I ripped the last 2×12 in half on my band saw, then ran kerfs down each side on my table saw 7/8″ wide so I could use them for the frame of the table. Ripping them down to 7/8″ would allow me to plane one of the pieces to 3/4″. Then I took the 1/2″ off cuts and glued them together to create a 1″ thick stock to mill down to 3/4″ back at the surface planer.

20180610_165822.jpg

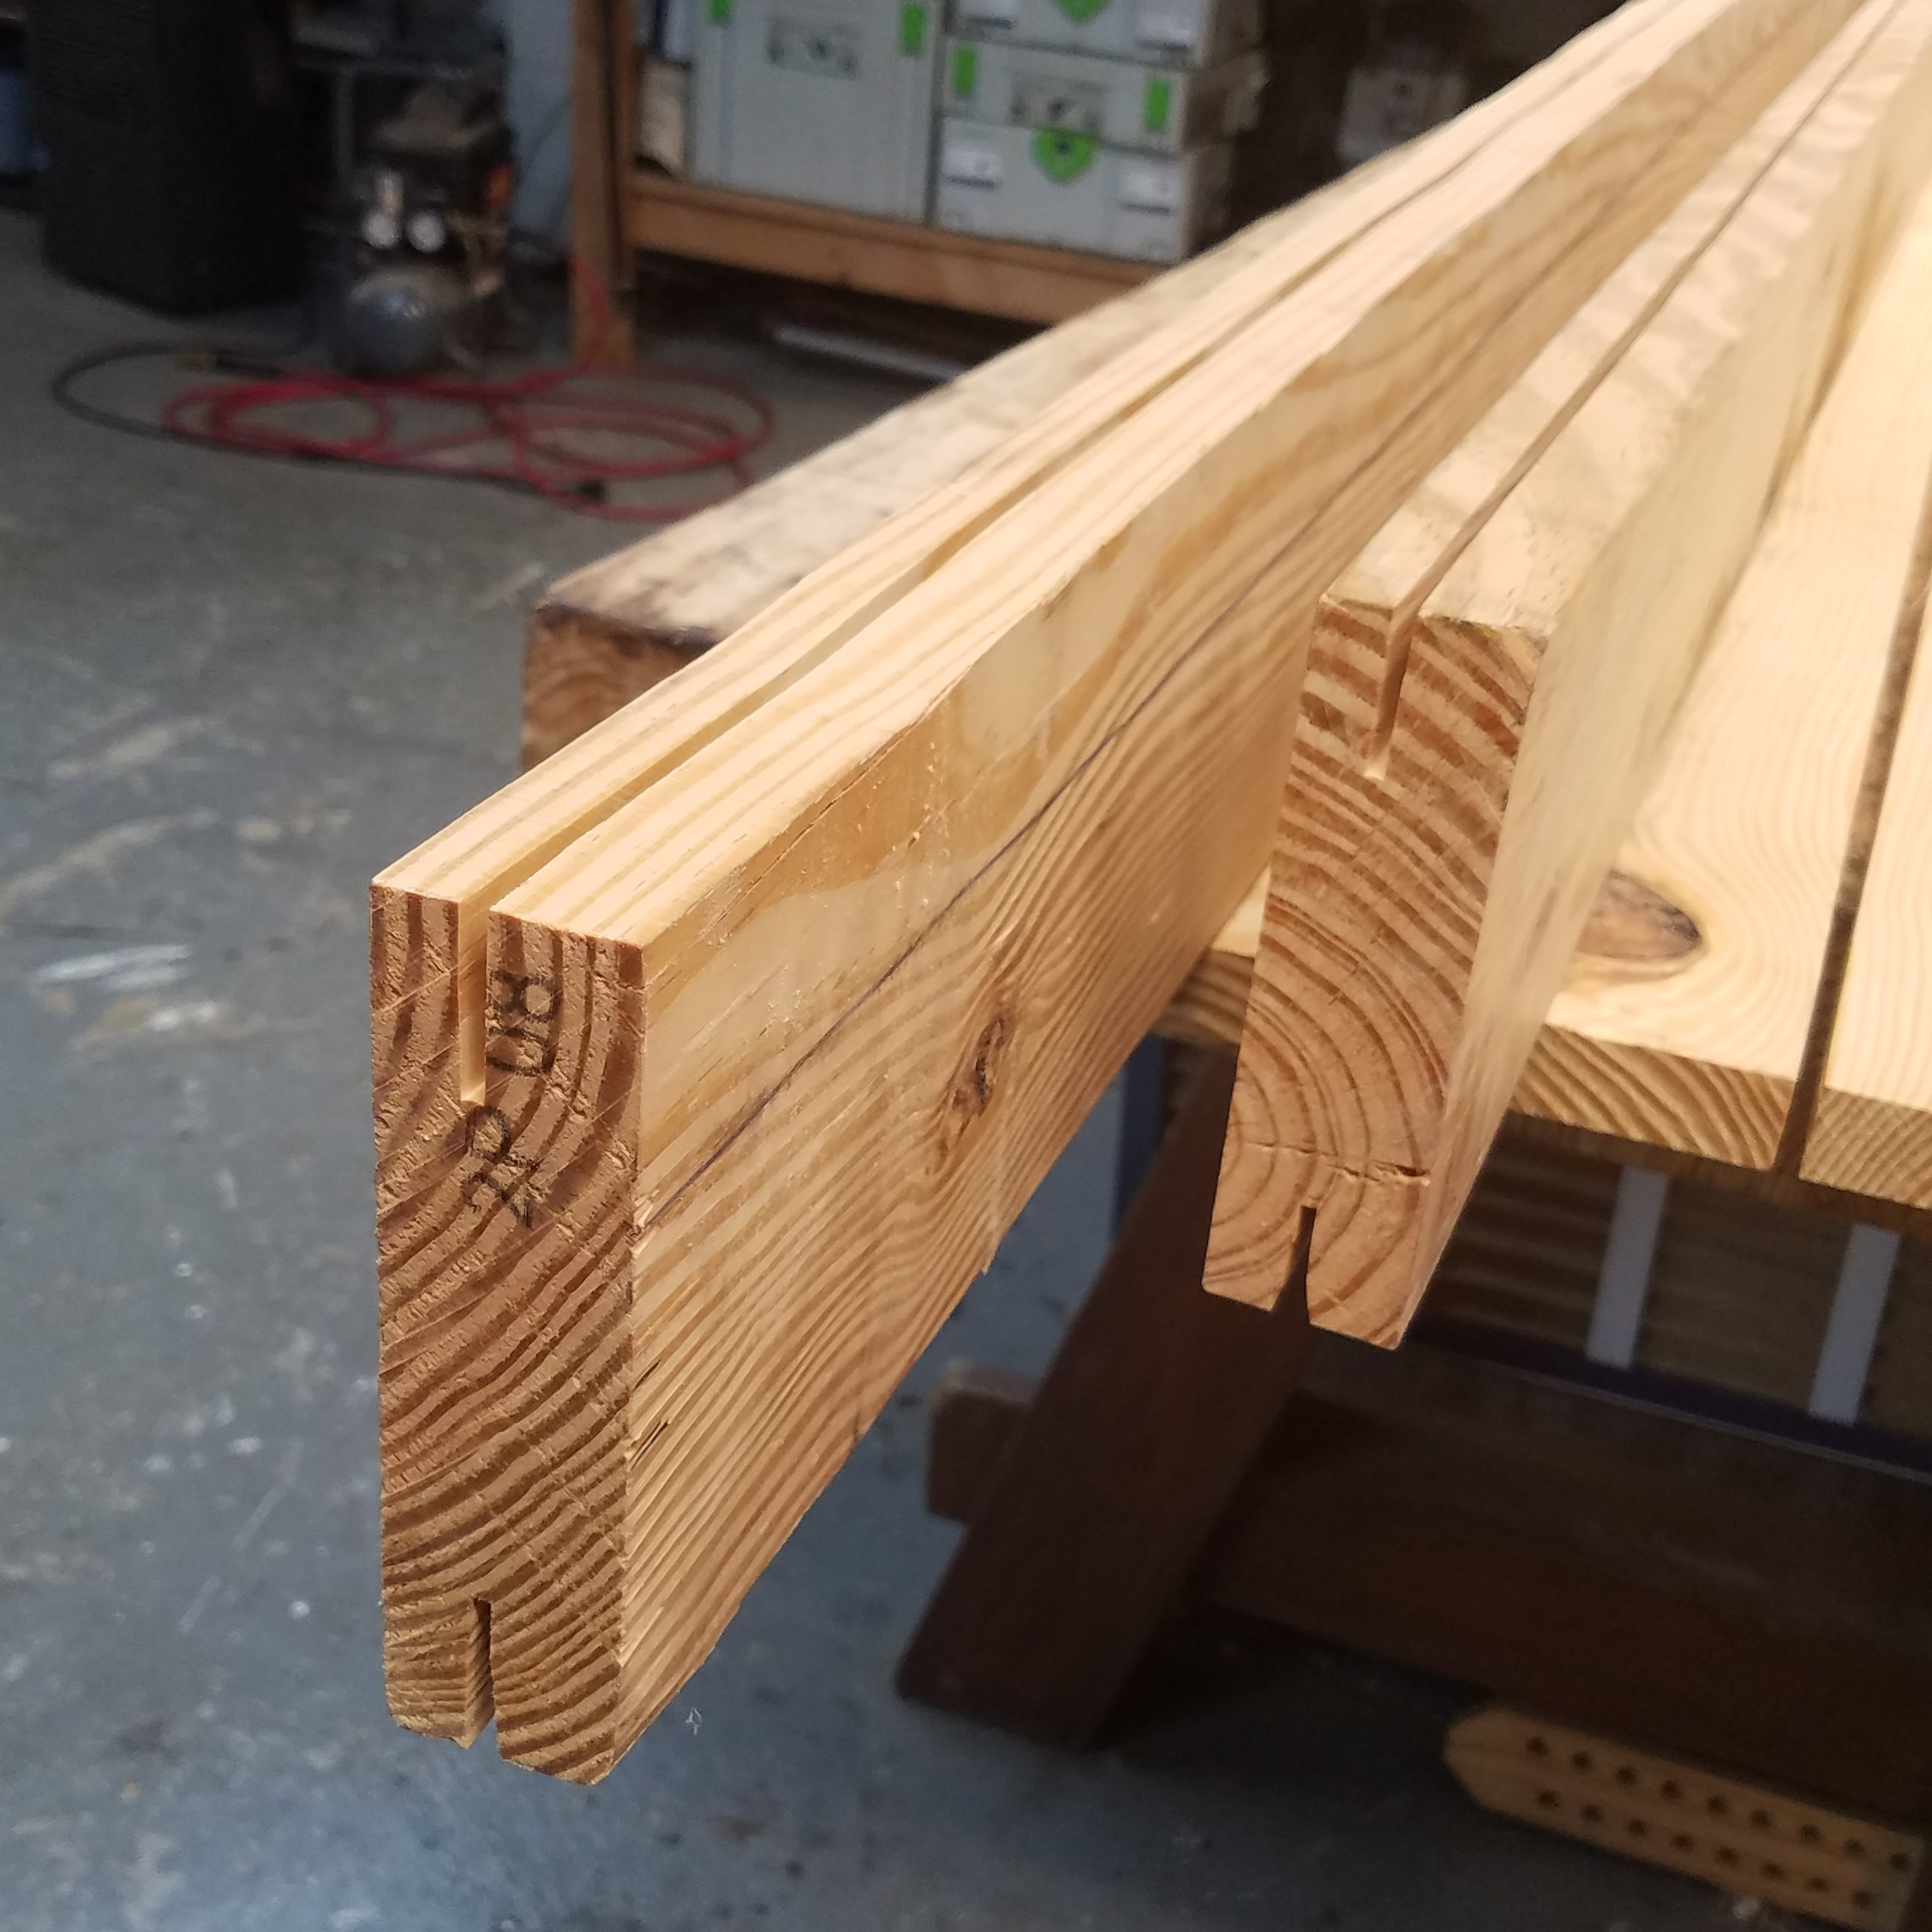
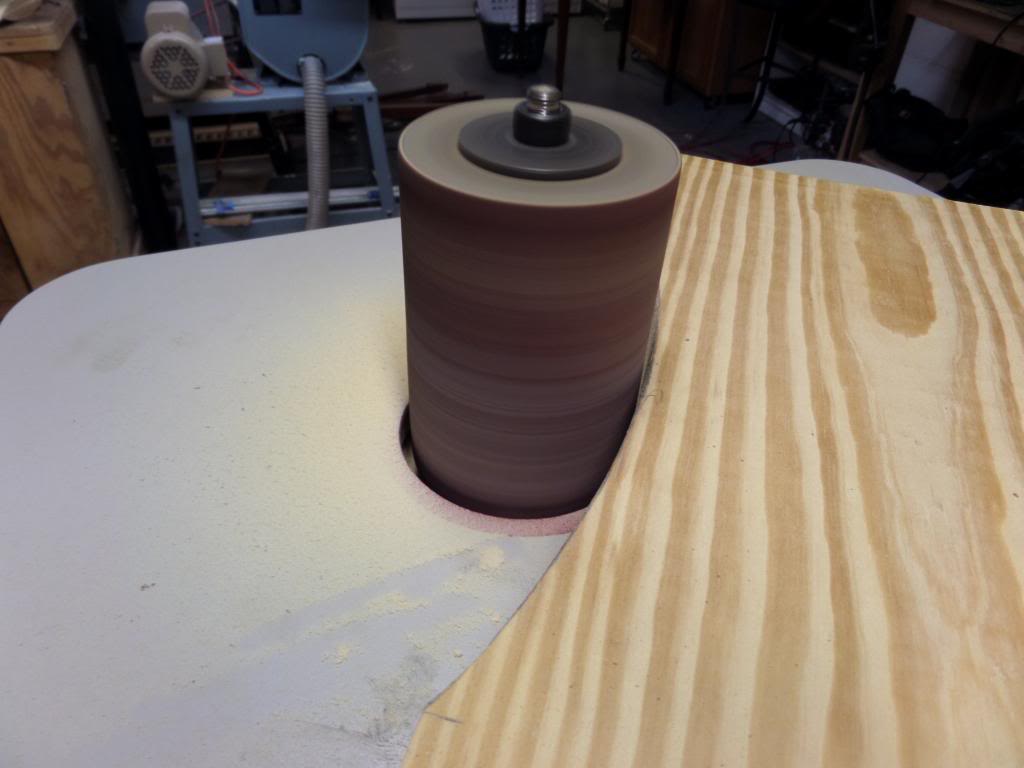
In the past, I ripped kerfs down the sides of the board and then take it over to the band saw to finish up the ripping. However, this board gave me some real trouble as it kept binding up the band saw blade. Frustrated, I tried everything, even giving it a go with my rip saw, with no luck.

IMG_20180610_185551_180.jpg

I was so disgusted I threw up a picture of my struggles on Instagram and then a follower of mine gave me the idea of finishing the ripping with a sawzall. Curious, I gave it a shot and sure enough, it worked perfectly only taking me ten minutes. Social media is awesome!

20180611_173657.jpg

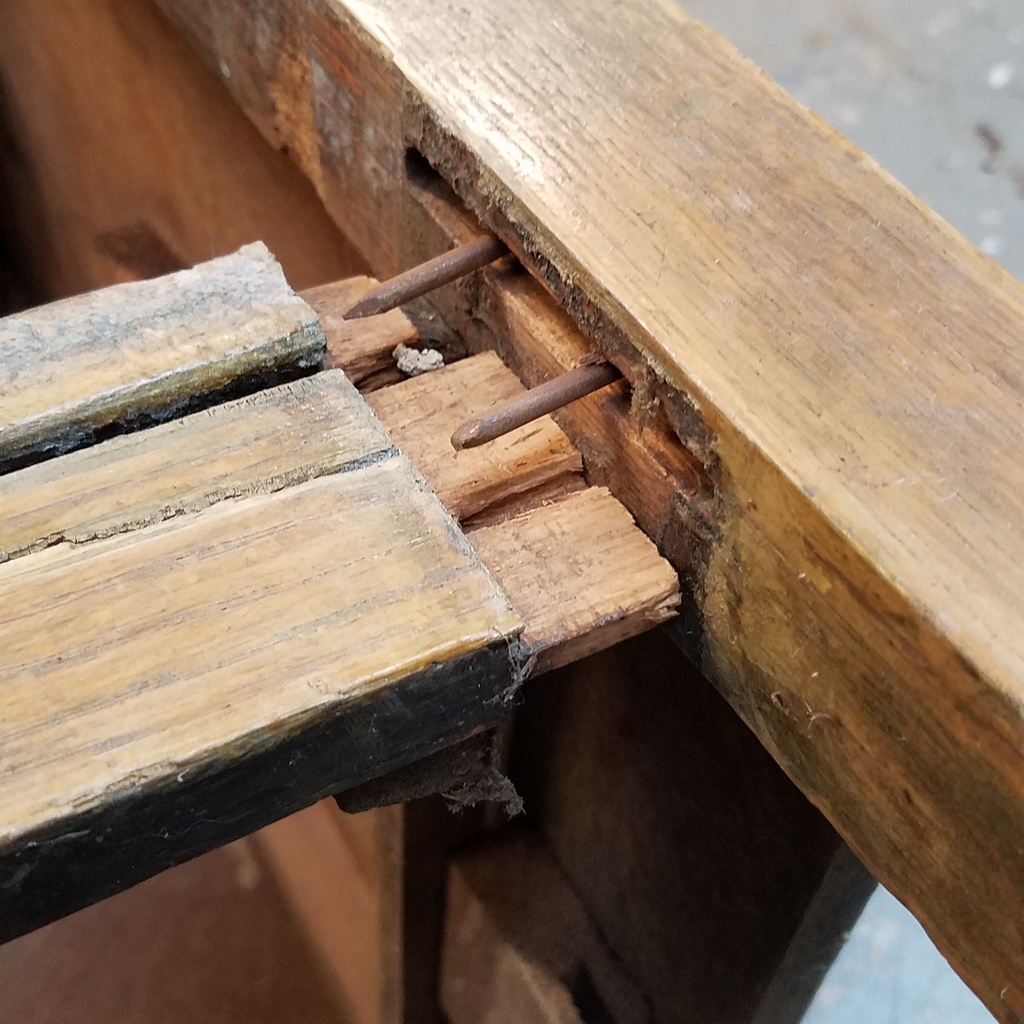
With the ripping done, I was ready to get back to business milling and gluing up the off cuts so I could still use them to build the frame of the harvest table.

IMG_20180611_192452_845.jpg

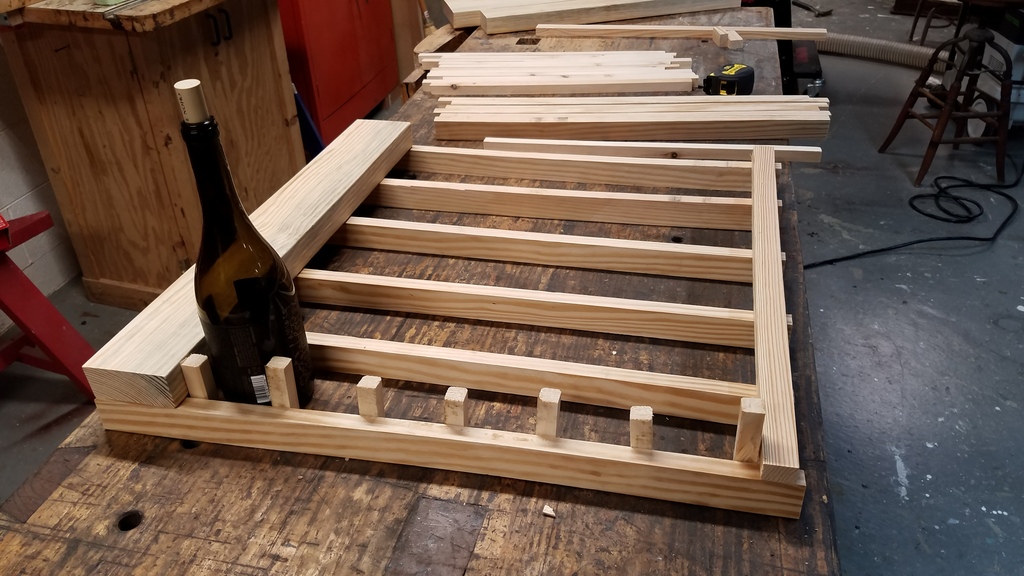
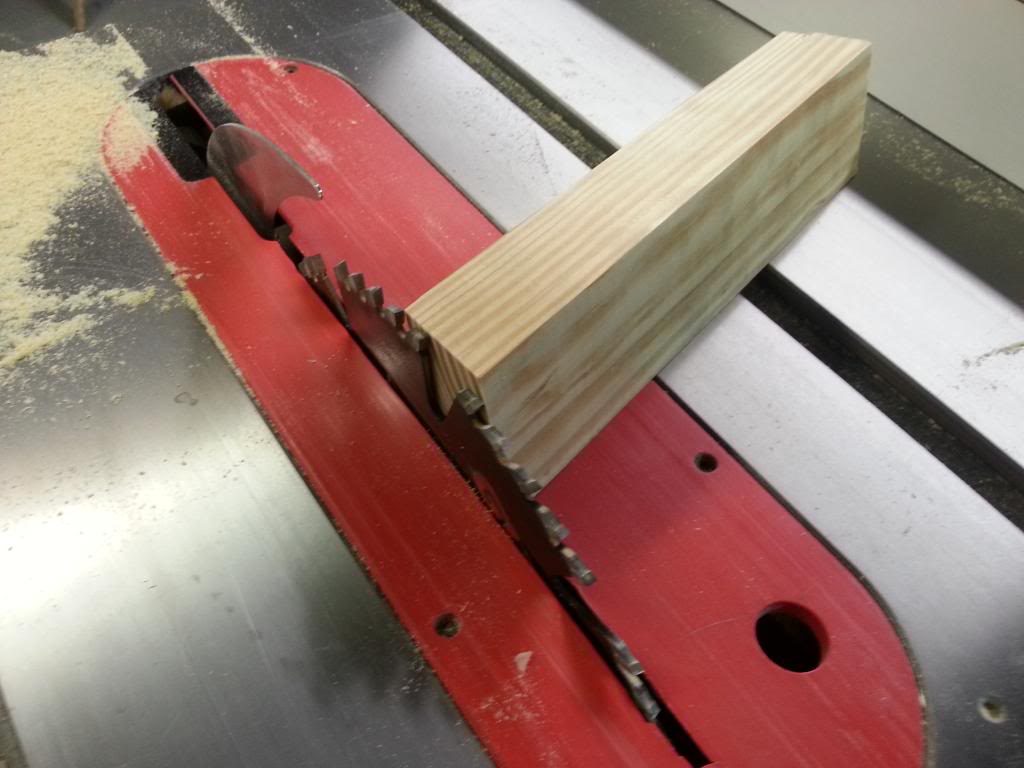
With the wood gluing, I turned my attention to the legs. Taking the 4×4’s I cut them to 30″ and turned a leg that my wife was pleased with.

20180616_155059.jpg

I then repeated the steps of the first leg to the next three. I ended up with four legs that were identical enough to one another.

IMG_20180616_184003_730.jpg

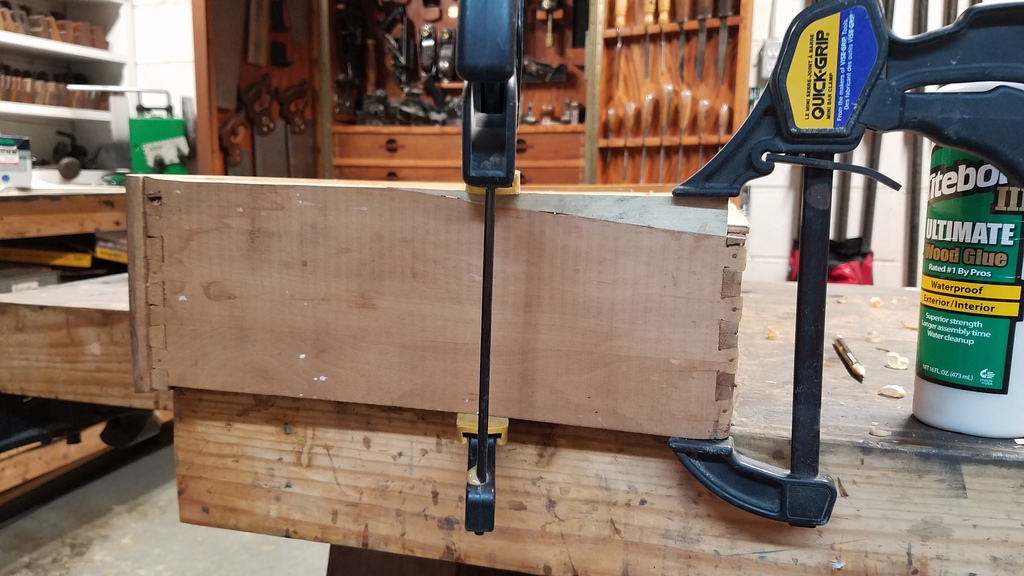
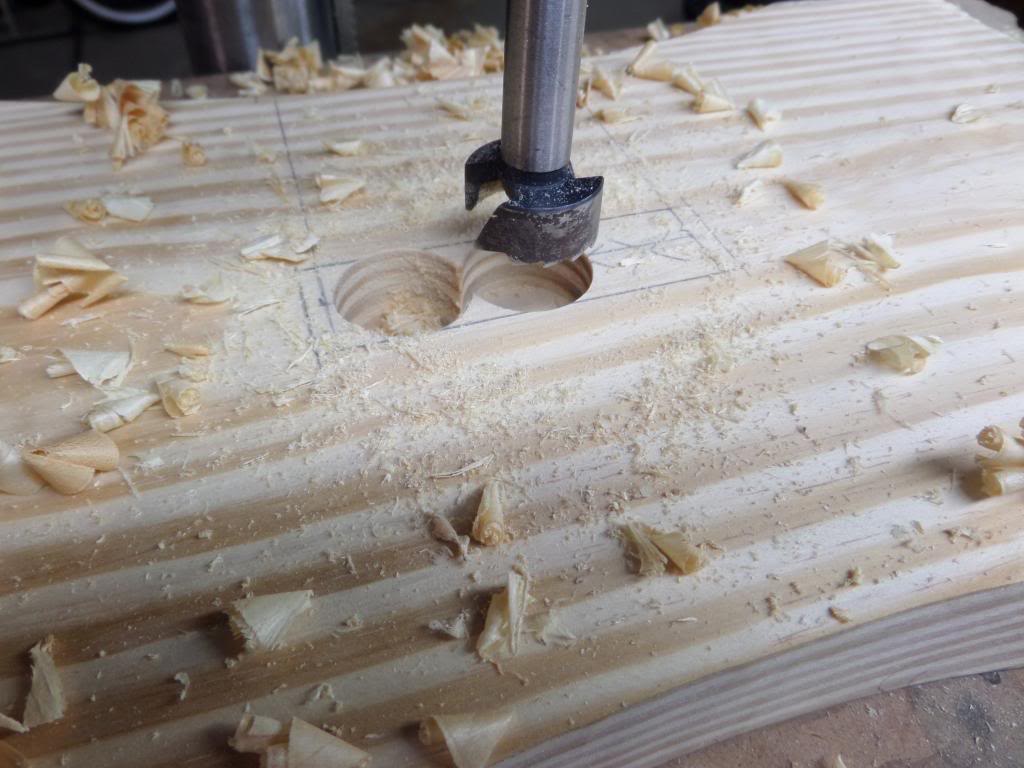
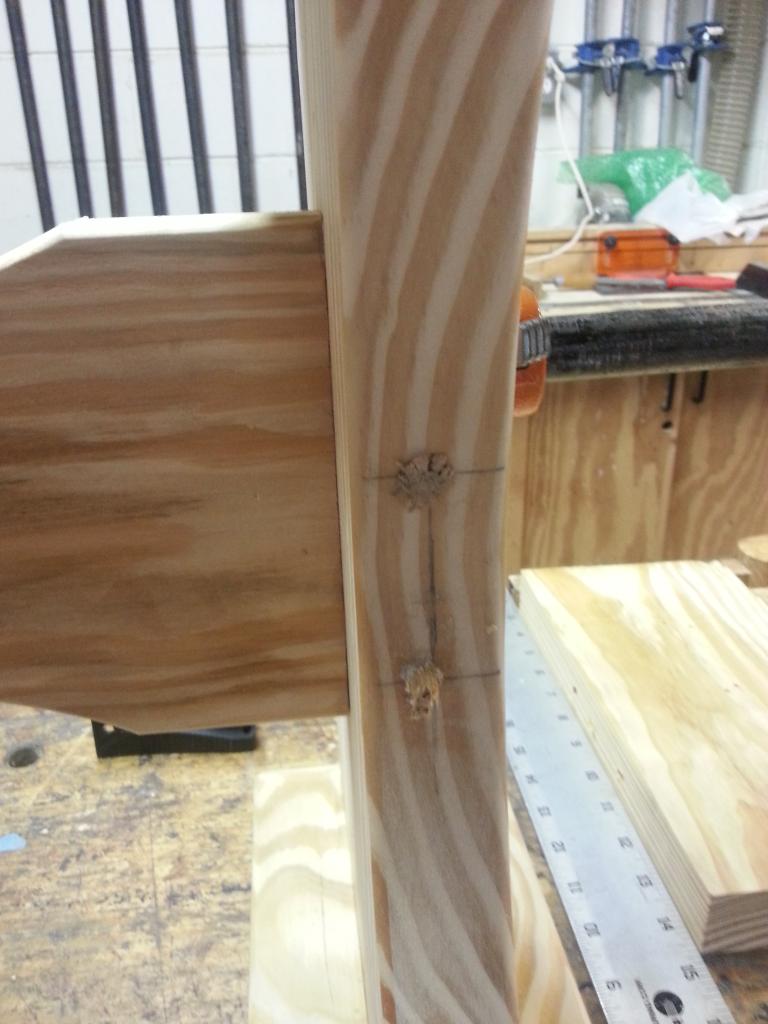
I wanted to use mortise and tenon joinery to attach the frame to the legs. so I set my mortising gauge to 3/8″ wide, the same width of my mortise chisel.

20180617_122228.jpg

I ran my mortising gauge down the side of the leg where I wanted a mortise and used the chisel to chop out a shallow area.

IMG_20180617_180210_104.jpg

Next I used a 3/8″ forstner bit and drilled down the depth of the mortise. Doing the mortise this way allowed me to not have my drill bit sway outside the mortised area.

IMG_20180617_180210_115.jpg

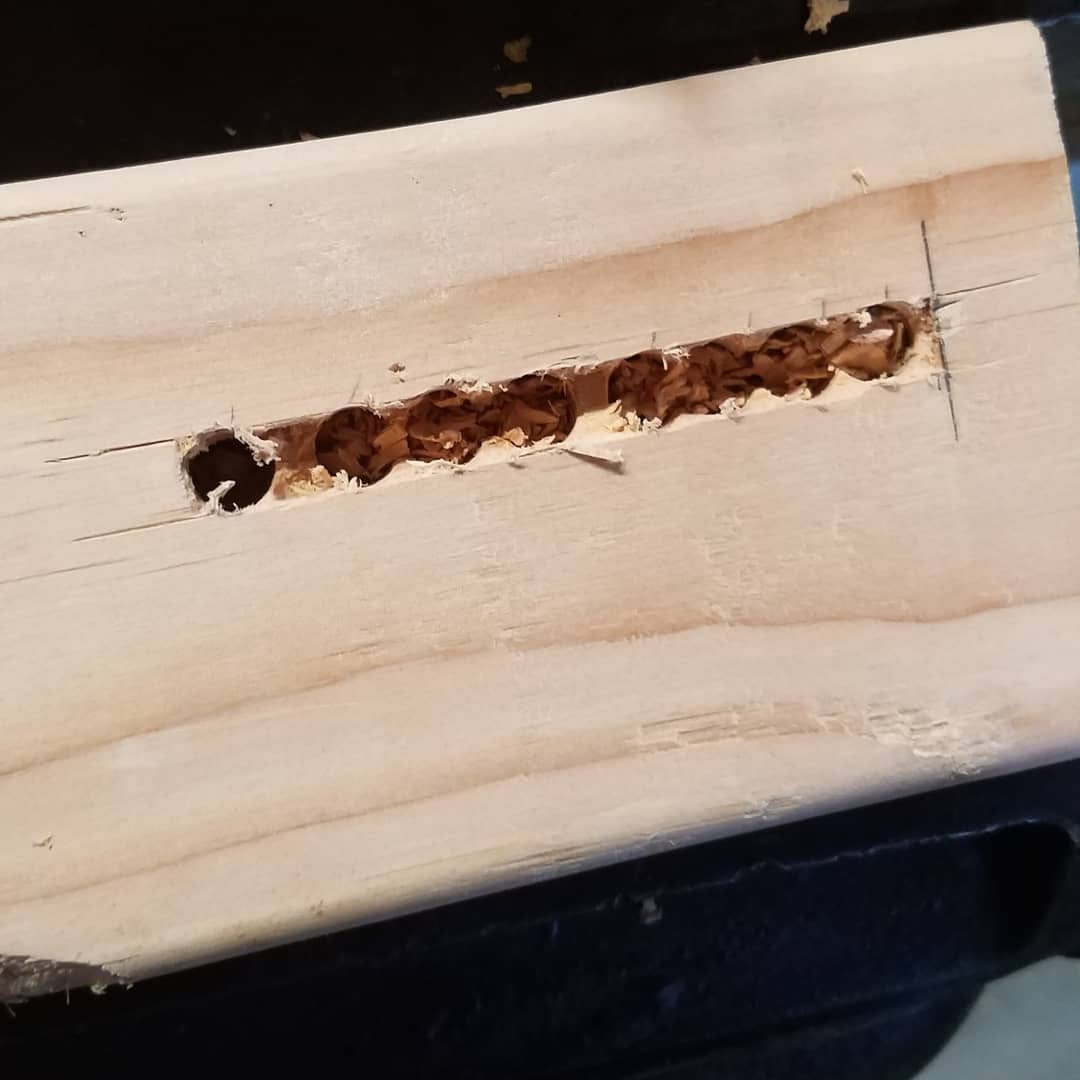
I then finished up the mortise back with my chisel making the ends of the mortise nice and square. This is an unconventional way to make a mortise,  but it allowed me to remove a lot of the waste much quicker than with the chisel alone.

IMG_20180617_180210_105.jpg

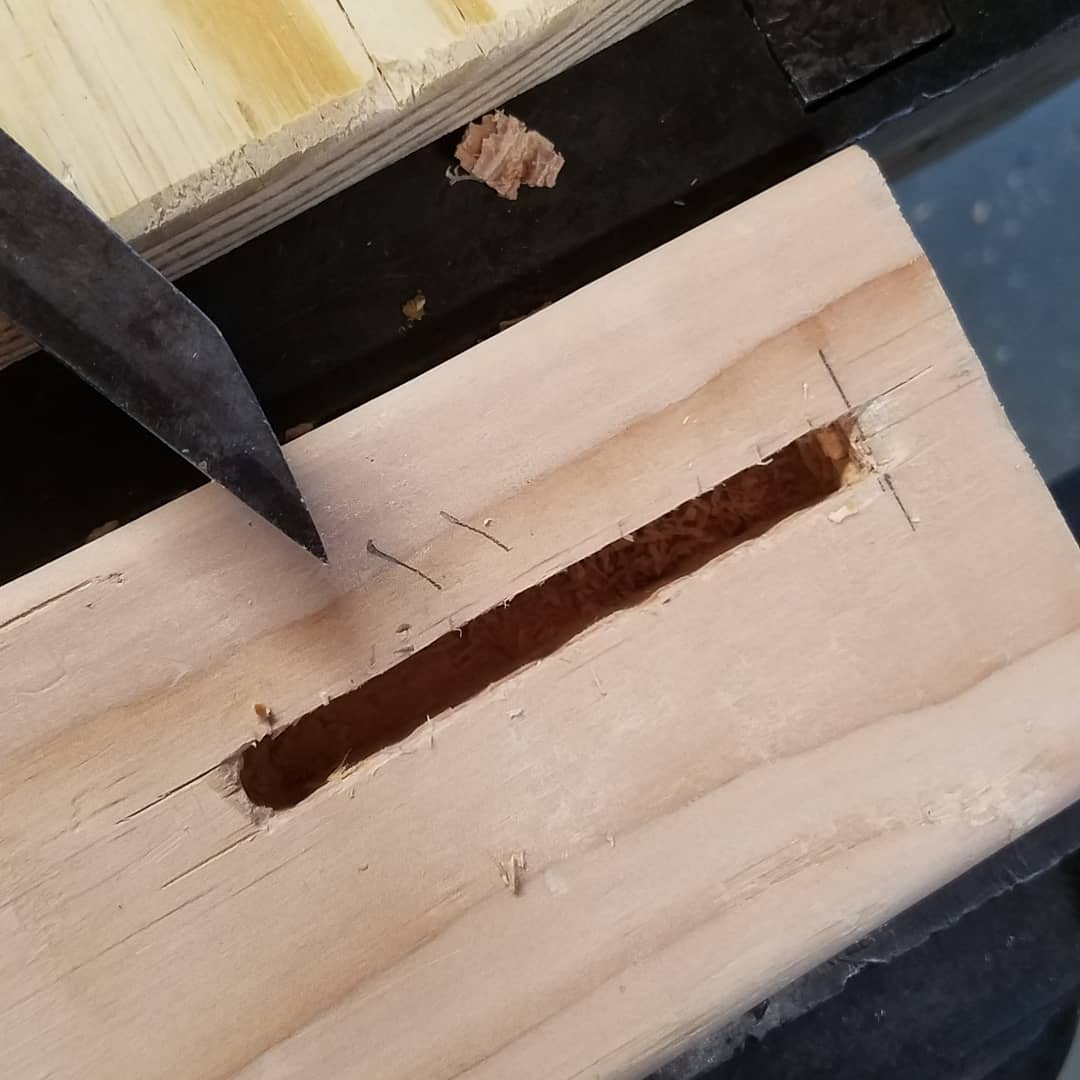
Test fitting the joint, I was pleased with the results. It took me less than an hour to cut all eight mortises.

IMG_20180617_180210_095.jpg

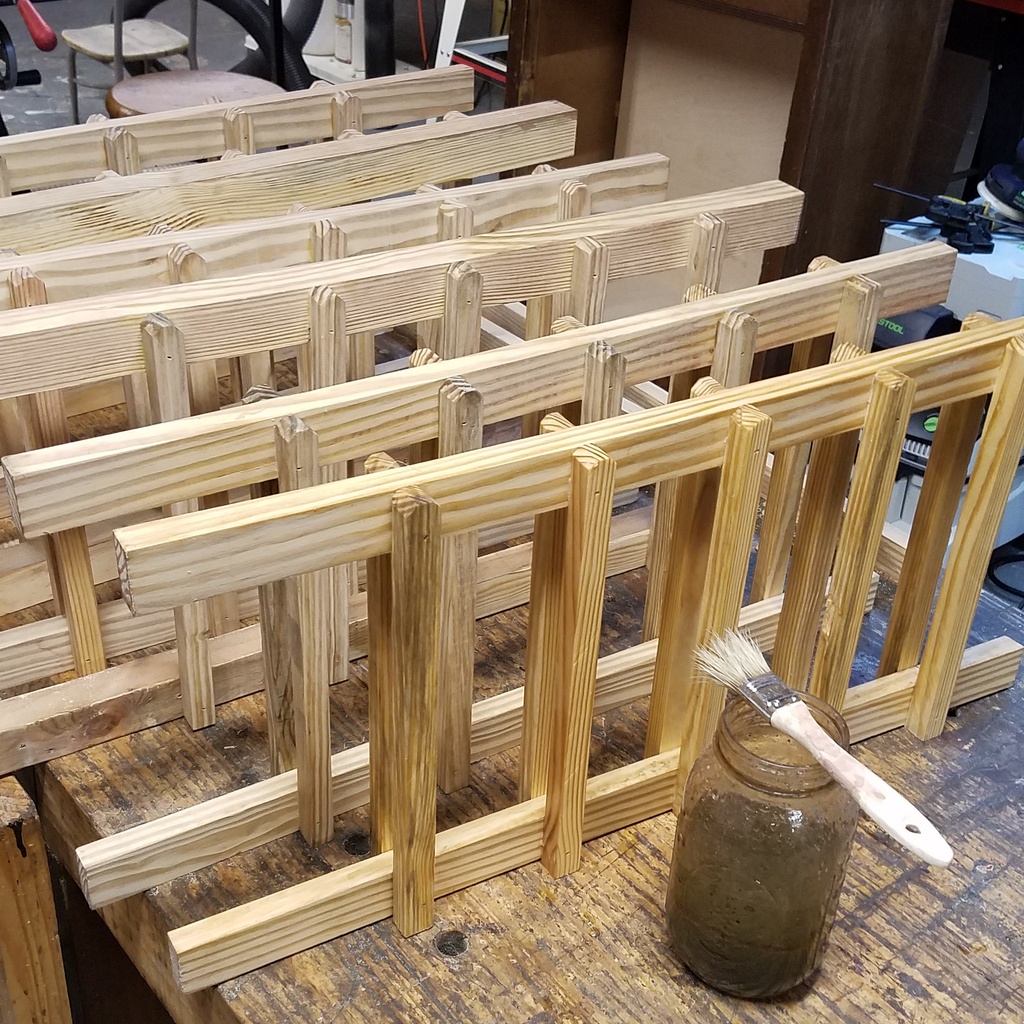
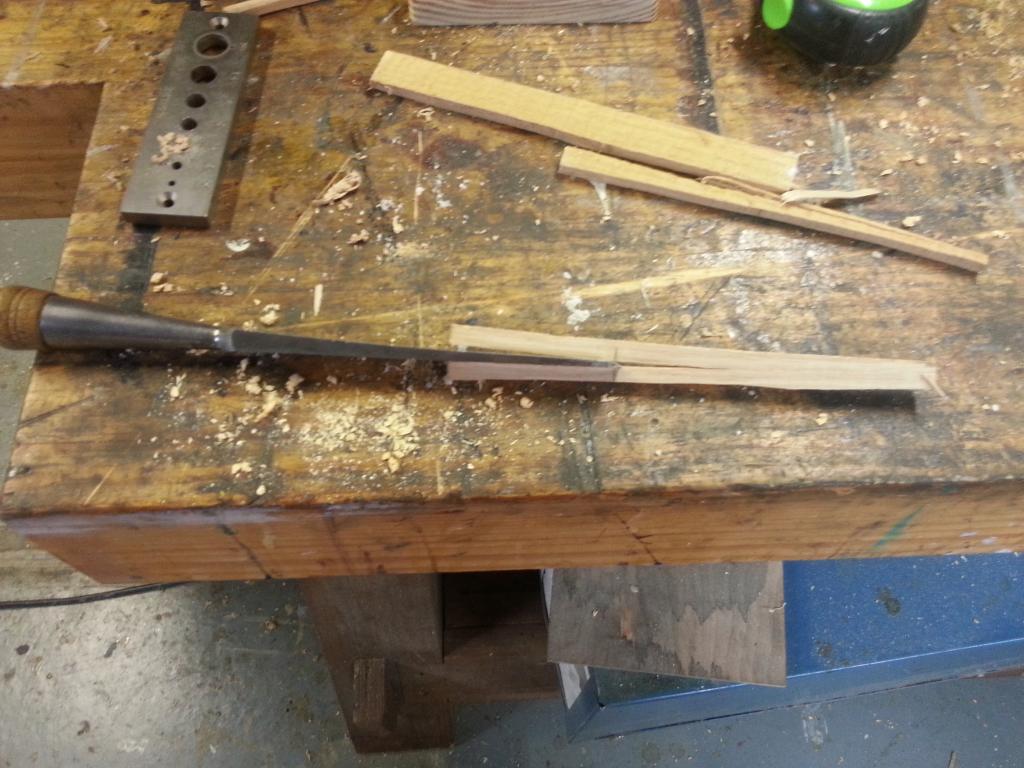
Using one of my beading planes, I planed a 3/8″ bead down the bottom of the frame boards. Cutting a bead on a seven-foot long board takes a bit of patience.

IMG_20180622_094900_433.jpg

Using pocket holes, I glued and screwed the frame to the legs and top. My wife wanted this table to be quick and easy which it was.

20180623_115851.jpg

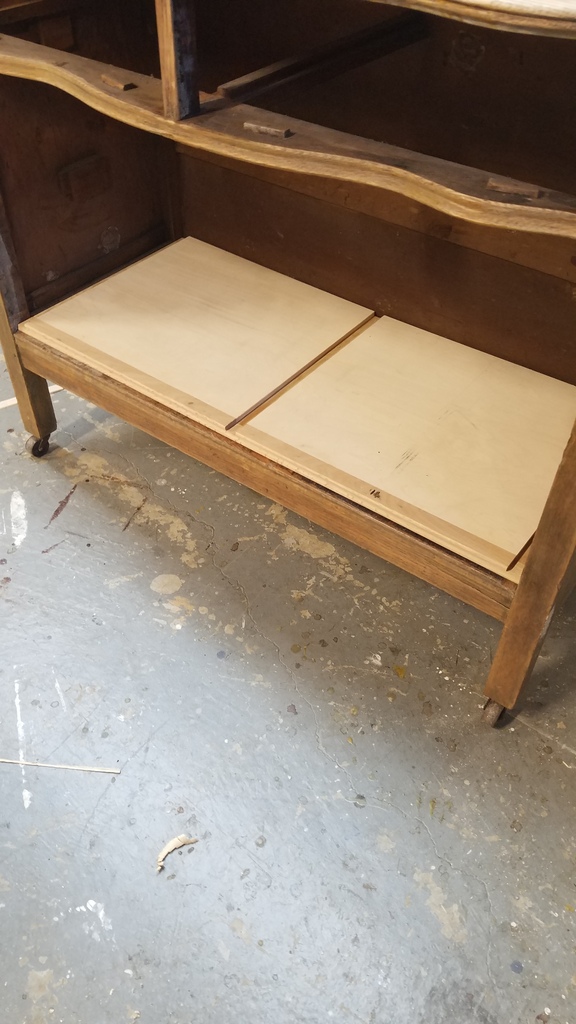
I flipped the table over and was happy with my work. The top is just two boards lying next to each other, not even being glued together.

IMG_20180623_133140_732.jpg

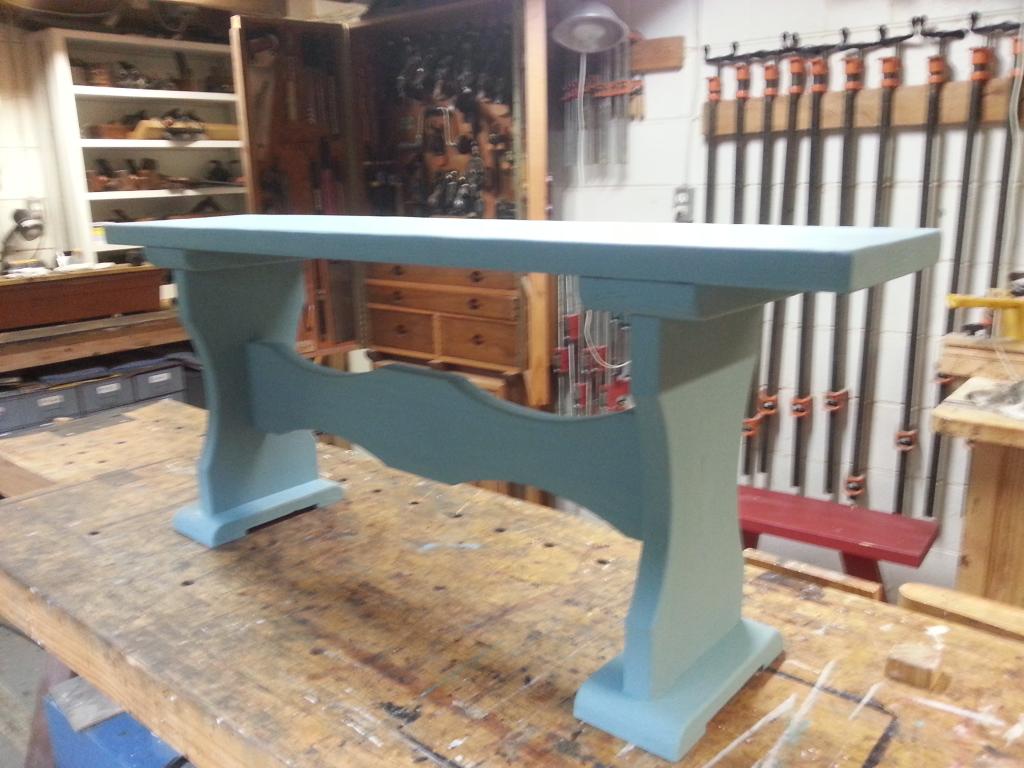
My wife stained the wood with steel wool and vinegar solution and then applied a couple of coats of milk paint to give the table an old world look.

IMG_20180630_112756_543.jpg

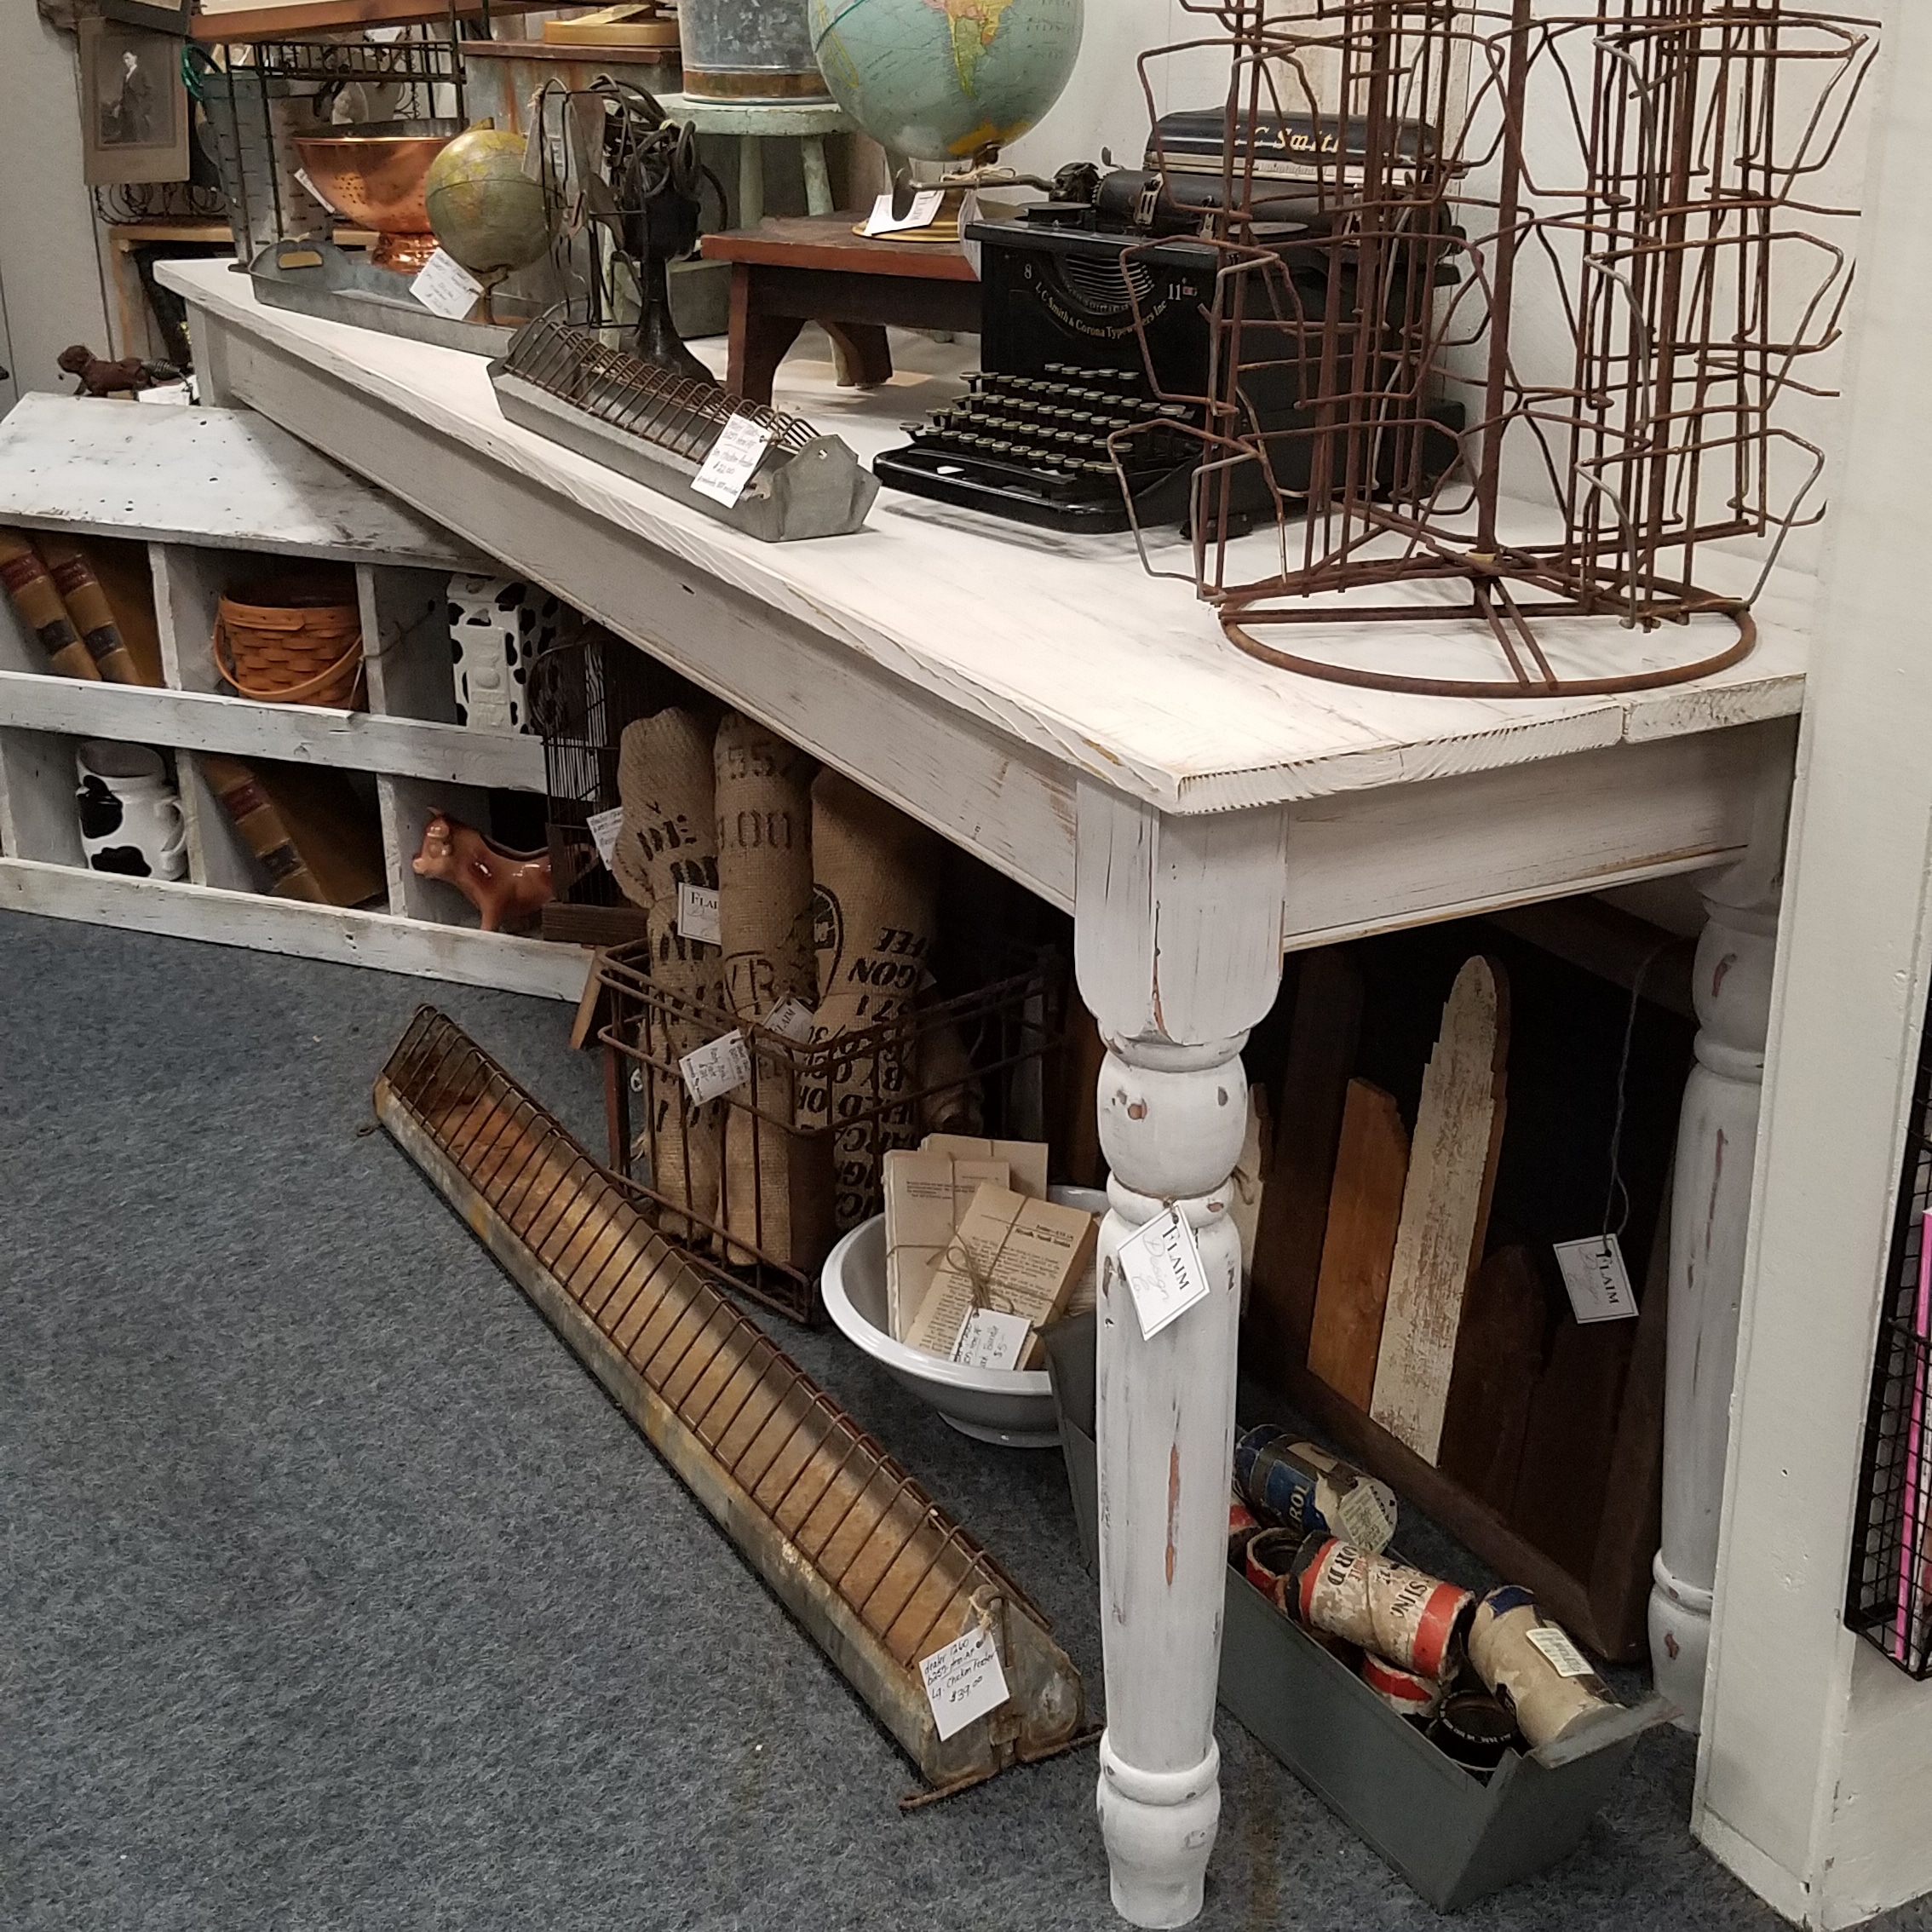
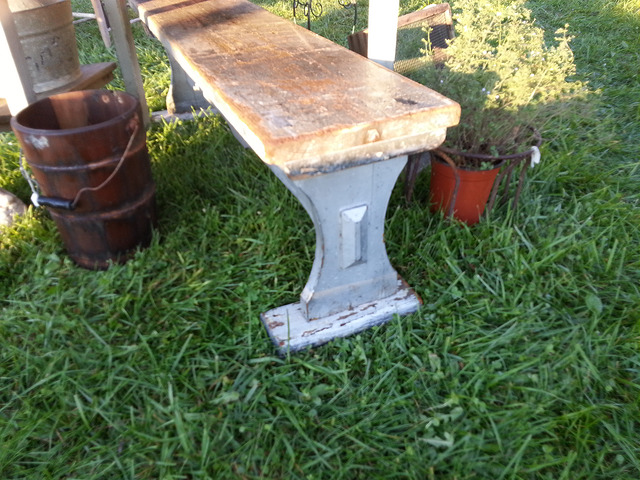
Here’s the table in her booth with some of her antiques on top. Quick and easy.

IMG_20180701_101137_655.jpg

Another Dresser Turned Wine Cabinet

Last year my wife and I bought an old dresser at an antique show in Columbus, Ohio. We had a spot in our dining room we wanted to make into a bar area and the dresser was small enough that it would fit nicely in that spot.cabinet

I had to remove the drawers to make room for the wine bottle storage I was going to build so, I cut off the rail and drawer runners that were between the two drawers.

img_20170106_164811_784

The dresser was old and someone in the past tried to repair the case by driving nails through the side of the case into the end grain of the tenon. I took the tenon out and drove the nails back out through the side.

img_20170106_173116_056

After the nails were gone, I glued the case back together to make everything sturdy and square.

20170106_174530

The cabinet was going to be painted so, I bought some birch plywood and cut up pieces to make a box that would slide inside the case. I also trimmed the edges of the plywood with oak to match the rest of the case.

img_20170107_181424_519

The old dresser had a bit of detail to the rails that I wanted to match on the box I was building.

20170107_165751

I took my No 8 hollow molding plane and planed a shallow recess down the middle and rounded over the sides with my block plane.

img_20170108_125824_574_1

I had to carefully build the box to fit inside the case. It needed to be loose to slide in, but not too big that it wouldn’t fit. I made the box an 1/8″ smaller than the length and height of the opening of the case so that it would fit. I used simple rabbet joinery to join the sides together and a dado down the middle for the divider.

20170108_142721

The moment of truth. After building the box I prayed that it would slide in the case. Thankfully it did.

20170108_152110

My wife painted the case with black milk paint. She also sanded and stained the top and drawers with a gel stain. I then applied two coats of Waterlox varnish on the top and drawers.

img_20170112_160845_049

I wanted the left side to hold wine bottles so, I built diagonal grid out of solid oak and used dadoes for joinery so that the other side of the grid would slide through. This too had to be fitted carefully so that it wasn’t too tight to slide in. After everything fitted well, I took it out, stained and applied Waterlox varnish to the grid.

20170112_172051

Here’s the final cabinet sitting in the same spot. We removed one shelf as we felt the wine glasses hung a little too low. The cabinet came out well and was dirt cheap to build.

img_20170117_193246_265


Refurbishing a Dresser into a Wine Cabinet

Back in the summer, my wife bought a dresser from a couple in Kentucky on the Longest Yard Sale for $20. The dresser wasn’t in the best shape as most of the drawers were beat up , but we decided to buy it anyway because we knew we would be able to re-purpose it into something other than a dresser.

20170114_175247

We decided to turn the dresser into a wine cabinet so I had to remove the rails from the middle of the case. I grabbed my Fein MultiMaster and cut off the tenons that attached the rails to the frame.

20170114_182131

I cleaned up the middle of the case and strengthened the case where it needed with glue and clamps.

20170114_183046

The cabinet opening was 25 1/2″ square so I designed the inside to accommodate as many wine bottles as possible. I played with different measurements until I decided on 4″ square holes to fit the wine bottles.

20170114_192909

While building a couple of grids, I test fitted them to make sure they would hold a wine bottle without falling through. I made the grids from southern yellow pine and each bar is about 3/4″ square, 12″ long with a chamfer on the front.

img_20170115_131238_044

I built the rest of the grids and tested their fit again. The cabinet would be able to hold 25 wine bottles.

img_20170115_143857_253

Since the bottom of the cabinet was now open to the floor, I added a piece of 1/4″ plywood to the base of the cabinet.

20170115_163753

And because I added the plywood to the bottom, I had to trim a 1/4″ off the bottom to all my grids. Using my panel cutter and a hand clamp, I was able to cut all the grids to the same length.

20170115_163758

After test fitting everything together, all the grids came together nicely. I installed a 1/4″ piece of plywood to the back of the grids so that the wine bottle wouldn’t fall through the back.

img_20170115_165248_517

Satisfied with the grids, I turned my attention to the drawer and glued a new piece of wood to the bottom of one side as it was damaged. The drawer wasn’t opening smoothly so this repair helped out a lot.

20170115_173721

Because the grids were freshly cut wood, I wanted to age them to match the piece, so I brushed on an apple cider vinegar and steel wool solution to darken them up.

img_20170116_165959_411

My wife painted the inside of the case black and the outside grey with milk paint to let some of the original finish show through. She then stained the top with a gel stain and applied three coats of Waterlox varnish. This cabinet is now ready for years of use under its new life.

img_20170120_171649_577

Painted Apothecary Drawer

I built this apothecary drawer for a cabinet my wife bought a few months ago. You can read the post here. My wife needed to paint the drawer and make it look old to match all the other ones.

 photo 20160521_143848.jpg

The first thing she did was take a solution of white distilled vinegar with steel wool and wiped it on the drawer so it would take on an aged look.

 photo 20160719_091145.jpg

She then painted the front with white milk paint. She built up the coats to give the front some depth since the original drawers had multiple layers of paint on them. After the paint dried, she applied some green paint to front and quickly wiped it away as there was also some green highlights showing through the white paint on the original drawers.

 photo 20160717_151258.jpg

The drawer was a little too white, so she gently applied dark wax and rubbed it in. Getting a perfect match with the colors from old drawers is really hard, but she did a really good job making the new drawer blend with the others..

 photo 20160723_174215.jpg

Here’s the drawer with the rest of the them back in the cabinet. She got lucky with the hardware as she found matching pulls from a seller on eBay. She had to replace nine of the handles because when she bought the cabinet, it came with handles of two different designs.

 photo 20160724_110358.jpg

Bentley came to see which drawer was the new one, but couldn’t figure it out. Can you?

 photo 20160724_110423.jpg

Harvest Table

A few moths ago my wife, Anita, and I picked up some old barn wood flooring in Dayton to be used for a harvest table she wanted me to build for her booth. While the wood sat in the basement, she kept looking for the right legs to use for the table. In the end, she opted for me to make some out of Douglas Fir 4×4’s I could buy from Lowe’s. She searched Pinterest for a leg she liked and printed off a picture so I could make it.

 photo ebay 014.jpg

I looked at the picture and started to turn something like it on the lathe. I kept the top of the leg similar to the picture, but changed the bottom to be a bit more simpler. After a few tweaks, I was happy with the end result. Now the challenge was to make three more legs that matched this one.

 photo ebay 017.jpg

I used a piece of scrap wood and marked every major location where there was a bead or valley in the board. I then used calipers to measure those increments and carefully tried to copy them to the next turning.

 photo ebay 019.jpg

After several minutes of careful turning, my second leg looked very similar to the first one on top. Even if the legs weren’t exactly the same, it was fine as they would be far enough away from one another that your eye wouldn’t be able to see the difference.

 photo ebay 023.jpg

If you’ve never turned Douglas Fir, I highly recommend it. It sucks..sucks bad. The crap chips like crazy even with sharp turning tools. Fortunately since the harvest table was suppose to look old, the chips wouldn’t be a big deal.

 photo ebay 022.jpg

After a couple of hours, I turned four legs that sort of looked like one another. The final step was to put them back on the lathe and use my parting tool to cut them at all the same length which was 30″ tall.

 photo ebay 026.jpg

The simplest part about building the harvest table was actually building it. I simply screwed the skirt onto the legs using 2″ screws. I didn’t even bother plugging the holes.

 photo ebay 028.jpg

I used cleats and pocket hole screws to keep the sides from bowing. I then attached the top onto the cleats using 1 1/4″ screws. Super simple.

 photo ebay 029.jpg

This was the table before sanding the grime off the boards.

 photo ebay 031.jpg

This is the table after a couple coats of white milk paint.

 photo blog 002_8.jpg

As you can see, once sanded, the milk paint gives the table a nice worn look. Even though this table breaks three of the seven deadly sins of woodworking, it works for it’s intended purpose. Just don’t expect to see it in a woodworking magazine anytime soon. All that matters is that Anita is very happy with it and finally has the harvest table she has always wanted.

 photo blog 003_10.jpg

Making a Bench from Dimensional Store Bought Lumber

When my wife Anita does shows, I’m always looking for something that I can make fairly quickly that she can sell in her booth to help pay for some of her fees. After helping her do shows over the past couple of years, I’ve noticed that small benches are quite popular. They’re nice to stick out on front porches or foyers or even mud rooms. In fact, some people even use a bench as the seating for one side of their kitchen table.

10407335874_d0e82a20d0_z

I designed this bench to be made from a 2″ x 12″ and a 2″ x 8″ that are eight feet long. However, if you change the dimension of the stretcher a little bit, it could be made form a 2″ x 12″ x 10′. The only issue doing that is you need to make sure your 2″ x 12″ x 10′ is choice wood with no splits at the end of the board because you’ll need nearly every inch of it. It doesn’t matter to me because I can’t fit a ten foot board in my car anyway, so I bought a 2″ x 12″ x 8′ and 2″ x 8″ x 8′ for under $20.00.

ww001

The construction of the bench is super simple. I make the legs 9″ wide x 16″ long. I measure down 2 1/2″ from top and bottom on each side and use the lid from my garbage can to draw an arch connecting the two marks. Then I cut it off the arches on my band saw. I sanded the arches smooth on my oscillating spindle sander.

ww012

The feet are 5″ wide x 10 3/4″ long. I draw a 1″ radius on both sides and remove the material with chisels, planes and files.

I want the bench to have four feet so I take two of the pads and cut grooves in them on my table saw. Once all the grooves are cut, I remove the waste with my bench router and plane everything smooth.

When designing the stretcher, I did nearly the same thing as the legs. I measured 2 1/2″ from each side and make a mark. Then I find the stretcher center and mark 2 1/2″ off each side of the center. I swing a compass set at a 12″ radius connecting the marks creating the arches for the stretcher.

ww015

In order for the legs to attach tot the stretcher, I bored a 1″ x 4″ mortise through the legs with a 1″ forstner bit and cleaned it up with chisels. The tenons I cut on the table saw and band saw and cleaned them up with my rabbet plane.

After all the parts are sanded, I dry fitted everything together to make sure the bench looked right. I wanted the tenons to have a mechanical fastener along with the glue, so I drilled two 1/4″ holes through the side of the legs going through the tenons.

20140823_123357

I grabbed some scrap oak and split a few splitters of wood with a chisel. The pins run down the grain making them exceptionally stronger since the grain follows the strength of the wood. I sized the pins by punching them through my Lie-Nielsen dowel plate. I shaved the pins a little bit with my spoke shave so they would start to fit through the 1/4″ hole of the dowel plate. Once the pin starts to fit in the hole, I pound the hell out of it.

20140823_123402

After I was satisfied with the way the bench stretcher fitted to the legs, I started gluing and screwing everything together, I placed glue of the pins and inserted them into the tenons of the bench. I didn’t bother draw boring the holes of the tenon. I was already satisfied with the tightness of the joint.

20140825_171145

The bench was painted a duck egg blue and waxed over top. The next bench I make will probably be a different color. Maybe a black or grey as neutrals are always popular.

20140825_170758

You can see the detail of the top where the scrub plane left little ridges in the wood giving the bench a bit of detail. It definitely looks better than having a plain board for the seat of the bench.


Making a Serving Tray


My wife wanted me to make a serving tray with splayed sides for her. She had a similar one she bought, but wanted to know if whipping up another one for her was doable. I didn’t think it would take too long so I accepted the challenge. I thought all I had to do was cut four boards with 15 degree angles on each end, attach them together and lay some slats down the middle. Boy was I wrong!

I started by milling up the stock by ripping a 2 x 8 length ways in half on the table saw and planed the wood to 1/2″ with my surface planer. After the stock was milled, I left them alone for a few days to let them acclimate in my shop.

20140601_132821

The toughest part about making a serving tray with splayed sides is calculating the compound angles of the sides. When I first looked at the tray, it seemed like if I simply cut a couple of boards at 90 degrees with a 15 degree angle on each end, it would work, but it won’t. I’m no math teacher so I can’t technically explain the geometry that is at work here, but when the sides are splayed to 15 degrees, it changes the end cut by just a few degrees. If I took my bevel and laid it on the outside of the tray and compared it to my try square, you can see the slight difference. I guess another way to look at the geometry is if you cut a cone in half at 15 degrees then look down at the part that had just been cut off, the shape wouldn’t be a circle, but a slight ellipse.

Trying to find the correct compound angle to cut the sides is simple if you know the trick. It starts with a piece of scrap wood with 15 degree angles cut on one side and one end. This piece will now be a jig to use to set up the miter gauge and saw blade.

20140601_140651

With the jig on it’s face, place it against the saw blade and swing the blade to match up with the other 15 degree angle. Now take your miter gauge and set it to the angle of the wood. Presto, there’s your compound angle.

20140601_140709.JPG


When cutting the parts you need to do like Roy Underhill and “keep your mind clear of impure thoughts.” It can get quite complicated figuring out which side of the blade you need cut your part on so that the two sides of the tray line up to 90 degrees. Testing on scrap pieces until you get the right cut is highly recommended. It took me nearly 30-45 minutes to figure it out.

20140601_143336

Ah, the pieces fit nicely and are square to one another.

20140601_143443

After the sides were cut I needed to cut a couple of handle holes which was no big deal. I used 3/4″ forstner bit and drilled five holes. Then I cleaned up between the holes with a paring chisel and rasps. Then I routed the top of the four sides with a 1/4″ round over bit.

20140601_154331(1)

I glued and pinned the sides together with pneumatic nails. Then I attached thin strips to the sides so that I could attach the slats.

20140601_161505

I milled up sixteen slats 1 1/2″ wide with 15 degree angles cut on both ends. The two slats at each end of the tray had a 15 degree angle cut down one side to fit snuggly against the side. After lying all the slats to one side, I measured the gap that was left. The total was 11 1/4″. With fifteen spaces between the slats, that would give me 3/4″ of space between each slat.

The dry fit worked well so now it’s time for the finish. I finished all the slats before attaching them to the tray because it would be a lot easier to apply finish that way. I started by dying the parts with walnut wood dye. This gave the wood an even darker tone and took a lot of the yellow coloring out of the pine.

20140608_185352

Next, I painted the parts with grey milk paint and let it dry for a few hours.

20140609_163302

After the milk paint dried, I mixed up a batch of paste wax. I used an Ebony colored wax, mixed it with a Clear wax so the color wouldn’t be so strong and applied a coat to all the parts. When I wiped off the excess, I glued and nailed the slats into place completing the tray. The wax colored the wood so dark that the pine looks like walnut now. My wife loves it! This tray could be used as a center piece on a dining room table or even hung on the wall in a kitchen as a piece of art.